
Chapter 7. More Cool Google Tools
The Google toolbar is great, but it’s not the last word on useful ways to use Google. In fact, it may not even work with your browser. If you can’t or don’t want to use the toolbar, you can still avoid unnecessary trips to Google’s home page by using browser buttons and sidebars instead. And bookmarklets, little buttons you can add to your browser, can help you perform a host of smart search tricks.
Google also has a bunch of other cool tools. The company has developed a search box for your desktop, for example, and a deskbar that lets you surf without even opening a browser.
Some of these offerings are still experimental, but Google lets you use them and offer feedback.
This chapter covers alternatives to the toolbar, the best of the new Google tools you can test-drive, and other often-neglected tips for Google efficiency—including keyboard shortcuts and secret mouse clicks. It also fills you in on Google Wireless, a special service that lets you use Google on the road using a mobile phone or palmtop with Internet access.
Alternative Search Boxes
A lot of people swear by the Google toolbar. But the Internet is about nothing if not choice, and some of these search tools offer nifty alternatives.
Browser Buttons
If you don’t have the screen room for the Google toolbar (or one of its imitators), or if your browser of choice came out during the Carter administration and doesn’t accommodate a search box, Google’s browser buttons can be a good way to run searches without jumping to the home page.
The browser buttons, shown in Figure 7-1, are simply links that you can place on the same toolbar that holds your most frequently used bookmarks (also known as “favorites”).
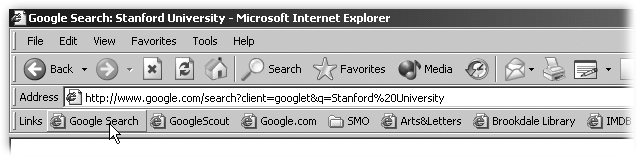
The buttons come in two flavors, and you can install either or both of them:
Google Search works two ways. You can highlight some text on a Web page and then click Google Search to search the Web for those words. Or, if you click the button without first selecting any text, a blank search box pops up where you can type any words you want to search for. (In Internet Explorer, the search box has the awkward moniker Explorer User Prompt, but it works the same.)
Google.com simply delivers you to Google’s home page.
The buttons work with pretty much any browser made in the last five years:
For Windows 95/98/NT/XP or Linux, they work with Internet Explorer 4 and later, and Netscape 4 and later.
For the Mac, they work with Internet Explorer 4 and later, and Netscape 4.5 and later.
Tip
Unofficially, the buttons also work with the Mozilla and Firefox browsers, because they use the same technology as Netscape. But Google won’t say which versions of these browsers they work with. If you use Mozilla or Firefox and you want to know if the buttons will fly on your browser, just try installing the buttons as described below. The process takes two seconds, and if it doesn’t work, you won’t have done any damage.
If you click over to www.google.com/options/buttons.html and click Get Your Google Buttons Here, Google detects the kind of browser you’re using and gives you appropriate instructions for installing the buttons—which takes less time than blinking an eye.
Search Sidebars
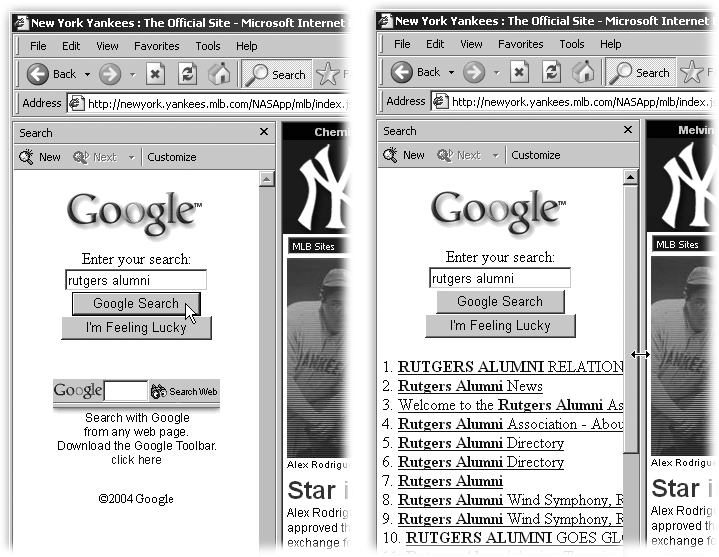
In some browsers, you can open a sidebar, like the one shown in Figure 7-2, and run searches from there. When you click a link in the sidebar, the new page appears in the main window. A search sidebar is useful primarily because it can retain the list of results links—saving you the trouble of clicking back over to your results page when you want to explore more than one result.
Tip
If you use Internet Explorer for Mac, the search sidebar is also hugely useful as a substitute for the Google toolbar.
Internet Explorer, Netscape, and Mozilla all have search sidebars. Here’s how they work.
Internet Explorer for Windows
The sidebar is somewhat superfluous in Internet Explorer for Windows, because the Google toolbar is more flexible and takes up less room. But if you want the listing of links, as shown in Figure 7-2, you need to use the sidebar—and you need to set it to display your results the way you want.
To open the search sidebar, choose View → Explorer Bar → Search, or on the Standard Buttons toolbar, click Search. To set Google to run sidebar searches and display results in the sidebar, you can use either of two methods: with or without the toolbar. Step 1 below gives you directions if you’ve already installed the toolbar. If you haven’t installed it or don’t want to, just follow the directions from step 2 on:
Set Google as the search engine for Internet Explorer.
While installing the Google toolbar, the wizard asks if you want Google as the default search engine. Tell it you do.
If you’ve already installed the toolbar, you can check or change the setting by opening the Toolbar Options dialog box (on the toolbar, click Options; or click the Google logo and then choose Options). Then on the More tab, turn on “Use Google as my default search engine in Internet Explorer.”
Set Internet Explorer to display your results in the sidebar.
First, open the search sidebar by choosing View → Explorer Bar → Search. Then, in the sidebar, click New. That should open a blank Google search box for you.
At this point, it’s possible that the Google gods are smiling on you and everything will work just beautifully without any further action on your part. To see, first test out the sidebar with a search. If your results appear as a list of links in the sidebar, and that’s what you want, you’re in luck.
If, however, the search results show up in the main window and that’s not what you want, head over to www.google.com/options/defaults.html and scroll down to Make Google Your Default Search Engine. In the section for Internet Explorer, Google provides two links to downloads that change the way your results show up. The first link makes your results appear in the sidebar; the second link makes your results appear in the main window. (In Internet Explorer, you can’t have it both ways—a list of links on the left and the full results listings on the right—unless you run the same search from the sidebar and the toolbar or main window.)
Assuming you want your results to show up in the sidebar, click the first link. When asked if you want to save or open it, choose Open. Then, in the next two dialog boxes that appear, click Yes and OK, respectively.
Close Internet Explorer and reopen it.
Run a search from the sidebar, and bask in glory as your results appear there.
Internet Explorer for Macintosh
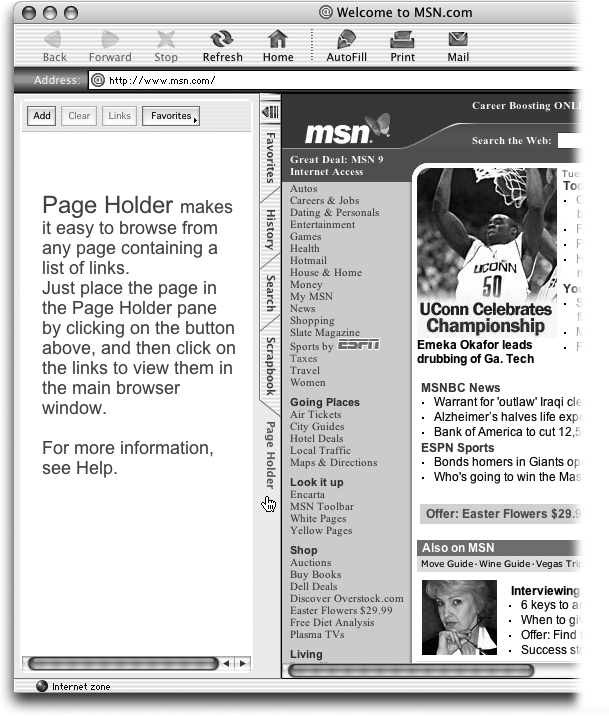
Setting up a Google sidebar in Internet Explorer for the Mac is a big win because you can’t get a Google toolbar for this browser. But the sidebar solution involves a twist, because the existing search sidebar doesn’t let you use Google. Instead, you have to use the Page Holder sidebar, shown in Figure 7-3. The Page Holder feature anchors a single Web page—in this case the Google home page—in the browser’s sidebar. When you click a link inside the sidebar, the new page opens in the browser’s main window.
Note
Actually, if you’re in a geeky mood, you might be able to hack Internet Explorer for the Mac to run Google searches from the search sidebar; www.visakopu.net/ie5google/ gives directions. But if you harbor no hackerish impulses, the Page Holder workaround is a good bet.
You can run Google searches from the Page Holder sidebar two different ways. If the page you hold in the sidebar is the Google home page (Figure 7-3, top), your results appear in the main window only. If the page you hold is a special search-box page from Google (Figure 7-3, bottom), however, your first page of results appears in the sidebar only, and it includes no details—though if you mouse over a link, a box appears and shows you the page snippet you’d see in a regular results listing.
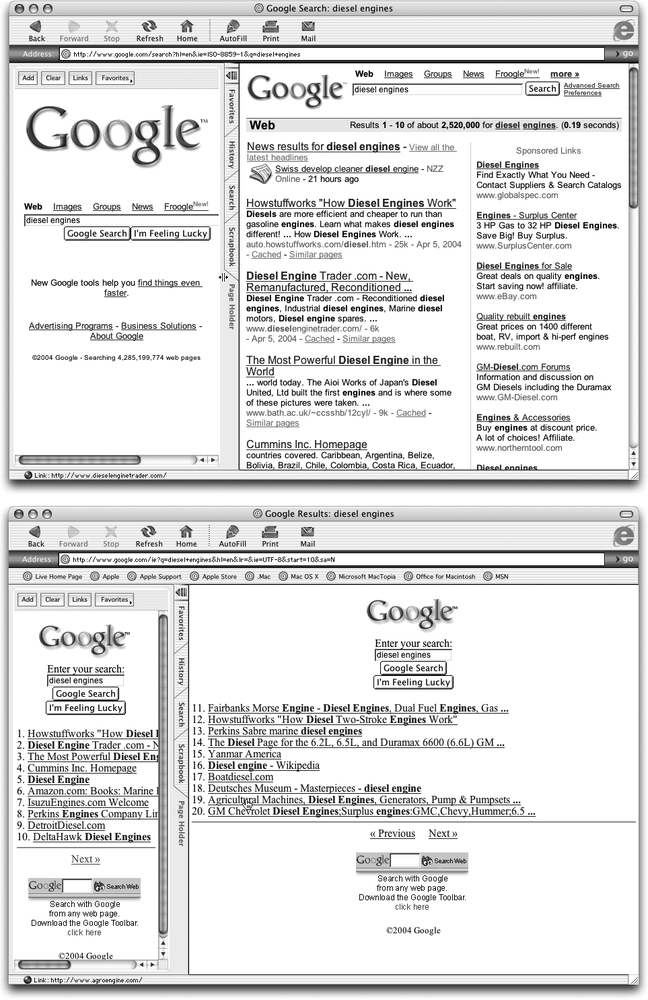
This Page Holder option, though, is helpful if you want to click through your first few results and view each page in the main window.
Here’s how to set up Page Holder to run Google searches:
Open Page Holder.
Internet Explorer calls the whole sidebar the Explorer Bar, and you can open it by pressing ⌘-T (or by choosing View → Explorer Bar). The bar has five tabs running along its right edge, and Page Holder is the bottom one. Click it to get the blank bar shown in Figure 7-4.
Open the page you want to preserve.
You have two choices here. You can hold the main Google home page by pointing your browser to www.google.com. (Searching from the home page opens your results in the main window only, as shown in Figure 7-3 at top.)
Or you can hold the special Google search pane, shown at bottom in Figure 7-3, by going to www.google.com/ie. (Searching from this search bar opens your first page of results in the sidebar only, as shown in Figure 7-3 at bottom. When you want to see results beyond the first ten, the sidebar gives you a Next link, but clicking it makes your results from 11 on appear in the main window. As in Internet Explorer for Windows, there’s no way to run a search from the sidebar that displays your results in both windows.)
Add the open page to Page Holder.
You can either click Add at the top of the Page Holder window, or you can find the @ icon in the address bar, to the left of the URL, and drag it into the Page Holder pane.
To save the page so you can easily return to it any time, click Favorites → Add to Page Holder Favorites.
Once you save it, the Google home page goes by the name Google; the search page goes by the name Google Results.
That’s it. You can now run a search from the sidebar and feel like you beat the system.
In Mac OS X, every program has a feature called Services, which are extra, general-purpose tools that let you do things like send emails from within a program and add sticky notes. You can find these services in the Application menu—the menu that bears the name of whatever program you’re using. The Services menu has a submenu with a list of options like Make New Sticky Note and Mail → Send to.
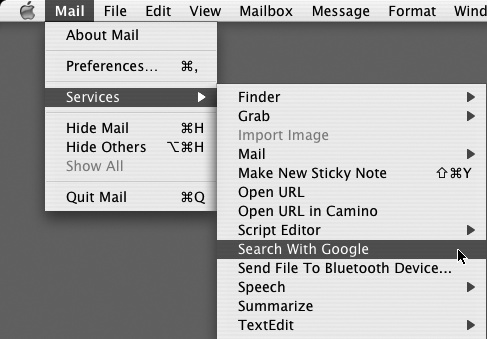
When you highlight some text in nearly any program, you can perform these Services on your selection. Thus, if you highlight a URL, and choose Application → Services → Make New Sticky Note, a new sticky with your URL appears.
The good news is that Search with Google (Shift-⌘-L) is also in the Services menu. The bad news is that Services don’t work with all programs. In fact, they’re mostly limited to applications that were written specifically for Mac OS X (known as Cocoa applications), which include programs like iChat, Safari, Mail, and TextEdit.
Quicker than using the Services menu, though, is running the Search in Google command from a program’s shortcut menu. While typing in a Cocoa program, you can simply right-click (or Control-click) a selection of text and choose Search in Google. In a flash, your Web browser opens and performs the corresponding Google search.
Netscape and Mozilla (Mac, Windows, and Linux)
Netscape and Mozilla act pretty much the same when it comes to searching Google from a sidebar. You can use the existing Search sidebar and simply choose Google as your search engine (which works just like the sidebar for Internet Explorer for Windows shown in Figure 7-2). Or you can download a special sidebar from Google that lets you perform a Lucky search and reach Google’s alternate collections (Images, Groups, Directory, and News). The special Google search is worth using only if you often look for things in the alternate collections—or if you’re often Feeling Lucky.
With either sidebar, Mozilla and Netscape share the useful feature of listing links to your results in the sidebar and opening the full Google results page in the main window. This setup is handy when you want to take a gander at all the details in a results listing (main window) but then need only the links to surf around (sidebar).
To open the sidebar, choose View → Show/Hide → Sidebar (or My Sidebar, in Netscape). On Windows machines, you can also open and close the sidebar by pressing F9. If the sidebar has something other than a search box showing (like a history of your browsing), click the tab for Search (which might be at the bottom of the sidebar).
In addition to the blank search box, the Search tab includes a menu labeled “using” that lets you choose your favorite search engine. If you don’t see Google on the list, choose Edit → Preferences (on the Mac, chose Mozilla [or Netscape] → Preferences); in the window that opens, click the plus sign (or flippy triangle) next to Navigator, and then choose Internet Search. At the top of the Internet Search page is a section for Default Search Engine. Use the “Search using” menu to pick Google, and then click OK. Voilà—you’re now ready to run searches from the sidebar.
Tip
You can leave the Search sidebar open but actually run searches from the Google toolbar. The advantage of this system is that you get the search flexibility of the toolbar (Section 6.1), but you wind up with a list of results links in the sidebar. It’s the best of both worlds.
If you want to use the special Google-only sidebar, described above and shown in Figure 7-5, head over to www.google.com/mozilla/google-search.html and scroll down to “Install a new Google sidebar panel.” When you click the link for your version of Netscape or Mozilla, the sidebar installs instantly, and you can begin using it right away.
Tip
Don’t overlook the What’s Related tab in the Mozilla and Netscape sidebar. Like the “Similar pages” link in a Google result, it shows a list of pages somehow related to the page you’re currently viewing. Even better, the tab provides contact information for the site’s owners (when available), so you can compliment (or insult) them about their Web design.

Searching from the Address Bar
In Internet Explorer for Windows, and Netscape or Mozilla for any operating system, you can use your address bar (the place where URLs appear) as a blank Google search box. This trick is quite practical; since almost everyone keeps the address bar visible, being able to search from it doesn’t add any gunk to your browser window.
Tip
In Firefox, running a search from the address bar takes you directly to Google’s I’m Feeling Lucky result for your keywords. For example, if you type in auctions, Firefox takes you to eBay.
Internet Explorer for Windows
In Internet Explorer, this system has a downside: Searches run slower than they do using almost any other method. If you don’t mind, here’s how to set it up:
If you have the Google toolbar installed, the box in Section 6.2.2 explains how to set up your browser to let you search from the address bar instead.
To search from the address bar without installing the toolbar, you have to set Google as your browser’s default search engine. If you followed the directions in Section 7.1.2 for setting up a Google search sidebar, you’ve already done this step. Try running a search from the address bar, and see if it’s working.
If you haven’t yet set your browser to use Google for searching, just click over to www.google.com/options/defaults.html and scroll down to Make Google Your Default Search Engine. In the section for Internet Explorer, Google provides two links to downloads that reset your browser; you can use either one. Click the link, and when it asks if you want to save or open it, choose Open. Then, in the next two dialog boxes that appear, click Yes and OK respectively. Close Internet Explorer and reopen it. You’re now ready to search from the address bar.
Netscape and Mozilla (Mac, Windows, and Linux)
In Netscape and Mozilla, the address bar is actually called the location bar, and using it for searches is a snap. First, make sure Google is your default search engine. If you set the search sidebar to use Google, as described in Section 7.1.2, you’re all set. If not, just choose Edit → Preferences (on the Mac, Mozilla/Netscape → Preferences), and in the window that opens, click the plus sign (or flippy triangle) next to Navigator, and then choose Internet Search. At the top of the Internet Search page is a section for Default Search Engine. Use the “Search using” menu to pick Google, and then click OK. Now go ahead and type your keywords into the location bar and click Search (if you press Enter, the search doesn’t happen).
Note
If you don’t see the Search button on your toolbar in Mozilla, choose View → Show/Hide → Navigation Toolbar and make sure “Search button” is turned on. In Netscape, choose Edit → Preferences → Navigator (on the Mac, Netscape → Preferences → Navigator panel); at the bottom of the Navigator page, make sure the Search button is turned on.
If you don’t want to go to the hassle of clicking Search every time you want some Google results, you can set your browser to understand a couple of letters typed into the location bar—like gg—as a sign that you want to run a Google search. For example, this:
gg "Cookie Monster"
could run a Google search for “Cookie Monster” and display the results in your main browser window. Here’s how to set it up:
Choose Bookmarks → Manage Bookmarks.
The Bookmark Manager snaps to attention.
Choose File → New → Bookmark. (On the Mac, head to the main menu bar and choose File → New → Bookmark.)
A dialog box opens, and depending on the version of Netscape or Mozilla you’re running, it either contains blank spaces for Name, Location, and Keyword, or for just Name and Location.
Either way, for Name type in something like Google Search, and for Location type http://www.google.com/search?q=%s.
If you have a field for keyword, type in the characters you want your browser to recognize as the sign to run a Google search. You can use anything you want, but it’s a good idea to stick with something short and suggestive, like gg. Now click OK and close the Bookmark Manger.
If you don’t have a space for the keyword, type in the name and location, then click OK. Now choose Edit → Properties, and in the dialog box that opens, find the Keyword box. Type in gg—or whatever you’d like—and then click OK and close the Bookmark Manger.
Run a search from the location bar by typing gg (or whatever) and your keywords.
Feel fancy.
You can also set up this location-bar trick to run Lucky searches, cache searches, and nearly anything else Google can do. For a few relevant Google URLs that you can cut and paste where you typed the URL in step 2 earlier, check out www.google.com/mozilla/google-search.html.
Bookmarklets
Google’s browser buttons, described earlier in this chapter, are actually bookmarklets—tiny programs embedded in links that you store on your Favorites or Links toolbar. When you click one of them, it performs a certain task just like any button would. Bookmarklets are nifty because they add extra features to your browser, but take up virtually no room on your hard drive and are a snap to install.
For example, a bookmarklet can pop open a small window with a blank box that runs your search using Google, Yahoo, Dogpile, or any other search service out there. A bookmarklet can also add a liters-to-gallons conversion button to your toolbar, or a button that immediately tells you the number of days remaining in the year (good if your birthday is December 31).
Bookmarklets.com has a slew of handy tools, including a Google search box (www.bookmarklets.com/tools/search/srchbook.phtml). And SquareFree.com has a bunch of Google-specific tools at http://squarefree.com/bookmarklets/seo.html. To install any bookmarklet that catches your fancy, just drag it to your Links or Favorites toolbar.
Note
If you’re the kind of JavaScript geek who thinks you might want to build your own bookmarklets, check out www.webreference.com/js/column35/. (If, on the other hand, you think JavaScript is a screenplay about coffee, stick with the prefab bookmarklets.)
SquareFree’s bookmarklets include:
Google backlinks. Replicates the link syntax (Section 2.6.6) by showing pages linked to the current page. Keep in mind, though, that this trick works only if Google has given both the current page and the linked pages relatively high ranks. (If you want every page—regardless of popularity—try SquareFree’s AllTheWeb backlinks bookmarklet, labeled “atw external backlinks.”)
Google site search: all. Gives you a list of all the pages on a single Web site. Most of the time, this is just a good way to count how many pages a site has, but on smaller sites, it may help you find things, too.
Tip
Many sites have related pages with varying URLs, like www.conferences.oreilly.com and www.oreilly.com. And most pages appear without your typing www first. Thus, if you want to see all the pages on a megasite like oreilly.com, leave out the www when you type the URL into the address bar; then, when you run the “all from site” bookmarklet, you also get listings from conferences.oreilly.com, java.oreilly.com, perl.oreilly.com, and a bunch of other geek-frequented sites.
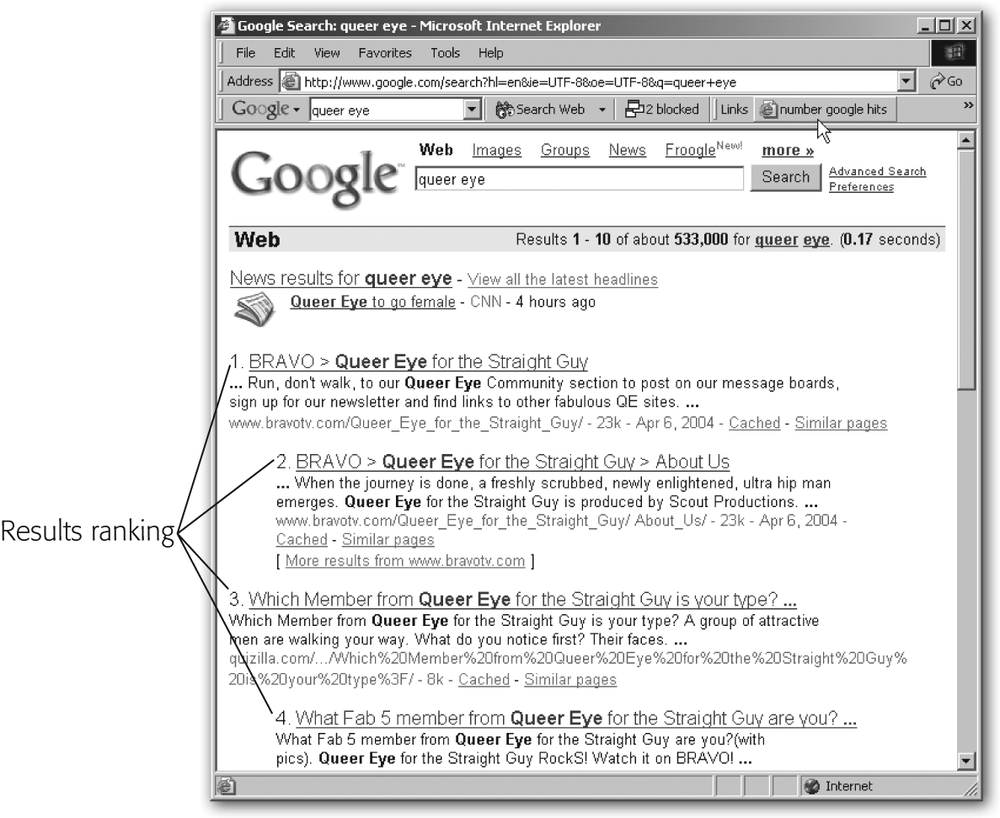
Number google hits. This bookmarklet numbers the individual listings on a Google results page, as shown in Figure 7-6. It’s a quick way to find out how high a page ranks within a set of results, which is helpful for curiosity seekers and Webmasters checking out how their own pages fare on Google (Section 7.2 has more on bookmarklets for Webmasters).
Google Desktop Search
If you’ve ever wished that Google could use its Web-searching superpowers to search the files on your hard drive, you might want to take a look at Google Desktop Search, another free program and a graduate of Google Labs (Section 7.5).
Note
Mac mavens and Windows warriors using anything older than Windows 2000 with Service Pack 3 can skip this section. Google Desktop Search works only on Windows XP and Windows 2000 with the latest service pack installed.
But Mac OS X Tiger tamers have a little bit o’ Google that’s all their own: Google-themed Dashboard widgets. These playful little programs can do everything from streaming Internet radio to displaying the latest currency conversion rates. Among the ever-growing collection are widgets devoted to quickie Google Maps, Google Search, and even I’m Feeling Lucky results. You can fulfill all your widget whims at www.apple.com/downloads/dashboard/. (If you’ve got Tiger in your Mac, you don’t need Google Desktop Search, as the system’s Spotlight feature handles all your file search needs in a flash.)
With Google Desktop Search on the case, you can find all sorts of things buried on your computer, from Web pages you’ve seen to Word documents you’ve worked on to email messages you’ve sent or received. Google Search can also dig through conversations you had over AOL Instant Messenger and search for MP3 files based on the artist or album they came from. Desktop Search doesn’t limit itself to looking for files by name or location, either—it can find files based on what’s inside them, matching them up to the keywords or phrases you type into the Search box.
Say, for example, you dimly recall an email exchange a few years ago when you were passing roasted corn recipes and links to cooking sites back and forth with a friend—and you really want to find a message from that discussion again. All you have to do is type in corn, and Google Desktop Search looks high and low across your computer for any document, email message, or other file with the word “corn” inside (or in the title).
Desktop Search does this expert sleuthing by indexing the contents of your hard drive—scanning the contents of your documents and storing the information on its servers so it can quickly scan for matching results to your search terms. If you’re nervous about having Google keep a copy of your info, check out their privacy info: http://desktop.google.com/privacypolicy.html. Still nervous? You may want to skip this Google goodie.
Installing Google Desktop Search
Windows 2000 and XP users can download a free copy of Google Desktop Search at http://desktop.google.com. When you first install the program, it takes some time to index all the files on your computers (Figure 7-7), but works quietly in the background so you don’t have to stop what you’re doing. You will need to close and reopen your email program after you install the program, though, so it can index your messages.
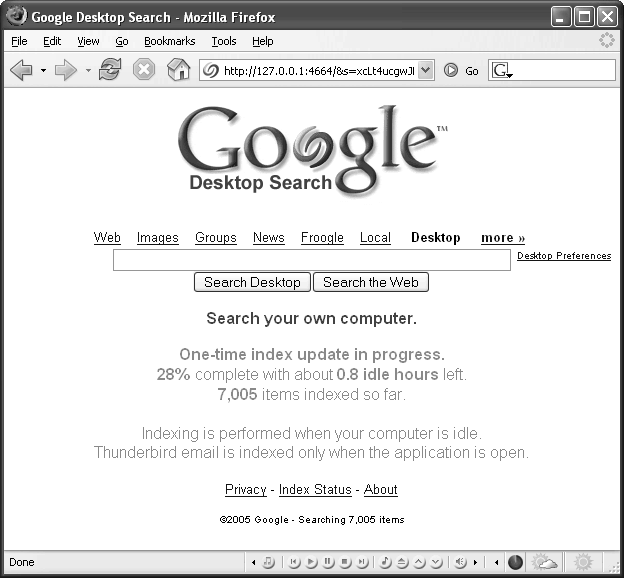
Google Desktop Search uses your computer’s idle time to do its indexing and cache work, borrowing some processor power whenever the computer sits for more than 30 seconds without doing anything. The program can take anywhere between 15 minutes and several hours to index your whole drive, depending on the size of files, the number of files, and the time your PC has to spare. As you create and download new files later, Google Desktop Search makes note of them and adds them to the cache automatically.
Note
If you have any anti-spyware software like Webroot Spy Sweeper installed on your system, you may get an indignant warning about something trying to mess with your start-up programs. This alert is normal, as Google Desktop Search does install itself in your Startup folder.
Once your computer is fully indexed, you’ll see a Desktop link above the Search box whenever you visit the Google home page; click that link to go searching through your computer’s contents.
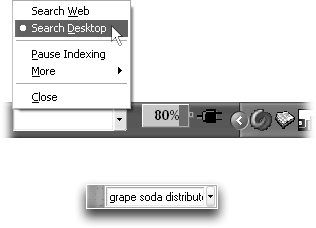
You can also use Desktop Search by entering keywords in the Desktop Search deskbar, down in the Windows taskbar area. As shown in Figure 7-8, the Search deskbar toggles back and forth so you can look for stuff on the desktop or on the Web from the same spot. If you select the More menu, you can switch to a groovy, ungrounded deskbar that hangs out on whatever part of your screen you want and floats around all your open windows.
Using Google Desktop Search
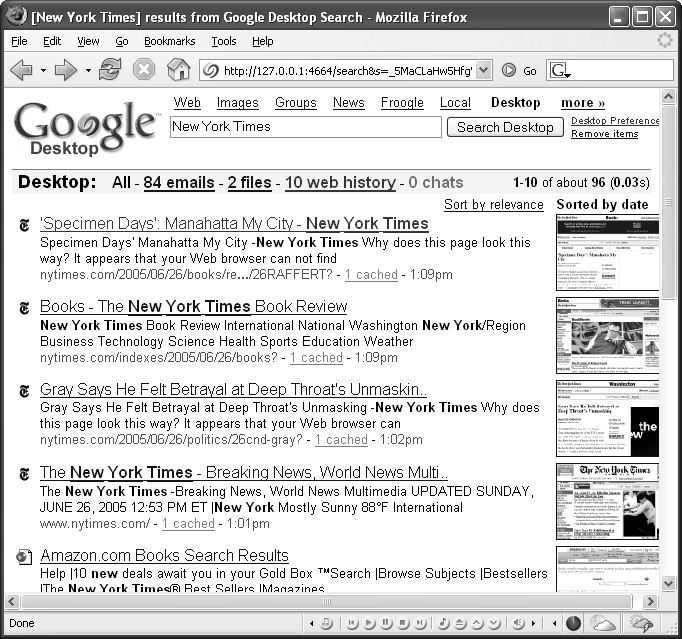
You search with Google Desktop Search in the same way you search for anything else with a Google service: Type your terms into the Search box, and then hit the Enter key. When you search your desktop, however, you get results that show your highlighted terms along with the files’ locations around your PC, so you can easily see what folder or drive the file lives in. (You may even find folders you forgot existed.) Google Desktop Search displays the results either by relevance or by date; click the link on the right side of the page to suit your fancy.
On the results page, there’s an icon next to each item that tells you what kind of file it is. A musical note indicates it’s a music file, an envelope means it’s an email message, and so on. You’ll also find familiar icons for Microsoft Office documents, Adobe PDF files, and America Online’s little yellow running androgyne. Google Desktop Search displays thumbnail images of Web pages, digital photos, and other image files that wash up in the results, too, so you have a visual clue right there without opening the actual file. When you click a link on the results page, the file pops open.
Clicking the link for a Web page takes you right to it in your browser. If the current Web page is newer than the one you remember seeing in your surfing sessions, you can see an older version of the page by clicking the “cached” link in the last line of the result’s description, as shown in Figure 7-9.
Clicking the title of a file—like a Word document or JPEG image—opens the most recent version of the file in the program you normally use to open such files. Old email messages show up on the results page with keywords highlighted within the text, and you have the option to open or reply to the original message in your regular email program with one click.
Tip
If items show up in your desktop-search results that you’d rather not see at all, you can manually remove them from the Desktop Search cache. When you’re on a page of results with items you don’t want to see, click the Remove Items link at the top of the page next to the Search box. Turn on the checkboxes next to the results you don’t want in the Desktop Search cache, and then click Remove Checked Items.
Setting the Desktop Search Preferences
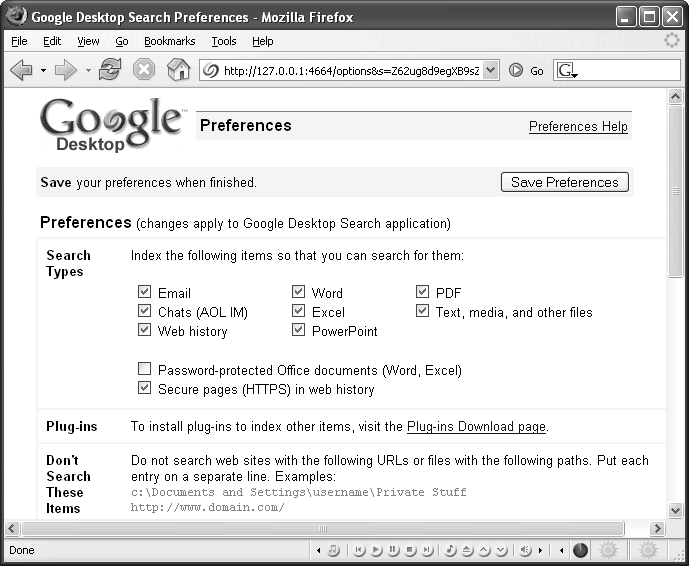
You can fine-tune Google Desktop Search in its Preferences area (Figure 7-10), which you can get to by clicking the “Desktop Preferences” link next to the search box when you’re using the program. Here, you can adjust seven different aspects of Desktop Search, including:
Search Types. Tell Desktop Search what kinds of files you want to hunt for in your searches—and which you want to ignore. You can tell the program not to index AOL Instant Messenger chats, for example, if you don’t want your online conversations with your buddies dredged up in the results page. You can also have the program not search for secure Web pages you may have used in the past, like ones where you had to fill out personal or confidential financial information.
Plug-ins. Software developers have already taken a crack at enhancing Google Desktop Search with their own software plug-ins, little extras described in more detail in the box in Section 7.3.3. You can add these features to the program to further its powers. Browse and install some of these helpful little tools here.
Don’t Search These Items. This preference lets you type in URLs or file paths to documents on your hard drive that you’d rather not have listed in your search results—like your tax forms or favorite online gambling sites.
Figure 7-10. Tell Google Desktop Search what kind of files you do and don’t want indexed and cached in its Desktop Preferences area. You can do other things here, too, like adding plug-ins (Section 7.3.3) and changing the number of search results per page.Search Box Display. This is another place where you can opt for a floating or taskbar-anchored search box for your Desktop duties.
Number of Results. If you hate clicking “Next Page” all the time as you wade through search results, you can change the number of results listed on a page from 10 to 20, 30, 50, or 100. Keep in mind that Desktop Search gets slower if you make the number higher that the original 10.
Google Integration. If you get jumpy seeing pages with a mixture of your Desktop and Web results listed together, you can put a stop to it right here by turning off this box.
Help Us Improve. Google would very much like it if you would allow anonymous reports to be sent from your computer to its headquarters, should you crash while using Desktop Search. If you’re not willing to participate, you can turn off the crash reports here.
Note
Google Desktop Search is a complex and powerful program that has a deep and searchable Support area posted online for all to see. If you have a question, glitch, or problem with some part of the program, take a look at http://desktop.google.com/support. Answers to your questions may already be available.
A few words about privacy
Google’s Desktop Search gives you the opportunity in the program’s preference area to skip indexing certain types of documents and files. But many people (the ones not reading this book, for example) may not realize you can change this setting.
If you don’t turn off certain kinds of searches, someone else could amble in, run a desktop search on your computer, and find all kinds of personal email messages and other documents you’d rather keep private. Or imagine if you used a public computer and didn’t realize that Desktop Search was installed; it’s possible someone could come along after you and call up personal email messages right out of the Desktop Search cache, no password needed at all.
Others may worry that Google uses the information it gleans from your computer’s contents to serve up robot-generated advertising, like the text-only ads that can pepper the right side of Gmail messages (Section 11.1). While you certainly see the text-based ads if you have Desktop Search set to mix in results from your computer alongside those from the Web at large, the company doesn’t put ads on Desktop-only search results.
Google itself puts it this way: “We treat your privacy with the utmost respect. Google Desktop Search doesn’t make your computer’s content accessible to Google or anyone else. The application also offers privacy options such as not indexing password-protected Office files or secure (HTTPS) web pages.”
If you want more specifics, Google’s Desktop Search privacy policy is available to read online at http://desktop.google.com/privacypolicy.html.
If you’re deeply worried about privacy in this increasingly indexed, connected, networked world of ours, either don’t use Google Desktop Search on your computer or adjust its preferences to skip those private files and sites. And, if you’re using someone else’s computer, you can temporarily turn off Desktop Search while you use the machine, as the next section explains.
Note
Google Desktop Search is also available in an “enterprise” edition, meaning network and technology administrators can get a version that installs easily to all the connected PCs across the company network. That version is also free and is available at http://desktop.google.com/enterprise/index.html.
Disabling Google Desktop Search
If you like having Google Desktop Search around to help you track down most of your stuff, but don’t want it to index every little thing, you can temporarily turn off the service—or shut it down altogether—without having to uninstall it from your computer. This can be helpful if, say, you want to pop over to a florist’s Web site and order flowers for your beloved from the family computer without leaving a trail in the Desktop Search cache.
To have Desktop Search stop indexing and caching everything in sight for the next 15 minutes, click the icon that looks like a rainbow pretzel in the Windows system tray, and then select Pause Indexing from the menu, as shown in Figure 7-11. (You can also get to this menu item by clicking the black triangle next to the anchored or floating deskbar on your screen.) When you get close to the end of the 15 minutes, a taskbar message balloon floats up and warns that you’re down to your last minute before indexing and caching begin again.
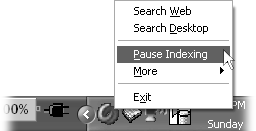
If you get done with your secret mission before the 15 minutes are up, you can get Google Desktop indexing again by returning to the same taskbar menu and choosing “Resume Indexing.” Need a bit more time? You can also select “Pause for 15 More Minutes.”
Shutting down Google Desktop Search for the duration of your computer session is as easy as quitting any other program on your computer: just bop back to the taskbar menu and choose Exit. Quitting entirely out of Desktop Search means no indexing, caching, or searching the PC, however.
You can then turn Desktop Search back on in two different ways:
Chose Start → Programs → Google Desktop Search → Google Desktop Search.
Restart the computer; Google Desktop Search kicks back on when you reboot.
If you decide that you don’t want Google Desktop Search in your life after all, uninstall the software by choosing Start → Programs → Google Desktop Search → Uninstall Google Desktop Search.
Google Deskbar
The Google deskbar, a search box that sits at the bottom of your Windows desktop, as shown in Figure 7-12, may not immediately appear useful. Why not just run searches from the toolbar in your browser?
It turns out there are tons of reasons to use the deskbar. Once you’ve tried it, you’ll be hooked.
But before you read up on the many things the deskbar can do, you should know that it runs only in Windows 98, ME, 2000, and XP (though it runs in any Web browser on these systems). Unfortunately, if you’re a foot soldier in the Linux or Mac armies, you can’t add this weapon to your search arsenal.
Note
If you’re a Linux or Mac jockey and you’re wondering why Google discriminates against you all the time, understand this: According to Google, only about three percent of the computers used to reach Google are Macs, and a mere one percent are Linux machines. (For more fun facts, check www.google.com/press/zeitgeist.html.)
For the nearly 90 percent of computer users whose systems can run the deskbar, here’s just a smattering of the excellent things you can use it for. And you can do all of it without even opening your browser (although you must be online):
Calculate things. Like any blank Google search box, you can use the deskbar as a calculator (see Section 1.6.1 for more on Google’s calculator function).
Look up definitions. The definition feature is particularly nice when you’re reading a Web page and don’t want to leave it in order to look something up. Type any term into the blank search box, press Ctrl+D, and a small window slides open with definitions. Alternatively, you can type define:septentrion (no spaces on either side of the colon) and then press Enter. The definition search works with individual words (like thymine) or with phrases (”open source software“).
Get synonyms. To open a window with a list of synonyms, type your keywords into the deskbar and then press Ctrl+T. This feature is handy when you’re writing an email and you need a synonym, for example, but the program you use doesn’t have a thesaurus. It’s also a dynamite substitute for the anemic Word thesaurus. And it’s not directly available through any other Google search box.
Tip
If you don’t install the deskbar, you can get synonyms with a little clicking around. You can run a regular Google search and then click the term as it appears in the blue bar above your results to get the Dictionary.com definition—where you can then click to get the term’s thesaurus listing. Or, from the Google toolbar, you can type in your terms, click the arrow to the right of the Search Web button, and then choose Dictionary. When you land at the Dictionary.com page, switch to the thesaurus listing.
Do a quickie search. When you’re working in Word, Excel, or any other program—even your Web browser—and you want to look up something that you think won’t require a whole search-and-click mission, just type your terms into the blank box, press Enter, and you’re rewarded with a mini Google results page.
For example, if you aren’t properly caffeinated, and while working on a report about the history of Microsoft, you forget the name of its chairman, you can just type Microsoft chairman into the deskbar, press Enter, and you’ve got Bill Gates’s name without having even to approach your browser.
Jump to a Web page. Normally, when you’re working in some program other than your browser and you want to open a Web page, you have to first open or click over to the browser, and then type the URL. Save yourself a whole click by typing a URL directly into the deskbar, which then opens your Web page in the full browser.
Installing the Deskbar
You can find the deskbar at http://toolbar.google.com/deskbar/. All you have to do to get it on your computer is click Download Google Deskbar and then choose Open or Save. If you choose Open, an installation wizard opens directly. If you choose Save, the installer downloads to your hard drive, and then a dialog box pops up asking if you want to open the file; choose Open to bring up the installation wizard.
The wizard asks if you agree to Google’s terms of use (say yes, or else you can’t install the deskbar), and then it asks if you want to send feedback statistics to Google about the way you use the toolbar. The screen explains what information Google does and doesn’t collect. Leaving the setting on (or not) is your choice—the deskbar works the same either way. Finally, it instructs you to right-click in your Windows taskbar (the band at the bottom of the screen) and choose Toolbars → Google Deskbar. That’s it.
If you feel like it, you can make the deskbar wider or narrower. Just mouse over the vertical bar to the left of the search box, and when it becomes a two-headed arrow, drag it left or right. (If no two-headed arrow appears, right-click the taskbar and make sure “Lock the Taskbar” is turned off.) If you move the bar all the way left, it drops down and forms a whole new row on the taskbar, which gives your other buttons more breathing room on the regular taskbar.
Tip
Even better, you can move the application buttons below by dragging the bar to their left downward, giving these buttons space to spread out and making the deskbar more prominent (as in Figure 7-13). It’s worth 60 seconds of your life to rearrange the taskbar elements until you find a system that work best for you.
Searching via the Deskbar
The most obvious way get to the deskbar is to click in it and start typing. But the fastest way to get there is via the keyboard shortcut: Ctrl+Alt+G. You can also search from the deskbar using any of the following methods:
Highlight text in any program and drag it to the deskbar; the deskbar automatically runs the search.
Put something on the clipboard (Ctrl+C to copy, or Ctrl+X to cut) and then press Ctrl+Alt+G. Your clipped text appears in the search box, but the deskbar doesn’t automatically run a search; press Enter to trigger it.
Type or drag a URL into the deskbar to launch a full browser window for that page.
Tip
When you place the cursor in the blank deskbar, you can press the up or down arrow to get an alphabetical history of searches you’ve performed there. Select one to run that search again.
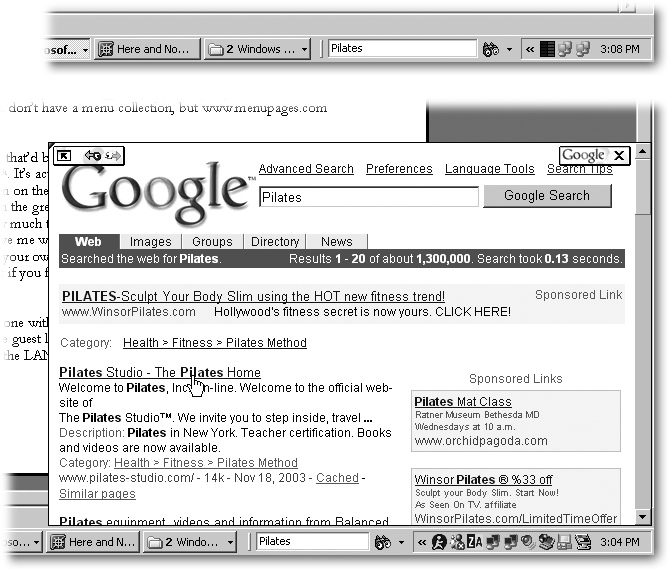
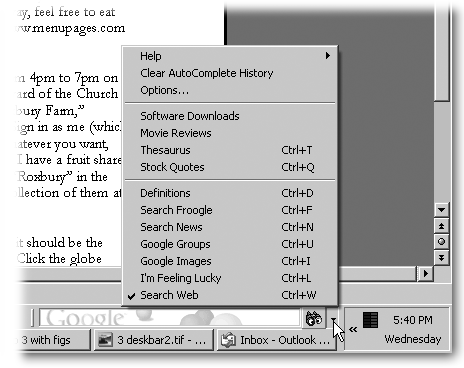
In addition to running standard Google searches, the deskbar lets you do a bunch of other nifty stuff—like getting definitions and stock quotes—all from the arrow button on the right end of the search box, just to the right of the googly-eyed button. Figure 7-13 shows the menu you get when you click the arrow.
Most of the time, when you perform a search using the deskbar, your results appear in what Google calls the mini-viewer (Figure 7-12, bottom).
This small window is a big boon because it lets you run searches with your browser closed, which saves memory, screen space, and general clicking. You can surf around in the viewer as you would in a regular browser window; when you click outside the window, it slides shut.
Note
The deskbar actually launches your browser in two cases. First, if you type a URL into the search box and press Enter, the deskbar automatically opens the page in your browser. Second, if you want to see your mini-viewer results on the big screen, click the arrow in the upper-left corner of the mini-screen to pop open your browser.
Customizing the Deskbar
If you couldn’t change a bunch of settings, most software would be about as much fun as a box of gray crayons. Happily, the Google Deskbar is flexible. For example, you can change the font size of the mini-viewer’s display, add your own custom searches, and change the way the mini-viewer appears and disappears.
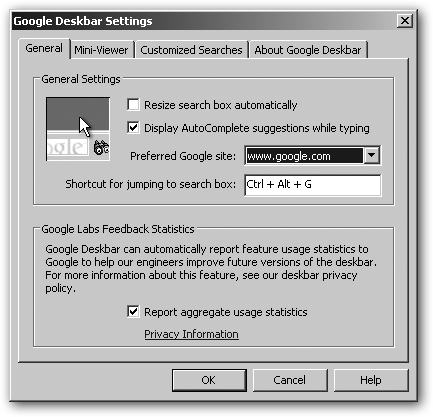
To reach the settings window shown in Figure 7-14, right-click the googly-eyed button on the right end of the deskbar, and then choose Google Deskbar Options.
Most of the options are self-explanatory, but here are a few you might not expect:
Turn the reporting feature on or off. If you change your mind about whether you want to send Google information about how you use the deskbar (which you decided when you installed it), head to the General tab, where you can change the setting.
Change the Google country site the deskbar uses for searches. This is handy if you find yourself in Azerbaijan, for example, and you want to do as the Azerbaijanis do. On the General tab, choose www.google.az from the “Preferred Google site” menu.
Make the viewer stay open when you click outside it. If you want to keep an eye on your results while you’re working in another program, click the Mini-Viewer tab and then turn off “Automatically close mini-viewer when you leave it.” (If you leave this setting on, the viewer will slide shut when you click out of it.)
Get the mini-viewer out of your sight. If the mini-viewer annoys you and you’d prefer to view your deskbar results in a new browser window, open the Mini-Viewer tab and turn off “Display search results in mini-viewer.”
View help, FAQs, privacy info, deskbar discussions, or links to places where you can tell Google what you think about the deskbar. Click the About Google Deskbar tab, and then choose the link you want.
The Customized Searches tab sounds straightforward, but requires some explanation. Google has a handful of special search types already set up: stock quotes, a thesaurus, movie reviews, and software downloads. Each custom search runs your query on a particular Web site (movie reviews, for example, run your search on RottenTomatoes.com). Most specialized searches have a keyboard shortcut, too (Ctrl+T to search an online thesaurus, for instance), and they all get a listing in the deskbar menu (click the arrow on the right end of the search box).
Customized Searches lets you change the existing searches or add new ones. You might want to change one if, say, you prefer a stock-quote service other than Google’s. Or you might want to add one if there’s a site you search often (like AltaVista or your company’s intranet), and you want to be able to reach it from the deskbar.
Here’s the hard part: You have to know the URL for the search you want to add. Unfortunately, that doesn’t mean the URL for the site in question but the string that runs a search on that site. For example, the stock-quote URL is http://www.google.com/search?q=stocks:{1}, and the movie-review URL is http://www.rottentomatoes.com/search/movie.php?searchby=movies&search={1}. Worse, Web sites all use different systems for creating that search URL. If you aren’t a Webmaster and you don’t know the search URL for a site you’d like to add, your only hope is to play around and try to hit on the right string.
Once you have the URL you need, head to Customize Searches, and click Edit to change an existing search or Add to create a new one. If you’re editing a search, all you have to do is replace the existing URL and then click OK twice. If you’re adding a new one, you need to name it and then add the URL. You can also try assigning a keyboard shortcut to your new search, but Google only gives you the option to use Ctrl plus one other key, and, frustratingly, most Ctrl+key combinations are already taken. Click OK twice to finish. To use your new search, type some keywords into the deskbar, click the arrow button on the right to get a menu of options, and then choose your special search from the list.
Experimental Google Tools
A lot of people think Google never changes. The home page has looked the same for several years, for example, and the results pages have maintained the same layout for about as long.
On the contrary, according to Google engineers, Google changes all the time. The way Google determines relevance (discussed in Section 3.2.2) shifts from time to time, improving the quality of your results almost imperceptibly. In addition, Google is always trying out new ways to let you search for and glean information. The company’s playground is called Google Labs (http://labs.google.com/), and the features on it sometimes become regular offerings.
Any feature posted on Google Labs is free for you to play with. You can even tell Google’s engineers whether you like it or not, and why. Some of the toys are terrific (the Definitions search [Section 1.6.1] is so great, it’s now part of the regular site), and some are just kind of weird. For example, there’s a voice search feature that lets you make a toll call to Google to tell it your search terms—but you have to go online to get your results, making it useful only when you’re surfing on a cellphone (and even then it’s limited; see http://labs1.google.com/gvs.html for more info). The ones that prove unpopular—or so popular they crash the Google servers—are sometimes discontinued without warning, so it’s a good idea not to get too attached to anything you find in the Labs.
That said, the experimental tools can be useful, and if you like one of them, it’s worth letting Google know if, say, RideFinder (Section 2.6) saves your bacon one night when you really need to get to the airport on short notice. This section covers a couple of the handier search tools; other good ideas from the Labs are discussed elsewhere in the book (for example, News Alerts, a system that emails you when news breaks on topics you choose, is discussed in the “Google News” section in Section 3.2).
Personalized Search
Google works hard to deliver highly relevant search results. But, of course, sometimes Google guesses wrong because what’s relevant to Jane Searcher may not be relevant to you. To help it find pages that are more likely to be of interest to you, try Google’s Personalized Web search.
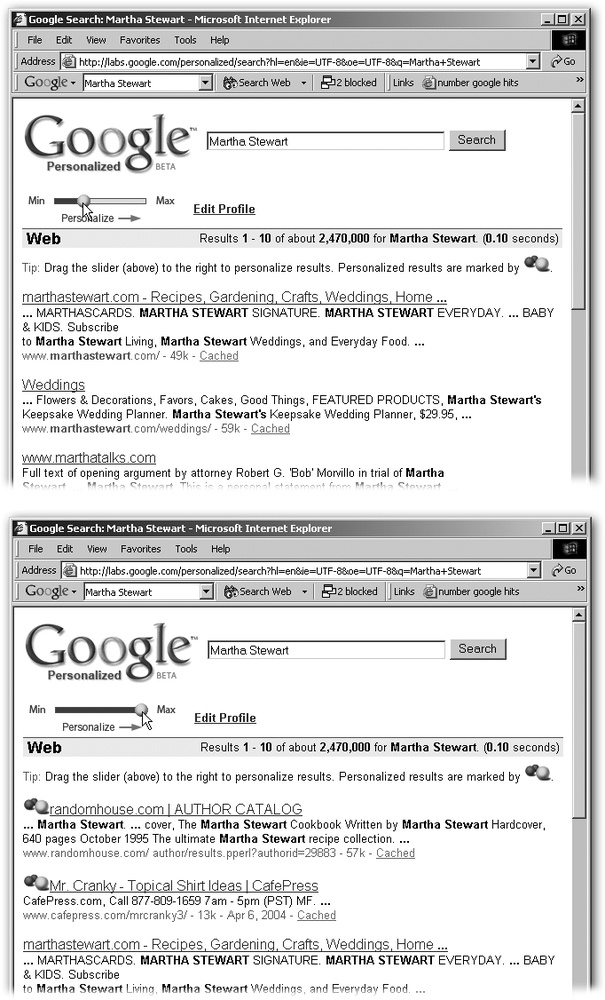
Google Personalized (http://labs.google.com/personalized) lets you tell Google what topics generally interest you. Then, when you run a search, Google displays the regular results but gives you the choice of seeing them rearranged according to your preset preferences. Figure 7-15 has an example.
Note
To use Google Personalized, you can be on any operating system, but you need Internet Explorer 5 or later, Netscape 5 or later, Mozilla 1.4 or later, or Firefox .8 or later. Make sure you have both JavaScript and cookies turned on (check your browser settings). And run your search in English, from a browser set to use English.
To set your topics, head to http://labs.google.com/personalized and click Create Profile. Click any of the categories to get a list of subcategories you can designate (Figure 7-16).
Note
Bonus Note: Personalized results appear on the first page of listings only, which means you’re limited to ten just-for-you results.
![Turn on subcategories that interest you. You can select as many as you want in every category that intrigues you. If you want to select an entire category, click the General choice (for example, “Recreation [General].”)](http://imgdetail.ebookreading.net/system_admin/3/0596100191/0596100191__google-the-missing__0596100191__httpatomoreillycomsourceoreillyimages2043570.png)
When you’re done adding categories, click Start Searching. If you want to add or delete categories at any time, just click Edit Profile from any Google Personalized page. The list on the left lets you remove existing categories; the list on the right is the same one you saw when you first set up your categories, and you can dive back into it for additional choices.
Personalize Your Homepage
When Google first crashed the search engine party back in the 1998, many people noticed how plain its home page was, especially in the era of Day-Glo background colors, flashing banner ads, and the screeching jumble of links that adorned most of the competition’s portal pages. For many years, the simple white background and search box remained just the way they’d always been whenever you hit up Google for some information.
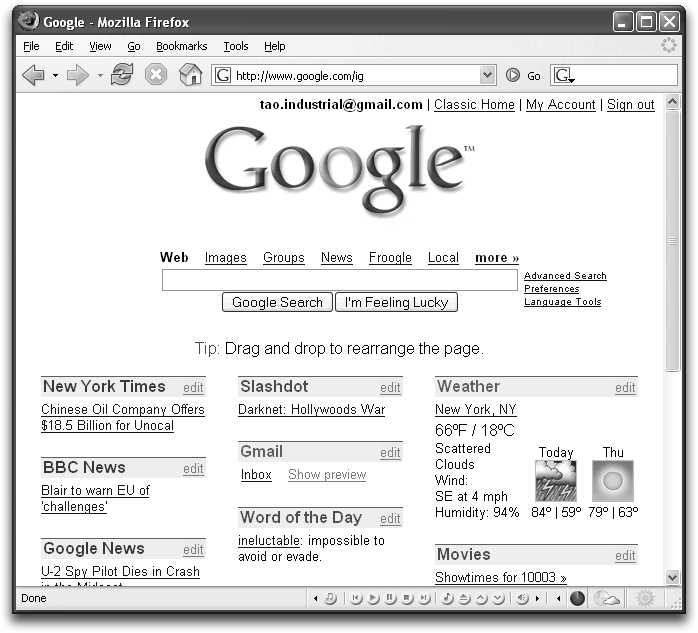
While it hasn’t gone whole hog in tarting up the old home page, Google is experimenting with letting you add a few helpful elements yourself. With its Personalize Your Homepage tool in Google Labs, you can customize the standard Google search page to your liking by adding things like stock tickers, weather reports, and news headlines from a variety of sources. You can also add helpful shortcuts, like a preview of your Gmail Inbox (Section 11.1.2), driving directions from Google Maps (Section 3.3.2), and movie times for the theaters in your area. Figure 7-17 shows an example of what a personalized Google page looks like.
To personalize your page, you need just a few things, including a Google Account (you can use your Gmail, Google Groups, or Froogle Shopping List user name and password here) and the most up-to-date version of your favorite Web browser for Windows, Mac OS X, or Linux. Then you need to surf on over to www.google.com/ig and click the link in the upper-left corner marked Add Content.
The next screen lets you click various buttons to add content to your home page: a preview of your waiting Gmail messages, tidbits from Google News, Quotes of the Day, and so on. If you want the weather in your area, click the “edit” link in the Weather box and fill in your Zip code. When you’ve picked what you want, click the “close” button.
Tip
You can add headlines from another Web site to your Google home page, provided that other site has what’s known as an RSS feed. (An RSS feed—like feed://www.nytimes.com/services/xml/rss/nyt/HomePage.xml—provides a summary of all the headlines on a site.) If you know the address of an RSS feed for your favorite site, simply type it in the Create a Section box to add its headlines to your Google home page.
If you’re not logged in to a Google service, you’ll get pestered to sign in with your Google Account name and password. If you don’t have an account, you’re presented with a link to join up right there. Once you’re signed up, signed in, and set to go, Google presents you with your customized creation.
You can rearrange the elements on the page by dragging and dropping them into an order that suits you. For example, if you always want the weather forecast and stock report right up front where you can see them, hover the mouse cursor over the section title until it turns into a cross, and then drag the weather box or stock section to the part of the page where you’d like to see it each time you visit Google.
You still have your beloved Google search box on the top half of the page now, but the lower half holds all your additions and customizations. (If you ever want to return to the plain-old Google home page, sans any of your decorations, click Classic Home in the upper-right corner.)
When you get the page just so and want to see it every time you’re in Google mode, just paste its URL into the area of your browser’s options or preferences where you tell it your home page.
Tip
Click the Edit link next to any section head on your personalized page to get in there and adjust your settings. You might need to temporarily tweak your settings if you’re traveling, for example, and want the weather for your current location instead of the forecast for back home.
If you’re on the road and away from your usual computer, you can still get to your custom page by popping over to www.google.com/ig and typing in your Google name and password. If you’re using somebody else’s computer, though, make sure you sign out of your Google account before you take off, since the next person who comes along to Google something will get an eyeful of your personalized page—including your stock tickers and Gmail message previews. Unless you feel like sharing with the rest of the class, then, click the Sign Out link at the top of the page before you leave.
My Search History
Have you ever spent some quality time with Google and found exactly what you were looking for—but then forgotten how you got there? Or moved to a different computer—in school, at a library, or at work—only to find your list of previous searches gone forever?
If either of these scenarios sounds frustrating and familiar, you may want to check out the My Search History experiment going on in Google Labs. With My Search History, Google keeps track of where you went and what you looked at. If you don’t remember which keywords you used in a past search—but you know roughly when you did the query—you can find the searches you performed on a certain date and time.
My Search History is yet another Google service for which you need a user name and password, though. You can sign up by clicking the “Create a Google Account” link right on the page at www.google.com/searchhistory—or, if you have a previous Google account (Gmail, Froogle Shopping List, or Google Groups), you can simply log in with that.
Note
My Search History needs JavaScript enabled in order to work. This isn’t a problem for most browsers created in the past five years or so, but you’ll need at least Internet Explorer 4.0, Netscape 6, Opera 7, or Safari 1.2. Firefox and Mozilla should work like a charm.
Using your search history
In order for Google to track and store your Web wanderings, you need to be logged in to your Google account (if you don’t see your email address in black at the top of the page, you’re not signed in). If you’re not logged in, click the Sign In link at the top of the Google home page.
After you’ve signed in, you can search with abandon, just like you normally do, but with the comforting knowledge that Google is quietly logging and compiling your searches as you go. (This is another one of those Google services that privacy advocates probably want to avoid.)
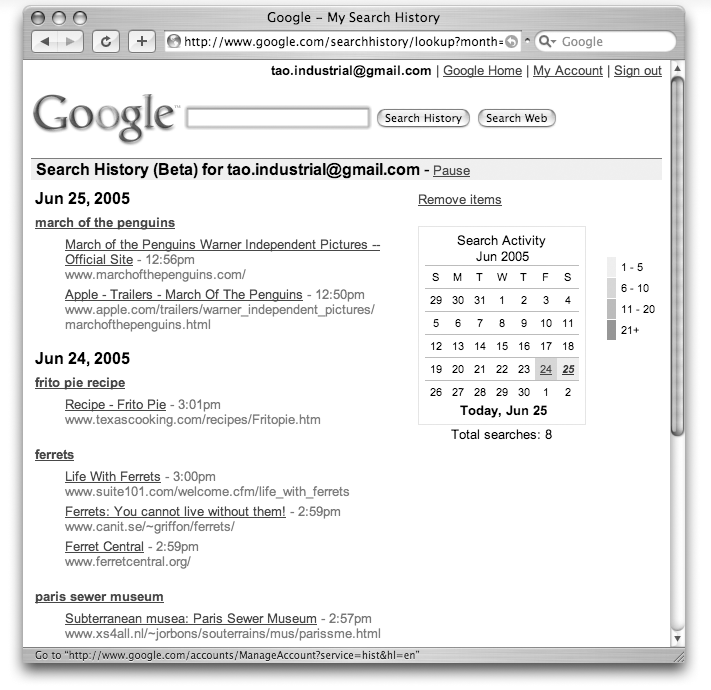
If you need to go back and look up something you saw earlier, click the Search History link at the top of the Google home page to see an organized list of all your searches—compiled by the keywords you originally used. As shown in Figure 7-18, the Search History displays the links to Web pages you visited during that search adventure, along with the date and time you visited. Click the links in the Search History list to revisit the sites. There’s even a calendar on the right side that you can use to click back in time.
Note
If you don’t see the Search History link at the top of the Google page, you probably need to log in to your account. Click the “Sign in” link at the top of the Google home page, or go to www.google.com/searchhistory.
Thanks to your Google account creation, your search history is stored on a server somewhere in Googleland, which means you can get to it from different computers. Simply sign in to your Google account from the home page, and then click Search History to pop into your search past.
If you decide that you don’t want to use the Search History after all, you can zap the whole thing. Sign in to your Google account by clicking the “Sign in” link on the home page (or at www.google.com/searchhistory). Click the My Account button at the top of the page. On the list of Google services on the next screen, click Delete Personalized Search to permanently discontinue the search.
Note
Going through with this deletion has the side effect of deleting your Personalized Search preferences (Section 7.5.1) as well. Unfortunately, there’s no way to delete your Search History without also deleting your Personalized Search settings, and vice versa.
If you do go through with the deletion, however, you can always restart your Personalized Search and Search History by going to www.google.com/accounts and clicking Personalized Search (under Try New Services).
Removing specific searches from the history
There may be times when you don’t want every little search you’ve ever made saved, like if you’re shopping for a birthday present or pricing a surprise vacation, and don’t want your spouse to find out.
Luckily, forgetting the past is just as easy as remembering it with My Search History. Click the link to go to your Search History page if you’re not on it, and then click the “Remove items” link underneath the calendar. This puts you into a page-editing mode where you turn on the checkmarks next to items you’d rather not save, and use the Remove button at the top of the column to wipe them out with one click. If you’re in a real house-cleaning mood, click All to select everything on your history page and then click the Remove button.
Google Suggest
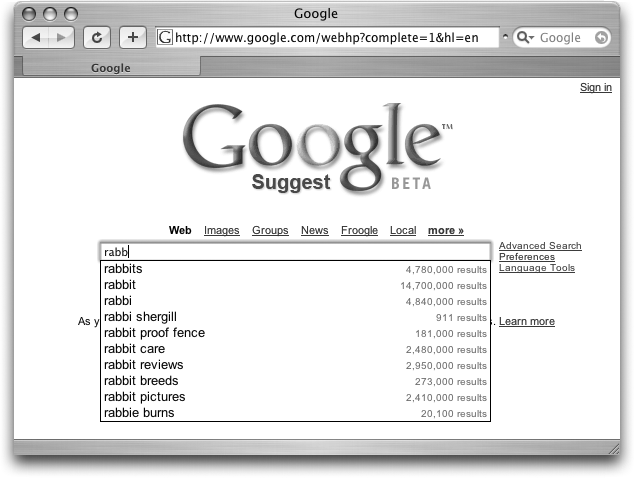
In these times of repetitive stress injuries and carpal tunnel syndrome, anything that saves a few keystrokes is a helpful, healthy thing. Google Suggest (as its name, er, suggests), is a Google Labs creation that pays attention to the keywords you start to type and tries to finish them for you, too (Figure 7-19).
You can find the Google Suggest page at www.google.com/webhp?complete=1&hl=en. If you like it and want to make it your official Web browser starting page, cut and paste the URL into your browser’s settings. (In Internet Explorer, choose Tools → Internet Options and then paste the address into the box in the Home Page area; most other Web browsers keep the settings in a similar place.)
Say you start by typing rabb in the search box. Google suggests everything from rabbit to rabbie burns to help you out. If you see your term on the list, tap the keyboard’s down arrow key to select it, and then hit Enter to start the search.
Google Suggest uses an algorithm to anticipate the phrase you’re typing, but says it doesn’t use your personal searching history as part of the formula. Instead, it bases its predictions on the huge pile of data it gathers from everybody using Google, and uses the popularity of those other searches to whittle down its suggestions for you.
Note
To use Google Suggest, you must have JavaScript and cookies turned on in your browser’s settings. And speaking of browsers, you need to be surfing on Internet Explorer 6.0 (or later) for Windows, or Safarai 1.2.2 (or later) for Mac OS X. You can also get by if you at least have Netscape 7.1, Firefox 0.8, Mozilla 1.4, or Opera 7.5.4 on your favorite operating system.
To work its suggestive magic, Google Suggest has to keep tabs on what you’re typing as you type it. Privacy-minded individuals may get a little creeped out, as Google Suggest communicates with the mother ship before the keywords are even halfway entered, but the company claims it doesn’t use your personal information for nefarious purposes without your consent. (You can read the company’s privacy policy at www.google.com/privacy.html.)
Google Video
When Google first started tinkering around with video in 2005, there wasn’t so much to look at—mainly screenshots and short text descriptions of the video pictured. The feature didn’t get a lot of attention because most people expect their moving pictures to actually move.
Fast-forward to today, and Google Video is going like gangbusters. It’s the company’s online marketplace for selling digitized recordings of TV shows, music videos, movies, NBA basketball games, and (most important) Rocky and Bullwinkle cartoons, each for a few bucks.
But there’s a lot of free, searchable stuff to see, too, from Super Bowl commercials to videos by future rock stars. Plus, Google offers everyone from indie filmmakers to regular camcorder-totin’ folks an open invitation to submit their video productions to the site, no matter the running time. Who needs a movie studio to distribute your digital film when you’ve got Google?
Using Google Video
With Google Video, you can watch the goods right on the Web (via your browser), or through Google’s own video-player software, or in certain cases, on a pocket media player like the Sony PlayStation Portable or Apple’s video iPod.
Note
For some videos, Google lets you watch or buy them only through the Google Video Player (Section 7.5.5.2). The player is a free, downloadable piece of software that, unfortunately for the Apple Corps, works only with Windows at the moment. (Check back periodically for a Mac version.)
To try out Google Video, head to http://google.video.com. When you land in Google’s video emporium, you see a screen full of thumbnail images, each representing a particular clip or show. If you see an image with the familiar tape-deck Play triangle button in the corner, you can play the video right there; simply click the picture to jump to a page where the video starts automatically, running right in your Web browser with no extra effort from you. (If the video is for sale, a clip plays.) If you see an image that doesn’t have the Play button, you can click the picture to get more options in that category.
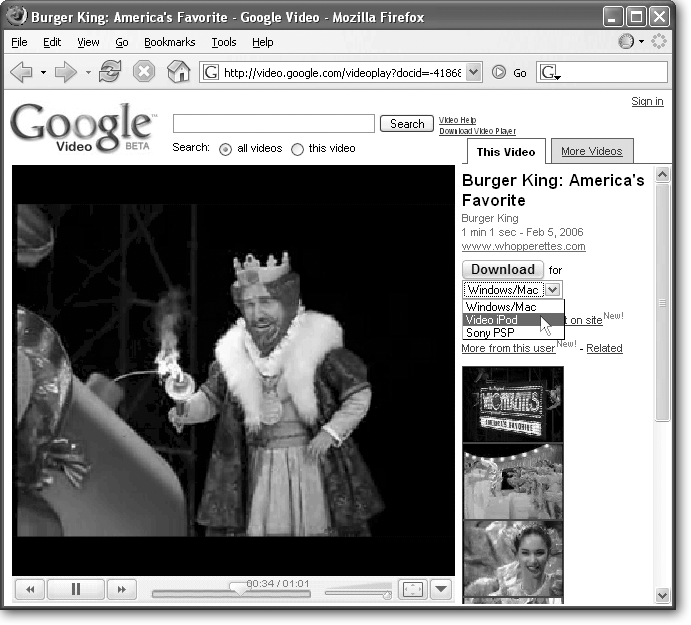
When you click a thumbnail image and go to a video’s page, the panel on the right side gives you information about where the video came from, when it was made, and the running time. Clickable buttons (Figure 7-20) tell you what exactly you can do with this video (besides just watching it through your browser):
Download means the video is free and you can pipe your own copy of it down to your computer to play with the Google Video Player (see the next page) or, depending on the file, to your Mac, your video iPod, or your Sony PSP.
Day Pass means you can pay a small fee to download the video and watch it with the Google Video Player anytime within 24 hours from your purchase—before the file stops working, sort of like a Blockbuster rental that goes poof!
Buy means you can pay for it, download it, and keep it around on your PC to play. Prices to buy a show or get a day pass vary widely. Most TV reruns cost about $2 to buy, while some sporting events can cost around $15; day passes average about a buck or three. You need Windows and a Google Account (Section 3.5.1) to buy video.
Note
One thing to note on copy-protected shows you may buy from the Google Video Store: You have to be online to play them, so Google can check the playback and make sure everything’s Copyright Kosher. This little sticking point really stinks if you want to watch your purchases off the grid on a plane, train, or bus.
Watching via your Web browser
If you want to watch free Google Video, your Web browser needs to meet a few specific system requirements. As far as operating systems go, Windows 2000 or later, and Mac OS X 10.3 (codenamed Panther) or later will get you into Google’s screening room.
You have your choice of browsers, as long as they are at least Internet Explorer 5.0, Safari 1.0, or Firefox 1.1 You also need to add the Adobe Macromedia Flash player plug-in to your browser, available free at www.adobe.com. And lastly, for smooth playback that won’t have you reaching for the Dramamine from all the jerky stop-startiness of the picture, you want a broadband Internet connection.
Watching with the Google Video Player
As mentioned earlier, some of the copy-protected video downloads you get from Google can be played only with the Google Video Player software. You may be prompted to download the player when you try to get a video, but you can also download it from a link at the top of the main Google Video page. The Google Video Player, for the moment, only works with Windows, and you need a PC with at least an Intel Pentium III 1-gigaherz processor (or its AMD equivalent), 128 megabytes of regular memory, and 16 megabytes of video memory.
With the Google Video Player, you can watch your vid in full-screen mode, skip over the boring stuff to get to the good parts, and browse the different scenes in the video with the built-in thumbnail pictures, sort of like DVD chapter-mark scenes.
Watching Google Video on portable devices
You can download some of the videos in the Google store to your computer and then shuttle them over to an Apple video iPod or Sony PSP for watching on the go. Look for a pop-up menu next to a video’s Download button. If there’s a portable version available, there’ll be a “Sony PSP” or “Video iPod” option to select in the list (Figure 7-20).
Once you download the file to your computer, you can copy it to your portable player just like any other video clip you’ve added:
For the iPod, add the file to the iTunes library and copy it to the iPod from there.
For the PSP, rename the video file to MAQXXXX.MP4 (where the Xs are numbers from 0 to 9), and then copy the renamed file to the MP_ROOT101ANV01 folder on the PSP’s Memory Stick.
If you’re having trouble finding portable video in the first place, use the Search bar at the top of the page to seek out video iPod or Sony PSP.
Uploading your own video
Want to show or sell your own fabulous video works to the Google Video Store? Point your browser to https://upload.video.google.com and follow the instructions onscreen. If you want to charge people to see it, though, Google takes a cut.
If your submitted flick passes Google’s inspection—which mostly means making sure you’re not trying to post porn or somebody else’s copyrighted stuff—your handicam work is posted and hosted online where millions of people could potentially see it. Take that, Hollywood establishment!
Tip
For further info on Google’s Video store, visit http://video.google.com/support.
Google Web Accelerator
Even with broadband connections like DSL and cable modems, there’s still a need for speed among many Web surfers. Google’s Web Accelerator software—still in the beta testing stage as of this writing—aims to kick things up a notch; install it, and your Web pages download faster, courtesy of Google Labs technology.
Google relies on a number of different processes to pump those pages through the pipe faster. Google Web Accelerator has its own express lane into Google’s servers, for example, and it stores its own copies of popular pages and makes them available more quickly. It can also prefetch (Section 6.2.2.3) some pages to your PC ahead of time, anticipating that you’ll click down a list of search results and want to see them.
In cases where not much on a Web page has changed since you looked at it last, Web Accelerator only grabs the newest stuff on the page and doesn’t bother to make you wait for downloads of the parts you already have in your browser’s cache. To squeeze more data into less bandwidth, the program compresses data before it sends it down to your computer, too.
Google Web Accelerator was designed with broadband connections in mind, however, so dial-up users with visions of shorter wait times will have to keep on waiting. The program was also created for use on Windows XP—or, at the very minimum, Windows 2000 with Service Pack 3 installed.
Note
Google Web Accelerator is optimized for Internet Explorer 5.5 and later, as well as Firefox 1.0 and later, but you can get it to work with other Windows Web browsers with a little finessing. Change your HTTP proxy settings to 127.0.0.1:9100 to accelerate Opera, Mozilla, or another browser.
Like a number of other Google services, this one has some privacy implications, because your Web surfing is no longer between you and the other site, but you, the other site, and Google. If that bothers you, maybe you want to stay in the right lane on the Web.
Running Google Web Accelerator
Like many of its experimental products, Google Web Accelerator is in the beta testing stage as of this writing, so the software may still have a few bugs to work out. It lives at http://webaccelerator.google.com, and you can download it for free.
After you download and install the program, a little speedometer icon appears both at the top of your Web browser’s window and down in your Windows system tray. When you go to a Web page that’s Google-boosted, the speedometer spins around, and the amount of time you’ve just saved gets added to a running total, as shown at the top of the browser window in Figure 7-21. Click the number to see a chart of your time saved. (On this page, you can also click to reset the time-saved counter back to zero.)
Note
Security being security, Google Web Accelerator doesn’t speed up encrypted pages with https:// addresses, so your online banking, stock trading, and shopping won’t be any faster.
If you click the speedometer icon itself (Figure 7-21), you get a menu of things to do with your Accelerator, including a preferences area that lets you tell the program the speed of your Internet connection, or instruct it to skip acceleration on specified sites. Your preferences for hauling down Web pages in advance are here (to prefetch or not to prefetch, for example [Section 6.2.2.3]), as well as settings for your browser’s history files and how frequently Google checks for new versions of pages already in its cache.
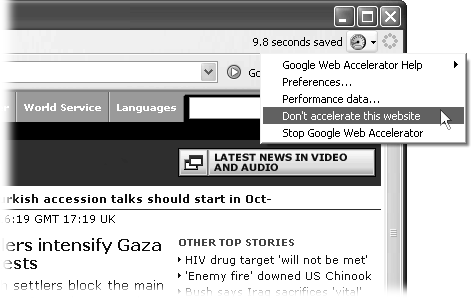
For those pages you don’t want to run through the Accelerator, there are a couple options. The Accelerator menu includes a “Don’t accelerate this website” option, as well as an option to just turn off the acceleration altogether. If you opt to stop, the speedometer icon down in the system tray takes a break, and you can only restart the Accelerator from the icon on the browser window (unless you’ve booted the icon off your IE window; in that case, restore it to its rightful place by selecting it from the Toolbars menu).
Some people enjoy having pages popping up faster than before and will feel far more efficient as the time-saved counter continues to climb. If you decide, however, that Web Accelerator isn’t doing all that much for you (or those privacy concerns are making you jumpy), you can uninstall Google Web Accelerator in the same place you go to uninstall other programs: Start → Control Panel → Add/ Remove Programs.
Google Sets
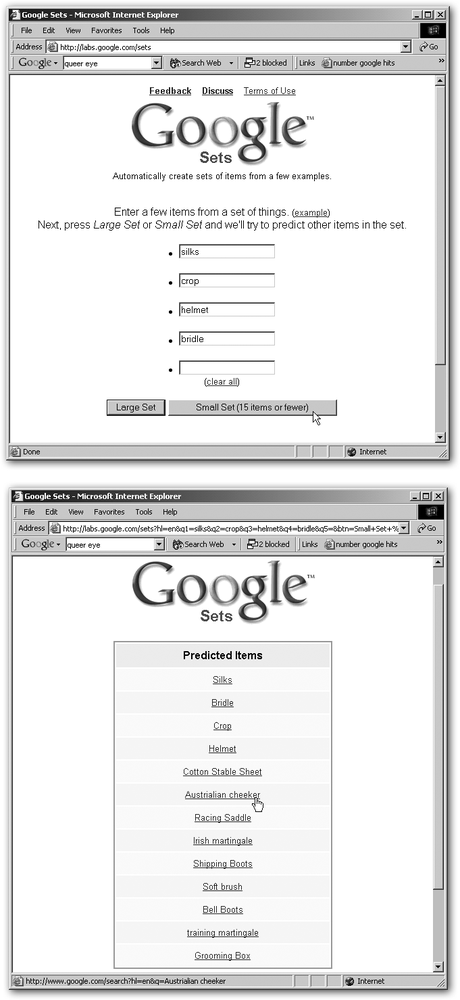
Google Sets is easily the experimental feature with the least revealing name. You half expect to hear Marv Albert yelling, “Google sets…he shoots…he scores!” But in fact, this feature performs a handy which-of-these-things-is-just-like-some-others search. For any set of related items you type, Google Sets tries to come up with a list of related search terms.
Here’s how it works. Head over to http://labs.google.com/sets, shown in Figure 7-22. Fill in anywhere from one to five terms that all seem somehow related to you (try months of the year or soft-drink names, for example). Then press Enter or click Large Set or Small Set to find out what matches Google gives you.
Google Sets is quirky. If you search for Yankees, Mets, Cardinals and Red Sox, for example, it gives you a list of Major League Baseball teams—and a bunch of oddball teams, like the Skipjacks, plus a smattering of football, basketball, and hockey teams.
Still, Google Sets can be a nifty way to find related items or jog your memory. For example, if you can’t remember the name of Big Bird’s imaginary friend, try typing in Big Bird, Oscar the Grouch, and Cookie Monster to get a list of the rest of the Muppets (and people) on Sesame Street—including Snuffleupagus. Or if you’re wondering who Seinfeld’s neighbors were, try Jerry, George, and Elaine, to have Google finish the list with Kramer and Newman. To get a list of major cities, you need know only London, Paris, and Washington.
Google Wireless
As the Zen maxim goes, “Wherever you go, there you are.” Thankfully, so too is Google. Just because you’ve left your laptop at home doesn’t mean you’ve forfeited your basic right to Google—as long as you’ve got a cellphone or PDA purchased within the past few years with you.
Google Wireless (www.google.com/wireless/guide.html) provides mobile access to the full power of Google right from the PDA in your palm, the BlackBerry on your belt, or the cellphone in your pocket. Settle that “in like Flynn” versus “in like Flint” dinner-table argument without leaving your seat. Find quickie reviews and commentary on that Dustmeister 2000 vacuum before making the purchase. Figure out where you’ve seen that bit-part actor before without waiting for the credits at the end of the movie.
And beyond searching, you can actually browse the Web with a little help from Google. By squishing down those complex pages into something your cellphone can understand, Google brings any Web page you can get to from your desktop PC to your cellphone on the fly. This feature is hugely useful, as most Web pages are encoded in ways that make them otherwise inaccessible from the older wireless phones that don’t have built-in browsers.
To get online out in the world you need two things: a phone or PDA capable of browsing the Web, and a data plan that lets you surf.
Tip
If you don’t yet have a cellphone or wireless PDA, the box on the next page explains some choices you have for wireless Internet features.
Can Your Device Get Online?
The lion’s share of today’s mobile phones, PDAs, and other mobile devices are Internet capable, meaning they have technology built in to let you surf Web pages and read and send email. Different devices use different Internet-friendly technologies, however.
Some devices—like the palmOne Treo 650, Windows Mobile–based phones, and Sony Ericsson’s P900 Smartphone—have a networking function that lets you reach the Internet over the same airwaves that carry your cellphone calls. This arrangement is similar to your home phone line, which can handle chatty phone calls or dial-up Internet connections with eqaul aplomb.
Other devices, like the Dell Axim X50, have built-in WiFi connectivity. WiFi is a system that lets you connect to the Internet wirelessly, via radio waves. In order to hop online with WiFi, though, you need to be near a unit, known as a base station, that broadcasts Internet signals. These days, your local airport, coffee shop, bookstore, and many McDonald’s all have such base stations. Sometimes you can hook into WiFi hotspots for free; in other places, you have to pay a fee. Either way, using a WiFi-ready PDA is just like using a laptop to connect to a wireless network.
Finally, some handhelds use Bluetooth, a type of short-range wireless networking, to let you connect your PDA to a cellphone that has built-in data networking or to beam files to a printer over the airwaves. Bluetooth itself doesn’t let you get online; rather, it links you with other devices that can connect to the Internet. So if you have a fancy handheld gizmo with Bluetooth features, you still need to find out if it has its own Internet connection, or if you need a cellphone that has built-in networking with which to connect.
If your gizmo has any of these features, consider yourself Internet-capable. If you have no idea what tricks your phone or PDA can do, check your cell carrier’s Web site for information about your device.
Tip
If you’re already a wireless subscriber and your phone doesn’t do Internet, look into upgrade deals, which are often available after a certain period of time has passed on your contract. If you can’t swing an upgrade deal, investigate buying a new phone from your provider or a cellphone retailer in your area.
Or pick up last season’s model for a song on eBay. Just be sure that the phone you buy is compatible with your current phone service. Check your provider’s site for a list of acceptable phones, or call their tech-support line and ask whether or not they support that “Snazphone 2003” you’re about to bid on.
Is Your Device Actually Online?
Just because your mobile device is capable of connecting to the Internet doesn’t yet mean you can just jump online. Once you have the right kind of device, you still need the service that lets you connect wirelessly—just the way you can have a nice touch-tone phone, but you can’t make any calls without a dial tone. You can usually reach wireless nirvana (the state of having the right device and the right service) by paying your cell service company a fee for Internet access.
Note
Actually, there’s a big exception to this rule: If your PDA is WiFi-ready, you can use it anywhere you find a free or pay-for-use hotspot. No extra service needed.
Cell service providers, like Verizon and Sprint, sell data plans—that is, Internet access for cellphones and wireless PDAs—for an additional fee on top of your usual monthly calling plan. Depending on the provider, the fee for data plans can range from a flat rate of $15 to $85 per month. And some providers offer a per-megabyte package, similar in structure to your typical phone minute plan, in which you prepay for some amount of data and then pay extra for everything you use over that amount. Work with your cellular provider to select the right Internet access plan.
Tip
In the wireless world, extra minutes and megabytes can cost a small fortune. So if you go for the per-megabyte scheme, do as you would with a minutes-per-month voice plan and choose slightly more megabytes per month than you think you’ll need. You can scale back if you find you’re just not using the Internet as much as you thought you would, but at least you won’t get stuck with the exorbitant extra charges.
Googling on the Fly
Once you’ve got your device and data plan lined up, you’re ready to hit the Web. But the Web comes in two flavors on mobile devices. On newer “smart” phones, PDAs, and hiptops, you can get the regular, glorious Web—the one you’re used to seeing on your desktop or laptop computer—via a small Web browser. On older and simpler phones, you may be limited to a text-only version of the Web called WAP, or Wireless Access Protocol, described in the box in Section 7.6.3.2. Figure 7-23 illustrates the difference.
After you’ve sorted out your phone’s Web proclivities, you can get Googling.
Googling by PDA, Hiptop, or Smartphone
If your mobile device of choice is a PDA or one of the smarter smartphones, surfing around works a lot like it does on your desktop or laptop computer. Here’s how to run a Google search:
Select Open, Enter Address, Go to URL, or the like from your browser’s toolbar or menus, and enter Google’s home page address: www.google.com .
If your small-screen browser just isn’t up to the task of displaying full-sized Web pages in all their glory, try Google’s scaled-down home page: www.google.com/palm. Never mind that it appears to be for Palm-branded devices; it works just as well on your Windows Mobile or BlackBerry handheld.
Figure 7-23. Left: Google search results on a full-fledged wireless Web browser. As you can see, they look a lot like the results you’d see on your regular computer—just a lot smaller. Right: Google search results on a WAP browser. Boring but serviceable.Note
Just visiting http://google.com (without the www) may, weirdly, take you to Google Canada. To avoid that quirk, just remember to type the full URL.
Click Go or OK to get things rolling.
Your browser springs into action, signified by a whirling globe, flowing progress bar, or a somewhat less dramatic “Connecting…” message. Depending on whether or not you were already online, you may also see various “Initializing,” “Signing On,” and “Established” messages along the way. It might take a few moments before you see the fresh, familiar face of Google (shown in Figure 7-24)—a tad more scrunched down than usual.
Write or type your search terms into the blank box labeled “Search the Web,” and then click Google Search to send your query on its way.
Depending on your browser, you either type your search query right in the blank search box, or you tap the search box to open a separate little text-entry dialog box. If your browser opens a separate window where you type in your search terms, go ahead and enter your query; then tap OK or the equivalent button to return to the main browser window, and then tap Search.
You can run any search you would on a regular computer, and you’ve even got the full range of Google search syntax (see Section 2.6) available to you. You might, however, find that those quotes, colons, parentheses, and minuses are tricky to type on your average mobile device. Sadly, the tech industry has yet to provide a solution for MPI (Mobile Punctuation Issues).
On mobile browsers, Google scales your results down a bit, leaving out the URL and page size for each (Figure 7-25). You still have access to Google’s local cache of pages and a link to pages similar to a particular result, though. And you can alter your query and run it again from the Google search box at the bottom of every results page.
That’s it! You can now surf the Web as you would normally.
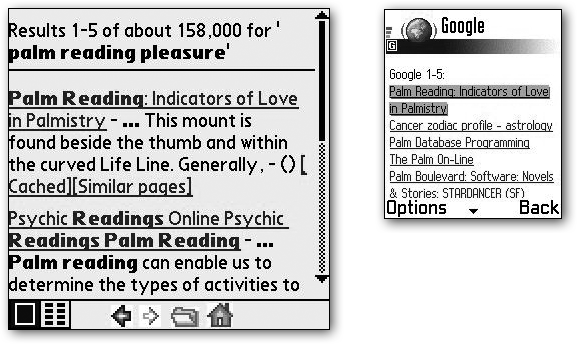
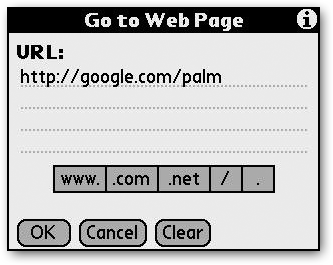
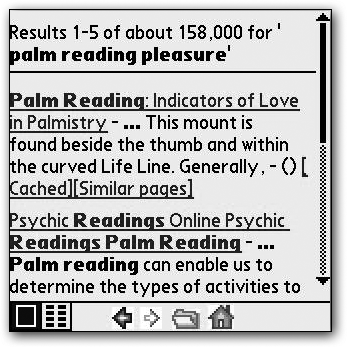
Googling by mobile phone
If your garden-variety mobile phone doesn’t have a full-fledged Web browser, it almost certainly has a built-in WAP browser. WAP, described in gory detail in the box in Section 7.6.3.2, is a simplified Web system, limited both in display and interactivity. When you use a WAP browser, you enter a world filled with almost nothing but 10 or 20 lines of text per screen. It’s not pretty, but you’ve got the wealth, if not the Technicolor, of the Web right in your pocket.
My cellphone didn’t come with a mouse. How do I navigate the Web?
The mechanics of choosing menu items, highlighting and selecting links, and entering text vary from device to device.
If your phone or PDA allows it, the simplest way to surf is using the up and down buttons, plus a third button (often called OK or Enter) for selecting or clicking.
If your gizmo has a joystick (middle picture) akin to the Ms. Pac-Man machine in your local museum, pushing it up and down should get you from textbox to button, and link to link. To select something, either press the joystick or look for a Select button.
Some gadgets have what’s called a scroll key or D-Pad (right), a circular or D-shaped button or arrangement of buttons that serves as a joystick. Press the upper and lower edges or buttons to move about, the center to select.
Then there’s the track wheel (left). As the name suggests, you scroll up and down by rotating a little wheel, either on the side or front of your phone. Push the wheel or a separate button to simulate a click. The big advantage of a scroll wheel? If your hand is shaped right, you can often scroll and click with only one hand, using the other for more important tasks—like, say, driving.

For newer phones that can support XHTML and can use the full Google Mobile offerings at www.google.com, however, things aren’t so black-and-white, because you can search for Web words and pictures. That means if you really, really need to find that color photo of the ferret wearing bunny ears that you found when you were using Google Image Search on your laptop, you can find it on Google Mobile search as well by choosing an Images search and tapping in the keyword ferret. (Of course, loading pictures is much, much slower than loading text on a phone or palmtop.)
In addition to Images, Google’s Mobile Search menu gives you the choice of Web (for your regular-old Web searches), Local, and Mobile Web (which are sites that have a version squished down and optimized especially for mobile phones). Yes, Google Local has now joined the company’s portable offerings. As discussed back in Section 2.5, you can skip the generalities of search results and go straight to local business listings and information. Skip ahead to Section 7.7.1.4 for more information on using Google Local on your mobile phone.
Before you can even start Googling from your mobile phone, you first have to find the browser. This process, in and of itself, can take some thumbing around. Browsers are usually hidden in plain sight, cleverly disguised by a moniker like Web, Internet Services, Services, Downloads, WAP, or some branded version thereof (mMode Downloads or T-Zones, for example). If nothing’s immediately obvious, look for an icon sporting your cellular provider’s logo, or try menu items in turn. Still no luck? Dig out that cellphone manual and see if it offers any hints.
Once you’ve found that WAP browser, it works pretty much like any Web browser. Follow links by selecting and clicking them. Click the Back button to back up a page. Jump to a particular Web site by typing its address. And so on.
The big difference is in the way you “type” text on a cellular keypad, a painstaking process known as texting. If you’re new to this technical torture, the box in Section 7.6.3.3, “Texting Sure Ain’t QWERTY,” tells you how to master your cellphone’s sorry excuse for a keyboard.
You can search Google on your cell in much the same way you’d do so on your regular computer: enter a query, click the Search button, browse through results, and click the link of anything that looks promising. Here’s how it breaks down:
Open your browser and type www.google.com in the URL box. Google should be able to figure out what mobile format your phone uses and automatically route you to the proper pages, but every once it a while, the auto-direct doesn’t work. If you get nowhere with the basic URL, type in www.google.com/xhtml. If that gets you nothing (maybe you have an older phone), type in wap.google.com/wml, Google’s WAP address, as shown in Figure 7-26. Then click “Go to” or the equivalent button to set the wheels in motion.
While the official Google Wireless URL is http://www.google.com on newer phones that support XHTML, and http://wap.google.com/wml on older models, you can shave off a few dozen keypresses by using just google.com/xhtml or google.com/wml. Even better, Google’s set up 466453.com—that’s “google” without all the multi-tapping—to make it just a little easier on your fingers than typing the whole URL the hard way. (You’d think they would have gone a tad further and assumed the /wml part, but they didn’t.)
Highlight the Google search box.
Use your cellphone’s navigation buttons to highlight the Google search box. If you’re not sure how to navigate on your phone, read the box, “Mouseless Navigation,” in Section 7.6.3.2 for a quick lesson.
Put the cursor in the search box.
Before you can type anything into the search box, you need to put the cursor in place. Do so by clicking the center of the joystick, pushing inward on the scroll-wheel, or choosing Select from a nearby browser menu. On some browsers, this process opens a separate screen where you type in your query.
Type in your search terms.
Figure 7-27 explains some subtleties.
Deselect the search box and click Search.
Hop out of the search box by clicking your joystick, scroll wheel, or choosing Done or the equivalent from a browser menu. Then highlight and click the Search button to send your query on its way. Your WAP browser leaps into motion and whirs away, waiting for results.
Note
If you’re a devotee of the I’m Feeling Lucky feature (Section 1.3), you may note its conspicuous absence here. Unfortunately, there’s no workaround, but you can take solace in the fact that arriving unluckily at the wrong page is a good way to blow both time and kilobits on a pokey, expensive cellular connection.
After a few moments, Google delivers the results (Figure 7-28).
Figure 7-28. Left: Google Wireless gives you five results per screen, which is usually more than enough, thanks to Google’s uncanny ability to find what you’re after. Move to the next five results using the Next 5 link at the bottom of each result screen. (Although this phone appears to show seven results, it’s actually just five—two of the lines are overflow. When you scroll down, your phone shows a visual indicator, like highlighting or a bullet, to show which lines are new listings.) Right: Your WAP browser’s “Options” or “Service options” or “More” menu holds some site-specific choices that might be useful to you. On Google’s menu, you can find Next 5, which is a handy shortcut to the link on the bottom of the results screen.Highlight any result and click it to go to that page.
Easy as pie, though sometimes as long as baking one if your cell network is slow. The extra-cool thing here is that while regular cellphones usually limit you to surfing Web pages that somebody has created specially for WAP browsers, Google actually lets you browse almost any normal Web page from your cellphone. The next section explains how.
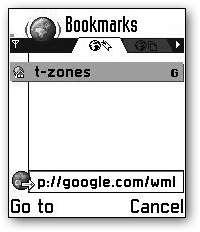
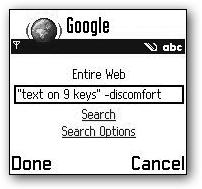
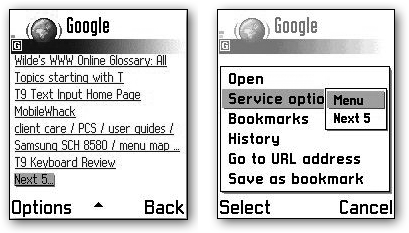
Tip
You can use the define operator (Section 1.6.1) on Google Mobile Search, too, just in case you need some word definitions right where you are.
WAP surfing
Most Web pages are not designed for the puny WAP browser on your mobile phone and are thus invisible when you’re surfing on the cell. So how can you visit any of the results your Google searches turn up?
In truth, you don’t actually leave Google and visit other sites at all. Instead, Google reads Web pages for you and scales them down to a form your mobile browser can deal with—usually a neat 10 to 20 lines of text per page (Figure 7-29, top). This proxy service is simply Google acting on your behalf. You can see the proxy setup in this URL:
	http://wmlproxy.google.com/wmltrans/h=en/g=/q=%22text+on+9+keys%22+-
	discomfort/s=0/u=www.t9.com@2F/c=0
wmlproxy tells you Google is handling a wireless conversion for you, and the address www.t9.com is the actual URL you’re visiting. All the rest is Google’s way of keeping track of your original search.

Google’s proxy service goes beyond searching, letting you view any Web page at all. Here’s how: On the Google Mobile home page, select the Search Options link and choose Go to URL. This link takes you to what appears to be the home page again, only instead of the search box, Google shows you a “Go to URL” box (Figure 7-30). Type in any URL you’d like to visit and then click Go to have Google show you the page in a form your phone can handle.
While the Google proxy is not a substitute for well-designed WAP sites targeted specifically at mobile jockeys, it does the terrific service of bringing you the entire Web on your WAP phone without a lick of work from individual site designers.
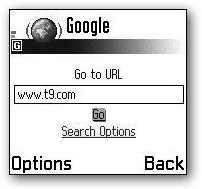
WAP Search Options
Just as regular-old Google has some advanced features, Google’s Wireless WAP service also has some rather useful search options, shown in Figure 7-31.
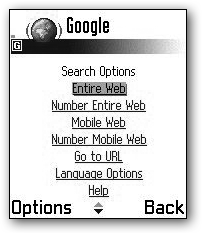
Here’s what you can do with Search Options:
Entire Web lets you search the entire Web. Nothing mysterious here.
Number Entire Web lets you search the entire Web using Google Number Search, a finger-saving system Google developed that lets you single-tap the keypad number associated with any of the letters it represents, rather than selecting a letter tap by tap. Use 0 for space and 1 for quotation marks. So with Google Number Search, you can tap out “google” as 466453, rather than the more demanding 4666 666455533.
Google Number Search is actually a clever twist on regular results. When you type in a string of numbers, Google figures out the possible words represented by that sequence, and then it shows you the most popular results that include those words. Because it’s guessing about what you really want, the Number Search works well sometimes; other times, it feels like driving with your eyes closed.
Most of the time, its success depends on the complexity of your search terms. For example, 1839806606463053971, “text on nine keys” as expressed in Google Number Search, comes up with different, yet no less relevant hits, than tapping out the phrase in full. Most people find texting easier, but Number Search is worth playing with if texting has burned out your thumbs.
Mobile Web lets you search for pages designed specifically for wireless devices. For example, the BBC Mobile site (www.bbc.co.uk/mobile) lays out its links for painless navigation on a mobile keypad, and it divides its stories into logical, mobile-screen-sized bites. This option is handy when you want only fast-loading pages that are easy to cruise on your mobile keyboard.
Tip
If you’re curious about the sorts of things you might find on the Mobile Web (that is, Web pages created for WAP browsers), but you’re surfing on a regular computer, try adding filetype:wml to any Google search (pages in WML format are designed for wireless devices). You can convert WML pages, known as cards, to regular old HTML pages—just click the “View as HTML” link associated with any result.
Number Mobile Web lets you search the Mobile Web using Google Number Search. For example, a simple 222 is a shortcut for BBCi, the BBC Interactive site.
Go to URL gives you a jumping-off point to reach any Web address—WAP-specific or not—via Google’s WAP proxy (Section 7.6.3.3).
Language Options lets you interact with Google in Français, Norsk, Svenska, and nine other languages. Similar to Google’s Language Tools (Section 2.4), Google Wireless’s Language Options allow you to use Google in the language of your choice. It affects all the prompts, buttons, and messages from Google, but not the Web pages themselves.
Help provides very limited online help—one page’s worth—for some Google Wireless features. It’s not that useful, so you may as well skip it.
Tip
If you’re surfing on a cellphone, tapping or texting in the Google URL can take half a presidential administration. To avoid the slog every time you go to Google, save the URL in your bookmarks. Go to google.com/wml and then look around your browser toolbar or menus for something like “Add Bookmark” or “Add to Favorites.” Your mobile browser should automatically name the bookmark for you, probably something like “Google.” Bookmark not only Google but any other sites you visit on a regular basis to save yourself the hassle of retyping addresses again and again.
Google Mobile Local Search
Just as you can search for the businesses or restaurants in a specific town or Zip code with Google Local on your computer (Section 2.5), you can also use the microscopic power of Google Local on your phone. Peck out http://mobile.google.com/local on your phone’s browser, and you’re ready to go Local.
Note
PDAs and phones that can handle the Google Mobile XHTML format can use Google Local Search on the go, but older WAP phones won’t be able to display the maps and other images used by the service.
Google Local wants to know two things from you on the mobile version of the main screen. First, it wants to know what you’re looking for. Then it wants to know where you’re looking for it. Fill in the boxes with the appropriate information like, say, burmese food in san diego or shoes in el paso and then select the Google Search button.
Tip
If you know the Zip code of the burg you’re searching, you can type that in the Where box instead of the town name.
You get back a list of local businesses that match, complete with addresses and phone numbers—and, best of all, a link to a tiny Google Map displaying the locations of the results, just like you get on the grown-up, deskbound version of Google Local. You can even adjust the view by zooming in and out of the wee maps.
As you can do with regular Google Local, you can also use Mobile Local to get yourself some driving direction to and from a place that turned up in your search results. Click the Driving Directions link at the top of your results page to bop to a fresh page where you can peck in starting and ending addresses. Now just navigate to and select the Get Directions button to get a list of instructions for getting between the two places.
Tip
If you find just the place you’re looking for but don’t have a pen handy to scribble down the number, fear not. You can call the number directly by selecting the number on screen and clicking your phone’s equivalent of the Enter button. This assumes, of course, that your phone is one of those types that lets you make a call while you’re wading around on the Web.
Froogle on the Road
If you’re a fan of Google’s Froogle feature (a product-search tool described in loving detail in Section 5.1), you’ll be glad to know you don’t have to lug a laptop to the mall to compare prices of whisks on sale. Instead, try Froogle Wireless, which brings comparison shopping right to your phone or PDA.
Froogle Wireless—currently part of Google Labs—doesn’t offer all the features of a regular Froogle search. You can’t limit your search by price, group the results by store, or sort them in any way. And most limiting, the results from a Froogle Wireless search, like those shown in Figure 7-32, don’t actually link anywhere.
Still, Froogle Wireless is a handy price-check tool when you’re standing in the aisle at Circuit Cathedral, trying to figure out if $149 is a good deal for an extension cord.
Here’s how to use it:
Tap http://wml.froogle.com, the Wireless Froogle address, into your mobile’s browser.
After a few moments, Froogle pops up on your tiny mobile screen.
Select the search box, type in your product terms, and then click Search. You can use the usual Froogle syntax (Section 5.2 ).
Google gives you a nice batch of results, shown in Figure 7-32. You can scroll through them as you would any Wireless Google results.
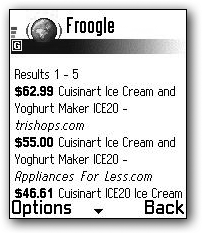
Google SMS
Images are impressive, but there’s nothing like pure unadorned text for speed and efficiency. SMS, which stands for Short Message Service, is a communications system that combines the terse text of a telegram with the rapid response of an instant message. It’s mostly used between mobile phones, where brevity is a necessary adaptation for using tiny phone keypads to peck out messages. Sending an SMS (sometimes called texting) from one phone to another is a popular activity with teenagers and businessfolk.
Google SMS lets you send messages to the Mighty Google itself on your wireless phone and get an answer back in a flash, right there on your phone’s screen. You can get driving directions sent to your phone, look up local weather forecasts and movie listings, find nearby businesses, and look up dictionary definitions, among other things. To use the service, you’ll need to have a wireless phone that can send and receive text messages and a service plan that allows for text messaging.
Tip
If you’re just getting into text messaging, and you find some of the lingo looks more like a license plate than a decipherable sentence, check out the list of text-messaging abbreviations online at www.webopedia.com/quick_ref/textmessageabbreviations.asp to help crack the code.
Sending Out an SMS
To get Google SMS to text you back, you need to send it a question. You do so by starting the text-message application on your cellphone, typing in a query, and then sending the message to 46645, which spells out GOOGL on most phones. (If you’re Googling merrily from the United Kingdom, though, dial 64664 instead—6GOOG, if you need something more alphabetical to remember.)
Driving directions
Let’s say you’re out driving around Los Angeles and you get lost on your way to the airport. You pull over in front of a movie theater and whip out your cellphone. You start a text message and address it to 46645. In the message body, you type:
from 6925 hollywood blvd hollywood ca to lax
In about a minute or so, your phone will beep with a message back from Google SMS. In some cases, your phone will beep with several messages from Google SMS, as text messages can’t have more than 160 characters and some service plans give you even fewer characters per message. When Google SMS sends you multiple messages in response to your query, they’ll show up in your phone’s message box numbered like this: 1/5, 2/5/, 3/5, and so on.
When you open up that first message, Google SMS informs you that Grauman’s Chinese Theater, (where you are right now) is 17 miles from Los Angeles International Airport (LAX), and it should take you 15 steps in 22 minutes to get there. The steps are just like the directions you get from Google Maps (Section 3.3), except they’re text-only and use more abbreviations—W for west, L for left, Cont. for Continued, and so on. Remember, phone screens are tiny, and you only get a certain amount of text per SMS message.
Of course, tapping out a long address like the example above can be time-consuming, so Google SMS lets you send queries in different (and more important, shorter) formats. You can cut it down to city names, Zip codes, city and state, or even just airport codes like EWR (Newark Liberty International) or BOS (Boston’s Logan International). You just need to tell Google SMS where you’re coming from and where you’re going to.
Tip
You can look up the code for just about any airport at www.world-airport-codes.com.
For example, you can phrase your SMS queries as such:
	47405 to ind
	from nashville tn to memphis
	to 570 second ave 10016 from 108 court st 11201
The above queries will get you directions (in order) from Bloomington, Indiana, to the Indianapolis International Airport; from Nashville to Memphis, Tennessee; and from Brooklyn to Manhattan.
Men, take note: No one will know you asked for directions if you just send Google a message.
Movie listings
Just as you can use Google from your regular computer to get movie schedules (Section 1.6.8), you can also ask Google SMS to send the current listings right to your phone. In addition to listings, you can get information about a certain movie if you query its title, which could be helpful if you’re out with the kids and can’t remember if that wacky comedy is rated PG or PG-13.
To get movie information sent to your phone, send these types of queries to 46645:
bewitched pensacola fl (shows you theaters playing Bewitched in Pensacola, Florida)
movie:movies 63101 (shows you a list of movies playing around St. Louis, Missouri)
movie:theaters palo alto (shows you a list of theaters around Palo Alto, California and what’s playing)
To get information about a movie, just tap its title into your phone and then send the message to Google SMS.
Weather forecasts
Getting a handful of Google weather updates sent to your phone uses many of the same search techniques you use to get Google weather information on your computer. Just start a new text message addressed to 46645 and type in weather followed by either the city and state name or the Zip code of the town you want to check. For example, just tap in weather lubbock tx to see how hot it’s going to be in that part of Texas today or weather 98101 to see if you’ll see any sun in Seattle.
Local business listings
If you’ve wandered around Google Local (Section 2.5), you’ve got a handle on how to find the nearest pizza joint or garage in the area. Those tricks work the same way on Google SMS. Just type what you’re looking for (cleaners) and where you are, either by city and state or Zip code (new haven ct or 06501), and fire the message off to Google SMS.
Q&Amp;A
Need some fast facts in a flash? Google SMS can answer many simple fact-based questions if you phrase them properly. To get the population of Canada, for example, send a text message with the query canada population, and get your answer back in a few seconds (“32,805,041” reports Google SMS, attributing the number to the CIA Fact Book).
For best results, remember to keep your queries grounded in fact, like shakespeare’s birthplace or capital of Bulgaria or who wrote moby-dick. Figure 7-33 gives you a sample of what to expect when Google answers your question.
Product prices
Froogle (Section 5.1) gets on the SMS train, too, and you can use the service to get current prices for products you’re curious about. Use the query price followed by the item you’re checking (laser printer or hp laserjet 1012, for example) to get a fistful of prices and stores sent back to your cellphone. You can also use the odd shortcut f instead of price (as in f cd player) or phrase the query as cd player prices. If you’re looking for the price on a specific book or product, type in the book’s ISBN number or the item’s UPC number to find how much it costs elsewhere.
Phone book listings
You can text a query straight to Google SMS and get address and phone numbers for people who are publicly listed in the Google PhoneBook (Section 1.6.3). There are a number of variations, including:
The person’s full name, city, and state (john doe wheeling wv)
The full name and just the state (john doe wv)
The full name and the telephone area code (john doe 304)
The full name and the Zip code (john doe 26003)
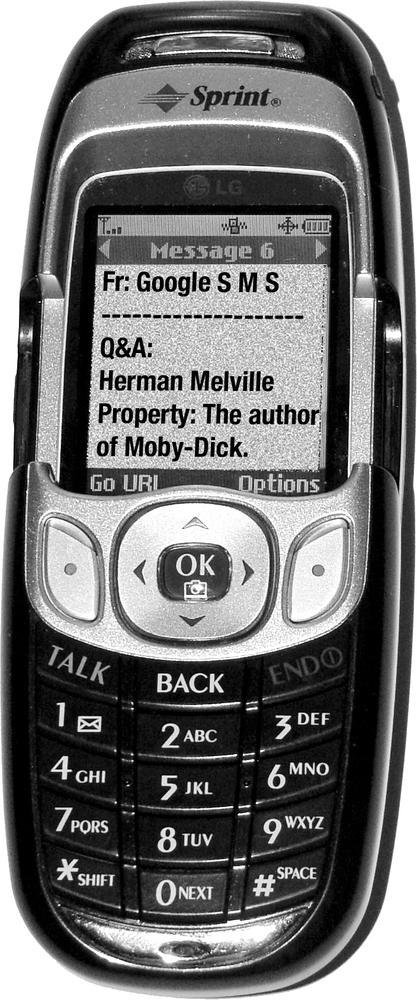
You may also get results with just the person’s last name and either just the Zip code or the city and state. (If you know the phone number but need the address, type in the phone number and send it to Google SMS.)
Definitions
If you have an SMS-equipped cellphone, you’ll never be caught flat without a dictionary. You can use the define operator (Section 1.6.1) to look up word definitions on Google SMS, as in define antediluvian. Even better, you don’t have to hunt and peck the word define out in your phone’s tiny keypad; just type a d or a D followed by the word you want to look up and send the message off to 46645.
Tip
Google SMS is quite extensive and has its own 13-page section of Frequently Asked Questions posted at www.google.com/sms/faq.html.