If you take a look at the right-hand side of Visual Studio, you will see a window named Solution Explorer. This is a very important window in Visual Studio; it displays the files and folders in the solution you are working on. In Visual Studio, we have solutions that are like wrappers of different projects. This term could be a little confusing, as we would normally use the word project to identify a particular piece of work. In Visual Studio, solutions are created as wrappers and projects are created inside solutions. A solution can have multiple projects in it. This breakdown helps to make modular applications. In this Solution Explorer window, you can see which projects are in the solution and which files are in the projects.
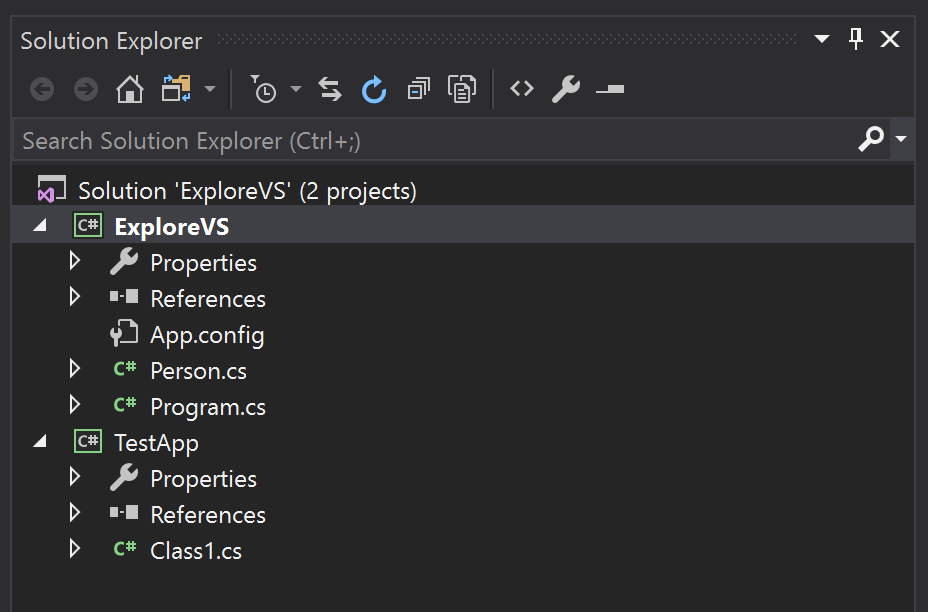
You can expand or minimize the projects and folders to get a better view, as shown in the following screenshot:

In the preceding screenshot, you can see that we have a solution called ExploreVS, and inside that, we have a project called ExploreVS. The project and the solution names are the same here because, when we created the solution, we chose to use the same name. If you want, you can have different names for the solution and the project.
In the Solution Explorer window, you can right-click on the solution and add another project easily. If you want to add a file or folder to the project, you can right-click on it and add it. In the following screenshot, you can see that we have added another project called TestApp to the solution, as well as a class called Person in the ExploreVS project. You can also see the number of projects that the solutions contain next to the solution name. There is also a search option in the Solution Explorer to search files easily in big solutions, in addition to some other features hiding behind the icons at the top. The circular arrow refreshes the Solution Explorer. Next to that, the stacked boxes collapse the projects to get a high-level view of the solution. After that, the icon with the three documents shows all the documents in the Solution Explorer. This is necessary because not every file is always available for viewing, as Visual Studio gives us the option to exclude files from the solution. This doesn't delete the file from the filesystem, but just ignores it in the solution. Then, next to that icon, we have a view code icon, which will open the code in the code editor. We also have the Properties icon, which will show the properties of a file or project.
On the left, we have the Home icon, which will bring you to the home panel. Next to that, we have the Solutions and Folders switcher. If you click that, instead of seeing the solution, you will see the folder of the filesystem, as shown in the following screenshot: