
We have discussed many useful features of Azure build pipelines in the previous two chapters. In them we talked about how we can set up a build pipeline using build tasks, variables, build job options, usage of different source control systems with builds, using builds to protect branches, and several other options and features.
In this chapter, we explore a few more features such as queueing builds and enabling diagnostic info with the debug build mode using variables in PowerShell scripts, usage of OAuth tokens, grouping tasks for reusability, usage of an agentless phase, importing and exporting builds, and organizing the builds into folder structures for maintainability.
Lesson 6.01: Queuing Builds and Enabling Debugging Mode for More Diagnostic Information
While working with build pipelines, we need to learn how to fix build failures quickly. Consider a situation where you are in the middle of a critical client release and it needs to be pushed quickly to production, but what if your build gets failed. You all may have experienced the pressure you get from the team when these types of failures happen. To solve the build failure quickly, it is necessary to identify the issue quickly. After the build fails, we need to read the build logs to understand the reason for failure. But sometimes log data provided are not enough to identify the real reason for the failure. Let’s see the same build task logs with the debug state as false and the debug state as true to see the benefit we get when we diagnose issues with the debug mode on.

Build log with debug false state
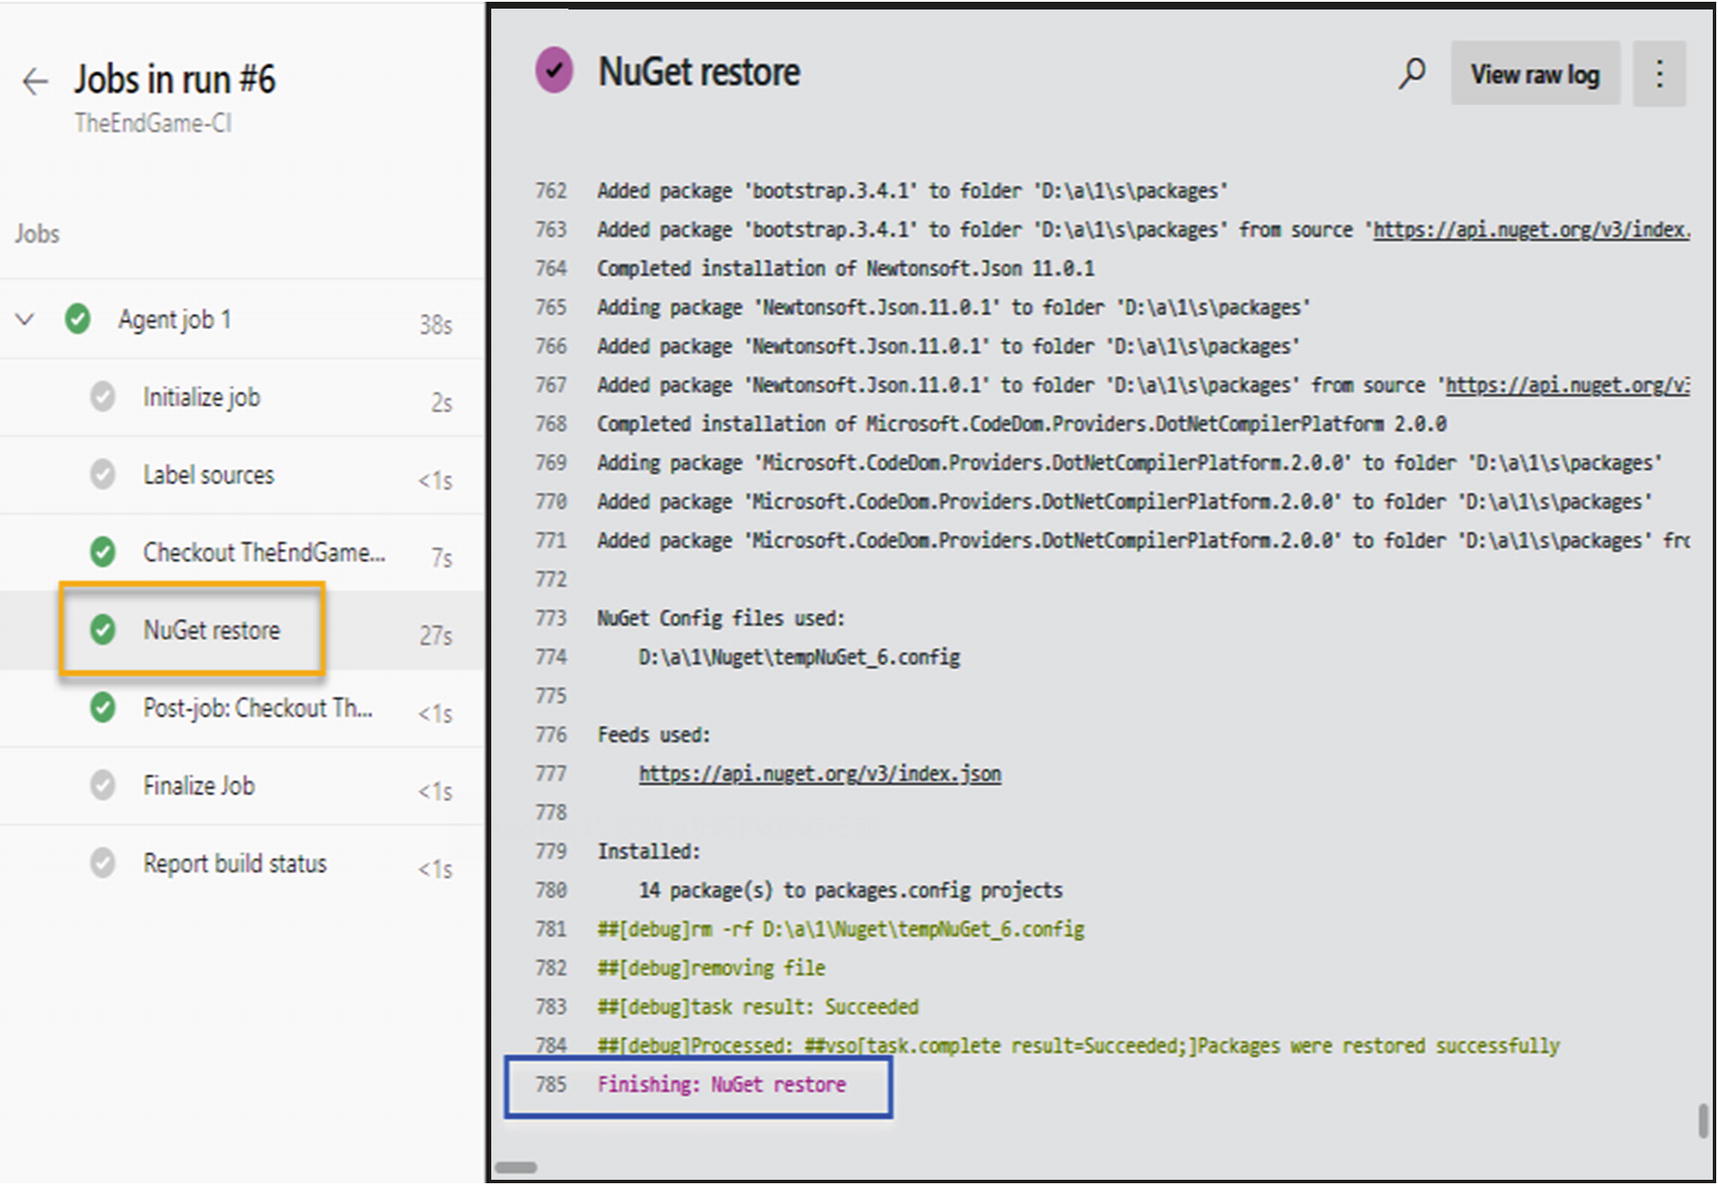
Build log with debug true
So, after the build failure, execute the build with the debug value set as true, which provides more details that you can use to identify the build failure reasons easily.
This lesson discussed that we can set the debug variable value to true and get more information on the failures with which we can easily identify the issues with the build.
Lesson 6.02: Setting Variable Values in PowerShell Scripts
While configuring build pipelines, pipeline tasks need various input values. Sometimes it can be a project name or a folder path, or a different set of values based on the type of project you are building. We all know it is good practice to have parameterized values rather than using hard-coded values in build steps. Hence, in pipelines we declare variables under the variable section. All the variables defined in the variable section of the pipeline can be used in any agent phase in the pipeline. Without declaring variables in the pipeline variable section, you can define dynamic variables for an agent phase using PowerShell scripts as well. These dynamic variables only belong to the agent phase to where the PowerShell script belongs.

Using Octopus variables in Azure DevOps pipelines
It creates a variable with the given variable name and assigns the given variable value. For example, a variable could be specified in Octopus as environment and it could have value develop or prod, etc., which is getting applied as a new variable in the Azure Pipeline. These variable values can be used by any task inside the agent phase.
This lesson discussed the very useful feature that allows you to create the build pipeline variables by dynamically using a PowerShell script.
Lesson 6.03: Accessing Secret Variable Values in PowerShell
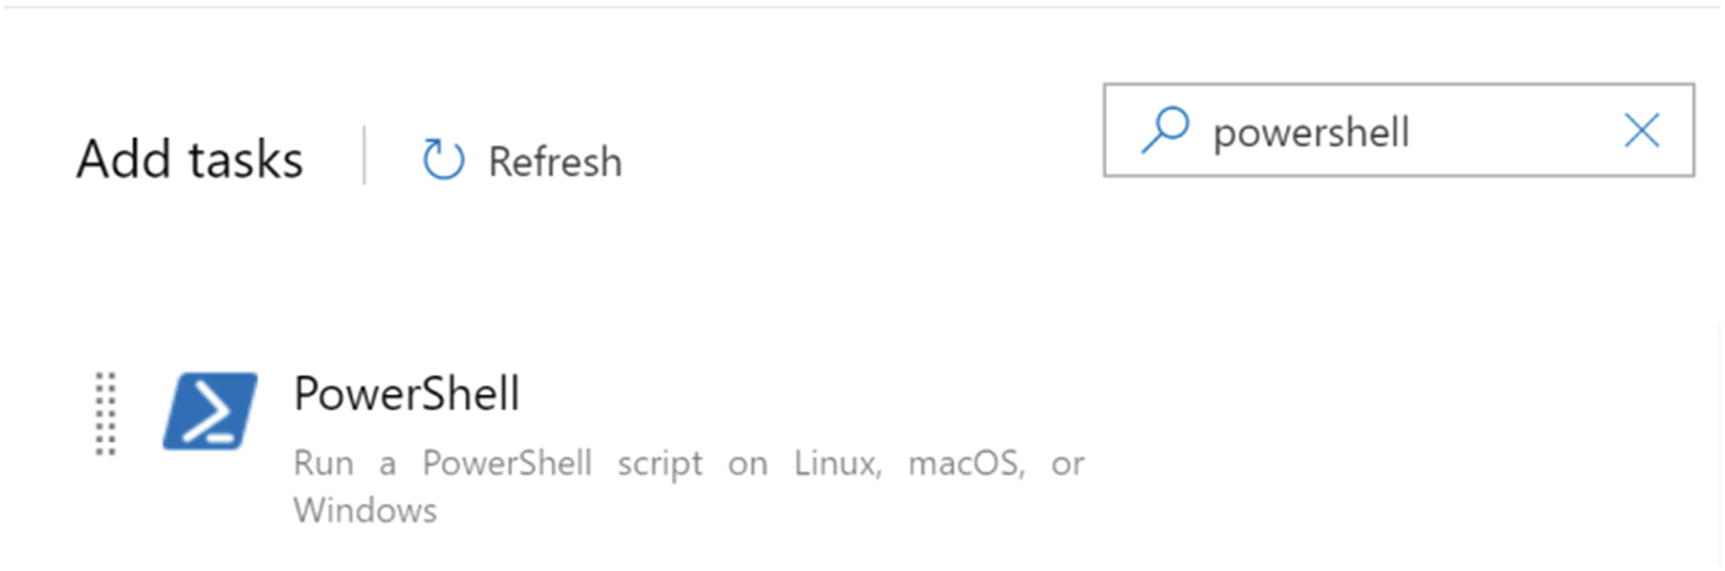
PowerShell task
While working with projects, we need to work with different types of values. Some can be shared publicly and some need to be secret. So, these secret values need to be treated differently due to the protection level required by them.
The variable values defined in the build pipelines are used by the agent by creating environment variables inside the agent. But for the secret values, it doesn’t add any values in the agent environment variables. So, in the PowerShell scripts, we can only access the variables by using a $env:variablename or $(variablename) for the non-secret variables. But for secret variables, as the agent does not create environment variables in it, we cannot access the secret variables with the $env:variable format. The only possible way to access secret variables in PowerShell would be with a $(variablename) format.
We were able to learn how the secret variables get handled in the PowerShell scripts and how those secret variables behave in the pipeline. Also, we discussed the reasons for behavior of the secret variables in build pipelines in this lesson.
Lesson 6.04: Using Auth Tokens in the Builds
As we already discussed in previous lessons of this book, there are so many configuration options available in the Azure DevOps build pipeline agent phase. Those configurations values can be used to make the build process efficient and effective. In this lesson, we will talk about the OAuth configuration in the agent phase.
While working with Azure DevOps, sometimes it is required to use the Azure REST API endpoint to create, delete, update, and retrieve the Azure DevOps service resources. So, mostly PowerShell tasks are used to execute REST API calls in the build pipelines. As we are already aware, before executing any REST API call, it is necessary to use authentication mechanisms to allow the API to perform authorized operations. In Azure DevOps, the Personal Access Token (PAT) is the most common way of providing authentication. But a OAuth configuration in the agent phase allows us to execute API calls without using a PAT as a parameter for authentication.

Enable OAuth token
In this lesson, we have discussed how to use the OAuth configuration in build pipelines and the importance of this configuration.
Lesson 6.05: Creating and Using Task Groups
One of the important features of the pipeline is a pipeline task. While we configure build pipelines, sometimes we need to use the same set of tasks in multiple build pipelines. Assume a project developed with the microservices architecture. Let’s say that Azure functions have been used to develop the microservices architecture and we need to configure a separate build pipeline for each function. In this type of situation, we use the same set of steps in each function build pipeline. It has a build task to build the code, a NuGet pack task to package the built output, and a NuGet push task to push the packed content to the Azure DevOps artifacts feed. If we have 100 functions in the project, we need to create 100 pipelines to build those. But instead of repeating the same work 100 times, we can create task groups to reduce the effort we put in to configure the pipelines.
A task group is grouping a set of repetitive tasks and maintaining it as the shared component for multiple pipelines. If we consider the situation where the project has more build pipelines that use the same set of tasks, we can create a task group using the repetitive tasks and pass parameters to it, using each build pipeline so that it builds and packages different projects.
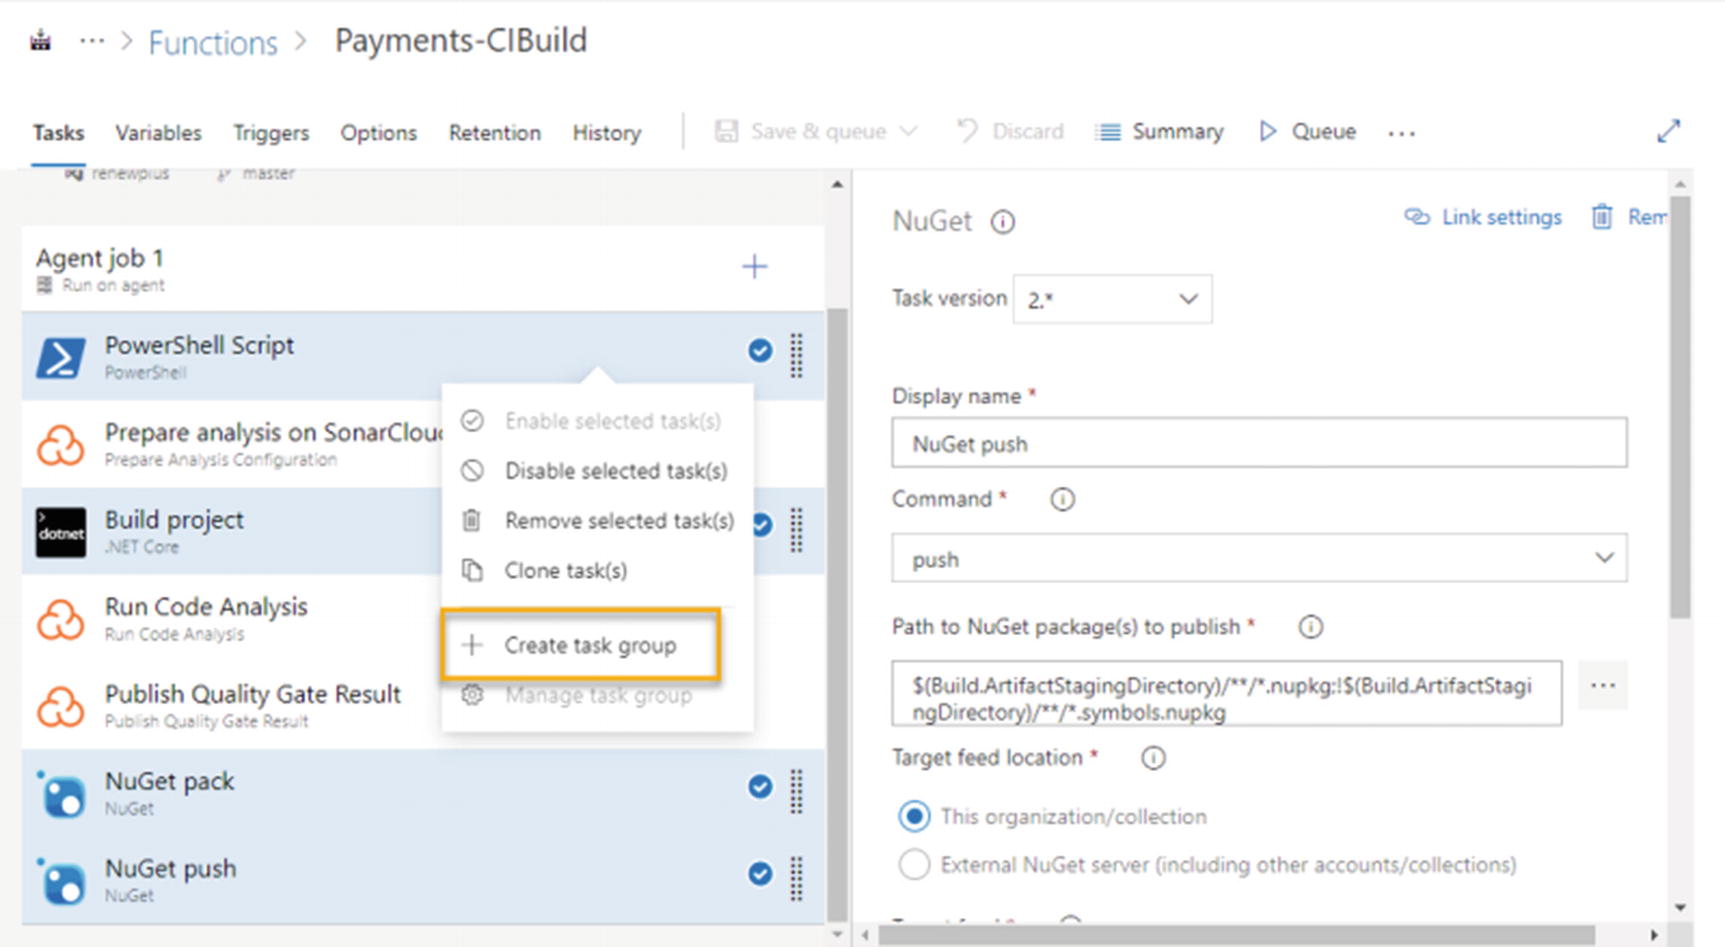
Creating task group
Adding a task group to build
If we create a task group, we can share this with other projects too. You can export the task group from one project to another project either in the same organization or an external one. Task groups are very usable and productive components that we can configure in Azure DevOps. For example, if you want to configure the same build tasks in the build pipeline in another project or a project in another organization, you can export the task group. When you click on the task group export button, it will download the json file. You can import this file in another team project, and it will automatically create a task group for you.
This lesson explained the use and importance of the task group. We were able to get an idea how to create a task group and the purpose of it. Further, we discussed its capabilities and reusability by allowing us to export and import to projects in the same organization and to projects in external organizations.
Lesson 6.06: Use Agentless Phases
Automated build uses a machine or more machines to do some work for us without any human interaction. We call the machines Agents, and they play a very important role of a task executor when it comes to automated pipelines. However, there are situations where you need to do some activities that do not require a machine to perform tasks such as waiting for an approval. For these waiting type of purposes, you can use agentless phases in build pipelines. Let’s discuss agentless phase capabilities in this lesson.

Add agentless phase
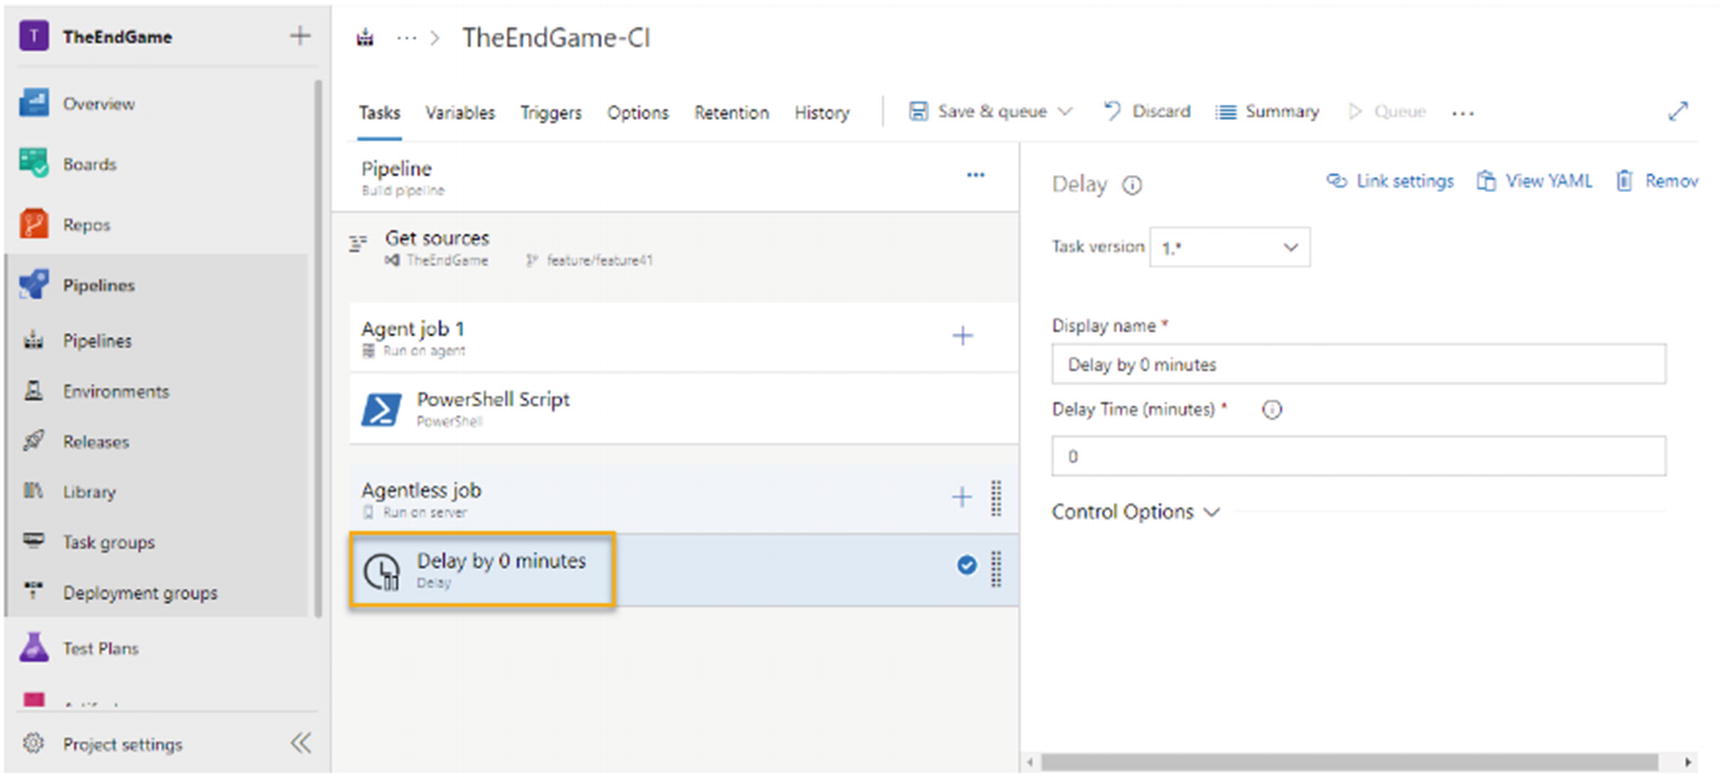
Delay task of agentless phase
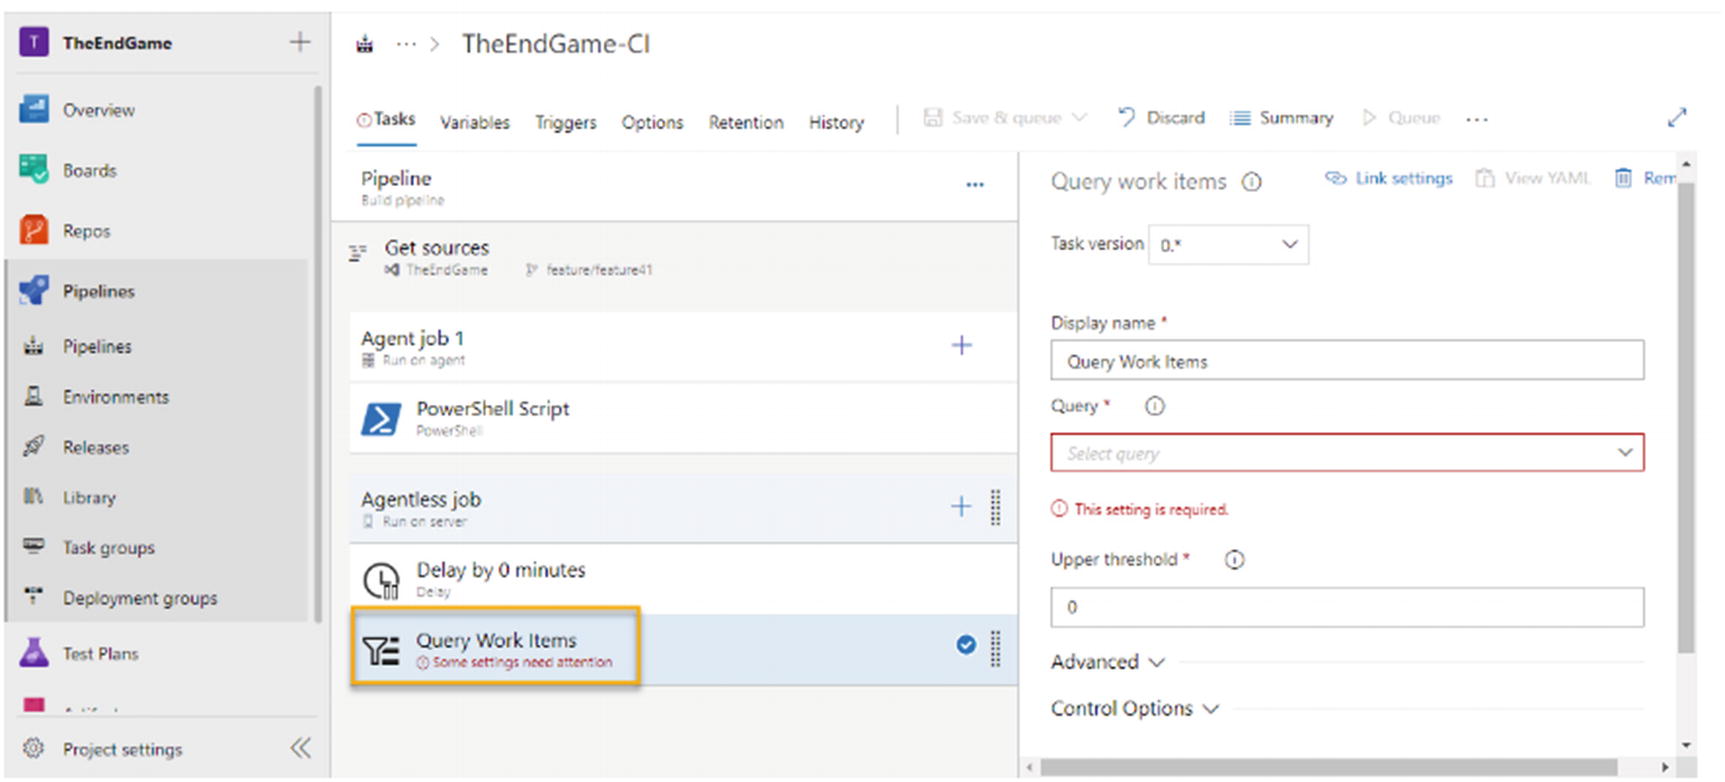
Query work items task of agentless phase
Another useful task is a manual intervention task that can wait for the user to approve or reject the further execution of the pipeline. This type of manual intervention helps to do any required manual verification of the executed steps before further executing the pipeline.
Other than these tasks, there are a few other agentless tasks available in the marketplace.
After going through this lesson, you were able to learn about the agentless phase available in the Azure DevOps build pipeline. Further, we have discussed a few tasks specific to the agentless phase and the usage of those tasks with some practical scenarios.
Lesson 6.07: Publishing Artifacts
Azure DevOps build pipelines are used to get the source from the repo, build the code, test the code, publish built binaries, and package it as deployable artifacts. Published artifacts are the outcome of most of the build pipelines. Azure DevOps uses different ways to save the build artifacts. One method is keeping the published artifacts in the same build pipeline. Further, you can publish the artifacts as NuGet packages to the Azure DevOps NuGet feed or an external NuGet feed. Their way of saving artifacts is keeping those in a shared file location.
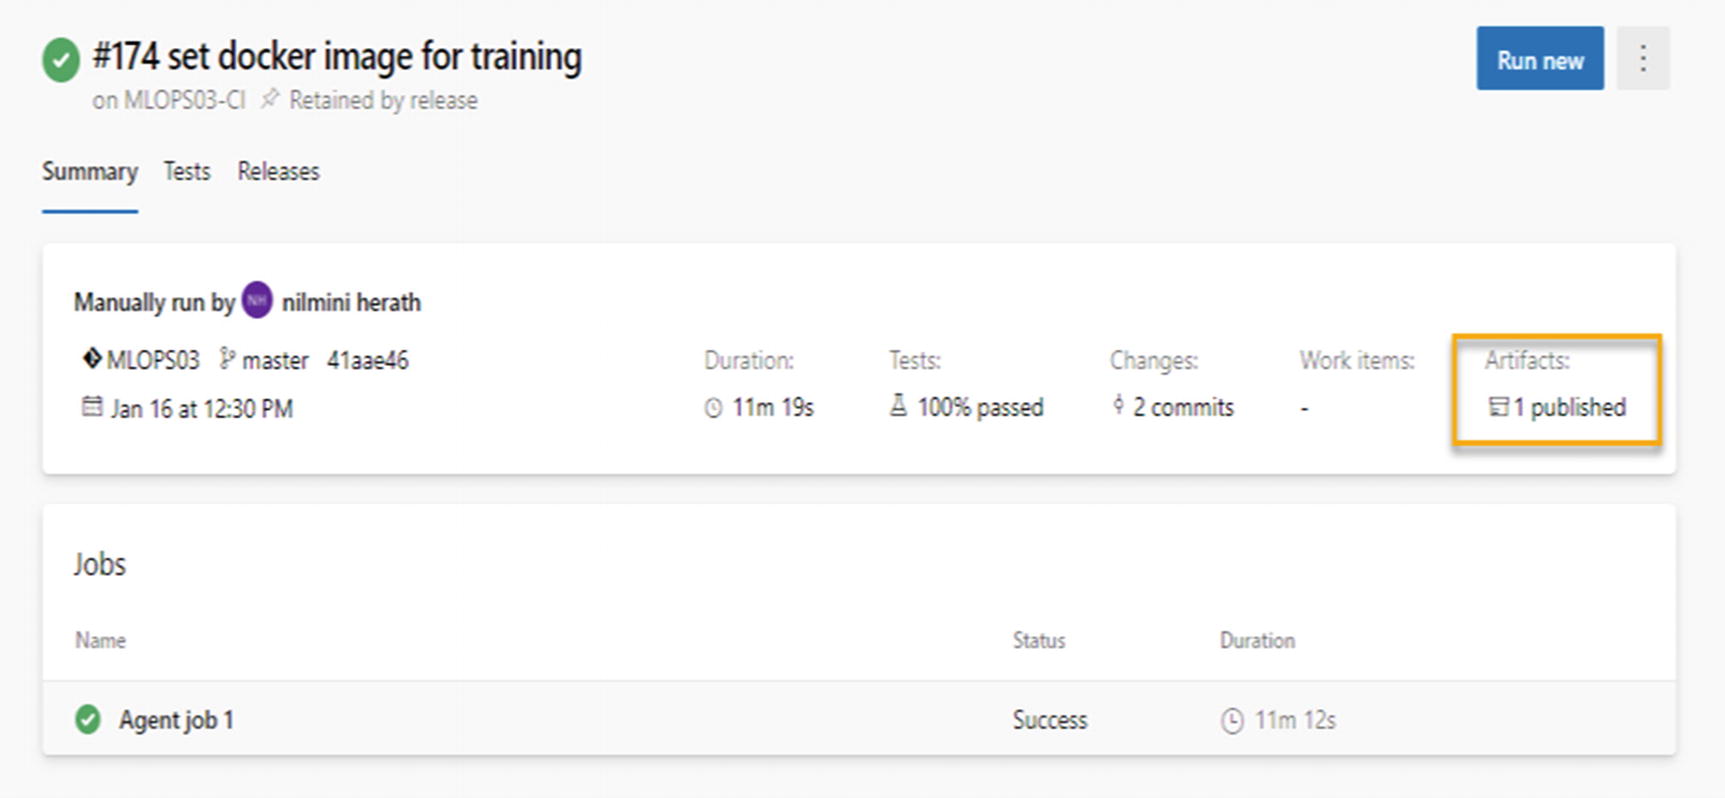
Published artifacts attached to pipeline
Artifacts attached to the build pipelines have a shorter lifetime as they will be dependent on the build retention time.
Using the same publish build output task, it is possible to publish the artifacts into a given file’s share path. It is worth it to keep a file share when your concern is security and you want to use it as an on-prem agent to publish your build artifacts to a shared folder with your network, which is not accessible by those outside of your corporate network.
In this lesson we briefly discussed build artifacts. In Chapter 7, we discuss these different artifact publishing options, discussed in more detail, and with usage scenarios.
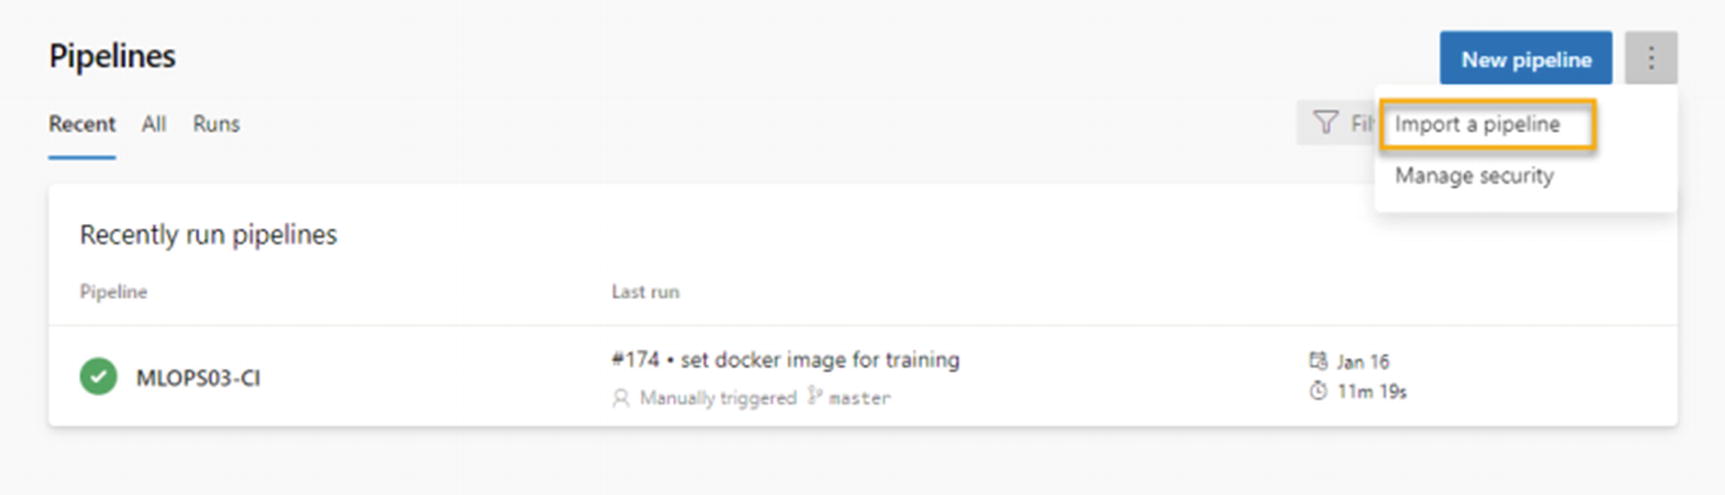
Lesson 6.08: Exporting and Importing Build Definition
As we know, sometimes we get requirements to set up build pipelines for multiple projects, mostly for a similar type of build needs. In that type of situation, it would not be worth it to spend more time to set up each build pipeline manually from scratch. Azure DevOps has the capability to export and import the build pipelines that allow us to set up build pipelines easily when we need similar builds in multiple projects.

Export build pipeline
Import json of build pipeline
But if you want to export a pipeline and import it to a different team project in the same or in a different Azure DevOps organization, it is not as straightforward as explained above for importing to the same team project.
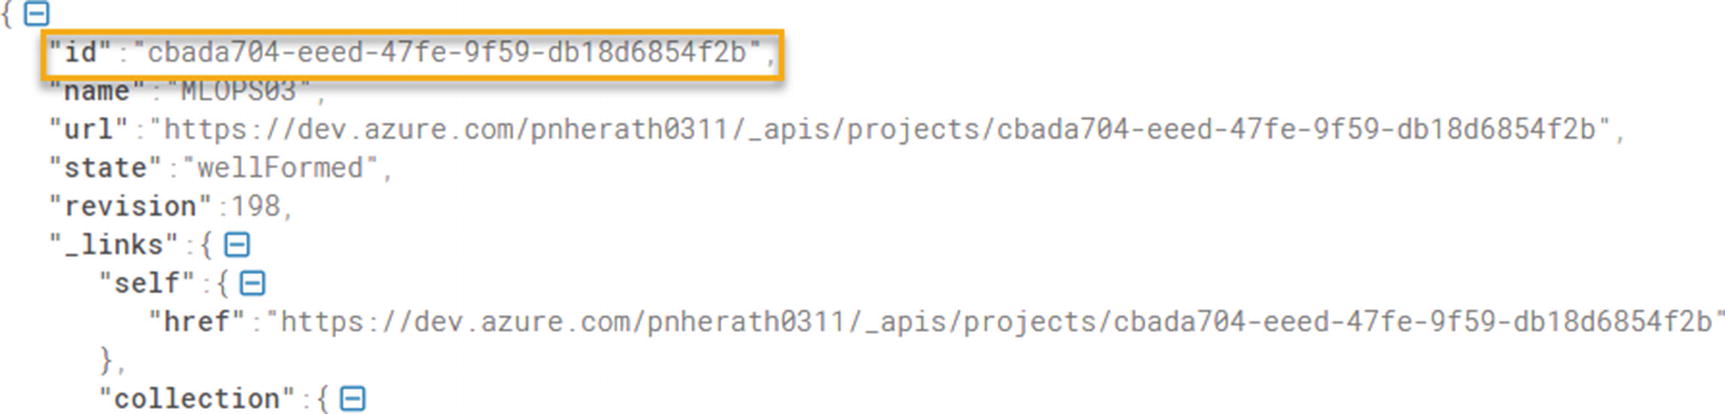
Project id
https://dev.azure.com/yourorgname/_apis/projects/teamprojectname?api-version=5.0
After finding the destination project id and source project id, replace the exported json file and source project id with the destination project id. Then you can import it to the destination team project and save it to create a build pipeline.
This lesson discussed the build pipeline export and import features available in Azure DevOps and their uses. Further, we were able to learn a technique to export and import the build pipelines between team projects and Azure DevOps organizations.
Lesson 6.09: Organizing Build into Folder
Depending on the project architecture, there can be multiple build pipelines in a single team project. As an example, if the team is developing the system using microservices architecture, it is required to set up separate build pipelines for each microservices component. It would be good to organize the build pipelines in a more manageable way to increase its maintainability.
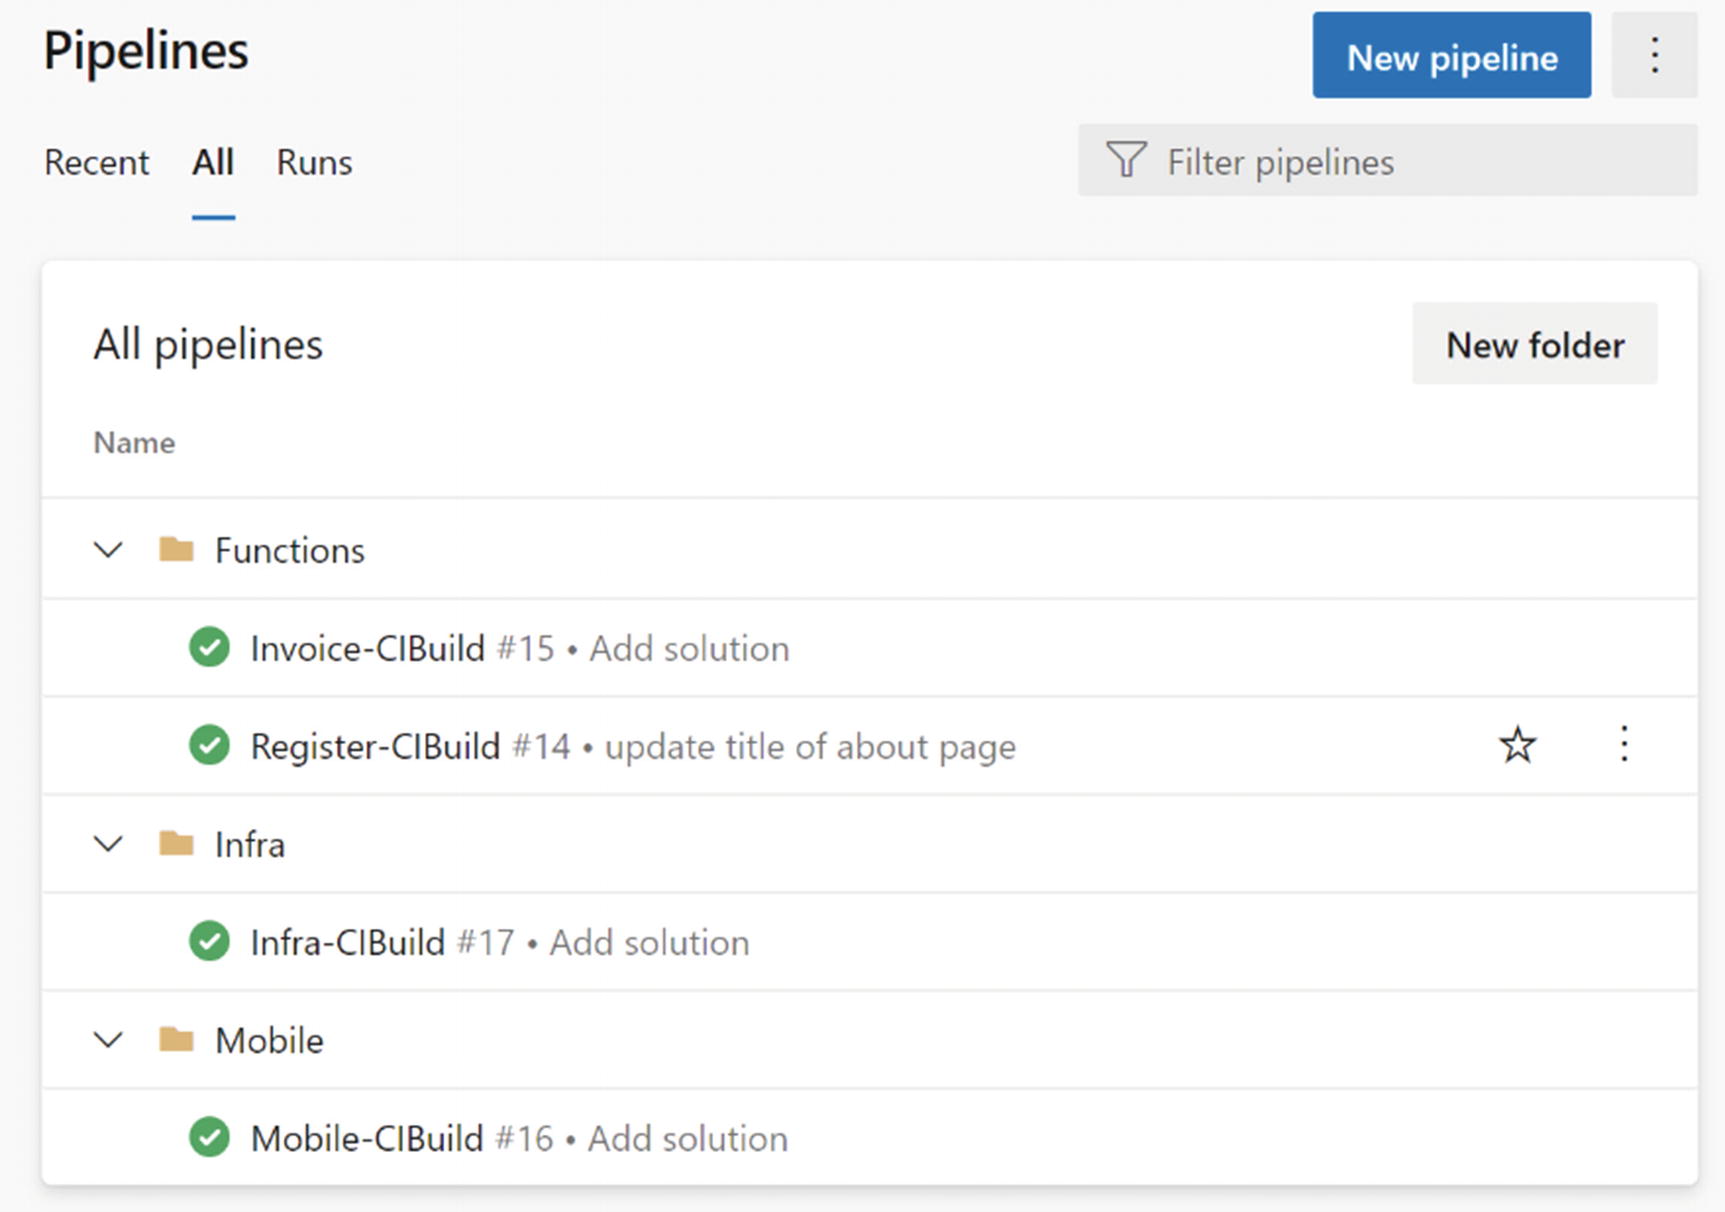
Build folder structure
Let’s consider a mobile development project that uses Azure functions as back-end microservices components. The function builds can be put under a folder named Functions. The mobile build can be organized under a folder named Mobile. Also, if the Infrastructure provisioned using the scripts, those Infra builds can be put to an Infra folder. Likewise, all the build pipelines should be categorized using meaningful folder structure. It will help users to easily access the relevant build pipelines without scrolling through all of the build definitions.
This lesson discussed the importance of having a good, organized folder structure to keep build definitions, which helps users to easily identify and maintain build pipelines.
Summary
In this chapter, we discussed more useful configurations and features available with Azure DevOps builds. As we explained, the debug mode of the build is very important to go through the build failure logs and identify the failure reasons. Also, we were able to discuss some useful features available in the Azure DevOps Pipelines while working with PowerShell scripts. Further, we talked about the use of the task groups and build artifacts, which are a very important part of Azure DevOps build pipelines. Additionally, we were able to get an idea of how to import and export build pipelines between team projects in the same organization or external organization, which is very useful when there is a requirement to copy similar build pipelines between projects. Finally, we discussed the importance of having a well-organized folder structure to keep build pipelines.
In the next chapter, we discuss build artifacts in detail to identify different options we can use to publish artifacts with usage scenarios.