Now that we are going to move into the development phase, let’s talk about some precautions you should take. They may look unimportant at first but, as the project grows, everyone regrets not doing them right from the start. This chapter’s takeaway is our greatest mistakes and realizations over the years.
Project structuring
Code patterns
Conventions
Asset optimization
In this chapter, we assume you have some sort of idea regarding coding, not a huge amount of experience. In other words, we provide some intermediate coding concepts assuming you know the basics already.
Project Structure
Code
- Image assets
Icons
Sprite sheets
- 3D assets
Character models
Props
Environment models
Animation data
NavMesh data
Lightning data
Audio files
- Native plugins
JAR
DLL
Video files
In short, a game project consists of lots of different types of files. You must know which files are being kept where or you will lose track. And for that, you need to maintain your project folder structure. Just so you know, there’s no fixed rule for this. You can maintain your own structure. Our recommendation is to take our structure as a suggestion for building your own.

Assets folder structure
The next thing is about adding or removing files from Unity. Always do so from Unity. Never try to add or remove files from the File Explorer. It is certainly possible, but please don’t do it. Whenever you add or remove files from the Unity project, Unity creates or removes metafiles for them. These metafiles are not visible from the editor but are visible from the File Explorer (and don’t remove them either). Now that you know the things you shouldn’t remove, let’s move on to adding stuff.
A blank Unity project only contains a default scene. You can delete it or keep it for preparing the demo. It’s up to you. You need a scene folder to keep all the scenes, which goes inside the v1.0 folder. We are going to propose two ways to structure your project because they’re very common.
The First Way

Project structure tree view
- 1.
Third-party assets
- 2.
Plugins [this is created by Unity]
- 3.
Editor [this is created by Unity]
- 4.
Streaming assets [this is created by Unity]
- 5.v1.0
- a.
Scripts [reusable]
- b.
2D assets
- c.
3D assets
- d.
Animations
- e.
Prefabs
- f.Scenes
- i.Maps
- 1.
Scene1
- 2.
Scene2
- 3.
Scene3
- ii.UI
- 1.
HUD
- 2.
MainMenu
- 3.
PauseMenu
- 6.
Publishing content
Let’s explain what each folder contains.
Third-Party Assets
- 1.Third-party assets
- a.
Asset1
- b.
Asset2
- c.
Asset3
DOTween (tween animations)
JSON.NET (serialize and deserialize JSON files)
Odin Inspector (custom editor)
Plugins
What is a plugin? It’s more like an extension to the tools you are already using. For your case, it’s an extension of the Unity editor. The Unity editor comes with a basic set of tools. Yet there’s always more that you need. Most often these plugins are .dll or .jar files . For example, if you need to show an Android webview with Unity, you use an Android plugin that makes the native Android calls to do that for you.
- 1.Plugins
- a.
Plugin1
- b.
Plugin2
- c.
Plugin3
UniWebView (cross-platform webview)
Cross-Platform Native Plugins (Android and iOS native calls)
SteamVR Plugin (virtual reality integration)
Editor
This is a very special folder. Files in this folder will never be included in your build. Sometimes you will install some editor-specific tools mostly for debugging or enhancing the development speed. All that content will go here. You must remember this always: any content in this folder will not be available in builds so do not put any reference content for the game in this folder.
Streaming Assets
This is also a special folder. But this is something that will be included in your build. This folder is used mostly to keep asset bundles. We will talk in more detail about this folder in a separate chapter.
v1.0

v1.0 folder structure
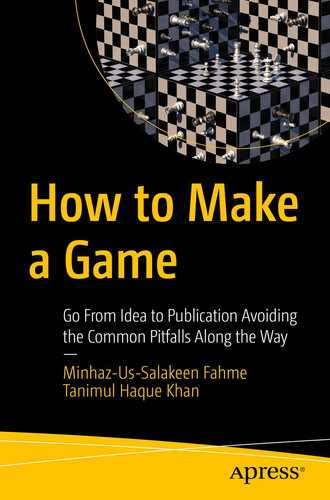
Scripts
- 1.Scripts
- a.
Character controllers
- b.
Managers
- c.
UI
- d.
AI
- e.
Audio
Scripts folder structure
2D Assets
- 1.2D assets
- a.
UI
- b.Game
- i.
Character
- ii.
Environment
- iii.
Props
Now here’s a choice you have to make. You can keep the character/environment/props/animations inside this folder or you can make subfolders for them. It depends on how you want to manage everything. Choose whichever style makes sense to you. It will probably depend on what kind of project you are making.
3D Assets
- 1.3D assets
- a.Character
- i.
Model
- ii.
Texture
- iii.
Material
- b.Environment
- i.
Model
- ii.
Texture
- iii.
Material
- c.Props
- i.
Model
- ii.
Texture
- iii.
Material
For animations, you can add one additional subfolder called animations for character/environment/props. Alternatively, you could have them separately defined in a different folder. It will depend on your project. For example, if you have only one character animation, then you can put it in there. But if you have multiple characters, you may wish to make one generic animation and set it for each character.
Prefabs
Then there’s the Prefabs folder . This is one of the most important parts of Unity’s workflow. Before we go back to talking about folder structure, let’s talk a little about prefabs. What are they? Prefabs are like templates/copies/images of a game object you modified in the inspector. Most often you use the same game object over and over again. So instead of creating it every time or duplicating it manually, you can save a template of it and then use it. And the best thing about prefabs is you can change the template and it will show up in the scene you are working on, which wouldn’t be possible if you just duplicated the game object. So if you are using the same object multiple times, always make a prefab out of it. It helps you follow the DRY (Don’t Repeat Yourself) principle. And it’s not like all the instances of a prefab are identical. You can override if necessary. To learn more about prefabs, go to https://docs.unity3d.com/Manual/Prefabs.html.
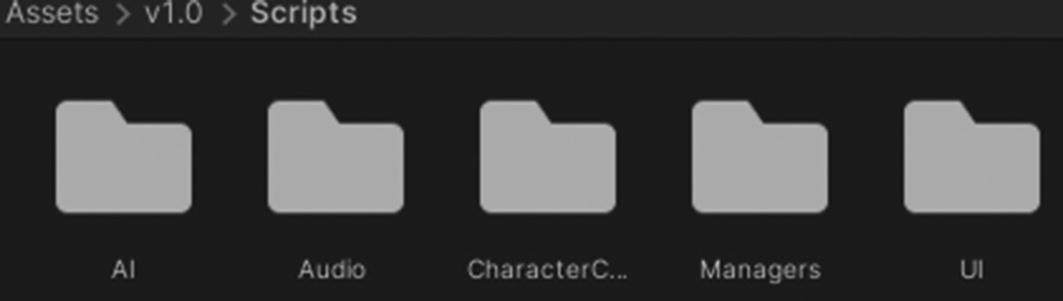
Scene
Maps: The game scenes
UI: The scenes that manage the UI elements
Scenes folder
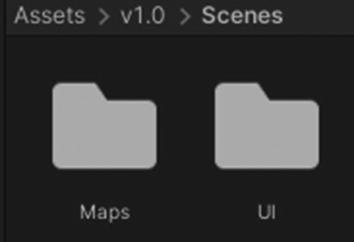
Scenes/Maps
- 1.Scenes/Maps
- a.Scene-1
- i.
Scripts
- ii.
2D Assets
- iii.
3D Assets
- iv.
Prefabs
- b.Scene-2
- i.
Scripts
- ii.
2D Assets
- iii.
3D Assets
- iv.
Prefabs
Maps folder structure
Scenes/UI
Hud
MainMenu
PauseMenu

UI folder structure
Now, which assets are usually reused?
It’s quite easy. Your UI elements should be consistent throughout the game no matter how many levels there are. So never put UI elements in a scene-specific folder. Your player character or enemy character will most likely be reused in every scene. So don’t put them there either. However, if you may have unique enemies for each scene, then you should put them in there. But this is rarely the case. The most common scene-specific character is the enemy boss. Usually, a boss character does not come back in the future. Well, that’s not always the case but usually they don’t. And each boss usually has its own custom logic scripts that should go to these folders too. Some props will be scene-specific and they can live inside these folders. Some environmental animation and NavMesh data should be in these folders. NavMesh is what you use for pathfinding inside Unity (which we talked about in Chapter 3). As it’s an advanced topic, we won’t be covering this in the book but you can find out more about it at https://docs.unity3d.com/Manual/Navigation.html.
Props
Boss model
Boss scripts
NavMesh
Level background music
Please note that this is not an exhaustive list. More items can reside here. But most platformer games will fall into this structure.
Publishing Content
This folder contains the company logo, intro video/animation, company information, legal documents, etc. Usually this content will persist across multiple projects, except for the game icon.
The Second Way
- 1.
Third-party assets
- 2.
Plugins [this will be created by Unity]
- 3.
Editor [this will be created by Unity]
- 4.
Streaming assets [this will be created by Unity]
- 5.Scripts
- a.
Character controllers
- b.
Managers
- c.
UI
- d.
AI
- e.
Audio
- 6.2D assets
- a.
UI
- b.Game
- i.
Character
- ii.
Environment
- iii.
Props
- 7.3D Assets
- a.
Character
- b.
Environment
- c.
Props
- 8.
Animations
- 9.
Prefabs
- 10.
Scenes
- 11.
Publishing content

Simplified project structure
Yes, this is the same structure only more simplified. You don’t need to make scene-specific folders; one scene folder will contain all the scenes. All the assets are assumed to be reused. Maybe some assets will be scene-specific but as their numbers are low in this kind of project you can ignore organizing them separately. Most mobile puzzle games fall into this category.
Code Patterns
In Unity, you can code any way you want. You can write a script anywhere and reference it from anywhere. Unlike other code projects, you don’t have to worry about assembly or namespaces, although it’s possible to have an assembly definition or namespaces to organize your code inside Unity. But just because Unity lets you code however you want, you should not. If you are trying out new styles or features, this can be very powerful as you can test out new things without worrying about these things. But the coding patterns are there for a reason: to keep things organized.
MVC
Single responsibility
MVC

Simplified MVC architecture
View
Let’s start with the view as this is the only thing the players will actually see. Whatever we see is called the view, or at least that’s how it’s supposed to be in the MVC pattern. But for games, it’s a little more to it. Games are not just something we see. They’re something we experience, so we can safely say anything that the player can experience is the view. For example, not just the visuals but also audio and haptic feedback sent through the vibration of controllers. There should be no doubt that everything in the game window we can see can be called the view. But we should also address the sound and other haptic sources as a part of the view for game development.
Model
Before we explain what a model is, let’s try to fix one misconception. You might think that there is no data in games. However, everything we see on our machines is data, manipulated in one form or another. By data, we don’t always mean databases or Excel sheets.
Position(x,y,z)
Rotation(x,y,z)
Scale(x,y,z)
Whenever something moves, it’s done by manipulating those three data points. No game object can exist without them.
Game objects need more data to explain themselves. For example, if you are designing a 2D character or a model, you will need image data for that game object. For 3D, you need to give it some mesh data. For animation, you need to give it some keyframe data so that it knows which frames change into which frames.
Now you shouldn’t have any doubt about models existing in game development too. Models are data containers for you to manipulate the game.
Controller
Controllers take input from the players and then process the model and update the view. They’re more like the central management system. The controller does not necessarily have to take input from the keyboard or mouse only. Even button events from the UI fall into this category.

MVC for games
Now that you know the terms , let’s talk about the benefits of using this pattern. Why take all these extra steps to develop game code?
As you develop more and more games, you will realize sometimes you are rewriting the same type of code again again again. But if you follow the rules, you can abstract your code and make it reusable in many other scripts as well as other games.
You should always strive to write decoupled code. If you are the only game developer on your project, you might find it unnecessary to organize the code in this way because you already know what is where. This is where you make the biggest mistake. A game is never developed by one person. A game is always developed and maintained by at least two developers. Both developers are you, but one is you today and the other will be you tomorrow. You today will know what is where, but you tomorrow will very likely forget what is where. And that’s when you get in trouble. But keeping things organized will save you in the future . After 5-6 months you will forget what was where because you are likely doing something new at this point. So if you need to support your own project, you’re in trouble. And if you need someone else to help with the project, this is where the project pattern will shine the most. Following a design pattern will make it easier to communicate with team members.
Single Responsibility
If your system needs new features, you will have to add or remove some code. And that may very likely force you to make changes to other files too. But what if I told you that you can add or modify features without touching anything or breaking anything else? The goal is to make a decoupled system that works when files are combined but the files don’t rely on each other to work. You will need something at the top of the hierarchy that ties everything together.
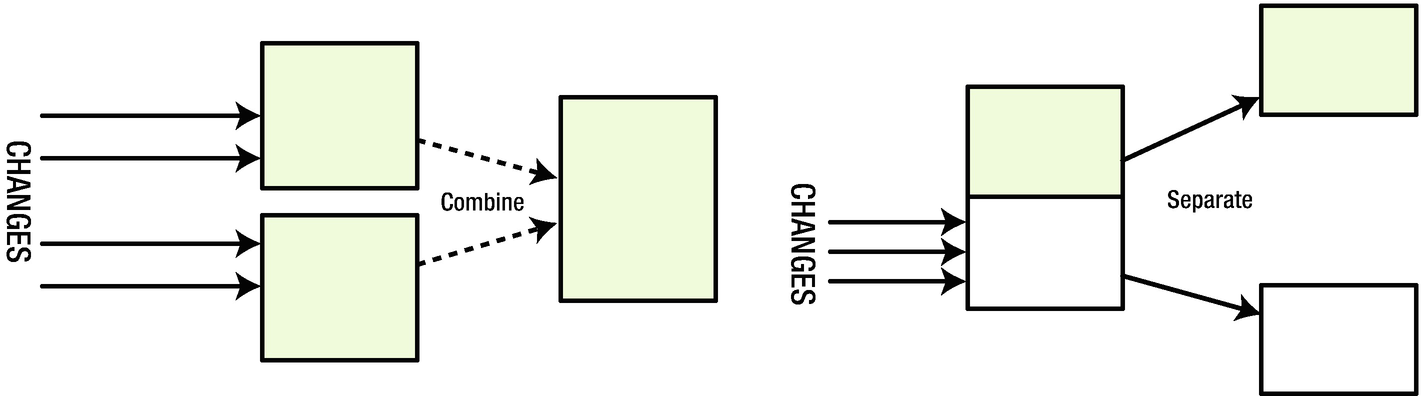
Adding/removing features with single responsibility
Need to add new features? Just combine them with previous ones. Need to remove a feature? Just pull it out of the system. It’s as simple as that. So how do we make such a system? Let’s design a small system for that.
Should take inputs
The character should move according to the inputs.
Proper animations should be played.
Manage collisions during movement
It’s an oversimplified version of a movement system but it will serve as a good example of this pattern.
By definition of this pattern, one class must be responsible for doing one and only one task. It shouldn’t have more than one public function. But that’s not always the case. In reality, what you should do is create one class that focuses on one particular domain such as the movement system. It shouldn’t go beyond doing anything other than the movement-related tasks.
You are going to write four classes to handle these four features and one manager class to handle the features.
Input Handler
OnMove
OnJump
OnCrouch
OnAttack
Motion Handler
Move
Jump
Crouch
Attack
Animation Handler
Move
Jump
Crouch
Attack
Take Damage
Death
Each one of these is a function that changes the state of the animator. This class doesn’t manage any input. It doesn’t even know anything about inputs. All it knows is there are an animator and some states that can be manipulated publicly with those functions.
Collision Handler
OnCollisionEnter
OnCollisionExit
OnTriggerEnter
OnTriggerExit
Putting the Pieces Together
The four classes above don’t know anything about each other. And they don’t rely on each other either. Why did you go through all these extra steps? Decoupling. You removed dependencies on each feature. That way if you need to make any changes to the animation, you don’t have to worry about breaking any other feature. Maybe you want to manage the collision differently now. You can change it without breaking anything else. The same goes for the input handler.
Now you need to tie all of these classes together to make the movement system work. You need a new class. Let’s call it, movement system manager . In this class, you will have a reference to the four classes above. This class will know how each of them works.
Now when the input handler fires the OnMove event , the manager will tell the motion handler and animation handler to execute their move function. The motion handler will manage the actual movement of the game object and the animation handler will animate the movement. And all three classes will work together without even knowing each other.
The collision handler will let the movement system manager know if the game object should be allowed to move forward. Depending on that, the manager can decide how to handle the motion and the animation.
This way you manage to write a decoupled movement system.
If you want to make changes to the animation system, just open the animation handler and make the necessary changes. The system will work without breaking anything.
Drawbacks
This pattern has one serious drawback: it creates lots of classes and lots of files. If you don’t follow the proper folder structure, the increasing file size will get overwhelming. But that’s exactly why we talked about folder structure at the beginning of the chapter. If you have been following the steps, the overwhelming number shouldn’t be an issue, since everything has already been organized.
Conventions
Now that you know about structuring your code, let’s go in-depth about what to write and whatnot. We are going to cover conventions.
You can certainly write code in any way you want to. You can name your variables ABC, asd, aaaa, or whatever you wish. But should you? Maybe you need to write a quick function that will only be used within the class. You might feel lazy and name it QuickFunc . For the moment it sounds fine. But after a week (when you’ve totally forgotten about it), you have to debug something in that very class. Now you are in trouble because you need to understand what the QuickFunc does by reading it line by line. Worse, someone else has to do it. So what if you named it properly?
So how do you name a function properly?
Who’s going to call it?
What does it do?
What’s the output?
What’s the input?
Once you have the answers, you can decide the signature of your function.
Who’s Going to Call It?
If the function is being used only by its class, you better put a private or protected access modifier. If you want your class to be inherited, make it protected; otherwise, most of the time you can make it private. If you want to call the function outside of the class, then you need to put a public modifier.
Now you may say, oh it’s common sense to do that. But does it matter? Yes, because making everything public saves you the trouble of thinking too much. Actually, this is done to save you time later. Because once you see that the function is named private, you know this function is only used within the class. During debugging, this will greatly help. It has another benefit. Since it’s private, you won’t get this method as a suggestion when using the class from outside. This way you will have a clear idea of functions that are available to you. This is very helpful when others are using your classes. They don’t need to know the small details about your class.
What Does It Do?
This is where the naming happens. It’s wise to name a function according to what it does. For example, if you want your function to move your character, you should probably name it Move() . If the function moves the character to the left, you should name it MoveLeft(). The same goes for the right: MoveRight().
How does it help? Without reading a single line of code, you already know the purpose of the function. This is extremely important for debugging or feature enhancement. One class may have 4-10 functions. What if you need to fix the code for movement? You can instantly find the lines of code by looking at the name of the function. If you named the functions ABC() or ML()[move left, in short] , you would have to spend some time reading the whole class whenever you needed to do any modifications.
As for the naming conventions in C#, it’s recommended that you use CamelCase . But you can indeed follow your own convention. However, always remember whatever you do, follow one convention throughout the project, and let your team know what it is. This will save a lot of time.
What’s the Output?
Every function must give you something back. Functions are like machines you put something into. It gets processed and it gives you something back. Ninety percent of the time your function will have something to give you back. Always try to return something, even if it’s just a boolean. If the function doesn’t have anything to return, try to return true or false if the action was successful. Think twice before you write a void function. If you make a function void, it kind of says that it’s an action. This is a great way to communicate with yourself and the other members of the team.
What’s the Input?
This is what decides if your function needs one or more parameters. Think about the things it needs to process. Obviously, you are working with some form of data.
A function should almost always take input. Public functions are usually made to process data from a different place, which may not be available to the class already. Usually public methods are the main entry point for sending data to a class to process.
Private functions are usually used to assist the public functions. Most of the time, private functions are written to make sure the public functions aren’t too bloated with code. A private function is usually called from within the class, or more specifically, a public function within the class. As a result, most of the data you need to process in a private function should already be available via some public function, which can now easily be used from private variables. But it’s always wise to have parameters in all functions that compute with one or more variables. This way it is always reusable.
The Benefit
From the name, you can tell it saves a file.
It’s a public function, so it’s expected to be called from a class object instance from outside.
The input parameter is a string called filepath and a string called data. So you can safely assume it saves the data to the file path.
It returns a bool. So it’s very likely that the method will return false if it fails to Save.
You got all this information from the signature of the function. You didn’t even have to worry about how the function executes.
But now you don’t what it is saving and where. What is the message you get from here?
You aren’t supposed to worry about where the file is saved and what is being saved. The class will handle itself.
This way team members can communicate with each other without ever talking.
Asset Optimization
We already explained the kind of assets/files that are required for a game project. We are going to explain how to optimize these files.
Text Files
Audio/video settings
Button mapping
Preferences
Item details
Dialogues
Localization data
Local leaderboards
You must be thinking that you should have a database for this. But a database for most games would be overkill. And slow too. You need to access this data as fast as possible. You may even want to tweak some of these files outside of the game if necessary, such as the audio/video settings or the button mapping.
And some files you don’t want to be tweaked by users because that could break the game. For example, if someone tweaks the values in the item details, it may make the game unbalanced. For those types of files, you will very much want them to be encrypted.
- 1.Unstructured
- a.
Plain text
- 2.Structured
- a.
Excel
- b.
CSV
- c.
XML
- d.
JSON
Plain text will save you the most space because it will only contain the data you need. But it’s going to be hard to maintain it since it’s not structured in any way. However, reading speed is very fast.
Excel is very easy to modify, but it adds a lot of extra information that will increase the size of the file unnecessarily. Reading speed is very slow.
XML is also easy to modify as it can be opened with Excel, but it doesn’t contain any extra information other than the tags. Reading speed is slow.
CSV (comma-separated values) is probably the best for managing both speed and external readability. It’s much better than XML because it doesn’t have all those tags. Instead, it organizes data with commas. It can also be opened with Excel and can be easily read by the parsers . The reading speed for this is the second best.
JSON is a structured file system that’s like plain text. It isn’t as easy as Excel to modify but it is possible. Reading speed is very fast.
Type | Read/Write Speed | Outside Modification | Formatted | File Size |
|---|---|---|---|---|
Plain text | Very fast | Very complicated | No | Smallest |
Excel | Very slow | Very easy | Yes | Large |
XML | Slow | Easy | Yes | Moderate |
CSV | Fast | Easy | Yes | Small |
JSON | Very fast | Moderate | Yes | Small |
From the chart, you can easily decide which structure to use when.
You shouldn’t use plain text almost ever, unless you want to store some temporary data that doesn’t need formatting but needs to be read and written very quickly. However, if you are a hardcore programmer and want to parse your own data, sure, go ahead.
You also shouldn’t use Excel because it’s slow and big in size. It’s hardly ever needed for any game. The only feature it provides here that you can click once and it will open with a conveniently installed editor.
If you really want an outsider to modify a file and make their life a bit easier, use XML so that they can open the file with some form of XML reader and modify it. You probably want the configuration files in this format. You won’t read them frequently from the game anyway, but users may need to modify them from outside. For example, they might need to change the resolution or keymapping if they messed up very badly.
JSON is the format you should almost always use. It is the most suitable for data storage. It’s as fast as plain text. It’s formatted. It doesn’t waste space like XML tags. It’s a well-structured minimalistic data container.
If in doubt, always save in JSON.
Audio Files
Compression
Long tail
Repeating loop
Compression
Lossy compression
Lossless compression
Lossy compression removes unnecessary data such as sounds that you can’t hear. Once this is done, this information cannot be recovered. For optimal file size, this should be used.
By default, we get the lossless compression, which isn’t as good as the lossy one in terms of file size. Also, it’s heavy on the CPU because the audio file must be decompressed when it is to be played.
Unless your game focuses a lot on sound, go for the lossy compression.
Long Tail
Some audio files have a long ending tail. Most of the time they are unnecessary for the game. It’s always wise to chop out those long ends if not needed.
Repeating Loop

Enabling a loop from the inspector
Unity Settings
Force to mono: This makes the audio have only one channel. Unless you want your sound to have different effects on different speakers, check this and the file size will go down.
Load in background: It’s pretty self-explanatory. Check this if you have a very big audio file for whatever reason, like dialogue.
Ambisonic: This is a decoder. If your audio files are encoded, check this.
- Default: Default settings for all platforms
Load type: This will decide the type of decompression you wish to have.
Preload audio data: If enabled, the audio clip will be preloaded when the scene is loaded.
Compression format: Select the type of compression you want.
Sample Rate: You can modify the sample rate here.
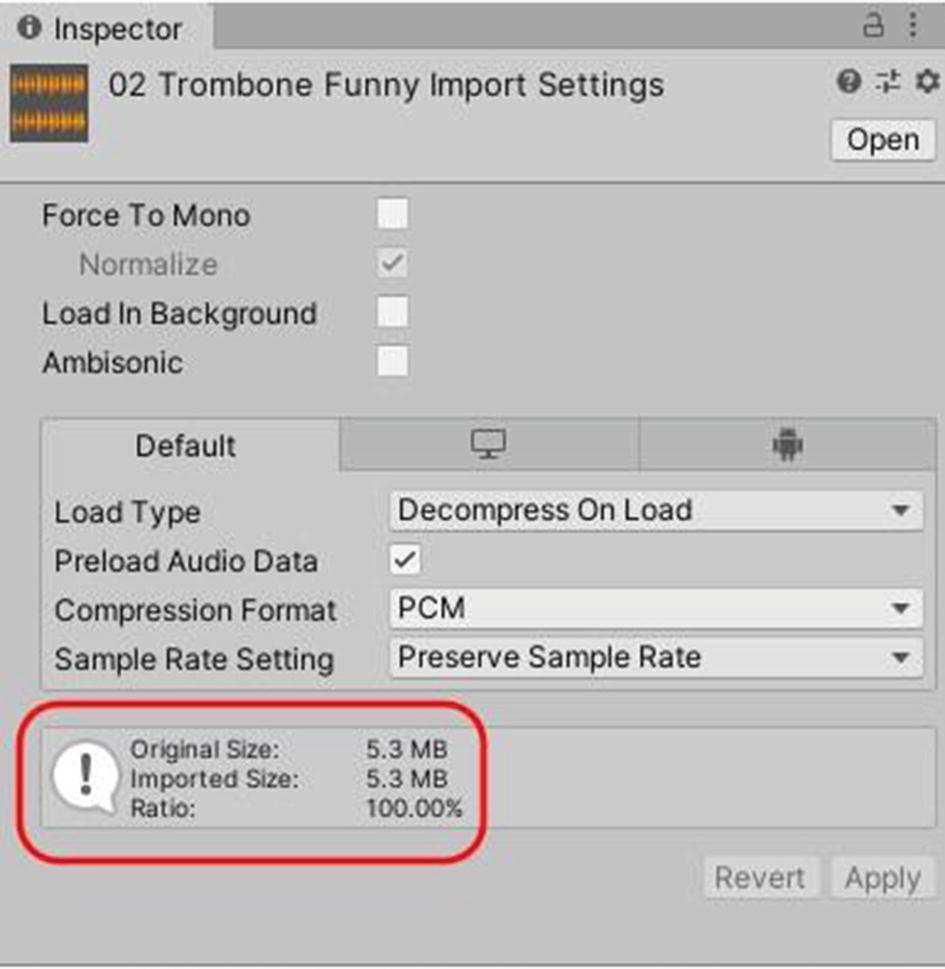
Audio compression settings
Here you can see by default the size is unchanged. The original size and imported size are the same. You can play around with the configuration to see how the size changes.
For more details, go to https://docs.unity3d.com/Manual/class-AudioClip.html.
Image Files
Imagine a game without image files. Pretty boring, right? Yes, images are the most important file type in a game. They are almost always the main assets and they occupy most of the space. Even if you are making a 3D game, the textures are the ones that will take more space than the actual 3D mesh data.
Common Mistakes
Below you will find a few common mistakes most new game developers will make and some good tips on how to avoid making them.
Resolution
One of the most common mistakes for image files is to use very high-resolution textures. New developers tend to think higher is better and try to get a 4k texture for a mouse cursor or something similar. That’s a very big waste of space. You need to know what you need and when. First of all, if you are using anything higher than 1920x1080 pixels, you need to do some quick checks. If it’s for background, see if your texture can be tiled. If you are making a 2D game, your characters should almost never be higher than 512x512 pixels. For props, it’s probably even lower.
Try to use vectors for your image assets, SVG files. This will save you a lot of headaches. Because then you don’t need to worry about higher pixels and file size. No matter how big your screen size, the file size will remain the same. Choose this file format if you are planning to support a very wide array of screen sizes from small to huge. But there’s a drawback to this system. Since it’s a vector, you may get stuck with a cartoonish art style because it’s still not mature enough to give you the details of the other available systems.
Compression
We almost always forget to compress image files. By default, most images are imported inside Unity with a 2k resolution. You may have downloaded icons that are 512x512 pixels but you will most likely need them to be 64x64. It’s wise to compress the image before loading it into Unity. Although Unity can compress it for you, it’s better to do it yourself to save some memory.
Unity Settings

Texture import settings
Unity offers very powerful tooling for sprite management. You can have one image that contains all the sprites. For a 2D character, this is very useful. You can have all the animations in one file and load them up. To do so, you must select the sprite mode as multiple and open the sprite editor to slice up the sprites.
For more details go to https://docs.unity3d.com/Manual/class-TextureImporter.html.
A Disorganized Army Is As Good As A Dead One
Everything we mentioned above may look like extra work. But in reality, if these steps aren’t taken as early as possible, the project will end up getting messy. It’s always very hard to organize a mess because it’s a mess. It’s wise to keep everything as well sorted as you possibly can. Have you ever played RTS (real-time strategy) games like Age of Empires, Command and Conquer, or The Battle for Middle Earth? They take hours to play, especially the ones where you have to build the whole civilization while struggling to fight and survive at the same time. You have to do so many things here. Building a civilization/army from zero needs continuous resources. You have to build up an army simultaneously because otherwise your opponent’s scouts might discover your lack of manpower and decide to invade early to get a quick and early win. While you are producing the resources and manpower, you have to manage the defenses as well. In the meantime, you also need to prepare yourself to attack. There are probably barracks to train soldiers and farms to cultivate crops as well. There are some fascinating heroic statues too, providing magical powers or civilization upgrades. Apart from these intriguing structures, there are also some strategic structures. They don’t produce anything. They help with some central boosts, for example, 2x resources, increasing kill points. Boring as they may seem, these little things make a lot of difference. If you check the after-game statistics, you might see that the players using these resources had more points than you. Had they been decent players, you might have been defeated by them. See? Small, boring things can make a difference. Also, in these games, there are options/shortcuts to organize your troops in battle. For example, you are busy defending the northern boundary where heavy artillery is raining down on your game. Suddenly, you hear an infiltration alert. Some enemy troops have used stealth and sneaked into the heart of your base. You knew that this could happen, so you did keep a small but fast troop to handle these sorts of incidents. You check the infiltration location and try to find your agile soldiers to take care of the enemies there. But wait. Where did you keep your agile battalion? The map is filled with little dots depicting your soldiers, especially in your area, but the map is huge and you can’t find them now. You forgot where exactly you kept them. There is no way anyone can remember the location of every troop in their huge army. After scanning the entire region for a whole minute, you find them, but by then your important structure has been demolished and you can’t make any new upgrades to your troops, eventually buying your opponent a window of a few minutes to try and get to your throat.
This is exactly what you wanted to avoid.
You should have used the shortcuts and tactics to keep your armies at your fingertips. You should have kept them organized so that you could find them in time. After all, what good is an army if you can’t use it when you need it? There’s not much use for good code/great assets if you can’t organize them in your project. You may lose a piece of the puzzle and have to do the whole thing over again, which is equivalent to not only losing the game but also throwing it away in frustration. Let’s not go that way. Let’s try to do what’s necessary when it is due. This extra effort is worth it.