

Sample use cases
Three use cases are provided in this chapter. These use cases were chosen because they represent many of the challenges enterprises face when it comes to managing metadata in massive scale.
Although these use cases provide an excellent representation of how the IBM Spectrum Discover platform can be used to optimize storage systems, enable data governance, and fulfill analytical needs that challenge organizations with billions of files and or objects, they are in no way the only use cases possible. In fact, the extensible architecture of the IBM Spectrum Discover platform enables metadata management for a nearly limitless number, and types, of use cases.
This chapter includes the following topics:
3.1 Storage optimization
In this section, we describe how to use IBM Spectrum Discover for the following tasks:
•Gain insights into unstructured data.
•Decrease storage capital expenditure (CaPex) by identifying aged data that can be relocated or deleted.
•Map data to business priorities, organization, and projects.
•Reduce storage operation expenditures (OpEx) by improving storage administrator productivity.
The reduction in storage OpEx is compounded when data is stored across dissimilar storage systems or hybrid multi-cloud environments.
3.1.1 Gaining insight into unstructured data
IBM Spectrum Discover provides two methods to easily explore cataloged data. The first method is a standard search box that allows for quickly finding data that meets the search criteria. The second method is a visual exploration of the data.
The visual exploration capabilities, which are provided by the IBM Spectrum Discover GUI, enable administrators and users, to quickly locate data that might, for all practical purposes, be lost. In this section, we show how CaPex can be greatly decreased by identifying aged data that can be relocated, or even deleted.
Visual exploration
Complete the following steps to start a visual exploration of the cataloged data in IBM Spectrum Discover:
1. Select the search icon in the navigation menu of the GUI. The search icon is highlighted by a red box on the left side in Figure 3-1.

Figure 3-1 Starting a visual exploration
2. Select the wanted groups in the or start a visual exploration section. Then, click press the circled-arrow to continue (see Figure 3-1).
The GUI presents available tags that are based on the selected groups. If a tag must be available, click Add more search criteria to select more groups, as shown in Figure 3-2.

Figure 3-2 Adding groups to your visual search
3. Click Submit.
4. Within the groups chosen, select the tags that are to be used to isolate the wanted data, as shown in Figure 3-3.

Figure 3-3 Tags selected
5. Click the circled-arrow. The GUI now displays the results of the visual exploration, as shown in Figure 3-4.

Figure 3-4 Visual exploration results
6. Now that data is narrowed down to some number of groupings, based on search criteria, you can drill down to individual records by selecting one or more groups and clicking Convert to individual record mode, as shown in Figure 3-4.
The resulting table provides all records that meet the search criteria for the groups that were selected, as shown in Figure 3-5.

Figure 3-5 Individual record table
Next, we describe generating a report for the records in our results.
Generating a report
We now want to report on data that was not accessed in the past year.
|
Note: All records in the record table were not accessed for a year or more. Therefore, for the purposes of our example, we limit the record table to records that were not accessed in 1 year only to show the flexibility of IBM Spectrum Discover.
|
Complete the following steps:
1. Continuing with our data that is shown in Figure 3-5 on page 36, click the funnel icon that is next to Generate Report to show the available filters that can be applied.
2. Click the twistie that is next to Last Accessed Time and set the start date to the date of interest, as shown in Figure 3-6.

Figure 3-6 Setting Last Access Time
3. Click OK.
4. Click Apply to update the record table.
Now, the record table shows only files last were accessed by the specified date, as shown in Figure 3-7.

Figure 3-7 Last Accessed Time results
5. Columns can also be added, or removed, by clicking the twistie that is next to Columns. In our example, we add Permissions and then, click Apply to update the record table. Also, we now click the funnel icon again to hide the filter section.
|
Note: Our source storage system is not integrated into LDAP. Therefore, owner is reported as the UID.
|
6. We are now ready to generate a report of all of the records that were not accessed within the last year. To select the records to be included in the report, click the check box next to the path, or select individual record, as shown in Figure 3-8.

Figure 3-8 Ready to generate a report

Figure 3-9 Naming the report
8. Click Submit to generate the report. Click OK after the report is generated.
9. Click Reports in the Navigation Menu. Locate the report that was created. Now the wanted action can be completed by clicking the wanted action on the right side of the wanted report in the Reports window. Reports can be viewed, downloaded, rerun, or deleted. The results are downloaded into a spreadsheet. The report generated is shown in Figure 3-10.

Figure 3-10 Report generated
3.1.2 Mapping data to business priorities
By using IBM Spectrum Discover, custom metadata values can be added to a set of the records based on filter criteria. For example, you can add a project name to records based on their location within the file system, owner ID, and so on. This process is done by using an auto-tagging policy.
Auto-tagging
To begin the auto-tagging process, we must create a tag to be associated with the policy we build to conduct the auto-tagging process.
Project name tag
Complete the following steps to create a project name tag:
1. Click the Metadata icon in the Navigation Menu.
2. Within the Metadata window, select the Tags link at the top of the window. In the Tags window, click Add and the New Organizational Tags pop-up window opens, as shown in Figure 3-11.

Figure 3-11 New Organizational Tags pop-up
3. Within the New Organizational Tags window, enter a unique name for the tag that is created.
|
Note: Tag names cannot contain spaces.
|
4. Select Open from the Type pull-down menu.
|
Note: An Open tag can be anything that describes groups of records and is not restricted to predefined values. Therefore, a project name, department name, or sensor serial number can be used.
|
5. Leave the Values field empty because it is not required for this open tag.
6. Click Submit to save the tag.
Now that a tag is created to use during project naming, we can build our policy to conduct the tagging.
Project naming policy
Complete the following steps to create a project naming policy:
1. Click Policies at the upper left corner of the Metadata window. Because a policy for project naming does not exist, we build a policy by clicking Add Policy in the right side of the policy listing, as shown in Figure 3-12.

Figure 3-12 Add Policy
2. In the Add new policy window (see Figure 3-13 on page 42), move the slider from Inactive to Active so that the policy can be run. Enter a name for the policy in the Name field.
|
Note: Policy names cannot contain spaces.
|
3. By using the Policy Type pull-down menu, choose AUTOTAG.
Next, we must provide a filter for the data we want to auto-tag. In our scenario, we know that user 1001 has numerous data for the project that we want to tag; therefore, our filter carries out on that user's data within the catalog.
4. After the filter is created, select Extract tag from path. This selection makes the Field and Depth pull-down menus visible.
5. In the Field pull-down menu, select the tag that was created. The tag now is associated with the policy.
6. Determine where the project names are within the path to the data. For the project naming to be carried out here, the seventh forward slash (/) in the path is where the project name derives.
|
Note: The directory that is below the root of the file system is where to begin counting forward slashes; for example:
root/folder1/subfolder2/subfolder3/subfolder4/…
If the depth is set to 4, the project name is subfolder3.
|

Figure 3-13 Add new policy
We run this policy immediately. If the policy is to be scheduled, select the wanted frequency. This provides options for selecting time of day, days of week, and date, as required. Figure 3-14 shows an example for the Schedule portion of the Add new policy window.

Figure 3-14 Scheduling a policy
7. Click Save after the schedule is set, or Now is chosen automatically.

Figure 3-15 Policies Progress
Because we elected to run our policy now, it completed. To confirm the results, we perform another visual exploration. To return to the search window, use the Navigation Menu search icon. The newly created tag is included in the choices for the visual exploration, as shown in Figure 3-16.
|
Note: It takes approximately 30 minutes before the newly created tag is updated with project names.
|

Figure 3-16 Search with project naming tag
Select the tag created for the project naming and click the circled-arrow. On the next window of the visual exploration, select the project name of interest, as shown in Figure 3-17. Then, click the circled-arrow.

Figure 3-17 Select a project
After the results are displayed (see Figure 3-18), select the project name and click Convert to individual record mode.

Figure 3-18 Convert project name
After the individual records display, click the funnel icon. Then, click the twistie for columns, select the project name tag, and click Apply (see Figure 3-19).

Figure 3-19 Setting displayed columns
Click the funnel icon again to clear the side pane from the window.
The Results windows now includes a column for the project name, as shown in Figure 3-20.

Figure 3-20 Display records with project names
3.1.3 Reducing storage operation expenditures
The IBM Spectrum Discover GUI dashboard, or home page, provides access to information about the connected storage systems in a manner that enables storage administrators to quickly ascertain high-level details that are required for day-to-day operations. For example, the Datasource Capacities section shows used and free space, but enhances that view by indicating the number of files to move or archive, based on user-defined policies. This feature enables a storage administrator to determine whether action is required, at a glance, as shown in Figure 3-21.

Figure 3-21 Datasource capacity
However, to further reduce the time required for administrative duties, these high-level views offer drill-down capabilities. This feature enables, in a matter of minutes, the ability to perform the actions required, by way of policies and action agents, or generating detailed reports.
The Records Indexed section of the IBM Spectrum Discover GUI dashboard provides the total capacity that is required for the records within the catalog. It also displays the total number of records, but again, provides drill-down capabilities that enable the storage administrator to get more information as required.
The next section of the IBM Spectrum Discover GUI dashboard is dedicated to highlighting space that might be wasted because of duplicate files. The duplicate file information section is shown on the lower right side of Figure 3-21.
|
Note: Identifying potential duplicate files can be resource-intensive on IBM Spectrum Discover. Therefore, the background task that provides this information is disabled by default. To enable this capability, see the instructions that are linked in the duplicate file information section or IBM Knowledge Center.
|
The lower portion of the IBM Spectrum Discover GUI dashboard displays capacity used, based on the tags available, as shown in Figure 3-22.

Figure 3-22 Capacity Used By
To offer the maximum efficiency of the storage administrator's time, and provide greater flexibility, custom tags (such as the ProjectNamingTag) are displayed in the capacity that is used by view. It is the bottom option in the pull-down menu that is shown in Figure 3-22.
To further enhance the insight that is provided by the capacity used by views, a pull-down menu allows for displaying the number of files that are cataloged within each option of the view, as shown in Figure 3-23.

Figure 3-23 Capacity Used By file counts
3.2 Data governance
Data governance is the overall management of data availability, accessibility, relevancy, usability, quality, and security in an enterprise. It also can help you manage your business data throughout its lifecycle.
One role that IBM Spectrum Discover plays in data governance is to ensure that your data storage systems are compliant with governance policies. IBM Spectrum Discover reduces the risk that might be buried in unstructured data stores. It also can accelerate the investigation into potentially fraudulent activities while making regulatory audits faster and more thorough.
3.2.1 Use case scenario
Suppose that a financial services organization maintains storage in multiple locations and in multiple data storage entities. The organization recently adopted a data governance policy to store all personally identifiable information (PII) in a particular data store in a single directory or folder.
The CIO’s organization is given the responsibility of ensuring this policy is adhered to across the organization. The CIO immediately appoints someone to be the organization’s data steward and assigns them the task of identifying problem areas in the context of data governance.
3.2.2 Data stewardship with IBM Spectrum Discover
The data steward finds that IBM Spectrum Discover enables fast data exploration and identification of PII data by using regular expression searches of the data contents. The data steward outlines a plan that includes the following tasks:
•Document the various components that can categorize a file or object as PII.
•Identify regular expressions to be used when searching files or objects that might match potential PII in their contents.
•Create IBM Spectrum Discover tags to be used in identifying a file or object as containing PII.
•Design IBM Spectrum Discover policies that use the regular expressions and tags to manifest the identification of files or objects that contain PII.
•Scheduling regular report generation with a format and frequency suitable for providing to the CIO.
After discussing and receiving approval for this plan from management, the data steward moves ahead with its implementation. Each step of their plan is described in the following sections.
3.2.3 Documenting the various PII components
Suppose the PII stored by the organization for individuals, in addition to their name, is limited to the following components:
•Email
•Address and ZIP code
•Credit card account number
•CVV number
•Social security number or tax identification number
3.2.4 Identifying regular expressions for the PII components
IBM Spectrum Discover provides several predefined regular expressions for content search policies. Those expressions that correspond to the PII components of concern to the organization are listed in Table 3-1.
Table 3-1 PII Components and the associated IBM Spectrum Discover regular expression names
|
PII component
|
Regular expression names
|
|
Email
|
EmailID
|
|
ZIP Code
|
USZIPCode
|
|
Credit card number
|
MasterCard, VisaCard, AmexCard
|
|
CVV code
|
CVV-Number
|
|
US Social Security number
|
US-SSN
|
The data steward notices that their organization stores US Social Security numbers such that the three numbers are delimited by spaces rather than numbers. Therefore, the IBM Spectrum Discover predefined US-SSN regular expression is not sufficient for their needs.
The data steward can redefine the US-SSN regular expression or define another regular expression to identify US Social Security numbers that are delimited by blanks. The latter approach is described in the “Regular expressions” on page 20. As shown in the example, the new regular expression is named US-SSNbd (“bd” suffix for blank-delimited).
3.2.5 Creating tags to identify files or objects that include PII
Only a few individuals across the organization have sufficient permission or privilege to view the PII data. That is, to protect their customers’ information, few members can open file or objects and examine their content. Therefore, generating reports that identify data governance problem areas should not display the actual PII. Governance reports. Instead, they need only to identify files or objects that contain PII.
As a result, the data steward uses a single IBM Spectrum Discover tag, containsPII, for this identification. This tag is set to true if any PII data is detected and false otherwise.
3.2.6 Creating policies to identify files or objects that include PII
With the tag defined for identifying PII-containing files or objects, we define the policy by using the IBM Spectrum Discover user interface, as shown in Figure 3-24.

Figure 3-24 Adding a policy for use in identifying storage that contains PII
When defining the policy, select the CONTENT SEARCH in the Agent pull-down menu. Therefore, the data steward selects the agent, contentsearchagent, which is associated with CONTENT SEARCH policies.
All regular expressions that apply to identifying PII data in the Search Expression pull-down menu are selected. Because of the sensitivity of the data and the potential for those users that do not have a need-to-know, the data steward selects True/False from the Value pull-down menu. The policy is scheduled to be run every Thursday in preparation for meeting with the CIO on Fridays.
3.2.7 Defining and scheduling regular reports for governance
After the new findPII policy runs, the containsPII tag’s values are updated. The data steward must identify any files that are outside of the PII-restricted storage area. To do so, they browse to the Search window and search for files that are identified as containing PII; that is, those files that include a containsPII value of True.
The search is further refined to exclude files that are in the restricted area; that is, we want to identify PII information that is outside of the designated PII storage location. The data steward enters the specific query and runs the search, as shown in Figure 3-25.

Figure 3-25 Searching for files that contain PII but are outside the designated PII storage area
After the governance report is generated (see Figure 3-26), it can be rerun on-demand. This feature eliminates the time that is required to generate the search syntax and configuration.

Figure 3-26 Generated governance report
The data steward can now select these results, generate a report, and name it governanceViolationReport (for example). The report is saved in the Reports window and as a result, can be rerun ad hoc, as shown in Figure 3-26 on page 51.
Reports can be downloaded in CSV format or by using the IBM Spectrum Discover REST API, in JSON format. With this report, the data steward is now prepared to take action in moving or eliminating data with PII that do not adhere to the organization’s data governance policies.
3.2.8 Summary
The example use case that is described in this section is only one data governance scenario where IBM Spectrum Discover can be a powerful tool in managing and enforcing an organization’s data governance policies.
Other governance scenarios
Imagine the initial scenario that the data steward might be faced with: locating all of the PII in the organization’s data center and then, working with storage management to identify a technology or location that is suitable for storing and protecting PII data. This task is dramatically simplified with IBM Spectrum Discover.
The data steward can run the same findPII policy, which identifies all files or objects across all storage systems that are owned by the organization. The subsequent search criteria are simplified by reporting PII-containing data only. Such a report can then be provided to the storage administrators to aid their planning in moving and protecting the organization’s PII data.
Similarly, any audit of the organization's PII policy can be accelerated by using IBM Spectrum Discover to help identify PII data. Auditors can supply their own regular expression searches to better satisfy any concerns in a fast and efficient manner.
Ensuring data protection with IBM Spectrum Discover Exploration
IBM Spectrum Discover can be used to not only “flag” data as containing PII, but to collect PII data. Users of IBM Spectrum Discover can be assured that PII is not exposed during metadata collection, exploration, or analysis.
All metadata that is collected by IBM Spectrum Discover is encrypted by using industry standard practices. In-flight data is protected by TLS throughout its journey to the IBM Spectrum Discover system. Inside the system, the DBMS that contains any metadata also is protected by in-place encryption.
3.3 Healthcare and life sciences use cases
IBM Spectrum Discover supports a wide range of use cases that can be applied to healthcare and life sciences applications. The technological advances in this industry led to a ubiquitous amount of unstructured data with rich metadata information in it.
In this section, we showcase working with Variant Call Format (VCF) files and Digital Imaging and Communications in Medicine (DICOM) files. We add custom metadata tags, add custom regex expression, create and run custom policies, and run search and report operations on the data. All of these processes by using the content search features that are delivered with IBM Spectrum Discover.
3.3.1 Variant Call Format use case
The VCF specifies the format of a text file that is used in bioinformatics for storing gene sequence variations. The standard is in version 4.3. A typical vcf file header is shown in Example 3-1.
Example 3-1 Example of a typical vcf file header
##fileformat=VCFv4.3
##fileDate=20090805
##source=myImputationProgramV3.1
##reference=file:///seq/references/1000GenomesPilot-NCBI36.fasta
##contig=<ID=20,length=62435964,assembly=B36,md5=f126cdf8a6e0c7f379d618ff66beb2da,species="Homo sapiens",taxonomy=x>
##phasing=partial
##INFO=<ID=NS,Number=1,Type=Integer,Description="Number of Samples With Data">
##INFO=<ID=DP,Number=1,Type=Integer,Description="Total Depth">
##INFO=<ID=AF,Number=A,Type=Float,Description="Allele Frequency">
##INFO=<ID=AA,Number=1,Type=String,Description="Ancestral Allele">
##INFO=<ID=DB,Number=0,Type=Flag,Description="dbSNP membership, build 129">
##INFO=<ID=H2,Number=0,Type=Flag,Description="HapMap2 membership">
##FILTER=<ID=q10,Description="Quality below 10">
##FILTER=<ID=s50,Description="Less than 50% of samples have data">
##FORMAT=<ID=GT,Number=1,Type=String,Description="Genotype">
##FORMAT=<ID=GQ,Number=1,Type=Integer,Description="Genotype Quality">
##FORMAT=<ID=DP,Number=1,Type=Integer,Description="Read Depth">
##FORMAT=<ID=HQ,Number=2,Type=Integer,Description="Haplotype Quality">
#CHROM POS ID REF ALT QUAL FILTER INFO FORMAT NA00001 NA00002 NA00003
20 14370 rs6054257 G A 29 PASS NS=3;DP=14;AF=0.5;DB;H2 GT:GQ:DP:HQ 0|0:48:1:51,51 1|0:48:8:51,51 1/1:43:5:.,.
20 17330 . T A 3 q10 NS=3;DP=11;AF=0.017 GT:GQ:DP:HQ 0|0:49:3:58,50 0|1:3:5:65,3 0/0:41:3
20 1110696 rs6040355 A G,T 67 PASS NS=2;DP=10;AF=0.333,0.667;AA=T;DB GT:GQ:DP:HQ 1|2:21:6:23,27 2|1:2:0:18,2 2/2:35:4
20 1230237 . T . 47 PASS NS=3;DP=13;AA=T GT:GQ:DP:HQ 0|0:54:7:56,60 0|0:48:4:51,51 0/0:61:2
20 1234567 microsat1 GTC G,GTCT 50 PASS NS=3;DP=9;AA=G GT:GQ:DP 0/1:35:4 0/2:17:2 1/1:40:3
Our example data is primarily of vcf v3.2 format. Most of our example data includes the line that contains the vcf file header that is shown in Example 3-2.
Example 3-2 Example of a typical vcf file header
##format=VCFv3.2
As a first example of how to work with IBM Spectrum Discover contentsearch policies and custom tags, we define the necessary infrastructure and help categorize the data that is based on the vcf format level.
Creating custom metadata tags
Log on with a user ID that includes data admin or data user rights and browse to Metadata → Tags in the web UI, as shown in Figure 3-27.

Figure 3-27 Creating custom metadata tags

Figure 3-28 Creating Characteristics tag
Click Metadata → Regular Expressions tab and create a regex by clicking Add Regex, as shown in Figure 3-29.

Figure 3-29 Adding regex
Because we want use our regular expression to return a value for our tag that is behind the search pattern, our regex must look similar to the regex that is shown in Example 3-3.
Example 3-3 Regex policy
format=(.*)$
At times, the special characters of a regex are difficult to work with (see Figure 3-30).

Figure 3-30 Our example regex
Browse to Metadata → Policies to create a policy by clicking Add Policy. The policy takes the Metadata Tag and the Regular Expression as input, as shown in Figure 3-31.

Figure 3-31 Creating a policy
The following information is needed to successfully create our example vcf policy. We highlight the names used in our lab test environment to help map back to the fields that are shown in Figure 3-31:
•Name
Choose a meaningful name for your policy. This name is shown in the IBM Spectrum Discover Metadata → Policy window.
Lab test value: vcf_format_pol
•Policy Type
The Policy Type can be AUTOTAG, DEEP_INSPECT, or CONTENT SEARCH. For our example, we want the CONTENT SEARCH agent to work with our data. Select CONTENT SEARCH.
Pre-completed from the previous window selection: CONTENT SEARCH
•Filter
This filter value controls the range of your data to which this policy is applied. Carefully choose the filter to ensure that the policy is applied to only the part of your data for which you intended it. This has a positive effect on performance and reduces policy runtime. In our example, we apply the policy to all *.vcf files
Lab test value: filetype='vcf'
•Agent
This action agent is the agent with which the policy works. The action agent for content search is included in the IBM Spectrum Discover documentation. It must be installed before this step.
Lab test value: contentsearchagent
•Tag
This tag is the tag with which the policy works. We created it as shown in Figure 3-28 on page 54.
Lab test value: vcf_format
•Search Expression
This menu allows you to select on or multiple regex from the list
Lab test value: vcf_format.
•Value
This setting can be True/False or Value matching expression. We are extracting the format of the .vcf file; therefore, we select Value matching expression.
Lab test value: Value matching expression
Choose to activate the policy while creating it. You can also add a schedule to the policy to run it repeatedly.
Click Save to save the policy.
The UI returns to the Metadata → Polices window and shows the running policy as displayed (see Figure 3-32).

Figure 3-32 vcf_format_pol Policy is running
After the policy completed successfully, we can search through our newly enriched metadata. Browse to the Search page and search for the .vcf files, as shown in Example 3-4.
Example 3-4 Search syntax for newly enriched vcf files
filetype='vcf' and vcf_format is not null
The search results resemble the results that are shown in Figure 3-33.

Figure 3-33 All *.vcf files with vcf_format detected
Click the Funnel icon that is to the right of Generate Report for more information.
Open the Columns row on the right side of the window to add the newly created custom metadata tag to the report, as shown in Figure 3-34 on page 60.

Figure 3-34 Adding vcf_format to the report
Click Apply to re-create the report with the added custom metadata tag. The newly created report is displayed, as shown in Figure 3-35.

Figure 3-35 Report with vcf_format column
You can also directly use a search query to create a report that shows (for example) all *.vcf files with a VCF format of 3.2. Our example search expression is shown in Example 3-5.
Example 3-5 Example of a vcf_format search
filetype='vcf' and vcf_format like 'VCFv3.2'
The report resembles the example that is shown in Figure 3-36.

Figure 3-36 All vcf files with v3.2 format
Another search query creates a report that shows (for example) all *.vcf files with a VCF format of 4.0. Our example search expression is shown in Example 3-6.
Example 3-6 Example of a vcf_format search
filetype='vcf' and vcf_format like 'VCFv4.0'
The report resembles the example that is shown in Figure 3-37.

Figure 3-37 All vcf files with v4.0 format
The results page also shows how many hits the search produced, as shown in Figure 3-38.

Figure 3-38 The 46 items in the search
Our example produces the results with the respective search terms as listed in Table 3-2.
Table 3-2 vcf_format search hits
|
Search expression
|
Number of hits
|
|
filetype='vcf'
|
46
|
|
filetype='vcf' and vcf_format is not null
|
46
|
|
filetype='vcf' and vcf_format like 'VCFv3.2'
|
44
|
|
filetype='vcf' and vcf_format like 'VCFv4.0'
|
2
|
|
vcf_format='VCFv3.2'
|
44
|
|
vcf_format='VCFv4.0'
|
2
|
With this simple analysis, we verified that all .vcf files are accounted for. The specific syntax of the strings we are looking for in the data can create a 100% fool proof regex challenging. It is always a good idea to perform a counter calculation.
To continue to work with the data, we run the search that is shown in Example 3-7 and generate a report from it.
Example 3-7 vcf_format search for report generation
vcf_format is not null

Figure 3-39 Search Results window
Enter a meaningful name for the report and click Submit to generate it, as shown in Figure 3-40.

Figure 3-40 Generate report
Click the Reports icon on the left side of the IBM Spectrum Discover UI. The list with available reports is displayed, as shown in Figure 3-41.

Figure 3-41 Available Reports
Click Download Report in the Actions column, as shown in Figure 3-42. You can open the report as comma-separated value (.csv) files directly into a third-party application; for example, Microsoft Excel. You can also download the report and save it to disk.

Figure 3-42 Download or open *.csv
The report contains the metadata tags that are available for the selected files and objects, as shown in Figure 3-43.

Figure 3-43 *.csv file in Excel with the vcf_format column
3.3.2 Digital Imaging and Communications in Medicine use case
Digital Imaging and Communications in Medicine (DICOM) is a standard for handling, storing, printing, and transmitting information in medical imaging. It includes a file format definition and a network communications protocol.
In this example, we focus on the file format definition and use it to extract metadata from the DICOM files for use in IBM Spectrum Discover. The DICOM files in our example are stored as *.dcm files. The file extension can also be different, such as dcm30 or nonexistent.
In this example, we also describe the use of the REpresentational State Transfer (REST) application programming interface (API). For more information about the use of the IBM Spectrum Discover REST API, see IBM Knowledge Center.
A typical .dcm file header resembles the example that is shown in Example 3-8.
Example 3-8 Example of the beginning of a typical dcm file header
(0008, 0005) Specific Character Set CS: 'ISO_IR 100'
(0008, 0008) Image Type CS: ['ORIGINAL', 'PRIMARY', 'AXIAL', 'CT_SOM5 SPI']
(0008, 0012) Instance Creation Date DA: '20150127'
(0008, 0013) Instance Creation Time TM: '164740.587000'
(0008, 0016) SOP Class UID UI: CT Image Storage
(0008, 0018) SOP Instance UID UI: 1.3.6.1.4.1.9590.100.1.2.261253712234905766225279748492392506610
(0008, 0020) Study Date DA: '20150127'
(0008, 0021) Series Date DA: '20160923'
(0008, 0022) Acquisition Date DA: '20150127'
(0008, 0023) Content Date DA: '20150127'
(0008, 002a) Acquisition DateTime DT: '20150127164818.751986'
(0008, 0030) Study Time TM: '155258.755000'
(0008, 0031) Series Time TM: '130446.484542'
(0008, 0032) Acquisition Time TM: '164818.751986'
(0008, 0033) Content Time TM: '164818.751986'
(0008, 0050) Accession Number SH: u''
(0008, 0060) Modality CS: 'CT'
(0008, 0070) Manufacturer LO: u'Siemens Healthcare'
(0008, 0080) Institution Name LO: u'Siemens Healthcare GmbH MED CT'
(0008, 0081) Institution Address ST: u'Siemensstrasse 1'
(0008, 0090) Referring Physician's Name PN: u'User'
(0008, 1030) Study Description LO: u'UNKNOWN'
(0008, 103e) Series Description LO: u'CL514_BODYAXW 5.0 I31f 2 B31f 0.6 (0.6) [A,0]'
(0008, 1050) Performing Physician's Name PN: u'User'
(0008, 1090) Manufacturer's Model Name LO: u'Somatom Definition Flash'
[…]
Most of our example data contains the line that is shown in Example 3-9 in the header.
Example 3-9 Example of a typical dcm file header
(0010, 0010) Patient's Name PN: u'734_201_164'
As a first example of how to work with IBM Spectrum Discover contentsearch policies and custom tags, we define the necessary infrastructure and help categorize the data based on the information Patient's Name in the DICOM file metadata.
Creating custom metadata tags
Log on with a user ID that includes data admin or data user rights and browse to Metadata → Tags in the web UI, as shown in Figure 3-44.

Figure 3-44 Creating custom metadata tags
Click Add and create an organizational tag with the name dicom_pname and the type Characteristics, as shown in Figure 3-45.

Figure 3-45 Creating Characteristics tag
As an alternative to creating a characteristics tag with the web UI, the REST API can be used. Log on to the IBM Spectrum Discover console with an SSH client and run the commands that are shown in Example 3-10.
Example 3-10 Create characteristics tag with REST API
export SD_USER=sdadmin
export SD_PASSWORD=Passw0rd
export OVA=localhost
gettoken
tcurl_json https://localhost/policyengine/v1/tags -d '{"tag": "dicom_pname", "type": "Characteristics", "value": "[]"}' -X POST
Tag dicom_pname added
[moadmin@art3mis ~]$
Verify the successful addition of the dicom_pname tag with the command that is shown in Example 3-11.
Example 3-11 .Verify characteristics tag creation REST API
tcurl_json https://localhost/policyengine/v1/tags/dicom_pname | jq
% Total % Received % Xferd Average Speed Time Time Time Current
Dload Upload Total Spent Left Speed
100 64 100 64 0 0 214 0 --:--:-- --:--:-- --:--:-- 214
{
"tag": "dicom_pname",
"type": "Characteristics",
"value": "[]"
}
[moadmin@art3mis ~]$
Click Metadata → Regular Expressions tab and create a regex by clicking Add Regex, as shown in Figure 3-46.

Figure 3-46 Adding regex
Because we want to use our regular expression to return a value for our tag that is behind the actual search pattern, our regex must look similar to the example that is shown in Example 3-12.
Example 3-12 Regex policy
^.*Patient.ssNames+[A-Z]+:s(.*)$
Sometimes, the special characters of a regex are difficult to work with (see Figure 3-47).

Figure 3-47 Our (Redpaper) example regex
As an alternative to creating a regex with the web UI, the REST API can be used. Log on to the IBM Spectrum Discover console with an SSH client and run the commands that are shown in Example 3-13.
Example 3-13 Create regex with REST API
tcurl_json https://localhost/policyengine/v1/regex -d '{"regex_id": "dicom_pname", "pattern": "^.*Patients\sName\s+[A-Z]+:\s(.*)$", "description": "Find DICOM Patients Name"}' -X POST
Regex dicom_pname added
[moadmin@art3mis ~]$
Verify the successful addition of the dicom_pname regex with the command shown in Example 3-14.
Example 3-14 Verify regex creation REST API
tcurl_json https://localhost/policyengine/v1/regex/dicom_pname | jq
% Total % Received % Xferd Average Speed Time Time Time Current
Dload Upload Total Spent Left Speed
100 123 100 123 0 0 425 0 --:--:-- --:--:-- --:--:-- 427
{
"pattern": "^.*Patient.s\sName\s+[A-Z]+:\s(.*)$",
"description": "Find DICOM Patients Name",
"regex_id": "dicom_pname"
}
[moadmin@art3mis ~]$
Click Metadata → Policies to create a policy by clicking Add Policy. The policy takes the Metadata Tag and the Regular Expression as input, as shown in Figure 3-48.

Figure 3-48 Creating a policy
The following information is needed to successfully create our example vcf policy. We highlight the names that are used in our lab test environment to help map back to the fields that are shown in Figure 3-48:
•Name
Choose a meaningful name for your policy. This name is shown in the IBM Spectrum Discover Metadata → Policy window.
Lab test value: dicom_pname_pol
•Policy Type
The Policy Type can be AUTOTAG, DEEP_INSPECT, or CONTENT SEARCH. For our example, we want the CONTENT SEARCH agent to work with our data. Select CONTENT SEARCH.
Pre-completed from previous window selection: CONTENT SEARCH
•Filter
This filter value controls the range of your data to which this policy is applied. Carefully choose the filter to ensure that the policy is applied to the part of your data that you intended it for only. This has a positive effect on performance and reduces policy runtime. In our example, we apply the policy to all *.dcm files.
Lab test value: filetype='dcm'
•Agent
This action agent works with the policy. The action agent for content search is included in the IBM Spectrum Discover documentation. It must be installed before this step.
Lab test value: contentsearchagent
•Tag
This tag is the tag with which the policy works. We created it as shown in Figure 3-28 on page 54. The value of the DICOM metadata is written into this tag.
Lab test value: dicom_pname
•Search Expression
This menu allows you to select on or multiple regex from the list
Lab test value: dicom_pname
•Value
The setting for Value can be True/False or Value matching expression. We are extracting the Patient's Name from the .dcm file; therefore, we select Value matching expression.
Lab test value: Value matching expression
Choose to activate the policy while creating it. You can also add a schedule to the policy to run it repeatedly.
Click Save to save the policy.
The UI returns to the Metadata → Polices window and shows the running policy as shown in Figure 3-49 on page 74.
As an alternative to creating a policy with the web UI, the REST API can be used. Log on to the IBM Spectrum Discover console with an SSH client and prepare a JavaScript Object Notation (JSON) file, as shown in Example 3-15.
Example 3-15 Create JSON file
cat dicom_pname_pol.json | jq
{
"pol_id": "dicom_pname_pol",
"action_id": "CONTENTSEARCH",
"action_params": {
"agent": "contentsearchagent",
"search_tags": [
{
"match_type": "value",
"tag": "dicom_pname",
"patterns": [
"dicom_pname"
]
}
]
},
"pol_filter": "filename LIKE '%dcm%'",
"schedule": "NOW",
"pol_state": "active"
}
Using jq in the command allows you to verify that the syntax of your JSON file is correct. Run the command that is shown in Example 3-16 to create the policy.
Example 3-16 Create policy with REST API
tcurl_json https://localhost:443/policyengine/v1/policies -X POST -d @dicom_pname_pol.json
Policy 'dicom_pname_pol' added
[moadmin@art3mis ~]$
Verify the successful addition of the dicom_pname_pol policy with the command that is shown in Example 3-17.
Example 3-17 Verify policy creation with REST API
tcurl_json https://localhost:443/policyengine/v1/policies/dicom_idate_pol5 | jq
% Total % Received % Xferd Average Speed Time Time Time Current
Dload Upload Total Spent Left Speed
100 587 100 587 0 0 1577 0 --:--:-- --:--:-- --:--:-- 1582
{
"pol_status": "running",
"action_params": "{"agent": "contentsearchagent", "search_tags": [{"patterns": ["dicom_pname"], "tag": "dicom_pname", "match_type": "value"}]}",
"pol_id": "dicom_pname_pol",
"schedule": "NOW",
"collection_list": null,
"pol_state": "active",
"execution_info": "{"submitted_count": 120000, "total_count": 512447, "start_time": "2019-06-27_22:43:29", "failed_count": 1, "completed_count": 12000}",
"explicit": "true",
"policy_owner": null,
"last_updated_by": null,
"pol_filter": "filename LIKE '%dcm%'",
"action_id": "CONTENTSEARCH"
}
[moadmin@art3mis ~]$
Independent from the source of creation of the policy, the web UI shows the policy running, as shown in Figure 3-49.

Figure 3-49 dicom_pname_pol Policy is running
After the policy completed successfully, we can search through our newly enriched metadata. Browse to the Search page and search for the .dcm files with the search expression that is shown in Example 3-18.
Example 3-18 Search syntax for newly enriched dcm files
filetype='dcm' and dicom_pname is not null
The search resembles the example that is shown in Figure 3-50.

Figure 3-50 All *.dcm files with dicom_pname detected
Click the Funnel icon to the right of Generate Report for more information. Open the Columns row on the right side of the window to add the newly created custom metadata tag to the report, as shown in Figure 3-51.

Figure 3-51 Adding dicom_pname tag to the report
Click Apply to re-create the report with the added custom metadata tag. The newly created report is displayed, as shown in Figure 3-52.

Figure 3-52 Report with dicom_pname column
We get 10,000 hits. We create a search query for a specific patient that is named Anonymous3159, as shown in Example 3-19.
Example 3-19 Example of a dicom_imagetype search
dicom_pname like '%Anonymous3159%'

Figure 3-53 Search results for specific patient
We get 1,284 hits. You can repeat this process to add the metadata tag dicom_imagetype to IBM Spectrum Discover. The regex is shown in Example 3-20.
Example 3-20 .dicom_imagetype search
^.*ImagesTypes+[A-Z]+:s(.*)$
After you repeated these steps, you can search for all of the files that are of a specific imagetype, as shown in Example 3-21.
Example 3-21 Example of a combined dicom_pname and dicom_imagetype search
dicom_pname like '%Anonymous3159%' and dicom_imagetype is not null
After adding the column dicom_imagetype to the report (see Figure 3-53 on page 78), the report resembles the example that is shown in Figure 3-54.

Figure 3-54 All dcm files of patient "Anonymous3159" showing dicom_imagetype
Search for all DICOM files of patient Anonymous315 that are of the image type ORIGINAL, SECONDARY, AXIAL. A successful search query is shown in Example 3-22.
Example 3-22 Example of a search query for combined dicom_pname and dicom_imagetype
dicom_pname like '%Anonymous3159%' and dicom_imagetype like '%ORIGINAL%SECONDARY%AXIAL%'
The report resembles the example that is shown in Figure 3-55.

Figure 3-55 All dcm files of patient Anonymous3159 of imagetype ORIGINAL SECONDARY AXIAL
We get 1,284 hits. As a form of control, our counter-calculation results in all available files for patient Anonymous3159 are of the same DICOM Image Type. Enter a meaningful name for the report and click Submit to generate the report, as shown in Figure 3-56.
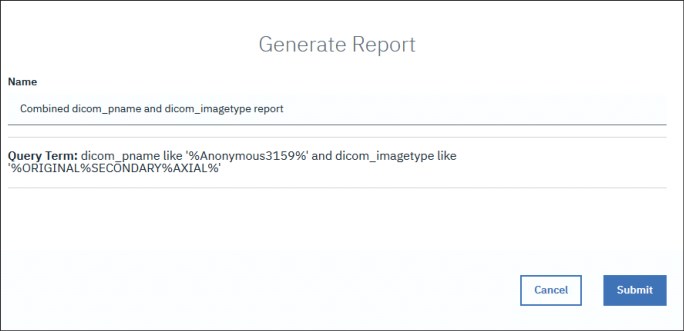
Figure 3-56 Generate report
Click the Reports icon on the left side of the IBM Spectrum Discover UI. The list with available reports is displayed, as shown in Figure 3-57.

Figure 3-57 Available Reports
Click your newly created report. Click Download Report in the Actions column, as shown in Figure 3-58. You can open the report as a .csv file directly into a third-party application; for example, Microsoft Excel. You can also download and save the report.

Figure 3-58 Download or open *.csv
The report contains the metadata tags that are available for the selected files and objects, as shown in Figure 3-59.

Figure 3-59 *.csv file in Excel with the dicom columns
Much metadata can be in certain file types, including DICOM. Manually creating tags, regex, and policies can take some time. Next, we describe how to partially automate creating multiple tags, regex, and policies.
Start with inspecting the DICOM metadata headers.
The DICOM header looks similar to our example that is shown in Example 3-8 on page 67 at the beginning of this use case. Develop a naming scheme that is derived from the metadata headers. Our example is shown in Example 3-23.
Example 3-23 Example naming scheme for DICOM tags, regex, and policies
Instance Creation Time dicom_ictime
SOP Class UID dicom_sopcuid
SOP Instance UID dicom_sopiuid10
Study Date dicom_studate
Series Date dicom_serdate
Acquisition Date dicom_adate
Content Date dicom_contdate
Acquisition DateTime dicom_adatetime
Study Time dicom_stutime
Series Time dicom_sertime
Acquisition Time dicom_atime
Content Time dicom_conttime
Accession Number dicom_accnum
Modality dicom_moda
Manufacturer dicom_manu
Institution Name dicom_iname
Institution Address dicom_iaddress
Referring Physician's Name dicom_refname
Study Description dicom_studesc
Series Description dicom_serdesc
Performing Physician's Name dicom_physname
Manufacturer's Model Name dicom_manmodname
With this naming scheme, we can start to create a multitude of tags by using the REST API, as shown Example 3-24.
Example 3-24 Example tag creation following a naming scheme
tcurl_json https://localhost/policyengine/v1/tags -d '{"tag": "dicom_scset", "type": "Characteristics", "value": "[]"}' -X POST
tcurl_json https://localhost/policyengine/v1/tags -d '{"tag": "dicom_itype", "type": "Characteristics", "value": "[]"}' -X POST
tcurl_json https://localhost/policyengine/v1/tags -d '{"tag": "dicom_icdate", "type": "Characteristics", "value": "[]"}' -X POST
tcurl_json https://localhost/policyengine/v1/tags -d '{"tag": "dicom_ictime", "type": "Characteristics", "value": "[]"}' -X POST
tcurl_json https://localhost/policyengine/v1/tags -d '{"tag": "dicom_sopcuid", "type": "Characteristics", "value": "[]"}' -X POST
tcurl_json https://localhost/policyengine/v1/tags -d '{"tag": "dicom_sopiuid", "type": "Characteristics", "value": "[]"}' -X POST
tcurl_json https://localhost/policyengine/v1/tags -d '{"tag": "dicom_studate", "type": "Characteristics", "value": "[]"}' -X POST
tcurl_json https://localhost/policyengine/v1/tags -d '{"tag": "dicom_serdate", "type": "Characteristics", "value": "[]"}' -X POST
tcurl_json https://localhost/policyengine/v1/tags -d '{"tag": "dicom_adate", "type": "Characteristics", "value": "[]"}' -X POST
tcurl_json https://localhost/policyengine/v1/tags -d '{"tag": "dicom_contdate", "type": "Characteristics", "value": "[]"}' -X POST
tcurl_json https://localhost/policyengine/v1/tags -d '{"tag": "dicom_adatetime", "type": "Characteristics", "value": "[]"}' -X POST
tcurl_json https://localhost/policyengine/v1/tags -d '{"tag": "dicom_stutime", "type": "Characteristics", "value": "[]"}' -X POST
tcurl_json https://localhost/policyengine/v1/tags -d '{"tag": "dicom_sertime", "type": "Characteristics", "value": "[]"}' -X POST
tcurl_json https://localhost/policyengine/v1/tags -d '{"tag": "dicom_atime", "type": "Characteristics", "value": "[]"}' -X POST
tcurl_json https://localhost/policyengine/v1/tags -d '{"tag": "dicom_conttime", "type": "Characteristics", "value": "[]"}' -X POST
tcurl_json https://localhost/policyengine/v1/tags -d '{"tag": "dicom_accnum", "type": "Characteristics", "value": "[]"}' -X POST
tcurl_json https://localhost/policyengine/v1/tags -d '{"tag": "dicom_moda", "type": "Characteristics", "value": "[]"}' -X POST
tcurl_json https://localhost/policyengine/v1/tags -d '{"tag": "dicom_manu", "type": "Characteristics", "value": "[]"}' -X POST
tcurl_json https://localhost/policyengine/v1/tags -d '{"tag": "dicom_iname", "type": "Characteristics", "value": "[]"}' -X POST
tcurl_json https://localhost/policyengine/v1/tags -d '{"tag": "dicom_iaddress", "type": "Characteristics", "value": "[]"}' -X POST
tcurl_json https://localhost/policyengine/v1/tags -d '{"tag": "dicom_refname", "type": "Characteristics", "value": "[]"}' -X POST
tcurl_json https://localhost/policyengine/v1/tags -d '{"tag": "dicom_studesc", "type": "Characteristics", "value": "[]"}' -X POST
tcurl_json https://localhost/policyengine/v1/tags -d '{"tag": "dicom_serdesc", "type": "Characteristics", "value": "[]"}' -X POST
tcurl_json https://localhost/policyengine/v1/tags -d '{"tag": "dicom_physname", "type": "Characteristics", "value": "[]"}' -X POST
tcurl_json https://localhost/policyengine/v1/tags -d '{"tag": "dicom_manmodname", "type": "Characteristics", "value": "[]"}' -X POST
We also create many regex, as shown in Example 3-25.
Example 3-25 Example tag creation following a naming scheme
tcurl_json https://localhost/policyengine/v1/regex -d '{"regex_id": "dicom_scset", "pattern": "^.*Specific\sCharacter\sSet\s+[A-Z]+:\s(.*)$", "description": "Find DICOM Specific Character Set"}' -X POST
tcurl_json https://localhost/policyengine/v1/regex -d '{"regex_id": "dicom_itype", "pattern": "^.*Image\sType\s+[A-Z]+:\s(.*)$", "description": "Find DICOM Image Type"}' -X POST
tcurl_json https://localhost/policyengine/v1/regex -d '{"regex_id": "dicom_icdate", "pattern": "^.*Instance\sCreation\sDate\s+[A-Z]+:\s(.*)$", "description": "Find DICOM Instance Creation Date"}' -X POST
tcurl_json https://localhost/policyengine/v1/regex -d '{"regex_id": "dicom_ictime", "pattern": "^.*Instance\sCreation\sTime\s+[A-Z]+:\s(.*)$", "description": "Find DICOM Instance Creation Time"}' -X POST
tcurl_json https://localhost/policyengine/v1/regex -d '{"regex_id": "dicom_sopcuid", "pattern": "^.*SOP\sClass\sUID\s+[A-Z]+:\s(.*)$", "description": "Find DICOM SOP Class UID"}' -X POST
tcurl_json https://localhost/policyengine/v1/regex -d '{"regex_id": "dicom_sopiuid", "pattern": "^.*SOP\sInstance\sUID\s+[A-Z]+:\s(.*)$", "description": "Find DICOM SOP Instance UID"}' -X POST
tcurl_json https://localhost/policyengine/v1/regex -d '{"regex_id": "dicom_studate", "pattern": "^.*Study\sDate\s+[A-Z]+:\s(.*)$", "description": "Find DICOM Study Date"}' -X POST
tcurl_json https://localhost/policyengine/v1/regex -d '{"regex_id": "dicom_serdate", "pattern": "^.*Series\sDate\s+[A-Z]+:\s(.*)$", "description": "Find DICOM Series Date"}' -X POST
tcurl_json https://localhost/policyengine/v1/regex -d '{"regex_id": "dicom_adate", "pattern": "^.*Acquisition\sDate\s+[A-Z]+:\s(.*)$", "description": "Find DICOM Acquisition Date"}' -X POST
tcurl_json https://localhost/policyengine/v1/regex -d '{"regex_id": "dicom_contdate", "pattern": "^.*Content\sDate\s+[A-Z]+:\s(.*)$", "description": "Find DICOM Content Date"}' -X POST
tcurl_json https://localhost/policyengine/v1/regex -d '{"regex_id": "dicom_adatetime", "pattern": "^.*Acquisition\sDateTime\s+[A-Z]+:\s(.*)$", "description": "Find DICOM Acquisition DateTime"}' -X POST
tcurl_json https://localhost/policyengine/v1/regex -d '{"regex_id": "dicom_stutime", "pattern": "^.*Study\sTime\s+[A-Z]+:\s(.*)$", "description": "Find DICOM Study Time"}' -X POST
tcurl_json https://localhost/policyengine/v1/regex -d '{"regex_id": "dicom_sertime", "pattern": "^.*Series\sTime\s+[A-Z]+:\s(.*)$", "description": "Find DICOM Series Time"}' -X POST
tcurl_json https://localhost/policyengine/v1/regex -d '{"regex_id": "dicom_atime", "pattern": "^.*Acquisition\sTime\s+[A-Z]+:\s(.*)$", "description": "Find DICOM Acquisition Time"}' -X POST
tcurl_json https://localhost/policyengine/v1/regex -d '{"regex_id": "dicom_conttime", "pattern": "^.*Content\sTime\s+[A-Z]+:\s(.*)$", "description": "Find DICOM Content Time"}' -X POST
tcurl_json https://localhost/policyengine/v1/regex -d '{"regex_id": "dicom_accnum", "pattern": "^.*Accession\sNumber\s+[A-Z]+:\s(.*)$", "description": "Find DICOM Accession Number"}' -X POST
tcurl_json https://localhost/policyengine/v1/regex -d '{"regex_id": "dicom_moda", "pattern": "^.*Modality\s+[A-Z]+:\s(.*)$", "description": "Find DICOM Modality"}' -X POST
tcurl_json https://localhost/policyengine/v1/regex -d '{"regex_id": "dicom_manu", "pattern": "^.*Manufacturer\s+[A-Z]+:\s(.*)$", "description": "Find DICOM Manufacturer"}' -X POST
tcurl_json https://localhost/policyengine/v1/regex -d '{"regex_id": "dicom_iname", "pattern": "^.*Institution\sName\s+[A-Z]+:\s(.*)$", "description": "Find DICOM Institution Name"}' -X POST
tcurl_json https://localhost/policyengine/v1/regex -d '{"regex_id": "dicom_iaddress", "pattern": "^.*Institution\sAddress\s+[A-Z]+:\s(.*)$", "description": "Find DICOM Institution Address"}' -X POST
tcurl_json https://localhost/policyengine/v1/regex -d '{"regex_id": "dicom_refname", "pattern": "^.*Referring\sPhysician.s\sName\s+[A-Z]+:\s(.*)$", "description": "Find DICOM Referring Physicians Name"}' -X POST
tcurl_json https://localhost/policyengine/v1/regex -d '{"regex_id": "dicom_studesc", "pattern": "^.*Study\sDescription\s+[A-Z]+:\s(.*)$", "description": "Find DICOM Study Description"}' -X POST
tcurl_json https://localhost/policyengine/v1/regex -d '{"regex_id": "dicom_serdesc", "pattern": "^.*Series\sDescription\s+[A-Z]+:\s(.*)$", "description": "Find DICOM Series Description"}' -X POST
tcurl_json https://localhost/policyengine/v1/regex -d '{"regex_id": "dicom_physname", "pattern": "^.*Performing\sPhysician.s\sName\s+[A-Z]+:\s(.*)$", "description": "Find DICOM Performing Physicians Name"}' -X POST
tcurl_json https://localhost/policyengine/v1/regex -d '{"regex_id": "dicom_manmodname", "pattern": "^.*Manufacturer.s\sModel\sName\s+[A-Z]+:\s(.*)$", "description": "Find DICOM Manufacturers Model Name"}' -X POST
Finally, we create many polices by using the tags from Example 3-24 on page 83 and the regex from Example 3-25 on page 84. To create many JSON files, we use our helper script, as shown in Example 3-26. It is creating JSON files that can be used to create polices for this specific example. The policy filter is fixed to all *.dcm files. The output is a JSON file that follows the naming scheme with an added _pol.json at the end; for example, dicom_scset_pol.json.
Example 3-26 JSON file creation helper script
cat create_json.sh
echo "{ " > $1\_pol.json
echo " "pol_id":""$1"_pol", " >> $1\_pol.json
echo " "action_id":"CONTENTSEARCH", " >> $1\_pol.json
echo " "action_params":{ " >> $1\_pol.json
echo " "agent":"contentsearchagent", " >> $1\_pol.json
echo " "search_tags":[ " >> $1\_pol.json
echo " { " >> $1\_pol.json
echo " "match_type":"value", " >> $1\_pol.json
echo " "tag":""$1"", " >> $1\_pol.json
echo " "patterns":[ " >> $1\_pol.json
echo " "$1" " >> $1\_pol.json
echo " ] " >> $1\_pol.json
echo " } " >> $1\_pol.json
echo " ] " >> $1\_pol.json
echo " }, " >> $1\_pol.json
echo " "pol_filter":"filename LIKE '%dcm%'", " >> $1\_pol.json
echo " "schedule":"NOW", " >> $1\_pol.json
echo " "pol_state":"active" " >> $1\_pol.json
echo "}
You can use the jq tool to verify the syntax of your JSON files by running the command that is shown in Example 3-27.
Example 3-27 Verification of JSON syntax with jq
cat dicom_scset_pol.json | jq
{
"pol_id": "dicom_scset_pol",
"action_id": "CONTENTSEARCH",
"action_params": {
"agent": "contentsearchagent",
"search_tags": [
{
"match_type": "value",
"tag": "dicom_scset",
"patterns": [
"dicom_scset"
]
}
]
},
"pol_filter": "filename LIKE '%dcm%'",
"schedule": "NOW",
"pol_state": "active"
}
By using the naming scheme, we run the helper script to create the JSON files, as shown in Example 3-28.
Example 3-28 Calling the JSON helper script
./create_json.sh dicom_scset
./create_json.sh dicom_itype
./create_json.sh dicom_icdate
./create_json.sh dicom_ictime
./create_json.sh dicom_sopcuid
./create_json.sh dicom_sopiuid
./create_json.sh dicom_studate
./create_json.sh dicom_serdate
./create_json.sh dicom_adate
./create_json.sh dicom_contdate
./create_json.sh dicom_adatetime
./create_json.sh dicom_stutime
./create_json.sh dicom_sertime
./create_json.sh dicom_atime
./create_json.sh dicom_conttime
./create_json.sh dicom_accnum
./create_json.sh dicom_moda
./create_json.sh dicom_manu
./create_json.sh dicom_iname
./create_json.sh dicom_iaddress
./create_json.sh dicom_refname
./create_json.sh dicom_studesc
./create_json.sh dicom_serdesc
./create_json.sh dicom_physname
./create_json.sh dicom_manmodname
With the prepared JSON files, we can run the policy creation commands as shown in Example 3-29.
Example 3-29 Creating the policies
tcurl_json https://localhost:443/policyengine/v1/policies -X POST -d @dicom_scset_pol.json
tcurl_json https://localhost:443/policyengine/v1/policies -X POST -d @dicom_itype_pol.json
tcurl_json https://localhost:443/policyengine/v1/policies -X POST -d @dicom_icdate_pol.json
tcurl_json https://localhost:443/policyengine/v1/policies -X POST -d @dicom_ictime_pol.json
tcurl_json https://localhost:443/policyengine/v1/policies -X POST -d @dicom_sopcuid_pol.json
tcurl_json https://localhost:443/policyengine/v1/policies -X POST -d @dicom_sopiuid_pol.json
tcurl_json https://localhost:443/policyengine/v1/policies -X POST -d @dicom_studate_pol.json
tcurl_json https://localhost:443/policyengine/v1/policies -X POST -d @dicom_serdate_pol.json
tcurl_json https://localhost:443/policyengine/v1/policies -X POST -d @dicom_adate_pol.json
tcurl_json https://localhost:443/policyengine/v1/policies -X POST -d @dicom_contdate_pol.json
tcurl_json https://localhost:443/policyengine/v1/policies -X POST -d @dicom_adatetime_pol.json
tcurl_json https://localhost:443/policyengine/v1/policies -X POST -d @dicom_stutime_pol.json
tcurl_json https://localhost:443/policyengine/v1/policies -X POST -d @dicom_sertime_pol.json
tcurl_json https://localhost:443/policyengine/v1/policies -X POST -d @dicom_atime_pol.json
tcurl_json https://localhost:443/policyengine/v1/policies -X POST -d @dicom_conttime_pol.json
tcurl_json https://localhost:443/policyengine/v1/policies -X POST -d @dicom_accnum_pol.json
tcurl_json https://localhost:443/policyengine/v1/policies -X POST -d @dicom_moda_pol.json
tcurl_json https://localhost:443/policyengine/v1/policies -X POST -d @dicom_manu_pol.json
tcurl_json https://localhost:443/policyengine/v1/policies -X POST -d @dicom_iname_pol.json
tcurl_json https://localhost:443/policyengine/v1/policies -X POST -d @dicom_iaddress_pol.json
tcurl_json https://localhost:443/policyengine/v1/policies -X POST -d @dicom_refname_pol.json
tcurl_json https://localhost:443/policyengine/v1/policies -X POST -d @dicom_studesc_pol.json
tcurl_json https://localhost:443/policyengine/v1/policies -X POST -d @dicom_serdesc_pol.json
tcurl_json https://localhost:443/policyengine/v1/policies -X POST -d @dicom_physname_pol.json
tcurl_json https://localhost:443/policyengine/v1/policies -X POST -d @dicom_manmodname_pol.json

Figure 3-60 Many policies running
Example 3-30 shows how to use the REST API to delete a multitude of policies.
Example 3-30 Delete a multitude of policies
tcurl_json https://localhost:443/policyengine/v1/policies/dicom_itype_pol -X DELETE
tcurl_json https://localhost:443/policyengine/v1/policies/dicom_icdate_pol -X DELETE
tcurl_json https://localhost:443/policyengine/v1/policies/dicom_ictime_pol -X DELETE
tcurl_json https://localhost:443/policyengine/v1/policies/dicom_sopcuid_pol -X DELETE
tcurl_json https://localhost:443/policyengine/v1/policies/dicom_sopiuid_pol -X DELETE
tcurl_json https://localhost:443/policyengine/v1/policies/dicom_studate_pol -X DELETE
tcurl_json https://localhost:443/policyengine/v1/policies/dicom_serdate_pol -X DELETE
tcurl_json https://localhost:443/policyengine/v1/policies/dicom_adate_pol -X DELETE
tcurl_json https://localhost:443/policyengine/v1/policies/dicom_contdate_pol -X DELETE
tcurl_json https://localhost:443/policyengine/v1/policies/dicom_adatetime_pol -X DELETE
tcurl_json https://localhost:443/policyengine/v1/policies/dicom_stutime_pol -X DELETE
tcurl_json https://localhost:443/policyengine/v1/policies/dicom_sertime_pol -X DELETE
tcurl_json https://localhost:443/policyengine/v1/policies/dicom_atime_pol -X DELETE
tcurl_json https://localhost:443/policyengine/v1/policies/dicom_conttime_pol -X DELETE
tcurl_json https://localhost:443/policyengine/v1/policies/dicom_accnum_pol -X DELETE
tcurl_json https://localhost:443/policyengine/v1/policies/dicom_moda_pol -X DELETE
tcurl_json https://localhost:443/policyengine/v1/policies/dicom_manu_pol -X DELETE
tcurl_json https://localhost:443/policyengine/v1/policies/dicom_iname_pol -X DELETE
tcurl_json https://localhost:443/policyengine/v1/policies/dicom_iaddress_pol -X DELETE
tcurl_json https://localhost:443/policyengine/v1/policies/dicom_refname_pol -X DELETE
tcurl_json https://localhost:443/policyengine/v1/policies/dicom_studesc_pol -X DELETE
tcurl_json https://localhost:443/policyengine/v1/policies/dicom_serdesc_pol -X DELETE
tcurl_json https://localhost:443/policyengine/v1/policies/dicom_physname_pol -X DELETE
tcurl_json https://localhost:443/policyengine/v1/policies/dicom_manmodname_pol -X DELETE
3.4 Summary
The use cases that are described in this chapter are only example scenarios where IBM Spectrum Discover can be a powerful tool to help system administrators optimize the use of storage systems, manage and enforce an organization’s data governance policies, or use deep inspection to provide insight to data contents.
The flexible and extensible architecture of IBM Spectrum Discover makes it an excellent metadata management system for almost any use case where greater insight of data that is contained within the physical confines of an enterprise’s data center, across clouds, or both simultaneously, is required.
..................Content has been hidden....................
You can't read the all page of ebook, please click here login for view all page.