First, let's see which components we need for the project. Apart from the Yún board, you will need three components: a USB camera, a PIR motion sensor, and an SD card. We will only make direct connections to Yún in this part, so you won't need a breadboard to make electrical connections.
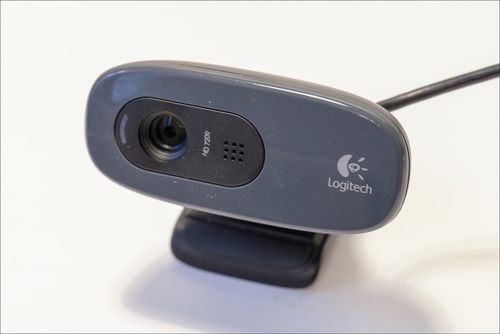
The most important component of this project is the USB camera. We are using a standard USB webcam from Logitech, the C700 model, which can record pictures up to the HD resolution. Of course, you can use other cameras if you already have one on your desk. Make sure that the camera is compatible with USB Video Class (UVC). Most of the recent webcams are compatible with this protocol. It might work with a camera that is not officially compatible with UVC, but there is no guarantee. You can find a list of all UVC compatible cameras at http://en.wikipedia.org/wiki/List_of_USB_video_class_devices.
Also, try to choose a camera with at least HD resolution, so you can get nice and clear pictures. It's not so important for the streaming part, but can be great if you want to use this project for other applications than security, for example, to create time-lapse videos. The following is an image of the USB camera we are using, the C700 USB webcam from Logitech:
Then, there is the PIR motion sensor. This sensor is a really inexpensive sensor that uses infrared pictures to detect motion in a room from anything that emits heat, such as humans. We could have used the camera directly to detect motion, but that would have not been so efficient. The camera uses quite a lot of power when it is on, whereas a PIR motion sensor uses nearly no power. It would also have been more difficult to write the software required to detect motion efficiently from the camera recording. We used a PIR motion sensor from Parallax, which you can see in the following image:

Again, you can use other brands of PIR sensors. The main thing to consider is that it should work with 5V voltage levels because that is the voltage level used by the Yún. Most sensors work with both 3.3V and 5V voltage levels, so you shouldn't have many problems with this characteristic. When motion is detected, it should simply put a logical high level on its signal pin.
For the SD card, we used a standard micro SD card. Usually, you will have one already in your digital camera or smartphone. You will need to format it correctly so that the Yún can use it. We recommend that you use the official SD card formatter from the SD card association, see https://www.sdcard.org/downloads/formatter_4/.
Now, on the software side, you will need a bit more than just the Arduino IDE. We are going to install the required software for the camera directly on the Yún board when we connect to it via SSH, but you will need the Temboo Python SDK to upload pictures on to Dropbox. You can find the SDK at https://www.temboo.com/download.
Then, you also need to have a Dropbox account, so you can upload pictures on to it. You can simply create an account by going to https://www.dropbox.com/home.
Once your account is created, you need to create an app that will be used by your project. This basically means that you have to authorize the project you are going to build in this chapter to automatically send pictures to your Dropbox account without having to enter your login and password every time. You will also be given all the required information (such as an API key) that we will enter later in the Python script on Yún.
Perform the following steps to create an app:
- To create an app, first go to https://www.dropbox.com/developers/apps.
- Then, click on Create app in the top-right corner of the window. You can now choose the type of app you want to create. In our case, we want to use the Dropbox API directly, as shown in the following screenshot:

- You will then be prompted to choose the kind of data your app needs to store. We want to upload pictures, so choose Files and datastores, as shown in the following screenshot:

- You can then finish the process of creating your Dropbox app.
- On the confirmation page that describes the app, you will need to write down the App key and App secret, which we will need for the rest of the project.
- Also, make sure that the Permission type field is set to App folder. This will ensure that the pictures are uploaded to the folder dedicated to the app and that the Yún won't have access to the rest of your Dropbox folder.
- What you need to get now is the Token key and Token secret relative to your Dropbox app, so you can enter them later in the software of our project.
To get them, the first step is to go to the InitialiseOAuth Choreo on the Temboo website at https://temboo.com/library/Library/Dropbox/OAuth/InitializeOAuth/. Here, you will need to enter the App key and App secret. This will generate some additional information such as a callback ID and a temporary token secret. You'll also be asked to visit a link to Dropbox to confirm the authentication.
- Finally, go to the FinalizeOAuth page to finish the process. You'll be asked to enter your App key, App secret, callback ID, and temporary token secret at https://temboo.com/library/Library/Dropbox/OAuth/FinalizeOAuth/.
After this step, you'll be given your final Token key and Token secret. Write them down as you'll need them later.