Now that all the connections are made, we can test the project. To get started, we will take care of the motion sensor. For this, we will write a very simple sketch that will only make use of the embedded Atmel microcontroller on the Yún board. We first need to declare the pin that the sensor is connected to, as follows:
const int sensor_pin = 8;
Then, in the setup() function, we will start the Serial connection, as follows:
Serial.begin(9600);
delay(1000);
We can also set some delay before data is read from the sensor, as it needs some time to initialize and work correctly. In the loop() function, we continuously read the value from pin number 8. Remember that the sensor will simply return a logical high state if some motion is detected and a low state otherwise. This means that we can store the sensor's reading into a Boolean variable, as shown in the following line of code:
boolean sensor_value = digitalRead(sensor_pin);
Every second, this value is then printed on the Serial monitor using the following lines of code:
Serial.println(sensor_value);
delay(100);
The complete code for this part can be found at https://github.com/openhomeautomation/geeky-projects-yun/tree/master/chapter3/pir_test.
You can now upload the preceding code on to your Yún board. Open the Serial monitor and try to pass your hand in front of the sensor; you should see the value change instantly on the Serial monitor, as shown in the following screenshot:
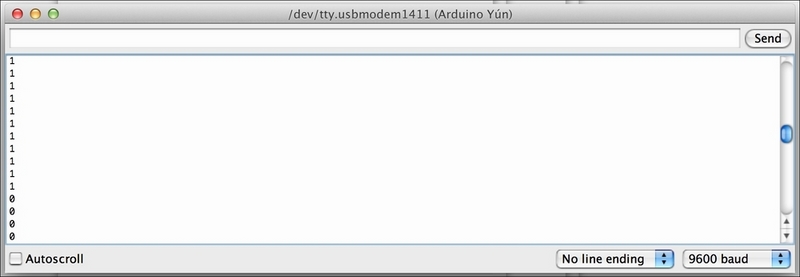
If you can see the values change instantly as you pass your hand in front of the sensor, this means that the Yún is wired correctly. You will also notice that the sensor turns red when it detects motion.
Now we are going to test the USB camera. We can actually test the camera without writing any Arduino sketch. What we are going to do instead is connect directly to the Yún board via SSH. Indeed, the camera is interfaced directly to the Linux machine of the Yún via the USB port, so the Arduino sketch will later have to use the Bridge library in order to access the camera.
For now, just go to a terminal window (the typical terminal that comes installed with OS X or Linux, or install one such as HyperTerminal if you are under Windows), and type the following command:
Of course, you will have to put the name you gave to your own Yún in place of yourYunName. For example, the name of my Yún is myarduinoyun; therefore, I need to type myarduinoyun.local. This will establish a direct connection with the Linux machine of the Yún.
You will then be prompted to enter the password that you chose for your Yún. If it works, you should see the following screenshot being displayed on your terminal, which indicates that you are now working directly on the Yún:
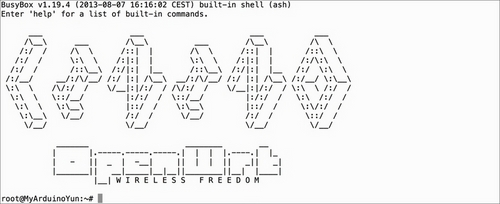
You can access all the functions from your Yún Linux machine. We are now going to install the required software for the camera. This requires the Arduino Yún to be connected to the Internet so that it can get the required packages, as described in the following steps:
- The process starts by updating the package manager,
opkg, as follows:opkg update - Install the UVC drivers, as follows:
opkg install kmod-video-uvc - Install the
python-opensslpackage that we will use later in the project, as shown in the following command:opkg install python-openssl - Finally, you can install the
fswebcamsoftware that we will use to take pictures, as shown in the following command:opkg install fswebcam - Once this part is done and the software is installed on the Yún, we can test the camera and take a picture. To also test whether the SD card is working at the same time, go over to the SD card folder, which is usually called
sda1, using the following command:cd /mnt/sda1 - You can now take a picture by typing the following command:
fswebcam test.png - You should see some message being printed that starts with the following:
--- Opening /dev/video0...
Trying source module v4l2...
/dev/video0 opened.
Some errors might be printed as well, but this doesn't matter for the process of taking a picture.
To check whether this works correctly, you can first check whether there is a file named test.png located on the SD card. To do this, you can simply type the following command:
ls
The preceding command will print the list of all the files in the current folder; in the present case, the SD card. You should see at least a file named test.png.
Now, to check that the picture is fine and not corrupted, you can, for example, remove the SD card from the Yún (by unmounting it first using the unmount/dev/sda1 command), and plug it directly to your computer using a micro SD card to normal SD card adapter. You should see the following screenshot in your browser (we already added the files that are required for the next sections of the project at this point, which explains the other files located on the SD card):

If you see a picture on your SD card at this point, open it to check that it was correctly taken. If that's the case, congratulations! Everything is now set up for you to write exciting applications with this project. If you can't see a picture at this point, the first step is to repeat the whole process again. Be careful to actually unmount the SD card after the picture is taken. You can also plug the camera directly to your computer to check whether the problem comes from the camera itself.