Over the past couple of years, cloud computing has grown to gigantic proportions, and it is not hard to see why. Companies can potentially save tons of money by not buying and maintaining their own server hardware; instead, they can opt for a pay-per-use model that can scale from one server to hundreds and back to one in mere minutes. Cloud providers like Microsoft make it very easy to get your software up and running on a cloud service and at the same time give you power tools to fully configure a cloud-based network that can even be an extension to your on-premise network.
Microsoft Azure, or just Azure for short, is Microsoft’s public cloud platform. Everyone with a credit card can create an account and start creating and publishing cloud services. The entire breadth of Azure is too big to describe in one chapter of a book, so I have selected much used services where .NET 6 can be important.
Configuring Azure services can be done in multiple ways. When starting with Azure, you will most likely first encounter the Azure portal https://portal.azure.com. A second popular approach is through the CLI. The Azure SDK ships with its own command line tools; these tools can be used to automate Azure actions, for example, to include them in a CI/CD pipeline. Visual Studio also ships with some Azure integrations, for example, to publish web applications to Azure. These integrations are very useful for a quick start but are quite limited in the end. The examples in this chapter are all done through the Azure portal. Keep in mind that the Azure portal is a web application that evolves very fast, so by the time you read this, things might look slightly different but the concepts will remain the same.
In this chapter, we’ll walk through some of the Azure services. To follow along, you will need an Azure account; costs may be involved depending on the services and tiers selected. Free Azure trials are available at https://azure.microsoft.com/en-us/free.
Web Apps
.NET
.NET Classic
Java
Ruby
NodeJS
PHP
Python
Let’s start building our first web app. As mentioned before, there are several ways to create Azure resources, but for now we will use the portal. The portal greets you with a list of recent resources and a list of resource types that are commonly created.
Creating an App Service
Azure portal start page
There is a button with a big + icon to create a new resource. This will once again bring up a page with some quick options for resource types but also a search to search through the extensive catalog of Azure services. It is important to know that not every service in the Azure services catalog is a Microsoft product. There are tons of third-party services in there as well. Some examples are MariaDB, SendGrid, several Linux distros for virtual machines, and many more. For this example, we need a web app. After we find it in the catalog and click Create, we enter into a setup wizard.
Make sure to select Web App, not Static Web App. Those are for the next section.

Web App creation wizard
First we need to select a subscription. Being an Azure user means you have a subscription. Azure has a lot of free services, but depending on how much flexibility, scale, or redundancy you need, you will quickly get into paid territory. To track what you use, Microsoft requires you to have a subscription. You can have several subscription tied to the same email address. As a Visual Studio customer, you get monthly Azure credits that you can spend. The amount depends on the type of Visual Studio license you have.
A Resource Group is a functional group that you can place your services in. Resource Groups are mostly meant for customers to order their services. Azure resources in the same resource group share the same lifecycle, permissions, and policies. Click Create New and give your resource group a name.
Next step is configuring the resource itself. Most important is how you want to call this. This name needs to be unique across all Azure customers since the name will be used as a url. As an Azure Web App user, you get a free domain in the form of https://<your web app name>.azurewebsites.net. This makes your web application easily reachable across the Internet, and you can make use of the SSL certificate for *.azurewebsites.net free of charge. It is of course possible to attach your own domain name to a web app instance, but that also means that you are responsible for the SSL certificate.
After selecting a name, we can choose if we want to deploy our project as code or as a Docker container. Azure supports multiple ways of deploying containerized applications; this is one of the more basic versions. When deploying as a container, Azure assumes that the container contains a web application that exposes ports 80 (http) or 443 (https). Deploying as code means that we publish our generated binaries onto the file system and the web server interprets and serves the response, just like in a shared hosting with any hosting provider. For now, we will stick to deploy as code and we will get into Docker later on in this chapter.
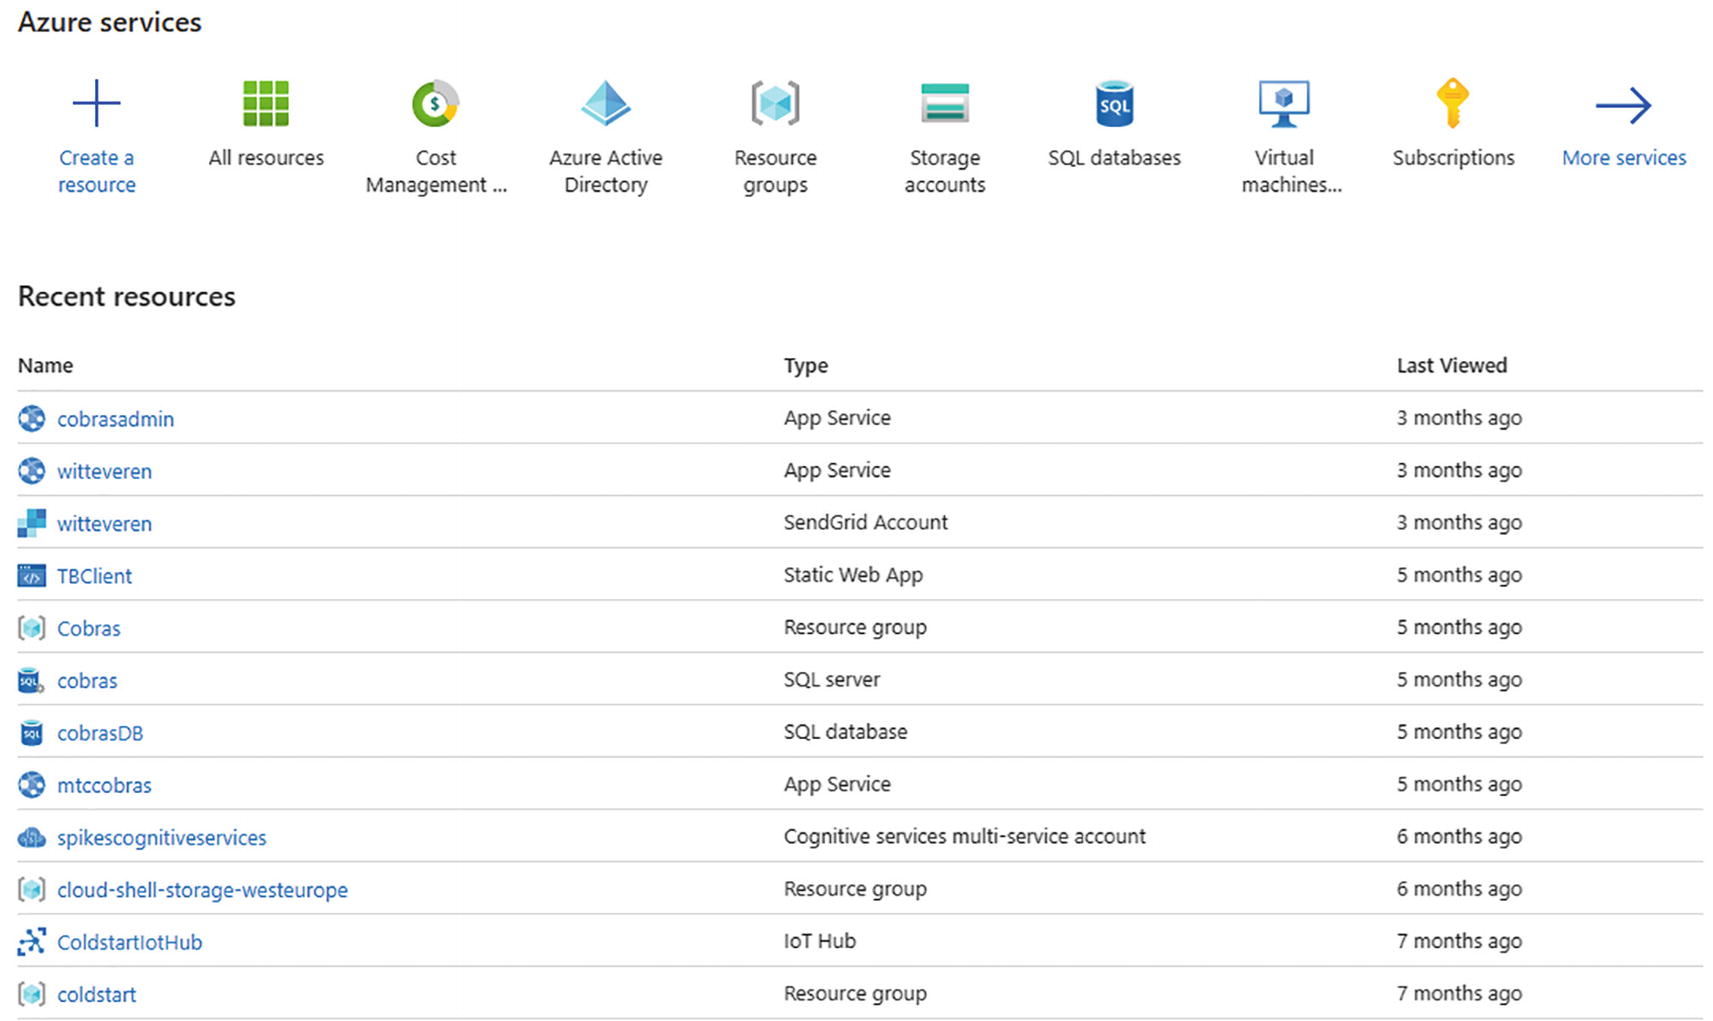
Price difference Linux – Windows
The pricing shown in Figure 8-3 is monthly cost calculated for a basic instance estimating 730 hours of usage. Looking at the pricing in the calculator, Windows is four times as expensive as Linux. However, Linux does not have a free tier in web app while Windows does. So there is more to it than just selecting the cheapest option. Make sure that you know very well what the different options are.
The next option is the region. Azure has datacenters across the world, but a region is not just one datacenter. A region is a collection of datacenters that are relatively close to each other. When you deploy a service to a region, you know that your application is running in one or more of the datacenters in that region but you do not know which one. The reason for this is redundancy; should one datacenter loose connection, one of the others in the same region can take over. There are several assurances of where data is stored and how data is transferred. These were put in place to comply to privacy regulations like GDPR in Europe. The list of regions is constantly extending as Azure is growing. At the time of writing, Azure has 33 regions. Do note that not every region supports every resource type. Newer resource types are usually available in US regions first and are gradually rolled out across the entire Azure network.

Selecting an SKU
The selection screen groups the available SKUs according to workloads and immediately shows estimated monthly cost. The selected SKU can be adjusted later on, for example, when your application usage is on the rise. If you switch to the Dev/Test tab at the top, you can select the Free tier; this will be sufficient for the demo and will keep you from spending Azure credits. After selecting the right SKU for your project, we can advance to step 2 of the wizard: Deployment.

Automatically configure CI/CD from Azure
Setting this up will generate a YAML file that is added to the code repository for a GitHub action. That action can automatically build and deploy your application to the newly created Azure Web App. A preview of the YAML file can be seen here in the Azure portal before it is added to your repository on GitHub. For more information on setting up the connection between Azure and GitHub Action, go checkout the documentation https://docs.microsoft.com/en-us/azure/app-service/deploy-github-actions?tabs=applevel.

Configuring monitoring
Application Insights is another Azure service that provides extensive logging and monitoring capabilities. Enabling it here will provide error and crash logging; for further logging, you will need to add the Application Insights SDK to your project.
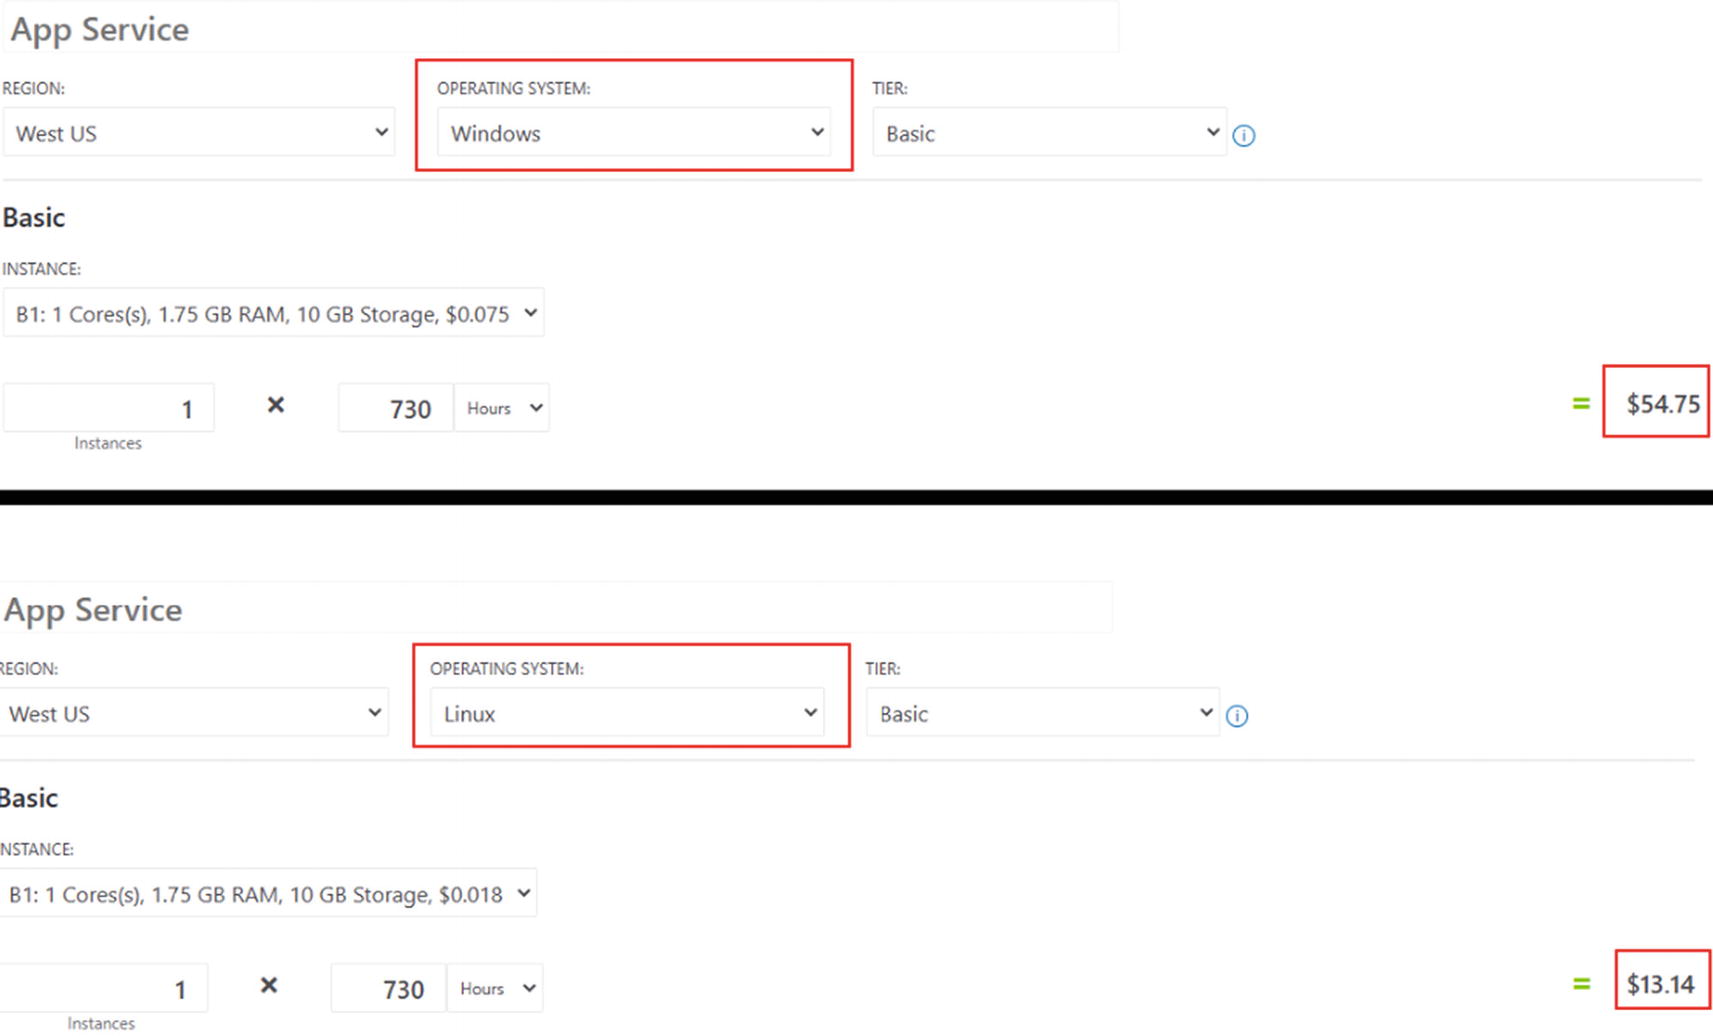
Tagging the resources

Deployment status
Azure will keep you informed about the deployment status. You are free to leave this page and come back later; deployment will continue just fine.

Deployment complete
To summarize, the following things just happened. Azure created an App Service instance to host our .NET 6 web application. Azure also generated a YAML file for a GitHub Build/Deploy pipeline. GitHub Actions compiled our application and deployed it to the newly generated Azure App Service. From now on, whenever new changes are committed to the main branch of the GitHub repository, the GitHub Action will compile and deploy a new version.

Dashboard on the Azure portal
From here we can stop, start, or restart our application server, look into our application logs, change the configuration, change service plans, and so on.
We can also download a publish profile that we can import in Visual Studio to deploy directly from the IDE to the cloud. The publish profile is a configuration file that we can import in Visual Studio from the Deploy option that we will use in a minute. In the Deploy wizard, we can either create a new publish profile or import a downloaded one.
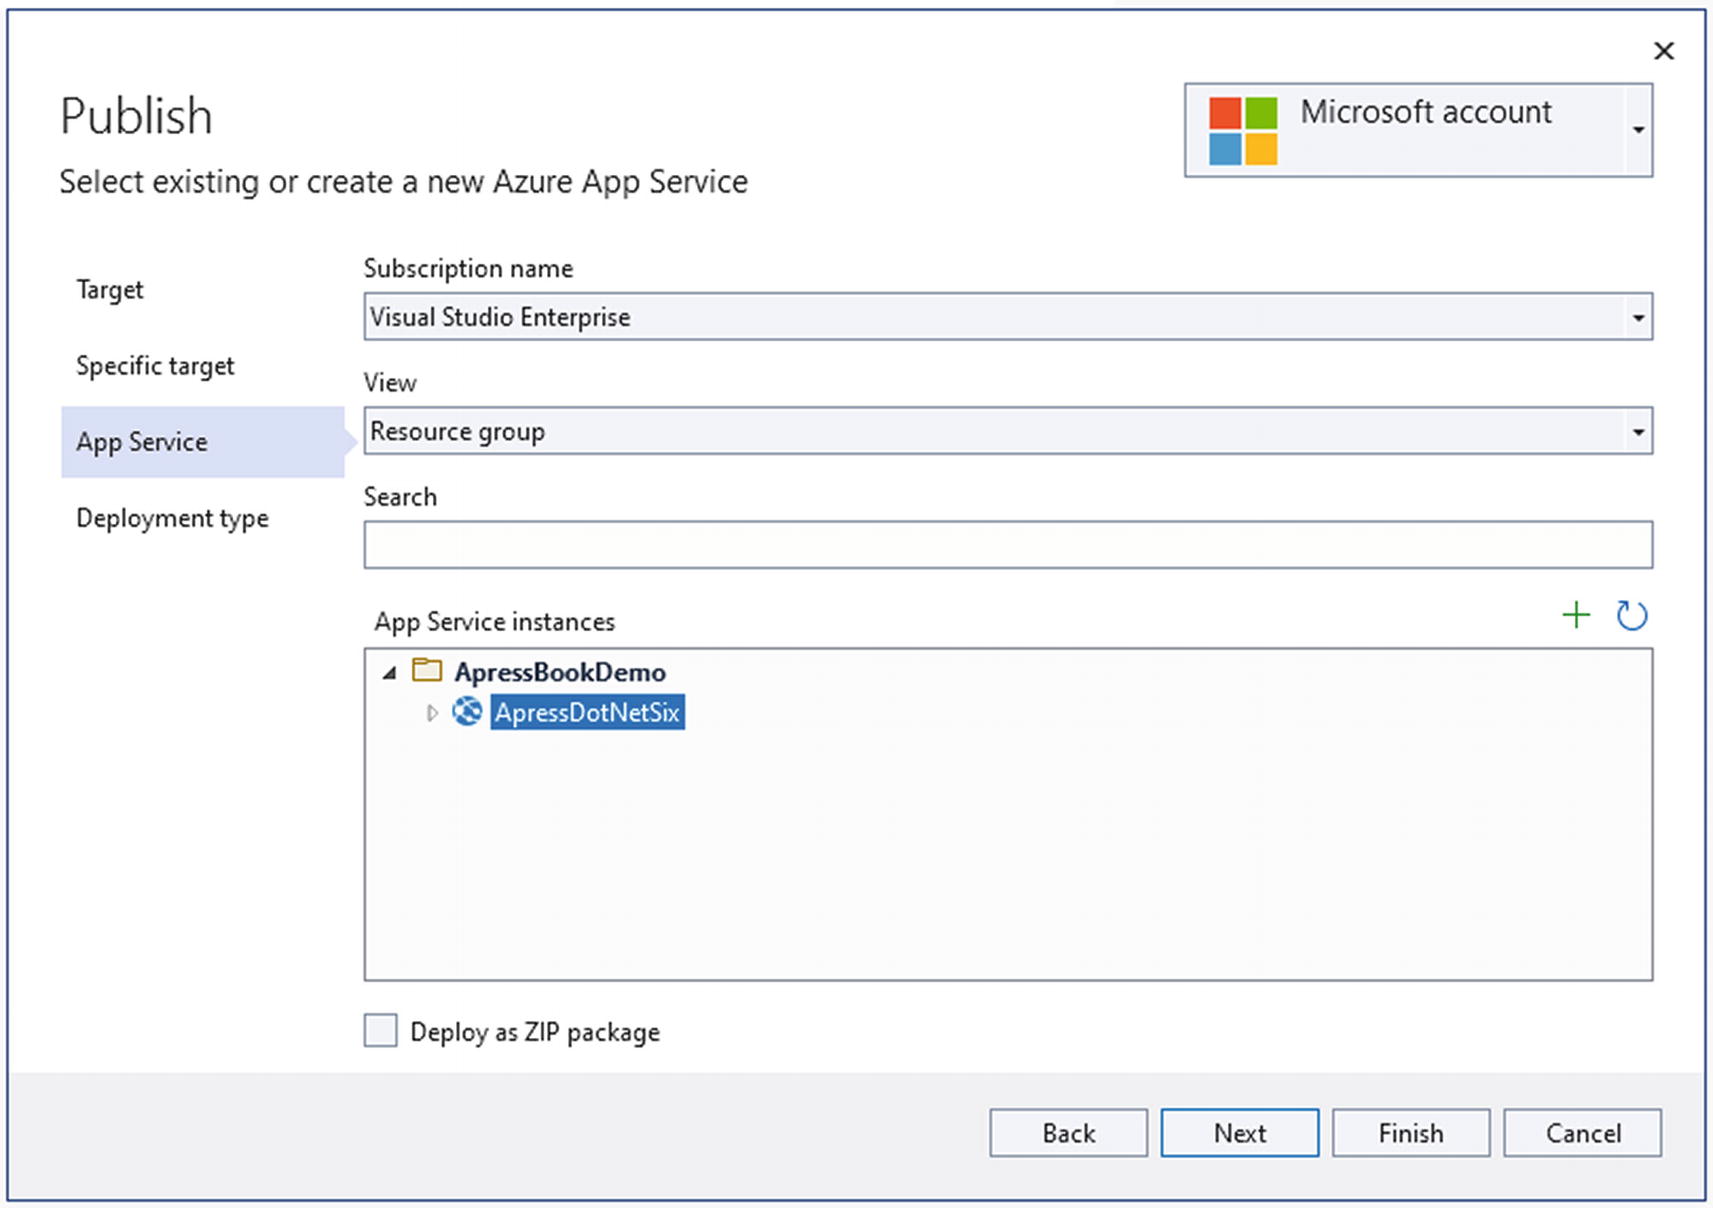
Deploying to Azure from Visual Studio
Publishing profile from Azure portal
Publishing profile from Visual Studio
Very different files that serve the same function. The reason these are different is that the publishing profile from the Azure portal is catered especially to cloud deployments, while the version from Visual Studio is more generic and can do deploys to other endpoints like the Windows filesystem, Docker, or any IIS server, for example.
Azure Web Apps or App Service is a great resource for publishing web-based applications. But there might be a better option if your application is pure HTML, CSS, and JavaScript based.
Static Web Apps
Static apps are becoming more and more the norm on frontend web development. Frameworks like Angular, Vue, React, and Blazor all generate client-side logic, relying heavily on RESTful APIs for the heavy lifting and data access. Since everything is executed client-side, we need a way to get the application on the client. In case of JavaScript-based frameworks like Angular, React, and Vue, those are all HTML, CSS, and JavaScript files, something a browser on the client can work with. In case of Blazor, this will be HTML, CSS, JavaScript, and DLL files, something browsers that support WebAssembly can work with. For more information on Blazor, see the Blazor chapter in this book. To get those files onto the client, we need a webserver that serves those files. This is where static web apps on Azure can help. Static web apps are a cloud service that serves files. Static apps can distribute the assets globally so that your application is in the Azure region closest to your customers for minimal delay.

Creating a static web app
First static web app-specific field is the hosting plan. Static web apps provide a free version for personal projects and a standard plan for professional projects.
Second part is the deployment details. Unlike Azure Web Apps, there is no support for publishing profiles in static apps. Static apps work solely with CI/CD integration, meaning that we need to link our Azure resource to a source repository. The wizard in the portal has a very good GitHub integration as you can see in Figure 8-12. There is support for any source repository, but it will need to be configured from the build server itself instead of here on the Azure portal. For this demo, I have created a default Blazor WebAssembly project.

GitHub Action successfully completed
After successfully compiling and zipping the Blazor output, the zip file is uploaded to Azure. Once uploaded, the static web app service will unzip everything; while that is happening, our GitHub Action will poll the service for completion. Static web apps don’t allow us to choose our own hostname like Azure Web Apps did; instead, it generates a unique url that we can find on the portal. We did have to enter an application name when creating the static web app resource, but that is purely an administrative name used for our purposes. Of course, we can still buy a custom domain and hook that up.

Blazor app running on Azure static web apps
We have successfully configured a Blazor app on static web apps. There is nothing happening server-side besides serving of files, client download everything and executes everything locally. The Blazor app shown here as a demo is compiled by GitHub using .NET 6 on an Ubuntu build host. Other supported frameworks include Angular, Vue, React, or static site generators like Gatsby. For a full up-to-date list of supported frameworks, see https://docs.microsoft.com/en-us/azure/static-web-apps/front-end-frameworks.
Web App for Containers
Web apps support a second hosting model as we have seen in the deployment wizard. Besides just deploying code, we can deploy our application as a Docker container. The ins-and-outs of Docker are way beyond the scope of this book, but just to get everyone on the same page, here is a quick primer of what Docker is.
Docker
Docker is a set of tools build upon the containerd runtime to create containerized applications. Containers are basically an evolution of virtual machines. Virtual machines emulate full hardware devices where containers are on the operating system level. A container bundles software, libraries, and configuration for running on a specific operating system. This means that a container is a fully isolated, self-configured unit of work that runs on top of the underlying operating system of the Docker host. This means that containers have less overhead than virtual machines, allowing more containers to run on one physical device than virtual machines.
A Docker file describing entry points, ports, and configuration.
Docker image, a containerized application, ready to startup and being used.
A Docker registry, this is like a package repository (NuGet, NPM, etc.) but for containers. It contains the container images we want to deploy.
A Docker runtime.
Docker runner, a system that pulls an image from a Docker registry and deploys it to a Docker runtime.
The Docker registry is needed as this is where Docker runners pull their images from. Let’s try to dockerize our MVC demo application.
First thing we need is to install Docker Desktop on our system. The installer can be downloaded from their website https://hub.docker.com/editions/community/docker-ce-desktop-windows. The installer will guide you through the process of installing WSL2 and making sure the right updates are installed, after which Docker and Docker Desktop will be installed. Docker Desktop is the Windows version of Docker. It provides a UI to configure Docker and a CLI. Most importantly, it connects the Docker engine to Visual Studio for debugging.
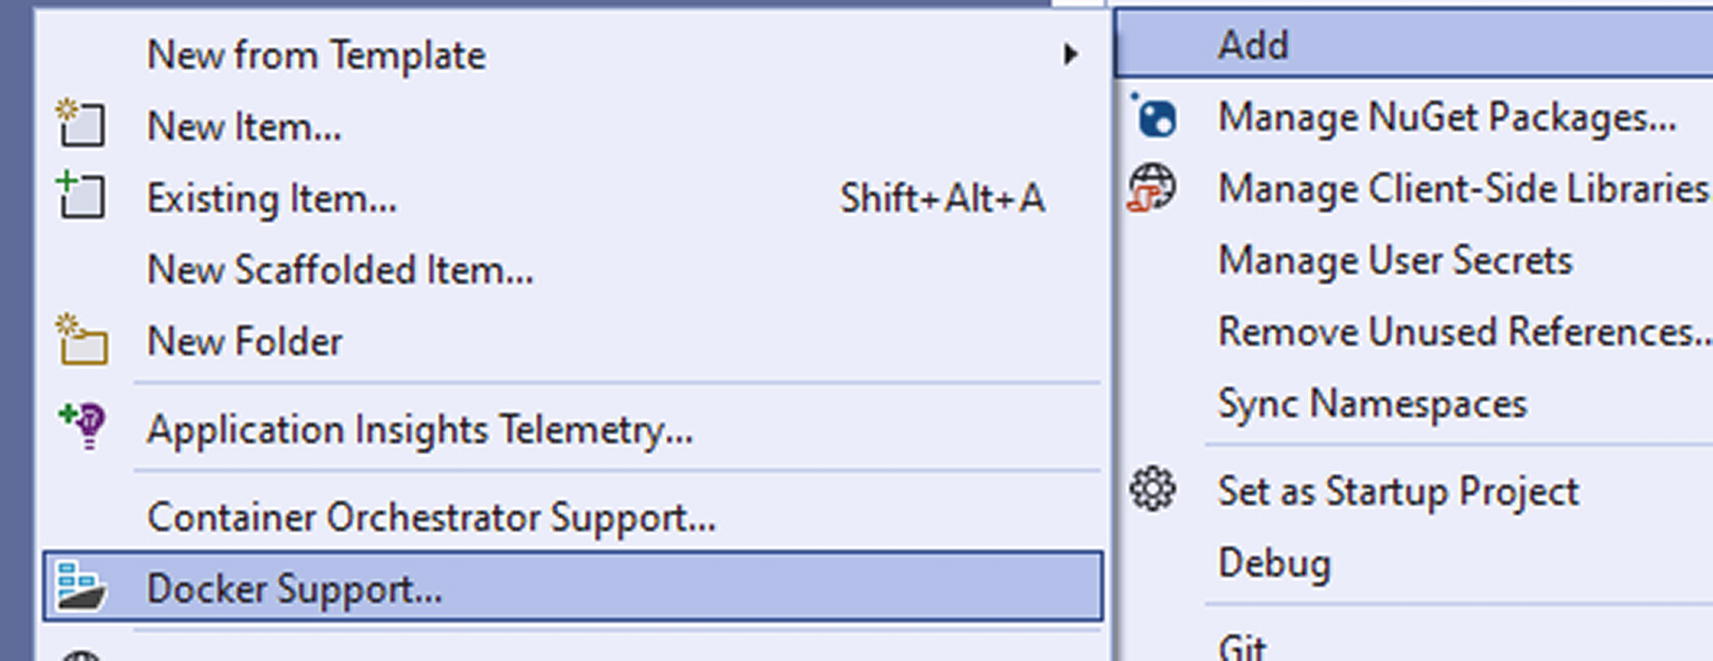
Adding Docker support to an application
Selecting this will ask if we want a Linux- or Windows-based container. Select Linux and continue. Visual Studio will generate a Docker file. This file contains all the instructions needed to build and run our .NET 6-based application in a container.
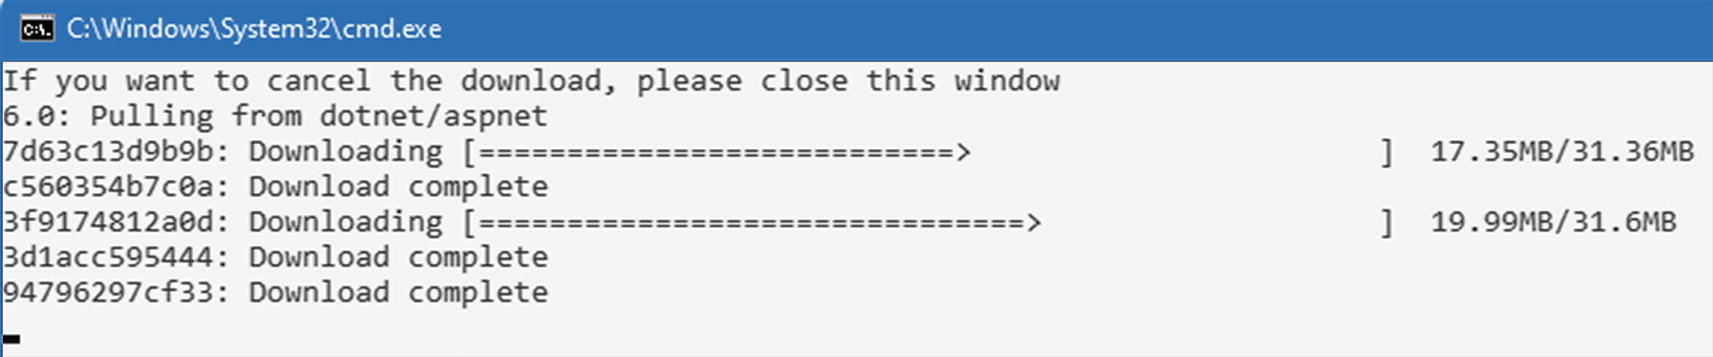
Downloading Docker images for ASP.NET

Running containers in Visual Studio
To be able to use this container for deployment, we first need to upload it to a container repository. Docker has a public repository where we can upload containers called Docker Hub, but Azure also has a service that allows us to create private container registries. This service is called the Azure Container Registry, or ACR.
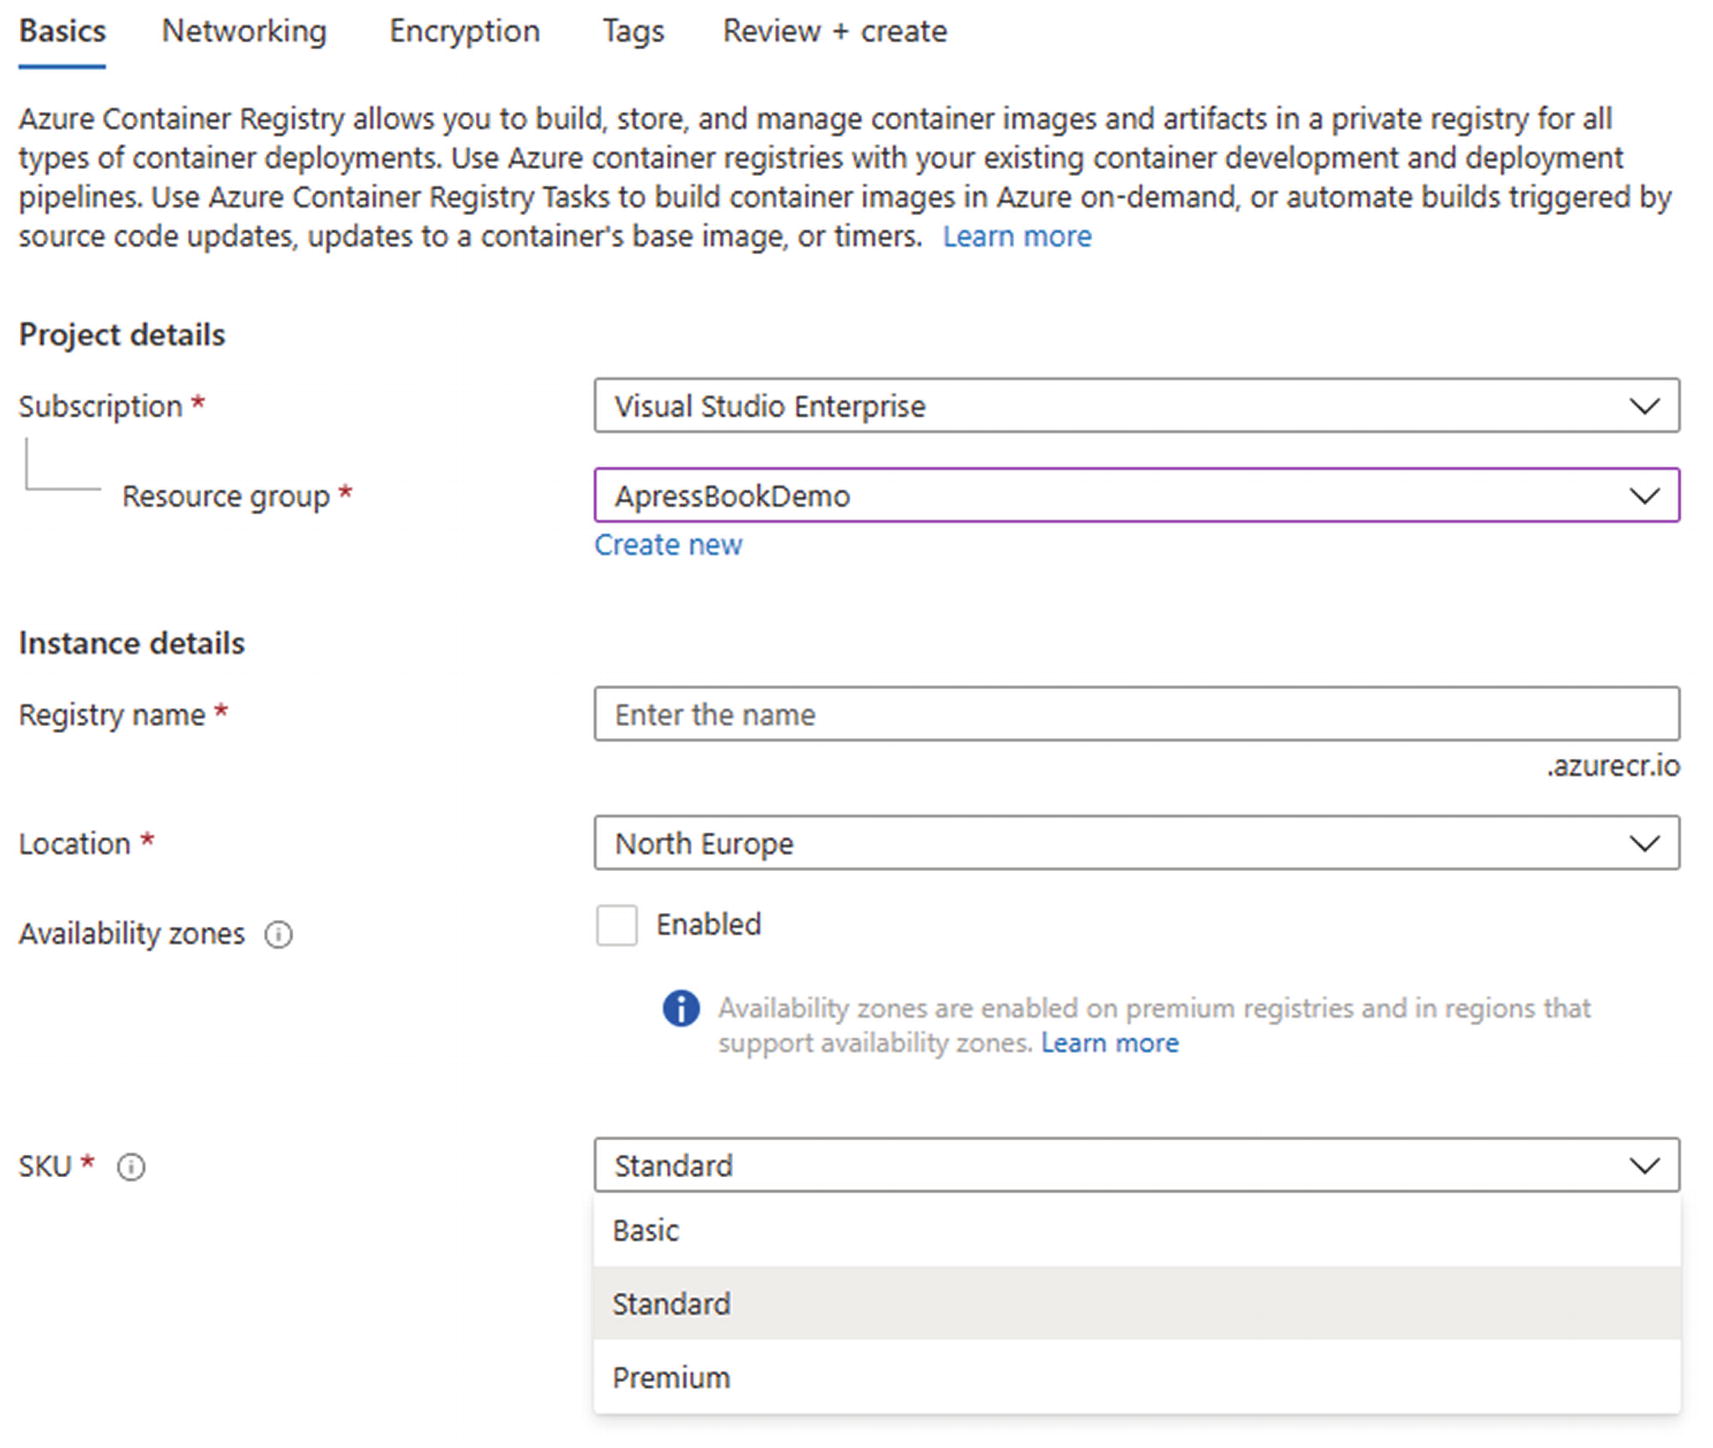
Creating an ACR instance
Creating an ACR instance is quite easy; the most important thing is the name. We need the <hostname>.azurecr.io domain in our commands to upload our containers to the correct registry.
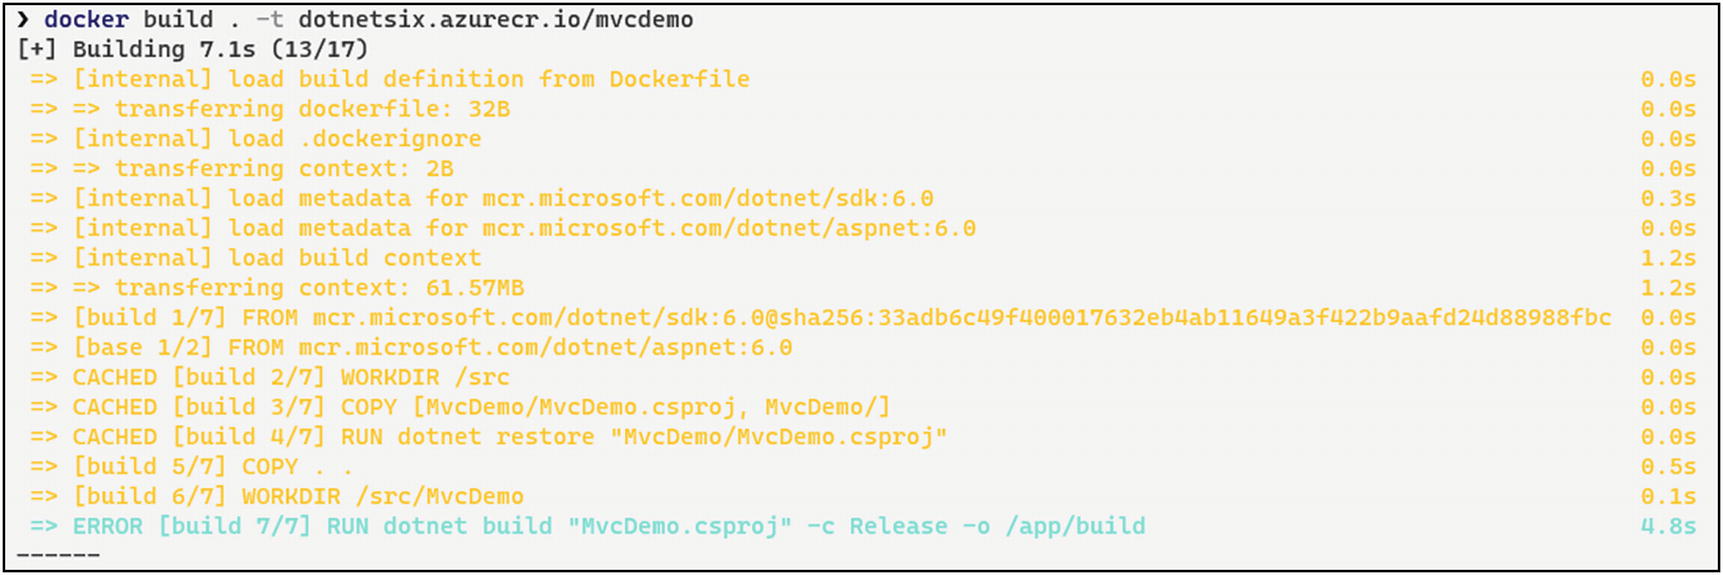
Error on Docker build
The reason is that this Dockerfile is used by the Visual Studio tooling to enable debugging and integrations. The Docker tooling internally uses different relative paths, assuming that the Docker file is on solution level, but Visual Studio places it on project level. The fastest solution is to copy the Docker file and duplicate it on solution level. In this way, both the Visual Studio tooling and Docker CLI tooling will work.
Docker build command

Building the container
We now have successfully created our container image; it is fully ready to be uploaded to our Azure Container Registry. However, since the ACR instance is private, we need to authenticate to Azure and ACR first. Make sure to have the Azure CLI installed for authenticating with the cloud platform. The CLI can be found at https://docs.microsoft.com/en-us/cli/azure/install-azure-cli.
Authenticating with Azure
Authenticating against ACR
Pushing container images to the ACR
We are not explicitly setting a tag so our image will automatically be tagged with :latest.

Container image on ACR

Setting up an Azure Web App using ACR
The wizard can connect to our ACR instance and read the list of images and tags. Azure will create a new instance, pull in the image from ACR, and create a container. Note that browsing to a Docker-based web app might take time; the container needs to be generated and spun up on first browse.
I have shown you the manual steps involved in building and deploying a Docker-based application. A next step would be to automate this entire process in your CI/CD pipeline.
Azure Functions
The final part in our discovery of Microsoft Azure brings us to serverless computing. Serverless computing means you have a piece of code running in the cloud without needing to worry about maintenance of the server, updating the operating system, scaling, containers, all of those classic overhead units of work are not needed in serverless systems. Obviously we still use servers to run our code in the cloud, but the fact that we can just build something and deploy it and it just works is where the term serverless computing comes from.
Serverless computing on Azure is done through a service called Azure Functions. Think back to RESTful APIs for a second. Remember how we created controllers with GET and POST requests? Imagine that you isolate one of those requests, the GET requests that load the list of books, for example. Now imagine that you can take that one request and deploy it to the cloud without any ASP.NET overhead, just the bare request, nothing else. That is what an Azure Function is. There is going to be a small overhead to define how the function is called as we will see, but it is much smaller than the overhead of setting up the entire ASP.NET environment.
Azure Functions are called by a trigger. Triggers are like events. These triggers can originate from different places; there are HTTP triggers that are called by doing an HTTP request to the function endpoint, very similar to a REST call. There are also numerous triggers that originate from other Azure resources, like a blob trigger that fires whenever a blob is added to a Blob Storage Container or a service bus queue trigger that fires whenever a message is received by a service bus.

Function triggers in Visual Studio
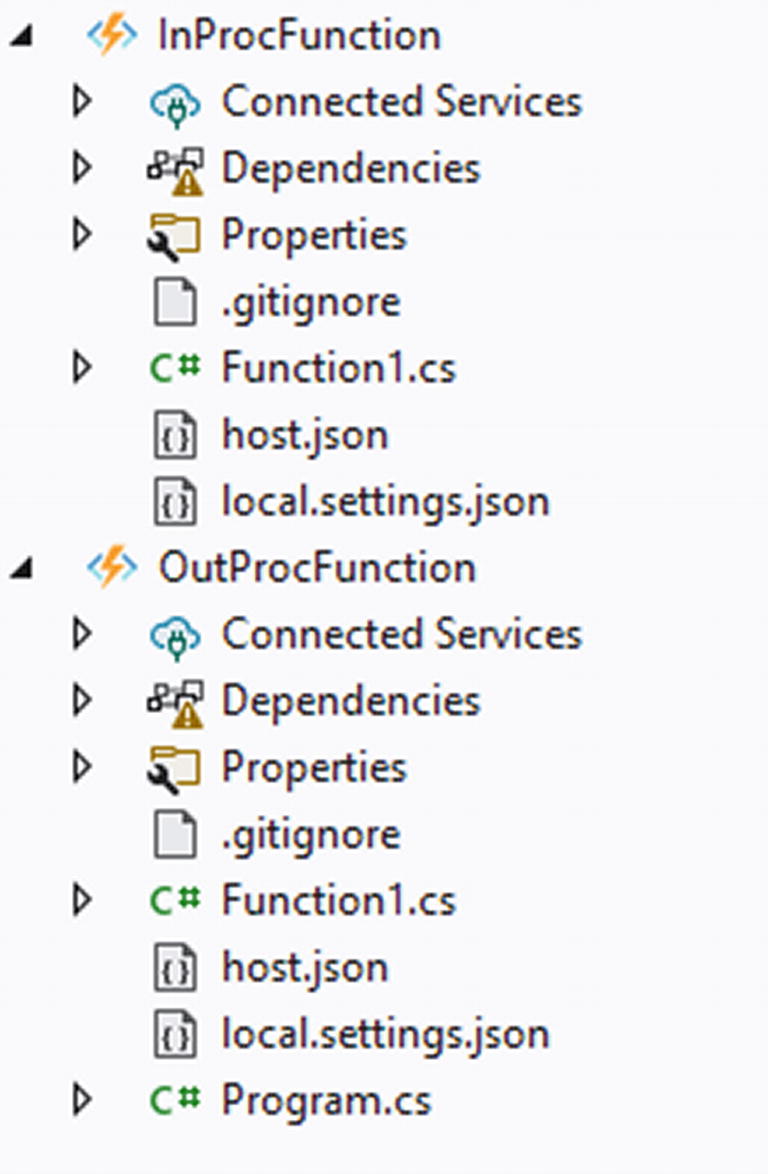
In-proc vs. out-proc projects
There are a few differences in template availability between both modes, and there is a small difference in template as well; the out-of-process version needs a Program.cs to serve as a starting point for the function. For now we will continue with the in-process function. To get Azure Functions support in Visual Studio, you will need to add the Azure workload using the Visual Studio Installer.

Swagger UI for Azure Functions
A default Azure Function
We start with a couple of attributes. The first one gives the function its name. The name is used in Swagger UI and the Azure Portal. The other attributes are all used to describe the function according to the OpenAPI spec so that Swagger UI can generate a great experience; we have looked at Swagger and OAS in detail in the previous chapter. The HttpTrigger attribute configures the trigger for this function. It registers the function as an HTTP endpoint with specific verbs, in this case GET and POST, in the Azure Functions runtime. The HttpRequest comes in through the req parameter; from this request, we can fetch the request body, deserialize it, and use the request parameters to build the response. We will go a bit deeper with a more clear example.
Custom startup object in an Azure Function
BookFunctions class
Fetching a list of books through an Azure Function

Fetching books in Swagger UI
Fetching a specific book by ID

Parameter filled in through routing
HTTP Trigger with POST
The major difference with the GET requests is that we specify the trigger to be of type POST and that we need to fetch the request body from the HttpRequest object. The Body property is a stream; fortunately, the JsonSerializer in System.Text.Json can accept a stream and deserialize it to any type.
Deploying Azure Functions

Choosing a Function type
Creating a new Function
After the function is created, we can go to the API Management step. This is an option to integrate Functions into an API management resource, but that goes beyond the scope of this book, so we can safely skip this step by selecting the Skip this step option that will enable the Create button. Once all steps are done, we can hit the Publish button and Visual Studio will work its magic creating Azure resources and pushing our Function to it.

Functions on the portal

Function url with function key

Calling a Function from Postman
Wrapping Up
Microsoft Azure is a powerful, globally distributed, versatile platform. The vast majority of available resources is large enough to fill multiple books on its own, so we have only scratched the surface here. I do hope that it has triggered you enough to go explore further and dive into the wonderous world of cloud-native applications and hybrid applications. With .NET being a first-class citizen in the Microsoft world, and .NET 6 being an important major release, it comes as no surprise that Azure was day 1 ready for .NET 6. Multiple services have supported it even back when .NET 6 was in preview. All of this is made complete with great Azure integration in Visual Studio 2022, allowing us to create resources and publish new code to them without leaving the IDE.