
We will be creating a new Enterprise Application project for our example.
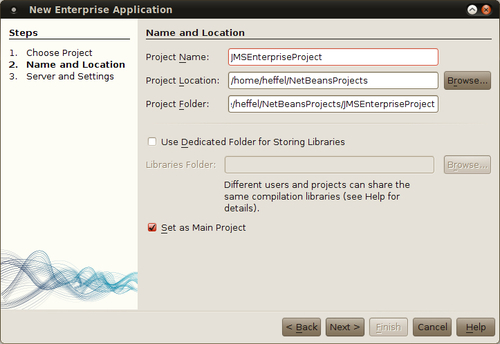
In our example, we will be adding an EJB module and an Application Client module.
Note
Any type of Java EE module can be a JMS message producer and/or consumer by simply invoking methods from the JMS API, we chose to create an EJB module since later in the chapter we will be creating a Message Driven Bean (MDB), that is a type of EJB. We chose an application client since it is one of the simplest modules that can be added to an enterprise application, allowing us to focus on JMS code without having to worry about writing lots of extraneous code. However, in real applications, it is common to have web applications or Session Beans act as JMS message producers, with an MDB acting as the consumer.

Now that we have created our project, we need to add a couple of necessary JMS resources, a JMS destination (Queue or Topic), and a JMS connection factory. When using GlassFish as our application server, we can create these resources directly from NetBeans.
JMS destinations are an intermediate location where JMS producers place messages, and JMS consumers retrieve them. When using the Point To Point (PTP) Messaging Domain, JMS destinations are message queues, where with the Publish/Subscribe Messaging Domain, the destination is a message topic.
In our example we will be using the PTP messaging domain, therefore we need to create a message queue, and the procedure to create a message topic is almost identical.
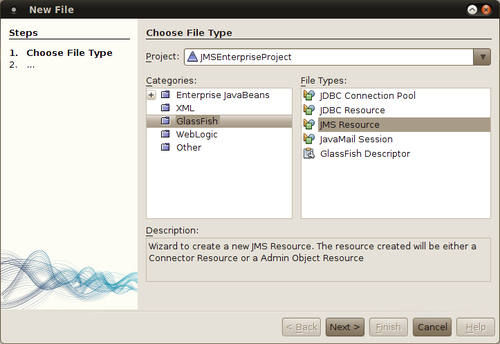
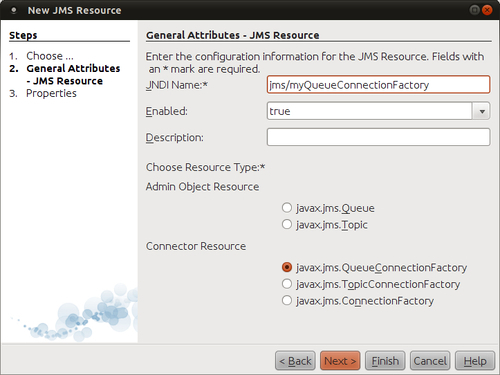
In order to create a message queue, we need to click on File | New File, select GlassFish from the Categories list, and JMS Resource from the File Types list.
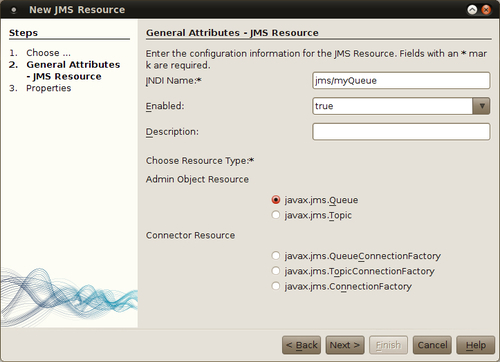
We then need to enter a JNDI name for our queue, in our example, we simply picked the default name jms/MyQueue, and accepted the default resource type of javax.jms.Queue.
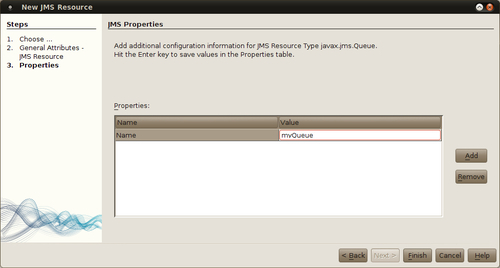
JMS message queues require a Name property, in our example we simply chose to use the JNDI name of our queue (minus the jms/ prefix) as the value of this property.
Note
The options under the Connector Resource section in the New JMS Resource wizard are connection factories that can be used to obtain a JMS Queue or Session. With Java EE it is simpler to have the JMS Queue or Session injected directly into the code rather than obtaining it through a connection factory.
At this point we have created a JMS queue to act as a JMS destination for our application; we also need to create a JMS connection factory. The JMS queue and connection factory will not actually be created until we deploy our project.
The first few steps in creating a connection factory are exactly the same as the ones we used for creating the queue (File | New File, select GlassFish and JMS Resource, then click Next>).
At this point we simply need to select javax.jms.ConnectionFactory as the resource type and enter a suitable JNDI name for our connection factory.
Selecting javax.jms.ConnectionFactory as the resource type has the advantage of allowing us to use this resource to create connections for both queues and topics. If we only need to create one or the other, we can select to create a resource of type javax.jms.TopicConnectionFactory or javax.jms.QueueConnectionFactory as appropriate. However, choosing javax.jms.ConnectionFactory allows more flexibility.
At this point we can simply click on Finish, or we can click on Next to assign additional properties to our connection factory, however this step is not necessary for connection factories.
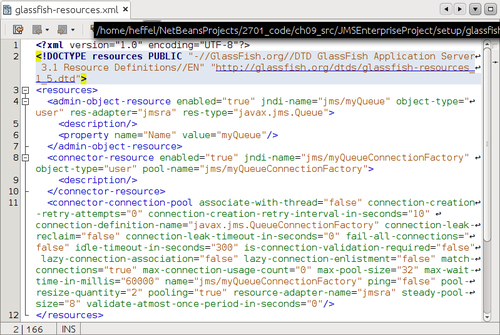
NetBeans adds the GlassFish resources we created to a file called glassfish-resources.xml. When we deploy our project to GlassFish, it reads this file and creates the resources defined in it. We can see the content of this file by expanding the Server Resources node in the Projects view and double-clicking on its name.
Once we have created our connection factory and destination (queue or topic), we need to write some code to send messages to it.
In our example, we will use the application client to send messages to the queue. NetBeans can generate a lot of the necessary boilerplate code automatically. In order to generate this code, the connection factory and destination to be used need to be created in the server, recall we mentioned in the previous section that GlassFish JMS resources created with NetBeans aren't actually created until we deploy our project. In order for these resources to be available to our application client, we need to deploy the project to have these resources created.
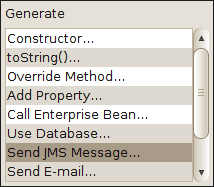
After we have deployed our project, we can generate the JMS code opening the main class (Main.java) for the application client project, right-clicking on its source, and selecting Insert Code, then selecting Send JMS Message from the resulting pop up window.
At this point we need to select a message destination and connection factory.
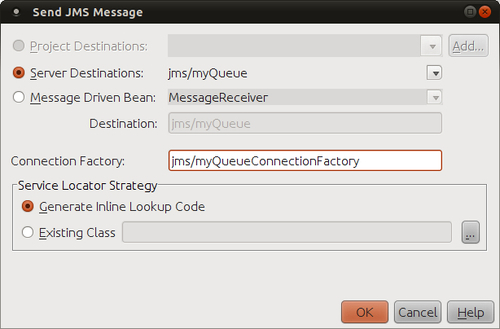
NetBeans detects the different destinations in the server, and provides them in a drop down list. It also makes a best guess at the JNDI name of the connection factory, that, in our case, turns out not to be correct. The above screenshot shows the corrected connection factory JNDI name.
At this point NetBeans generates two methods in our code, a method to send a JMS message to our destination, and another method to create it. Additionally, it injects the necessary resources, the messaging destination and connection factory, into our code via the @Resource annotation.
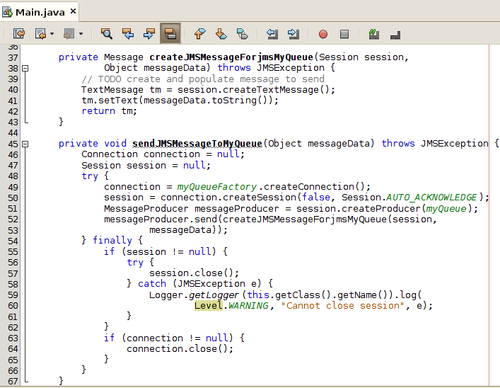
In our example, the name of the method used to create messages is createJMSMessageForjmsMyQueue() (the exact method name will vary depending on the name of our JMS destination), it returns an instance of a class implementing javax.jms.Message, which all JMS message types must implement, and takes two parameters, an instance of a class implementing javax.jms.Session, and an object containing the message data.
javax.jms.Message has several subinterfaces that are part of the standard Java EE API, in most cases, we use one of the subinterfaces to send messages, instead of using a direct implementation of javax.jms.Message. The following table summarizes all of the standard Java EE subinterfaces:
|
Subinterface |
Description |
|---|---|
|
|
Used to send an array of bytes as a message. |
|
|
Used to send name-value pairs as messages. The names must be String objects, the values must be either primitive types or Java objects. |
|
|
Used to send serializable objects as messages. A serializable object is an instance of any class that implements |
|
|
Used to send a stream of Java primitive types as a message. |
|
|
Used to send a String as a message. |
Of the above message types, TextMessage and ObjectMessage are the most frequently used. We will use TextMessage for our example, using other message types is very similar.
Tip
Consult the Java EE JavaDoc for details on the APIs for each of the message types. Java EE JavaDoc can be found at http://download.oracle.com/javaee/6/api/.
Notice that the createJMSMessageforjmsMyQueue() method is invoked by the generated sendJMSMessageToMyQueue(), we are expected to invoke sendJMSMessageToMyQueue() as opposed to invoking createJMSMessageForjmsMyqueue() directly. In our example, we do this in the main method of our application.
After adding this invocation, our main() method looks like this:

At this point we have a complete application that will send messages to our message queue. We can deploy the project and execute it, however, we haven't written any code to retrieve messages yet, which is the next step we need to take. However, before moving on, let's go through the generated sendJMSMessageToMyQueue() method so that we can better understand how it works.
The first thing the method does is to obtain a JMS connection by invoking the createConnection() method on the injected instance of javax.jms.ConnectionFactory, and assigning it to a local variable of type javax.jms.Connection.
After the JMS connection is created, the method obtains a JMS session by invoking the createSession() method on the Connection object. The createSession() method has two parameters, the first parameter is a Boolean indicating if the created session is transacted. Transacted sessions allow the code sending messages to a JMS destination to send several messages as part of a transaction. To send several messages as part of a transaction, the JMS client sends messages to the queue as usual, then invokes the commit() method on the JMS session. By default, the code generated by NetBeans does not create a transacted JMS session, but we can override this by simply changing the value of the first parameter in createSession() to true.
The second parameter of the createSession() method indicates how JMS messages will be acknowledged by the message receiver. There are three valid values for this parameter, all three are defined as constants in the javax.jms.Session interface. The value of the second parameter to createSession() is ignored when creating a transacted session.
|
Acknowledge Mode |
Description |
|---|---|
|
|
When using this mode, the JMS session will auto-acknowledge message receipt for the client. |
|
|
When using this mode, message receivers must explicitly invoke the |
|
|
When using this mode, the JMS session will lazily acknowledge message receipts on behalf of the JMS client. Using this acknowledge mode may result in some messages being delivered more than once, but it can improve performance by eliminating some of the work the session must do in order to avoid duplicate message deliveries. |
Of the three acknowledge modes, Session.AUTO_ACKNOWLEDGE is the most commonly used, since it slightly reduces the amount of work to be done by application developers. NetBeans uses this mode by default in the generated code, but we are free to modify the generated code as necessary to meet our requirements.
After creating a JMS session, the next thing the generated code does is to create a JMS message producer by invoking the createProducer() method on the JMS session object. This method takes a JMS destination as its sole parameter, unsurprisingly, in the generated code the injected message queue is sent as a parameter to this method.
The last thing this method does is to actually send the message to the message queue. This is done by invoking the send() method on the javax.jms.MessageProducer instance obtained in the previous line. This method takes an instance of a class implementing javax.jms.Message or one of its subinterfaces as a parameter, in the generated code, the generated method to create the message (createJMSMessageForjmsMyQueue() in our example) is invoked inline, since this method's return value is of the appropriate type.
Notice that most of the body of the generated method to send JMS messages is enclosed in a try/finally block. Most of the lines inside the try block have the potential of throwing a JMSException, if this happens, the code attempts to close the JMS session and connection, which is the exact same thing that needs to be done if the code ends normally, therefore it makes sense to put this code in the finally block.
Although it is possible to write standalone applications that can retrieve messages from a messaging destination, most Java EE applications rely on message driven beans for this task, and NetBeans makes it very easy to generate message driven beans.