
One advantage that Facelets has over JSP is its templating mechanism. Templates allow us to specify page layout in one place. Then, we can have template clients that use the layout defined in the template. Since most web applications have consistent layout across pages, using templates makes our applications much more maintainable because changes to the layout need to be made in a single place. If at one point we need to change the layout for our pages (for example, add a footer or move a column from the left side of the page to the right side of the page), we only need to change the template and the change is reflected in all the template clients.
We can add a Facelets template to our project simply by going to File | New File, selecting the JavaServer Faces category, and selecting the Facelets Template file type.
NetBeans provides very good support for Facelets templating. It provides several templates "out of the box" using common web page layouts.
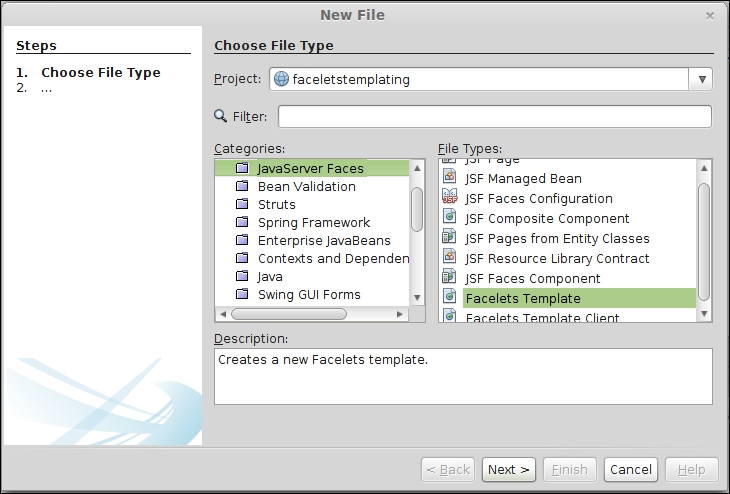
We can then select from one of several predefined templates to use as a base for our template or simply use it "out of the box".
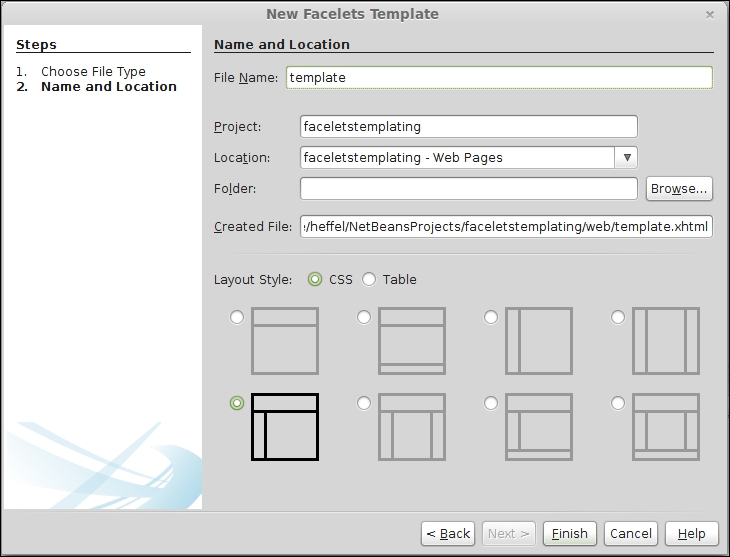
NetBeans gives us the option of using HTML tables or CSS for layout. For most modern web applications, CSS is the preferred approach. For our example, we will pick a layout containing a header area, a single left column, and a main area.
After clicking on Finish, NetBeans automatically generates our template, along with the necessary CSS files.
The automatically generated template looks like this:
<?xml version='1.0' encoding='UTF-8' ?>
<!DOCTYPE html PUBLIC "-//W3C//DTD XHTML 1.0 Transitional//EN" "http://www.w3.org/TR/xhtml1/DTD/xhtml1-transitional.dtd">
<html xmlns="http://www.w3.org/1999/xhtml"
      xmlns:ui="http://xmlns.jcp.org/jsf/facelets"
      xmlns:h="http://xmlns.jcp.org/jsf/html">

    <h:head>
        <meta http-equiv="Content-Type" content="text/html; charset=UTF-8" />
        <h:outputStylesheet name="./css/default.css"/>
        <h:outputStylesheet name="./css/cssLayout.css"/>
        <title>Facelets Template</title>
    </h:head>

    <h:body>


        <div id="top" class="top">
            <ui:insert name="top">Top</ui:insert>
        </div>
        <div>
            <div id="left">
                <ui:insert name="left">Left</ui:insert>
            </div>
            <div id="content" class="left_content">
                <ui:insert name="content">Content</ui:insert>
            </div>
        </div>
    </h:body>
</html>
As we can see, the template doesn't look much different from a regular facelets file.
We can see that the template uses the following namespace: xmlns:ui="http://xmlns.jcp.org/jsf/facelets". This namespace allows us to use the <ui:insert> tag. The contents of this tag will be replaced by the content in a corresponding <ui:define> tag in template clients.
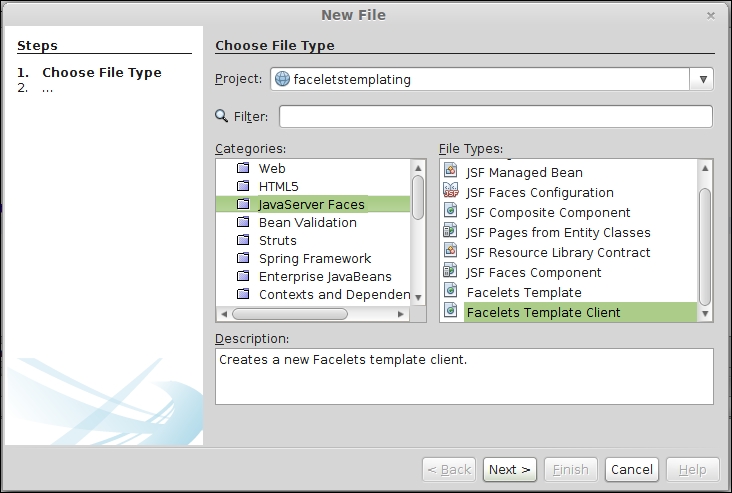
To use our template, we simply need to create a Facelets template client. This can be done by going to File | New File, selecting the JavaServer Faces category, and selecting the Facelets Template Client file type.
After clicking on Next, we need to enter a filename (or accept the default) and select the template that we will use for our template client.
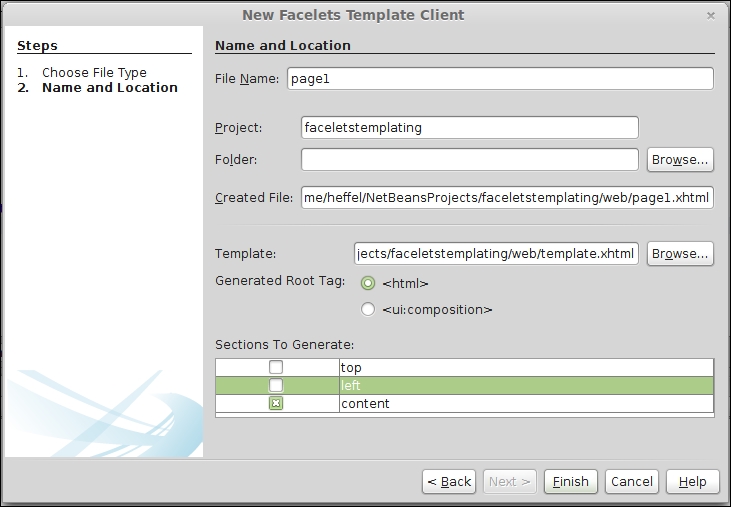
When using Facelets templating, if a template client does not override a section defined on the template, then the template's markup is shown on the rendered page. This allows us to define, for example, a page header that should be the same across all pages in our application in one place (the template), rather than redefining it on every page.
In our example, the top and left sections should be the same across the application. Therefore, we uncheck these boxes so that those sections are not generated in our template client.
After clicking on Finish, our template client is created, with the following content:
<?xml version='1.0' encoding='UTF-8' ?>
<!DOCTYPE html PUBLIC "-//W3C//DTD XHTML 1.0 Transitional//EN" "http://www.w3.org/TR/xhtml1/DTD/xhtml1-transitional.dtd">
<html xmlns="http://www.w3.org/1999/xhtml"
      xmlns:ui="http://xmlns.jcp.org/jsf/facelets">

    <body>

        <ui:composition template="./template.xhtml">

            <ui:define name="content">
                content
            </ui:define>

        </ui:composition>
    </body>
</html>
As we can see, the template client also uses the xmlns:ui="http://xmlns.jcp.org/jsf/facelets" namespace; in a template client, the <ui:composition> tag must be the parent tag of any other tag belonging to this namespace. Any markup outside this tag will not be rendered, and the template markup will be rendered instead.
The <ui:define> tag is used to insert markup into a corresponding <ui:insert> tag in the template. The value of the name attribute in <ui:define> must match the corresponding <ui:insert> tag in the template.
After deploying our application, we can see templating in action by pointing the browser to our template client URL.
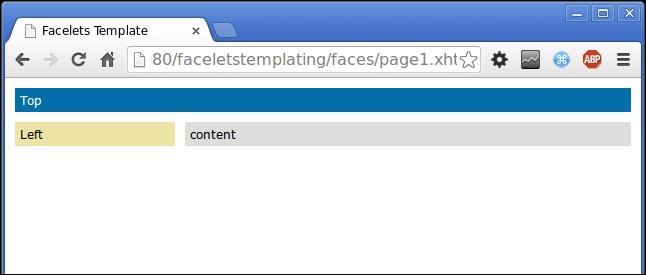
We can see that NetBeans generated a template that allows us to create a fairly elegant page with very little effort on our part. Of course, we should replace the markup in the <ui:define> tags to suit our needs.
Here is a modified version of our template, adding markup to be rendered in the corresponding places in the template:
<?xml version='1.0' encoding='UTF-8' ?>
<!DOCTYPE html PUBLIC "-//W3C//DTD XHTML 1.0 Transitional//EN" "http://www.w3.org/TR/xhtml1/DTD/xhtml1-transitional.dtd">
<html xmlns="http://www.w3.org/1999/xhtml"
      xmlns:ui="http://xmlns.jcp.org/jsf/facelets">

    <body>

        <ui:composition template="./template.xhtml">

            <ui:define name="content">
                <p>
                    In this main area we would put our main text, images, forms, etc. In this example we will simply use the typical filler text that web designers love to use.
                </p>
                <p>
                    Lorem ipsum dolor sit amet, consectetur adipiscing elit. Nunc venenatis, diam nec tempor dapibus, lacus erat vehicula mauris, id lacinia nisi arcu vitae purus. Nam vestibulum nisi non lacus luctus vel ornare nibh pharetra. Aenean non lorem lectus, eu tempus lectus. Cras mattis nibh a mi pharetra ultricies. In consectetur, tellus sit amet pretium facilisis, enim ipsum consectetur magna, a mattis ligula massa vel mi. Maecenas id arcu a erat pellentesque vestibulum at vitae nulla. Nullam eleifend sodales tincidunt. Donec viverra libero non erat porta sit amet convallis enim commodo. Cras eu libero elit, ac aliquam ligula. Quisque a elit nec ligula dapibus porta sit amet a nulla. Nulla vitae molestie ligula. Aliquam interdum, velit at tincidunt ultrices, sapien mauris sodales mi, vel rutrum turpis neque id ligula. Donec dictum condimentum arcu ut convallis. Maecenas blandit, ante eget tempor sollicitudin, ligula eros venenatis justo, sed ullamcorper dui leo id nunc. Suspendisse potenti. Ut vel mauris sem. Duis lacinia eros laoreet diam cursus nec hendrerit tellus pellentesque.
                </p>
            </ui:define>
        </ui:composition>
    </body>
</html>
Since the content section is the only one that is specific to our client, we need to define the top and left sections of the template:
<?xml version='1.0' encoding='UTF-8' ?>
<!DOCTYPE html PUBLIC "-//W3C//DTD XHTML 1.0 Transitional//EN" "http://www.w3.org/TR/xhtml1/DTD/xhtml1-transitional.dtd">
<html xmlns="http://www.w3.org/1999/xhtml"
      xmlns:ui="http://xmlns.jcp.org/jsf/facelets"
      xmlns:h="http://xmlns.jcp.org/jsf/html">


    <!-- <h:head> section omitted for brevity -->
    <h:body>


        <div id="top" class="top">
            <ui:insert name="top">
                <h2>Welcome to our Site</h2>
            </ui:insert>
        </div>
        <div>
            <div id="left">
                <ui:insert name="left">
                    <h3>Links</h3>
                    <ul>
                        <li>
                            <h:outputLink value="http://www.packtpub.com">
                                <h:outputText value="Packt Publishing"/>
                            </h:outputLink>
                        </li>
                        <li>
                            <h:outputLink value="http://www.ensode.net">
                                <h:outputText value="Ensode.net"/>
                            </h:outputLink>
                        </li>
                        <li>
                            <h:outputLink value="http://www.ensode.com">
                                <h:outputText value="Ensode Technology, LLC"/>
                            </h:outputLink>
                        </li>

                        <!-- other links omitted for brevity -->
                    </ul>
                </ui:insert>
            </div>
            <div id="content" class="left_content">
                <ui:insert name="content">Content</ui:insert>
            </div>
        </div>
    </h:body>
</html>
Since our template client does not override the top and left sections, the markup from the template will be rendered in the browser.
After making the preceding changes, our template client now renders as follows:
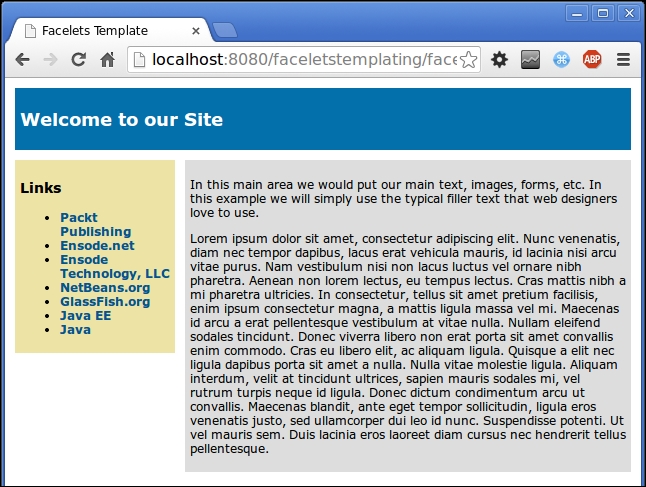
As we can see, creating Facelets templates and template clients with NetBeans is a breeze.