
14Applet and Graphics Programming
14.1 INTRODUCTION
An introduction is a special kind of Java program that a browser enabled with Java technology can run by downloading from the Internet. An applet is typically embedded inside a web page and runs in the context of the browser. An applet must be a subclass of the java.applet.Applet class, which provides the standard interface between the applet and browser environment.
An applet is an inherent part of a graphical user interface. It is a type of graphical component that can be displayed in a window (whether belonging to a web browser or to some other program). When shown in a window, an applet is a rectangular area that can contain other components, such as buttons and text boxes. It can display graphical elements such as images, rectangles and lines. And it can respond to certain "events", such as when the user clicks on the applet with a mouse.
Applets created by the user locally are known as local applets, whereas applets downloaded from the Internet from some remote machines and run in browser are known as remote applets. An applet can be viewed inside a Java-compatible browser or it can run using a tool shipped with Java development kit known as appletviewer. A remote applet is usually embedded in some web program.
The Applet class defined in the package java.applet is really only useful as a basis for making subclasses. An object of type Applet has certain basic behaviours, but doesn't actually do anything useful. It is just a blank area on the screen that does not respond to any events. To create a useful applet, a programmer must define a subclasss that extends the Applet class. There are several methods in the Applet class that are defined to do nothing at all. The programmer must override at least some of these methods and assign them some task.
Applets are particularly well suited for providing functions in a web page which requires more interactivity or animation that HTML can provide, such as graphical game, complex editing or interactive data visualization. The end user is able to access the functionality without leaving the browser.
14.2 APPLET VERSUS APPLICATION PROGRAMS
1. Applet has no main method whereas all stand-alone applications must have a main method. Only some of the applets have main method.
2. Applets could be deployed easily on the web, while installation of Java application is a cumbersome process.
3. An applet is an inherent part of a graphical user interface whereas an application program is a part of character user interface.
4. An applet has to be embedded into some web program to run it; it cannot be run stand-alone. To run an application program simply, main method is required; thus it can run standalone.
5. Standalone application requires main method for the execution of the program. For the execution of the applets certain methods are automatically called like init, paint, etc.
6. From the security point of view, applets are not allowed to read or write files to local machine. Otherwise, it could be possible for a remote applet to create havoc onto the user's machine.
7. One applet cannot communicate to another over communication link.
8. An Applet is a Windows-based program.
14.3 THE APPLET CLASS
The Applet class provides a standard interface between applets and their environment. The Applet class is responsible for the overall execution of the applet as this class contains a number of methods which control the life cycle of the applet. The hierarchy of Applet class is as shown in Figure 14.1.

Figure 14.1 The hierarchy of Applet class
The hierarchy clearly shows that Applet class extends Panel class, Panel class extends Container class, Container class extends Component class and, as said earlier, Object class is the parent class of each class. All classes except Object in the above hierarchy are responsible for providing support for Windows- and graphical-based components known as abstract window toolkit (AWT), which is covered in the next chapters.
The most common methods of Applet class are listed in the table given below with a brief description.
Table 14.1 Method of Applet class
14.4 WRITING THE FIRST APPLET
All applet classes must declare Applet class as their super class. This class is defined in the package java.applet. To draw a simple string onto the Applet window, paint method is used which takes an object of Graphics class which is defined in the package java.net .
The class has a number of methods for drawing graphics onto applet window. In the program drawstring method has been made use of, which takes three arguments. The string is displayed along x coordinate and y coordinate. The method is called automatically by the Java whenever a window is displayed. Java uses the standard, two-dimensional computer graphics coordinate system. The first visible pixel in the upper left-hand corner of the applet canvas is (0, 0). Coordinates increase to the right and down. This is shown in Figure 14.2.
The above program must be saved in a file applet1.Java . After writing the program, compile the program as follows:
javac applet1.java
This command will produce file applet1.class in the current directory. When an applet appears on a page in a web browser, it is up to the browser program to create the applet object and add it to a web page. The web browser, in turn, gets instructions about what is to appear on a given web page from the source document for that page. For an applet to appear on web page, the source document for that page must specify the name of the applet and its size. This specification is written in a language called HTML . For example, the HTML code for the above program can be written in a file applet1.html
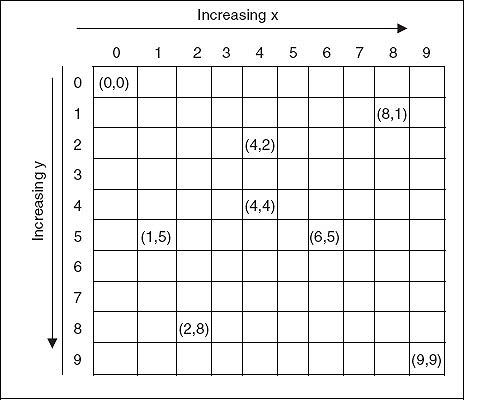
Figure 14.2 Coordinate system in Java
<html>
<applet code ="applet1.class" height=300 width =300>
</applet>
</html>
Now the applet can be run locally using appletviewer tool
appletviewer applet1.html
The message is displayed in a rectangle that is 300 pixels in width and 300 pixels in height.
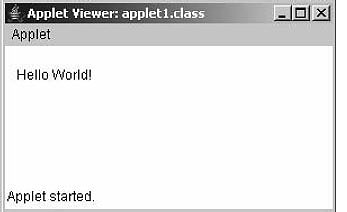
Figure 14.3 Running applet for applet1.java
The <APPLET> tag is used to add a Java applet to a web page. This tag must have a matching </APPLET>. A required modifier named CODE gives the name of the compiled class file that contains the applet. HEIGHT and WIDTH modifiers are required to specify the size of the applet. This assumes that the files applet1.class is located in the same directory with the HTML document. If this is not the case, another modifier, CODEBASE , can be used, to give the URL of the directory that contains the class file. For example, if a particular file is in directory C:jpsch14, in the HTML file for the applet the following can be written:
<html>
<applet code="C:jpsch14applet1.class" height=200 width= 200>
</APPLET>
</html>
The value of CODE itself is always just a file name, not a URL .
<applet code = applet1.class width = 200 height = 200>
And
<applet code ="applet1" width = 200 height =200>
are the same.
The applet1.html file can also be run within web browser. Inside a small rectangular window the output is displayed. This is as shown in Figure 14.4.
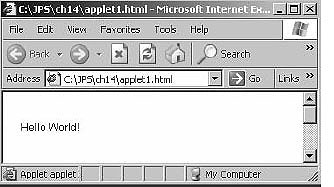
Figure 14.4 Applet applet1.html within Web browser
Because the appletviewer ignores everything but Applet tags, the programmer can put those tags in the Java source file as comments:
//<applet code ="My applet" width=200 height=200></APPLET>
This way, "appletviewer applet1.java" can be run and tiny HTML files need not be created to run applets. For example, modifying applet1.java will result into following code.
//<applet code ="applet1" height=200 width =200></APPLET>
import java.awt.*;
import java.applet.*;
public class applet1 extends Applet
{
   public void paint(Graphics g)
   {
           g.drawString("Hello World!", 10, 30);
   }
}
14.5 LIFE CYCLE OF AN APPLET
A few methods are called from the birth of an applet to its death. The applet cycle describes how these methods are called in order and how many times.
All applets have the following four methods:
public void init();
public void start();
public void stop();
public void destroy();
They have these methods because their super class, java.applet.Applet , has these methods. (It has others too, but for now these four methods only are taken up).
In the super class, these are simply do-nothing methods. For example
public void init() {}
1. The init() method is called exactly once in an applet's life, when the applet is first loaded. It is normally used to read PARAM tags, start downloading any other images or media files and set up the user interface. Most applets have init() methods.
2. The start() method is called at least once in applet's life, when the applet is started or restarted. In some cases it may be called more than once. Many applets that a programmer writes will not have explicit start() methods and will merely inherit one from their super class. A start() method is often used to start any threads the applet will need while it runs.
The major difference between the init() and strat() methods is that the method start() can be called again in the same life cycle. For example, when a client leaves the HTML pages and then returns, the applet will not be discarded completely from memory, so the applet will simply restart, skipping the init() method and calling the start() method again. If the applet is completely destroyed, it has to be physically reloaded, which will start the life cycle all over again, initially calling init() again.
3. The stop() method is called at least once in an applet's life, when the browser leaves the page in which the applet is embedded. The applet's start() method will be called at some later point when the browser returns to the page containing the applet. In some cases the stop() method may be called multiple times in an applet's life.
4. The destroy() method is called exactly once in an applet's life, just before the browser unloads the applet. This method is generally used to perform any final cleanup. For example, an applet that stores state on the server might send some data back to the server before it is terminated. Many applets will not have explicit destroy methods and just inherit one from their super class.
In the JDK's appletviewer, selecting the Restart menu item calls stop() and then start(). Selecting the Reload menu item calls stop(), destroy() and init(), in that order. The programmer's code may occasionally invoke start() and stop() . For example, it is customary to stop playing an animation when the user clicks the mouse in the applet and restart it when they click the mouse again.
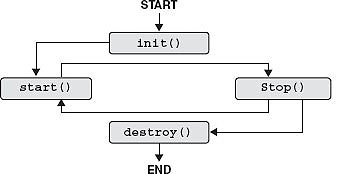
Figure 14.5 Applet life cycle
Explanation: The showStatus method is located in the object java.applet.Applet , so this method is inherited from the class Applet . Its primary function is to display text at the bottom of the window in the appletviewer or at the status bar on a Java-compliant browser. The for loop causes enough delay so that one can see the text in the status bar.
Compile the file using javac to create the class file. Now create lifecycle.html file as given below:
//File name: lifecycle.html
<html>
<APPLET>
<applet code ="lifecycle" height=200 width=200>
</APPLET>
</html>
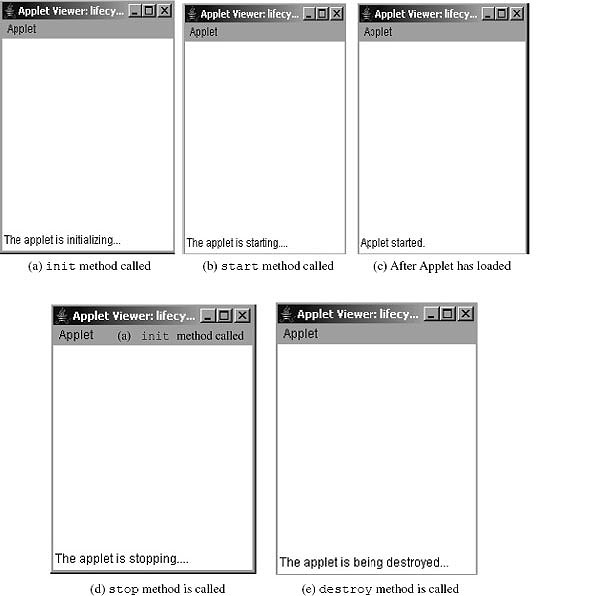
Figure 14.6 Output screen (a, b, c, d and e) of Program 14.2
14.6 APPLET TAG AND APPLET PARAMETERS
The <APPLET> tag is used to add a Java applet to a web page. The <APPLET> tag is responsible for starting the execution of applet. This tag must have a matching </APPLET>. A required modifier named CODE gives the name of the compiled class file that contains the applet. HEIGHT and WIDTH modifiers are required to specify the size of the applet.
In the applet programs seen so far <APPLET> tag has been used in a very simple manner. In this section, this is dealt with in detail. The general syntax for <APPLET> tag is shown as follows:
<APPLET
[CODEBASE = codebaseURL]
CODE = appletFile
[ALT = alternateText]
[ARCHIVE = archiveList]
[NAME = appletInstanceName] WIDTH = pixel HEIGHT = pixels
[ALIGN = alignment]
[VSPACE = pixels][HSPACE = pixels]
>
[<PARAM NAME = AttributeName VALUE = AttributeValue>]
[<PARAM NAME = AttributeName2 VALUE = AttributeValue>]
.........
[HTML Displayed in the absence of Java]
</APPLET>
The square brackets contain options. Some of the options are explained below:
CODEBASE: This attribute gives the URL of the directory that contains the class file. The HTML document's URL directory is used as the CODEBASE if this attribute is not specified. It is an optional attribute.
CODE: This required attribute denotes the class files for the applet.
ALT: A short text message can be assigned to this tag and same will be displayed where the browser cannot run Java applets for whatever reason.
ARCHIVE: If an applet uses a lot of .class files, it is a good idea to collect all the .class files into a single .zip or .jar file. Zip and jar files are archive files which hold a number of smaller files. The Java development system is probably capable of creating them in some way. If class files are in an archive, the name of the archive file has to be specified in an ARCHIVE modifier.
VSPACE and HSPACE: These optional attributes specify the number of pixels above and below the applet (VSPACE) and on each side of the applet (HSPACE).
NAME: This optional attribute specifies a name for the applet instance, which makes it possible for applets on the same page to find (and communicate with) each other. To obtain an applet by name, getApplet(), method defined by the AppletContext interface can be used.
ALIGN: This optional attribute specifies the alignment of the applet. The possible values of this attribute are left, right, top, texttop, middle, absmiddle, baseline, bottom and absbottom.
PARM and VALUE: This tag is the only way to specify an applet-specify attribute. Applets access their attribute with the getParameter() method. This is discussed in the next section.
14.7 PASSING PARAMETER TO APPLET
Parameters can be passed to applets from the HTML file. The parameter can then be retrieved in the applet class file and used. To pass a parameter to the applet, the PARAM tag can be used in the HTML. Using this tag, the name of the parameter and its value can be defined. The programmer can pass as many parameters as needed. The syntax of using parameters is given below:
<PARAM NAME = parameter_name value = parameter_value>
For example, for passing a parameter name txt with value "hello" will be defined as:
<PARAM NAME = txt value = "hello">
In the applet code the parameter can be retrieved as:
String text = getParameter ("txt");
The getParameter method can be used to retrieve the parameter value. The parameter name is passed in double quotes as shown above. If parameter has no value, null will be returned as shown in the following example.
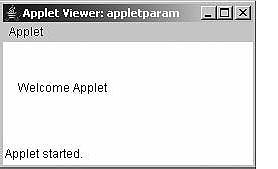
Figure 14.7 Output screen of Program 14.3
Explanation: In the Java file, one of the life cycle methods init() is overridden to accept parameters from the browser.
alter = getParameter("Txt");
str = (alter == null) ? "String is empty" : alter;
It is seen in the code that the format to get a parameter relies on the fact that a temporary variable (in this case, alter) is used to accept input from the getParameter method that was made available to the programmer from the class Applet . The string inside the method getParameter specifies the default value if alter comes back empty. The last line of code in this method exemplifies the use of the ternary operator and with it, one is able to test whether the alter is null (i.e., that no value was returned from the getParameter call). If the evaluation is true, the default string "String is empty " will be placed on the applet instead. If a value was returned from the call, the evaluation will be returned false, and the value in the temporary variable will be passed on to the applet by passing it to the variable str .
Explanation: In the HTML file for the applet two parameters, N1 and N2, are passed with integer value 20 and 40, respectively. As all the parameters are String by default so they have to be converted into integer before processing them. In the init method using the Integer.parseInt method they have been converted into integer and stored into n1 and n2, respectively. Next, maximum of the n1 and n2 are found and stored in m . Later it is converted into String str which is displayed.
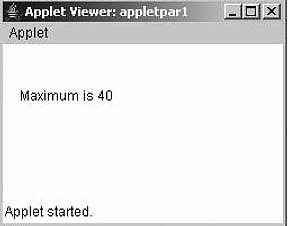
Figure 14.8 Output screen of Program 14.4
By the way, if anything is put besides PARAM tag between <APPLET> and </APPLET> , it will be ignored by any browser that supports Java. On the other hand, a browser that does not support Java will ignore the APPLET and PARAM tags. This means that if a message such as "Your browser doesn't support Java" is put between <APPLET> and </APPLET> , that message will only appear in browsers that does not support Java.
Here is an example of an APPLET tag with PARAMs and some extra text for display in browsers that does not support Java:
<applet code = "ShowMessage.class" WIDTH=200 HEIGHT=50>
<PARAM NAME = "message" VALUE = "Goodbye World!">
<PARAM NAME = "font" VALUE = "Serif">
<PARAM NAME = "size" VALUE = "36">
<p align = center>Sorry, but your browser doesn't support Java!</p>
</APPLET>
14.8 THE PAINT, UPDATE AND REPAINT METHOD
14.8.1 The Paint Method
The paint method is defined by the AWT component class. The paint() method is called by the system when the applet needs to be drawn. In a subclass of Applet, the paint() method can be redefined to draw various graphical elements such as rectangles, lines and text on the applet. The definition of this method must have the form as given below:
public void paint(Graphics g)
{
    //draw some stuff }
}
The parameter g, of type Graphics , is provided by the system when it calls the paint() method. The paint method is called whenever applet begins execution, whenever something needs to be redrawn (i.e., resizing/minimizing/restoring the applet window). In Java, any kind of drawing is done using a method provided by a Graphics object. There are many such methods. A few examples are presented later in graphics programming section.
The paint() method of an applet does not, by the way, draw GUI components such as buttons and text input boxes that the applet might contain. Such GUI components are objects in their own right, defined by other classes. All component objects, not just applets, have paint() methods. Each component is responsible for drawing itself in its own paint() method. Later, it will be seen that many applets do not even define a paint() method of their own. Such applets exist only to hold other GUI components, which draw themselves.
14.8.2 The Update Method
This method is called when the applet has requested that a portion of its window be redrawn. The default version of update() first fills an applet with the default background color and then calls paint(). The AWT calls the update method in response to a call to repaint. Whenever there is a change in the background color in paint the user will experience a fluctuation of screen each time update() is called-that is, whenever the window is repainted. The remedy of this problem is to override the update() method so that it performs all necessary display activities. Then have paint() simply call update().
public void update(Graphics g)
{
     //redisplay your window, here
}
public void paint(Graphics g)
{
     update(g);
}
14.8.3 The Repaint Method
The repaint() method is defined by the AWT. It causes the AWT run-time system to execute a call to the applet's update() method, which, in its default implementation, calls paint(). The method is a member function of the Component class. Now whenever one needs to draw or paint something, there is no need to write that in paint method. It can be stored and a call can be made to repaint which in turn will be calling the paint method. This technique is used with AWT controls and event handling codes in the coming chapters. For example, to draw a String object msg , one can assign contents to it anywhere within the applet windows code and then call repaint which will then call paint method. Inside the paint method drawstring method can be used to display the string.
The method has four overloaded forms:
1. void repaint()
This form of method causes the whole of the window to be repainted.
2. public void repaint(long tm)
This form of method repaints the component. This results in a call to paint within tm milliseconds. This form of method can be used with animations where a consistent update time is necessary.
3. public void repaint(int x, int y, int w, int h)
This form of method repaints the specified rectangle of this component, where the left-top coordinates are specified by x and y and width-height are specified by w and h. If one needs to update only a small portion of the window, it is more efficient to repaint only that region.
4. public void repaint(long tm, int x, int w, int h)
This form is similar to the third form but here also specify the time tm in milliseconds for which calling to paint is delayed.
As stated earlier, this method will be used extensively in event handling codes.
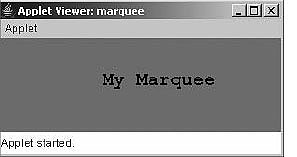
Figure 14.9 Output screen of Program 14.5
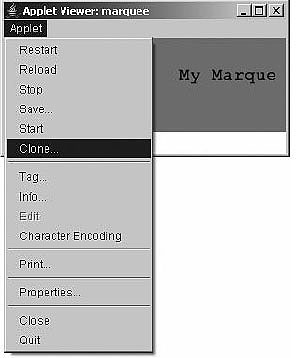
Figure 14.10 Menu of the applet "marquee" to get clone
Explanation: In this program, a marquee has been developed that moves from left to right. The controlling of marquee is done using a separate thread. For this purpose, the applet window class marquee implements Runnable interface. In the init method the foreground and background color, and font have been set. An instance t is also taken of Thread class. In the start method of Applet Thread instance t is initialized and t.start calls the run method. (Recall start method of Thread class that calls run method automatically.) In the run method, the repaint method calls the paint method. In run method, there is an infinite for loop inside that modifies the value of x and gives delay of 50 millisecond using sleep method. This causes paint method to be called after every 50 millisecond. In the paint method msg is drawn at x and y position. As x is being changed inside run method, the string "My Marquee" moves from left to right. When the condition
if ((x - 10) > (this.getSize().width))
x = 1;
returns true, that is, x - 10 is greater than width of the applet window, x becomes 1 and marquee starts again from starting position 1.
In case applet is stopped using stop menu option within applet window using appletviewer , boolean variable stop becomes false and thread is stopped. When it is resumed again using resume menu option, it starts again.
It is possible to improve the marquee applet to move the marquee in either direction, from top to bottom, bottom to top or any other. One can try this as well as the two marquees simultaneously.
14.9 Getdocumentbase() AND Getcodebase() METHODS
These two methods are important in that they return the complete URL for the applets. Both are discussed one by one.
The signature of the method getDocumentBase() defined by Applet class is:
public URL getDocumentBase()
The method getDocumentBase() gets the URL of the document in which this applet is embedded. For example, suppose an applet is contained within the document:
http://java.sun.com.products/jdk/1.5/index.html
The document base is:
http://java.sun.com.products/jdk/1.5/index.html
The signature of the getCodeBase method is
public URL getCodeBase()
The method gets the base URL. This is the URL of the directory which contains this applet. The following example clarifies the above two methods practically.
Explanation: The program is simple. In this program, two URL references are created and initialized in the init method with getDocument Base() and getCodeBase(). The URL class is defined in the java.net package, so this has to be imported into the program. In the paint method the URLs are converted to String form and are displayed using drawString method. For more about URL class refer the chapter "Networking in Java".
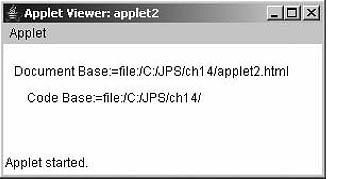
Figure 14.11 Output screen of Program 14.6
14.10 THE APPLETCONTEXT INTERFACE
The interface corresponds to an applet's execution environment: the document containing the applet and the other applets in the same document. The methods in this interface can be used by an applet to obtain information about its environment. The context of the currently executing applet is obtained by a call to the getAppletContext () method defined by Applet . Some of the abstract methods of the interface are shown in Table 14.2.
| Method Signature | Description |
AppletgetApplet(String name) |
Finds and returns the applet in the document represented by this applet context with the given name or null if not found. The name can be set in the HTML tag by setting the name attribute. |
Enumeration getApplets() |
Returns an enumeration of all applets in the documents represented by this applet context. |
AudioClip getAudioClip (URL url) |
Returns an AudioClip object that encapsulates the audio clip found at the location specified by url. |
Image getImage(URL url) |
Returns an Image object that can then be painted on the screen. The url argument that is passed as an argument must specify an absolute URL. |
void showDocument(URL url) |
Replaces the web page currently being viewed with the given URL. This method may be ignored by applet contexts that are not browsers. |
void showDocument(URl url, String target) |
Requests that the browser or applet viewer show the web page indicated by the url argument. The placement of the document is specified by target as described in the text. An applet viewer or browser is free to ignore showDocument. |
void show(String status) |
Requests that the argument string be displayed in the "status window". |
Table 14.2 Methods of AppletContext interface
The most important method is showDocument method. After obtaining an applet's context another HTML document can be loaded using showDocument method. As can be seen from the table above, there are two forms of the showDocument method. In the second form, the target argument may be one of the following as shown in Table 14.3.
| Target Argument | Description |
"_self" |
Show in the window and frame that contain the applet |
"_parent" |
Show in the applet's parent frame. If the applet's frame has no parent frame, acts the same as "_self". |
"_top" |
Show in the top-level frame of the applet's window. If the applet's frame is the top-level frame, acts the same as "_self". |
"_blank" |
Show in a new, unnamed top-level window. |
name |
Show in the frame or window named name. If a target named name does not already exist, a new top-level window with the specified name is created, and the document is shown there. |
Table 14.3 Target argument of showDocument method
The following is an example of usage of this method.
Explanation: In this program, the start method of the Applet class is overridden. In the method the execution context of the applet is obtained using method getAppletContext(). The context is stored in the reference ac of AppletContext interface. The current directory of the HTML file that is to be displayed is obtained using getCodeBase method. The url is combined with the "demo.html" file and used as argument in the showDocument method. Note the code will not work if applet is run using appletviewer. Create a separate HTML file by the name AppCon.htm and put the following code in it.
//file AppCon.html
<html>
<applet code ="AppCon" width = 300 height = 100>
</APPLET>
</html>
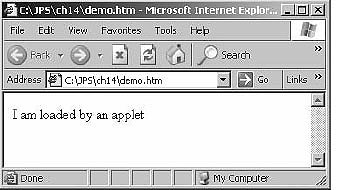
Figure 14.12 Output screen of Program 14.7
Now run the above .html file using any browser. IE has been used in Win XP .
14.11 PLAYING AUDIO IN APPLET
For playing audio in applets there are two methods: the first one is to use play method defined by applet class and second is to use AudioClip interface defined by java.applet package. Both approaches are taken one by one.
14.11.1 Playing Audio Using Play Method of Applet Class
The method has two forms. The signature of the first form is given below:
public void play(URL url, String name)
The method plays the audio clip given the URL and a specifier that is relative to it. Nothing happens if the audio clip cannot be found. The url is an absolute URL giving the base location of the audio clip. The name is the location of the audio clip, relative to the url argument.
Second form does take only URL as argument:
public void play(URl url)
The method is illustrated using an example given below:
Explanation: The program is simple. A new URL using the getCodeBase and an audio file name, which is to be played, are created. The file name is "POP1.mid". Here, only audio files are created with wav and mid extensions. The file to be played must be in the current directory of the applet. The URL thus created is passed to the play method. The play method plays the file from beginning to end just once. The audio file is played as soon as applet is started.
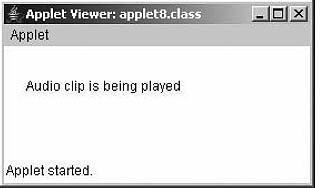
Figure 14.13 Output screen of Program 14.8
14.11.2 Playing Audio Using AudioClip Interface
The AudioClip interface is defined by the java.applet package. The AudioClip interface is a simple abstraction for playing a sound clip. Multiple AudioClip items can be played at the same time, and the resulting sound is mixed together to produce a composite. It has got three methods:
(a) void play()
This method starts playing this audio clip. Each time this method is called, the clip is restarted from the beginning. The clip is played just once.
(b) void stop()
This method when called stops playing this audio clip.
(c) void loop()
This method when called starts playing this audio clip in a loop.
The method getAudioClip of the Applet class returns a reference of this interface. It has the following two forms:
public AudioClip getAudioClip(URL url, String name)
public AudioClip getAudioClip(URL url);
These methods return the AudioClip object specified by the URL and name arguments in first form and only URL in second form. The methods always return immediately whether or not the audio clip exists. When this applet attempts to play the audio clip, the data will be loaded.
An example is given below.
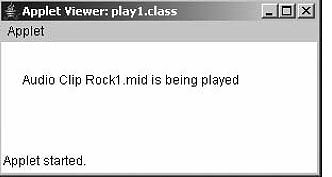
Figure 14.14 Output screen of Program 14.9
Explanation: The program is similar to the previous one but here AudioClip interface has been used for playing the audio. The URL here is passed to the getAudioClip method and reference returned is stored in reference ac of AudioClip . The audio clip is then played using play method of this reference.
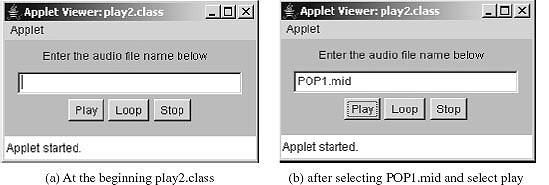
Figure 14.15 Output screen of Program 14.10
Explanation: Some of the concepts used in this program are covered in subsequent chapters. Readers are advised to refer them first and try the above code. In the program, there is one Label instance, one TextField instance and 3 Button instances. The file name is taken from the user in the text box. When play button is clicked actionPerformed method is called. In the method, using the file name entered in the text box and getCodeBase , a new URL instance is created and depending on which button was pressed, action is taken.
14.12 WORKING WITH GRAPHICS CLASS
To do any drawing at all in Java, a graphics context is needed. A graphics context is an object belonging to the Graphics class. Instance methods are provided in this class for drawing shapes, text and images. Any given Graphics object can draw to only one location. In this chapter, that location will always be one of Java's GUI components, such as an applet. The Graphics class is an abstract class, which means that it is impossible to create a graphics context directly, with a constructor. There are two ways to get a graphics context for drawing on a component: first of all, of course, when a component's paint () method is called, the parameter to that method is a graphics context for drawing on the component. Second, to make it possible to draw on a component from outside its paint() method, every component has an instance method called getGraphics(). This method is a function that returns a graphics context for the component.
The instance method, getGraphics(), is defined in the Component class. It returns a graphics context that can be used for drawing to a particular component. That is, if comp is any component object and if g is a variable of type Graphics, the following is true.
g = comp.getGraphics();
After this assignment, g can be used for drawing to the rectangular area of the screen that represents the component, comp. When writing a particular applet or what other component class, one needs to call the (inherited) getGraphics() method in the same class. So it would be simply "g = getGraphics() ". This gives a graphics context for drawing in the component being written.
The Graphics class provides a number of methods for drawing various graphical shapes like, line, rectangle, circle, arc, polygon, etc. The class is an abstract class and an object of it cannot be initiated. In this section, some of the commonly used graphical methods will be dealt with.
14.12.1 Drawing Lines and Rectangles
For drawing lines, the Graphics class provides the method as:
void drawLine(int x1, int y1, int x2, int y2)
The method draws a line from (x1, y1) to (x2, y2). It can be used as:
g.drawLine(10,10,50,10);
For drawing rectangle, the Graphics class provides method as:
void drawRect(int top, int left, int width, int bottom);
For example, g.drawRect(20, 20, 120, 50);
The method draws a rectangle whose top left coordinate is given as (20, 20), width 120 and height 50.
The following is another example:
int w = this.getSize().width-1;
int h = this.getSize().height-1;
g.drawRect(0, 0, w, h);
Remember that getSize(). width is the width of the applet and getSize().height is the height. The upper left-hand corner of the applet starts at (0, 0) not at (1, 1). This means that a 100 by 200 pixel applet includes the points with x coordinates between 0 to 99, not between 0 and 100. Similarly, the y coordinates are between 0 and 199 inclusive, not 0 and 200.
There is no separate drawSquare() method. A square is just a rectangle with equal length sides, so to draw a square call drawRect() and pass the same number for both the height and width argument.
A rounded rectangle can also be drown. For this purpose, there is method drawRoundRect . The signature is:
void drawRoundRect(int top,int left,int width,int height, int
arcWidth,int arcHeight)
The first four parameters are same as for rectangle. The last two parameters are arc width and arc height for joining the corners of the rectangle so that it will look like a rounded rectangle.
14.12.2 Drawing Ovals and Circles
Java has methods to draw outlined and filled ovals. As one would probably guess, these methods are called drawOval() and fillOval(), respectively. As one might not guess they take identical arguments to drawRect() and fillRect(), which is given as follows.
public void drawOval(int left,int top,int width,int height);
public void fillOval(int left, int top, int width, int height);
Instead of the dimensions of the oval itself, the dimensions of the smallest rectangle which can enclose the oval are specified. The oval is drawn as large as it can touch the rectangle's edges at their centres. This is as shown in the picture:
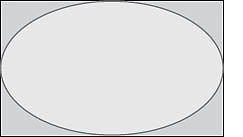
The arguments to drawOval() are the same as the arguments to drawRect(). The first int is the left-hand side of the enclosing rectangle, the second is the top of the enclosing rectangle, the third is the width and the fourth is the height. For example, to draw a circle at centre (x, y) of radius r the following will be written:
g.drawOval(x-r, y-r, 2*r, 2*r);
Java also has method to draw outlined and filled arcs. They are similar to drawOval() and fillOval() but a starting and ending angle must also be specified for the arc. Angles are given in degree. The signatures are as follows:
public void drawArc(int left,int top,int width,int height, int
startAngle, int stopAngle)
public void fillArc(int left,int top,int top,int width,int height,
int startAngle, int stopAngle)
The rectangle is filled with an arc of the largest circle that could be enclosed within it. The location of 0 degrees and whether the arc is drawn clockwise or counter-clockwise are currently platform dependent.
14.12.3 Drawing Polygon
Polygons are defined by their corners. The polygon seen and created here lie in a 2-D plane. The basic constructor for the Polygon class is
public Polygon(int[] xpoints, int[]ypoints, int npoints)
where xpoint is an array that contains the x coordinate of the polygon and ypoints is an array that contains the y coordinate. Both should have the length npoints. Thus to construct a 3-4-5 right triangle with the right angle on the origin one would type:
int[]xpoint = {0,3,0};
int[]ypoint =(0,0,4};
Polygon myTriangle = new Polygon(xpoints, ypoints, 3};
To actually draw the polygon Java.awt.Graphics's drawPolygon(Polygon p) method is used within the paint() method like this:
g.drawPolygon(myTriangle);
The arrays and number of points can be passed directly to the drawPolygon() method if so preferred:
g.fillPolygon(xpoints, ypoints, xpoints.length);
There is also an overhead fillPolygon() method. The syntax is exactly as one expects:
g.fillPolygon(myTriangle);
g.fillPolygon(xpoints, ypoints, xpoints.length);
Java automatically closes the polygons it draws. That is, it draws polygons that look like the one on the right rather than on the left.
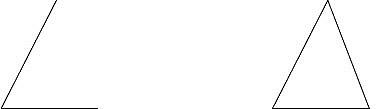
If the polygons are not wanted to be closed, a polyline can be drawn instead with the drawPolyline() method of the Graphics class.
public abstract void drawPolyline(int[]xPoints, int[] yPoints, int
nPoints)
14.12.4 Using Color
Java is designed to work with the RGB color system. An RGB color is specified by three numbers that give the level of red, green and blue, respectively, in the color. A color in Java is an object of the class, Color . A new color can be constructed by specifying its red, blue and green components. For example,
Color myColor = new Color(r, g, b);
There are two constructors that can be called in this way. In the one that is commonly used r , g and b are integers in the range 0 to 255 . In the other, they are numbers of type float in the range 0.0F to 1.0F . Often, constructing new colors can be avoided altogether, since the Color class defines several named constants representing common colors:

The static color name may be in whole lowercase; for example, Color.black may be written as Color. BLACK.
An alternative to RGB is the HSB color system. In the HSB system, a color is specified by three numbers called the hue, the saturation and the brightness. The hue is the basic color, ranging from red through orange through all the other colors of the rainbow. The brightness is pretty much what it sounds like. A fully saturated color is a pure color tone. Decreasing the saturation is like mixing white or gray paint into the pure color. In Java, the hue, saturation and brightness are always specified by values type float in the range from 0.0F to 1.0F. The Color class has a static member function named getHBSColor for creating HSB colors. To create the color with HSB values given by h, s and b, the following can be written:
myColor = Color.getHSBColor(h,s,b);
For example, a random color could be made that is as bright and as saturated as possible with:
myColor = Color.getHSBColor((float))Math.random(), 1.0F, 1.0F);
The type cast is necessary because the value returned by Math.random() is of type double, and Color. getHSBColor() requires values of type float. (By the way, one might ask why RGB colors are created using a constructor while HSB colors are created using a static member function. The problem is that two different constructors would be needed, both of them with three parameters of type float. Unfortunately, this is impossible. One can only have two constructors if their numbers of type of parameters differ)
For drawing colorful shapes the foreground color can be set as:
setForeground(Color.red);
The function setForeground of Component class take just one parameter: the color which is to be set. The argument must be some predefined colors of Color class which can be Color.red, Color. blue, Color.black, etc. The red, green, blue, etc., are static members of Color class. For example, in the above program just add the line in the beginning of the paint method.
setForeground(Color.blue);
And all shapes will be in blue color. For setting the background of the applet setBackgorund method can be used which was seen in applet lifecycle program. For filling the closed figure and as drawing pen color, setColor method of Graphics class can also be used. This is as shown below:
g.setColor(Color.red);//sets drawing pen and fill color as red.
Similarly, current color can be obtained by using the constructor of Color class which takes three arguments of type int and represents red, green and blue component of the color. They can take value between 0 and 255. One such usage is:
Color col = new Color(234, 45, 123);
g.getColor(col);
g.setColor(new Color(234, 45, 123));
setForeground(new Color(0,0,222));
In the above example, red component is 234, green 45 and blue 123.
For getting the current foreground and background color, there are the functions defined by the component class:
Color. getBackground();
Color.getForeground();
These functions can be used for obtaining the current foreground and background color as:
Color bg = getbackground();
Color bg = getForeground();
14.12.5 Setting the Drawing Mode
In Java, for drawing anything onto the screen, two drawing modes can be used. The default mode is the paint mode and other mode is the XOR mode. The default mode is the paint mode where if one shape is drawn over another, the second one hides the overlapped portion and is completely visible. The XOR mode is discussed first.
For setting the XOR mode, the method setXORMode can be used. Its signature is as shown below:
public abstract void setXORMode(Color c1)
Here, c1 specifies the color that will be XORed to the window when an object is drawn. The method specifies that logical pixel operations are performed in the XOR mode, which alternates pixels between the current color and a specified XOR color.
For restoring the main drawing mode, use the method setPaintMode . Its signature is given below:
public abstract void setPaintMode()
The method sets the paint mode of this graphics context to overwrite the destination with this graphics context's current color. This sets the logical pixel operation function to the paint or overwrite mode.
Explanation: In this program, a filled rectangle is drawn using blue color of width and height 80 pixels. The paint mode is then set to XOR mode with XOR color to magenta using function setXORMode. Next, a filled rectangle is drawn whose left-top coordinates are 40-40, with width and height of 90 pixels. The coordinates of second rectangle are chosen in such a manner that the second rectangle overlaps the first. Now, due to XOR mode, overlapped pixels of two rectangles are drawn in magenta color and uncovered portion of second rectangle is drawn in cyan color. Next, drawing mode is restored to paint mode using setPaintMode method. The method causes the current fill and pen cooler to reset to original color as set using setColor method.
For the following two programs concepts of event handling must be clear in order to cover it in the next chapter.
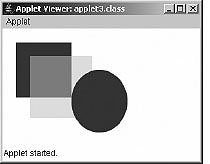
Figure 14.16 Output screen of Program 14.11
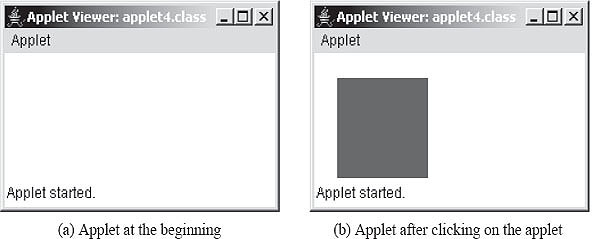
Figure 14.17 Output screen of Program 14.12
Explanation: In this program in paint method, when click is false the XOR mode is set. The color passed is the current background color. The else part is skipped and a filled rectangle is drawn onto the same place where rectangle in blue color was drawn. This results in wiping the previous rectangle drawn and nothing is visible onto the screen. This is all because of line.
g.setXORMode(getBackground());
The boolean variable click was set to true when the mouse was clicked. In this case, else part executes and rectangle drawn is visible. This technique can be used to draw rubber band lines.
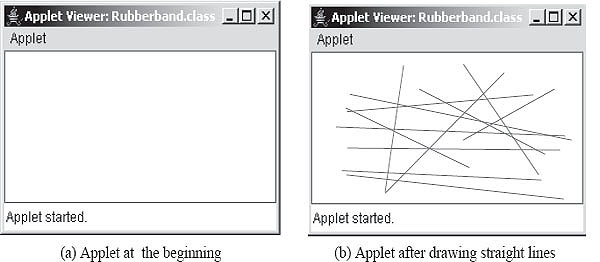
Figure 14.18 Output screen of Program 14.13
Explanation: XOR mode can be used to implement a "rubber band cursor". A rubber band cursor is commonly used to draw straight lines. When the user clicks and drags the mouse, a moving line stretches between the starting point of the drag and the current mouse location. When the user releases the mouse, the line becomes a permanent part of the image. While the mouse is being dragged, the line is drawn in XOR mode. When the mouse moves, the line is first redrawn in its previous position. In XOR mode, this second drawing operation erases the first. Then, the line is drawn in its new position. When the user releases the mouse, the line is erased one more time and is then drawn permanently using paint mode. The same idea can be used for other figures besides lines.
In the program when the user first presses the mouse button starting mouse coordinates are stored in sx and sy in mousePressed method. The same points are stored in px and py, too. The graphics context for the applet window is stored in Graphics instance dragGr using getGraphics method. The paint mode is set to XOR mode using setXORMode method. As stated above while the mouse is being dragged, the line is drawn in XOR mode. As soon as mouse is released, the line is visible as straight line.
14.12.6 Programming Example
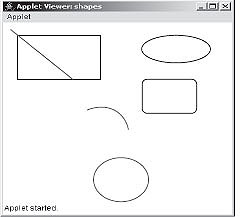
Figure 14.19 Output screen of Program 14.14
Explanation: The program is self-explanatory.
Explanation: The program draws a hollow polygon from points (100, 200) to (350, 100) and from (350, 100) to (15, 50). In the second case, when drawing a filled polygon, the same two arrays are initialized with new coordinates. Note that the polygon can be directly drawn and filled without making use of Polygon class as explained earlier.
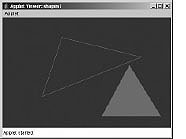
Figure 14.20 Output screen of Program 14.15
Explanation: The number of sides (i.e., 8 for octagon) is stored in variable x. Two arrays arrx and arry have been created for storing the x and y coordinates of the octagon, respectively. Each side of the octagon is placed at an angle 360/8 = 45 degree. We know that if ? is the angle and r is the length then polar coordinates (θ, r), Cartesian coordinates can be obtained as x = r cos θ and y = r sin θ . Here θ is 45 and r is 150 which is the length of one side of octagon in pixles. To store all the coordinates in the array a loop is run from 0 to 360 with step size equal to 45 . The angle has to be converted into radians. The respective x and y coordinates are stored in the array arrx and arry and then outside the loop they are used in drawing octagon.
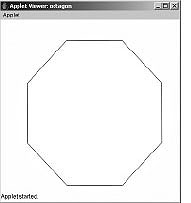
Figure 14.21 Output screen of Program 14.16
Explanation: This pointer gives reference to the current component object (i.e., applet). Use of getSize().width and getSize(). height gives width and height of the applet window. To draw filled concentric circles, the width and the height of the enclosing rectangle around the circles are to be assumed first. After fixing the height and width, for example, as RH and RW, respectively, the top and left coordinates of the rectangle can be found out. If AH and AW represents the height and width of the applet window and (AW/2, AH/2) gives the center of the window. The left-top coordinates of the enclosing rectangle is given as:
RL = AW/2 - RW/2 and RH = AH/2 - RH/2
For a circle RH and RW will be same. Putting the value of RH and RW the following is obtained.
RL = AW/2 - AW/4 and RT = AH/2 - AH/4
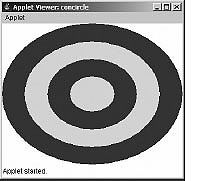
Figure 14.22 Output screen of Program 14.17
Explanation: In the paint method, random numbers between 1 and 1000 are generated and stored in x and y. x%w ensures that numbers generated randomly are within the width and height of the applet window. One end of the line at the centre of the window is kept by writing the (x1, y1) as (h/2, w/2). The second point of line is x and y which changes in every iteration of the loop. For generating random colors, Color class is made use of. The constructor of this class takes three components of color as red, green and blue. The values of these components are within the range 0-255. Due to x%255, y%255 different colors are generated in each iteration of the loop.
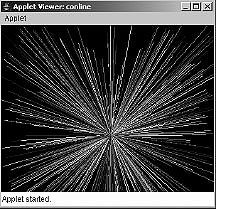
Figure 14.23 Output screen of Program 14.18
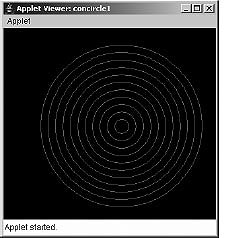
Figure 14.24 Output screen of Program 14.19
Explanation: The logic to generate concentric circles was explained earlier. The difference here is that hollow circles are drawn instead of filled circles.
14.13 WORKING WITH FONTS
A font represents a particular size and style of text. The same character will appear different in different fonts. In Java, a font is characterized by a font name, a style and a size. To work with the fonts, Java provides the Font class. The Font class represents fonts, which are used to render text in a visible way. The Font class is defined by the package Java.awt. A font can have many faces, such as heavy, medium, oblique, gothic and regular. All of these faces have similar typographic design. There are three different names that one can get from Font object. The logic font name is simply the name that was used to construct the font. The font face name, or just font name for short, is the name of a particular font face, like Helvetica Bold. The family name is the name of the font family that determines the typographic design across several faces, like Helvetica.
The available font names are system dependent, but one can always use the following five strings as font names: "Serif", "SansSerif", "Monospaced", "Dialog" and "DialogInput". These fonts are known as logical fonts. All the system-dependent fonts are known as physical fonts.
To create and use a font in a program the Font class constructor can be used as follows:
Font(String name, int style, int size);
The name is the font name defined by the system font libraries (e.g., " Courier ", " Times new Roman", "Arial ", etc.). The style may be Font.PLAIN , Font.BOLD Font.ITALIC and Font.BOLD+Font.ITALIC . These are the constants defined by Font class. To set more than one style the symbol (|) can be used (e.g., Font.BOLD | Font.ITALIC) . The size specifies size in points.
For example:
Font myfont = new Font("Arial", Font.BOLD, 14);
The example given above creates a new font object named myfont which represents Arial bold font of point size 14. After creating a font object it can be set using setFont method as:
setFont(myfont);
Some of the methods of Font class are given in the table below:
| Method Signature | Description |
String getFamily() |
Returns the name of the font family to which the invoking font belongs. |
String getFontName() |
Returns the font face name of this font. For example, Helvetica Bold could be returned as a font face name. |
String getName() |
Returns the logical name of this font. |
public int getStyle() |
Returns the style of this font. The style can be plain, bold, italic, or bold + italic. |
boolean isBold() |
Indicates whether or not this font object's style is bold. |
boolean isItalic() |
Indicates whether or not this font object's style is Italic. |
boolean isPalin() |
Indicates whether or not this font's style is Plain. |
int getSize() |
Returns the size, in points, of the invoking font. |
Table 14.4 Methods of Font class
The Font class also defines certain static variables as properties of the font.
| Properties Name | Description |
protected String name |
The logical name of this Font, as passed to the constructor. |
protected int style |
The style of this font, as passed to the constructor. this style can be plain, bold, italic, or bold + italic. |
protected int size |
The point size of this font, rounded to integer. |
protected float pointSize |
The point size of this font in float. |
Table 14.5 Properties of Font
Explanation: In this program, the font associated with the Graphics class is retrieved into font instance f. From this font instance, the font name, font family, size, style, etc., are determined using methods of Font class. All these information are displayed using drawstring method. In the end, the font instance f is also displayed in String form using to String method. This displays the complete font information which was displayed individually above various methods of Font class.
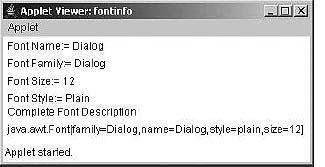
Figure 14.25 Output screen of Program 14.20
Explanation: The program is simple. All five logical fonts defined by Java are used and a string displayed after setting a specified font.
14.14 THE FONTMETRICS CLASS
Often, when drawing a string, it is important to know how big the image of the string will be. This information is needed if one wants to centre a string on an applet, or wants to know how much space to leave between two lines of text when they are drawn one above the other, or if the user is typing the string and a cursor is needed to be positioned at the end of the string. In Java, questions about the size of a string are answered by an object belonging to the standard class java.awt.FontMetrics . The FontMetrics class defines a font metrics object, which encapsulates information about the rendering of a particular screen.
There are several lengths associated with any given font. Some of them are shown in this illustration:
The line in the illustration just touching the bottom of each character in the two strings and crossing the character g are the base line of the two lines text. The suggested distance between two baselines, for single-spaced text, is known as the lineheight of the font. The ascent is the distance that tall characters can rise above the baseline, and the descent is the distance that tails like the one on the letter g which can descend below the baseline. The ascent and descent do not add up to the lineheight , because there should be some extra space called leading. All these quantities can be determined by calling instance methods in a FontMetrics object. There are also methods for determining the width of a character and that of a string.
If F is a font and g is a graphics context, a FontMetrics object is obtained for the font F by calling g.getFontMetrics(F). If fm is a variable that refers to the FontMetrics object, the ascent, descent, leading and lineheight of the font can be obtained by calling fm.getAscent(), fm.getDescent(), fm.getLeading() and fm.getHeight(). If ch is a character, fm. charWidth(ch) is the width of the character when it is drawn in that font. If str is a string, fm. stringWidth(str) is the width of the string.
The following example shows the message " Hello World " in the exact centre of the component by using FontMetrics class and its various methods.
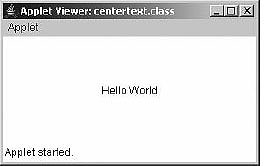
Figure 14.26 Output screen of Program 14.22
Explanation: The variables x and y denote starting point of baseline of string.
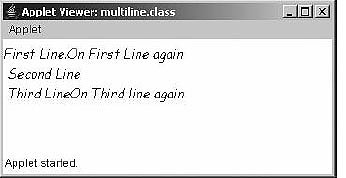
Figure 14.27 Output screen of Program 14.23
Explanation: For finding the total height of the text, the getHeight method is used. For finding width of the string as seen in the previous example, the stringWidth method is used. When newLine method is called, FontMetrics instance of Graphics class is obtained using getFontMetrics method. This is stored in fm. The height of the string s is obtained using getHeight method. This is added to the cy. As string is to be displayed on to the new line, cx is set to 0. In the sameLine method, the cx is advanced by adding the width of the string; no change is made to the cy.
14.15 PONDERABLE POINTS
1. Java applets are small programs that are meant to run on a page in a web browser. They can also be run locally using appletviewer tool.
2. For creating an applet the program class must extend Applet class which is defined in package java.applet.
3. Applets are different from console applications as they do not have main method.
4. There are mainly four methods defined in the applet class: init, start, destroy and stop.
5. For embedding an applet program in an HTML file APPLET tag must be used.
6. For drawing onto applet window the paint method and Graphics class can be made use of.
7. The Graphics class defines a number of useful methods for drawing various shapes and images.
8. Parameters to applets can be passed using PARAM tag. All PARAM parameters return String value which is accessed using getParameter method.
9. 9. The repaint method calls paint method through update method.
10. AppletContext interface can be used for applet-to-applet communication.
11. The showDocument method of AppletContext interface can be used for transferring control to other HTML page.
12. The Font class encapsulates a font in Java.
13. Fonts are of two types: logical and physical. Physical fonts are platform dependent whereas logical fonts are defined by the JVM.
14. The FontMetrics class encapsulates information about the rendering of a particular font on a particular screen.
REVIEW QUESTIONS
1. Explain the life cycle of an Applet.
2. Write an applet to illustrate the life cycle of an Applet.
3. Explain the order of method invocation in an Applet.
4. How is an applet converted to an application?
5. What are the interfaces available in applet class?
6. What are the differences between an Applet and an Application?
7. Write an applet to display an image and play a song.
8. Explain the Applet Context. How do you make Applet-to-Applet communication?
9. Are getCodeBase() and getDocument-Base() the same? Explain.
10. What is the use of appletviewer and show Status Method?
11. Explain applet tag with an example.
12. What are the mandatory attributes in Applet tag?
13. Write an applet to display current date and time.
14. Write an Applet for Growing Text and Growing Image.
15. Use setBackground and setForeground method to randomly change the colors of an applet.
16. What is the default layout of an Applet?
17. Write short notes on the following methods:
(a) Font class
(b) Update
(c) Repaint
(d) Paint
18. Your file consists of the following code:
//set a
import java.awt.Graphics;
import java.applet.Applet;
//set b
import java.awt.*;
import java.applet.*
Which set takes less compile time? Prove it through example.
19. Describe the arguments used in the drawRect() and drawRoundedRect().
20. Explain the drawArc() and fillArc() method.
21. Write an application to draw the following shapes with different color:
(a) Line
(b) Poly line
(c) Clipping
(d) Circle
(e) Oval
(f) Ellipse
(g) Arc
(h) Polygon
22. Write an applet to draw the human face.
23. What is clipping? Explain with an example.
24. Write an applet to draw National flag with color.
25. Write a program to display the small rounded rectangles in a specified area, using clipping concept.
Multiple Choice Questions
1. Java applets are small programs that are meant to run on a page in a Web browser. They can also be run locally using
(a) Java
(b) Javac
(c) Appletviewer
(d) Noneofthe above
2. Applet class is defined in
(a) java.applet package
(b) java.Applet package
(c) java.awt package
(d) java.io package
3. Applets are different from console applications as they do not have
(a) run method
(b) main method
(c) start method
(d) none of the above
4. Which of the following is used for applet communication?
(a) Wait and notify
(b) Context switching
(c) AppletContext interface
(d) Runnable interface
5. The ____ method of AppletContext interface can be used for transferring control to other HTML page.
(a) appletviewer
(b) init
(c) showDocument
(d) showApplet
6. Fonts are of two types: logical and physical. Physical fonts are platform independent whereas logical fonts are:
(a) platform independent
(b) platform dependent
(c) defined by JVM
(d) defined by OS
7. For showing window and frame that contain the applet ____ target argument is used.
(a) "_parent"
(b) "_top"
(c) "_self"
(d) none of the above
8. The first method called for any applet is
(a) start()
(b) init()
(c) play()
(d) none of the above
9. Which of the following is the method of applet life cycle:
(a) Public void destroy()
(b) AppletContext()
(c) String getAppletInfo()
(d) URL getCodeBase()
10. The repaint() method is defined by
(a) Applet
(b) AWT
(c) Collection Framework
(d) none of the above
KEY FOR MULTIPLE CHOICE QUESTIONS
1. c
2. a
3. b
4. c
5. c
6. c
7. c
8. b
9. a
10. b