
The browser-based JavaScript console that we’ve been using so far is great for trying out small snippets of code, but in order to create actual programs, we’ll need something a bit more flexible, like a web page with some JavaScript in it. In this chapter, we’ll learn how to create a basic HTML web page.
HTML (HyperText Markup Language) is the language used to make web pages. The word HyperText refers to text that is connected by hyperlinks, the links on a web page. A markup language is used to annotate documents so that they’re not just plaintext. The markup tells software (like a web browser) how to display the text and what to do with it.
In this chapter, I’ll show you how to write HTML documents in a text editor, a simple program designed for writing plaintext files without the formatting you find in word processors like Microsoft Word. Word-processed documents contain formatted text (with different fonts, type colors, font sizes, etc.), and word processors are designed to make it easy to change the formatting of the text. Word processors usually allow you to insert images and graphics as well.
Plaintext files contain just text, without any information about the font, color, size, and so on. You can’t put an image in a text file unless you make it out of text—like this cat, for example.
  /\_/
=( °w° )=
  )   (  //
 (__ __)//
We’ll write our HTML in the cross-platform (compatible with Windows, Mac OS, and Linux) Sublime Text editor. You can download and use Sublime Text for free, but after a while you’ll be asked to pay for a license. If you don’t like that idea, I’ve listed some completely free alternatives below. My instructions in this chapter are geared toward Sublime Text, but since text editors are relatively simple, the instructions should work pretty much the same for any editor.
Gedit is a cross-platform text editor from the GNOME project (https://wiki.gnome.org/Apps/Gedit/).
For Microsoft Windows, Notepad++ (http://notepad-plus-plus.org/) is another good alternative.
On Mac OS, TextWrangler (http://www.barebones.com/products/textwrangler/) is a good option.
To install Sublime Text, visit http://www.sublimetext.com/. Installation instructions differ for each operating system, but you should find them pretty clear. If you run into any problems, try the Support section at the Sublime Text home page.
Once you’ve installed Sublime Text, start the program and create a new file with File▸New File. Next, choose File▸Save to save your new, blank file; name it page.html and save it to your desktop.
Now it’s time to write some HTML. Enter the following text into your page.html file:
<h1>Hello world!</h1>
<p>My first web page.</p>
Save your updated version of page.html with File▸Save. Now let’s see what that page would look like in a web browser. Open Chrome, choose File▸Open File, and select page.html from your desktop. You should see something like Figure 5-1.
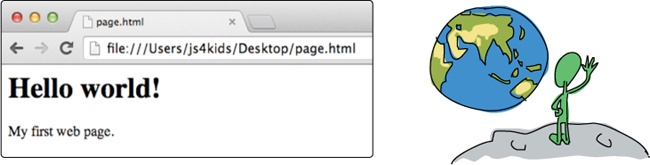
You’ve just created your first HTML document! Although you’re viewing it in your web browser, it’s not actually on the Internet. Chrome is opening your page locally and just reading your markup tags to figure out what to do with its text.
HTML documents are made up of elements. An element starts with a start tag and ends with an end tag. For example, in our document so far we have two elements: h1 and p. The h1 element starts with the start tag <h1> and ends with the end tag </h1>. The p element starts with the start tag <p> and ends with the end tag </p>. Anything between the opening and closing tags is the content of the element.
Start tags consist of the element name surrounded by angle brackets: < and >. End tags are the same, but they have a forward slash (/) before the element name.
Each element has a special meaning and use. For example, the h1 element means “This is a top-level heading.” The content you put in between the opening and closing <h1> tags is displayed by the browser on its own line, in a large, bold font.
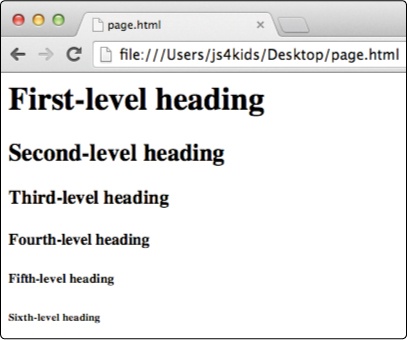
There are six levels of heading elements in HTML: h1, h2, h3, h4, h5, and h6. They look like this:
<h1>First-level heading</h1>
<h2>Second-level heading</h2>
<h3>Third-level heading</h3>
<h4>Fourth-level heading</h4>
<h5>Fifth-level heading</h5>
<h6>Sixth-level heading</h6>
Figure 5-2 shows how the headings look on a web page.
The p element is used to define separate paragraphs of text. Any text you put between <p> tags will display in a separate paragraph, with some space above and below the paragraph. Let’s try creating multiple p elements. Add this new line to your page.html document (the old lines are shown in gray):
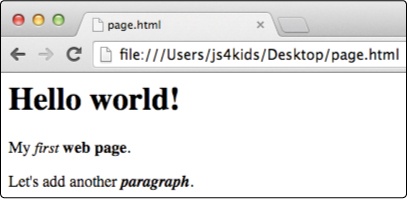
<h1>Hello world!</h1>
<p>My first web page.</p>
<p>Let's add another paragraph.</p>
Figure 5-3 shows the web page with the new paragraph.
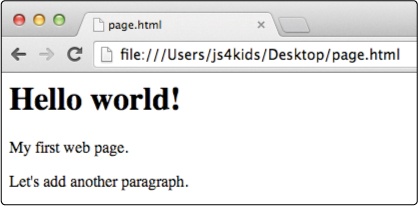
Notice that the paragraphs appear on different lines and are separated by a bit of space. This is all because of the <p> tags.
What would our page look like without the tags? Let’s take a look:
Hello world!
My first web page.
Let's add another paragraph.
Figure 5-4 shows our page without any tags.
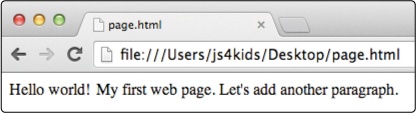
Oh no! Not only have we lost the formatting, but everything’s on one long line! The reason is that in HTML, all whitespace is collapsed into a single space. Whitespace means any character that results in blank space on the page—for example, the space character, the tab character, and the newline character (the character that is inserted when you press ENTER or RETURN). Any blank lines you insert between two pieces of text in an HTML document will get collapsed into a single space.
The p and h1 elements are called block-level elements because they display their content in a separate block, starting on a new line, and with any following content on a new line.
Let’s add two more elements to our document, em and strong:
<h1>Hello world!</h1>
<p>My <em>first</em> <strong>web page</strong>.</p>
<p>Let's add another <strong><em>paragraph</em></strong>.</p>
Figure 5-5 shows what the page looks like with the new tags.
The em element makes its content italic. The strong element makes its content bold. The em and strong elements are both inline elements, which means that they don’t put their content onto a new line, as block-level elements do.
To make content bold and italic, put it inside both tags. Notice in the previous example that the bold italic text has the tags in this order: <strong><em>paragraph</em></strong>. It’s important to properly nest elements. Nesting means that if an element is inside another element, its opening and closing tags should both be inside the parent element. For example, this is not allowed:
<strong><em>paragraph</strong></em>
In this case, the closing </strong> tag comes before the closing </em> tag. Browsers generally won’t tell you when you’ve made a mistake like this, but getting nesting wrong can cause your pages to break in strange ways.
What we’ve looked at so far is really just a snippet of HTML. A full HTML document requires some extra elements. Let’s take a look at an example of a complete HTML document and what each part means. Update your page.html file with these new elements:
<!DOCTYPE html>
<html>
<head>
    <title>My first proper HTML page</title>
</head>

<body>
    <h1>Hello world!</h1>
    <p>My <em>first</em> <strong>web page</strong>.</p>
    <p>Let's add another <strong><em>paragraph</em></strong>.</p>
</body>
</html>
Note
Sublime Text should automatically indent certain lines for you, as shown in this example. It’s actually identifying lines based on their tags (like <html>, <h1>, and so on) and indenting them according to their nesting. Sublime Text doesn’t indent the <head> and <body> tags, though some editors do.
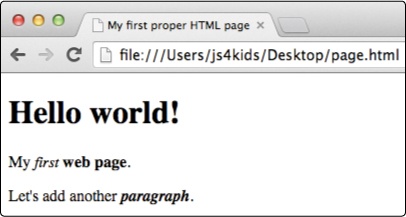
Figure 5-6 shows the complete HTML document.
Let’s take a walk through the elements in our page.html file. The <!DOCTYPE html> tag is just a declaration. It simply says, “This is an HTML document.” Next comes the opening <html> tag (the closing </html> tag is at the very end). All HTML documents must have an html element as their outermost element.
There are two elements inside the html element: head and body. The head element contains certain information about your HTML document, such as the title element, which contains the document’s title. For example, notice that in Figure 5-6, the title in the browser tab—“My first proper HTML page”—matches what we entered in the title element. The title element is contained inside the head element, which is contained inside the html element.
The body element contains the content that will be displayed in the browser. Here, we’ve just copied the HTML from earlier in the chapter.
HTML elements have a clear hierarchy, or order, and can be thought of as a kind of upside-down tree. You can see how our document would look as a tree in Figure 5-7.
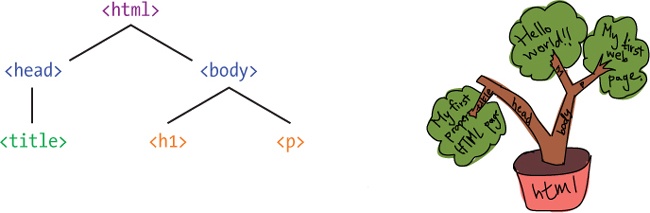
The top element is the html element. It contains the head and body elements. The head contains the title element, and the body contains the h1 and p elements. The browser interprets your HTML according to this hierarchy. We’ll look at how to change the document structure later, in Chapter 9.
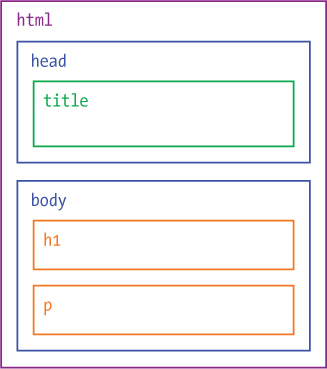
Figure 5-8 shows another way of visualizing the HTML hierarchy, as a set of nested boxes.
Earlier in this chapter, we learned that the HT in HTML stands for HyperText, or linked text. HTML documents can contain hyperlinks (links for short) that take you to other web pages. The a element (for anchor) creates a link element.
Modify your HTML document to match the following example: delete the second p element and the <em> and <strong> tags, and then add the new colored code to create a link to http://xkcd.com/:
<!DOCTYPE html>
<html>
<head>
    <title>My first proper HTML page</title>
</head>
<body>
    <h1>Hello world!</h1>
    <p>My first web page.</p>
    <p><a href="http://xkcd.com">Click here</a> to read some excellent
comics.</p>
</body>
</html>
Now save and open your page in your browser, and it should look like Figure 5-9.
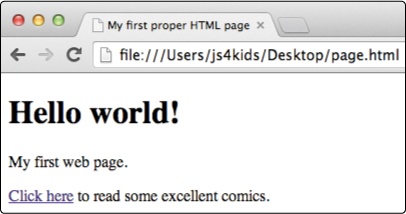
If you click that link, your browser should go to the xkcd website, http://xkcd.com/. Once you’ve had your fill of geeky comics, click the back button to return to your page.
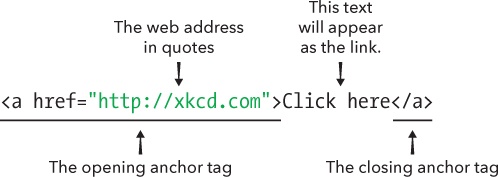
Let’s take a closer look at how we created that HTML link. To tell the browser where to go when you click the a element, we added something called an attribute to the anchor element. Attributes in HTML elements are similar to key-value pairs in JavaScript objects. Every attribute has a name and a value. Here’s the xkcd link we created again:
<a href="http://xkcd.com">Click here</a>In this case, the attribute name is href and the attribute value is "http://xkcd.com". The name href stands for hypertext reference, which is a fancy way of saying “web address.”
Figure 5-10 shows all the parts of the link.
The link will take you to whatever web address is entered as the value of the href attribute.
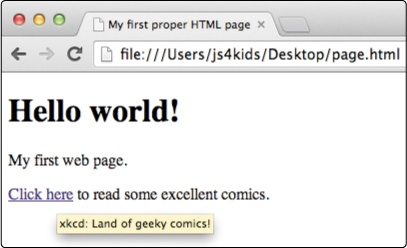
Another attribute we can add to links is the title attribute. This attribute sets the text you see when you hover your mouse over a link. For example, change the opening <a> tag so it looks like this:
<a href="http://xkcd.com" title="xkcd: Land of geeky comics!">Click here</a>
Now reload the page. When you hover your cursor over the link, you should see the text “xkcd: Land of geeky comics!” floating above the page, as shown in Figure 5-11.
In this chapter, you learned the basics of HTML, the language used to create web pages. We created a simple page containing a link to another page.
In the next chapter, we’ll look at how to embed JavaScript in our web page. This will make it much easier to create larger programs as we explore more features of JavaScript in the next few chapters.
This is a book on JavaScript, not HTML, so I’ve introduced only the very basics of creating HTML documents. Here are some resources where you can learn more about HTML:
The Mozilla Developer Network’s Introduction to HTML: https://developer.mozilla.org/en-US/docs/Web/Guide/HTML/Introduction/
Codecademy’s HTML and CSS course: http://www.codecademy.com/tracks/web/
Mozilla Webmaker: https://webmaker.org/