
Pass Data with Safe Args
You may have noticed that the SingleTeamFragment class isn’t happy right now because it doesn’t know about SingleTeamFragmentArgs or that navArgs function. Also note that the problematic line looks suspiciously close to how we grab a ViewModel class.
In Android, the “traditional” way to send data between locations is via a Bundle, where you add key/value pairs and either send them directly into a class or as part of an Intent. Instead of doing that, we’re going to take advantage of the Navigation Safe Args plugin.
This plugin allows us to send typed values between destinations rather than String values we have to convert into something else manually. We then can reference a NavArgs class that’s generated for us to use the values.
Before we try to use NavArgs anywhere, we need to add in a classpath dependency and a plugin reference.
Add the Safe Args Plugin
This is one of the rare occasions where we add a dependency to our project build.gradle file rather than the app-level file, since we’re bringing in a new plugin. Alongside the Kotlin and Gradle classpath dependencies, we need to include the Safe Args plugin:
| | dependencies { |
| | classpath "com.android.tools.build:gradle:$gradle_version" |
| | classpath "org.jetbrains.kotlin:kotlin-gradle-plugin:$kotlin_version" |
| » | classpath |
| » | "androidx.navigation:navigation-safe-args-gradle-plugin:$nav_version" |
| | } |
Notice that we don’t even need a new version variable here since we just use the existing Navigation version. Once the dependency is added, then we can include one more plugin in the app’s build.gradle file:
| | plugins { |
| | id 'com.android.application' |
| | id 'kotlin-android' |
| | id 'kotlin-kapt' |
| » | id 'androidx.navigation.safeargs.kotlin' |
| | } |
With those added, sync up Gradle, and head into navigation/nav_graph.xml to add some Actions.
Add Navigation Actions
Navigation actions are a way to get from one destination to another. In our case, we’re going to add a way to move from both the TeamsFragment and StandingsFragment to the SingleTeamFragment.
To do this, we add an <action> tag inside one of our <fragment> tags, like so:
| | <fragment |
| | android:id="@+id/standingsFragment" |
| | android:name="dev.mfazio.abl.standings.StandingsFragment" |
| | android:label="@string/standings"> |
| » | <action |
| » | android:id="@+id/actionGoToTeam" |
| » | app:destination="@id/singleTeamFragment" /> |
| | </fragment> |
Now, that’s great, except we can’t go to the SingleTeamFragment without any extra info since we won’t know which team to reference. This is where the Safe Args come in; we can add <argument> tags to an <action> to include parameters:
| | <fragment |
| | android:id="@+id/standingsFragment" |
| | android:name="dev.mfazio.abl.standings.StandingsFragment" |
| | android:label="@string/standings"> |
| | <action |
| | android:id="@+id/actionGoToTeam" |
| | app:destination="@id/singleTeamFragment"> |
| » | <argument |
| » | android:name="teamId" |
| » | app:argType="string" /> |
| » | <argument |
| » | android:name="teamName" |
| » | app:argType="string" /> |
| | </action> |
| | </fragment> |
Now, the action will work here, but we need to allow the SingleTeamFragment class to receive those args. This means we need a new <fragment> tag with some <argument> tags in it:
| | <fragment |
| | android:id="@+id/singleTeamFragment" |
| | android:name="dev.mfazio.abl.teams.SingleTeamFragment" |
| | android:label="{teamName}" |
| | tools:layout="@layout/fragment_single_team"> |
| | <argument |
| | android:name="teamId" |
| | app:argType="string" /> |
| | <argument |
| | android:name="teamName" |
| | app:argType="string" /> |
| | </fragment> |
A couple of takeaways here: the <argument> tags match up between the <action> and <fragment> (meaning both tags contain the same <argument> tags), plus we can even use one of those <argument> values in an attribute of the <fragment> tag. The android:label"{teamName}" means that whatever we send in as a teamName argument, that’s what will be displayed in the toolbar when the screen is shown.
If we want to get here from the TeamsFragment, we can copy the same <argument> tags into that <fragment> tag. Hopefully this sounds to you like a poor approach since we’re copying and pasting values, but don’t worry, we have a better way we can do this.
The Navigation library has the concept of global actions, which can be accessed from anywhere. This means we declare the <action> once, then reference it from any location we choose. To add a global action, we just need to create a stand-alone <action> tag in nav_graph.xml. The entire (final) file looks like this:
| | <navigation xmlns:android="http://schemas.android.com/apk/res/android" |
| | xmlns:app="http://schemas.android.com/apk/res-auto" |
| | xmlns:tools="http://schemas.android.com/tools" |
| | android:id="@+id/nav_graph" |
| | app:startDestination="@id/standingsFragment"> |
| | |
| » | <action |
| » | android:id="@+id/actionGoToTeam" |
| » | app:destination="@id/singleTeamFragment"> |
| » | <argument |
| » | android:name="teamId" |
| » | app:argType="string" /> |
| » | <argument |
| » | android:name="teamName" |
| » | app:argType="string" /> |
| » | </action> |
| | |
| | <fragment |
| | android:id="@+id/standingsFragment" |
| | android:name="dev.mfazio.abl.standings.StandingsFragment" |
| | android:label="@string/standings" /> |
| | <fragment |
| | android:id="@+id/teamsFragment" |
| | android:name="dev.mfazio.abl.teams.TeamsFragment" |
| | android:label="@string/teams" /> |
| | <fragment |
| | android:id="@+id/singleTeamFragment" |
| | android:name="dev.mfazio.abl.teams.SingleTeamFragment" |
| | android:label="{teamName}" |
| | tools:layout="@layout/fragment_single_team"> |
| | <argument |
| | android:name="teamId" |
| | app:argType="string" /> |
| | <argument |
| | android:name="teamName" |
| | app:argType="string" /> |
| | </fragment> |
| | </navigation> |
Last word of warning: global actions only work if the navigation graph has an ID property, so don’t forget to include that.
With the navigation graph complete, we’re ready to get back into our Kotlin code to get moving around. Make sure SingleTeamFragment compiles without any errors, and notice how we’re using args.teamId in the binding logic. That’s all we need to use Safe Args in a destination.
Navigating via Actions
We want to add navigation logic for our SingleTeamFragment to both the Teams grid and Standings screen, both of which are handled in similar ways. We’ll start out with the StandingsAdapter since the code is already present, but commented out.
In the bind function inside the StandingsListTeamViewHolder class, we’re binding a UITeamStanding object to our layout. We also have a block of code wrapped in a comment that we can now add in:
| | fun bind(standingsTeamItem: StandingsListItem.TeamItem) { |
| | binding.uiTeamStanding = standingsTeamItem.uiTeamStanding |
| » | //TODO: Uncomment this code when you're ready. |
| » | binding.clickListener = View.OnClickListener { view -> |
| » | val action = NavGraphDirections.actionGoToTeam( |
| » | standingsTeamItem.uiTeamStanding.teamId, |
| » | standingsTeamItem.uiTeamStanding.teamName |
| » | ) |
| » | view.findNavController().navigate(action) |
| » | } |
| | } |
That code will assign the clickListener for a Standings list item and send the user to the SingleTeamFragment class, complete with the team name and ID. The Safe Args plugin generates that NavGraphDirections class for us, making the call itself nice and straightforward.
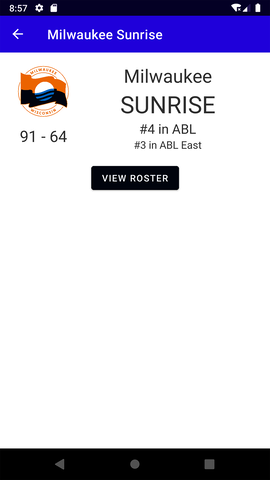
Uncomment the code and run your app. You should now be able to click a team in the Standings page and it’ll take you to their Team page, as shown in the image.
The bind function in TeamsGridAdapter is basically the same thing:
| | fun bind(item: UITeam) { |
| | binding.apply { |
| | team = item |
| » | setClickListener { view -> |
| » | val action = NavGraphDirections.actionGoToTeam( |
| » | item.teamId, |
| » | item.teamName |
| » | ) |
| » | view.findNavController().navigate(action) |
| » | } |
| | } |
| | } |
We can follow this same pattern whenever we want to get to a certain page in the app from another place within the app. But what happens if we want to get to a certain page from outside the app? That’s where deep links come into play.