A generator is the foundation for electrical power generation, creating electrical current from rotary-motion input. Wind provides the rotary motion for a wind turbine generator. This chapter involves experimenting with generators by working with a LEGO-based design, including the construction of a hand-cranked generator that uses manual motion to spin it. In later chapters, this manual rotation will be replaced by energy from wind.
Generator Basics
Generators create electricity by spinning a coil of wire near a magnet via the principle of electromagnetic induction. The physicist Michael Faraday studied the phenomenon of induction, quantifying it in the law that bears his name. The essence of Faraday’s law is that an electromotive force is generated in the coil, and that force is related to the time rate of change of the magnet’s field strength. Consideration of Faraday’s law indicates that to generate higher electrical power two approaches can be taken: (1) using a strong magnet, or (2) moving the wire coil quickly. Spinning the magnet is an effective way to move the wire coil quickly.
To illustrate how generators are actually built, Figure 1-1 shows a LEGO-based generator with the cover removed. In the opened generator, the edge of the disk of wire coils, called a rotor, and the edge of the magnet can be seen. Taking apart a generator as done here is likely to damage the device and is not recommended. We sacrificed a generator in our collection in the name of scientific advancement.
Figure 1-1
The LEGO #71427c01 motor—or generator, in this case—is shown both with and without its cover
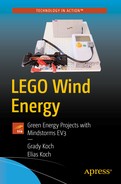
Further disassembly of the generator, seen in Figure 1-2, shows more of the parts involved, including the rotor/magnet core, spinning axle, steel annulus, and electrical connections. Brushes are fine wires that touch the commutator to connect electrical output to end use. The hole in the steel annulus goes over the commutator assembly to shape and concentrate the magnetic field created by the magnet. The commutator is a segmented metal ring used to periodically reverse the electrical current direction so that direct current output results, rather than alternating current. When the motor is assembled, the brushes press up against the commutator. Figure 1-3 gives a close-up view of the rotor/magnet core. The rotor is at the front of this view, featuring three coils of wire that spin about an axle that has a commutator on the end. Each coil of wire has two electrical connections; hence, there are six segments making up the commutator to accommodate all three coils. Electrical output is connected from the commutator by contact with the brushes seen in Figure 1-2. The magnet is a disk attached behind the rotor, with the magnet surface visible through the holes of the rotor’s wire coils.
Figure 1-2
Taking apart the pieces of the #71427c01 device shows the rotor/magnet core, spinning axle, steel annulus, and electrical connections
Figure 1-3
A close-up view of the rotor/magnet core shows the wire coils, commutator, and magnet
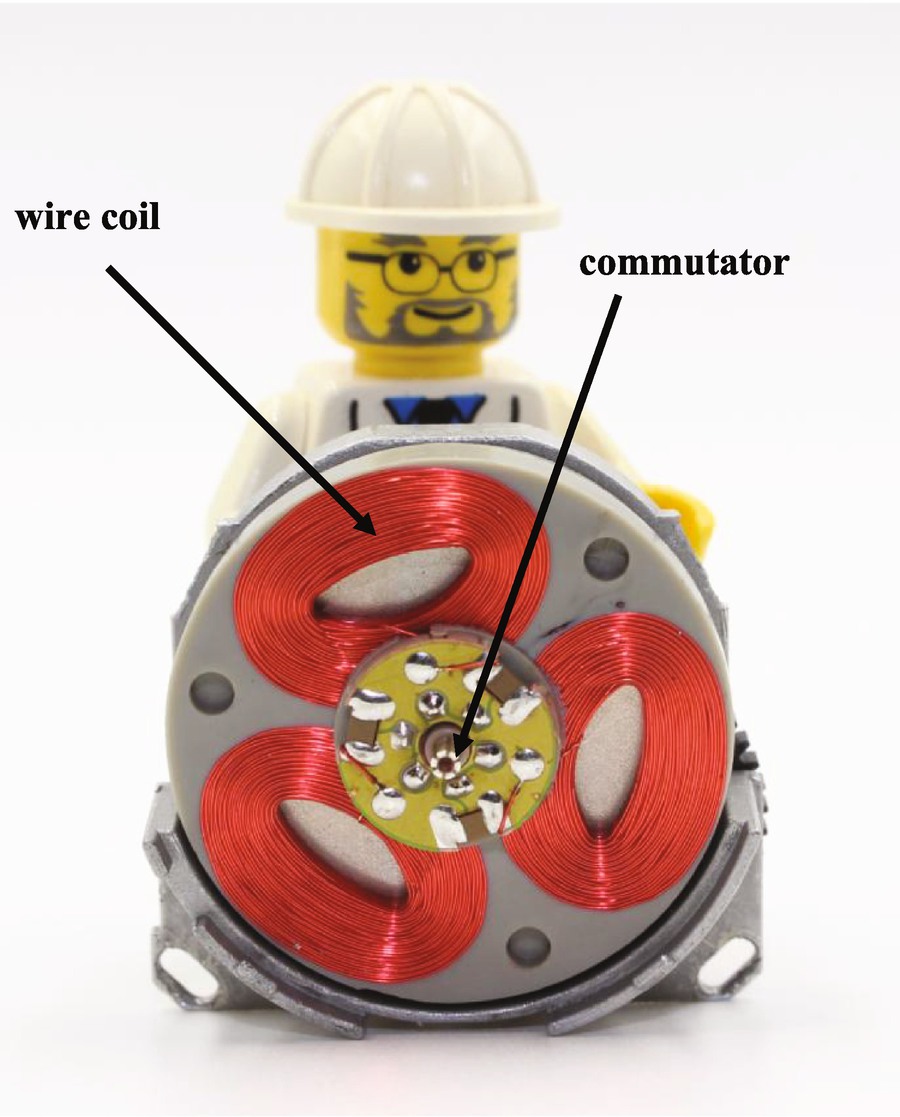
The generator shown in Figure 1-1 was not intended to be used as a generator—it’s actually a motor. But motors and generators are closely related, being sort of inverses of each other. Motors create rotary motion with an electrical input, whereas a generator uses rotary motion to create electrical output. By grabbing the shaft of a motor and spinning it, an electrical current will be generated at the motor’s electrical contacts. LEGO has never made a generator, but has made many types of motors. Several such LEGO motors produced over the years are shown in Figure 1-4. Only a few types of LEGO motors are suitable to be used as a generator, since most have gear systems built into their housings to make them more suitable for building vehicles or robots. This gearing can involve too high a torque for turning the rotor shaft. Furthermore, some LEGO motor designs have complicated connections to accommodate encoders for precision control, as used in the Mindstorms EV3 and Power Functions motors. LEGO’s older and simpler designs work best as a generator, such as the #71427c01 Electric Technic Mini-Motor 9V and the #2838c01 Electric Technic Motor 9V. The best-performing generator found after trying all of the devices shown in Figure 1-4 is #71427c01, also featured in Figures 1-1 to 1-3. Second best is the #2838c01. Third best is the #87577c01 Power Functions E Motor, giving an option if a modern motor is desired. The #2838c01 and #71427c01 motors have been out of production for several years but can readily be found on bricklink.com. The #71427c01 motor has a cousin in #43362c01, with an almost identical case, but different internal construction. #71427c01 and #43362c01 can be distinguished from each other by weight, as #71427c01 is heavier.
Figure 1-4
LEGO motors to consider for use as a generator include: (1) #71427c01 Technic Mini-Motor 9V, (2) #58120c01 Power Functions M Motor, (3) #87577c01 Power Functions E Motor, (4) #99455 EV3 Medium Servo Motor, and (5) #2838c01 9V Motor
Putting a Generator to Use
A generator can be used to build a simple hand-crank flashlight, as shown in Figure 1-5 and in video at hightechlego.com. Step-by-step directions to build the flashlight are given here. Cranking the handle turns the generator enough to light up the #4771 Electric Light Brick that is attached to the generator’s electrical output, although the light is not very bright in this design. A gear system is obviously needed here to increase the rotation speed of the generator’s shaft, the subject of the following chapter. And, of course, the end goal of this book is to have wind energy spin the crank shaft.
Figure 1-5
A hand crank–powered flashlight can be built from a LEGO generator by following the steps shown below
While experimentation is encouraged and is the point of this book, it’s important to note that an LED (light emitting diode) shouldn’t be used with the hand-crank flashlight since the generator can produce either a positive or negative voltage depending on the direction of the crank-shaft spin. A negative voltage can damage an LED, whereas the old-fashioned filament lightbulbs of the #4771 Electric Light Brick can work with either a positive or a negative voltage. An interesting feature of the #4771 is that it creates a constant light for one voltage polarity and a flashing light for the opposite voltage polarity.
Non-LEGO Generators
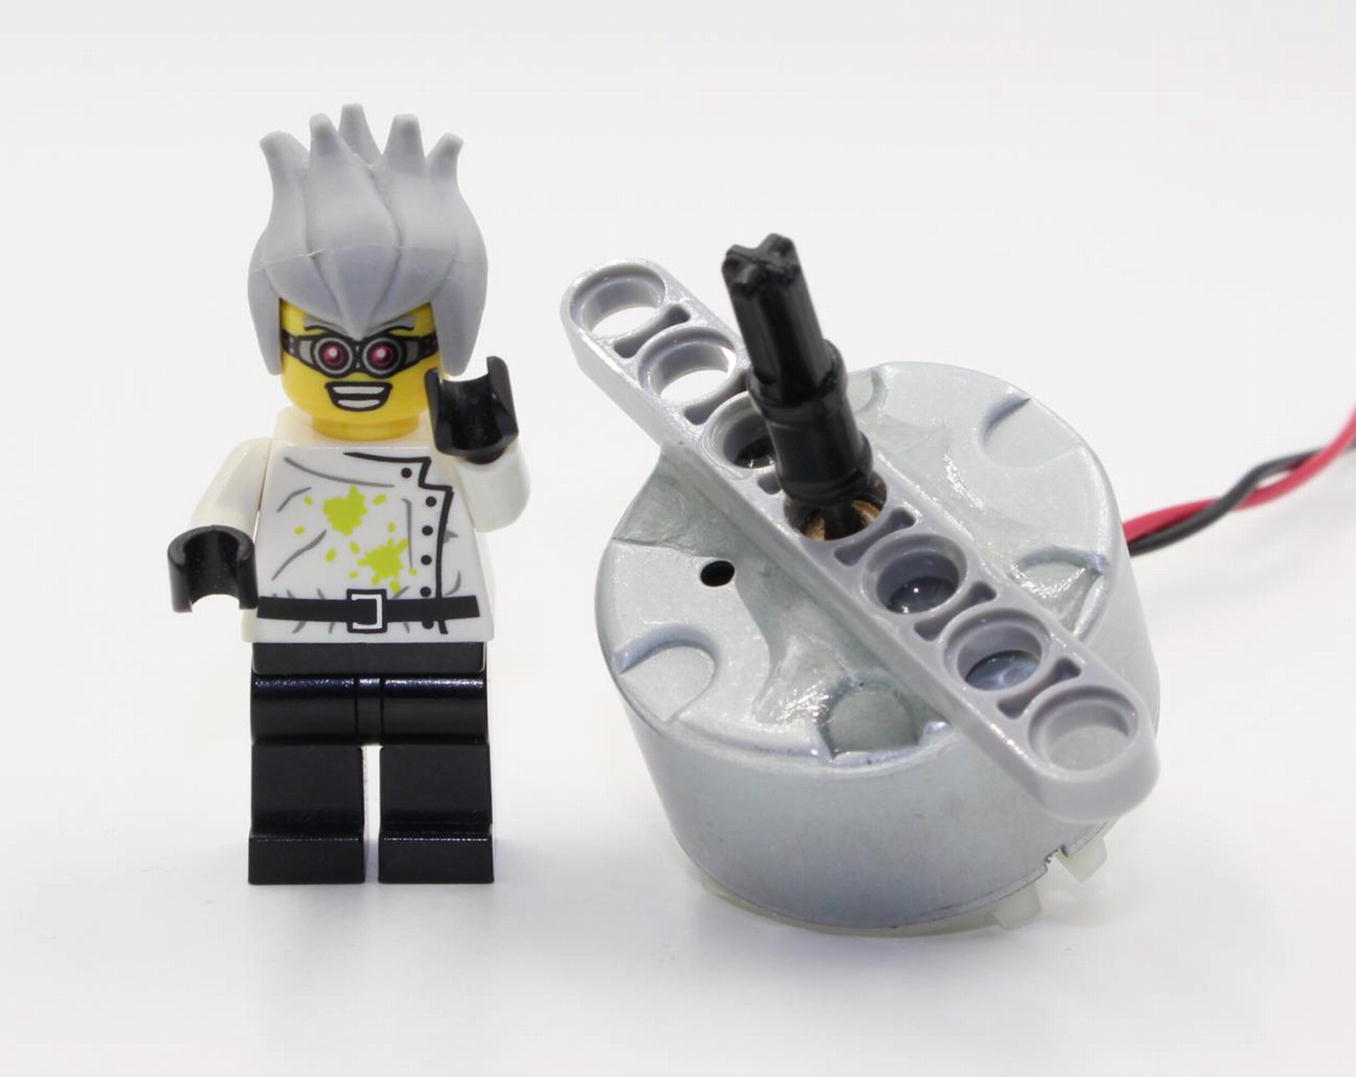
A LEGO-based generator has the appeal of fitting with the LEGO system, providing convenience and options for building the rest of a turbine. For example, attaching gears to a LEGO generator is a simple task. However, a situation may arise where a different type of generator needs to be used. A prime example of this is participating in wind power design competitions, such as the KidWind Challenge, for which there is a rule that a specific generator must be used, such as the one shown in Figure 1-6, purchased from Vernier Software and Technology (vernier.com). The KidWind-approved generator is shown in Figure 1-6, along with LEGO part additions. With this added LEGO compatibility, the rest of the turbine construction can proceed with LEGO elements.
Figure 1-6
A generator specified for the KidWind Challenge has LEGO parts added so that it can be used with the LEGO system
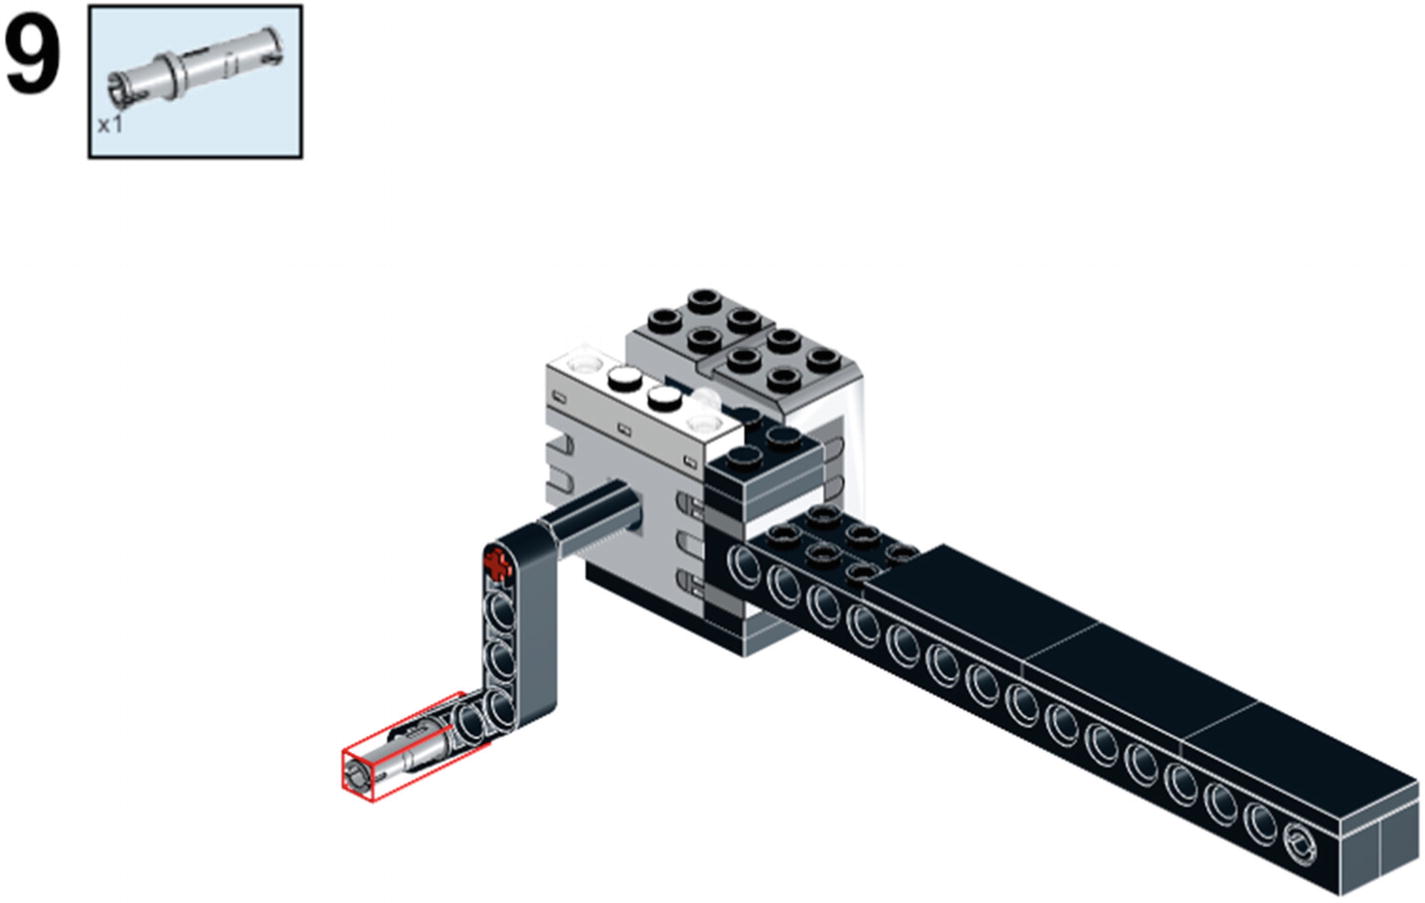
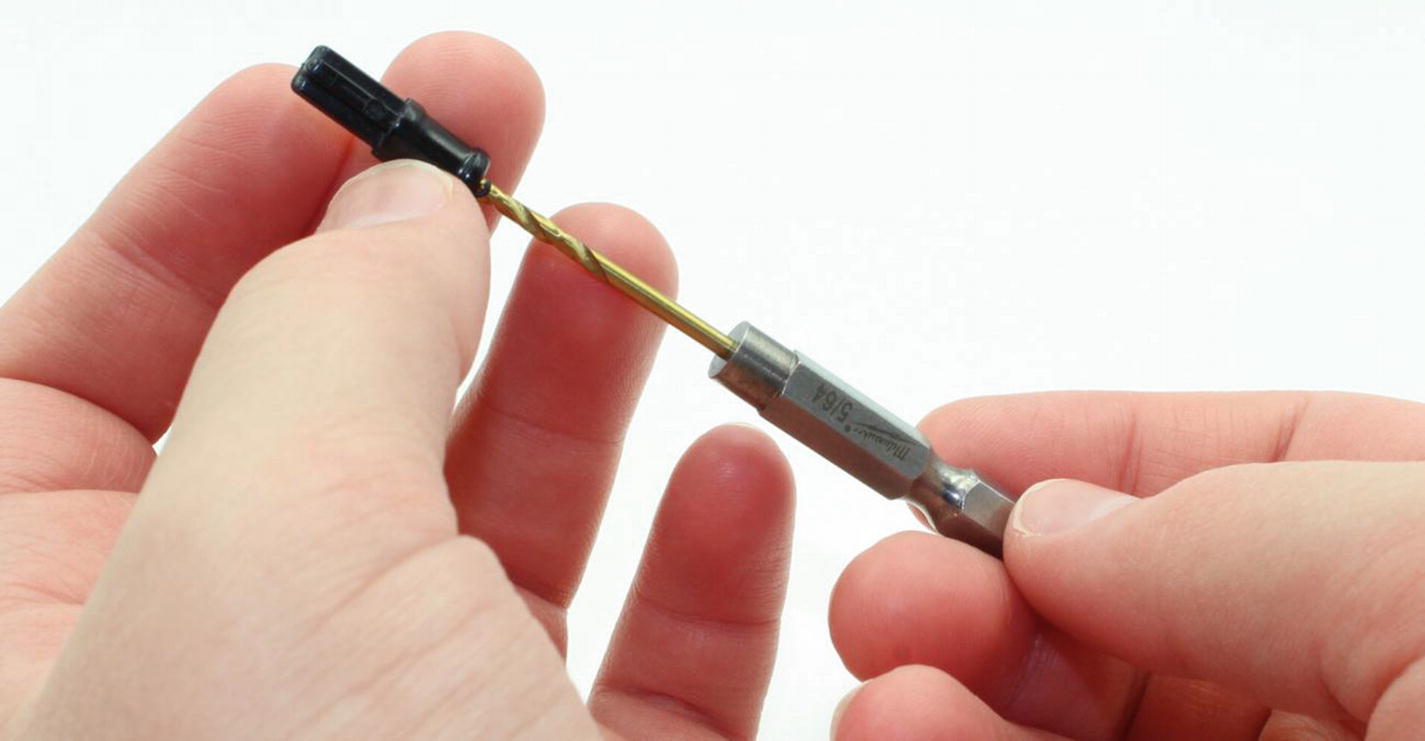
Modifications to the KidWind generator include (1) a #32065 1x7 Thin Technic Liftarm for mounting, and (2) the attachment on the generator shaft of an adapter to a LEGO-compatible axle. The 1x7 Thin Technic Liftarm requires enlargement of the center hole to fit over the center of the generator, as shown in Figure 1-7, with this enlargement achieved by a tapered reamer tool. The reamer is turned into the center hole of the liftarm a little at a time, alternating sides of the hole as it progresses. Frequent fit checks are done as the liftarm hole is gradually enlarged. When the liftarm hole is just large enough to fit over the generator, it is permanently fixed into place with five-minute epoxy. The shaft/axle adapter takes advantage of a part made for a product line of motors called Pololu, available at robotshop.com (Product Code: RB-Pol-137) or at hightechlego.com. This Pololu adapter fits with the KidWind generator after a minor procedure to slightly enlarge the spindle mounting hole, as shown in Figure 1-8. Enlargement involves turning a 5/64 drill bit into the opening of the shaft. The bit should be turned by hand, not with a motorized drill. Pliers or vice grips can be used if more leverage is needed to turn the drill bit. After enlargement, a speck of cyanoacrylate glue (Super Glue or Krazy Glue) applied before inserting over the KidWind generator ensures the adapter stays in place.
Figure 1-7
The center hole of a #32065 1x7 Technic Liftarm needs a little enlargement to fit over a collar on the KidWind generator
Figure 1-8
The shaft diameter on the Pololu shaft/axle adapter needs a little enlargement to fit over the shaft of the KidWind generator
Generator Wire Connections
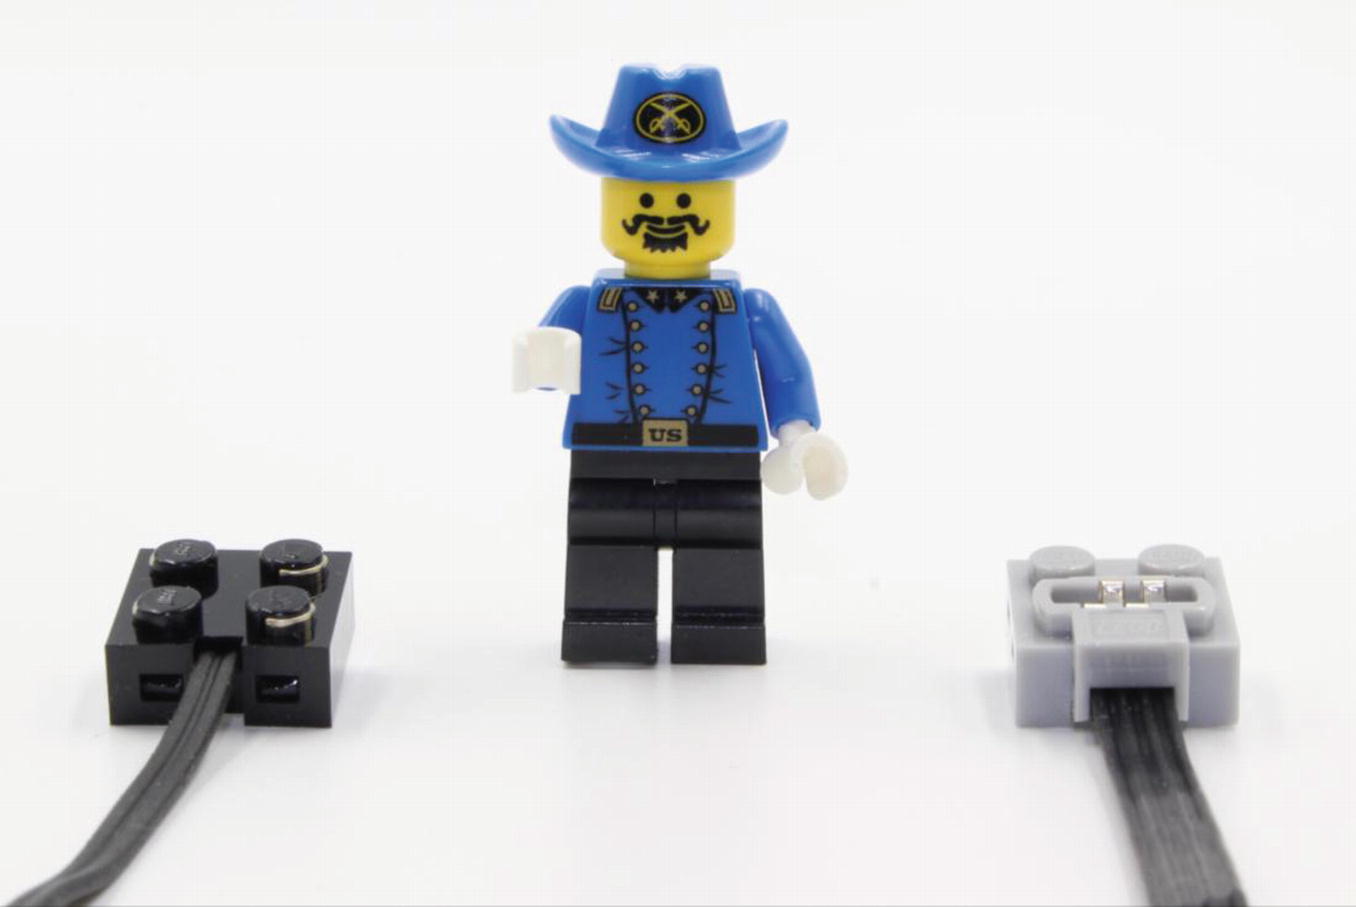
Connecting to a KidWind generator is simple because the generator is sold with two wires already attached. These two wires are connected to a measurement device during the KidWind competition. LEGO generators have different styles of cables, depending on the type of generator. Referring to Figure 1-4, the older devices of #71427c01 and #2838c01 use the #5306 Wire Cable. The newer Power Functions generators, #58120c01 and #87577c01, have power cables attached to them, which can be extended using the Power Functions #60656 Extension Wire. Both the #60656 and #5306 cables are shown in Figure 1-9. Connecting to the #60656 and #5306 for turbine power output can be done with alligator clips, as will be described in Chapter 6. The #60656 is dual use in that it can accommodate the older #2838c01 and #58120c01 generators, as well as the Power Functions devices. This backward compatibility is useful since the #5306 Wire Cable is getting harder to find in new condition. Connecting to the EV3 motor requires a breakout connector that gets a bit complicated—examples are shown at hightechlego.com.
Figure 1-9
The connectors on two LEGO wire cables are on the #5306 Wire Cable (left) and the Power Functions #60656 Extension Wire (right)
Summary
This chapter has presented how generators use the principle of electromagnetic induction to produce electricity. The LEGO implementation of a generator was shown, adapting LEGO-intended designs for motors as generators. LEGO has made many types of motors over the years, some performing better than others as generators. Our experiments showed that the #71427c01 Technic Mini-Motor worked the best as a generator in terms of highest power output. Some instances, such as a wind turbine design competition, may call for a non-LEGO generator to be used. For such a case, designs were shown to make a non-LEGO generator compatible with the LEGO system so the rest of the wind turbine can be built from LEGO. This chapter closed with an explanation of electrical cable connections to various LEGO generators. In the next chapter, gearbox designs will be described to allow for a higher rotation speed in a generator.