11
Mouse and Keyboard Interaction

In this chapter, you’ll learn how to program interactive sketches that respond to mouse and keyboard input. You can combine those input devices in interesting and useful ways. For example, many computer games use a combination of keys for player movement and the mouse for aiming. Here, you’ll program sketches that use the mouse to paint as well as to select items from a tool palette. You’ll also add shortcut keys to activate tools by using the keyboard.
This chapter introduces system variables you can use to monitor mouse clicks and keypresses. You’ll also learn about event functions that execute whenever a particular type of mouse or keyboard event occurs.
The first task you’ll complete is a simple doodling program. The second is a more elaborate paint app that includes a tool palette for selecting colors and brushes. When you’re programming interactive sketches, you need to be able to change the contents of the display window in response to user input so both programs are set up as animated sketches.
Mouse Interaction
You can use mouse input to perform point-and-click operations. You can also program gesture-type motions that combine mouse movements and clicks, like a drag-and-drop or pan. Most mice include three buttons—a left button, a right button, and a clickable scroll wheel that doubles as a center button.
Mouse Variables
Processing’s mouseX and mouseY variables hold the horizontal and vertical position of your mouse pointer in the display window. Processing also provides the system variables pmouseX and pmouseY that contain the mouse coordinates of the previous frame. There’s also a mousePressed variable that’s set to True whenever a mouse button is held down.
The first task in this chapter focuses on Processing’s mouse variables to monitor the position of the mouse pointer and detect when mouse buttons are pressed. You’ll program a simple sketch for making scratch art. A sheet of scratch art paper is covered with a rainbow blend of colors, then coated in a layer of black (Figure 11-1). The “scratcher” uses a plastic or wooden stylus to etch lines in the black surface, revealing the colors beneath.

Figure 11-1: The layers that make up a sheet of scratch art paper (left), and doodling with a stylus (right)
You could buy scratch paper ready-made or make it yourself, but pixels are cheap and reusable!
Create a new file and save it as scratch_art. Add the following code to get your mouse drawing a trail of white circles:
def setup():
    size(800, 400)
    frameRate(20)
    background('#000000')
    stroke('#FFFFFF')

def draw():
    circle(mouseX, mouseY, 15)
Each frame, Processing draws a new circle positioned using the mouseX and mouseY values. Those coordinates are retrieved once each frame, and the frame rate is relatively low (20 fps). The draw() block has no background() function, so every circle drawn persists until you close the display window. If you move the mouse slowly, the circles will form a solid white line; wherever you move the mouse quickly, you’ll leave discernible gaps in the line (Figure 11-2). The upper left corner of the display window always contains a circle, because the first x-y coordinate pair for the mouse is equal to (0, 0).

Figure 11-2: The faster you move your mouse, the larger the gaps in the line.
You can increase the frame rate to fill in the line better, but you’ll still get gaps if you move the mouse fast enough. To ensure a continuous line, replace the circle() function with code for drawing lines:
. . .
def draw():
    strokeWeight(15)
    line(mouseX, mouseY, pmouseX, pmouseY)
The strokeWeight() argument of 15 matches the circle diameter from before. The line() function draws a line between the mouse coordinates of the current frame and those of the previous frame.
Run the sketch. The first line() function will extend from the upper left corner (0, 0) to where your mouse pointer first enters the display window. In Figure 11-3, my mouse enters the display window from the left edge (I’m drawing the wave from left to right).

Figure 11-3: Drawing a continuous line by using a line() function for each frame
To turn the “brush” on and off, insert an if statement to activate the line() function while the left mouse button is being pressed:
. . .
def draw():
    strokeWeight(15)
    if mousePressed and mouseButton == LEFT:
        line(mouseX, mouseY, pmouseX, pmouseY)
The mousePressed variable holds a Boolean value that’s set to True while any mouse button is pressed. The mouseButton variable is equal to LEFT, RIGHT, or CENTER, depending on which button is pressed, and 0 if it’s none of them.
Run the sketch to confirm that Processing draws a white line while you’re holding down the left- mouse button.
For the rainbow-color scratch art effect, insert code to base the stroke color on the position of the mouse pointer. The horizontal position will control hue, and the vertical position will control saturation:
. . .
def draw():
    colorMode(HSB, 360, 100, 100)
    h = mouseX * 360.0 / width
    s = mouseY * 100.0 / height
    b = 100
    stroke(h, s, b)
    . . .
In this example, you set the color mode to HSB (hue, saturation, brightness). The h variable is assigned a hue value between 0 and 360; the s variable is assigned a saturation value between 0 and 100. Both the h and s values are based on the mouse pointer’s position relative to the width and height of the display window. The color’s brightness value is always 100 percent.
Run the sketch to test out the finished scratch art program (Figure 11-4).

Figure 11-4: Doodling in the scratch art program
Now that you’ve seen Processing’s mouse variables, in the next task, you’ll learn about mouse event functions.
Mouse Events
Processing offers a selection of mouse event functions that run each time a particular mouse event takes place. Those functions are mouseClicked(), mouseDragged(), mouseMoved(), mousePressed(), mouseReleased(), and mouseWheel(). You add code to an event function block that executes when the event function is triggered. To illustrate how this works, I’ll compare an example using a mousePressed variable with another that employs a mousePressed() event function.
The following code uses the mousePressed system variable to switch the background color from red to blue with the press of a mouse button:
def draw():
    background('#FF0000')  # red

    if mousePressed:
        background('#0000FF')  # blue
The background color is blue as long as the user is holding down a mouse button; otherwise, it’s red. The next example uses a mouse event—a mousePressed() function—to perform a similar operation:
def draw():
    background('#FF0000')  # red

def mousePressed():
    background('#0000FF')  # blue
Each time a mouse button is pressed, the mousePressed() function executes the blue background line, and the display window will briefly flash blue (for a single frame). It immediately returns to red, regardless of how long you hold down the mouse button. This is because an event function executes just once per event; in other words, the background will not flash blue again until you release and then re-press the mouse button.
Creating a Paint App
For the next exercise, you’ll program a basic painting app that will feature a tool palette for selecting color swatches and other options. You’ll use the mousePressed(), mouseReleased(), and mouseWheel() functions.
The large dark blue area, to the right in Figure 11-5, is your canvas for drawing; the tool palette sits against the left edge. You hold down the left-mouse button to draw.
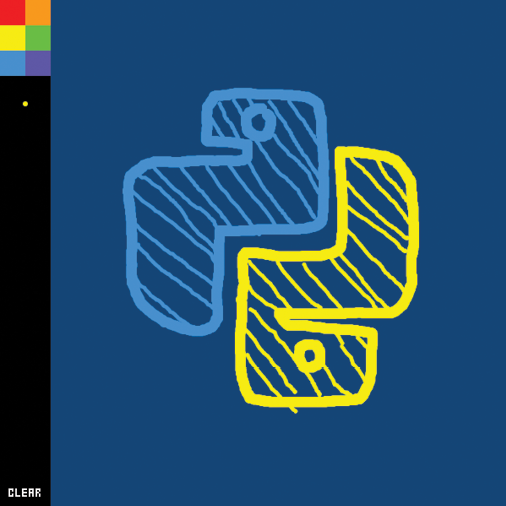
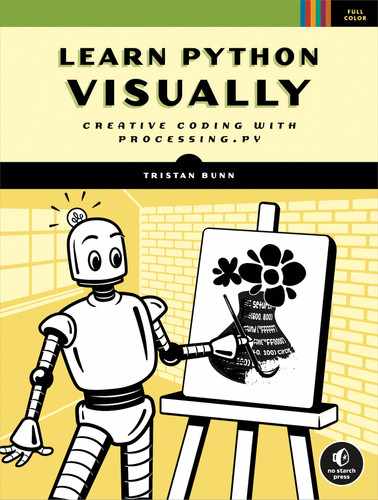
Figure 11-5: The paint app with a (badly drawn) Python logo
To begin, create a new sketch and save it as paint_app. You’ll use the Ernest font, created by Marc André “Mieps” Misman, to label the buttons in your tool palette. Download this font from the book’s GitHub web page:
- Open your web browser and go to https://github.com/tabreturn/processing.py-book/.
- Navigate to chapter-11-mouse_and_keyboard_interaction.
- Download the Ernest.ttf file.
- Create a new data subfolder within your sketch folder and place the Ernest.ttf file in it.
Add the following code to set up your sketch. This defines the display window size, background color, font, and global variables for the paint app:
def setup():
    size(600, 600)
    background('#004477')
    ernest = createFont('Ernest.ttf', 20)
    textFont(ernest)

swatches = ['#FF0000', '#FF9900', '#FFFF00',
            '#00FF00', '#0099FF', '#6633FF']
brushcolor = swatches[2]
brushshape = ROUND
brushsize = 3
painting = False
paintmode = 'free'
palette = 60
You’ll use the global variables (swatches, brushcolor, and so on) to adjust and monitor the state of the brush. The default brush color is set to yellow. Later, you’ll use the palette variable to set the width of the tool palette. You haven’t added anything visual yet, so if you run the sketch, all you’ll see is a plain blue display window.
Controlling the Draw Loop with loop() and noLoop() Functions
You’ll control the draw() function behavior by using mouse events. While the left mouse button is pressed, the draw() function will loop; once it’s released, the looping stops, which is a convenient way to control how the paint app works. Of course, the draw() function loops by default, so you’ll need the loop() and noLoop() functions to take control of this behavior.
The noLoop() function stops Processing from continually executing the code in the draw() block. A loop() function reactivates the standard draw() function behavior, and a redraw() function is available if you need to execute the draw() code just once.
To start, add a noLoop() function to the setup() block, and a draw() function that prints the frame count:
def setup():
    . . .
    noLoop()
. . .
def draw():
    print(frameCount)
If you run the sketch, the console should display a single 1, confirming that the draw() function has run only once.
Now add code to the draw() function to make the mouse draw lines in the display window, and add two mouse events to start and stop the flow of paint:
. . .
def draw():
    print(frameCount)
    global painting, paintmode

 1 if paintmode == 'free':

     2 if painting:
            stroke(brushcolor)
            strokeCap(brushshape)
            strokeWeight(brushsize)
         3 line(mouseX, mouseY, pmouseX, pmouseY)

     4 elif frameCount > 1:
            painting = True

5 def mousePressed():
    # start painting
    if mouseButton == LEFT:
        loop()

6 def mouseReleased():
    # stop painting
    if mouseButton == LEFT:
        global painting
        painting = False
        noLoop()
Read over this code while simulating the process in your mind, paying careful attention to when painting is equal to True or False, and when the draw() function is running continuously. The sketch begins with the painting variable set to False; the draw() function isn’t looping at this point. When you press the left mouse button 5, the loop() function instructs Processing to resume looping the draw() function; when you release the button 6, the noLoop() function halts the draw behavior again. The paintmode variable is set to free 1 by default, so Python checks whether you’re currently painting 2. You’ll add other paint modes later. If painting is equal to True, Processing draws a line between the mouse coordinates of the current frame and those of the previous frame 3; if not, it checks that the frame count has passed 1 4 before setting the painting variable to True. The if 2 and elif 4 steps are necessary to avoid drawing straight lines between where you cease and resume painting (release the left button, move the mouse, and then press the button again), and the frameCount > 1 stops Processing from drawing a line from the upper left corner to where you first begin painting. In Figure 11-6, the left screenshot depicts what happens if you omit those statements.
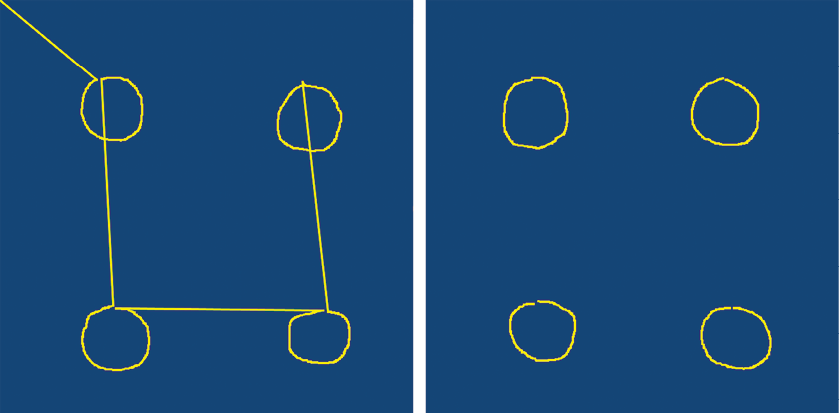
Figure 11-6: Processing drawing straight lines between the points where painting stops and starts (left), and your version of the program (right)
Run the sketch, and draw a few circles to test that the code is working. Watch the console and note that the frame count increases only while you’re pressing the left mouse button.
Adding Selectable Color Swatches
The tool palette will include six color swatches that you can use to change the brush color. Add the following code to the bottom of the draw() block to render a black panel against the left edge of the display window, and within it, six color swatches based on the swatches list:
. . .
def draw():
    . . .
    # black panel
    noStroke()
    fill('#000000')
    rect(0, 0, palette, height)
    # color swatches
    for i, swatch in enumerate(swatches):
        sx = int(i%2) * palette/2
        sy = int(i/2) * palette/2
        fill(swatch)
        square(sx, sy, palette/2)
. . .
The for loop iterates the swatches list, drawing a grid of squares filled in different colors. Your program draws the panel (and swatch elements) after the brushstrokes to prevent unwanted strokes appearing over the palette as you select things.
If a user clicks a color swatch, you must assign that color to the brushcolor variable; add code for this to the mousePressed() function:
. . .
def mousePressed():
    . . .
    # swatch select
    if mouseButton == LEFT and mouseX < palette and mouseY < 90:
        global brushcolor
        brushcolor = get(mouseX, mouseY)
The if statement tests for a left-click and checks that the mouse pointer is positioned somewhere over the color swatches. The get() function returns the color for the pixel under the mouse pointer and assigns it to the brushcolor variable. You add a global line to overwrite the brushcolor variable in the global scope, the same variable that the draw() function uses to apply the stroke for the brush color.
Run the sketch. You can now select colors for painting (Figure 11-7).
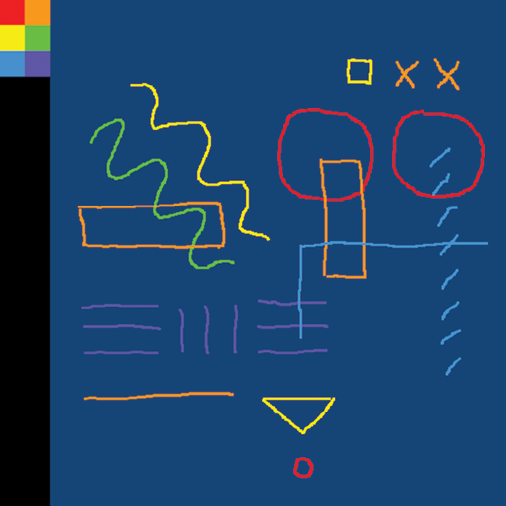
Figure 11-7: Click the swatches in the tool palette to change the brush’s color.
Next, you’ll add a feature for resizing the brush, mapping this to the scroll wheel.
Resizing the Brush by Using the Scroll Wheel
The mouseWheel() event function is used to execute code when the mouse wheel is moved. Additionally, you can use it to retrieve positive or negative values depending on the direction of the scroll wheel’s rotation. The direction of rotation for positive/negative values, however, depends on your system’s configuration. Your touch pad scroll should work for this too, usually with a two-finger drag.
Add a mouseWheel() function to the very bottom of your code:
. . .
def mouseWheel(e):
    print(e)
The e within the mouseWheel() function’s parentheses serves as a variable to which the event details are assigned. You may name this whatever you like; programmers commonly use e or event.
Run the sketch, position your mouse pointer somewhere over the display window, and use the scroll wheel. The console should display something like the following:
<MouseEvent WHEEL@407,370 count:1 button:0>From this output, you can establish that the type of mouse event is WHEEL. At the moment of the event, the horizontal mouse position is 407, and the vertical position is 370 (@407,370). The scroll direction is positive (count:1). Of course, your values will vary somewhat.
Add code that uses the mouseWheel() function to adjust the brush size. This code will also display a brush preview below the swatches, which will reflect the active brush’s color, size, and shape:
. . .
def draw():
    . . .
    # brush preview
    fill(brushcolor)
    if brushshape == ROUND:
        circle(palette/2, 123, brushsize)
 1 paintmode = 'free'

. . .

def mouseWheel(e):
    # resize the brush
    global brushsize, paintmode
 2 paintmode = 'select'
 3 brushsize += e.count
 4 if brushsize < 3:
        brushsize = 3
 5 if brushsize > 45:
        brushsize = 45
    redraw()
You don’t want to paint while adjusting the brush size, so paintmode is switched to select 2. The e.count is used to retrieve the negative/positive scroll value from the event variable, which is added to brushsize 3. It’s necessary, however, to include checks (if statements) to ensure that the new brush size remains within a reasonable range (between 3 4 and 45 5). Finally, the redraw() function runs the draw() function, just once, to update the brush preview and switch paintmode back to free 1.
Run the sketch to confirm that you can resize the brush by using the scroll wheel, which updates the brush preview in the palette (Figure 11-8).
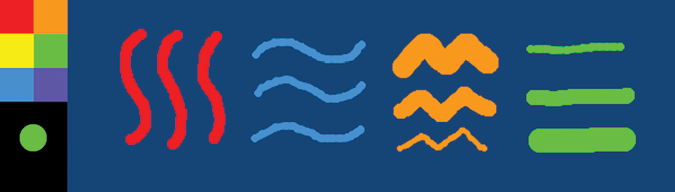
Figure 11-8: Painting with brushes of different sizes
There’s one problem, though. When selecting swatches with a large brush, a blob of paint might extend into the dark blue canvas area (Figure 11-9).
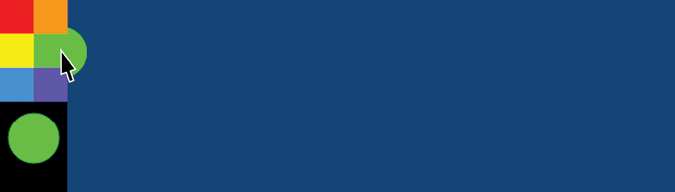
Figure 11-9: Selecting a color swatch with a large brush
To solve this problem, add an if statement to the draw() function that disables painting while the mouse is over the palette. Use the paintmode variable to control this:
. . .
def draw():
    print(frameCount)
    global painting, paintmode

    if mouseX < palette:
        paintmode = 'select'
    . . .
Run the sketch to confirm that you can select color swatches with large brushes, without blobs encroaching on the canvas area.
Now that you understand how mouse events work, consult the online reference if you need a mouseDragged() or mouseMoved() function. You’ll try out a mouseClicked() function in “Challenge #11: Adding Paint App Features” on page 252. If you’d like to change the mouse pointer from an arrow to something else, you can use the cursor() function. For example, you can add a cursor(CROSS) function to the setup() block for a crosshair.
Keyboard Interaction
Computers inherited their keyboard designs from typewriters. In the process, computer keyboards spawned various new keys, such as the arrow, escape, and function keys, and a number pad for more efficient numeric entry. They also have modifier keys (like alt and ctrl) that you can use in conjunction with other keys to perform specific operations. For example, the Z, X, C, and V keys combine with ctrl or to perform undo/cut/copy/paste operations.
Keyboard interaction in Processing works similarly to mouse interaction, with system variables such as key and keyPressed, and event functions like keyPressed(), keyReleased(), and keyTyped().
Now, let’s add keyboard shortcuts to the paint app for selecting colors.
Adding Keyboard Shortcuts to the Paint App
To program the shortcuts, you’ll combine the key system variable and keyPressed() event function. The keyPressed() function runs once each time a key is pressed. However, holding down a key may cause repeated function calls. The operating system controls this repetitive behavior, and configurations can vary among users. Processing stores the value of the most recently used key in the key system variable.
Add a keyPressed() event function to the end of your code. For now, this will print the key value in the console:
. . .
def keyPressed():
    print(key)
Run the sketch and press different keys. Numbers, letters, and symbols display in the console as you might expect them to—you get a 1 when you press the 1 key, a q when you press the Q key, and so on. If caps lock is on, you get uppercase letters.
To select different color swatches, replace the print() function with code that uses the number keys 1 to 6:
. . .
def keyPressed():
    global brushcolor, paintmode
    paintmode = 'select'
    # color swatch shortcuts
    if str(key).isdigit():
        k = int(key) - 1
        if k < len(swatches):
            brushcolor = swatches[k]
            redraw()
Python’s isdigit() method returns True if all of the characters in a string are digits. This works only on characters/strings and will handle most key values fine, returning False for any letters and symbols. However, Processing represents special keys (arrows and modifiers) by using numeric codes—in other words, integers, not strings. So, you use str(key) to convert any numeric codes to strings to prevent certain keypresses from crashing the app. If the key value is a digit, Python will subtract 1 from it and assign it to variable k. Because the swatches list is zero-indexed, color 1 is equal to swatches[0], and so forth. The final if statement verifies that the index value (k) is less than the length of the swatches list—in other words, a number between 0 and 5. The redraw() function updates the brush preview.
The paint app can paint in different colors, in strokes of varying thickness. Experiment with adding other features to your paint app.
Challenge #11: Adding Paint App Features
One of the most useful features you can add is a Clear button so you don’t need to close and reopen the app when you want a blank, new canvas. You’ll program a button that resets the canvas to dark blue.
Add a button labeled CLEAR to the palette:
. . .
def draw():
    . . .
    # clear button
    fill('#FFFFFF')
    text('CLEAR', 10, height-12)
This draws CLEAR, in the Ernest font, in the lower left corner of the display window (Figure 11-10).
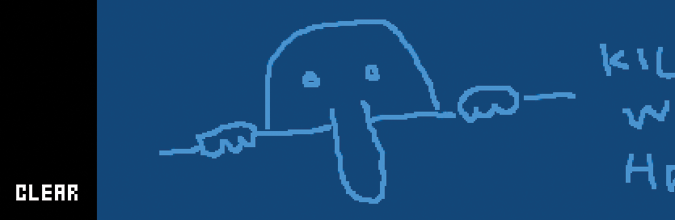
Figure 11-10: The Clear button
You can use a mouseClicked() function to execute code when a mouse button is clicked, at the moment of release. Like the other mouse events, this code executes just once until you repeat the action. Add a mouseClicked() function to your code:
. . .
def mouseClicked():
    circle(width/2, height/2, width)
If you click anywhere in the display window, this code will draw a circle over the entire paint app. Now replace the circle() line with code that responds only to clicks over the Clear button and not anywhere outside that region. Additionally, this code must draw a dark blue square over the canvas area.
Once you have the Clear button working correctly, try adding a Save (As Image) button, an eraser, more swatches, or maybe even a color mixer. If you need help, you can find the solution at https://github.com/tabreturn/processing.py-book/tree/master/chapter-11-mouse_and_keyboard_interaction/paint_app/.
Summary
In this chapter, you learned how to add interactivity to your sketches by using mouse and keyboard input. You learned about Processing’s system variables for those input devices, as well as their event functions that execute, just once, when a specific event occurs.
Processing supports a range of input devices, such as microphones, cameras, and game controllers, and I encourage you to explore those features. You can also connect an Arduino board to Processing if you want to build custom input devices.
In this chapter, you programmed a simple tool palette for selecting color swatches. Many software and web development projects require graphic interface development, and many graphical user interface (GUI) toolkits provide sets of ready-made widgets for things like buttons, checkboxes, sliders, drop-down lists, and text fields. Processing has GUI libraries to explore if you want to build more complex interfaces. For Python (outside of Processing), Tkinter, PyQt, and Kivy are a few options.
In the Afterword, I’ll point you to other useful resources and suggest the next steps you might consider taking in your creative coding adventures.