
While the purpose of unit tests is to verify units of code in isolation, end-to-end (E2E) tests are intended to validate the application as a whole. Those tests can go to various depths. Their scope may be limited to the client application itself. In such a case, any distant service used by the application needs be mocked one way or another.
They can also cover the whole system. Most of the time, this means that the services backing the application must be deployed to a test location and initialized with well-controlled test data.
Whatever your end-to-end test strategy is, the technology stays pretty much the same. In this section, we will see how to leverage Protractor to write functional test scenarios for our contact management application.
At the time of writing, the CLI doesn't include a Protractor setup. Since we started our project using the CLI, let's see how we can add support for end-to-end tests to our application.
We first need to install the protractor plugin for Gulp, along with the del library. Open a console in the project's directory and run the following command:
> npm install gulp-protractor del --save-dev
Next, we need to store some configuration values about the end-to-end testing process. Let's add these to the aurelia.json file:
aurelia_project/aurelia.json
{
  //Omitted snippet...
  "unitTestRunner": {
    "id": "karma",
    "displayName": "Karma",
    "source": "test\unit\**\*.js"
  },
  "e2eTestRunner": {
    "id": "protractor",
    "displayName": "Protractor",
    "source": "test/e2e/src/**/*.js",
    "output": "test/e2e/dist/",
    "transpiler": {
      "id": "babel",
      "displayName": "Babel",
      "options": {
        "plugins": [
          "transform-es2015-modules-commonjs"
        ]
      }
    }
  },
  //Omitted snippet...
}
This new section contains paths and transpiler options that will be used by our E2E task.
This task is pretty straightforward: it transpiles the test suite using Babel, so it can run on Node, and then launches Protractor. Let's first write the task descriptor:
aurelia_project/tasks/e2e.json
{
  "name": "e2e",
  "description":
    "Runs all end-to-end tests and reports the results.",
  "flags": []
}
Next, let's write the task itself:
aurelia_project/tasks/e2e.js
import gulp from 'gulp';
import del from 'del';
import {webdriver_update, protractor} from 'gulp-protractor';
import plumber from 'gulp-plumber';
import notify from 'gulp-notify';
import changedInPlace from 'gulp-changed-in-place';
import sourcemaps from 'gulp-sourcemaps';
import babel from 'gulp-babel';
import project from '../aurelia.json';
import {CLIOptions} from 'aurelia-cli';

function clean() {
  return del(project.e2eTestRunner.output + '*');
}

function build() {
  return gulp.src(project.e2eTestRunner.source)
    .pipe(plumber({
      errorHandler: notify.onError('Error: <%= error.message %>')
    }))
    .pipe(changedInPlace({firstPass:true}))
    .pipe(sourcemaps.init())
    .pipe(babel(project.e2eTestRunner.transpiler.options))
    .pipe(gulp.dest(project.e2eTestRunner.output));
}

function run() {
  return gulp.src(project.e2eTestRunner.output + '**/*.js')
    .pipe(protractor({
      configFile: 'protractor.conf.js',
      args: ['--baseUrl', 'http://127.0.0.1:9000']
    }))
    .on('end', () => { process.exit(); })
    .on('error', e => { throw e; });
}

export default gulp.series(
  webdriver_update,
  clean,
  build,
  run
);
If you are not familiar with Gulp, let me quickly explain what this task does:
- It updates WebDriver if needed
- It cleans the output directory, where the transpiled test suite sits
- It transpiles the test suite in the output directory
- It launches Protractor.
You may have noticed that a configuration file path is passed to Protractor. Let's write this configuration:
protractor.conf.js
exports.config = {
  directConnect: true,

  capabilities: {
    'browserName': 'chrome'
  },

  specs: ['test/e2e/dist/**/*.js'],

  plugins: [{
    package: 'aurelia-tools/plugins/protractor'
  }],

  jasmineNodeOpts: {
    showColors: true,
    defaultTimeoutInterval: 30000
  }
};
Exploring Protractor in any depth is outside the scope of this book. However, you can probably understand from this configuration that it will use Google Chrome to run the tests, that it expects the test files to sit in the test/e2e/dist directory, which is where we configured our task to transpile our test suite, and that a plugin is loaded from the aurelia-tools package. The aurelia-tools library is already included in CLI-based projects, so there no need to install it.
This last part is pretty important, since this plugin adds some Aurelia-specific methods to the Protractor API. We'll see those in the following section.
Our contact management application does not live by itself. It sits over an HTTP-based API, which allows the application to access data and perform actions. As such, we need a controlled version of the API, a kind of mock, actually, which will contain a predefined set of data, and which we can reset to its original state before each test.
You can take this mocked API from this book's artifacts. Simply copy the chapter-7app este2eapi-mock directory from the samples and paste it in the teste2e directory of your own project. You will probably need to create the e2e directory first.
Once this is done, make sure you restore all dependencies needed by the API mock by opening a console in the api-mock directory and running the following command:
> npm install
The API mock is now ready to run.
In order to reset the data set before each test, we'll need a helper function:
test/e2e/src/contacts/api-mock.js
import http from 'http';

export function resetApi() {
  const deferred = protractor.promise.defer();

  const request = http.request({
    protocol: 'http:',
    host: '127.0.0.1',
    port: 8000,
    path: '/reset',
    method: 'POST'
  }, response => {
    if (response.statusCode < 200 || response.statusCode >= 300) {
      deferred.reject(response);
    } else {
      deferred.fulfill();
    }
  });
  request.end();

  return deferred.promise;
}
In case you didn't know, Protractor runs on Node, not in the browser. As such, we start by importing the http Node module. Next, we define and export a resetApi function, which simply sends a POST request to the /reset endpoint of our HTTP API. It also returns a Promise, which is resolved when the HTTP request completes.
This function tells the backend to reset its dataset to its original state. We will call it before every test, so each test can be sure to work with the same set of data, even if a previous test created a new contact or updated an existing one.
A typical E2E test will load a given URL, retrieve one or many DOM elements from the document, perform an action or dispatch an event on this or those elements, and then verify that the expected outcome was achieved.
As such, selecting elements and performing actions on them can quickly bloat the test code. Additionally, it is fairly common to have to select a given set of elements in multiple test cases. Having to duplicate the selection code in many places makes the code rigid and hard to change. The tests becomes more restrictive than liberating.
To make our tests more self-descriptive and easier to change, we will use the page object pattern. This pattern describes how we create a class to represent the UI of a given page or component in order to encapsulate the logic of selecting specific elements and performing actions on them.
Let's illustrate this by creating such a class for the contact list component:
test/e2e/src/contacts/list.po.js
export class ContactsListPO {

  getTitle() {
    return element(by.tagName('h1')).getText();
  }

  getAllContacts() {
    return element.all(by.css('.cl-details-link'))
      .map(link => link.getText());
  }

  clickContactLink(index) {
    const result = {};
    const link = element.all(
      by.css(`.cl-details-link`)).get(index);
    link.getText().then(fullName => {
      result.fullName = fullName;
    });
    link.click();
    return browser.waitForRouterComplete().then(() => result);
  }

  clickNewButton() {
    element(by.css('.cl-create-btn')).click();
    return browser.waitForRouterComplete();
  }

  setFilter(value) {
    element(by.valueBind('filter & debounce'))
      .clear().sendKeys(value);
    return browser.sleep(200);
  }

  clickClearFilter() {
    element(by.css('.cl-clear-filter-btn')).click();
    return browser.sleep(200);
  }
}
This class starts with a getAllContacts method. This method uses the Protractor API to select all elements with the cl-details-link CSS class, and then maps them to their text content. This method allows us to get an array containing the full name of all displayed contacts.
Next, it exposes a clickContactLink method, which retrieves the element at the provided index among those with the cl-details-link CSS class, and then gets its text content to assign it as the fullName property on a result object, before performing a click on the element. It then uses one of the extension methods provided by Aurelia's Protractor plugin to wait for the router to complete its navigation cycle, which would be triggered by clicking on the link and return the resulting Promise, whose result is changed for the result object.
Note
As mentioned before, exploring Protractor in depth is outside the scope of this book. However, if you are unfamiliar with it, it is important to understand that all methods in the Protractor API return Promises, but that it is often unnecessary to chain them using then because Protractor internally queues all asynchronous operations.
I strongly suggest that you get familiar with this aspect of Protractor before trying to write extensive E2E test suites.
The clickNewButton method is pretty simple; it selects the element with the cl-create-btn CSS class and performs a click on it, before waiting for the router to complete its navigation cycle.
The setFilter method uses another of the Protractor's Aurelia plugin extension methods to select the element data-bound to the filter property and decorated with the debounce binding behavior. It then clears its value and sends a given sequence of key strokes to it, before letting the browser sleep for 200 milliseconds.
Lastly, the clickClearFilter method selects the element with the cl-clear-filter-btn CSS class and performs a click on it. It then makes the browser sleep for 200 milliseconds.
The purpose of a page object is to encapsulate and abstract away interactions with the view. Since all the code dealing with the component's HTML is centralized in a single class, the impacts of modifying the component's view will be limited to this class. Additionally, as we will see in the next section, the test cases themselves will only have to deal with this high-level API over the view, not with the intricacies of the HTML structure itself. Most calls to the Protractor API will be hidden inside our page objects.
You may have noticed that most selectors in the previous code snippet use new CSS classes to select elements. Let's add those to the contacts list template:
src/contacts/components/list.html
<template>
  <section class="container">
    <h1>Contacts</h1>

    <div class="row">
      <div class="col-sm-1">
        <a route-href="route: contact-creation"
           class="btn btn-primary cl-create-btn">
          <i class="fa fa-plus-square-o"></i> New
        </a>
      </div>
      <div class="col-sm-2">
        <div class="input-group">
          <input type="text" class="form-control"
                 placeholder="Filter"
                 value.bind="filter & debounce">
          <span class="input-group-btn" if.bind="filter">
            <button class="btn btn-default cl-clear-filter-btn"
                    type="button"
                    click.delegate="filter = ''">
              <i class="fa fa-times"></i>
              <span class="sr-only">Clear</span>
            </button>
          </span>
        </div>
      </div>
    </div>

    <group-list items.bind="contacts
                  | filterBy:filter:'firstName':'lastName':
                    'company'"
                group-by="firstLetter" order-by="fullName">
      <template replace-part="item">
        <a route-href="route: contact-details;
                       params.bind: { id: id }"
           class="cl-details-link">
          <span if.bind="isPerson">
            ${firstName} <strong>${lastName}</strong>
          </span>
          <span if.bind="!isPerson">
            <strong>${company}</strong>
          </span>
        </a>
      </template>
    </group-list>
  </section>
</template>
Lastly, before diving in our first test case, let's quickly add two other page objects we'll need in our tests:
test/e2e/src/contacts/creation.po.js
export class ContactCreationPO {

  getTitle() {
    return element(by.tagName('h1')).getText();
  }
}
test/e2e/src/contacts/details.po.js
export class ContactDetailsPO {

  getFullName() {
    return element(by.tagName('h1')).getText();
  }
}
The first page object encapsulates the contact creation component. It simply exposes a getTitle method, which selects the h1 element and returns its text content.
The second one is for the contact details component. It has a getFullName method, which allows us to retrieve the displayed full name of the contact by selecting the h1 element and returning its text content.
Now that all the tools we need are ready, let's write a first test case for the contacts list component:
test/e2e/src/contacts/list.spec.js
import {resetApi} from './api-mock.js';
import {ContactsListPO} from './list.po.js';

describe('the contacts list page', () => {

  let listPo;

  beforeEach(done => {
    listPo = new ContactsListPO();

    resetApi().then(() => {
      browser
        .loadAndWaitForAureliaPage('http://127.0.0.1:9000/')
        .then(done);
    });
  });

  it('should display the list of contacts', () => {
    expect(listPo.getTitle()).toEqual('Contacts');
    listPo.getAllContacts().then(names => {
      expect(names.length).toBeGreaterThan(0);
    });
  });
});
Here, we start with a test setup, which creates an instance of the contacts list page object, resets the API, then uses another of the extension methods offered by Aurelia's Protractor plugin to load a given URL, and then wait for the Aurelia application to finish booting.
Next, we define a first test case, which uses the page object's methods to ensure that some contacts are displayed.
Note
Even though tests running using Protractor are asynchronous, most of the time there is no need to use Jasmine's done function to let the framework know when a test case is finished, because Protractor modifies Jasmine's functions to handle asynchronicity itself using its own internal task queue.
The exception to this rule is when performing an asynchronous operation that is not handled by Protractor, such as in the beforeEach function where we reset the API using an asynchronous HTTP request.
At this point, we have everything ready and run our E2E tests. To do this, we first need to run the API mock, by opening a console in the test/e2e/api-mock directory inside our project and executing the following command:
> npm start
Once the API is running, we must also launch the application itself, by opening a console in the project's directory and running the command:
> au run
Those two commands are necessary, because the E2E tests will need to load our application in a browser in order to execute, and will need to call the API to reset its data before each test. Of course, the application itself also needs the API to request data and perform actions.
Once the API mock and the application are both running, we can launch the E2E tests by opening a third console in the project directory and running the following command:
> au e2e
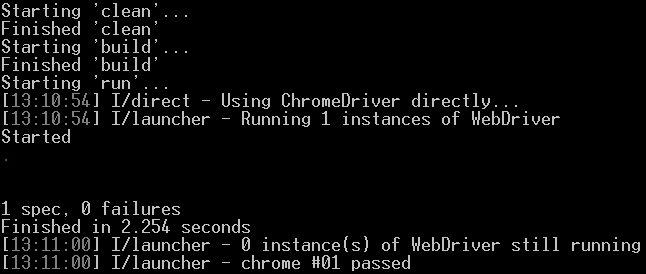
You will see the task start, and during the process a Chrome instance will show up. You will see the application load and the test case scenario play live before your eyes, before Chrome shuts down and the task completes. The complete output should be similar to this:
Now that we know that everything works correctly, let's add some tests for the contacts list component:
test/e2e/src/contacts/list.spec.js
import {resetApi} from './api-mock.js';
import {ContactsListPO} from './list.po.js';
import {ContactDetailsPO} from './details.po.js';
import {ContactCreationPO} from './creation.po.js';

describe('the contacts list page', () => {

  let listPo, detailsPo, creationPo;

  beforeEach(done => {
    listPo = new ContactsListPO();
    detailsPo = new ContactDetailsPO();
    creationPo = new ContactCreationPO();

    resetApi().then(() => {
      browser
        .loadAndWaitForAureliaPage('http://127.0.0.1:9000/')
        .then(done);
    });
  });

  it('should load the list of contacts', () => {
    expect(listPo.getTitle()).toEqual('Contacts');
    listPo.getAllContacts().then(names => {
      expect(names.length).toBeGreaterThan(0);
    });
  });

  it('should display details when clicking a contact link', () => {
    listPo.clickContactLink(0).then(clickedContact => {
      expect(detailsPo.getFullName())
        .toEqual(clickedContact.fullName);
    });
  });

  it('should display the creation form when clicking New', () => {
    listPo.clickNewButton();

    expect(creationPo.getTitle()).toEqual('New contact');
  });

  it('should filter the list', () => {
    const searched = 'Google';

    listPo.setFilter(searched);

    listPo.getAllContacts().then(names => {
      expect(names.every(n => n.includes(searched))).toBe(true);
    });
  });

  it('should reset unfiltered list when clicking clear filter', () =>
  {
    let unfilteredNames;
    listPo.getAllContacts().then(names => {
      unfilteredNames = names;
    });
    listPo.setFilter('Google');

    listPo.clickClearFilter();

    listPo.getAllContacts().then(names => {
      expect(names).toEqual(unfilteredNames);
    });
  });
});
- The first of those new test cases makes sure that, when clicking on a contact entry in the list, the application navigates to the contact's details component
- The second one makes sure that, when clicking on the New button, the application navigates to the contact creation component
- The third one makes sure that, when typing a search term in the filter textbox, the list is filtered down using this search term
- Lastly, the fourth one makes sure that, when clearing the filter textbox after a search, the list is restored unfiltered
This test suite now covers all the features of the contacts list component. If you run the E2E tests at this point, you should see the five test cases pass.
Let's try to complicate things a bit by adding a test suite for the contact creation component, which includes a complex form with validation rules.
First, we'll write a reusable class following the page object pattern, which will encapsulate the contact form view. This way, we'll be able to use this class to test contact creation, and also to eventually test the contact edition.
We'll start with a base page object for list editors. This class will encapsulate the details about how to access and perform actions on parts of one of the list-editor elements on the contact form component.
test/e2e/src/contacts/form.po.js
class ListEditorPO {

  constructor(property) {
    this.property = property;
  }

  _getContainer() {
    return element(by.css(
      `list-editor[items\.bind=contact\.${this.property}]`));
  }

  _getItem(index) {
    return this._getContainer()
      .all(by.css(`.le-item`))
      .get(index);
  }

  _selectOption(index, name, value) {
    this._getItem(index)
      .element(by.valueBind(`${name} & validate`))
      .element(by.css(`option[value=${value}]`))
      .click();
    return browser.sleep(200);
  }

  _setText(index, name, value) {
    this._getItem(index)
      .element(by.valueBind(`${name} & validate`))
      .clear()
      .sendKeys(value);
    return browser.sleep(200);
  }

  clickRemove(index) {
    this._getItem(index)
      .element(by.css(`.le-remove-btn`))
      .click();
    return browser.sleep(200);
  }

  clickAdd() {
    this._getContainer()
      .element(by.css(`.le-add-btn`))
      .click();
    return browser.sleep(200);
  }
}
Here, we start by defining a base class named ListEditorPO. This class encapsulates interaction with a single list-editor element in the contact form and knows how to:
- Select a given
optionin aselectbound to a given property at a given index in the list. - Send a given sequence of keys into a field bound to a given property at a given index in the list.
- Click the Remove button at a given index in the list.
- Click the Add button.
Next, we'll extend this class by writing four specialized page objects, one for each type of item a contact can have:
test/e2e/src/contacts/form.po.js
//Omitted snippet...

class PhoneNumberListEditorPO extends ListEditorPO {

  constructor() {
    super('phoneNumbers');
  }

  setType(index, value) {
    return this._selectOption(index, 'type', value);
  }

  setNumber(index, value) {
    return this._setText(index, 'number', value);
  }
}

class EmailAddressListEditorPO extends ListEditorPO {

  constructor() {
    super('emailAddresses');
  }

  setType(index, value) {
    return this._selectOption(index, 'type', value);
  }

  setAddress(index, value) {
    return this._setText(index, 'address', value);
  }
}

class AddressListEditorPO extends ListEditorPO {

  constructor() {
    super('addresses');
  }

  setType(index, value) {
    return this._selectOption(index, 'type', value);
  }

  setNumber(index, value) {
    return this._setText(index, 'number', value);
  }

  setStreet(index, value) {
    return this._setText(index, 'street', value);
  }

  setPostalCode(index, value) {
    return this._setText(index, 'postalCode', value);
  }

  setState(index, value) {
    return this._setText(index, 'state', value);
  }

  setCountry(index, value) {
    return this._setText(index, 'country', value);
  }
}

class SocialProfileListEditorPO extends ListEditorPO {

  constructor() {
    super('socialProfiles');
  }

  setType(index, value) {
    return this._selectOption(index, 'type', value);
  }

  setUsername(index, value) {
    return this._setText(index, 'username', value);
  }
}
Here, we define a bunch of classes that extend the base ListEditorPO class: PhoneNumberListEditorPO, EmailAddressListEditorPO, AddressListEditorPO, and SocialProfileListEditorPO. They all:
- Specify the property which the underlying
list-editorelement is bound to - Add specialized methods to set the value of the fields of each item in the underlying
list-editor, such assetTypeandsetNumberfor phone numbers, orsetStreetandsetCityfor addresses
Lastly, we'll write a page object for the contact form itself:
test/e2e/src/contacts/form.po.js
//Omitted snippet...


export class ContactFormPO {

  constructor() {
    this.phoneNumbers = new PhoneNumberListEditorPO();
    this.emailAddresses = new EmailAddressListEditorPO();
    this.addresses = new AddressListEditorPO();
    this.socialProfiles = new SocialProfileListEditorPO();
  }

  _setText(name, value) {
    element(by.valueBind(`contact.${name} & validate`))
      .clear()
      .sendKeys(value);
    return browser.sleep(200);
  }

  setFirstName(value) {
    return this._setText('firstName', value);
  }

  setLastName(value) {
    return this._setText('lastName', value);
  }

  setCompany(value) {
    return this._setText('company', value);
  }

  setBirthday(value) {
    return this._setText('birthday', value);
  }

  setNote(value) {
    return this._setText('note', value);
  }

  getValidationErrors() {
    return element.all(by.css('.validation-message'))
      .map(x => x.getText());
  }
}
Here, we export a class named ContactFormPO, which encapsulates interaction with the view of the contact form. It has one instance of each of the classes extending ListEditorPO, so tests can interact with the various list-editor elements for phone numbers, e-mail addresses, addresses, and social profiles. It also has methods allowing us to set the value of the first name, last name, company, birthday, and note. Finally, it has a method allowing us to retrieve all the validation error messages on the form.
Before being able to write our new tests, we need to connect this form page object with the page object for the contact creation component. We'll also add a couple of methods to it:
test/e2e/src/contacts/creation.po.js
import {ContactFormPO} from './form.po.js';

export class ContactCreationPO extends ContactFormPO {

  getTitle() {
    return element(by.tagName('h1')).getText();
  }

  clickSave() {
    element(by.buttonText('Save')).click();
    return browser.sleep(200);
  }

  clickCancel() {
    element(by.linkText('Cancel')).click();
    return browser.sleep(200);
  }
}
Here, we first make the ContactCreationPO class inherit the ContactFormPO class, Then, we add a first method to click on the Save button, and another method to click on the Cancel link.
With this ready, it is pretty straightforward to write a test suite for the contact creation component:
test/e2e/src/contacts/creation.spec.js
import {resetApi} from './api-mock.js';
import {ContactsListPO} from './list.po.js';
import {ContactCreationPO} from './creation.po.js';

describe('the contact creation page', () => {

  let listPo, creationPo;

  beforeEach(done => {
    listPo = new ContactsListPO();
    creationPo = new ContactCreationPO();

    resetApi().then(() => {
      browser.loadAndWaitForAureliaPage('http://127.0.0.1:9000/');
      listPo.clickNewButton().then(done);
    });
     });
});
In this test suite's setup, we start by creating page objects for the list and the creation components. We reset the API's data, then load the application, and click on the New button to navigate to the contact creation component.
We can now enrich this test suite with some cases that verify the behavior of the contact creation component:
it('should display errors when clicking save and form is invalid', () => {
  creationPo.setBirthDay('this is absolutely not a date');
  creationPo.phoneNumbers.clickAdd();
  creationPo.emailAddresses.clickAdd();
  creationPo.addresses.clickAdd();
  creationPo.socialProfiles.clickAdd();

  creationPo.clickSave();

  expect(creationPo.getTitle()).toEqual('New contact');
  expect(creationPo.getValidationErrors()).toEqual([
    'Birthday must be a valid date.',
    'Address is required.',
    'Number is required.',
    'Street is required.',
    'Postal Code is required.',
    'City is required.',
    'Country is required.',
    'Username is required.'
  ]);
});

it('should create contact when clicking save and form is valid', () => {
  creationPo.setFirstName('Chuck');
  creationPo.setLastName('Norris');
  creationPo.setBirthDay('1940-03-10');

  creationPo.emailAddresses.clickAdd();
  creationPo.emailAddresses.setType(0, 'Office');
  creationPo.emailAddresses.setAddress(0,
    '[email protected]');

  creationPo.clickSave();

  expect(listPo.getTitle()).toEqual('Contacts');
  expect(listPo.getAllContacts()).toContain('Chuck Norris');
});

it('should not create contact when clicking cancel', () => {
  creationPo.setFirstName('Steven');
  creationPo.setLastName('Seagal');

  creationPo.clickCancel();

  expect(listPo.getTitle()).toEqual('Contacts');
  expect(listPo.getAllContacts()).not.toContain('Steven Seagal');
});
Here, we define three test cases. The first one makes sure that, when the form is in an invalid state and the Save button is clicked, no navigation occurs and the proper validation messages are displayed. The second one makes sure that, when the form is in a valid state and the Save button is clicked, the application navigates back to the contacts list component. It also ensures that the new contact is displayed in the list. The third test case makes sure that clicking on Cancel makes the application navigate back to the contacts list component. It also ensures that no new contact is displayed in the list.
This chapter could go on much longer by adding tests for other features in our application, but writing additional tests would add little value to the learning experience of Aurelia in itself. End-to-end testing an Aurelia application with Protractor is a topic that deserves its own book. However, the goal of the present section was to give you a taste of it and get you started. Hopefully, it did.