
Chapter 5. React with JSX
In the last chapter, we dove deeply into how React works, breaking down
our React applications into the smallest bits: elements and even fibers.
Having that knowledge in place is really important, but writing all of
your React apps with createElement functions is very time-consuming.
It’s a bit like if you had just sat down to Thanksgiving dinner with
your family, and your sister said, “Oh no. We forgot the cranberry
sauce.” And you said, “Ok, go get it”, thinking that she’d go to the
kitchen and bring out the canned cranberry sauce you got at Trader
Joe’s. But instead she got in the car and drove 17 miles to a cranberry
bog, skimmed the cranberries that were bobbing on top of the water, came
back, and cooked the sauce from scratch.
This was not the most efficient way to get cranberry sauce on the table, and we must seek efficiency in all aspects of our lives. The way we make things more efficient in our React applications is to use JSX.
JSX is a JavaScript extension that allows us to define React elements using syntax that looks similar to HTML. In this chapter, we are going to discuss how to use JSX to construct a React application.
React Elements as JSX
Facebook’s React team released JSX when they released React to provide a concise syntax for creating complex DOM trees with attributes. They also hoped to make React more readable like HTML and XML. In JSX, an element’s type is specified with a tag. The tag’s attributes represent the properties. The element’s children can be added between the opening and closing tags.
You can also add other JSX elements as children. If you have an unordered list, you can add child list item elements to it with JSX tags. It looks very similar to HTML.
<ul><li>1 lb Salmon</li><li>1 cup Pine Nuts</li><li>2 cups Butter Lettuce</li><li>1 Yellow Squash</li><li>1/2 cup Olive Oil</li><li>3 Cloves of Garlic</li></ul>
JSX works with components as well. Simply define the component using the
class name. We pass an array of ingredients to the IngredientsList as
a property with JSX.

When we pass the array of ingredients to this component, we need to surround it with curly braces. This is called a JavaScript expression, and we must use these when passing JavaScript values to components as properties. Component properties will take two types: either a string or a JavaScript expression. JavaScript expressions can include arrays, objects, and even functions. In order to include them, you must surround them in curly braces.
JSX Tips
JSX might look familiar, and most of the rules result in syntax that is similar to HTML. However, there are a few considerations that you should understand when working with JSX.
Nested Components
JSX allows you to add components as children of other components. For
example, inside the IngredientsList, we can render another component
called Ingredient multiple times:
<IngredientsList><Ingredient/><Ingredient/><Ingredient/></IngredientsList>
className
Since class is a reserved word in JavaScript, className is used to
define the class attribute instead:
<h1className="fancy">Baked Salmon</h1>
JavaScript Expressions
JavaScript expressions are wrapped in curly braces and indicate where
variables shall be evaluated and their resulting values returned. For
example, if we want to display the value of the title property in an
element, we can insert that value using a JavaScript expression. The
variable will be evaluated and its value returned:
<h1>{title}</h1>
Values of types other than string should also appear as JavaScript expressions:
<inputtype="checkbox"defaultChecked="{false}"/>
Evaluation
The JavaScript that is added in between the curly braces will get evaluated. This means that operations such as concatenation or addition will occur. This also means that functions found in JavaScript expressions will be invoked:
<h1>{"Hello" + title}</h1><h1>{title.toLowerCase().replace}</h1>
functionappendTitle({title}){console.log(`${title}is great!`);}
Mapping Arrays with JSX
JSX is JavaScript, so you can incorporate JSX directly inside of JavaScript functions. For example, you can map an array to JSX elements:
<ul>{props.ingredients.map((ingredient,i)=>(<likey="{i}">{ingredient}</li>))}</ul>
JSX looks clean and readable, but it can’t be interpreted with a
browser. All JSX must be converted into createElement calls or
factories. Luckily, there is an excellent tool for this task: Babel.
Babel
Many software languages require you to compile your source code. JavaScript is an interpreted language: the browser interprets the code as text, so there is no need to compile JavaScript. However, not all browsers support the latest JavaScript syntax, and no browser supports JSX syntax. Since we want to use the latest features of JavaScript along with JSX, we are going to need a way to convert our fancy source code into something that the browser can interpret. This process is called compiling, and it is what Babel is designed to do.
The first version of the project was called 6to5, and it was released in September 2014. 6to5 was a tool that could be used to convert ES6 syntax to ES5 syntax, which was more widely supported by web browsers. As the project grew, it aimed to be a platform to support all of the latest changes in ECMAScript. It also grew to support converting JSX into JavaScript. The project was renamed as Babel in February 2015.
Babel is used in production at Facebook, Netflix, PayPal, Airbnb, and more. Previously, Facebook had created a JSX transformer that was their standard, but it was soon retired in favor of Babel.
There are many ways of working with Babel. The easiest way to get started is to include a link to the Babel CDN directly in your HTML, which will compile any code in script blocks that have a type of “text/babel”. Babel will compile the source code on the client before running it. Although this may not be the best solution for production, it is a great way to get started with JSX.
<!DOCTYPE html><html><head><metacharset="utf-8"/><title>React Examples</title></head><body><divid="root"></div><!-- React Library & React DOM --><scriptsrc="https://unpkg.com/[email protected]/umd/react.development.js"></script><scriptsrc="https://unpkg.com/[email protected]/umd/react-dom.development.js"></script><scriptsrc="https://unpkg.com/@babel/standalone/babel.min.js"></script><scripttype="text/babel">// JSX code here. Or link to separate JavaScript file that contains JSX.</script></body></html>
Console Warning in the Browser with In-Browser Babel
When using the in-browser transformer, you’ll see a warning that says to precompile scripts for production. Don’t worry about this for the purposes of this and any other small demos. We’ll upgrade to production-ready Babel later in the chapter.
Recipes as JSX
JSX provides us with a nice, clean way to express React elements in our code that makes sense to us and is immediately readable by developers. The drawback of JSX is that it is not readable by the browser. Before our code can be interpreted by the browser, it needs to be converted from JSX into JavaScript.
This data array contains two recipes, and this represents our application’s current state:
constdata=[{name:"Baked Salmon",ingredients:[{name:"Salmon",amount:1,measurement:"l lb"},{name:"Pine Nuts",amount:1,measurement:"cup"},{name:"Butter Lettuce",amount:2,measurement:"cups"},{name:"Yellow Squash",amount:1,measurement:"med"},{name:"Olive Oil",amount:0.5,measurement:"cup"},{name:"Garlic",amount:3,measurement:"cloves"}],steps:["Preheat the oven to 350 degrees.","Spread the olive oil around a glass baking dish.","Add the yellow squash and place in the oven for 30 mins.","Add the salmon, garlic, and pine nuts to the dish.","Bake for 15 minutes.","Remove from oven. Add the lettuce and serve."]},{name:"Fish Tacos",ingredients:[{name:"Whitefish",amount:1,measurement:"l lb"},{name:"Cheese",amount:1,measurement:"cup"},{name:"Iceberg Lettuce",amount:2,measurement:"cups"},{name:"Tomatoes",amount:2,measurement:"large"},{name:"Tortillas",amount:3,measurement:"med"}],steps:["Cook the fish on the grill until cooked through.","Place the fish on the 3 tortillas.","Top them with lettuce, tomatoes, and cheese."]}];
The data is expressed in an array of two JavaScript objects. Each object contains the name of the recipe, a list of the ingredients required, and a list of steps necessary to cook the recipe.
We can create a UI for these recipes with two components: a Menu
component for listing the recipes and a Recipe component that
describes the UI for each recipe. It’s the Menu component that we will
render to the DOM. We will pass our data to the Menu component as a
property called recipes:
// The data, an array of Recipe objectsconstdata=[...];// A function component for an individual RecipefunctionRecipe(props){...}// A function component for the Menu of RecipesfunctionMenu(props){...}// A call to ReactDOM.render to render our Menu into the current DOMReactDOM.render(<Menurecipes={data}title="Delicious Recipes"/>,document.getElementById("root"));
The React elements within the Menu component are expressed as JSX.
Everything is contained within an article element. A header element,
an h1 element, and a div.recipes element are used to describe the
DOM for our menu. The value for the title property will be displayed
as text within the h1:
functionMenu(props){return(<article><header><h1>{props.title}</h1></header><divclassName="recipes"/></article>);}
Inside of the div.recipes element, we add a component for each recipe:
<divclassName="recipes">{props.recipes.map((recipe,i)=>(<Recipekey={i}name={recipe.name}ingredients={recipe.ingredients}steps={recipe.steps}/>))}</div>
In order to list the recipes within the div.recipes element, we use
curly braces to add a JavaScript expression that will return an array of
children. We can use the map function on the props.recipes array to
return a component for each object within the array. As mentioned
previously, each recipe contains a name, some ingredients, and cooking
instructions (steps). We will need to pass this data to each Recipe as
props. Also remember that we should use the key property to uniquely
identify each element.
You could also refactor this to use spread syntax. The JSX spread
operator works like the object spread operator. It will add each field
of the recipe object as a property of the Recipe component. The
syntax here will supply all properties to the component:
{props.recipes.map((recipe,i)=><Recipekey={i}{...recipe}/>);}
Remember that this shortcut will provide all of the properties to the
Recipe component. This could be a good thing but might also add too
many properties to the component.
Another place we can make a syntax improvement to our Menu component
is where we take in the props argument. We can use object
destructuring to scope the variables to this function. This allows us to
access the title and recipes variables directly, no longer having to
prefix them with props:
functionMenu({title,recipes}){return(<article><header><h1>{title}</h1></header><divclassName="recipes">{recipes.map((recipe,i)=>(<Recipekey={i}{...recipe}/>))}</div></article>);}
Now let’s code the component for each individual recipe:
functionRecipe({name,ingredients,steps}){return(<sectionid={name.toLowerCase().replace(/ /g,"-")}><h1>{name}</h1><ulclassName="ingredients">{ingredients.map((ingredient,i)=>(<likey={i}>{ingredient.name}</li>))}</ul><sectionclassName="instructions"><h2>CookingInstructions</h2>{steps.map((step,i)=>(<pkey={i}>{step}</p>))}</section></section>);}
Each recipe has a string for the name, an array of objects for
ingredients, and an array of strings for the steps. Using object
destructuring, we can tell this component to locally scope those fields
by name so we can access them directly without having to use
props.name, or props.ingredients, props.steps.
The first JavaScript expression that we see is being used to set the
id attribute for the root section element. It is converting the
recipe’s name to a lowercase string and globally replacing spaces with
dashes. The result is that “Baked Salmon” will be converted to
“baked-salmon” (and likewise, if we had a recipe with the name “Boston
Baked Beans” it would be converted to “boston-baked-beans”) before it is
used as the id attribute in our UI. The value for name is also being
displayed in an h1 as a text node.
Inside of the unordered list, a JavaScript expression is mapping each
ingredient to an li element that displays the name of the ingredient.
Within our instructions section, we see the same pattern being used to
return a paragraph element where each step is displayed. These map
functions are returning arrays of child elements.
The complete code for the application should look like this:
constdata=[{name:"Baked Salmon",ingredients:[{name:"Salmon",amount:1,measurement:"l lb"},{name:"Pine Nuts",amount:1,measurement:"cup"},{name:"Butter Lettuce",amount:2,measurement:"cups"},{name:"Yellow Squash",amount:1,measurement:"med"},{name:"Olive Oil",amount:0.5,measurement:"cup"},{name:"Garlic",amount:3,measurement:"cloves"}],steps:["Preheat the oven to 350 degrees.","Spread the olive oil around a glass baking dish.","Add the yellow squash and place in the oven for 30 mins.","Add the salmon, garlic, and pine nuts to the dish.","Bake for 15 minutes.","Remove from oven. Add the lettuce and serve."]},{name:"Fish Tacos",ingredients:[{name:"Whitefish",amount:1,measurement:"l lb"},{name:"Cheese",amount:1,measurement:"cup"},{name:"Iceberg Lettuce",amount:2,measurement:"cups"},{name:"Tomatoes",amount:2,measurement:"large"},{name:"Tortillas",amount:3,measurement:"med"}],steps:["Cook the fish on the grill until hot.","Place the fish on the 3 tortillas.","Top them with lettuce, tomatoes, and cheese."]}];functionRecipe({name,ingredients,steps}){return(<sectionid={name.toLowerCase().replace(/ /g,"-")}><h1>{name}</h1><ulclassName="ingredients">{ingredients.map((ingredient,i)=>(<likey={i}>{ingredient.name}</li>))}</ul><sectionclassName="instructions"><h2>CookingInstructions</h2>{steps.map((step,i)=>(<pkey={i}>{step}</p>))}</section></section>);}functionMenu({title,recipes}){return(<article><header><h1>{title}</h1></header><divclassName="recipes">{recipes.map((recipe,i)=>(<Recipekey={i}{...recipe}/>))}</div></article>);}ReactDOM.render(<Menurecipes={data}title="Delicious Recipes"/>,document.getElementById("root"));
When we run this code in the browser, React will construct a UI using our instructions with the recipe data as shown:

If you are using Google Chrome and you have the React Developer Tools Extension installed, you can take a look at the present state of the component tree. To do this, open the developer tools and select the React tab:

Here we can see the Menu and its child elements. The data array
contains two objects for recipes, and we have two Recipe elements.
Each Recipe element has properties for the recipe name, ingredients,
and steps.
The components are constructed based on the application’s data being
passed to the Menu component as a property. If we change the recipes
array and rerender our Menu component, React will change this DOM as
efficiently as possible.
React Fragments
In the previous section, we rendered the Menu component, a parent
component which rendered the Recipe component. We want to take a
moment to look at a small example of rendering two sibling components
using a React Fragment. Let’s start by creating a new component called
Cat that we’ll render to the DOM at the root:
functionCat({name}){return<h1>Thecat'snameis{name}</h1>;}ReactDOM.render(<Catname="Jungle"/>,document.getElementById("root"));
This will render the h1 as expected, but what might happen if we added
a p tag to the Cat component at the same level as the h1:
functionCat({name}){return(<h1>Thecat's name is {name}</h1><p>He'sgood.</p>);}
Immediately, we’ll see an error in the console that reads:
Adjacent JSX elements must be wrapped in an enclosing tag and
recommends using a fragment. This is where fragments come into play!
React will not render two or more adjacent or sibling elements as a
component, so we used to have to wrap these in an enclosing tag like a
div. This led to a lot of unnecessary tags being created though, a
bunch of wrappers without much purpose. If we use a React Fragment, we
can mimic the behavior of a wrapper without actually creating a new tag.
Start by wrapping the adjacent tags, the h1 and p, with a
React.Fragment tag:
functionCat({name}){return(<React.Fragment><h1>Thecat's name is {name}</h1><p>He'sgood.</p></React.Fragment>);}
Adding this clears the warning. You also can use a fragment shorthand to make this look even cleaner:
functionCat({name}){return(<><h1>Thecat's name is {name}</h1><p>He'sgood.</p></>);}
If you look at the DOM, the fragment is not visible in the resulting tree:
<divid="root"><h1>The cat's name is Jungle</h1><p>He's good</p></div>
Fragments are a relatively new feature of React and do away with the need for extra wrapper tags that can pollute the DOM.
Intro to webpack
Once we start working with React in real projects, there are a lot of questions to consider: How do we want to deal with JSX and ESNext transformation? How can we manage our dependencies? How can we optimize our images and CSS?
Many different tools have emerged to answer these questions, including Browserify, Gulp, Grunt, Prepack, and more. Due to its features and widespread adoption by large companies, webpack has also emerged as one of the leading tools for bundling.
webpack is billed as a module bundler. A module bundler takes all of our different files (JavaScript, LESS, CSS, JSX, ESNext, and so on) and turns them into a single file. The two main benefits of bundling are modularity and network performance.
Modularity will allow you to break down your source code into parts, or modules, that are easier to work with, especially in a team environment.
Network performance is gained by only needing to load one dependency in
the browser, the bundle. Each script tag makes an HTTP request, and
there is a latency penalty for each HTTP request. Bundling all of the
dependencies into a single file allows you to load everything with one
HTTP request, thereby avoiding additional latency.
Aside from code compilation, webpack also can handle:
Code splitting
Splits up your code into different chunks that can be loaded when you need them. Sometimes these are called rollups or layers; the aim is to break up code as needed for different pages or devices.
Minification
Removes whitespace, line breaks, lengthy variable names, and unnecessary code to reduce the file size.
Feature Flagging
Sends code to one or more—but not all—environments when testing out features.
Hot Module Replacement (HMR)
Watches for changes in source code. Changes only the updated modules immediately.
The Recipes app that we built earlier in this chapter has some limitations that webpack will help us alleviate. Using a tool like webpack to statically build your client JavaScript makes it possible for teams to work together on large-scale web applications. We can also gain the following benefits by incorporating the webpack module bundler:
Modularity
Using the module pattern in order to export modules that will later be imported or required by another part of the application makes our source code more approachable. It allows development teams to easily work together by allowing them to create and work with separate files that will be statically combined into a single file before sending to production.
Composition
With modules, we can build small, simple, reusable React components that we can compose efficiently into applications. Smaller components are easier to comprehend, test, and reuse. They are also easier to replace down the line when enhancing your applications.
Speed
Packaging all of the application’s modules and dependencies into a single client bundle will reduce the load time of your application because there is latency associated with each HTTP request. Packaging everything together in a single file means that the client will only need to make a single request. Minifying the code in the bundle will improve load time as well.
Consistency
Since webpack will compile JSX and JavaScript, we can start using tomorrow’s JavaScript syntax today. Babel supports a wide range of ESNext syntax, which means we do not have to worry about whether the browser supports our code. It allows developers to consistently use cutting-edge JavaScript syntax.
Creating the Project
To demonstrate how you might set up a React project from scratch, let’s
go ahead and create a new folder on your computer called recipes-app:
mkdir recipes-app
cd recipes-app
For this project, we’re going to go through the following steps:
-
Create the project.
-
Break down recipe app into components that live in different files.
-
Set up a webpack build that incorporates Babel.
create-react-app
There is a tool called Create React App that can be used to autogenerate a React project with all of this pre-configured. We’re going to take a closer look at what’s happening behind the scenes before abstracting these steps away with a tool.
1. Create the Project
Next, we’ll create the project and package.json file with npm, sending the -y flag to use all of the defaults. We’ll also install webpack, webpack-cli, react, and react-dom:
npm init -y
npm install react react-dom
If you’re using npm 5+, you don’t need to send the --save flag when
installing. Next, we’ll create the following directory structure to
house the components:
recipes-app (folder)
  > node_modules (already added with npm install command)
  > package.json (already added with npm init command)
  > package-lock.json (already added with npm init command)
  > index.html
  > /src (folder)
    > index.js
    > /data (folder)
      > recipes.json
    > /components (folder)
      > Recipe.js
      > Instructions.js
      > Ingredients.js
File Organization
There’s no one way to organize the files in a React project. This is just one possible strategy.
2. Break Components Into Modules
Currently, the Recipe component is doing quite a bit. We are
displaying the name of the recipe, constructing an unordered list of
ingredients, and displaying the instructions, with each step getting its
own paragraph element. This component should be placed in the
Recipe.js file. In any file where you’re using JSX, you’ll need to
import React at the top:
./src/components/Recipe.js
importReactfrom"react";functionRecipe({name,ingredients,steps}){return(<sectionid="baked-salmon"><h1>{name}</h1><ulclassName="ingredients">{ingredients.map((ingredient,i)=>(<likey={i}>{ingredient.name}</li>))}</ul><sectionclassName="instructions"><h2>CookingInstructions</h2>{steps.map((step,i)=>(<pkey={i}>{step}</p>))}</section></section>);}
A more functional approach to the Recipe component would be to break
it up into smaller, more focused function components and compose them
together. We can start by pulling the instructions out into their own
component and creating a module in a separate file that we can use for
any set of instructions.
In that new file called Instructions.js, create the following
component:
./src/components/Instructions.js
importReactfrom"react";functionInstructions({title,steps}){return(<sectionclassName="instructions"><h2>{title}</h2>{steps.map((s,i)=>(<pkey={i}>{s}</p>))}</section>);}exportdefaultInstructions;
Here we have created a new component called Instructions. We will pass
the title of the instructions and the steps to this component. This way
we can reuse this component for “Cooking Instructions,” “Baking
Instructions,” “Prep Instructions”, or a “Pre-cook Checklist”—anything
that has steps.
Now think about the ingredients. In the Recipe component, we are only
displaying the ingredient names, but each ingredient in the data for the
recipe has an amount and measurement as well. We will create a component
called Ingredient for this:
./src/components/Ingredient.js
importReactfrom"react";functionIngredient({amount,measurement,name}){return(<li>{amount}{measurement}{name}</li>);}exportdefaultIngredient;
Here we assume each ingredient has an amount, a measurement, and a name.
We destructure those values from our props object and display them
each in independent classed span elements.
Using the Ingredient component, we can construct an IngredientsList
component that can be used any time we need to display a list of
ingredients:
./src/components/IngredientsList.js
importReactfrom"react";importIngredientfrom"./Ingredient";functionIngredientsList({list}){return(<ulclassName="ingredients">{list.map((ingredient,i)=>(<Ingredientkey={i}{...ingredient}/>))}</ul>);}exportdefaultIngredientsList;
In this file, we first import the Ingredient component because we are
going to use it for each ingredient. The ingredients are passed to this
component as an array in a property called list. Each ingredient in
the list array will be mapped to the Ingredient component. The JSX
spread operator is used to pass all of the data to the Ingredient
component as props.
Using spread operator:
<Ingredient{...ingredient}/>
is another way of expressing:
<Ingredientamount={ingredient.amount}measurement={ingredient.measurement}name={ingredient.name}/>
So, given an ingredient with these fields:
letingredient={amount:1,measurement:"cup",name:"sugar"};
We get:
<Ingredientamount={1}measurement="cup"name="sugar"/>
Now that we have components for ingredients and instructions, we can compose recipes using these components (#example0517).
./src/components/Recipe.js
importReactfrom"react";importIngredientsListfrom"./IngredientsList";importInstructionsfrom"./Instructions";functionRecipe({name,ingredients,steps}){return(<sectionid={name.toLowerCase().replace(/ /g,"-")}><h1>{name}</h1><IngredientsListlist={ingredients}/><Instructionstitle="Cooking Instructions"steps={steps}/></section>);}exportdefaultRecipe;
First we import the components that we are going to use,
IngredientsList and Instructions. Now we can use them to create the
Recipe component. Instead of a bunch of complicated code building out
the entire recipe in one place, we have expressed our recipe more
declaratively by composing smaller components. Not only is the code nice
and simple, but it also reads well. This shows us that a recipe should
display the name of the recipe, a list of ingredients, and some cooking
instructions. We’ve abstracted away what it means to display ingredients
and instructions into smaller, simple components.
In a modular approach, the Menu component would look pretty similar.
The key difference is that it would live in its own file, import the
modules that it needs to use, and export itself:
./src/index.js
Let’s create this file:
importReactfrom"react";import{render}from"react-dom";importMenufrom"./components/Menu";importdatafrom"./data/recipes.json";render(<Menurecipes={data}/>,document.getElementById("root"));
The first four statements import the necessary modules for our app to
work. Instead of loading react and react-dom via the script tag,
we import them so webpack can add them to our bundle. We also need the
Menu component, and a sample data array which has been moved to a
separate module. It still contains two recipes: Baked Salmon and Fish
Tacos.
All of our imported variables are local to the index.js file. When we
render the Menu component, we pass the array of recipe data to this
component as a property.
The data is being pulled from the recipes.json file. This is the same
data that we used earlier in the chapter, but now it’s following valid
JSON formatting rules:
./src/data/recipes.json
[
  {
    "name": "Baked Salmon",
    "ingredients": [
      { "name": "Salmon", "amount": 1, "measurement": "lb" },
      { "name": "Pine Nuts", "amount": 1, "measurement": "cup" },
      { "name": "Butter Lettuce", "amount": 2, "measurement": "cups" },
      { "name": "Yellow Squash", "amount": 1, "measurement": "med" },
      { "name": "Olive Oil", "amount": 0.5, "measurement": "cup" },
      { "name": "Garlic", "amount": 3, "measurement": "cloves" }
    ],
    "steps": [
      "Preheat the oven to 350 degrees.",
      "Spread the olive oil around a glass baking dish.",
      "Add the yellow squash and place in the oven for 30 mins.",
      "Add the salmon, garlic, and pine nuts to the dish.",
      "Bake for 15 minutes.",
      "Remove from oven. Add the lettuce and serve."
    ]
  },
  {
    "name": "Fish Tacos",
    "ingredients": [
      { "name": "Whitefish", "amount": 1, "measurement": "lb" },
      { "name": "Cheese", "amount": 1, "measurement": "cup" },
      { "name": "Iceberg Lettuce", "amount": 2, "measurement": "cups" },
      { "name": "Tomatoes", "amount": 2, "measurement": "large" },
      { "name": "Tortillas", "amount": 3, "measurement": "med" }
    ],
    "steps": [
      "Cook the fish on the grill until cooked through.",
      "Place the fish on the 3 tortillas.",
      "Top them with lettuce, tomatoes, and cheese."
    ]
  }
]
Now that we have pulled our code apart into separate modules and files, let’s create a build process with webpack that will put everything back together into a single file. You may be thinking: “Wait, we just did all of that work to break everything apart, and now we are going to use a tool to put it back together? Why on Earth…?” Splitting projects into separate files typically makes larger projects easier to manage because team members can work on separate components without overlap. It also means that files can be easier to test.
3. Creating the webpack build
In order to create a static build process with webpack, we’ll need to install a few things. Everything that we need can be installed with npm.
npm install --save-dev webpack@next webpack-cli
Remember we have already installed React and ReactDOM.
For this modular Recipes app to work, we are going to need to tell webpack how to bundle our source code into a single file. As of version 4.0.0, webpack does not require a configuration file to bundle your project. If you don’t include a config file, webpack will run the defaults to package your code. Using a config file though means that you’ll be able to customize your setup. Plus, this shows us some of the magic of webpack instead of hiding it away. The default webpack configuration file is always webpack.config.js.
The starting file for our Recipes app is index.js. It imports React,
ReactDOM, and the Menu.js file. This is what we want to run in the
browser first. Wherever webpack finds an import statement, it will
find the associated module in the filesystem and include it in the
bundle. index.js imports Menu.js, Menu.js imports Recipe.js,
Recipe.js imports Instructions.js and IngredientsList.js, and
IngredientsList.js imports Ingredient.js. Webpack will follow this
import tree and include all of these necessary modules in our bundle.
Traversal through all of these files is creates what is called a
dependency graph. A dependency is just something our app needs like a
component file, a library file like React, or an image. Picture the each
file we need being a circle on the graph and webpack draws all of the
lines between the circles to create the graph. That graph is the bundle.
import Statements
We are using import statements, which are not presently supported by
most browsers or by Node.js. The reason import statements work is
because Babel will convert them into require('module/path');
statements in our final code. The require function is how CommonJS
modules are typically loaded.
As webpack builds our bundle, we need to tell webpack to transform JSX to React elements.
The webpack.config.js file is just another module that exports a JavaScript literal object that describes the actions that webpack should take. The configuration file should be saved to the root folder of the project, right next to the index.js file:
./webpack.config.js
constpath=require("path");module.exports={entry:"./src/index.js",output:{path:path.resolve(__dirname,"dist"),filename:"bundle.js"}};
First, we tell webpack that our client entry file is ./src/index.js.
It will automatically build the dependency graph based upon import
statements starting in that file. Next, we specify that we want to
output a bundled JavaScript file to ./dist/bundle.js. This is where
webpack will place the final packaged JavaScript.
Next let’s install the necessary Babel dependencies. We will need
babel-loader and @babel/core:
npm install babel-loader @babel/core --save-dev
The next set of instructions for webpack consists of a list of loaders
to run on specified modules. This will be added to the config file under
the module field:
module.exports={entry:"./src/index.js",output:{path:path.resolve(__dirname,"dist"),filename:"bundle.js"},module:{rules:[{test:/.js$/,exclude:/node_modules/,loader:"babel-loader"}]}};
The rules field is an array because there are many types of loaders
that you can incorporate with webpack. In this example, we are only
incorporating the babel-loader. Each loader is a JavaScript object.
The test field is a regular expression that matches the file path of
each module that the loader should operate on. In this case, we are
running the babel-loader on all imported JavaScript files except those
found in the node_modules folder.
At this point, we need to specify presets for running Babel. When we set a preset, we tell Babel which transforms to perform. In other words, we can say “Hey Babel. If you see some ESNext syntax here, go ahead and transform that code into syntax we’re sure the browser understands. If you see some JSX, transform that too. Start by installing the presets:
npm install @babel/preset-env @babel/preset-react --save-dev
Then create one more file at the root of the project, .babelrc:
{"presets":["@babel/preset-env","@babel/preset-react"]}
All right! We’ve created something pretty cool: a project that resembles a real React app! Let’s go ahead and run webpack to make sure that this works.
Webpack is run statically. Typically bundles are created before the app is deployed to the server. You can run it from the command line using npx:
npx webpack
Webpack will either succeed and create a bundle, or fail and show you an
error. Most errors have to do with broken import references. When
debugging webpack errors, look closely at the filenames and file paths
used in import statements.
You can also add an npm script to your package.json file to create a
shortcut:
  "scripts": {
    "build": "./node_modules/.bin/webpack"
  },
Then you can run the shortcut to generate the bundle:
npm run build
Loading the bundle
We have a bundle, so now what? We exported the bundle to the dist
folder. This folder contains the files that we want to run on the web
server. The dist folder is where the index.html file should be
placed. This file needs to include a target div element where the
React Menu component will be mounted. It also requires a single
script tag that will load our bundled JavaScript.
./dist/index.html
<!DOCTYPE html><html><head><metacharset="utf-8"/><title>React Recipes App</title></head><body><divid="root"></div><scriptsrc="bundle.js"></script></body></html>
This is the home page for your app. It will load everything it needs from one file, one HTTP request: bundle.js. You will need to deploy these files to your web server or build a web server application that will serve these files with something like Node.js or Ruby on Rails.
Source mapping
Bundling our code into a single file can cause some setbacks when it comes time to debug the application in the browser. We can eliminate this problem by providing a source map. A source map is a file that maps a bundle to the original source files. With webpack, all we have to do is add a couple of lines to our webpack.config.js file:
webpack.config.js with source mapping
module.exports={entry:"./src/index.js",output:{path:"dist/assets",filename:"bundle.js"},devtool:"#source-map"// Add this option for source mapping};
Setting the devtool property to '#source-map' tells webpack that you
want to use source mapping. The next time you run webpack, you will see
that two output files are generated and added to the dist folder: the
original bundle.js and bundle.js.map.
The source map is going to let us debug using our original source files. In the Sources tab of your browser’s developer tools, you should find a folder named webpack. Inside of this folder, you will see all of the source files in your bundle:
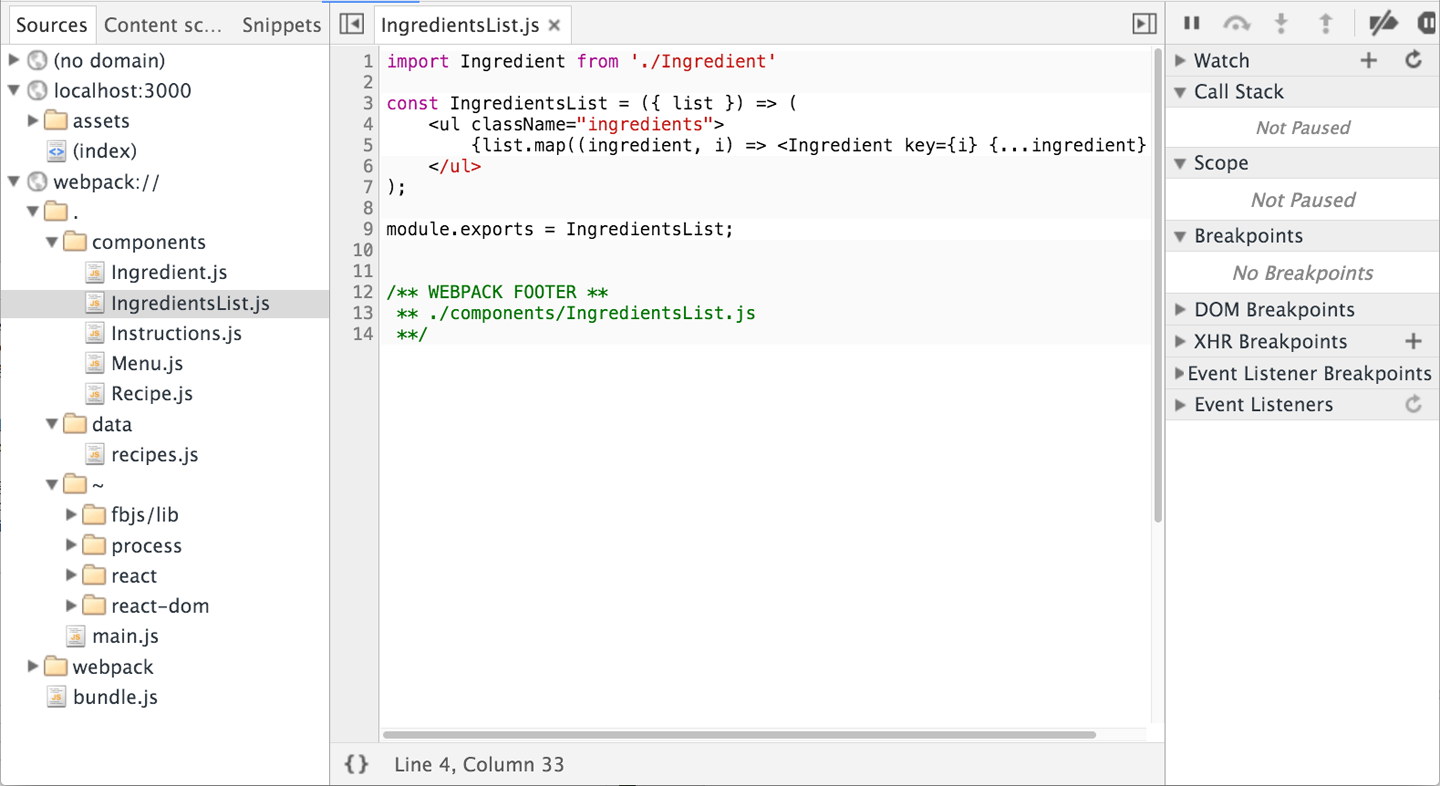
You can debug from these files using the browser step-through debugger. Clicking on any line number adds a breakpoint. Refreshing the browser will pause JavaScript processing when any breakpoints are reached in your source file. You can inspect scoped variables in the Scope panel or add variables to Watch in the watch panel.
create-react-app
A pretty amazing tool to have at your disposal as a React developer is
Create React App, a command-line tool that autogenerates a React
project. create-react-app was inspired by the
Ember CLI project, and it lets developers get
started with React projects quickly without the manual configuration of
webpack, Babel, ESLint, and associated tools.
To get started with create-react-app, install the package globally:
npm install -g create-react-app
Then, use the command and the name of the folder where you’d like the app to be created:
create-react-app my-project
npx
You can also use npx to run create-react-app without the need for a
global install. Simply run npx create-react-app my-project.
This will create a React project in that directory with just three
dependencies: React, ReactDOM, and react-scripts. react-scripts was
also created by Facebook and is where the real magic happens. It
installs Babel, ESLint, webpack, and more, so that you don’t have to
configure them manually. Within the generated project folder, you’ll
also find a src folder containing an App.js file. Here, you can edit
the root component and import other component files.
From within the my-react-project folder, you can run npm start. If
you prefer, you can also run yarn start. This will start your
application on port 3000.
You can run tests with npm test or yarn test. This runs all of the
test files in the project in an interactive mode.
You can also run the npm run build command. Using yarn, run
yarn build.
This will create a production-ready bundle that has been transformed and minified.
create-react-app is a great tool for beginners and experienced React
developers alike. As the tool evolves, more functionality will likely be
added, so you can keep an eye on the changes on
GitHub.
We leveled up our React skills by learning about JSX. We created components. We broke those components into a project structure, and we learned more about Babel and webpack. Now we’re ready to take our knowledge of components to the next level. It’s time to talk about Hooks.