
CHAPTER 3
ONE ENERGY SOURCE FLOWS TO THE NEXT: LIGHT, WIND, AND ELECTROMAGNETIC FIELDS
THE WORLD COMES IN WAVES
Rainbows, jump ropes, and blue skies—these are great subjects for starting to understand energy. Here is a crucial piece of information to know up front: Energy can change forms. It might start out in the form of wind energy, for example, and be turned into electricity. Energy can never be destroyed, but at the same time, neither can it be made. It can only change forms. The amount of energy we have in the universe right now is all of the energy we ever will have.
Leonardo was aware that the energy of the air (wind) was related to the energy of water’s waves and that both were related to the energy of the Sun. He was fascinated with the way that waves move on water, on land, and in the air. “The wave flees from the place of its creation without the water changing position like the waves which the course of the wind makes in wheat fields in May, when one sees the waves running over the fields without the ears of wheat changing their place.”
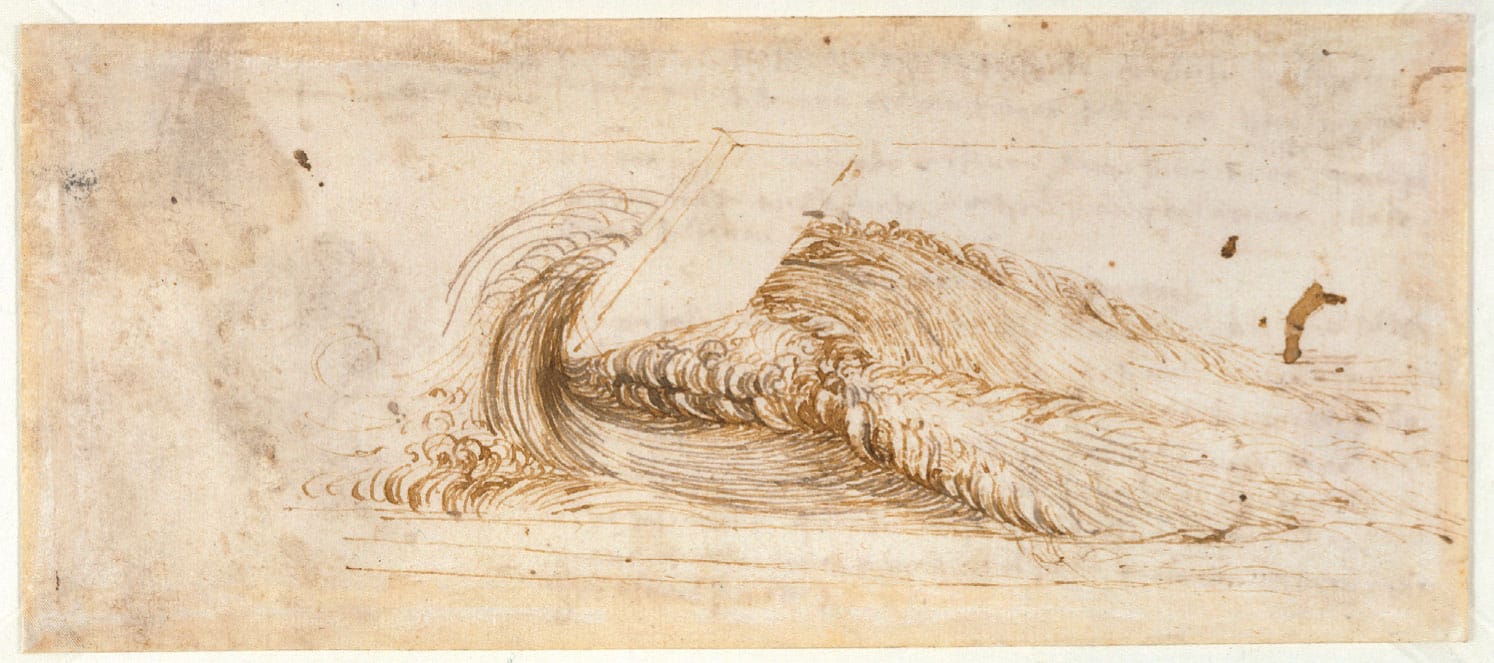
Leonardo was fascinated by waves and the flow of water. He drew this study around 1510.
Scientists call the process of capturing energy from one source and turning it into another form conservation of energy. In this context, the word conserve means “guard,” as in, “Guard this resource. It’s all we have!” This is a fact, and, what’s more, it’s a law—the law of thermodynamics, which is the science of heat actions and energy.
But where are the rainbows, blue skies, and jump ropes? Let’s start with the jump ropes because making a rope dance is a simple model for the electromagnetic spectrum. That’s where the rainbows and blue sky come in. From there, we will jump into projects in which you will conserve energy.
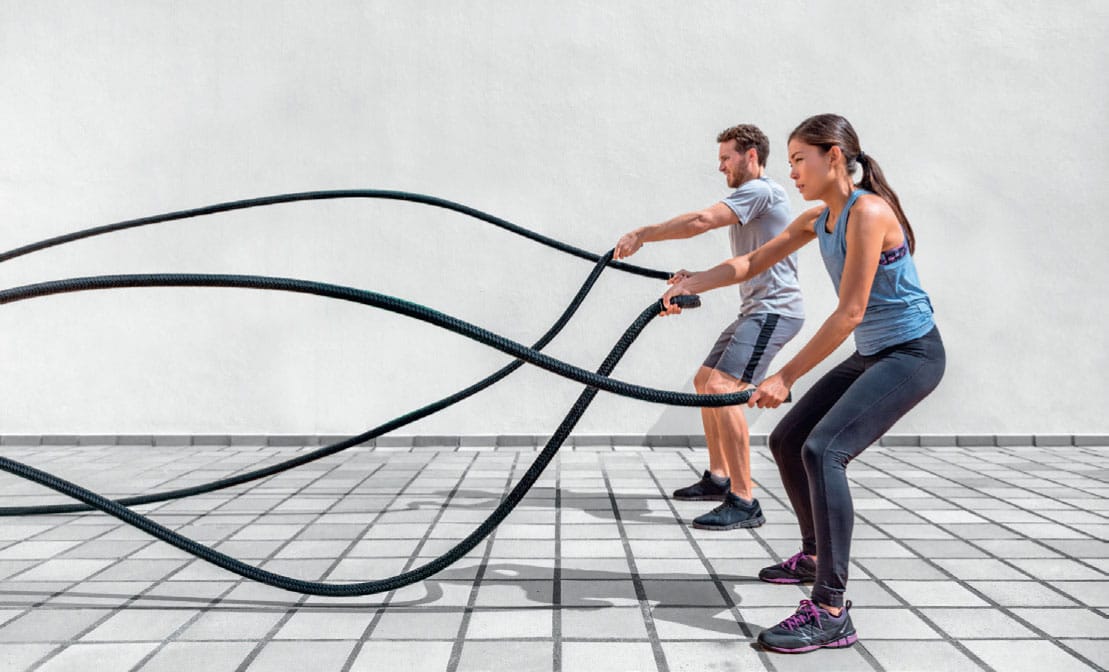
MAKING WAVES
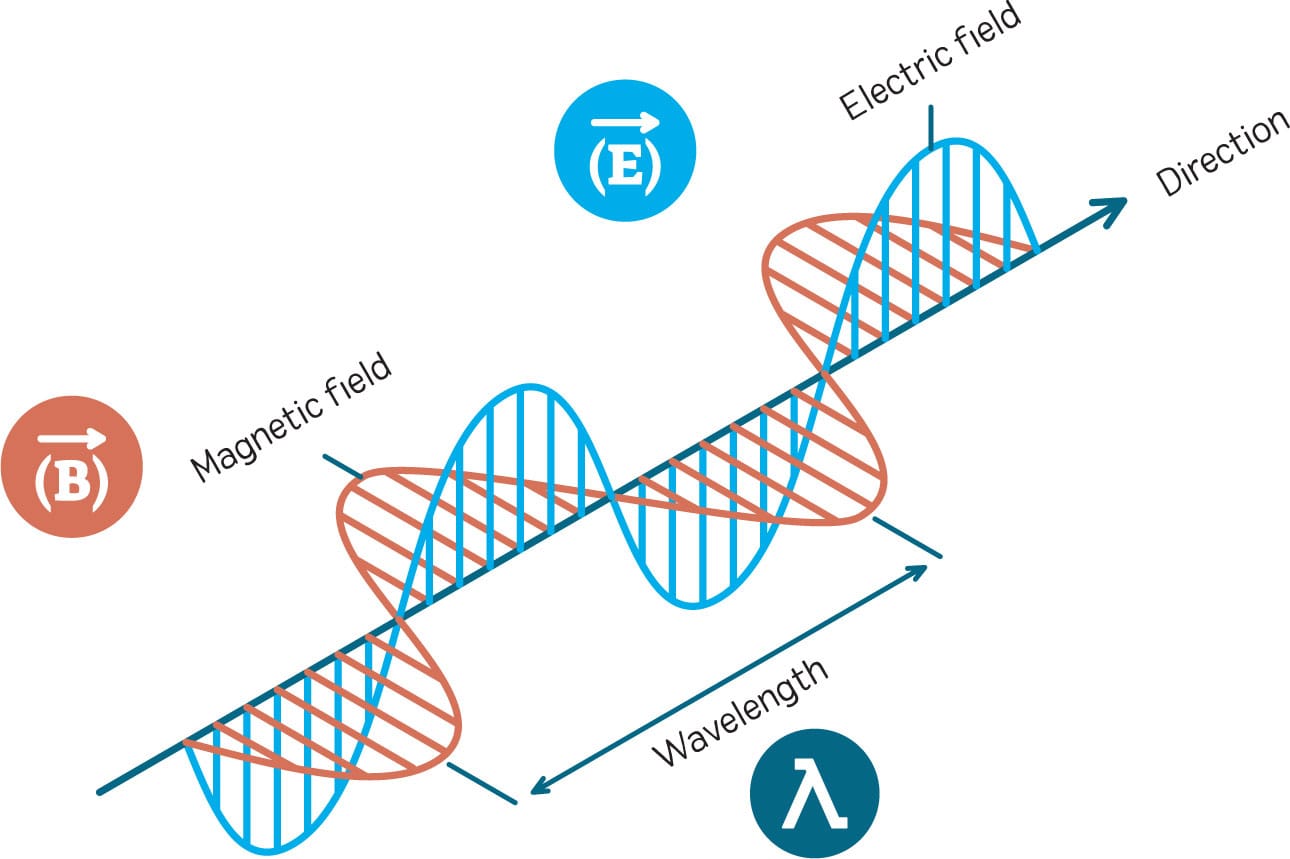
Take a rope by one end and move your arm up and down to make it dance in waves. This is a great simulation of the energy waves that are bombarding you right now wherever you are. These energy waves are electromagnetic waves—literally created from the tight relationship between electrical fields and magnetic fields. The energy that makes turning on a light, watching television, listening to a radio, using a microwave oven, and communicating with a cell phone possible is electromagnetic energy, and it travels in wavelike patterns, like the jump rope, at the speed of light.
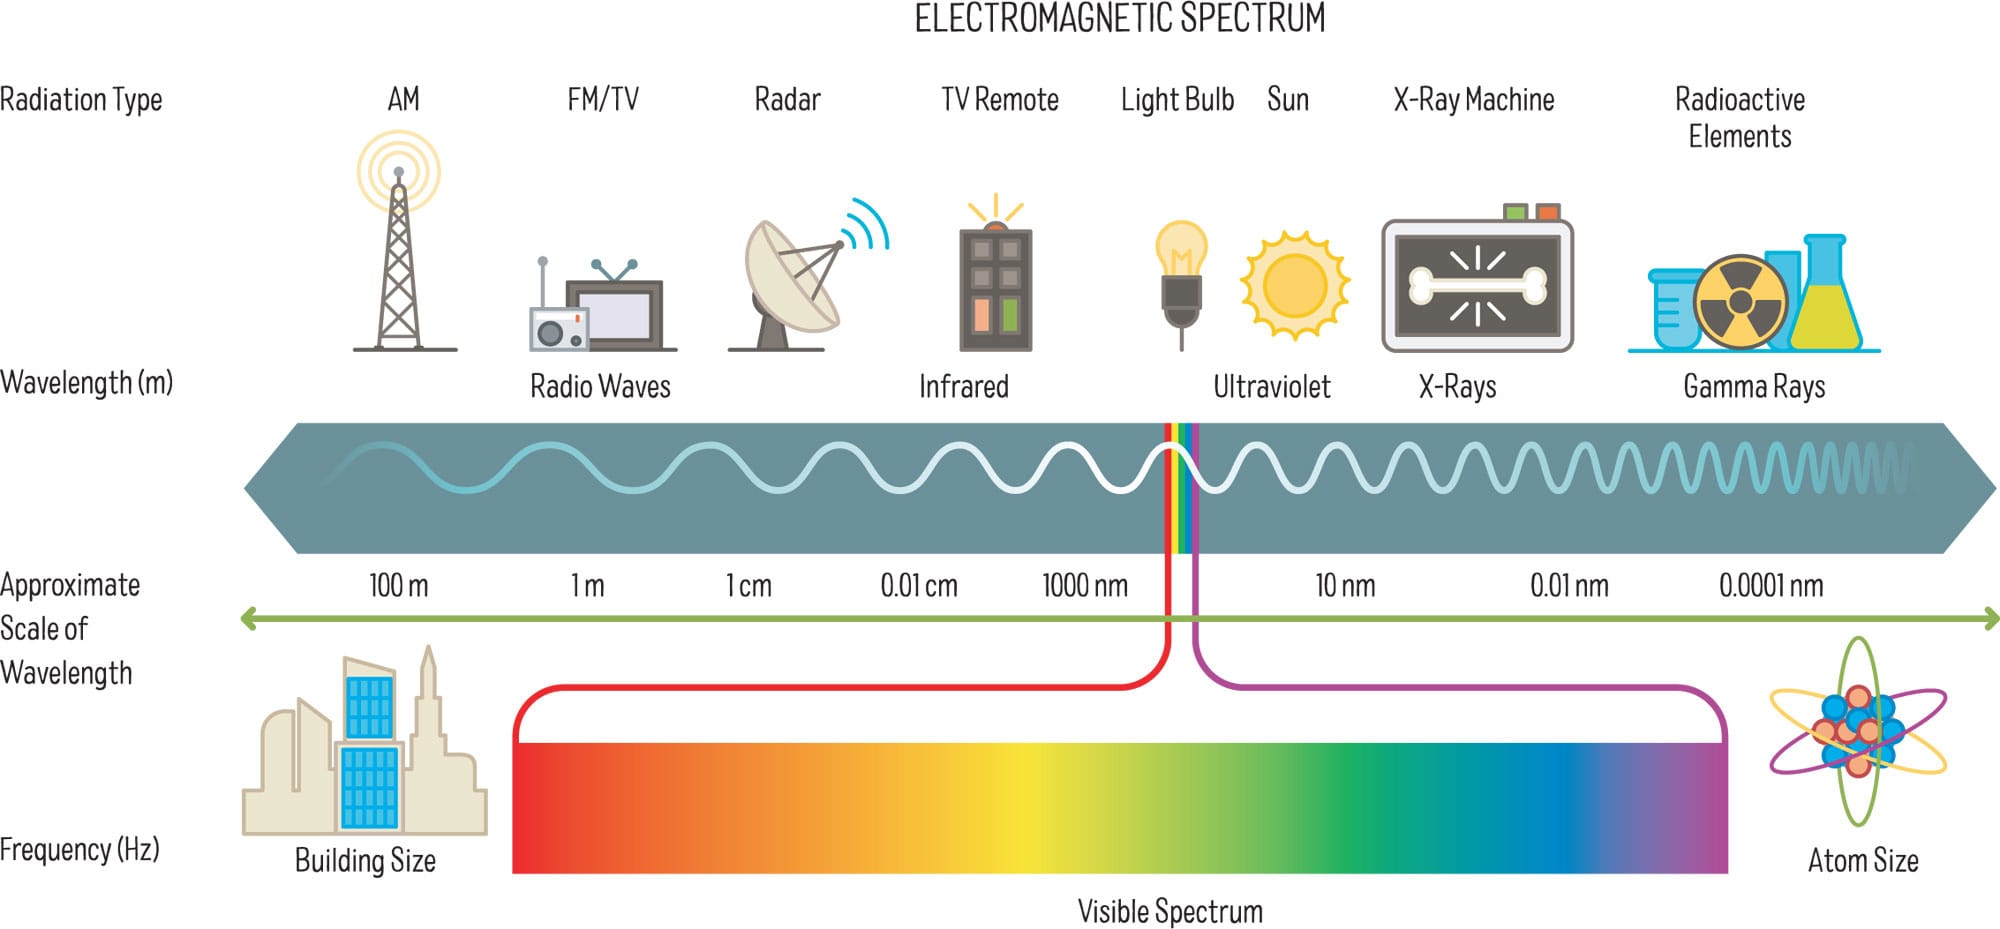
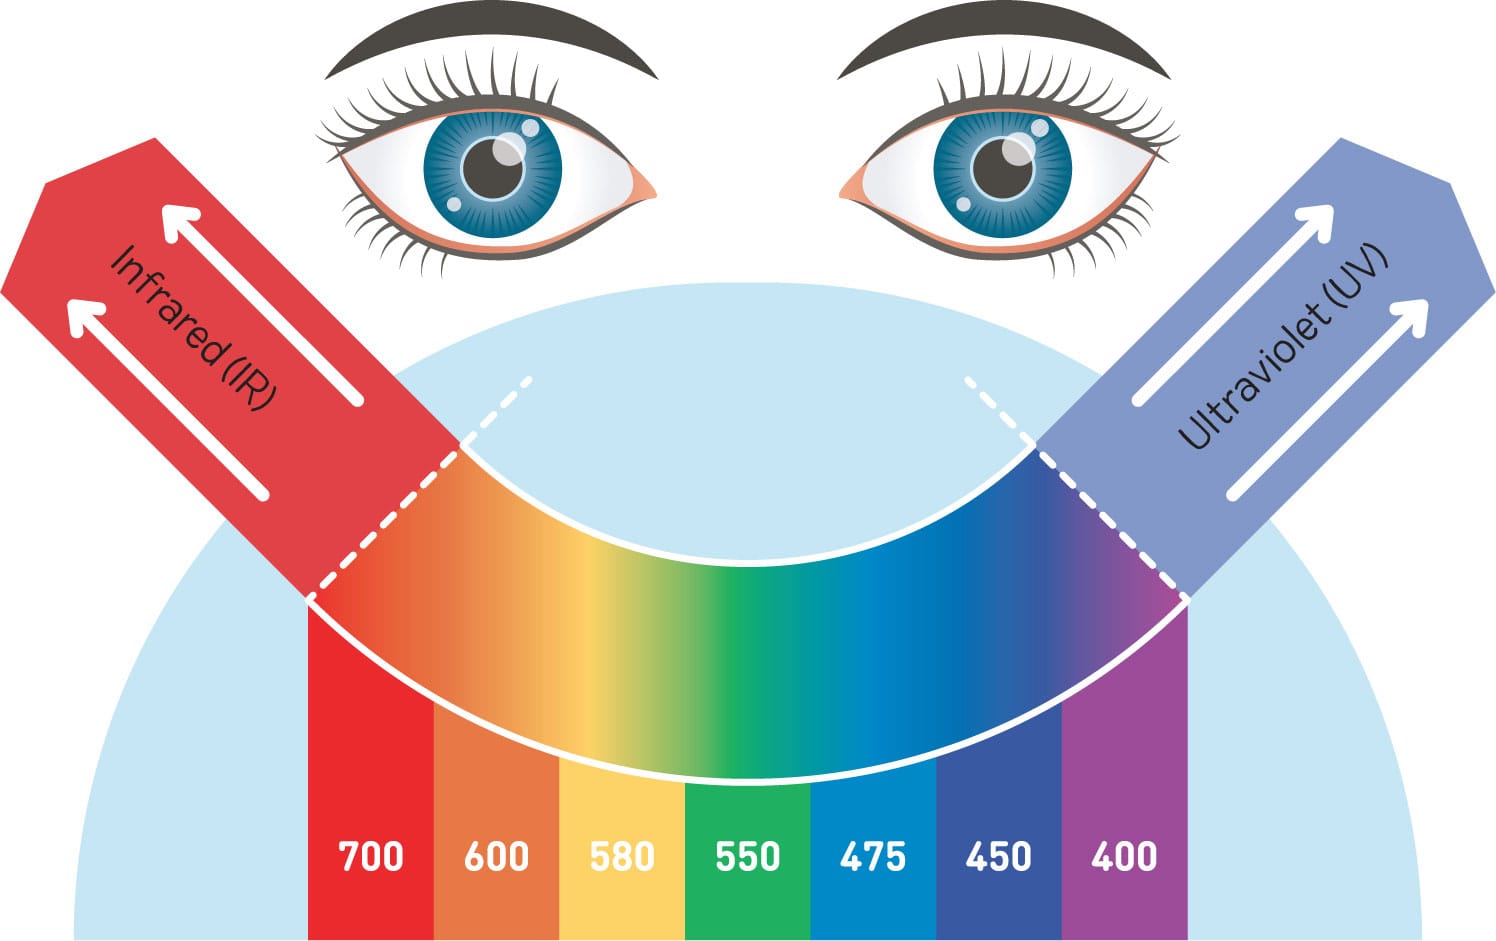
Electromagnetic energy stretches across a wide spectrum, aptly called the electromagnetic spectrum. Radio waves, microwaves, infrared light, ultraviolet light, X-rays, and gamma rays each occupy a different range of the spectrum. Energy, streaming in particles and light waves, increases as the waves become shorter.
The visible spectrum is that part of the electromagnetic spectrum that we have the ability to see with our eyes. Notice, below, that it is in the colors of the rainbow! Each of the rainbow’s seven hues corresponds to a different wavelength on the spectrum.
PROJECT
WRITE WITH RAINBOW LIGHT
Let’s experience how light with different wavelengths behaves. For this project, you will write with light of different wavelengths in the visible spectrum. Each has a different energy level. Can you predict how colors with different energy levels will react when used to write on glow-in-the-dark paper? Record your prediction in your notebook.
WHAT YOU WILL NEED
Mini LED flashlights: one red, one blue, and one purple
Glow-in-the-dark paper or duct tape (available at craft stores) attached to a panel of heavy cardstock (suggested size: 5" × 7" (12.7 × 17.7 cm)
Pencil or pen
Regular flashlight
Notebook
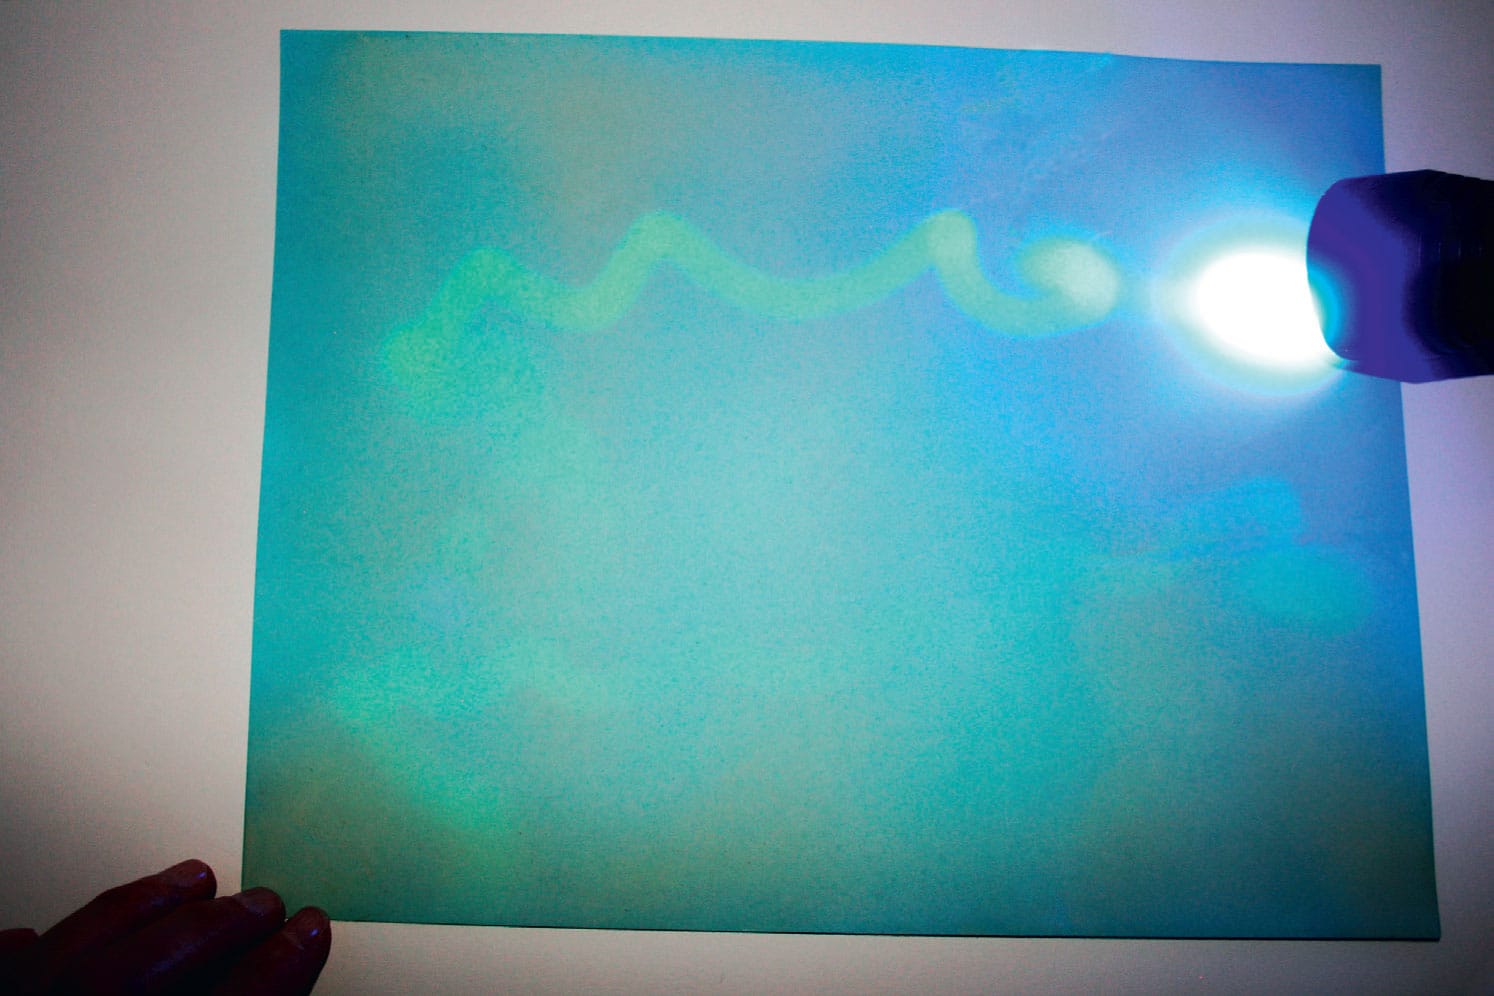
1 Turn on the red LED light and write across the glow-in-the-dark paper. What effect does the light have on the paper surface?
2 Repeat with the blue light, then the purple light.
3 What is happening? What observable differences are there in the interaction between the paper and each different light color?
4 Finally, write on the surface with the regular flashlight. How would you describe the reaction of light to paper?
Wavelengths are measured in nanometers (nm)
COLOR HAS ENERGY!
The energy of each color’s wavelength is measured in nanometers. The red light, at 700 nanometers, has the lowest energy. (A nanometer is 1 billionth of a meter [1.09 yards].) In the case of nanometers and wavelength, more is less—as in less energy. Blue has more energy than red, but its wavelength is shorter in nanometers. Violet, with a wavelength of just 400 nanometers, has the greatest energy.
In our project, the purple light glowed brightest because its high energy prompts the electrons in the glow-in-the-dark paper to react. What’s their reaction? To jump to a higher energy level! The higher energy of the blue and purple lights, which are at the blue end of the spectrum, has been added to the electrons, and they are in a state of excitement. Then, when the charge wears off, the electrons fall back down to their low-energy state and give off electromagnetic radiation in the process. We see the radiation as a green-blue light.
ENERGY IN AN ATOM
PROJECT
ELECTRON DANCE
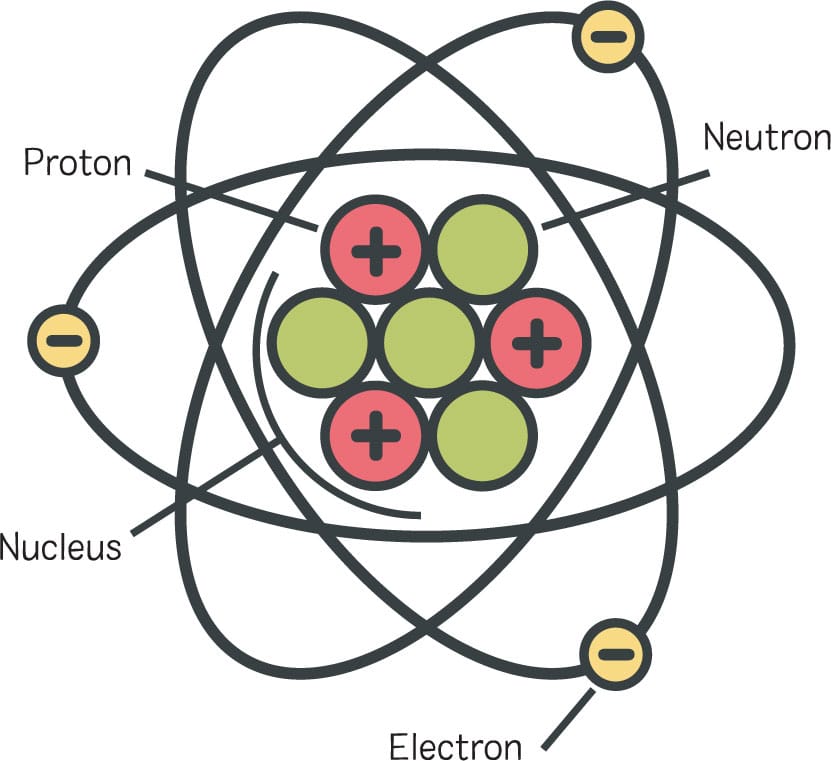
In an atom’s family of protons, electrons, and neutrons, electrons are like the unpredictable relatives. They jump around, leave the atom for a while, and then return, unannounced. Let’s observe their movement.
WHAT YOU WILL NEED
Puffed rice cereal
Flat plate or piece of paper
Balloon
Wool cloth (optional)
1 Pour a small amount of cereal onto the plate or paper in a single layer.
2 Blow up the balloon and tie off the end. Energetically rub the balloon back and forth over your hair or a piece of wool.
3 Begin to pull the balloon away. If you have hair long enough, you should see it maintain its attraction to the balloon. You might say your hair is standing on end!
4 Hold the balloon over the cereal. The cereal pieces will stand on end, too. Make the cereal “dance” by moving the balloon over it.
THE SCIENCE BEHIND THE EXPERIMENT
What is happening to make cereal dance and your hair stand on end?
The movement of electrons makes your hair and the cereal stand up. In this way, we can see the effect of their movement. When you rub the balloon over your head, electrons transfer from your hair to the balloon. Then, when you move the balloon over the cereal, the electrons, with their negative charge, attract the protons in the cereal because the protons have a positive charge.
When you move the balloon over the cereal, you are telling electrons what to do, and you can see where they are.

OPPOSITES ATTRACT
When the cereal stands up on the balloon, the electrons have moved away from the balloon to the surface of the cereal. Why? You negatively charged the balloon with the electrons from your hair, and the electrons are moving toward the positively charged protons. Like a kid at a Valentine’s Day dance who finally moves away from friends to ask someone to dance, the electrons move away from the pack of negatively charged particles and move toward their opposite, the protons. When a cereal piece falls away from the balloon, the electrons have moved back up to the balloon. Dance over. Time to move back to the safety of the pack.
HOW RAINBOWS ARE MADE
When the Sun comes out during or immediately after a rainstorm, we have the perfect conditions for producing rainbows. Each color, or wavelength in the visible spectrum, is reflected at a different angle. Red has the longest wavelength. Violet, at the opposite end of the spectrum, has the shortest wavelength. When we see a rainbow, we are seeing an amazing process unfold:
1. Light enters a raindrop and is refracted (which means bent). As the light refracts, it’s slowed down.
2. The light hits the back of the raindrop and is reflected.
3. Finally, as the reflected light leaves the raindrop, it is refracted once more.
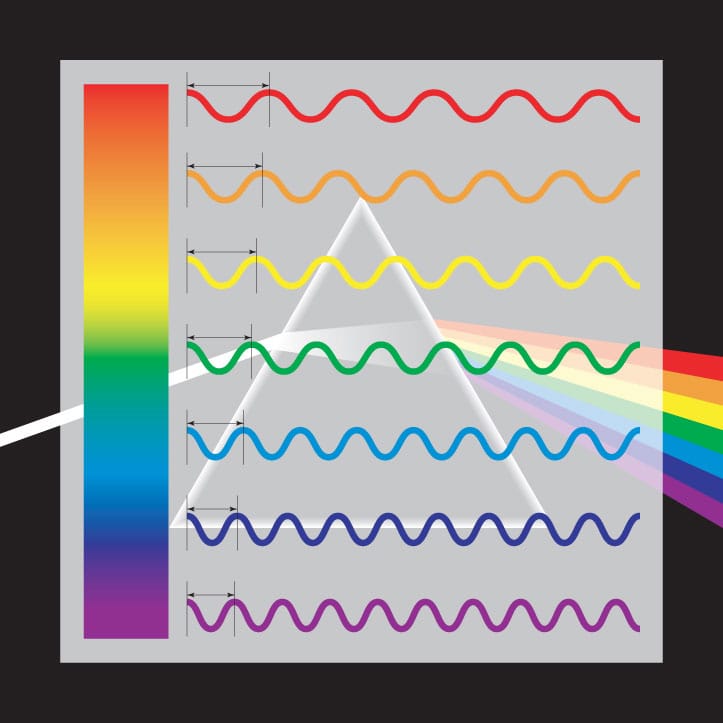
Wavelengths become shorter as they increase in energy, with the blue hues having the most energy. Because of its wavelength, each color will pass through a prism at a different angle.
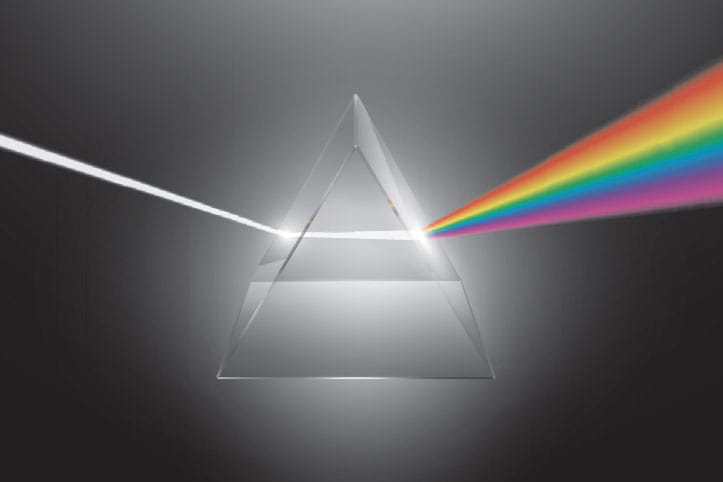
EACH RAINDROP IS A PRISM
When sunlight enters a prism, it looks white to the human eye. But in 1665, Isaac Newton proved that white light is made up of all colors of the rainbow. By conducting an experiment that passed light through a prism, which bent the light waves, Newton separated the colors in the visible spectrum. To prove the point, he then passed the rainbow through a second prism to “remix” them into white light.

Leonardo formed an answer to his question “Why is the sky blue?” after climbing to the top of Monte Rosa, pictured here, in the Italian Alps. He correctly stated, “The air takes the azure [blue] through the corpuscles of humidity, which catch the luminous rays of the Sun.”
PROJECT
BUILD A MODEL WIND TURBINE
Capture wind power to generate electricity and you will have conservation of energy! In this project, you will build a wind turbine, including creating turbine blades of different designs to measure how much electricity each produces. Your turbine will work on the same principle as large-scale turbines and be an excellent demo for transforming one energy source into another.
This project is a model of how science, engineering, art, and design blend to address energy needs in the world today.
WHAT YOU WILL NEED
Cardstock (this is for the turbine blades; use cardstock that is colorful and decorative or add your own color and patterns to the blades)
Ruler
Scissors
Toothpicks
Masking tape or clear packing tape
Bottle cork
Mini 1.5–3V motor (available at hobby stores and online for $1 to $6)
Alligator clips
Multimeter
Pencil or pen
Science notebook
Windy day (if there is no breeze outdoors and you are eager to test your finished turbine, use a fan or a hair dryer to create wind—with the full awareness that you are using electricity to blow a turbine to generate electricity)
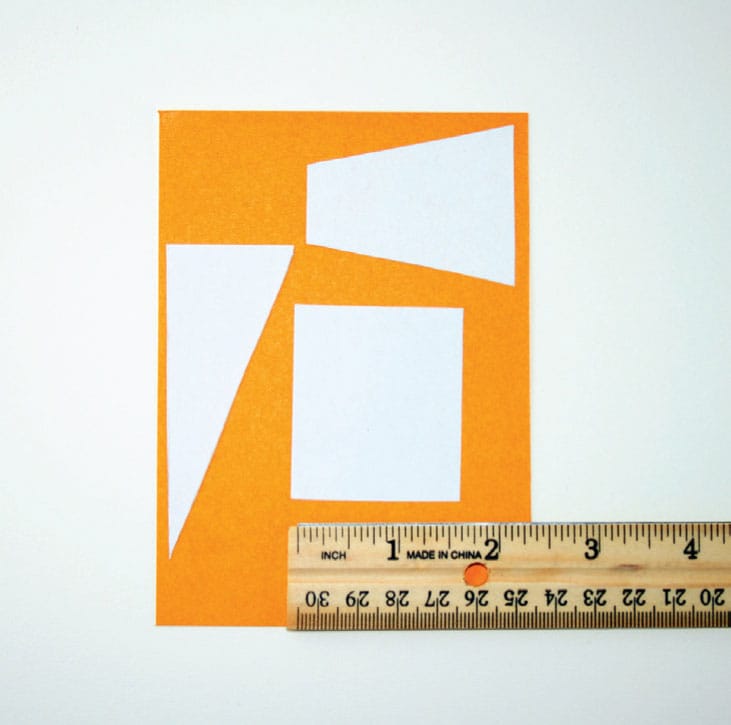
1 Measure and cut turbine blades from the cardstock. Make at least one set of three to eight blades that have the same shape. Consider circles, rectangles, right triangles, and trapezoids! A set of rectangular blades, for example, might include four blades each measuring 11/2" × 2" (3.8 × 5 cm).
2 In order to count the number of times a blade turns in a given time period, make one blade in each set a different color than the rest. Making more than one set of different shapes will give you the chance to test which blades generate more energy.
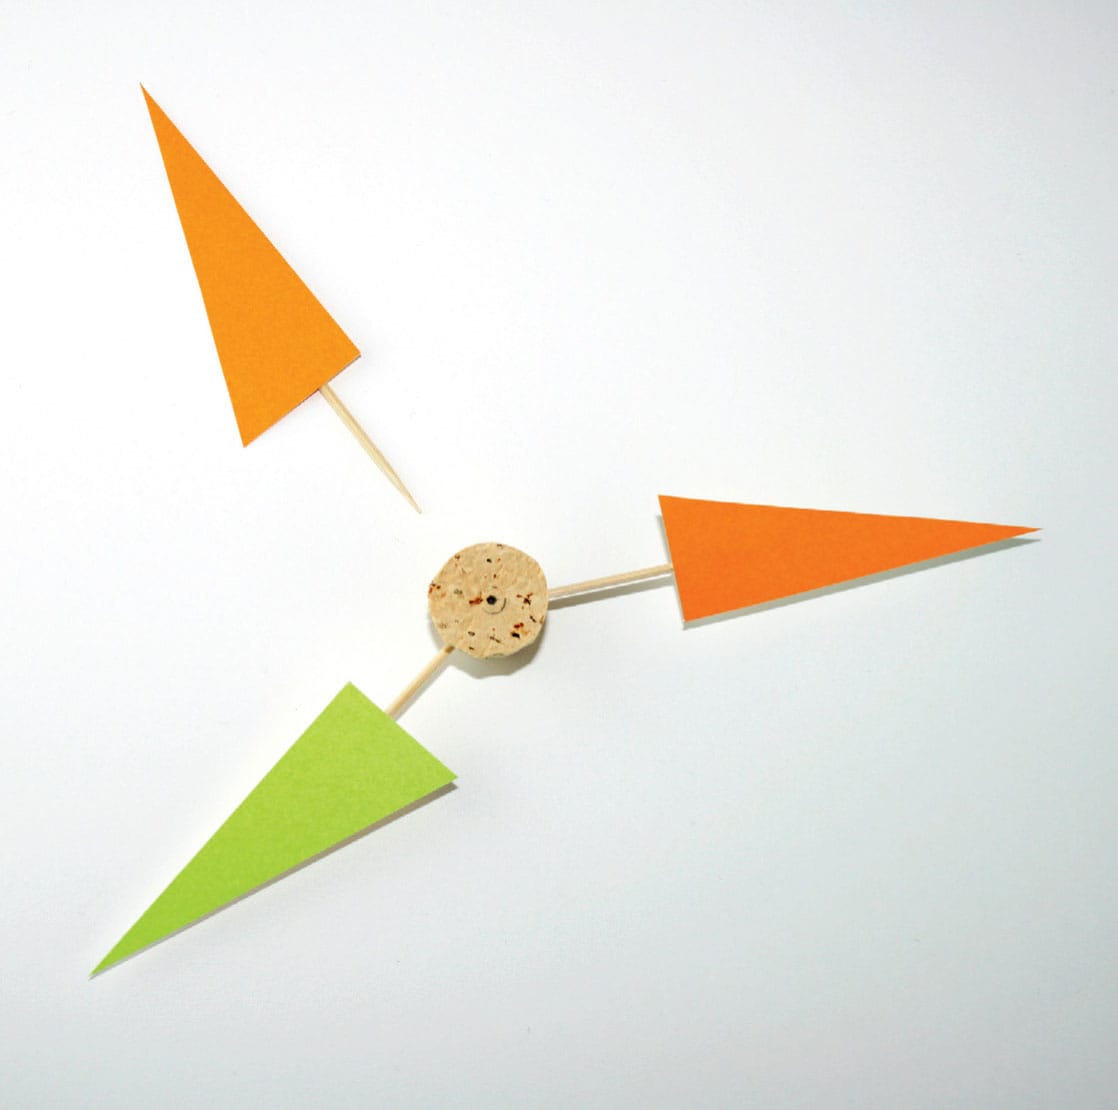
3 Tape a toothpick onto the middle of each blade, allowing 1" (2.5 cm) to extend beyond the bottom edge. Push the blades into the cork, positioning them evenly around the circumference.
4 Adjust the blades so they are at the same angle.
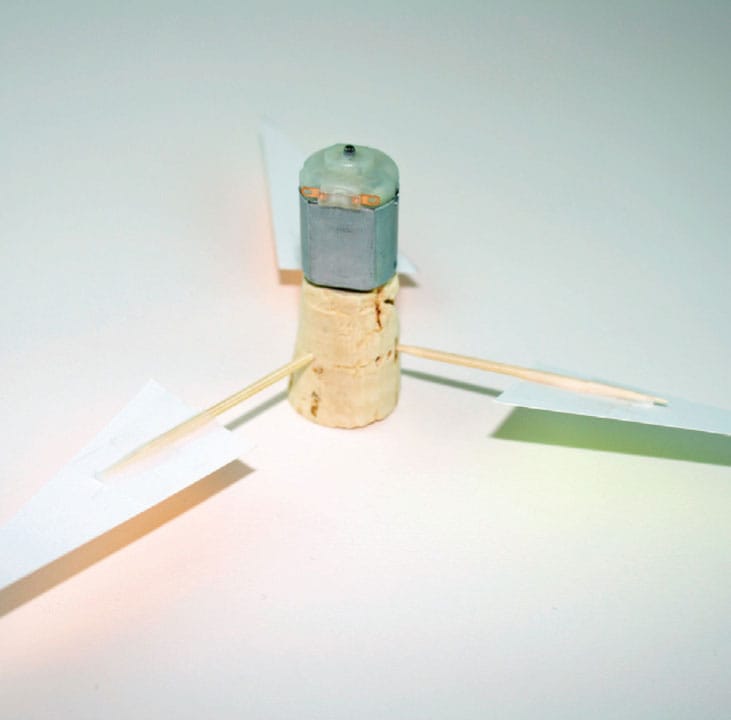
5 Push a hole into the top of the cork with a toothpick, then push the cork onto the shaft of the motor.
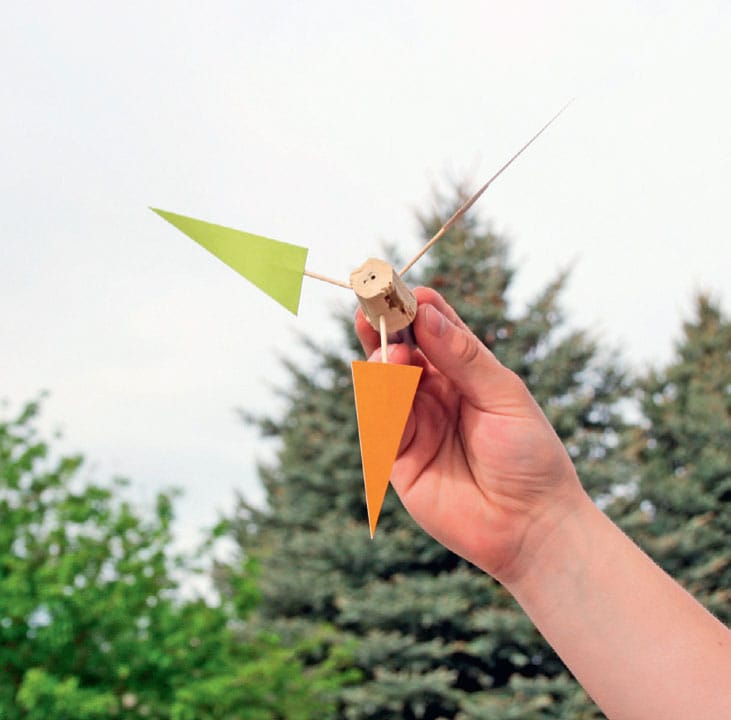
6 Go outside. Hold the turbine so it is facing into the wind. Once you know the turbine works, test its energy production. You have built your machine so that it works when facing into the wind. Appropriately, this design is called an upwind turbine.
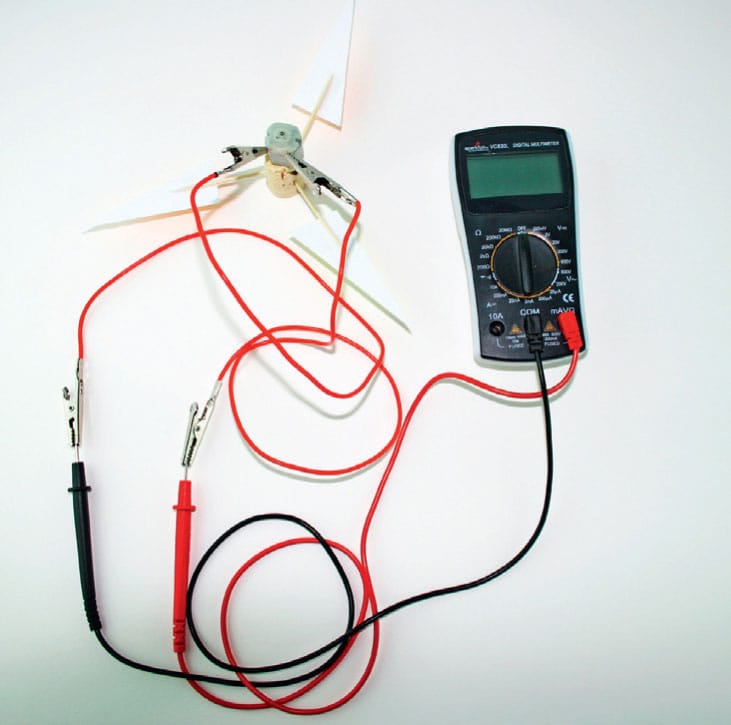
7 Attach one end of the alligator clips to the motor and the other end to the probes on the multimeter.
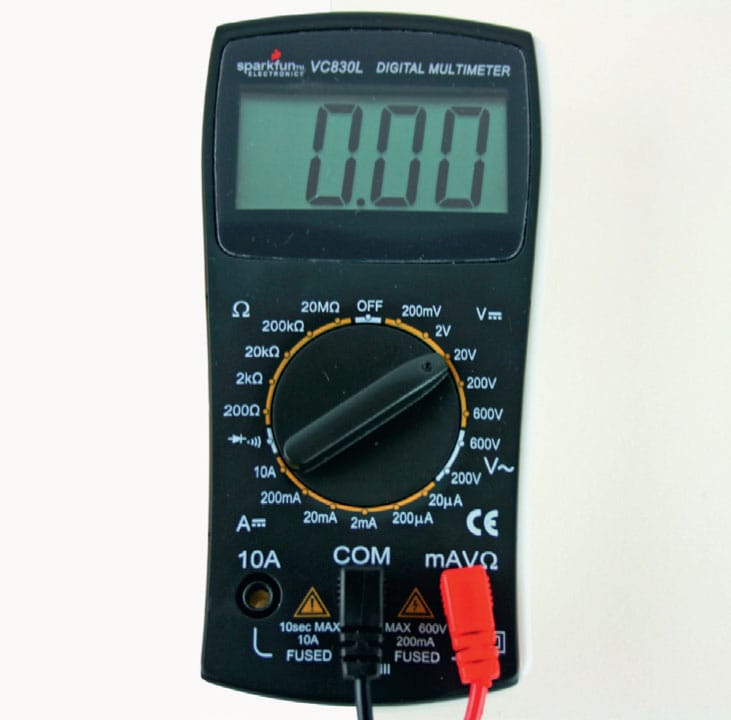
8 Adjust the settings on multimeter exactly like this: Turn the selection dial to the range for DC (direct current). In this range, the V for voltage will be followed by a straight line. Point the dial to 20V or 20 volts.
9 Hold the turbine into the wind and, using the multimeter, note the voltage produced. Record this information in your science notebook.
10 For comparison and testing, experiment with how the machine captures the wind. Adjust the angle of the blades and retest the voltage. What do these changes do the performance of your turbine?
11 What produces the most energy with the least wind? Observe the angle, blade design, and number of blades that give you the strongest results. The blades and wind speed will determine the amount of electricity that can be generated.
12 As with the design of your planes in chapter 1, air molecules moving over the surface of the blades create friction. How might you design an airfoil into the blades to take advantage of air pressure and movement?
WIND WORKS FOR THE EARTH
The wind turns turbines, which produce electricity. Wind-turbine technology continues to develop! Improvements in how turbines work have led to their increased use worldwide, but there are opportunities to further improve wind-turbine technology. Hint: This is a direct appeal to you and your growing genius in science and innovation.
In building and testing your wind turbine, you defined energy, which scientists think of as the ability to do work. In chapter 2, you experienced kinetic—or motion—energy. Now you know something about the kinetic energy in the flow of wind.

Wind turbines are among the technologies for transforming renewable energy into electricity.
The blades of your turbine captured wind and transferred its power to the motor of the turbine. The mechanical ability and energy of the turbine, in turn, were transformed into electricity. It’s a beautiful example of energy conservation.
Given your experience with this project, why is it critical to design a turbine to harness the greatest amount of electricity with the least amount of wind? What questions would you form to learn more about wind as a renewable energy source?
Write and sketch your thoughts in your notebook.

This is a recreation of Leonardo’s design for a gauge to measure the speed of wind and water.
ELECTROMAGNETIC FIELD
Let’s bring together the elements that make an electromagnetic field. In making the field, we will generate electromagnetic waves by reproducing a simple model for a generator. Our generator will have two parts: a coil of wire, called an armature, and a magnet. By now, you’re likely getting the idea that we are creating an electromagnetic field by bringing together electricity and magnetism.
Copper is an excellent conductor of electricity. That means two things: One, the part of the generator that conducts electricity will be a copper wire coil. Two, electrons will be on the move! Electric current is a flow of electrons, and they will be pulled through the field by the magnet.
Here are the key questions at the heart of this project and points for scientific observation:
Will electrons flow in the copper wire because you are moving it over and around the magnet?
Alternatively, is a magnetic field created around the magnet because electrons in the wire are flowing?
You will uncover the answers in the following project.
Electric fields tightly interact with magnetic fields to produce—you guessed it—electromagnetic fields. The prediction of their interrelationship was made by Scottish physicist James Clerk Maxwell in the nineteenth century.
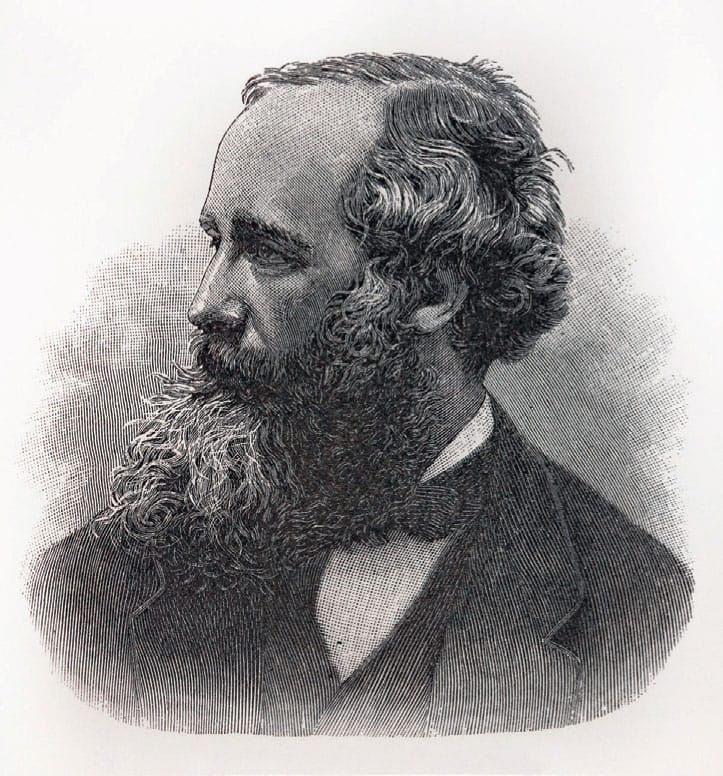
James Clerk Maxwell (1831–79), a Scottish mathematical physicist, was the researcher who defined electromagnetic theory. His contributions to science rank alongside those of Albert Einstein and Sir Isaac Newton.
PROJECT
BUILD A GENERATOR (TO CREATE AN ELECTROMAGNETIC FIELD)
In this project, you are supplying the energy to move the magnet and coil. In a large-scale system, a turbine would turn the coil or magnet. In some cases, wind is captured to power turbines to generate electricity, as you experienced in the previous section. Other times, it is hydropower (running water) or steam produced by nuclear energy and fossil fuels.
WHAT YOU WILL NEED
40" (1 m) of bare copper wire
Alligator clips
Bar magnet
Multimeter
Cardboard tube
Notebook
Pencil or pen
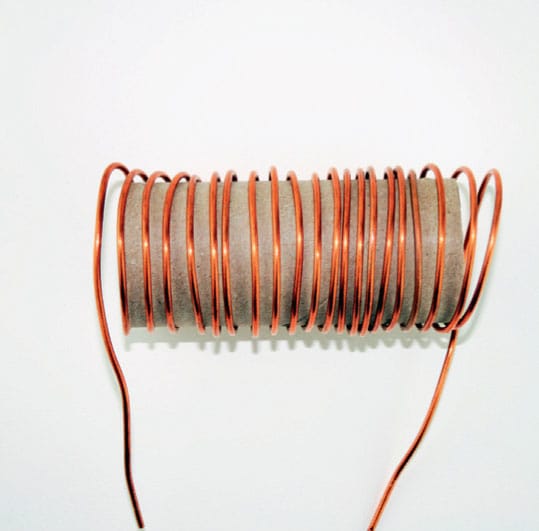
1 Wind the copper wire around the tube about twenty times.
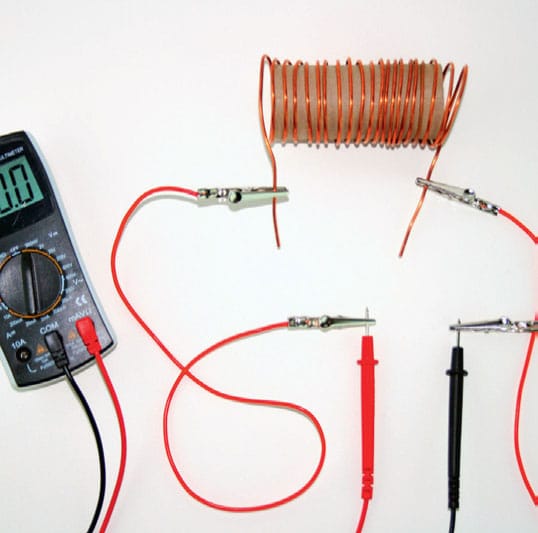
2 Connect both ends of the wire to the multimeter with the alligator clips. Set the multimeter dial to 200mV or lowest setting in the DC (direct current) range.
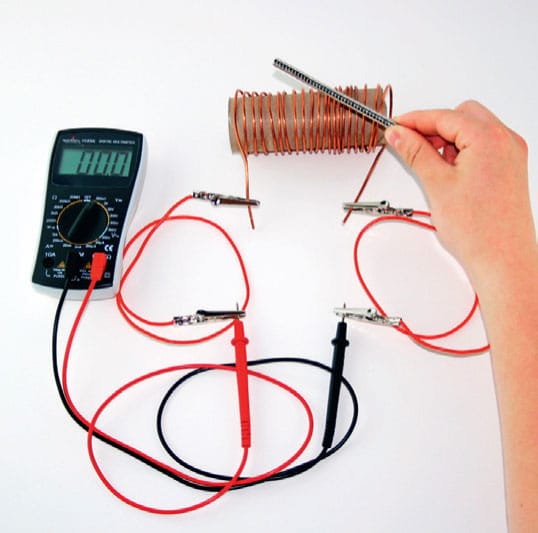
3 Move the magnet near (but not through) the coil. Note the reading on the multimeter and record this in your notebook. Move the magnet in various directions around the coil and observe the changes.
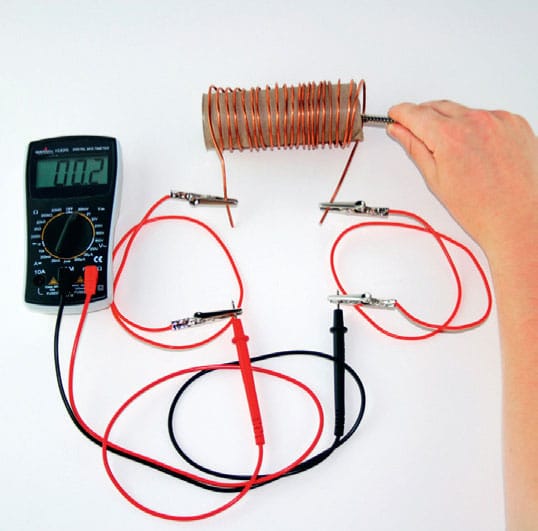
4 Now move the magnet back and forth through the coil. Repeat this by moving the magnet alternately faster and slower through the coil.
ASK YOURSELF
Now change things up: What happens when you move the coil over the magnet? What is the effect of keeping the magnet still? In what position is the magnet when the reading on the multimeter is highest?
TELLING ELECTRICITY WHAT TO DO
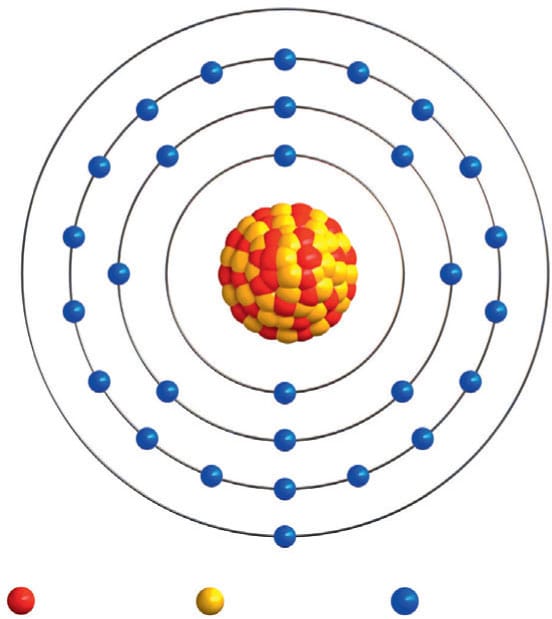
A copper atom has 29 protons and 29 electrons, but one of those electrons strays farthest from the nucleus of the atom. Number 29 is a valence electron, the one we can “free” from the atom and redirect to create an electric charge. In this diagram, which electron is the valence electron?
BOSSING ELECTRONS AROUND
Tell stray electrons what to do and you can make electricity flow.
Electrons that have moved the farthest away from the nucleus of an atom are called valence electrons. Compared to electrons closer to the nucleus, valence electrons need less force to be directed through an electric circuit. In the following project, you will sew a circuit that tells electrons what to do so they light up an LED. You then will have a simple but beautiful piece to embed into something you carry or wear, such as a backpack, shirt, or hat. Your new electric circuit will be wearable and washable (as long as you remove the battery!).
PICTURE THE FLOW OF ELECTRICITY
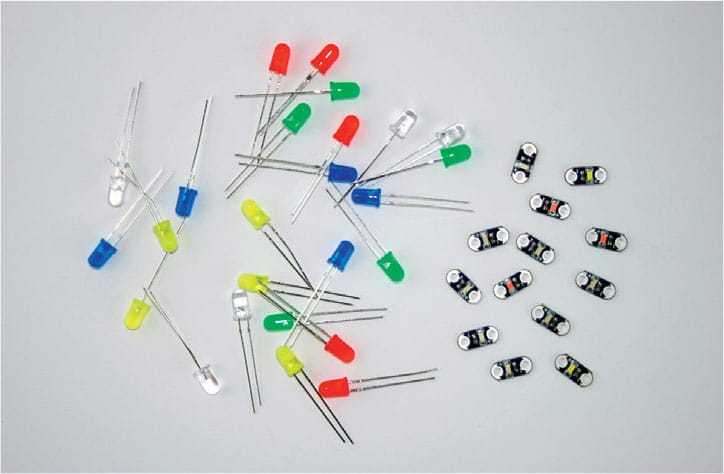
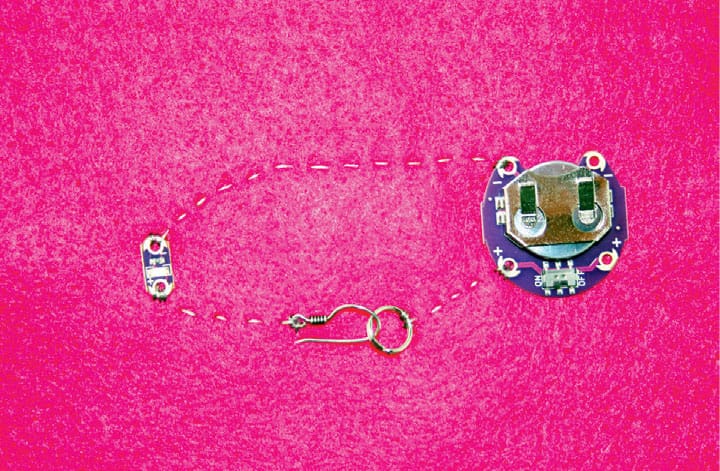
When you build a circuit with electronic textiles (or e-textiles), you are directing electrons to leave a battery and travel to a switch, which controls the electric current or flow. The path of electricity then will travel to the other side of the switch through thread that conducts electricity and into an LED, or light-emitting diode. You are harnessing electrons and controlling their movement.
The LED will be a single color and wavelength, just like the colors and wavelengths of the visible spectrum. As electric current runs through it, the LED will light up!
The materials you will use to build a circuit are great at their job of conducting electricity. They are made of metals that include nickel, stainless steel, and copper.
DIRECTING ELECTRONS
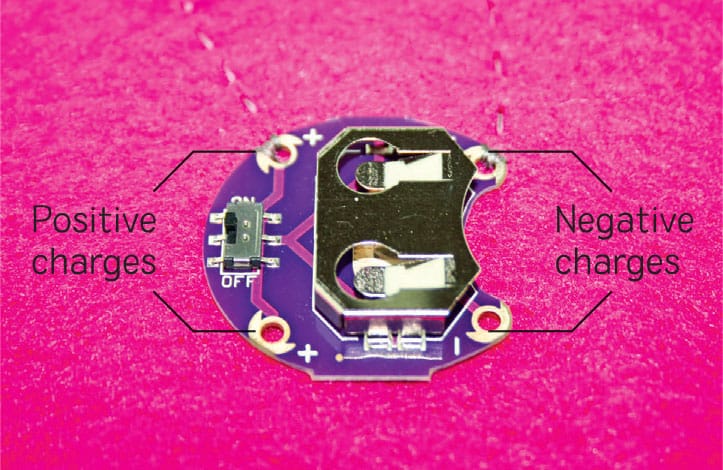
Within the battery holder and LED are a positive charge and a negative charge. These charges are separated and marked with the symbols + and −. When an electrical component has a positive pole and a negative pole, we say it is polarized. These are exactly and completely opposite one another.
When you build your circuit, you will keep the positive and negative sides separate. This will tell the electrons how to move in order to light the LED. You will be making electrons move from atom to atom across the entire surface of your circuit.
PROJECT
CREATIVE ELECTRIC TECH
Build a circuit—it’s simple but electric!
E-textiles are a STEAM high point because they bring together the science of electricity, the planning and construction of engineering, and the aesthetics and attention to detail of art and design. They also lead to adventures in writing code and innovating new products.
Ask yourself these questions as you begin to plan your design:
How can conductive thread, as well as your choice and arrangement of LEDs, be decorative?
Will the battery holder be part of the design and placed on the front of the felt or on the reverse?
A switch completes and disrupts an electric current. When a switch is on and the LED is lit, the circuit is “closed” and electricity is running through the path that you designed. When the switch and the LED are off, the circuit is “open” and electricity has been disrupted.
What kind of DIY switch can you devise for your design?
What metals from around your house can you collect to conduct electricity and use creatively to turn a circuit off and on?
Where can a switch be both functional and beautifully placed?
WHAT YOU WILL NEED
Piece of felt about 4" × 6" (10 × 15 cm))
Sewing needle
Conductive thread cut to a length of 24" (60 cm) (available from craft and fabric stores)
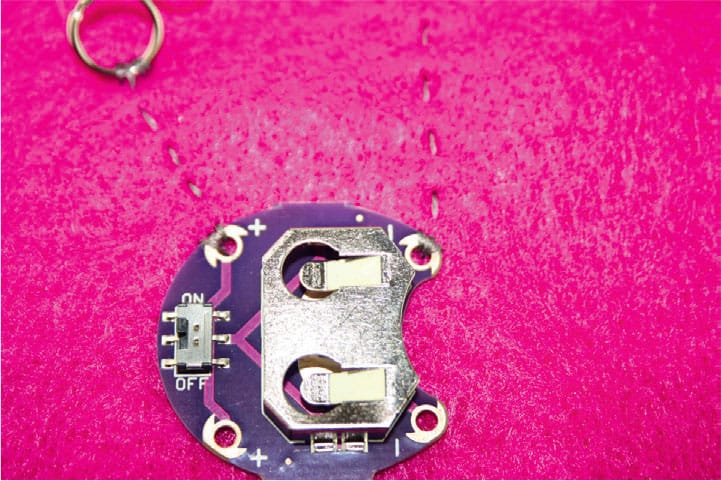
3V coin-cell battery
Battery holder (available with and without a built-in switch)
Mini LED (available in a rainbow of colors, or wavelengths; LED is an abbreviation for light-emitting diode)
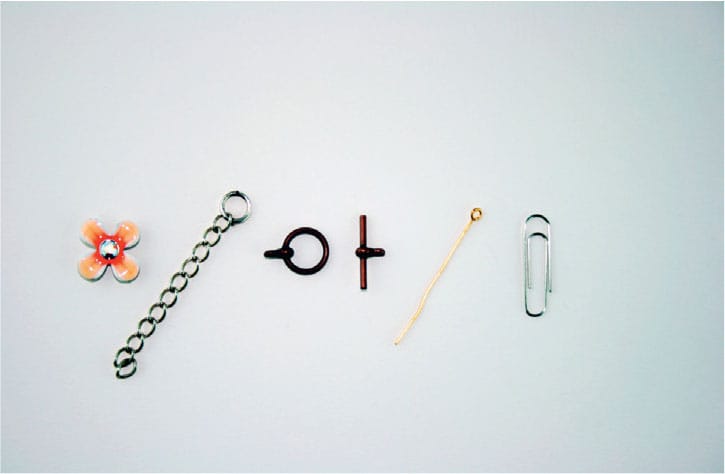
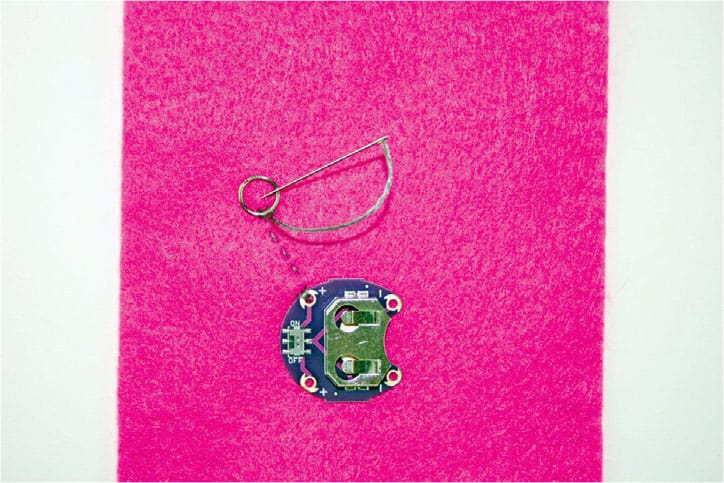
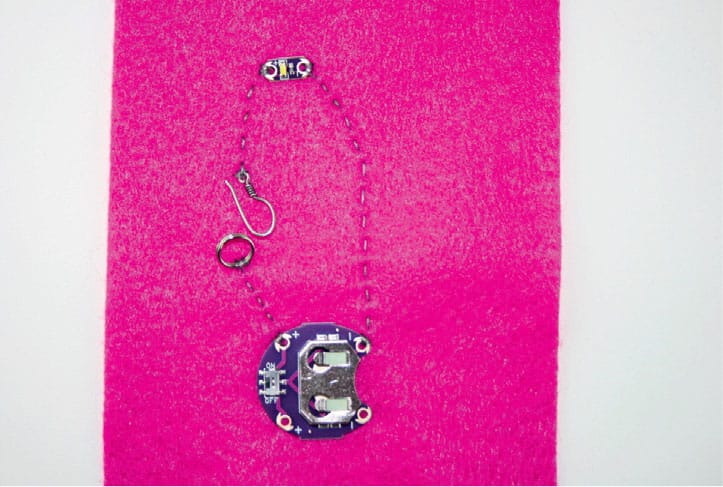
“Found” metal bits from around your house (these will become a DIY switch for your design and can include, for example, a length of broken chain, an earring wire, a charm, or a clasp from a necklace or bracelet)
Scissors
Red pencil or marker
Black pencil or marker
Notebook
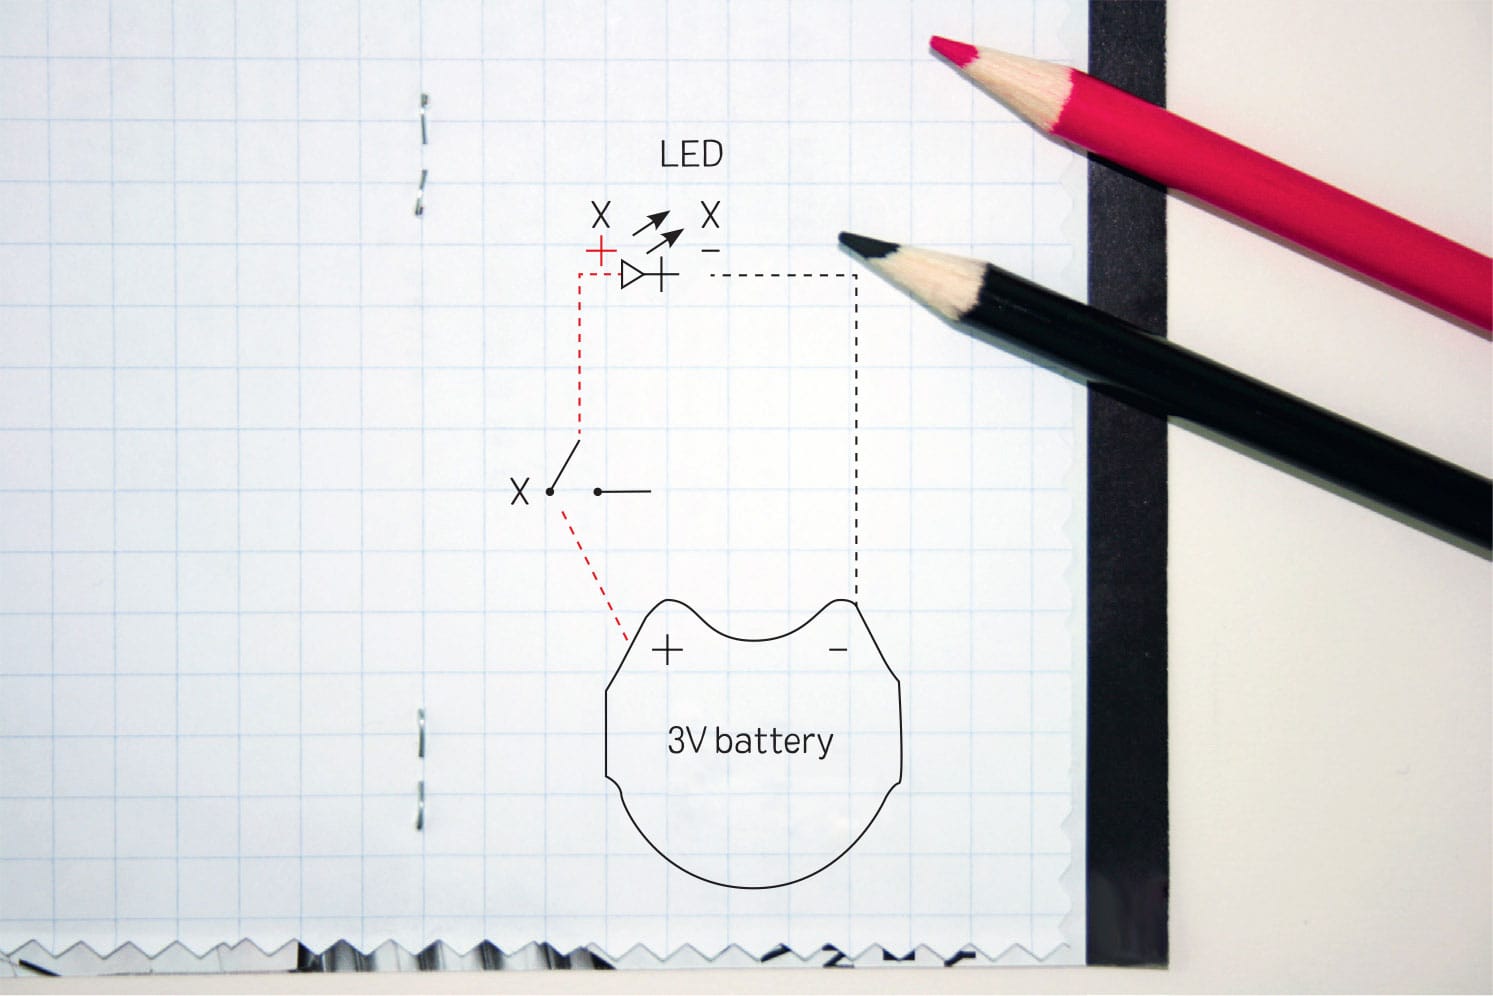
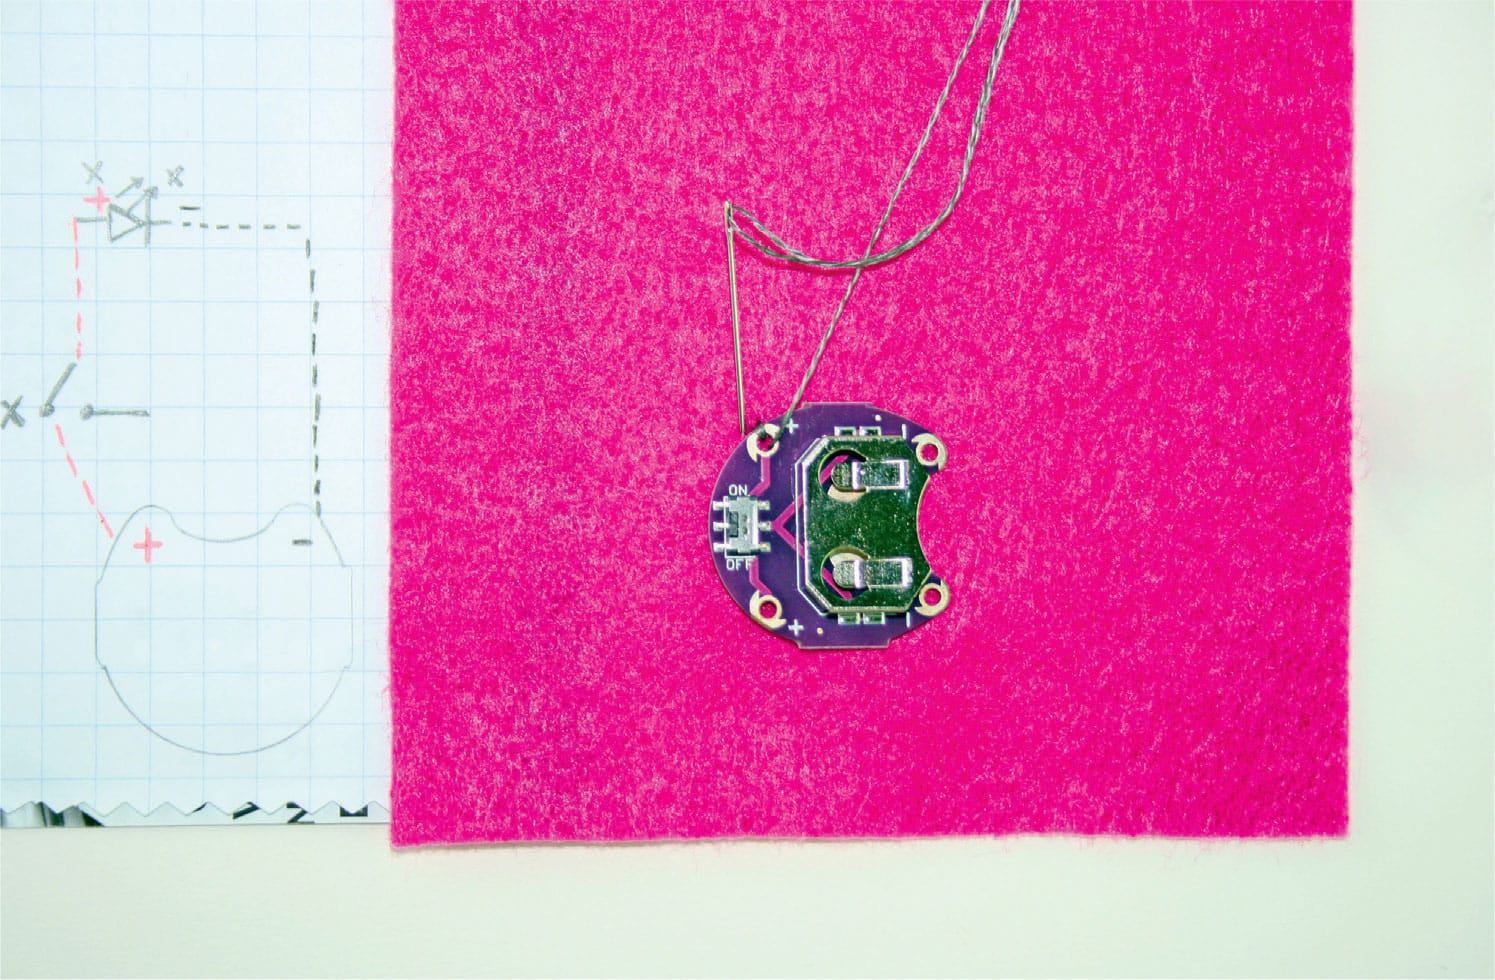
1 Sketch a circuit design in your notebook.
Here is what to include:
Show where you will place the battery holder (an easy way is to trace around it).
Sketch the positive circuit in red. This will be the path beginning at the positive side of the battery holder and traveling to the first side of the switch. There, you will tie and cut your thread. Next, you will sew the second side of the switch and continue making stitches to the positive tab in your LED. There, you will tie and cut your thread.
Use Xs to show where you will tie and cut!
Draw the switch using the symbol in the drawing above near the left-most “X.”
Draw the negative circuit in black. This will be the path from negative side of the battery holder to the negative side of the LED.
Include a note about the voltage of your battery.
2 Decide which side of the felt will be the front and which will be the back.
3 Thread the needle. Use a single strand of thread. Do not double the thread.
4 Tie a knot as close to the end as possible. Make a loop, push the tail through, and pull the knot close to the end of the length of thread. Do this again, tying a second knot on top of the first.
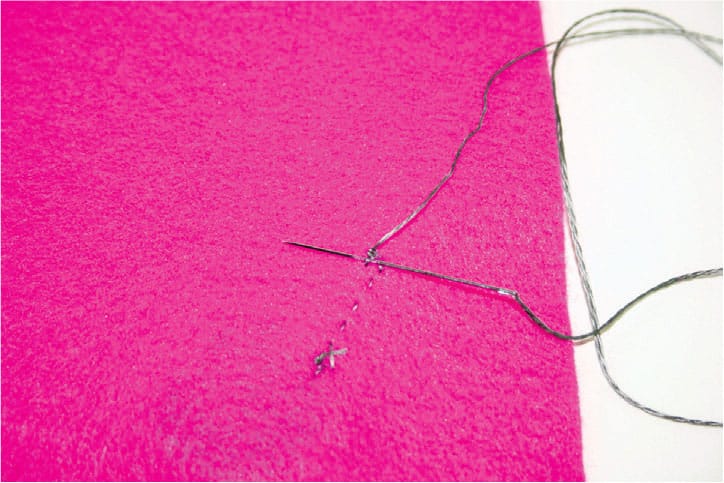
5 Sew the positive circuit into place. Tip: If there are two positive and two negative terminals on the battery holder, you need to sew only one of each.
a. Sew the positive (+) terminal of the coin-cell battery holder to the fabric with three stitches.
b. Make neat running stitches to the point where you will place your DIY switch. Sew one side of the switch near the positive terminal of the coin-cell battery holder. Make three stiches to secure it.
c. Tie off the thread. To make a knot, flip the project to the back side. Slip the needle under the last stitch, but do not pull it through yet. Loop the thread around the tip of the needle several times. Pull it through and make a snug knot.
d. Cut it away from your fabric.
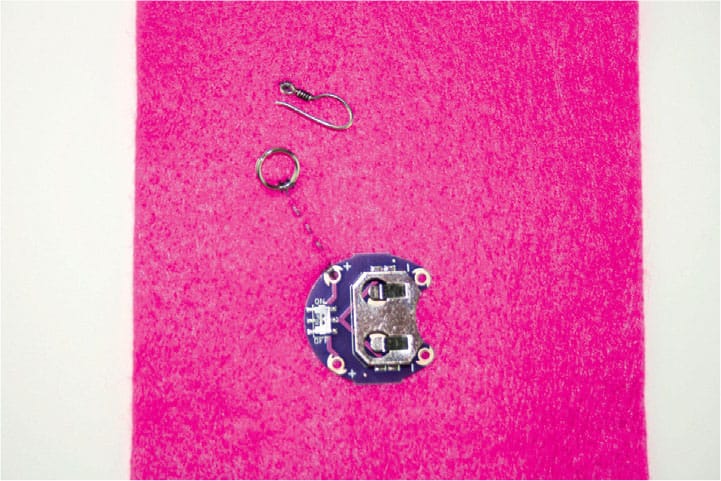
e. Sew the second side of the switch using three stiches. If one side of the thread connects to the other, it will create a bypass and the switch will not turn off and on!
f. Make neat running stiches to the point where you will place the LED.

g. Continue building the positive circuit by sewing down the positive side of the LED with three stiches.
h. Tie the thread. Be sure to cut it away from the fabric.
6 Sew the negative circuit.
a. Sew one negative (−) terminal of the coin-cell battery holder to the fabric with three stiches. Make sure the stiches do not touch or come near the top of the battery holder.
b. Continue to sew the negative circuit: Make running stiches from the negative terminal of the battery holder to the negative side of the LED.
c. Tie and cut the thread. Be sure to cut it away from the fabric.
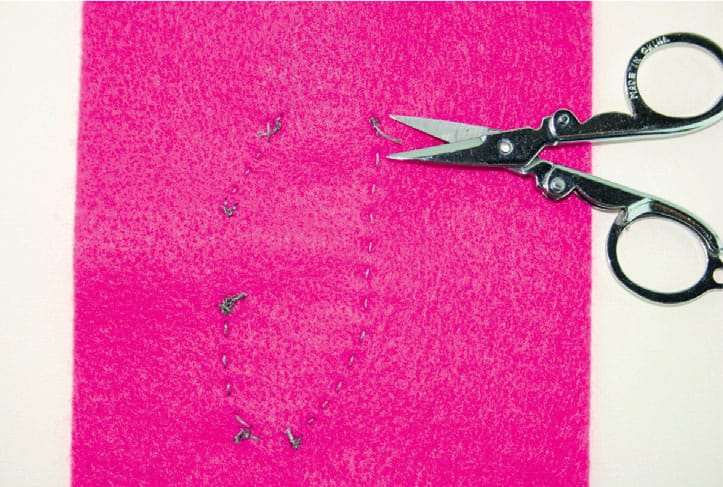
d. Look at the back of your fabric and trim any tails so that positive tails do not come near negative tails.
7 Insert the battery with the smooth side up
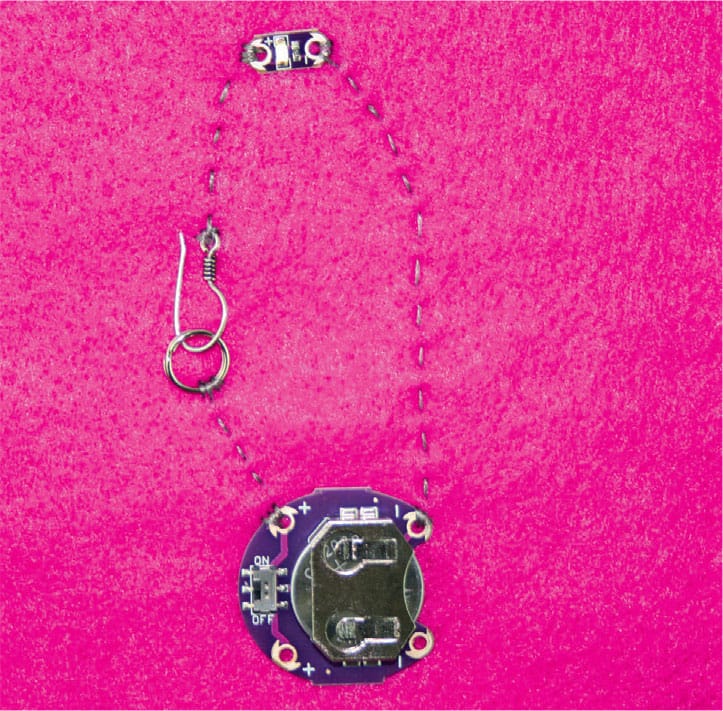
8 Engage the switch so it closes the circuit and electricity can flow!
Voilà—you’ve built a circuit!
Important:
When you need to throw your project in the washer, remove the battery first.