
4
Test-Driving Data Input
In this chapter, you’ll explore React forms and controlled components.
Forms are an essential part of building web applications, being the primary way that users enter data. If we want to ensure our application works, then invariably, that’ll mean we need to write automated tests for our forms. What’s more, there’s a lot of plumbing required to get forms working in React, making it even more important that they’re well-tested.
Automated tests for forms are all about the user’s behavior: entering text, clicking buttons, and submitting the form when complete.
We will build out a new component, CustomerForm, which we will use when adding or modifying customers. It will have three text fields: first name, last name, and phone number.
In the process of building this form, you’ll dig deeper into testing complex DOM element trees. You’ll learn how to use parameterized tests to repeat a group of tests without duplicating code.
The following topics will be covered in this chapter:
- Adding a form element
- Accepting text input
- Submitting a form
- Duplicating tests for multiple form fields
By the end of this chapter, you’ll have a decent understanding of test-driving HTML forms with React.
Technical requirements
The code files for this chapter can be found here: https://github.com/PacktPublishing/Mastering-React-Test-Driven-Development-Second-Edition/tree/main/Chapter04.
Adding a form element
An HTML form is a bunch of fields wrapped in a form element. Even though we’re mostly interested in the fields, we need to start with the form element itself. That’s what we’ll build in this section.
Let’s create our first form by following these steps:
- Create a new file called test/CustomerForm.test.js and add the following scaffold. It contains all the usual imports and component test initialization that you’ve seen in the previous chapters:
import React from "react";
import {
initializeReactContainer,
render,
element,
} from "./reactTestExtensions";
import { CustomerForm } from "../src/CustomerForm";
describe("CustomerForm", () => {
beforeEach(() => {
initializeReactContainer();
});
});
- Now you’re ready to create your first test. Add the following test to the describe block:
it("renders a form", () => {
render(<CustomerForm />);
expect(element("form")).not.toBeNull();
});
- We have a complete test, so let’s run it and see what happens:
FAIL test/CustomerForm.test.js
● Test suite failed to run
Cannot find module '../src/CustomerForm' from 'CustomerForm.test.js'
The failure tells us that it can’t find the module. That’s because we haven’t created it yet.
- So, create a blank file named src/CustomerForm.js. Running your test again should give you the following output:
FAIL test/CustomerForm.test.js
● CustomerForm › renders a form
Element type is invalid: expected a string (for built-in components) or a class/function (for composite components) but got: undefined. You likely forgot to export your component from the file it's defined in, or you might have mixed up default and named imports.
8 |
9 | export const render = (component) =>
> 10 | act(() =>
11 | ReactDOM.createRoot(...).render(...)
| ^
12 | );
11 |
12 | export const click = (element) =>
13 | act(() => element.click());
Stack traces from test helper code
Jest’s stack trace points to a failure within our extensions code, not the test itself. If our code was in an npm module, Jest would have skipped those test lines from its output. Thankfully, the error message is helpful enough.
- To fix this issue, we need to add an export that matches the import we wrote at the top of our test file. Add the following line to src/CustomerForm.js:
export const CustomerForm = () => null;
- Running some tests gives the actual expectation failure:
● CustomerForm › renders a form
expect(received).not.toBeNull()
Received: null
This can be fixed by making the component return something:
import React from "react";
export const CustomerForm = () => <form />;
Before moving on, let’s pull out a helper for finding the form element. As in the previous chapter, this is arguably premature as we have only one test using this code right now. However, we’ll appreciate having the helper when we come to write our form submission tests later.
- Open test/reactTestExtensions.js and add the following function:
export const form = (id) => element("form");
- Modify your test file by adding the following import. You can leave the element import in place because we’ll use it later in the next section:
import {
initializeReactContainer,
render,
element,
form,
} from "./reactTestExtensions";
- Finally, update your test to use the helper, as shown here. After this, your test should still be passing:
it("renders a form", () => {
render(<CustomerForm />);
expect(form()).not.toBeNull();
});
That’s all there is to creating the basic form element. With that wrapper in place, we’re now ready to add our first field element: a text box.
Accepting text input
In this section, we’ll add a text box to allow the customer’s first name to be added or edited.
Adding a text field is more complicated than adding the form element. First, there’s the element itself, which has a type attribute that needs to be tested. Then, we need to prime the element with the initial value. Finally, we’ll need to add a label so that it’s obvious what the field represents.
Let’s start by rendering an HTML text input field onto the page:
- Add the following test to test/CustomerForm.test.js. It contains three expectations (there’s an exercise at the end of this chapter that you can follow to pull these out as a single matcher):
it("renders the first name field as a text box", () => {
render(<CustomerForm />);
const field = form().elements.firstName;
expect(field).not.toBeNull();
expect(field.tagName).toEqual("INPUT");
expect(field.type).toEqual("text");
});
Relying on the DOM’s Form API
This test makes use of the Form API: any form element allows you to access all of its input elements using the elements indexer. You give it the element’s name attribute (in this case, firstName) and that element is returned.
This means we must check the returned element’s tag. We want to make sure it is an <input> element. If we hadn’t used the Form API, one alternative would have been to use elements("input")[0], which returns the first input element on the page. This would make the expectation on the element’s tagName property unnecessary.
- Let’s move a bit faster. We’ll make all the expectations pass at once. Update CustomerForm so that it includes a single input field, as shown here:
export const CustomerForm = () => (
<form
<input type="text" name="firstName" />
</form>
);
- Since this form will be used when modifying existing customers as well as adding new ones, we need to design a way to get the existing customer data into the component. We’ll do that by setting an original prop that contains the form data. Add the following test:
it("includes the existing value for the first name", () => {
const customer = { firstName: "Ashley" };
render(<CustomerForm original={customer} />);
const field = form().elements.firstName;
expect(field.value).toEqual("Ashley");
});
- To make this test pass, change the component definition to the following. We will use a prop to pass in the previous firstName value:
export const CustomerForm = ({ original }) => (
<form
<input
type="text"
name="firstName"
value={original.firstName} />
</form>
);
- Upon running the tests again, you’ll see that although this test now passes, the first two tests fail because they don’t specify the original prop. What’s more, we have a warning:
Warning: You provided a `value` prop to a form field without an `onChange` handler. This will render a read-only field. If the field should be mutable use `defaultValue`. Otherwise, set either `onChange` or `readOnly`.
- To fix the initial tests, create a new constant, blankCustomer, that will act as our “base” customer. It’ll do just fine for tests that don’t care about specific field values, such as our first two tests. Add this definition just above the beforeEach block:
const blankCustomer = {
firstName: "",
};
What about specifying an empty object for the original prop?
In this object definition, we set the firstName value to an empty string. You may think that either undefined or null would be good candidates for the value. That way, we could sidestep having to define an object like this and just pass an empty object, {}. Unfortunately, React will warn you when you attempt to set a controlled component’s initial value to undefined, which we want to avoid. It’s no big deal, and besides that, an empty string is a more realistic default for a text box.
- Update the first two tests so that they render with the original prop set, as shown here. With this change in place, you should have three passing tests, but the warning remains:
it("renders a form", () => {
render(<CustomerForm original={blankCustomer} />);
expect(form()).not.toBeNull();
});
it("renders the first name field as a text box", () => {
render(<CustomerForm original={blankCustomer} />);
const field = form().elements.firstName;
expect(field).not.toBeNull();
expect(field.tagName).toEqual("INPUT");
expect(field.type).toEqual("text");
});
- To get rid of the warning, add the word readOnly to the input tag. You might be thinking: surely, we don’t want a read-only field? You’re right, but we need a further test, for modifying the input value, before we can avoid using the readOnly keyword. We’ll add that test a little further on:
<input
type="text"
name="firstName"
value={original.firstName}
readOnly
/>
Tip
Always consider React warnings to be a test failure. Don’t proceed without first fixing any warnings.
- The last two tests include the following line, which reaches inside the form to pull out the firstName field:
const field = form().elements.firstName;
Let’s promote this to be a function in test/reactTestExtensions.js. Open that file and add the following definition after the definition for form:
export const field = (fieldName) =>
form().elements[fieldName];
- Then, import it into test/CustomerForm.js:
import {
initializeReactContainer,
render,
element,
form,
field,
} from "./reactTestExtensions";
- Change the last test you wrote so that it uses the new helper:
it("includes the existing value for the first name", () => {
const customer = { firstName: "Ashley" };
render(<CustomerForm original={customer} />);
expect(field("firstName").value).toEqual("Ashley");
});
- Update the first test in the same way:
it("renders the first name field as a text box", () => {
render(<CustomerForm original={blankCustomer} />);
expect(field("firstName")).not.toBeNull();
expect(field("firstName")).toEqual("INPUT");
expect(field("firstName")).toEqual("text");
});
- Next up, we’ll add a label to the field. Add the following test, which uses the element helper:
it("renders a label for the first name field", () => {
render(<CustomerForm original={blankCustomer} />);
const label = element("label[for=firstName]");
expect(label).not.toBeNull();
});
- Make this pass by inserting the new element into your JSX for CustomerForm:
<form
<label htmlFor="firstName" />
...
</form>
The htmlFor attribute
The JSX htmlFor attribute sets the HTML for attribute. for couldn’t be used in JSX because it is a reserved JavaScript keyword. The attribute is used to signify that the label matches a form element with the given ID – in this case, firstName.
- Let’s add some text content to that label:
it("renders 'First name' as the first name label content", () => {
render(<CustomerForm original={blankCustomer} />);
const label = element("label[for=firstName]");
expect(label).toContainText("First name");
});
- Update the label element to make the test pass:
<form
<label htmlFor="firstName">First name</label>
...
</form>
- Finally, we need to ensure that our input has an ID that matches it with the label’s htmlFor value so that they match up. Add the following test:
it("assigns an id that matches the label id to the first name field", () => {
render(<CustomerForm original={blankCustomer} />);
expect(field("firstName").id).toEqual("firstName");
});
- Making that pass is as simple as adding the new attribute:
<form>
<label htmlFor="firstName">First name</label>
<input
type="text"
name="firstName"
id="firstName"
value={firstName}
readOnly
/>
</form>
We’ve now created almost everything we need for this field: the input field itself, its initial value, and its label. But we don’t have any behavior for handling changes to the value – that’s why we have the readOnly flag.
Change behavior only makes sense in the context of submitting the form with updated data: if you can’t submit the form, there’s no point in changing the field value. That’s what we’ll cover in the next section.
Submitting a form
For this chapter, we will define “submit the form” to mean “call the onSubmit callback function with the current customer object.” The onSubmit callback function is a prop we’ll be passing.
This section will introduce one way of testing form submission. In Chapter 6, Exploring Test Doubles, we will update this to a call to global.fetch that sends our customer data to our application’s backend API.
We’ll need a few different tests to specify this behavior, each test building up the functionality we need in a step-by-step fashion. First, we’ll have a test that ensures the form has a submit button. Then, we’ll write a test that clicks that button without making any changes to the form. We’ll need another test to check that submitting the form does not cause page navigation to occur. Finally, we’ll end with a test submission after the value of the text box has been updated.
Submitting without any changes
Let’s start by creating a button in the form. Clicking it will cause the form to submit:
- Start by adding a test to check whether a submit button exists on the page:
it("renders a submit button", () => {
render(<CustomerForm original={blankCustomer} />);
const button = element("input[type=submit]");
expect(button).not.toBeNull();
});
- To make that pass, add the following single line at the bottom of the form’s JSX:
<form>
...
<input type="submit" value="Add" />
</form>
- The following test introduces a new concept, so we’ll break it down into its component parts. To start, create a new test, starting, as follows:
it("saves existing first name when submitted", () => {
expect.hasAssertions();
});
The hasAssertions expectation tells Jest that it should expect at least one assertion to occur. It tells Jest that at least one assertion must run within the scope of the test; otherwise, the test has failed. You’ll see why this is important in the next step.
- Add the following part of the test into the outline, below the hasAssertions call:
const customer = { firstName: "Ashley" };
render(
<CustomerForm
original={customer}
onSubmit={({ firstName }) =>
expect(firstName).toEqual("Ashley")
}
/>
);
This function call is a mix of the Arrange and Assert phases in one. The Arrange phase is the render call itself, and the Assert phase is the onSubmit handler. This is the handler that we want React to call on form submission.
- Finish off the test by adding the following line just below the call to render. This is the Act phase of our test, which in this test is the last phase of the test:
const button = element("input[type=submit]");
click(button);
Using hasAssertions to avoid false positives
You can now see why we need hasAssertions. The test is written out of order, with the assertions defined within the onSubmit handler. If we did not use hasAssertions, this test would pass right now because we never call onSubmit.
I don’t recommend writing tests like this. In Chapter 6, Exploring Test Doubles, we’ll discover test doubles, which allow us to restore the usual Arrange-Act-Assert order to help us avoid the need for hasAssertions. The method we’re using here is a perfectly valid TDD practice; it’s just a little messy, so you will want to refactor it eventually.
- Now, you need to import click:
import {
initializeReactContainer,
render,
element,
form,
field,
click,
} from "./reactTestExtensions";
- Making this test pass is straightforward, despite the complicated test setup. Change the component definition so that it reads as follows:
export const CustomerForm = ({
original,
onSubmit
}) => (
<form onSubmit={() => onSubmit(original)}>
...
</form>
);
- Now, run the test with npm test. You’ll discover that the test passed but we have a new warning, as shown here:
console.error
Error: Not implemented: HTMLFormElement.prototype.submit
at module.exports (.../node_modules/jsdom/lib/jsdom/browser/not-implemented.js:9:17)
Something is not quite right. This warning is highlighting something very important that we need to take care of. Let’s stop here and look at it in detail.
Preventing the default submit action
This Not implemented console error is coming from the JSDOM package. HTML forms have a default action when submitted: they navigate to another page, which is specified by the form element’s action attribute. JSDOM does not implement page navigation, which is why we get a Not implemented error.
In a typical React application like the one we’re building, we don’t want the browser to navigate. We want to stay on the same page and allow React to update the page with the result of the submit operation.
The way to do that is to grab the event argument from the onSubmit prop and call preventDefault on it:
event.preventDefault();
Since that’s production code, we need a test that verifies this behavior. We can do this by checking the event’s defaultPrevented property:
expect(event.defaultPrevented).toBe(true);
So, now the question becomes, how do we get access to this Event in our tests?
We need to create the event object ourselves and dispatch it directly using the dispatchEvent DOM function on the form element. This event needs to be marked as cancelable, which will allow us to call preventDefault on it.
Why clicking the submit button won’t work
In the last couple of tests, we purposely built a submit button that we could click to submit the form. While that will work for all our other tests, for this specific test, it does not work. That’s because JSDOM will take a click event and internally convert it into a submit event. There is no way we can get access to that submit event object if JSDOM creates it. Therefore, we need to directly fire the submit event.
This isn’t a problem. Remember that, in our test suite, we strive to act as a real browser would – by clicking a submit button to submit the form – but having one test work differently isn’t the end of the world.
Let’s put all of this together and fix the warning:
- Open test/reactTestExtensions.js and add the following, just below the click definition. We’ll use this in the next test:
export const submit = (formElement) => {
const event = new Event("submit", {
bubbles: true,
cancelable: true,
});
act(() => formElement.dispatchEvent(event));
return event;
};
Why do we need the bubbles property?
If all of this wasn’t complicated enough, we also need to make sure the event bubbles; otherwise, it won’t make it to our event handler.
When JSDOM (or the browser) dispatches an event, it traverses the element hierarchy looking for an event handler to handle the event, starting from the element the event was dispatched on, working upwards via parent links to the root node. This is known as bubbling.
Why do we need to ensure this event bubbles? Because React has its own event handling system that is triggered by events reaching the React root element. The submit event must bubble up to our container element before React will process it.
- Import the new helper into test/CustomerForm.test.js:
import {
...,
submit,
} from "./reactTestExtensions";
- Add the following test to the bottom of the CustomerForm test suite. It specifies that preventDefault should be called when the form is submitted:
it("prevents the default action when submitting the form", () => {
render(
<CustomerForm
original={blankCustomer}
onSubmit={() => {}}
/>
);
const event = submit(form());
expect(event.defaultPrevented).toBe(true);
});
- To make that pass, first, update CustomerForm so that it has an explicit return:
export const CustomerForm = ({
original,
onSubmit
}) => {
return (
<form onSubmit={() => onSubmit(original)}>
...
</form>
);
};
- Just above the return, add a new function, handleSubmit, and update the form so that it calls that instead:
export const CustomerForm = ({
original,
onSubmit
}) => {
const handleSubmit = (event) => {
event.preventDefault();
onSubmit(original);
};
return (
<form onSubmit={handleSubmit}>
</form>
);
};
- Run your tests and ensure they are all passing.
Submitting changed values
It’s finally the time to introduce some state into our component. We will specify what should happen when the text field is used to update the customer’s first name.
The most complicated part of what we’re about to do is dispatching the DOM change event. In the browser, this event is dispatched after every keystroke, notifying the JavaScript application that the text field value content has changed. An event handler receiving this event can query the target element’s value property to find out what the current value is.
Crucially, we’re responsible for setting the value property before we dispatch the change event. We do that by calling the value property setter.
Somewhat unfortunately for us testers, React has change tracking behavior that is designed for the browser environment, not the Node test environment. In our tests, this change tracking logic suppresses change events like the ones our tests will dispatch. We need to circumvent this logic, which we can do with a helper function called originalValueProperty, as shown here:
const originalValueProperty = (reactElement) => {
  const prototype =
    Object.getPrototypeOf(reactElement);
  return Object.getOwnPropertyDescriptor(
    prototype,
    "value"
  );
};
As you’ll see in the next section, we’ll use this function to bypass React’s change tracking and trick it into processing our event, just like a browser would.
Only simulating the final change
Rather than creating a change event for each keystroke, we’ll manufacture just the final instance. Since the event handler always has access to the full value of the element, it can ignore all intermediate events and process just the last one that is received.
Let’s begin with a little bit of refactoring:
- We’re going to use the submit button to submit the form. We figured out how to access that button in a previous test:
const button = element("input[type=submit]");
Let’s move this definition into test/reactTestExtensions.js so that we can use it on our future tests. Open that file now and add this definition to the bottom:
export const submitButton = () =>
element("input[type=submit]");
- Move back to test/CustomerForm.test.js and add the new helper to the imports:
import {
...,
submitButton,
} from "./reactTestExtensions";
- Update the renders a submit button test so that it uses that new helper, as shown here:
it("renders a submit button", () => {
render(<CustomerForm original={blankCustomer} />);
expect(submitButton()).not.toBeNull();
});
The helper extraction dance
Why are we doing this dance of writing a variable in a test (such as const button = ...) only to then extract it as a function moments later, as we just did with submitButton?
Following this approach is a systematic way of building a library of helper functions, meaning you don’t have to think too heavily about the “right” design. First, start with a variable. If it turns out that you’ll use that variable a second or third time, then extract it into a function. No big deal.
- It’s time to write the next test. This is very similar to the last test, except now, we need to make use of a new change helper function. We’ll define this in the next step:
it("saves new first name when submitted", () => {
expect.hasAssertions();
render(
<CustomerForm
original={blankCustomer}
onSubmit={({ firstName }) =>
expect(firstName).toEqual("Jamie")
}
/>
);
change(field("firstName"), "Jamie");
click(submitButton());
});
- This function uses the new change helper that was discussed at the beginning of this section. Add the following definitions to test/reactTestExtensions.js:
const originalValueProperty = (reactElement) => {
const prototype =
Object.getPrototypeOf(reactElement);
return Object.getOwnPropertyDescriptor(
prototype,
"value"
);
};
export const change = (target, value) => {
originalValueProperty(target).set.call(
target,
value
);
const event = new Event("change", {
target,
bubbles: true,
});
act(() => target.dispatchEvent(event));
};
Figuring out interactions between React and JSDOM
The implementation of the change function shown here is not obvious. As we saw earlier with the bubbles property, React does some pretty clever stuff on top of the DOM’s usual event system.
It helps to have a high-level awareness of how React works. I also find it helpful to use the Node debugger to step through JSDOM and React source code to figure out where the flow is breaking.
- To make this pass, move to src/CustomerForm.js and import useState into the module by modifying the existing React import:
import React, { useState } from "react";
- Change the customer constant definition to be assigned via a call to useState. The default state is the original value of customer:
const [ customer, setCustomer ] = useState(original);
- Create a new arrow function that will act as our event handler. You can put this just after the useState line that you added in the previous step:
const handleChangeFirstName = ({ target }) =>
setCustomer((customer) => ({
...customer,
firstName: target.value
}));
- In the returned JSX, modify the input element, as shown here. We are replacing the readOnly property with an onChange property and hooking it up to the handler we just created. Now, the value property also needs to be updated so that it can use React’s component state rather than the component prop:
<input
type="text"
name="firstName"
id="firstName"
value={customer.firstName}
onChange={handleChangeFirstName}
/>
- Go ahead and run the test; it should now be passing.
With that, you’ve learned how to test-drive the change DOM event, and how to hook it up with React’s component state to save the user’s input. Next, it’s time to repeat the process for two more text boxes.
Duplicating tests for multiple form fields
So far, we’ve written a set of tests that fully define the firstName text field. Now, we want to add two more fields, which are essentially the same as the firstName field but with different id values and labels.
Before you reach for copy and paste, stop and think about the duplication you could be about to add to both your tests and your production code. We have six tests that define the first name. This means we would end up with 18 tests to define three fields. That’s a lot of tests without any kind of grouping or abstraction.
So, let’s do both – that is, group our tests and abstract out a function that generates our tests for us.
Nesting describe blocks
We can nest describe blocks to break similar tests up into logical contexts. We can invent a convention for how to name these describe blocks. Whereas the top level is named after the form itself, the second-level describe blocks are named after the form fields.
Here’s how we’d like them to end up:
describe("CustomerForm", () => {
  describe("first name field", () => {
    // ... tests ...
  };
  describe("last name field", () => {
    // ... tests ...
  };
  describe("phone number field", () => {
    // ... tests ...
  };
});
With this structure in place, you can simplify the it descriptive text by removing the name of the field. For example, "renders the first name field as a text box" becomes "renders as a text box" because it has already been scoped by the "first name field" describe block. Because of the way Jest displays describe block names before test names in the test output, each of these still reads like a plain-English sentence, but without the verbiage. In the example just given, Jest will show us CustomerForm first name field renders as a text box.
Let’s do that now for the first name field. Wrap the six existing tests in a describe block, and then rename the tests, as shown here:
describe("first name field", () => {
  it("renders as a text box" ... );
  it("includes the existing value" ... );
  it("renders a label" ... );
  it("assigns an id that matches the label id" ... );
  it("saves existing value when submitted" ... );
  it("saves new value when submitted" ... );
});
Be careful not to include the preventsDefault test out of this, as it’s not field-specific. You may need to adjust the positioning of your tests in your test file.
That covers grouping the tests. Now, let’s look at using test generator functions to remove repetition.
Generating parameterized tests
Some programming languages, such as Java and C#, require special framework support to build parameterized tests. But in JavaScript, we can very easily roll our own parameterization because our test definitions are just function calls. We can use this to our advantage by pulling out each of the existing six tests as functions that take parameter values.
This kind of change requires some diligent refactoring. We’ll do the first two tests together, and then you can either repeat these steps for the remaining five tests or jump ahead to the next tag in the GitHub repository:
- Starting with renders as a text box, wrap the entirety of the it call in an arrow function, and then call that function straight after, as shown here:
const itRendersAsATextBox = () =>
it("renders as a text box", () => {
render(<CustomerForm original={blankCustomer} />);
expect(field("firstName")).not.toBeNull();
expect(field("firstName").tagName).toEqual(
"INPUT"
);
expect(field("firstName").type).toEqual("text");
});
itRendersAsATextBox();
- Verify that all your tests are passing.
- Parameterize this function by promoting the firstName string to a function parameter. Then, you’ll need to pass in the firstName string into the function call itself, as shown here:
const itRendersAsATextBox = (fieldName) =>
it("renders as a text box", () => {
render(<CustomerForm original={blankCustomer} />);
expect(field(fieldName)).not.toBeNull();
expect(field(fieldName).tagName).toEqual("INPUT");
expect(field(fieldName).type).toEqual("text");
});
itRendersAsATextBox("firstName");
- Again, verify that your tests are passing.
- Push the itRendersAsATextBox function up one level, into the parent describe scope. That will allow you to use it in subsequent describe blocks.
- Use the same procedure for the next test, includes the existing value:
const itIncludesTheExistingValue = (
fieldName,
existing
) =>
it("includes the existing value", () => {
const customer = { [fieldName]: existing };
render(<CustomerForm original={customer} />);
expect(field(fieldName).value).toEqual(existing);
});
itIncludesTheExistingValue("firstName", "Ashley");
- Verify your tests are passing and then push itIncludesTheExistingValue up one level, into the parent describe scope.
- Repeat this process for the label tests, which can be included in one function. The second test can use a parameter within its test definition, as shown here:
const itRendersALabel = (fieldName, text) => {
it("renders a label for the text box", () => {
render(<CustomerForm original={blankCustomer} />);
const label = element(`label[for=${fieldName}]`);
expect(label).not.toBeNull();
});
it(`renders '${text}' as the label content`, () => {
render(<CustomerForm original={blankCustomer} />);
const label = element(`label[for=${fieldName}]`);
expect(label).toContainText(text);
});
};
- Repeat the same process for the three remaining tests:
const itAssignsAnIdThatMatchesTheLabelId = (
fieldName
) =>
...
const itSubmitsExistingValue = (fieldName, value) =>
...
const itSubmitsNewValue = (fieldName, value) =>
...
Important note
Check the completed solution for the full listing. This can be found in the Chapter04/Complete directory.
- With all that done, your describe block will succinctly describe what the first name field does:
describe("first name field", () => {
itRendersAsATextBox("firstName");
itIncludesTheExistingValue("firstName", "Ashley");
itRendersALabel("firstName", "First name");
itAssignsAnIdThatMatchesTheLabelId("firstName");
itSubmitsExistingValue("firstName", "Ashley");
itSubmitsNewValue("firstName", "Jamie");
});
Take a step back and look at the new form of the describe block. It is now very quick to understand the specification for how this field should work.
Solving a batch of tests
Now, we want to duplicate those six tests for the last name field. But how do we approach this? We do this test by test, just as we did with the first name field. However, this time, we should go much faster as our tests are one-liners, and the production code is a copy and paste job.
So, for example, the first test will be this:
describe("last name field", () => {
  itRendersAsATextBox("lastName");
});
You’ll need to update blankCustomer so that it includes the new field:
const blankCustomer = {
  firstName: "",
  lastName: "",
};
That test can be made to pass by adding the following line to our JSX, just below the firstName input field:
<input type="text" name="lastName" />
This is just the start for the input field; you’ll need to complete it as you add the next few tests.
Go ahead and add the remaining five tests, along with their implementation. Then, repeat this process for the phone number field. When adding the submit tests for the phone number, make sure that you provide a string value made up of numbers, such as "012345". Later in this book, we’ll add validations to this field that will fail if you don’t use the right values now.
Jumping ahead
You might be tempted to try to solve all 12 new tests at once. If you’re feeling confident, go for it!
If you want to see a listing of all the tests in a file, you must invoke Jest with a single file. Run the npm test test/CustomerForm.test.js command to see what that looks like. Alternatively, you can run npx jest --verbose to run all the tests with full test listings:
PASS test/CustomerForm.test.js
  CustomerForm
    ✓ renders a form (28ms)
    first name field
      ✓ renders as a text box (4ms)
      ✓ includes the existing value (3ms)
      ✓ renders a label (2ms)
      ✓ saves existing value when submitted (4ms)
      ✓ saves new value when submitted (5ms)
    last name field
      ✓ renders as a text box (3ms)
      ✓ includes the existing value (2ms)
      ✓ renders a label (6ms)
      ✓ saves existing value when submitted (2ms)
      ✓ saves new value when submitted (3ms)
    phone number field
      ✓ renders as a text box (2ms)
      ✓ includes the existing value (2ms)
      ✓ renders a label (2ms)
      ✓ saves existing value when submitted (3ms)
      ✓ saves new value when submitted (2ms)
Modifying handleChange so that it works with multiple fields
Time for a small refactor. After adding all three fields, you will have ended up with three very similar onChange event handlers:
const handleChangeFirstName = ({ target }) =>
  setCustomer((customer) => ({
    ...customer,
    firstName: target.value
  }));
const handleChangeLastName = ({ target }) =>
  setCustomer((customer) => ({
    ...customer,
    lastName: target.value
  }));
const handleChangePhoneNumber = ({ target }) =>
  setCustomer((customer) => ({
    ...customer,
    phoneNumber: target.value
  }));
You can simplify these down into one function by making use of the name property on target, which matches the field ID:
const handleChange = ({ target }) =>
  setCustomer(customer => ({
    ...customer,
   [target.name]: target.value
  }));
Testing it out
At this stage, your the AppointmentsDayView instance is complete. Now is a good time to try it out for real.
Update your entry point in src/index.js so that it renders a new CustomerForm instance, rather than AppointmentsDayView. By doing so, you should be ready to manually test:
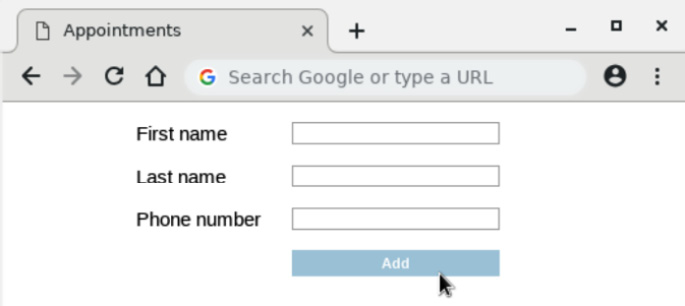
Figure 4.1 – The completed CustomerForm
With that, you have learned one way to quickly duplicate specifications across multiple form fields: since describe and it are plain old functions, you can treat them just like you would with any other function and build your own structure around them.
Summary
In this chapter, you learned how to create an HTML form with text boxes. You wrote tests for the form element, and for input elements of types text and submit.
Although the text box is about the most basic input element there is, we’ve taken this opportunity to dig much deeper into test-driven React. We’ve discovered the intricacies of raising submit and change events via JSDOM, such as ensuring that event.preventDefault() is called on the event to avoid a browser page transition.
We’ve also gone much further with Jest. We extracted common test logic into modules, used nested describe blocks, and built assertions using DOM’s Form API.
In the next chapter, we’ll test-drive a more complicated form example: a form with select boxes and radio buttons.
Exercises
The following are some exercises for you to try out:
- Extract a labelFor helper into test/reactTestExtensions.js. It should be used like so:
expect(labelFor(fieldName)).not.toBeNull();
- Add a toBeInputFieldOfType matcher that replaces the three expectations in the itRendersAsATextBox function. It should be used like so:
expect(field(fieldName)).toBeInputFieldOfType("text");