
So far, this book has shown you how to work with VBA to perform actions within a VBA host application, such as Word or Access. But you might sometimes (perhaps often) need to communicate between applications as well. This chapter shows you the tools for contacting and manipulating one application from another: Automation, data objects, Dynamic Data Exchange (DDE), and SendKeys.
In this chapter you will learn to do the following:
Use Automation to transfer information
Use the
Shellfunction to run an applicationUse data objects to store and retrieve information
Communicate via DDE
Communicate via
SendKeys
Most VBA host applications (such as the Office applications that this chapter uses as examples) offer several tools for communicating with other applications:
- Automation
Formerly known as Object Linking and Embedding (OLE), Automation is the newest and usually most effective method for transferring information from one Windows application to another. If the applications you're using support Automation, use it in preference to the alternatives, DDE and
SendKeys.- Dynamic Data Exchange (DDE)
An older method of transferring information between applications that remains a good fallback when Automation isn't available. DDE is available in only some applications.
SendKeysThe oldest method of communicating with another application,
SendKeysrelies on sending keystroke equivalents to the other application rather than manipulating it in the more sophisticated ways employed by Automation and DDE. Although crude by comparison with Automation and DDE,SendKeyscan still be effective.
Beyond these three communications tools, this chapter also discusses the DataObject object, which you can use to store information and to transfer information to and from the Windows Clipboard.
Automation is the most powerful and efficient way to communicate between applications. Each application that supports Automation offers one or more Component Object Model (COM) objects that you can access programmatically—usually an object representing the application, an object representing the various types of files the application uses, objects representing its major components, and so on.
For any Automation transaction, there's a server application that provides the information and a client application that receives it. (There's also another pair of terms for the two applications: the server application is also sometimes known as the object application, and the client application is known as the controlling application.)
Automation lets the client application harness the capabilities of the server application. For example, Excel has far better calculation features than Word and can generate charts, data maps, and so on based on its calculations and data. By using Automation, Word can use Excel's calculation engine to perform calculations and insert the results into a Word document, or it can use Excel to create a chart that it inserts into a document as well. Word can also take more limited actions, such as causing Excel to open a workbook, copy a group of cells from a spreadsheet in it, and paste-link them into a document.
To use Automation through VBA, you create an object in VBA that references the application you want to work with. You use the CreateObject function to create a new object in another application and the GetObject function to retrieve an existing object in another application.
When using Automation, you can choose whether to display the server application or keep it hidden from the user. For some procedures, you'll need to display it—for example, the user might need to choose a file or a folder or make another choice that requires live intervention. In other situations, it can be best to keep the server application hidden so that the user isn't distracted by an application suddenly launching itself spontaneously and robotically carrying out actions. This can make some users uneasy, as if the computer has gotten out of control. A colleague of mine, something of a prankster, used to torment new hires by inserting a procedure in their word processor that caused individual characters to start swinging, then drop off the bottom of the screen. As if they'd "come loose." Then he would walk over and tell them that this isn't a problem as long as they don't jar their desk while typing.
But even if you decide to hide the server application from the user when the procedure runs, in most cases it's helpful to display the server application while you're writing and testing the procedure. Doing so makes it much easier to see what's going wrong when your code doesn't work as expected.
When you use Automation to access another application, you can choose which type of binding to use—that is, how to establish the reference between the client application and the server application.
Early binding involves adding a reference to the application's object library by using the References dialog box (Tools
For example, the following statements connect to a slide within a PowerPoint presentation by using early binding:
Dim myPowerPoint As PowerPoint.Application
Dim myPresentation As Presentation
Dim mySlide As Slide
Set myPowerPoint = CreateObject("PowerPoint.Application")
Set myPresentation = myPowerPoint.Presentations.Add
Set mySlide = myPresentation.Slides.Add(Index:=1, Layout:=ppLayoutTitleOnly)
With late binding, you create an object that references the other application when you run the code. If you declare the object explicitly, you declare it as an object—As Object—rather than declaring it as a specific object class type.
For example, the following statements declare the Object variable myOutlook and then assign to it a reference to an Outlook.Application object:
Dim myOutlook As Object
Set myOutlook = CreateObject("Outlook.Application")If the server application you're using supports early binding, use it in preference to late binding. There are three advantages to early binding:
Once you've added to the project the reference to the application's object library, you can access the application's objects, properties, and methods through the VBA Editor session from the host application. This makes it much easier to use the editor's built-in Intellisense features to find the objects, properties, and methods you need in the application you're referring to and to avoid mistakes such as typos and missing arguments.
Because you specify the type of the object variable when you declare it, you're less likely to get the wrong object by mistake.
Because VBA can compile more information about the object, code aspects of its methods and properties need not be resolved during runtime. So it runs faster.
On the other hand, late binding can avoid object library issues such as having to make the right references and library version problems.
The CreateObject function creates and returns a reference to an Automation object exposed to other applications. The syntax is as follows:
CreateObject(class[,servername])
Here, class is a required argument specifying the class (the formal definition) of the object to create. The class argument consists of the name of the library that will provide the object and the type of object to be provided, so it looks like this:
applicationname.objecttype
For example, to specify the Excel Application object as a class, use a class argument of Excel.Application. Here, Excel is the name of the application that provides the object, and Application is the type of object that Excel provides. Likewise, use Excel.Sheet to specify a worksheet object in Excel.
servername is an optional Variant argument of the String subtype used to specify the name of the network server on which to create the object. To use no server, just the user's machine, omit servername or specify an empty string. To use a remote server, you must have DCOM (the Distributed Component Object Model) installed, and the object on the server computer must be configured to allow remote creation.
Typically, you'll use a CreateObject function with a Set statement to assign to an object variable the object that you create. For example, the following statements declare an object variable named myNewSheet and assign an Excel worksheet object to it:
Dim myNewSheet As Object
Set myNewSheet = CreateObject("Excel.Sheet")The GetObject function returns a reference to an existing Automation object. The syntax is as follows:
GetObject([pathname] [,class])
You can provide either argument—but you must provide one of them. Here, pathname is an optional Variant argument of the String subtype specifying the full path and name of the file that contains the object you want to retrieve. pathname is optional, but if you don't specify it, you must specify the class argument. class (which is optional if you specify pathname but required if you don't) is a Variant argument of the String subtype specifying the class of the object you want to return.
As with CreateObject, typically you'll use a GetObject function with a Set statement to assign to an object variable the object that you return with the GetObject function. For example, in the second of the following statements, the GetObject function returns an object consisting of the workbook Z:FinanceRevenue.xlsm. The Set statement assigns this object to the object variable named Revenue declared in the first statement:
Dim Revenue As Object
Set Revenue = GetObject("Z:FinanceRevenue.xlsm")
Here, the workbook is associated with Excel. When this code runs, VBA starts Excel if it isn't already running and activates the workbook. You can then reference the object by referring to its object variable; in this example, you could manipulate the Revenue object to affect the workbook Z:FinanceRevenue.xlsm.
The following sections show three examples of using Automation with the Office applications.
This example transfers information from an Excel spreadsheet to a Word document.
First, add to the target Word project (the project that will contain the code that accesses Excel) a reference to the Excel object library. See the following steps for an example of how to do this:
Start or activate Word, and then press Alt+F11 to launch the VBA Editor.
In the Project Explorer, click the project to which you want to add the reference. For example, if the procedure or procedures will reside in the
Normal.dotmtemplate, select the Normal project in the Project Explorer before adding the reference. Or just choose Insert
Choose Tools
Select the check box for the Microsoft Excel 14.0 Object Library item.
Click the OK button to close the References dialog box.
Once you've added the reference, you can use the Object Browser to browse Excel objects. Display the Object Browser as usual by pressing F2 or choosing View
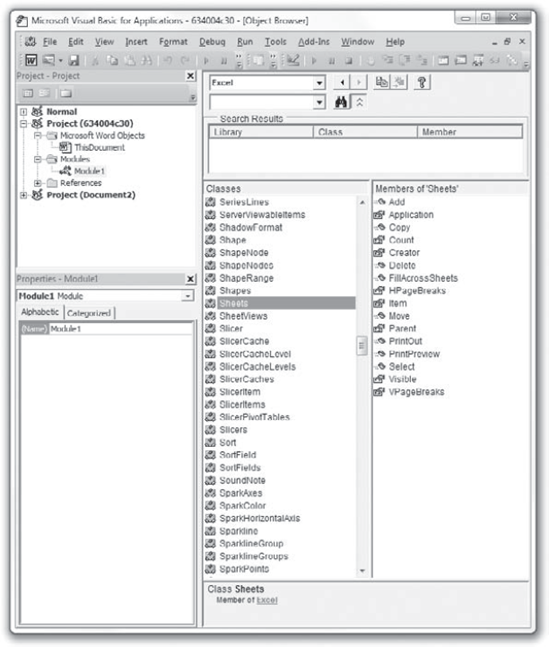
Figure 30.1. Once you've loaded the Excel object library, you can view its contents in the Object Browser from the VBA Editor session launched from the host application (in this case, Microsoft Word).
To create and test the next code example, first set up the preconditions in Excel that this procedure expects: namely, a range object named SalesTotal. To do this, open Excel, and right-click a cell anywhere in the displayed sheet in Book1 (the default name of the first blank workbook). In the context menu, choose the Define Name option. In the New Name dialog box that opens, type SalesTotal in the Name field. Then click OK to close the dialog box.
Now double-click the same cell you just named and type in 145 or some other value. It's this value that your macro in Word will pluck from this workbook. Now click the File tab in the Ribbon, choose Save As, and save this workbook as Book1.xlsx in the C: emp subdirectory. (Note that you're saving it as an .xlsx file.) Now you can either leave Excel running or just close it. It won't matter because our macro will open the file on the hard drive.
Okay, now write the code using the VBA Editor's assistance and code-completion features. Create the procedure shown in Listing 30.1. This procedure uses the GetObject function to retrieve the information from a cell in an Excel spreadsheet and insert it in the active Word document at the current insertion point (where the blinking cursor is).
Example 30.1. Getting data from an Excel cell and inserting it into Word
1.    Sub Return_a_Value_from_Excel()
2.
3.        Dim mySpreadsheet As Excel.Workbook
4.        Dim strSalesTotal As String
5.
6.        Set mySpreadsheet = _
7.            GetObject("C:TempBook1.xlsx")
8.
9.        strSalesTotal = mySpreadsheet.Application.Range("SalesTotal").Value
10.
11.       Set mySpreadsheet = Nothing
12.
13.       Selection.TypeText "Current sales total: $" & strSalesTotal & "."
14.       Selection.TypeParagraph
15.
16.   End Sub
This subprocedure retrieves one piece of information from an Excel spreadsheet that's on the hard drive. Here's what happens in the subprocedure:
Line 3 declares the object variable
mySpreadsheetof the typeExcel.Workbook. Line 4 declares the String variablestrSalesTotal.Line 6 uses a
Setstatement and theGetObjectfunction to makemySpreadsheetreference the spreadsheetC:TempBook1.xlsm.Line 9 assigns to the String variable
strSalesTotaltheValueproperty (the actual data) of theRangeobject namedSalesTotalin the ExcelApplicationobject. You defined theSalesTotalrange as a single cell, sostrSalesTotalreceives the value of that cell.Line 11 assigns to the
mySpreadsheetobject the special valueNothing, releasing the memory it occupied. (Because the procedure ends almost immediately afterward, this statement isn't necessary here. VBA will destroy it at the end of execution of the procedure. But it's good practice to free the memory assigned to an object when you no longer need to use the object, just to get into the habit.)Line 13 uses the
TypeTextmethod of theSelectionobject in Word to enter a string of text and thestrSalesTotalstring at the current selection. Line 14 uses theTypeParagraphmethod to insert a paragraph after the text.
If you have trouble getting this example to work, double-check the following:
Choose Tools
If you see an error message stating "Run-time error '432': File name or class name not found during Automation operation," it means that there's something wrong in this line of code:
Set mySpreadsheet = _
        GetObject("C:TempBook1.xlsx")
Either you've mistyped this path in your code (such as typing
C:Docsrather thanC:Temp) or you have not saved an Excel file namedBook1.xlsxto this folder.If you see an error message stating "Run-time error '1004': Method 'Range' of object '_Application' failed," this is an error in the following line of code:
strSalesTotal = mySpreadsheet.Application.Range("SalesTotal").ValueA failure of this code means either you've got a typo in the code, such as specifying the wrong range name, or there is no range by the name SalesTotal in the Excel workbook you're opening.
We managed to send data from Excel to Word in the previous section. Now let's go the other way.
This next procedure (Listing 30.2) runs as a macro in Word. The procedure requires that Excel be currently running, so the procedure checks for the possibility that Excel isn't executing and handles the error by starting Excel if necessary. The procedure creates a new Excel workbook and then transfers information from Word to the workbook.
As before, you'll find creating this procedure easier if you first add to the current Word project a reference to the Excel object library. (See the previous section for instructions.)
Example 30.2. Sending data from Word to Excel
1.  Sub List_Word_Page_Count_in_Excel_Spreadsheet()
2.
3.      Dim WordCount As Variant
4.      Dim strPath As String
5.      Dim strFile As String
6.      Dim docCurDoc As Document
7.      Dim myXL As Excel.Application
8.      Dim myXLS As Excel.Workbook
9.      Const errExcelNotRunning = 429
10.     Const errDocNotAvailable = 5174
11.
12.     On Error GoTo Handle
13.
14.     ' open the Word document:
15.     strPath = "C:	emp"
16.     strFile = "test.docm"
17.     Set docCurDoc = Documents.Open(strPath & "" _
18.         & strFile, AddToRecentFiles:=False)
19.
20.
21.     'is Excel already running?
22.     Set myXL = GetObject(, "Excel.application")
23.
24.     myXL.Visible = True
25.     Set myXLS = myXL.Workbooks.Add
26.     myXL.ActiveCell.Range("A1").Select
27.     myXL.ActiveCell = "Word Count"
28.
29.     WordCount = docCurDoc _
30.         .BuiltInDocumentProperties(wdPropertyWords)
31.
32.         myXL.ActiveCell.Range("A2").Select
33.         myXL.ActiveCell = WordCount
34.
35.         docCurDoc.Close SaveChanges:=wdDoNotSaveChanges
36.
37. Shutdown:
38.     Set myXL = Nothing
39.     Set myXLS = Nothing
40.
41.     Exit Sub
42.
43. Handle:
44.      If Err.Number = errExcelNotRunning Then
45.         'If no instance of Excel is running then, run it:
46.         Set myXL = CreateObject("Excel.Application")
47.         Err.Clear
48.         Resume Next
49.     ElseIf Err.Number = errDocNotAvailable Then
50.         MsgBox "No Word Document named Test.docm Found"
51.         GoTo Shutdown
52.     Else
53.         Resume Next
54.     End If
55.
56. End Sub
Here's what happens in Listing 30.2:
Line 2 is a spacer. In fact, all blank lines are just spacers—so I won't mention them again.
Line 3 declares the Variant variable that will be assigned the number of words in a Word document. Later, in line 33, this same variable assigns its value to an Excel cell. Line 4 declares the String variable
strPaththat will hold the file path to the Word document, and line 5 declares the String variablestrFilethat will hold the Word document's filename.Line 6 declares the
DocumentvariabledocCurDoc; it will point to the Word document when it is opened using theOpenmethod of theDocumentsobject. Line 7 declares anExcel.Applicationobject variablemyXL, and line 8 declares anExcel.Workbookobject variablemyXLS.Line 9 declares the constant
errExcelNotRunning, setting its value to429. This error number indicates that the procedure attempted to manipulate Excel while no instance of Excel was currently executing. Line 10 declares the constanterrDocNotAvailable, setting its value to5174. This error number indicates that the Word document your procedure attempted to open could not be found.Line 12 starts error handling for the procedure, directing execution to the code below the label
Handlein the event of an error.Line 17 opens the Word document specified by
strPath, a backslash, andstrFile, assigning the document object to thedocCurDocvariable. If the document isn't available, an error occurs and execution is transferred to the error handler code that starts in line 43. This error number matches the constant defined in the procedure aserrDocNotAvailable, so a message box informs the user that the Word document wasn't found. Then execution is transferred to theShutdownlabel where the two object variables are destroyed and the procedure is exited.Line 22 can also potentially trigger an error condition. It attempts to assign a currently executing instance of Excel to the object variable
myXL. However, if this attempt fails, execution is transferred to theHandlelabel. If Excel isn't running at this point, error 429 ("ActiveX component cannot create object") occurs, so line 44 in the error handler checks for this error by using the constanterrExcelNotRunning. If it matches the error number, line 46 assigns tomyXLanewinstance of Excel that it creates by using theCreateObjectfunction. Line 47 then uses anErr.Clearstatement to clear the error, and line 48 contains aResume Nextstatement to cause VBA to resume execution back up at the next statement following the offending statement.One way or another, by the time line 24 is executed,
myXLrefers to a running instance of Excel. Line 24 sets theVisibleproperty ofmyXLtoTrueso that it appears onscreen.Line 25 assigns to
myXLSa new workbook created by using theAddmethod of theWorkbooksobject inmyXL.Line 26 positions the insertion pointer in the first cell.
Line 27 assigns to the active cell in
myXLthe textWord Count.Line 29 assigns the document's word count value to the variable
WordCount. This value is accessed by using thewdPropertyWordsproperty from theBuiltInDocumentPropertiescollection ofdocCurDoc.Line 32 moves the insertion cursor down one row in Excel to cell A2, and line 33 displays the word count in that cell.
Finally, line 35 closes the Word document without saving any changes that may have been made to it while it was opened for inspection.
Line 41 contains an
Exit Substatement to exit the procedure at this point—to avoid permitting execution to continue down into the zone where the error handling statements are. Using anExit Sublike this is common when a procedure includes an error handler at the end.
The next procedure shows how to communicate between PowerPoint and Outlook. This procedure, run from PowerPoint, returns the existing instance of Outlook or (if there is none) creates a new instance. The procedure then uses PowerPoint to send a message that gives details drawn from the presentation.
Listing 30.3 shows the procedure. There's one complication: Because PowerPoint doesn't have a central macro storage project like Word's Normal.dotm or Excel's Personal Macro Workbook, the code must be stored in an open presentation. This could be the presentation that is the subject of the email, but it is much more convenient to maintain a code-only presentation that you open at the beginning of all PowerPoint sessions that require the use of code. This becomes your own personal macro storage system.
In any case, you need some slides from which to pick information that will be sent (and you also need to provide your email address), so follow these steps to set up the necessary preconditions for the upcoming example.
First, prepare the target PowerPoint project (the project that will contain the code that accesses Outlook and will contain the slides you're accessing):
Start PowerPoint. Close the default (empty) presentation by clicking the File tab on the Ribbon and choosing Close. Now click the File tab a second time, click the Sample Templates icon, and double-click the Contemporary Photo Album presentation to load it into PowerPoint.
Launch the VBA Editor by pressing Alt+F11.
In the Project Explorer, click the project to which you want to add the following necessary reference (project names are in boldface in the Project Explorer). For example, if you've designated a code presentation, click it in the Project Explorer before you add the reference. If necessary, choose Insert
Choose Tools
Select the check box for the Microsoft Outlook 14.0 Object Library item.
Click OK to close the References dialog box.
Now enter the code from Listing 30.3 into the module you inserted in step 3.
Example 30.3. Placing a PowerPoint Slide in an Outlook Message
1.  Sub Notify_of_New_Presentation()
 2.
 3.      Dim myPresentation As Presentation
 4.      Dim strPresentationFilename As String
 5.      Dim strPresentationTitle As String
 6.      Dim strPresentationPresenter As String
 7.      Dim myOutlook As Outlook.Application
 8.      Dim myMessage As Outlook.MailItem
 9.      Const errOutlookNotRunning = 429
10.
11.      On Error GoTo ErrorHandler
12.
13.      Set myPresentation = ActivePresentation
14.      With myPresentation
15.          strPresentationFilename = .FullName
16.          strPresentationTitle = _
                 .Slides(1).Shapes(3).TextFrame.TextRange.Text
17.          strPresentationPresenter = _
                 .Slides(2).Shapes(2).TextFrame.TextRange.Text
18.      End With
19.
20.      Set myOutlook = GetObject(, "Outlook.Application")
21.      Set myMessage = myOutlook.CreateItem(ItemType:=olMailItem)
22.      With myMessage
         ' replace the following line with your email address:
23           .To = "[email protected]"
24.
25.          .Subject = "Presentation for review: " & strPresentationTitle
26.          .BodyFormat = olFormatHTML
27.          .Body = "Please review the following presentation:" & _
                 vbCr & vbCr & "Title: " & strPresentationTitle & vbCr & _
                 "Presenter: " & strPresentationPresenter & vbCr & vbCr & _
                 "The presentation is in the file: " & _
                 strPresentationFilename
28.          .Send
29.      End With
30.
31.      myOutlook.Quit
32.
33.      Set myMessage = Nothing
34.      Set myOutlook = Nothing
35.      Exit Sub
36.  ErrorHandler:
37.      If Err.Number = errOutlookNotRunning Then
38.          Set myOutlook = CreateObject("Outlook.Application")
39.          Err.Clear
40.          Resume Next
41.      Else
42.          MsgBox Err.Number & vbCr & Err.Description, vbOKOnly + _
                 vbCritical, "An Error Has Occurred"
43.    End If
44.
45.  End Sub
Here's what happens in Listing 30.3:
Line 3 declares a
Presentationobject variable namedmyPresentation. Line 4 declares a String variable namedstrPresentationFilename, which is used for storing the path and filename of the presentation. Line 5 declares a String variable namedstrPresentationTitle, which is used to store the title of the presentation. Line 6 declares a String variable namedstrPresentationPresenter, which is used to store the name of the presenter of the presentation.Line 7 declares an
Outlook.Applicationobject variable namedmyOutlookthat is used to represent the Outlook application. Line 8 declares anOutlook.MailItemobject variable namedmyMessagethat is used to represent the message that the procedure creates. Line 9 declares a constant namederrOutlookNotRunningand assigns to it the number429, the error number returned if no instance of Outlook is available when theGetObjectfunction tries to access it.Line 11 starts error handling for the procedure, directing execution to the label
ErrorHandler(in line 36) in the event of an error.Line 13 assigns the active presentation to the
myPresentationobject variable. Lines 14 through 18 contain aWithstructure that works withmyPresentation. Line 15 assigns theFullNameproperty ofmyPresentationtostrPresentationFilename.Line 16 assigns to
strPresentationTitletheTextproperty of theTextRangeobject in theTextFrameobject in the thirdShapeobject on the firstSlideobject—in other words, the text from the first placeholder shape on the first slide in the presentation. Similarly, line 17 assigns tostrPresentationPresenterthe text from the second shape on the second slide.Line 20 assigns to
myOutlookthe current instance of Outlook, which it returns using theGetObjectfunction. If Outlook isn't running at this point, error 429 ("ActiveX component cannot create object") occurs, so line 37 in the error handler checks for this error by using the constanterrOutlookNotRunning. If it matches, line 38 assigns tomyOutlooka new instance of Outlook that it creates by using theCreateObjectfunction. Line 39 then uses anErr.Clearstatement to clear the error, and line 40 contains aResume Nextstatement to cause VBA to resume execution at the statement after the offending statement.Line 21 uses the
CreateItemmethod of the OutlookApplicationobject (represented bymyOutlook) to create a new mail item (a new email), which it assigns tomyMessage. Lines 22 through 29 contain aWithstructure that works withmyMessage.Line 23 assigns recipients by setting the
Toproperty (you should change this line to your own email address so you can test this code and receive the message it sends).Line 24 is a placeholder.
Line 25 enters text for the
Subjectproperty. Line 26 specifies that the message use HTML formatting (.BodyFormat = olFormatHTML). Line 27 assigns text to the body of the message by using theBodyproperty. Line 28 then uses theSendmethod to send the message.Line 31 uses the
Quitmethod to closemyOutlook.Line 33 sets
myMessagetoNothing, releasing the memory it occupied. Similarly, line 34 setsmyOutlooktoNothing. Line 35 then exits the procedure.As discussed earlier in this list, the primary function of the error handler is to launch an instance of Outlook if none is currently running. If any other error than error 429 occurs, execution branches to the
Elsestatement in line 41, and line 42 displays a message box that gives the error number and description.
If you test this example, be sure to change line 23 from my email address to your email address.
Instead of using the CreateObject function to start an application and return a reference to it, you can use the Shell function to run an application. Shell can run any executable program, and its syntax is straightforward:
Shell(pathname[,windowstyle])
Here, pathname is the file path and program name of the program you want the Shell command to execute. Also include in the pathname any necessary command-line switches or arguments required by that program.
windowstyle is an optional Variant argument of the Integer subtype that you use to specify the type of window in which to run the application. Table 30.1 lists the constants and values for windowstyle.
Table 30.1. Constants and values for the windowstyle argument
Constant | Value | Window Style |
|---|---|---|
|
| Minimized and hidden, but with focus |
|
| Normal ("restored") with focus |
|
| Minimized with focus (the default) |
|
| Maximized with focus |
|
| Normal ("restored") without focus |
|
| Minimized without focus |
The Shell function returns a unique task identification number (task ID) that identifies the application it has just started. You can use this task ID to quickly access the application without having to go through the list of all the applications that are running.
To return the task ID of an application, assign the task ID to a variable when you run the Shell statement. The following example runs Lotus 1-2-3 and assigns the task ID to the MyTaskID variable:
Dim myTaskID As Long
myTaskID = Shell("c:lotus123programs123w.exe")To activate an application (switch the focus to a running application), you can use the AppActivate statement. AppActivate activates, but doesn't maximize or restore an application—so if the application is minimized, focus will be shifted to its taskbar icon but the application won't be displayed. (To maximize, minimize, or restore an application window, use the Shell statement as discussed in the previous section of this chapter.)
The syntax for AppActivate is as follows:
AppActivate title[, wait]
Here, title is a required String specifying the title contained in the title bar of the application window to be activated. For example, to activate Excel, you'd specify Microsoft Excel for title because Excel displays "Microsoft Excel" in its title bar:
AppActivate "Microsoft Excel"
If you have two or more sessions of Excel running, VBA arbitrarily picks one. To avoid this random choice, you can specify the full title that's displayed in the title bar—for example, Microsoft Excel - Book2.
You can also activate an application by using the task ID for the application that was returned by the Shell function. Using the task ID eliminates the possibility of confusing multiple sessions of the same application. Each ID is unique.
wait is an optional Boolean value that defaults to False. You can set wait to True to have the calling application wait until it has the focus before it can call the other application. You might want to set wait to True to avoid having the calling application interrupt a sensitive process that had the focus.
For example, the following statement activates PowerPoint:
AppActivate "Microsoft PowerPoint"
The following statements start a utility program called renumber.exe and assign its task ID to a variable and then use the variable to activate renumber.exe:
Dim myTaskID As Long
myTaskID = Shell("c:Renumber
enumber.exe")
AppActivate MyTaskIDAs you've seen so far in this book, you can store information in many places using VBA. But what you may find uniquely useful about the data object is its ability to return information from, and write information to, the Clipboard. This chapter is all about ways to communicate between applications, and the Clipboard is one such tool.
As you'll see in the example code later, it's necessary to set a reference to the Microsoft Forms 2.0 Object Library before you can use the data object.
A data object is logically attached to a UserForm object in the Microsoft Forms object model, but you can use a data object without using a user form. A data object, which is represented in VBA by the DataObject object, is an object in which you store data. Each data object can hold multiple pieces of textual information, and each piece must be in a different, defined format. You can create and use multiple data objects to store multiple pieces of data in the same format, or you can cheat and tell VBA that information is in a different format when really it's not.
At any given time, the Clipboard can contain one text item and one item in another format, such as a graphical object. If you copy another text item to the Clipboard, that item will overwrite the previous text item, but any graphical item on the Clipboard will remain unscathed. Likewise, if you copy a graphical item to the Clipboard, it will overwrite any previous graphical item (or indeed any item in a nontext format) stored on the Clipboard, but any text item on the Clipboard won't be affected.
The data object works in a similar but different way: It can't store graphical information, but it can store multiple pieces of textual information, each defined as being in a different format. (Remember, though, that these pieces of data don't actually have to be in different formats.)
To create a data object, declare an object variable of the DataObject type and then use a Set statement to assign a new DataObject object to it. For example, the following statements declare a DataObject variable named myDObj and assign a new DataObject to it:
Dim myDObj As DataObject
Set myDObj = New DataObject
To store information in a data object, use the SetText method. The SetText method takes the following syntax:
object.SetText(StoreData [, format])The components of the syntax are as follows:
objectis a required argument specifying a valid object.StoreDatais a required argument specifying the data to store in the data object.formatis an optional argument containing an Integer value or a String specifying the format of the information inStoreData. A value of1indicates text format; a value other than1or a String indicates a user-defined format.
For example, the following statement stores the text Sample text string in the DataObject named myDObj:
myDObj.SetText "Sample text string"
The following statement stores the text Sample formatted text string in the DataObject named myDObj, defining and using the custom format myFormat:
myDObj.SetText "Sample formatted text string", "myFormat"
Once the custom format has been defined and stored in the data object, you can access the data stored in that format by specifying the format. In this case, no formatting is actually involved—the code simply uses the format argument to create and identify a different data slot in the data object so that the new string doesn't overwrite the existing text string. It's a trick.
To return information from a data object, use the GetText method of the DataObject object. The GetText method takes the following syntax:
object.GetText([format])The components of the syntax are as follows:
objectis a required argument specifying a valid object.formatis an optional argument containing a String or an Integer specifying the format of the data to retrieve.
For example, the following statement displays a message box containing the plain-text string stored in the DataObject named myDObj:
MsgBox myDObj.GetText
The following statement assigns to the String variable strTemp the text stored with the myFormat format in the DataObject named myDObj:
strTemp = myDObj.GetText("myFormat")Here's a working code example that illustrates how to create a data object and then use it to store and retrieve information. First, choose Tools
Type this working example into an application's VBA Editor, and press F5 to see it execute:
Sub StoreText()

   Dim myDObj As DataObject

   Set myDObj = New DataObject

   myDObj.SetText "Sample text string"

   MsgBox myDObj.GetText


End Sub
To assign text to the Clipboard from a data object, use the PutInClipboard method of the DataObject. For example, the following statements create a new data object named myDO, assign to it the text Nasta Louise Alarez, and then assign that text to the Clipboard:
Sub StoreText()

Dim myDO As DataObject
Set myDO = New DataObject
myDO.SetText "Nasta Louise Alarez"
myDO.PutInClipboard

End Sub
Test this by pressing F5, and then press Ctrl+V to display the Clipboard contents.
To fetch whatever text information is in the Clipboard and store it in a data object, use the GetFromClipboard method of the DataObject object. For example, the following statements create a data object referenced by the variable aDO, assign to it the text from the Clipboard, and then display the text:
Sub GetClipboardText()

Dim aDO As DataObject
Set aDO = New DataObject
aDO.GetFromClipboard

MsgBox aDO.GetText

End Sub
To return formatted information from the Clipboard and store it in a data object, use the GetFormat method of the DataObject object.
To find out whether a data object contains a given format, use the GetFormat method of the DataObject object. The syntax for the GetFormat method is as follows:
object.GetFormat(format)Here are the components of the syntax:
objectis a required argument that returns a validDataObjectobject.formatis an Integer or String specifying the format you're looking for. If theDataObjectcontains the format,GetFormatreturnsTrue; if not,GetFormatreturnsFalse.
For example, the following statement checks to see if the DataObject named myDO contains the format myHTML and assigns the format's contents to the string strHTMLText if it does:
If myDO.GetFormat("myHTML") = True Then _
strHTMLText = myDO.GetText(Format:="myHTML")If the application with which you want to communicate doesn't support Automation, you can try Dynamic Data Exchange (DDE). DDE is a protocol that establishes between two applications a channel through which they can automatically exchange data. DDE can be tricky to set up, but once you get it working, it is usually reliable.
Not all applications support DDE. Among the Office applications, Word, Excel, and Access support DDE, but PowerPoint and Outlook do not.
In the following descriptions of DDE statements, I'll use the term method in its more generic, non-OOP sense. Back long, long ago when DDE was introduced (in Windows 3.0!), object-oriented programming wasn't yet fashionable.
A typical DDE conversation can contain the following actions:
Using the
DDEInitiatemethod to start a DDE connection and establish the channel on which the connection operatesUsing the
DDERequestmethod to return text from the other application or theDDEPokemethod to send text to the other applicationUsing the
DDEExecutemethod to execute a command in the other applicationUsing the
DDETerminatemethod to close the current DDE channel or using theDDETerminateAllmethod to close all the DDE channels
To start a DDE connection, you use the DDEInitiate method. The DDEInitiate method employs the following syntax:
expression.DDEInitiate(App, Topic)The components of the syntax are as follows:
expressionis an optional expression specifying anApplicationobject.Appis a required String argument specifying the name of the application with which the DDE connection is to be started.Topicis a required String argument specifying the DDE topic (such as an open file) in the application. To discover the list of topics available for an application, you send a DDE request (via theDDERequestmethod, discussed in the next section) to theSystemobject in the application.
DDEInitiate returns the number of the DDE channel established. You then use this number for subsequent DDE calls.
For example, the following statements declare the Long variable lngDDEChannel1 and assign to it a DDE channel established with the workbook Sales Results.xlsm in Excel:
Dim lngDDEChannel1 As Long
lngDDEChannel1 = DDEInitiate("Excel", "Sales Results.xlsm")To return a string of text from another application, you use the DDERequest method. The DDERequest method takes the following syntax:
expression.DDERequest(Channel, Item)The components of the syntax are as follows:
expressionis an optional expression that returns anApplicationobject.Channelis a required Long argument specifying the DDE channel to use for the request.Itemis a required String argument specifying the item requested.
To get the list of topics available via DDE, request the Topics item from the System topic. For example, the following statements establish a DDE channel to FrontPage (by using DDEInitiate) and return the list of DDE topics, assigning the list to the String variable strDDETopics:
Dim lngDDE1 As Long
Dim strDDETopics As String
lngDDE1 = DDEInitiate(App:="FrontPage", Topic:="System")
strDDETopics = DDERequest(Channel:=lngDDE1, Item:="Topics")
Open Excel, click the File tab on the Ribbon, and then click the New option. Double-click Installed Templates, and then double-click Sales Report. Now open Word's VBA Editor and type in the following procedure. The following statements establish a DDE channel to the workbook SalesReport1.xlsm in Excel and return the contents of cell C7 (R7C3) in the String variable strResult:
Sub DDEtoExcel()

Dim lngDDEChannel1 As Long, strResult As String
lngDDEChannel1 = DDEInitiate("Excel", "SalesReport1")
strResult = DDERequest(lngDDEChannel1, "R7C3") MsgBox strResult DDETerminateAll End Sub
For DDE to work, you have to use the correct, full name of the target document as it appears in the title bar of the application. In this case, your target document is an Excel workbook. The previous code works only if you haven't yet saved the SalesReport1 workbook because before it's saved, a new workbook has no filename extension appended to its name. However, if you have already saved this workbook, you must append whatever filename extension you employed, such as .xlsm. Here's an example:
lngDDEChannel1 = DDEInitiate("Excel", "SalesReport1.xlsm")The DDETerminateAll statement is explained shortly.
To send text to another application, use the DDEPoke method. The DDEPoke method takes the following syntax:
expression.DDEPoke(Channel, Item, Data)The components of the syntax are as follows:
expressionis an optional expression that returns anApplicationobject.Channelis a required Long argument specifying the DDE channel to use.Itemis a required String argument specifying the item to which to send the data.Datais a required String argument specifying the data to be sent.
Continuing the previous example, the following statements use the DDEPoke method to assign the data 2000 to cell C7 in the worksheet if the value of the result returned is less than 2000:
Sub DDEPokeExcel()

Dim lngDDEChannel1 As Long, strResult As String
lngDDEChannel1 = DDEInitiate("Excel", "SalesReport1.xlsm")
strResult = DDERequest(lngDDEChannel1, "R7C3")
DDEPoke Channel:=lngDDEChannel1, Item:="R7C3", Data:="599"
DDETerminateAll
End SubTo execute a command in another application, use the DDEExecute method. The DDEExecute method takes the following syntax:
expression.DDEExecute(Channel, Command)The components of the syntax are as follows:
expressionis an optional expression that returns anApplicationobject.Channelis a required Long argument specifying the DDE channel to use.Commandis a required String argument specifying the command or series of commands to execute.
For example, the following statements establish a DDE channel to Excel and issue a Close command to close the active workbook:
Dim lngMyChannel
lngMyChannel = DDEInitiate(App:="Excel", Topic:="System")
DDEExecute lngMyChannel, Command:="[Close]"
When you've finished a DDE communication, use the DDETerminate method to close the DDE channel you opened. The syntax for the DDETerminate method is as follows:
expression.DDETerminate(Channel)Here are the components of the syntax:
expressionis an optional expression that returns anApplicationobject.Channelis a required Long argument specifying the DDE channel to close.
The following statements continue the previous example, closing the DDE channel that was opened:
Dim lngMyChannel
lngMyChannel = DDEInitiate(App:="Excel", Topic:="System")
DDEExecute lngMyChannel, Command:="[Close]"
DDETerminate lngMyChannel
To close all open DDE channels, use the DDETerminateAll method:
DDETerminateAll
Because VBA doesn't automatically close DDE channels when a procedure ends, it's a good idea to use a DDETerminateAll statement to make sure you haven't inadvertently left any DDE channels open.
The SendKeys statement is a basic and limited form of communication with other applications. You may find SendKeys useful if neither Automation nor DDE works with the target application. But SendKeys does have limitation, as you'll see shortly.
SendKeys sends the specified keystrokes to the destination application. For example, to use SendKeys to send the command to create a new file in Notepad, you send the keystrokes for Alt+F, N (to execute the File
SendKeys works only with currently running Windows applications: You can't use SendKeys to start another application (for that you need to use Shell, as discussed earlier in this chapter), nor can you use SendKeys to communicate with DOS applications running in virtual DOS machines under Windows.
The syntax for the SendKeys statement is as follows:
SendKeys string[, wait]
Here, string is a required String expression specifying the keystrokes to be sent to the destination application. wait is an optional Boolean value specifying whether to wait after sending the keystrokes until the application has executed them (True) or to immediately return control to the procedure sending the keystrokes (False, the default setting). The True setting, however, can prevent some kinds of timing problems.
Typically, string consists of a series of keystrokes (rather than a single keystroke). All alphanumeric characters that appear on the regular keyboard are represented by the characters themselves: To send the letter H, you specify H in the string, and to send the word Hello, you specify Hello in the string. To denote the movement and editing keys, SendKeys uses keywords enclosed within braces ({}), as described in Table 30.2.
Table 30.2. SendKeys keywords for movement and editing keys
Key | Code |
|---|---|
, |
|
fl |
|
‡ |
|
· |
|
Backspace |
|
Break |
|
Caps Lock |
|
Delete |
|
End |
|
Enter |
|
Esc |
|
F1, F2, etc. |
|
Help |
|
Home |
|
Insert |
|
NumLock |
|
Page Down |
|
Page Up |
|
Print Screen |
|
Scroll Lock |
|
Tab |
|
To send meta keys, use the symbols shown in Table 30.3.
SendKeys automatically assigns the keystroke after the meta key to the meta key. For example, to send a Ctrl=O keystroke, you specify ^O, and SendKeys assigns the O to the Ctrl keystroke; the next keystroke after the O is considered to be struck separately. If you need to assign multiple keystrokes to the meta key, enter the keystrokes in parentheses after the meta key. For example, to send Alt=F, Alt=I, Alt=I, you'd specify %(FII) rather than %FII.
SendKeys has special meanings for the plus sign (=), caret (^), percent sign (%), and parentheses (); the tilde (∼) gets special treatment as well. To use these characters to represent themselves, enter them within braces: {=} sends a regular = sign, {^} a regular caret, {%} a percent sign, {∼} a tilde, and {()} parentheses. Likewise, you must enclose brackets (which have a special meaning in DDE in some applications) within braces; braces themselves also go within braces.
Using SendKeys is much less complex than these details initially make it appear—and with that reassurance, there's one more trick you should know: To repeat a key, enter the key and the number of repetitions in braces. For example, to send five ↑ keystrokes, you'd specify {UP 5}; to send 10 zeroes, you'd specify {0 10}.
Listing 30.4 shows an example of using SendKeys to start Notepad and send log-file information to it.
Example 30.4. Automating Notepad with SendKeys
1.  Sub Send_to_Notepad()
 2.      Dim strLogDate As String
 3.      Dim strSaveLog As String
 4.      Dim strMsg As String
 5.      Dim appNotepad As Variant
 6.      strMsg = "Sample log text here."
 7.      strLogDate = Month(Now) & "-" & Day(Now) & "-" & Year(Now)
 8.      strSaveLog = "Log file for " & strLogDate & ".txt"
 9.      appNotepad = Shell("notepad.exe", vbNormalFocus)
10.      AppActivate appNotepad
11.      SendKeys strMsg & "%FS" & strSaveLog & "{Enter}" & "%{F4}", True
12.  End Sub
Here's how the code works:
The
Send_to_Notepadprocedure starts by declaring (in lines 2, 3, and 4) three String variables—strLogDate, strSaveLog, andstrMsg—and (in line 5) one Variant variable,appNotepad.Line 6 then assigns to
strMsga sample string of text.Line 7 assigns to
strLogDatea date built of theDay, Month, andYearvalues forNow(which returns the current date and time). For example, if the date is July 11, 2008,Month(Now)will return7, Day(Now)will return11, andYear(Now)will return2008, so thestrLogDatestring will contain7-11-2008.Line 8 then assigns to the
strSaveLogstring (which will be used to supply the filename for the log file) text describing the file, thestrLogDatestring, and the.txtfilename extension (to continue our example,Log file for 7-11-2008.txt).In line 9, the procedure finally gets down to business, using the
Shellstatement to run Notepad in a "normal" (not maximized or minimized) window with focus and storing the task ID of the Notepad session in the variableappNotepad.Line 10 then uses an
AppActivatestatement to activate Notepad.Line 11 uses a
SendKeysstatement to send to Notepad the following:The information contained in the String variable
strMsg.An Alt=F keystroke (to pull down the File menu), followed by an S keystroke to choose the Save item on the menu. This keystroke displays the Save As dialog box with the File Name text box selected.
The
strSaveLogString variable, which is entered in the File Name text box.An Enter keystroke to choose the Save button in the Save As dialog box.
An Alt=F4 keystroke to quit Notepad.
Line 12 ends the procedure.
When you run this procedure (again, you need to run the procedure by pressing F5 rather than stepping into it with F8), you'll see the following:
Notepad springs to life.
The contents of the
Msgstring appear in the Notepad window.The Save As dialog box displays itself, enters the filename in the File Name text box, and then dismisses itself.
Notepad closes.
Because SendKeys was historically most often employed to open an application's menus and select an option from the menus, you might think that Vista and Windows 7 applications—which are largely menu free—would seriously curtail the flexibility of the SendKeys technique. However, this isn't true. Many of the features of the Ribbon, for example, are accessible via key combinations. Try pressing the sequence Alt, W, Q, 2, and the Enter key in Word; it will switch to the View tab on the Ribbon, select the Zoom option, and switch to a 200% zoom. The difference here is that instead of employing the traditional approach of simultaneously pressing the Alt key while pressing other keys (such as Alt+V to open a View menu), in Vista and Windows 7 you press and release Alt by itself, then you press the W key to switch to the View tab on the Ribbon. At this point, additional keystrokes are possible to activate the various options on the View tab. To exit from this mode, press Esc.
Here's another code example, which illustrates how to manipulate applications employing the Ribbon. This time Excel, not Notepad, is the target, and the Ribbon is manipulated. You send an Alt key by itself (this activates the shortcut key feature on the Ribbon and the Quick Access Toolbar as well, displaying a variety of keys you can choose from). Then in the following procedure you switch to the View tab (a W does that), and finally you select full-screen mode by sending E:
Sub Send_to_Excel()

    Dim appExcel As Variant

    appExcel = Shell("Excel.exe", vbNormalFocus)
AppActivate appExcel
SendKeys "%", True 'send Alt by itself
SendKeys "W", True 'W for the View tab
SendKeys "E", True 'E for full screen mode
End Sub- Use Automation to transfer information
Automation sets up communication between two applications, designating one of them as the server and the other as the client.
- Master It
Of the various ways to communication between applications, which is generally the most effective?
- Use the
Shellfunction to run an application Although the
Shellfunction can prove useful in a variety of inter-application communication situations,Shellcan also present the programmer with a timing problem.- Master It
Describe the timing issues that the
Shellfunction raises, and name a good solution to this problem.
- Use data objects to store and retrieve information
This book has described a variety of ways to store and retrieve information when working with the VBA language. Using data objects are among these useful techniques.
- Master It
How is the data object technology special as a way of storing and retrieving information; what can a data object do that's unique?
- Communicate via DDE
Dynamic Data Exchange (DDE) is a technology introduced back in May 1990 with Windows 3.0. Use it if other, more efficient communication technologies are unavailable to the applications you are working with.
- Master It
Not all applications support DDE. Which Office 2010 applications don't support DDE communication?
- Communicate via
SendKeys Using
SendKeysis a fairly simple, rather awkward, and limited way to communication between applications. It imitates typing in keystrokes, thereby allowing you to manipulate an application by accessing some of its features using, for example, Alt+key combinations, such as Alt+F to open a File tab on the Ribbon.- Master It
SendKeyswas historically most often employed to open an application's menus and select an option from the menus. Because Vista and Windows 7 applications largely do away with traditional menus, isSendKeysof even more limited use in Vista and Windows 7 than in previous versions of Windows?