
This chapter shows you how to start working with the PowerPoint object model, the architecture underlying PowerPoint. The chapter demonstrates how to perform common actions with the most immediately useful PowerPoint objects. These objects include the Presentations collection and the Presentation object, the ActivePresentation object, the Slides collection and Slide objects, Window objects, and Master objects.
In this chapter you will learn to do the following:
Understand the PowerPoint object model
Understand PowerPoint's creatable objects
Work with presentations
Work with windows and views
Work with slides
Work with masters
You can write VBA code without understanding how the PowerPoint object model fits together, but most people find that familiarity with the main objects in the object model is helpful. Also, the code examples in the Help system's object model reference can be invaluable. They show how and where to employ objects in your own programming.
To begin exploring the PowerPoint object model, follow these steps:
Launch or activate PowerPoint, and then press Alt+F11 to launch or activate the VBA Editor.
Press F1 to open the Help dialog box.
If necessary, click the book icon (second from the right in the row of icons in the PowerPoint Help dialog box). This opens the table of contents.
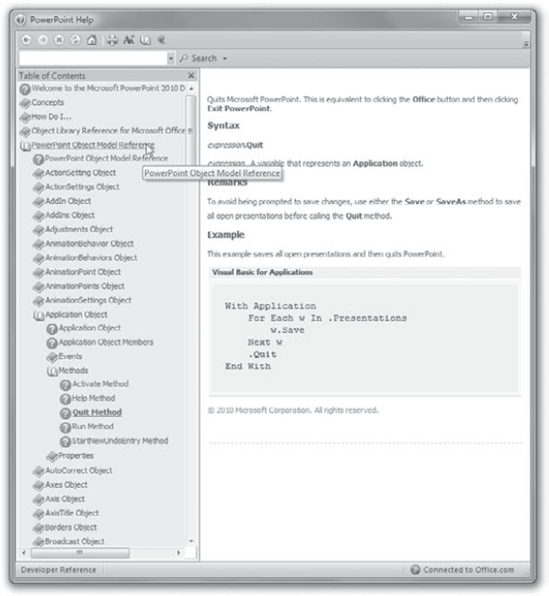
In the table of contents, click PowerPoint Object Model Reference. You'll now see the whole collection of syntax specifications, useful descriptions, and code examples, as shown in Figure 24.1.
In PowerPoint, the Application object gives you access to all the objects in the PowerPoint application. But for many operations, you can go directly through one of the "creatable" objects available in PowerPoint. (Recall that creatable merely means you can optionally leave out the word Application when specifying a creatable object in your code.) The four most useful creatable objects are listed here:
The
ActivePresentationobject represents the active presentation.The
Presentationscollection contains thePresentationobjects, each of which represents one of the open presentations.The
ActiveWindowobject represents the active window in the application.The
SlideShowWindowscollection contains theSlideShowWindowobjects, each of which represents an open slide show window. This collection is useful for manipulating a slide show that's currently displayed.
Within a presentation, you'll typically find yourself working with the Slides collection, which contains all the Slide objects that represent the slides. On a slide, most items are represented by Shape objects gathered into the Shapes collection. For example, the text in a typical placeholder is contained in the Text property of the TextRange object in the TextFrame object within a Shape object on a slide.
To get any work done in PowerPoint, you'll usually need to work with one or more presentations. VBA uses the Presentation object to represent a presentation and organizes the open Presentation objects into the Presentations collection.
You can create a new presentation based on the default template. This is equivalent to clicking the File tab on PowerPoint's Ribbon, then clicking the New option in PowerPoint. To do this, use the Add method with the Presentations collection. The syntax is as follows:
expression.Add(WithWindow)Here are the components of this syntax:
expressionis a required expression that returns aPresentationsobject. Often, it's easiest to use thePresentationsobject itself.WithWindowis an optional Long argument. SetWithWindowtomsoFalseto prevent the new presentation from being visible—for example, so that you can create and manipulate it without the user seeing the details. (You may want to temporarily hide the presentation so that the user doesn't have to endure the irritating flickering effect that PowerPoint tends to exhibit while creating presentation objects programmatically.) The default value ismsoTrue, making the new presentation visible.
For example, the following statements declare an object variable of the Presentation type named myPresentation, create a new presentation, assign the new presentation to myPresentation, and make it invisible to the user:
Dim myPresentation As Presentation
Set myPresentation = Presentations.Add(WithWindow:=msoFalse)To create a new presentation based on a template other than the default template, use the Open method of the Presentations collection. The syntax is as follows:
expression.Open(FileName, ReadOnly, Untitled, WithWindow)The components of the syntax are explained here:
expressionis a required expression that returns aPresentationsobject. Often, it's easiest to use thePresentationsobject itself.FileNameis a required String argument that specifies the path and name of the file to use as a template for the new presentation. This file can be either a template in the conventional sense or a presentation that you want to use as a template.ReadOnlyis an optional argument that specifies whether the file is opened with read-only status (msoTrue) or with read/write status (msoFalse). When creating a new presentation based on a template, you don't need to specifyReadOnly.Untitledis an optional argument that specifies whether to open the file as itself (msoFalse) or as a copy (msoTrue). When creating a new presentation based on a template, setUntitledtomsoTrue.WithWindowis an optional argument that you can set tomsoFalseto prevent the new presentation from being visible. The default value ismsoTrue, making the new presentation visible.
For example, the following statement creates a new presentation based on the template named Capsules.potm in the C:Program FilesMicrosoft OfficeTemplatesPresentation Designs folder:
Presentations.Open _
FileName:="C:Program FilesMicrosoft OfficeTemplatesPresentation DesignsCapsules.potm", Untitled:=msoTrueTo open an existing presentation already on the hard drive, use the Open method of the Presentations collection. The syntax is as shown in the previous section. The difference is that you use the FileName argument to specify the presentation you want to open (as opposed to the file that you want to use as the template for creating a new presentation) and either omit the Untitled argument or set it to msoFalse. You may also need to use the OpenConflictDocument argument to specify how to handle any conflict file that exists for the presentation you're opening.
For example, the following statement opens the existing presentation named Train Time.pptm stored in the folder Z:Public, opening the presentation for editing rather than opening it as read-only:
Presentations.Open FileName:="Z:PublicTrain Time.pptm", ReadOnly:=msoFalseThe first time you save a presentation, you must specify the path and filename to use. After that, you can save the presentation under the same name or specify a different path, name, format, or all three. This is the same distinction between the Save and Save As options on the File tab of the Ribbon.
To save a presentation for the first time, or to save a presentation using a different path, name, or format, use the SaveAs method. The syntax is as follows:
expression.SaveAs(Filename, FileFormat, EmbedFonts)
Here are the components of this syntax:
expressionis a required expression that returns aPresentationobject.Filenameis a required String argument that specifies the filename under which to save the presentation. Normally, you include the path inFilename; if you omit the path, PowerPoint uses the current folder.FileFormatis an optional argument that specifies the file format to use. Although there are 32 totalSaveAsconstants, Table 24.1 lists only the 8 most widely useful formats.EmbedFontsis an optional argument that you can set tomsoTrueto embed TrueType fonts in the presentation, or toFalse(the default) to not embed them.
Table 24.1. FileFormat constants for saving PowerPoint files
Constant | |
|---|---|
PowerPoint format |
|
Default format (set on the Save tab of the Options dialog box) |
|
Single-file web page |
|
Web page |
|
PowerPoint 95 |
|
Presentation for Review |
|
Design Template |
|
PowerPoint Show |
|
For example, the following statement saves the presentation identified by the object variable myPresentation under the name HR.pptm in the folder Z:SharedPresentations, using the PowerPoint 95 format and not embedding fonts:
myPresentation.SaveAsFileName:="Z:SharedPresentationsHR.pptm", _ FileFormat:=ppSaveAsPowerPoint7, EmbedTrueTypeFonts:=msoFalse
To save a presentation under its existing name, use the Save method. This method takes no arguments. For example, the following statement saves the active presentation:
ActivePresentation.Save
If the presentation on which you use the Save method has never been saved, PowerPoint doesn't prompt the user to specify the filename and location. Instead, PowerPoint saves the presentation using the default name assigned to its window (for example, a presentation whose window is called Presentation11 will be saved as Presentation11.pptm) and in the current folder. To avoid using this default name and location, you can check the Path property of the Presentation object before using the Save method if you need to determine whether the presentation has been saved. If it has not been saved (if Path = ""), then you would use the SaveAs method to specify the folder and title you want to use, as in this example:
If ActivePresentation.Path = "" Then
    ActivePresentation.SaveAs FileName:="z:publicpresentationsCorporate.pptm"
Else
    ActivePresentation.Save
End IfInstead of using the SaveAs method to save a presentation under a different name, you can use the SaveCopyAs method to save a copy of the open presentation without affecting the open presentation (the presentation remains open, and any unsaved changes remain unsaved). The syntax and arguments for the SaveCopyAs method are the same as for the SaveAs method:
expression.SaveAs(Filename, FileFormat, EmbedFonts)
For example, the following statement saves a copy of the active presentation under the name Copy 1.pptm in the folder Z:PublicPresentations, using the same file format as the presentation currently uses:
ActivePresentation.SaveCopyAs FileName:="Z:PublicPresentationsCopy 1.pptm"
The Presentations collection doesn't have a Save method, but you can save all open presentations by using a loop such as that shown in the following subroutine. This subroutine leaves unsaved any presentation that doesn't yet have a filename assigned.
Sub Save_All_Presentations()
    Dim myPresentation As Presentation
    For Each myPresentation In Presentations
        If myPresentation.Path <> "" Then myPresentation.Save
    Next myPresentation
End SubTo close a presentation, use the Close method of the appropriate Presentation object. The Close method takes no arguments. For example, the following statement closes the active presentation:
ActivePresentation.Close
If the presentation you're closing contains unsaved changes, PowerPoint prompts the user to save them. To avoid the user's being prompted, set the Saved property of the Presentation object to True before using the Close method. Here's an example:
With Presentations("Karelia Industry.pptm")
    .Saved = True
    .Close
End WithYou can export an entire presentation, a single slide, or a range of slides by using the Export method of the Presentation object, the Slide object, or a SlideRange object. The syntax for the Export method with a Presentation object is as follows:
expression.Export(Path, FilterName, ScaleWidth, ScaleHeight)The syntax for the Export method with a Slide object or a SlideRange object is almost the same:
expression.Export(FileName, FilterName, ScaleWidth, ScaleHeight)Here are the components of this syntax:
expressionis a required expression that returns aPresentationobject, aSlideobject, or aSlideRangeobject, as appropriate.Path(for aPresentationobject) is a required String argument that specifies the path of the folder in which to save the graphics files of the slides.FileName(for aSlideobject or aSlideRangeobject) is a required String argument that specifies the filename to use for the exported graphic. Include the path inFileNameunless you want PowerPoint to use the current folder.FilterNameis a required String argument that specifies the filter to use. Use the registered filename extension (JPG, TIF, BMP, orPNG) forFilterName.ScaleWidthis an optional Long argument that you can include to specify the width of the graphic in pixels.ScaleHeightis an optional Long argument that you can include to specify the height of the graphic in pixels.
For example, the following statement exports all the slides in the active presentation to 800 × 600 JPG graphics in the Z:PublicPresentations folder. PowerPoint names the graphics Slide1, Slide2, and so on:
ActivePresentation.Export Path:="Z:PublicPresentations", _
    FilterName:="JPG", ScaleWidth:=800, ScaleHeight:=600
The following statement exports the sixth slide in the active presentation to the file named Slide6.png in the Z:PublicPresentations folder, using the PNG format:
ActivePresentation.Slides(6).Export _
FileName:="Z:PublicPresentationsSlide6.png", FilterName:="PNG"To print a presentation, use the PrintOut method of the appropriate Presentation object. The syntax is as follows:
expression.PrintOut(From, To, PrintToFile, Copies, Collate)Here are the components of this syntax:
expressionis a required expression that returns aPresentationobject.FromandToare optional Integer arguments that specify the first slide and last slide to print. If you omitFrom, PowerPoint prints from the first slide; if you omitTo, PowerPoint prints through the last slide.PrintToFileis an optional String argument that you can include to make PowerPoint print to the specified file rather than to the printer.Copiesis an optional Integer argument that specifies how many copies of the presentation or slides to print. OmitCopiesto use the default value,1.Collateis an optional argument that you can set tomsoFalseto prevent PowerPoint from collating multiple copies (which is the default setting).
For example, the following statement prints all the slides in the active presentation:
ActivePresentation.PrintOut
The following example prints slides 5 through 12 of the presentation identified by the object variable myPresentation:
myPresentation.PrintOut From:=5, To:=12
You can apply a design template to a presentation, to a single slide within a presentation, or to a range of slides by using the ApplyTemplate method with the Presentation object, the Slide object, or the SlideRange object. The syntax is as follows:
expression.ApplyTemplate(FileName)Here, expression is a required expression that returns a Presentation object, a Slide object, or a SlideRange object. FileName is a required String argument that specifies the path and name of the design template.
For example, the following statement applies the design template named Clouds.potm stored in the C:UsersRichardAppDataRoamingMicrosoftTemplates folder to the active presentation:
ActivePresentation.Slides(1).ApplyTemplate FileName:= _
"C:UsersRichardAppDataRoamingMicrosoftTemplatesClouds.potm"
The following statement applies the design template named Mountain Top.potm stored in the Z:PublicTemplate folder to the first slide in the presentation named Success.pptm:
Presentations("Success.pptm").Slides(1).ApplyTemplate FileName:= _
    "Z:PublicTemplateMountain Top.potm"
The following example applies the design template named Disaster.potm stored in the Z:PublicTemplate folder to a range of slides consisting of the first, fourth, and sixth slides in the active presentation:
ActivePresentation.Slides.Range(Array(1, 4, 6)).ApplyTemplate _
FileName:="Z:PublicTemplate Disaster.potm"The ActivePresentation property of the Application object returns a Presentation object that represents the active presentation (the presentation in the active window). The ActivePresentation object can be very useful for procedures that the user starts.
If no window is open, trying to use the ActivePresentation object returns an error. Unless you're sure that there is an active presentation, it's a good idea to check that a window is open before you access the ActivePresentation object, as in this example:
If Windows.Count = 0 Then
    MsgBox "Please open a presentation before running this macro."
    End
End IfTo get the PowerPoint window into the state you want, you'll often need to work with the window and with the view. PowerPoint uses two types of windows:
Document windows are windows that contain documents (presentation files) rather than slide shows. VBA considers document windows to be
DocumentWindowobjects organized into theDocumentWindowscollection but represents them withWindowobjects organized into theWindowscollection. (Sounds mad, but you'll see how this works shortly.)Slide show windows are windows that contain open slide shows. VBA uses
SlideShowWindowobjects and theSlideShowWindowscollection to represent slide show windows.
The following sections show you how to work with document windows. You'll learn how to work with slide show windows in "Setting Up and Running a Slide Show" in Chapter 25, "Working with Shapes and Running Slide Shows."
The Windows collection contains a Window object for every open window in the PowerPoint application. When you open a presentation while working interactively, PowerPoint opens a window so that you can see the presentation. When you open a presentation via VBA, you can set the WithWindow argument of the Add method to msoFalse to prevent PowerPoint from displaying a window for the presentation. In the user interface, you can also open further windows as necessary—for example, by clicking the New Window button in the Window section of the Ribbon's View tab.
PowerPoint uses the ActiveWindow object to represent the window that is active (the window that currently has the focus and is thus the one that accepts mouse clicks or typing). Only one window is active at a time. The active window is always the first Window object in the Windows collection—Windows(1).
If no window is open at all, or all open windows are hidden, there is no active window and using the ActiveWindow object causes VBA to return an error. To make sure that a window is open, check whether the Count property of the Windows collection is 0. Here's an example:
If Windows.Count = 0 Then MsgBox "There is no active window.", vbOkOnly + _
    vbExclamation, "No Window Is Open"
When you're working with presentations using VBA, you may sometimes find that the ActiveWindow object is a handy way to access a presentation, especially for a macro that the user runs after choosing the presentation, slide, or other object that they want to affect. In other cases, you may find that the ActivePresentation object is a more convenient way to access the presentation you need to work with, or you may prefer to access the presentation via the Presentations collection.
To open a new window, use the NewWindow method of the appropriate Window object. This method takes no arguments. For example, the following statement opens a new window showing the contents of the active window:
ActiveWindow.NewWindow
To close a window, use the Close method with the appropriate Window object. In PowerPoint, the Close method takes no arguments.
For example, you might close all windows but one on a presentation:
Do While ActivePresentation.Windows.Count > 1
    ActivePresentation.Windows(ActivePresentation.Windows.Count).Close
Loop
Alternatively, you might use the Save method to save a presentation before closing its last window, as in the next example. (More simply, you could use the Close method to close the presentation itself after saving it.)
With ActivePresentation
    If .Path = "" Then
        MsgBox "Please save this presentation.", vbOKOnly
    Else
        .Save
        For Each myWindow In Windows
            .Close
        Next myWindow
    End If
End WithTo activate a window or one of its panes, use the Activate method of the appropriate Window object. For example, the following statement activates the first window open on the presentation Benefits.pptm:
Presentations("Benefits.pptm").Windows(1).ActivateTo arrange windows, use the Arrange method with the appropriate Windows collection. The syntax is as follows:
expression.Arrange(ArrangeStyle)Here, expression is a required expression that returns a Windows collection. ArrangeStyle is a required argument that specifies how to arrange the windows: ppArrangeCascade (cascade the windows in an overlapping arrangement that lets you see the title bar of each window but the contents of only the front window) or ppArrangeTiled (tile the windows; the default setting).
You can maximize, minimize, or restore the application window by setting the WindowState property of the Application object to ppWindowMaximized, ppWindowMinimized, or ppWindowNormal. Similarly, within the application window, you can maximize, minimize, or restore a document by setting its WindowState property.
When a window is in a "normal" state (ppWindowNormal, not maximized or minimized), you can position it by using the Top and Left properties to specify the position of the upper-left corner of the window and size it by setting its Height and Width properties.
The following example maximizes the application window and cascades the document windows within it:
Application.WindowState = ppWindowMaximized
Windows.Arrange ArrangeStyle:=ppArrangeCascade
To change the view in a window, set the ViewType property of the appropriate Window object to one of these 12 constants: ppViewHandoutMaster, ppViewMasterThumbnails, ppViewNormal, ppViewNotesMaster, ppViewNotesPage, ppViewOutline, ppViewPrintPreview, ppViewSlide, ppViewSlideMaster, ppViewSlideSorter, ppViewThumbnails, or ppViewTitleMaster. For example, the following statement switches the active window into Slide Sorter view:
ActiveWindow.ViewType=ppViewSlideSorter
To zoom the view, specify a value from 10 to 400 for the Zoom property of the View object for the appropriate window. The value represents the zoom percentage, but you don't include a percent sign. For example, the following statement zooms the active window to 150 percent:
ActiveWindow.View.Zoom = 150
The Pane object represents a pane of the PowerPoint window in Slide view. The Outline pane is represented by index number 1, the Slide pane by index number 2, and the Notes pane by index number 3. You can activate a pane by using the Activate method with the appropriate Pane object. The following example switches the view in the active window to Slide view and activates the Outline pane:
With ActiveWindow
    .ViewType = ppViewSlide
    .Panes(1).Activate
End With
To change the arrangement of the panes in a PowerPoint window in Slide view, use the SplitHorizontal property and the SplitVertical property of the Window object. The SplitHorizontal property controls the percentage of the document window's width that the Outline pane occupies, and the SplitVertical property controls the percentage of the document window's height that the Slide pane occupies. The following example sets the Outline pane to take 25 percent of the width of the document window (leaving 75 percent to the Slide pane), and the Slide pane to take 75 percent of the height of the window (leaving 25 percent to the Notes pane):
With ActiveWindow
    .SplitHorizontal = 25
    .SplitVertical = 75
End WithOnce you have created or opened the presentation you want to affect, you can access the slides it contains by using the Slides collection, which contains a Slide object for each slide in the presentation. Each slide is identified by its index number, but you can also assign names to slides in three different ways:
- Using Object variables
Then you can refer to each slide by its Object variable name.
- Using ID numbers
See the section titled "Finding a Slide by Its ID Number" later in this chapter.
- Using the
Nameproperty See the section titled "Accessing a Slide by Name" later in this chapter.
Having a unique name for a slide is especially useful when you add slides to or delete slides from a presentation, because this causes the index numbers of the slides to change. It's much easier to just name the slides than to try to keep track of their shifting index numbers.
To add a slide to a presentation, use the Add method with the Slides collection. The syntax is as follows:
expression.Add(Index, Layout)Here are the components of this syntax:
expressionis a required expression that returns aSlidescollection. In many cases, it's easiest to use theSlidescollection itself.Indexis a required Long argument that specifies the index number for positioning the slide in the presentation. For example, the number2makes the new slide the second slide in the presentation.Layoutis a required Long argument that specifies the layout for the new slide. The layout names correspond closely to the names you'll see in the Insert Slide dialog box or the Slide Layout task pane. For example,ppLayoutBlankspecifies a blank slide,ppLayoutTitleOnlya title-only slide, andppLayoutChartAndTexta chart-and-text slide.
For example, the following statements declare an object variable named mySlide and assign to it a new title slide added at the beginning of the active presentation:
Dim mySlide As Slide
Set mySlide = ActivePresentation.Slides.Add(Index:=1, _
Layout:=ppLayoutTitle)When creating presentations automatically, it's often useful to insert slides from an existing presentation. To do so, use the InsertFromFile method of the Slides collection. The syntax is as follows:
expression.InsertFromFile(FileName, Index, SlideStart, SlideEnd)Here are the components of this syntax:
expressionis a required expression that returns aSlidescollection. Often, you'll want to use theSlidescollection itself.FileNameis a required String argument that specifies the file from which to insert the slides.Indexis a required Long argument that specifies the slide position in the open presentation at which to insert the slides.SlideStartis an optional Long argument that specifies the first slide to insert. If you omitSlideStart, PowerPoint starts at the first slide.SlideEndis an optional Long argument that specifies the last slide to insert. If you omitSlideEnd, PowerPoint goes up to the last slide.
For example, the following statement inserts slides 2 through 8 from the presentation named Handbook.pptm stored in the folder Z:TransferPresentations, placing the slides starting at the fifth slide in the open presentation Corporate.pptm:
Presentations("Corporate.pptm").Slides.InsertFromFile _
    FileName:="Z:TransferPresentationsHandbook.pptm", Index:=5, _
SlideStart:=2, SlideEnd:=8When working programmatically with a presentation, it can be difficult to track which slide is which, especially when you add, delete, insert, copy, or move slides—thereby changing the slides' index numbers.
To help you, PowerPoint assigns a slide ID number to each slide when it's created. The slide ID number doesn't change when you move a slide to a different position in the presentation, unlike the index number, which always reflects the slide's position in the presentation. You can check a slide's ID number by returning the SlideID property of the appropriate Slide object.
To find a slide by its ID number, use the FindBySlideID method of the Slides collection. The syntax is as follows:
expression.FindBySlideID(SlideID)Here, expression is a required expression that returns a Slides collection. SlideID is a required Long argument that specifies the ID number of the slide you want to return.
The following example declares a Long variable named TargetSlide and assigns to it a new slide added at the fifth index position in the active presentation, inserts a full presentation at the third index position, and then uses the FindBySlideID method to return the slide identified by TargetSlide and apply a different design template to it. This approach is similar to creating Object variables for slides, described earlier in this chapter. However, here you create Long variables to hold the ID numbers instead of Object variables:
Dim TargetSlide As Long
TargetSlide = ActivePresentation.Slides.Add(Index:=5, _
    Layout:=ppLayoutFourObjects).SlideID
Presentations("Corporate.pptm").Slides.InsertFromFile _
    FileName:="Z:TransferPresentationsHandbook.pptm", Index:=3
ActivePresentation.Slides.FindBySlideID(TargetSlide).ApplyTemplate _
    FileName:="C:Program FilesMicrosoft OfficeTemplatesPresentation
ÂDesignsBrain Blitz.potm"To change the layout of an existing slide, set its Layout property. For example, the following statement changes the layout of the first slide in the active presentation to the clip-art-and-vertical-text layout:
ActivePresentation.Slides(1).Layout = ppLayoutClipArtAndVerticalText
When you change the layout of a slide, PowerPoint moves its existing contents to allow any new objects needed to be added to the slide.
To delete an existing slide, use the Delete method with the appropriate Slide object. For example, the following statement deletes the first slide in the active presentation:
ActivePresentation.Slides(1).Delete
Be aware that PowerPoint doesn't confirm the deletion of a slide via VBA.
To copy a slide, use the Copy method of the appropriate Slide object. The Copy method takes no arguments. (You can also cut a slide by using the Cut method, which also takes no arguments.)
To paste a slide, use the Paste method of the Slides collection. The Paste method takes an Index argument that specifies the slide position at which to paste in the slide.
For example, the following statements copy the first slide in the active presentation and paste it in so that it is the fifth slide:
ActivePresentation.Slides(1).Copy
ActivePresentation.Slides.Paste Index:=5
Instead of copying and pasting, you can directly duplicate a slide by using the Duplicate method of the Slide object. This method takes no arguments and places the duplicate of the slide immediately after the original in the index number list. For example, the following statement duplicates the fourth slide in the active presentation, placing the copy at the fifth index position:
ActivePresentation.Slides(4).Duplicate
Instead of cutting and pasting a slide, you can move it directly by using the MoveTo method with the appropriate Slide object. Moving a slide has the same net effect as cutting and pasting it but has the advantage of not changing the contents of the Clipboard (which you might need to preserve for the user or for other purposes). The syntax for the MoveTo method is as follows:
expression.MoveTo(ToPos)Here, expression is a required expression that returns a Slide object, and ToPos is a required Long argument that specifies the index position to which you want to move the slide.
For example, the following statement moves the third slide in the presentation identified by the object variable myPresentation to the beginning of the presentation:
myPresentation.Slides(3).MoveTo ToPos:=1
Instead of accessing a slide by its index number, you can assign a name to it by using the Name property of the Slide object. For example, the following statements assign the name Chairman's Introduction to the fifth slide in the active presentation and then use the Select method of the Slide object to select that slide by name:
ActivePresentation.Slides(1).Name = "Chairman's Introduction"
ActivePresentation.Slides("Chairman's Introduction").SelectTo work with a range of slides, use the Range method of the Slides collection to return a SlideRange object that represents the slides. The SlideRange object can represent a single slide, but you're usually better off using it to represent a range of slides. (You can access a single slide more easily by its index number or by a name you assign to it than through a SlideRange object.)
To return a SlideRange object that encompasses two or more slides, use the Array function with a comma-delimited list of the slides. The list can use either the index numbers or the names of the slides. For example, the following statements declare the SlideRange object variable mySlideRange and assign to it the first five slides in the open presentation named HR.pptm:
Dim mySlideRange As SlideRange
Set mySlideRange = _
Presentations("HR.pptm").Slides.Range(Array(1, 2, 3, 4, 5))
The following statement assigns to the SlideRange object variable mySlideRange the slides named Intro and Outro in the active presentation:
Set mySlideRange = ActivePresentation.Slides.Range(Array("Intro", "Outro"))You can apply a design template to a slide by using the ApplyTemplate method, as discussed in "Applying a Template to a Presentation, to a Slide, or to a Range of Slides," earlier in this chapter. You can also apply a background or a color scheme, as discussed in the following sections.
To apply a background to a slide or several slides, use the Background property of the appropriate Slide object or SlideRange object to return the ShapeRange object representing the background of the slide or slides. You can then use the Fill object to set a color, fill, gradient, or picture in the background.
The following example applies the picture Winter.jpg from the folder C:Sample Pictures to the fourth slide in the presentation named Corporate.pptm. The example sets the FollowMasterBackground property to msoFalse, making the slide use a different background than the slide master, and also sets the DisplayMasterShapes property to msoFalse, making the slide not display the shapes on the slide master:
With Presentations("Corporate.pptm").Slides(4)
    .FollowMasterBackground = msoFalse
    .DisplayMasterShapes = msoFalse
    With .Background
        .Fill.ForeColor.RGB = RGB(255, 255, 255)
        .Fill.BackColor.SchemeColor = ppAccent1
        .Fill.UserPicture "C:Sample PicturesWinter.jpg"
    End With
End WithA color scheme is a group of eight colors that are used to create the look of the title, background, and other elements of a slide, handout, or notes page. VBA uses an RGBColor object to represent each color and a ColorScheme object to represent each color scheme. The ColorScheme objects are gathered in a ColorSchemes collection for the entire presentation.
To change the color scheme of a slide or several slides, use the ColorScheme property of the appropriate Slide object or SlideRange object to return the ColorScheme object, and then work with the Colors method to specify the color. The syntax is as follows:
expression.Colors(SchemeColor)Here, expression is a required expression that returns a ColorScheme object. SchemeColor is a required argument that specifies which color in the color scheme to set—for example, ppAccent1 (for the first accent in the color scheme), ppBackground (the background color), or ppTitle (the title color).
The following statement sets the background color of the color scheme for the first three slides in the active presentation to black, which is RGB(0, 0, 0):
ActivePresentation.Slides.Range(Array(1, 2, 3)) _
.ColorScheme.Colors(ppBackground).RGB = RGB(0, 0, 0)To set a transition for a slide, a range of slides, or a master, use the SlideShowTransition property of the Slide object, the SlideRange object, or the Master object to return the SlideShowTransition object.
To specify the speed at which the transition runs, set its Speed property to ppTransitionSpeedFast, ppTransitionSpeedMedium, or ppTransitionSpeedSlow.
To control how the slide advances, set the AdvanceOnTime property to msoTrue (for automatic advancing) or msoFalse (for manual advancing). If you use automatic advancing, use the AdvanceTime property to specify the number of seconds. If you want the slide to advance when the user clicks, set the AdvanceOnClick property to msoTrue. (You can set both AdvanceOnTime and AdvanceOnClick to msoTrue. The slide advances manually if the user clicks before the AdvanceTime interval has elapsed.)
To play a preset sound effect with the transition, use the SoundEffect property of the SlideShowTransition object to return the SoundEffect object, use the Name property to specify the name of the sound effect, and then use the Play method to play the sound effect. You can also play a separate sound file by using the ImportFromFile method of the SoundEffect object and using the FullName argument to specify the path and filename of the sound file.
If you want the sound to loop until the next sound, set the LoopSoundUntilNext property of the SlideShowTransition object to msoTrue. The default value is msoFalse.
The following example sets up a transition for the second slide in the active presentation. The transition uses the Fade effect running at medium speed, sets advancing either on click or after a delay of 30 seconds, and plays a sound file from an external source without looping:
With ActivePresentation.Slides(2)
    With .SlideShowTransition
        .EntryEffect = ppEffectFade
        .Speed = ppTransitionSpeedMedium
        .AdvanceOnClick = msoTrue
        .AdvanceOnTime = msoTrue
        .AdvanceTime = 30
        .SoundEffect.ImportFromFile _
            FileName:="d:SoundsCrescendo.wav"
        .LoopSoundUntilNext = msoFalse
    End With
End WithVBA uses the Master object to represent the various masters that PowerPoint uses: the slide master, title master, handout master, and notes master.
To work with the slide master for a presentation, use the SlideMaster property of the Presentation object.
To return the slide master for a slide, use the Master property of the appropriate Slide object. For example, the following statement adds a title to the slide master for the active presentation (if the slide master already has a title, VBA returns an error):
ActivePresentation.SlideMaster.Shapes.AddTitle.TextFrame.TextRange.Text = _
"Orientation"To find out whether a presentation has a title master, check the HasTitleMaster property. If it doesn't, you can use the AddTitleMaster method of the Presentation object to add a title master, as in the following example. If the presentation already has a title master, VBA returns an error when you try to add a title master:
If Not ActivePresentation.HasTitleMaster Then _
ActivePresentation.AddTitleMaster
To return the title master for the presentation, use the TitleMaster property of the Presentation object. The following example checks that the title master exists and, if it does, formats the date and time to be visible and to use the dMMMyy format with automatic updating:
With myPresentation
    If .HasTitleMaster Then
        With .TitleMaster.HeadersFooters.DateAndTime
            .Visible = msoTrue
            .Format = ppDateTimedMMMyy
            .UseFormat = msoTrue
        End With
    End If
End WithTo work with the handout master, use the HandoutMaster property of the Presentation object to return the Master object. The following example uses the HandoutMaster property of the ActivePresentation object to fill the background of the handout master with a picture:
With ActivePresentation.HandoutMaster.Background
    .Fill.ForeColor.RGB = RGB(255, 255, 255)
    .Fill.BackColor.SchemeColor = ppAccent1
    .Fill.UserPicture "d:igrafxdawn.jpg"
End WithTo work with the notes master, use the NotesMaster property of the Presentation object to return the Master object. For example, the following statement clears the HeaderFooter objects in the notes master in the first open presentation:
Presentations(1).NotesMaster.HeadersFooters.Clear
You can delete the title master or handout master, but not the slide master or notes master. To delete the title master or handout master, use the Delete method of the Master object. The following example checks that the active presentation has a title master and then deletes it:
If ActivePresentation.HasTitleMaster Then _
 ActivePresentation.TitleMaster.Delete
- Understand PowerPoint's creatable objects
Creatable objects are commonly used objects that can be employed in VBA code without requiring that you qualify them with the
Applicationobject. You can leave that word out of your code; it's optional, and rarely used.- Master It
Name one of the objects or collections that are creatable in PowerPoint procedures.
- Work with presentations
You can create a new presentation programmatically, but PowerPoint generates an annoying flicker on most systems while it brings the new presentation into view. You can block this unpleasant, strobelike effect to avoid disturbing your audience.
- Master It
How do you prevent a newly created presentation from being visible so that you can create and manipulate it in your code without the user seeing the flickering effect onscreen?
- Work with windows and views
To get the PowerPoint window into the state you want, you'll often need to work with the window and with the view.
- Master It
PowerPoint uses two types of windows. What are they?
- Work with slides
Once you have created or opened the presentation you want to manipulate, you can access the slides it contains by using the
Slidescollection. This collection contains aSlideobject for each slide in the presentation. Each slide is identified by its index number, but you can also use object variables to refer to slides or assign names to slides.- Master It
Why would you want to assign names to slides rather than using the default index numbers that are automatically assigned to the slides?
- Work with masters
Before attempting to manipulate a master in your code, you should determine whether the master actually exists in the presentation.
- Master It
How do you find out whether a presentation has a title master?