
Refitting using waist-shaping darts
Almost any hip-length or longer garment that feels a bit shapeless can be refined to feel and look more elegant. You can easily alter dresses, tunics, shirts, blouses, and tops without affecting the look from the front at all. Witchcraft? No. Waist-shaping darts? Yes.
| You will need | Pins, tape measure, fabric-marking tool, ruler, hand-sewing needle, color-matched thread, scissors/thread snips, iron, ironing board |
| Sewing machine? | Use a straight stitch where a running stitch is indicated in step 10 |
Top Tip
The natural waistline is higher than most people think it is. To find the position of your natural waist, stand facing a mirror and bend your body to the side. Place your hand where your torso creases: this is your natural waistline.

1 Try the garment on in front of a mirror. Play around with pinching fabric evenly on both sides of your back at your natural waist (see Top Tip); it’s easier to see with the garment the right way out. Pinch different amounts, but resist over-fitting.

2 Turn the garment inside out and put it back on. Recreate the desired effect and place a pin vertically in each side at your natural waistline. Aim to pin the fabric by the same amount at each dart position. Ask a friend to help if possible/necessary.
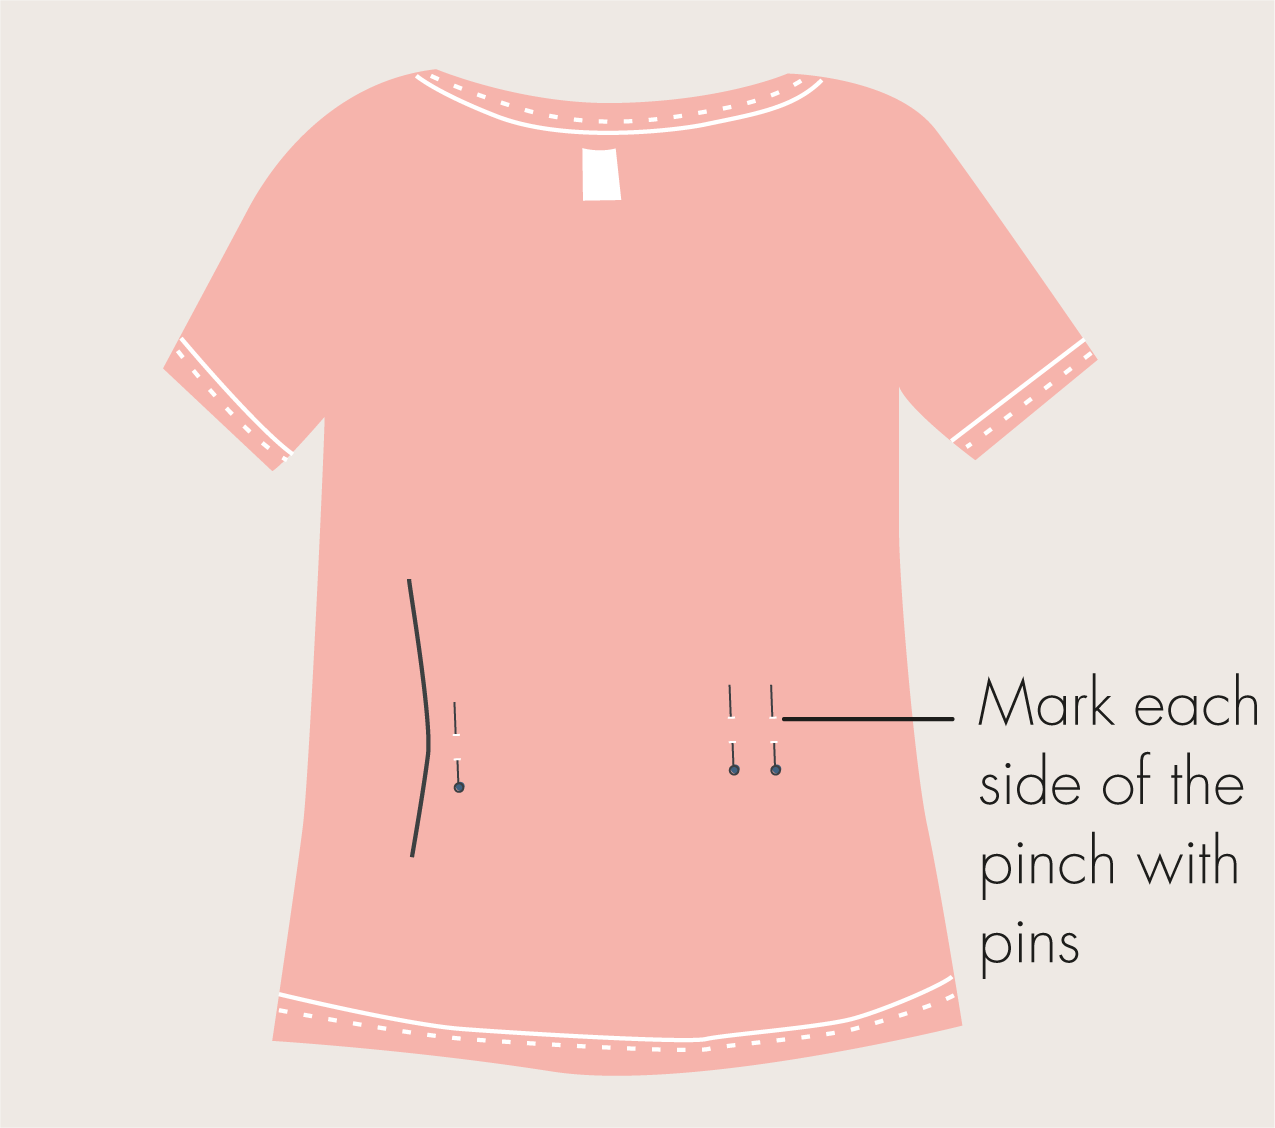
3 Carefully take off the garment and lay it on a flat surface inside out, ready to mark the darts. Place a pin vertically on either side of the fabric at the pinch. Remove the original pin so the fabric can lay flat. Repeat on the other side.
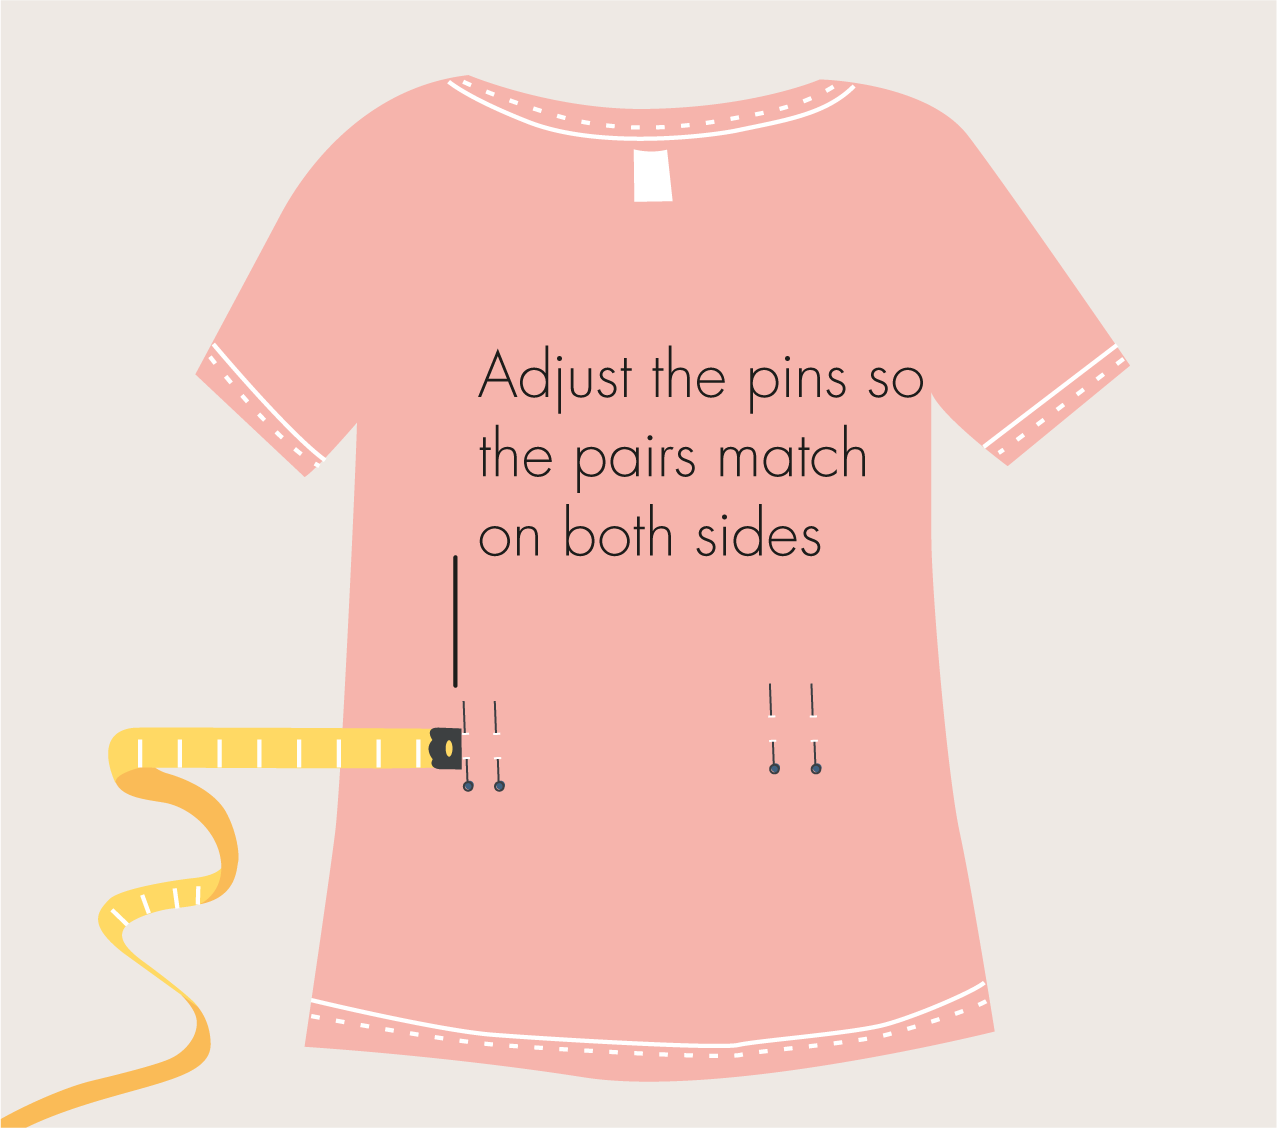
4 Measure the distance from the side seam to the nearest vertical pin on both sides. Add these measurements together and divide by two to get the average distance from the side seam to outer edge of the dart. Write this number down.

5 Measure the distance between each pair of vertical pins. Add them together and divide by two to get an average width for each dart. Write this down. With these numbers, you can start to plot your dart onto the fabric.
Note: You may find it useful to practice steps 4 to 9 using your measurements to plot the darts on paper first, before marking the actual garment. It will be difficult to remove any plotting mistakes on the actual fabric.

6 Remove the pins. At the natural waist, measure across from the side seam and draw a vertical mark at the measurement from step 4. Make a second mark for the width of the dart, using the number from step 5. Repeat on the other side.
Top Tip
Resist the urge to pinch out too much fabric because this will unbalance and distort the garment, with a disproportionate amount of fabric at the front compared with the back.
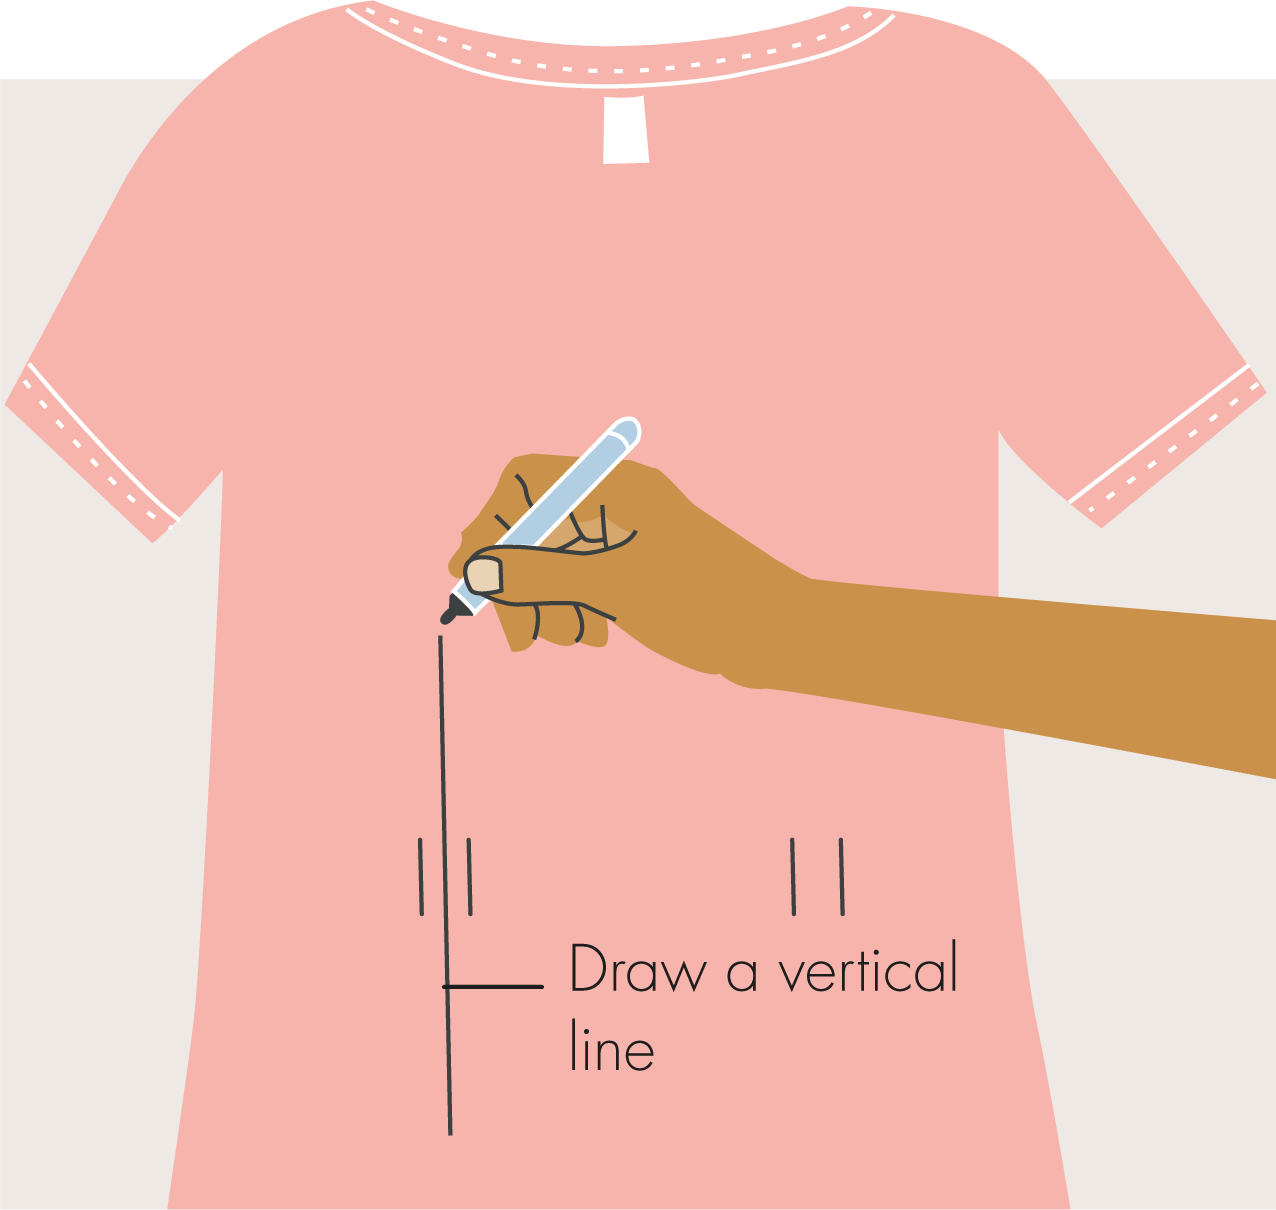
7 The width of the darts are now plotted. To plot their length, start by drawing a vertical line through the center of the dart, perpendicular to the waistline. Extend the line at least 6 in (15 cm) above and 6 in (15 cm) below the waistline.

8 If the width of your dart is 1⅜in (3.5 cm) or more, make a small horizontal mark on the long vertical line 6 in (15 cm) above and below the waistline. If it is less than 1⅜in (3.5 cm) wide, make the mark 4¾in (12 cm) above and below the waistline.

9 Draw straight lines to connect the four points to form a long diamond shape. Fold the garment along the vertical line, right-sides together. Redraw the point at the waistline so it becomes a smooth curve. Repeat on the other side.

10 Keep the fabric flat and in position by placing pins perpendicular to the dart. Follow steps 3 to 6 in Mending a tear to make a row of running stitches following the line. Stitch both darts, then gently press them toward the center back.