
IN THIS CHAPTER
The Siemens SL45i is more than just one of the first Java phones to be released in Europe—it's actually a lean, mean, fine-tuned gameplaying machine.
To accomplish this, Siemens has put out one of the most advanced Micro Java APIs. The API not only fully supports MIDP, but offers the software developer some additional capabilities:
Create sprites and sounds using a Game API
Send SMS messages
Access the phone book and make calls
Beam data via the phone's infrared port
Access the phone's side keys
Motorola, Siemens, and Ericsson have announced that they will band together and create a standard game API. This de facto game API will most likely have many of the same classes and methods discussed in this chapter.
To build a Siemens-specific MIDlet, you must write your code, compile it, pre-verify it, and package it. In other words, the process is exactly the same as creating any other MIDlet.
Siemens has released a full Software Development Kit (SDK) that makes the process easy. You can even integrate the SDK with the Forte development environment if you want. First off, you must have Java 1.3 or later installed. This can be downloaded from http://java.sun.com/j2se/.
Next, download the Siemens SDK. Go to Siemens' site at http://www.siemens-mobile.de/ and click on the Developer's Portal. If you don't already have an account, you will need to sign up for one. Signing up is free and painless. Then click on the Wireless Java link to download the latest SDK.
Finally, if you'd actually like to load your MIDlets onto a Siemens phone, you can grab the DataExchange software from http://www.my-siemens.com/. Just go to the SL45i page and visit the Downloads and Applications section.
To actually compile, be sure to include the API.jar file in your classpath. Assuming you installed the Siemens SDK to the C:SiemensJava directory, you could compile the Test.java program as follows:
javac –g –bootclasspath C:SiemensJavaSDKlibAPI.jar Test.java
You can then pre-verify in much the same way:
preverify –classpath C:SiemensJavaSDKlibAPI.jar;. Test
Finally, to package everything together you can use the JAR command:
jar cf test.jar Test.class
You can now create the JAD Application Descriptor File (ADF) as with any other MIDlet. Details on how to do this are discussed in Chapter 9, “Creating a MIDlet.”
The Siemens SDK comes with a neat little SL45i emulator that enables you to launch either JAD files or raw Java classes.
To load up a class file, click on the Start Java Application line in the Commands window. You can select a JAR file, a JAD file, or even a Java class.
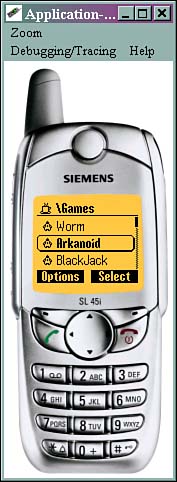
After an application has been downloaded on the emulator, you can run it by selecting the Menu command on the phone itself, then choosing Surf/Fun, Java. Select the application you want, then choose the Option command. The application runs, as shown in Figure 23.1.
The easiest way to test your applications out is to copy the class files over using the Siemens DataExchange software.
Connect your phone to your PC using a valid cable—it should come with the phone, or you can obtain one from Siemens. You can now run the DataExchange software:
Finally, you can use the phone or emulator to actually download your MIDlet over the air (OTA). To do so, be sure to set up a valid JAD file with a MIDlet-JAR-URL attribute that points to a valid URL:
MIDlet-Jar-URL: http://www.myserver.com/MyGame.jar
If you want to test the download locally, just point to the phone's local /java/jam directory:
MIDlet-Jar-URL: file://a:/java/jam/games/MyGame.jar
The Siemens game SDK contains everything you might need to create a smooth and quick-moving action game. The SDK classes are in the com.siemens.mp.game package. The classes are
Images are the main focus of most games. The Siemens API makes it easy to create, manipulate, and render complicated characters and scenes.
To create a special Siemens image, just pass a normal Java image into the ExtendedImage class. Because of the way the image might be manipulated, the image width must be divisible by eight.
For example
ExtendedImage im = new (testimage);
You can then modify the image any way you want and use the getImage() method to retrieve a standard Java image.
After you create an ExtendedImage, you can perform all sorts of neat modifications. Many methods take a color parameter. If you are using 2 bits per pixel, then 0 is the transparent color, 1 is white, and 2 or 3 is black. Otherwise, if you are using only 1 bit per pixel, then 0 is white and 1 is black.
Commands include the following:
public void clear(byte color)—. Clears the entire image using the given color.public void setPixel(int x, int y, byte color)—. Allows you to set a given pixel to a specific color.Using this command, you can create your own images. For example
ExtendedImage im=new ExtendedImage(new Image(24,24));
im.setPixel(5,0,(byte)1); //black pixel at pos 5,0
public void setPixels(byte[] pixels, int x, int y, int width, int height)—. This lets you create an image using a byte array. Each bit of the array indicates the color of the pixel. You can then render this image at a given x,y location. Note that the x location must be divisible by eight.For example, to draw a black line that is 8 pixels across and 2 pixels high, create a byte array with two bytes set to –1. The decimal value of –1 is all ones—
11111111. You could then draw this line at location4x1within an empty image:ExtendedImage im=new ExtendedImage(new Image(24,24)); byte[] pix=new byte[] { (byte)-1, (byte)-1 } ; im.setPixels(pix, 8, 1, 8, 2);
Alternatively, you can grab the information from an image using
public int getPixel(int x, int y)
public void getPixelBytes(byte[] pixels, int x, int y, int width, int height)
To create high-performance graphics, many games will directly modify the video screen, avoiding the overhead of fancy paint and double buffering routes. The process of copying a large array of bits directly into video memory is known as blitting.
You can easily blit with any ExtendedImage. Simply call the blitToScreen(int x,int y) routine, passing in the exact x and y positions you want your image to appear:
myimg.blitToScreen(10,15);
The most typical usage is to draw all sprites, tiles, and so on to an offscreen image, and then blit that big image onto the screen.
A typical game's paint routine would use a GraphicObjectManager to paint all sprites and tiles to an offscreen ExtendedImage, as shown in the following code snippet:
Every Sprite or ExtendedImage you create is a subclass of the GraphicObject class. This class basically only has two methods, enabling you to show or hide the graphic:
public void setVisible(Boolean visible)public boolean getVisible()
You can actually deal with all your objects using the GraphicObjectManager class. New objects are added, by default, to the end of the list. When objects are drawn, the first element in the list will be drawn first. Positioning objects in the manager enables you to layer them behind or in front of each other.
The class has the following methods:
public void paint(Image image, int x, int y)—. The key routine. Draws all the objects into the given image (usually an offscreen image). The offscreen image must not be transparent. This offscreen image can then be smoothly blitted onto the device's screen.public void addObject(GraphicObject gobject)—. Adds a new object to the object manager at the end of the list.public void insertObject(GraphicObject gobject, int position)—. Adds a new object at a specific location in the list.public int getObjectPosition(GraphicObject gobject)—. Returns the number associated with the given object.public GraphicObject getObjectAt(int index)—. Returns the object at the given index.public void deleteObject(GraphicObject gobject)—. Deletes the given object from the manager.public void deleteObject(int position)—. Deletes the object at the given position from theObjectManager.public void paint(ExtendedImage image, int x, int y)—. Draws all objects to the givenExtendedImageoffscreen object.public static byte[] createTextureBits(int width, int height, byte[] texture)—. Converts a texture from bytes per pixel into bits per pixel. This enables you to “compress” an image into fewer bytes. For example, the image{0,0,1,1,1,1,0,0}would be converted into just one byte:{60}.
In Chapter 15, “Entering the Land of Sprites,” we discussed what sprites are—basically, any character or graphical object in your game that needs to be animated or moved.
Siemens phones have a special Sprite class, a subclass of GraphicObject. The Sprite class lets you do pretty much anything you can think of:
public void setPosition(int x, int y—. This enables you to drop the upper right corner of the sprite at a specific set of coordinates.public void setCollisionRectangle(int x, int y, int width, int height)—. This enables you to create a specific collision rectangle around the sprite. The rectangle can be bigger than the sprite image itself if you want your character to be extra-sensitive, or the rectangle can be small and detect specific collisions. For example, if your sprite is a graphic of a penguin, you can set the collision rectangle around the penguin's head. That way, if a bad guy threw a fish at the penguin's body, a collision would not be detected.public void setFrame(int framenumber)—. This method sets which frame of the animation to draw. Theframenumberparameter can be set to be anywhere from0to theframeCount-1.
After your game is running, you can detect where your sprites are and whether or not they've collided with another sprite or a specific point on the screen:
public int getXPosition()—. Returns the actual x (horizontal) coordinate.public int getYPosition()—. Returns the actual y (vertical) coordinate.public int getFrame()—. Returns which frame of animation is currently being shown.public boolean isCollidingWith(Sprite other)—. Returns true if the given sprite's collision rectangle is overlapping the other sprite's collision rectangle.public boolean isCollidingWithPos(int x, int y)—. Returns true if the given sprite's collision rectangle overlaps with a specific (x,y) coordinate.
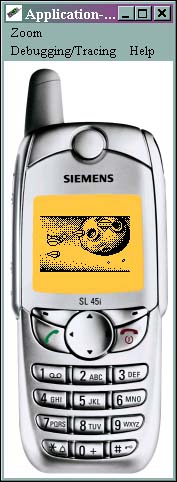
A sprite basically consists of two images—a filmstrip of the animated graphic, and a simple black-and-white image representing a mask. A mask can be thought of as a specific shape that has been cut out of a black sheet of paper. The shape is then laid atop your graphic, as shown in Figure 23.2. Any pixels not covered by the cut-out will be transparent.

You can create a mask using most paint programs. Simply throw out the color information from your image, leaving a black silhouette of your sprite.
There are three ways to construct a Sprite using the Siemens API:
public Sprite(Image source, Image mask, int numFrames)—. This creates a sprite given a source image, a mask image, and a given number of frames. The width of the source and mask image must be divisible by eight.public Sprite(ExtendedImage source, ExtendedImage mask, int numFrames)—. Just like the previous method, except it takes inExtendedImages as the source and mask instead ofImages.public Sprite(byte[] source, int source_offset, int width, int height, byte[] mask, int mask_offset, int numFrames)—. Yet another way of creating a sprite. Instead of passing in anImageobject, you can pass in the raw image source and mask data. You must define the width and height of the image so that the byte array can be parsed correctly. The width, of course, must be divisible by eight. You might also begin reading in the bytes at a specific offset.
Each of these constructors will throw an IllegalArgumentException if the width of the image is not divisible by eight, if there is the wrong number of frames, or if a transparent color is used as either the source or mask image.
So, to create a quick game with a few sprites you could use code similar to the following:
Image frog=Image.createImage("/frog.png");
Image frogm=Image.createImage("/frog-mask.png");
Sprite frogsprite = new Sprite(frog, frogm, 1);
GraphicObjectManager spriteManager= new GraphicObjectManager();
spriteManager.addObject(frogsprite);
sprite.setPosition(10,10);
spriteManager.paint(offscreen, 0, 0);
In your paint method, you could then draw the game screen as follows:
g.drawImage(offscreen, 0, 0, Graphics.LEFT | Graphics.TOP)
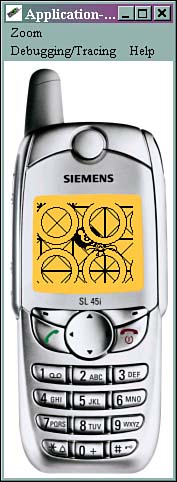
Ultimately, you can layer multiple sprites on top of each other to create a full game, as shown in Figure 23.3.
Most games feature not only characters (sprites), but a background world within which the sprites live. The Siemens API includes an easy-to-use TiledBackground class that lets you define and draw tiles or patterns across your game screen.
As with Sprites, a TiledBackground constructor takes three alternative forms:
public TiledBackground(Image tilePixels,Image tileMask, byte[] map, int widthInTiles, int heightInTiles)public TiledBackground(ExtendedImage tilePixels,ExtendedImage tileMask, byte[] map, int widthInTiles, int heightInTiles)public TiledBackground(byte[] tilePixels, byte[] tileMask, byte[] map, int widthInTiles, int heightInTiles)
The parameters are as follows:
tilePixels—. A Java image,ExtendedImage, or byte array that contains the tiles. The total width of the image must be eight. The height can be as long as you want, but the number must be divisible by eight.tileMask—. This is an 8×8 pixel Java image,ExtendedImage, or byte array with the mask that should be overlaid over the tiles.map—. This is a byte array that defines how the tiles should be drawn. Each byte represents a separate tile. This concept is explained a bit later in this chapter.widthInTiles—. The width of the tile map.heightInTiles—. The height of the tile map.
If the width of the image or mask is not 8, a transparent color is used in the image or mask, or if you define a bigger map than you've actually created, an IllegalArgumentException will be thrown.
Finally, you can determine where within the TileMap the tiles should be drawn using the setPositionInMap(int x, int y) method.
You can define your tile using any Java image, ExtendedImage, or a byte array.
Although tiles are often geometric, it often makes sense to use a byte array to create the pattern. Each byte in the array should either be 0 (white) or 1 (black). Each pattern within the array should be 8 pixels wide and 8 pixels high.
You can create as many images as you want within a given array. For example, the following code defines an array of two different tiles—the mountains and the forests. If you squint at the zeros and ones, you can almost make out what the pattern will look like. Figure 23.4 corresponds to the tiles created here:
final static private byte tiles_pixels[] = {
         0,0,0,0,0,0,0,0, // First tile: The mountain
         0,0,0,0,0,0,0,0,
         0,0,0,0,0,0,0,0,
         0,0,0,1,1,0,0,0,
         0,0,1,1,1,1,0,0,
         0,1,1,1,1,1,1,0,
         1,1,1,1,1,1,1,1,
         1,1,1,1,1,1,1,1,

         0,0,0,1,1,0,0,0, // Second tile: The tree
         0,0,1,1,1,1,0,0,
         0,1,1,1,1,1,1,0,
         0,1,1,1,1,1,1,0,
         0,0,1,1,1,1,0,0,
         0,0,0,1,1,0,0,0,
         0,0,0,1,1,0,0,0,
         0,0,0,1,1,0,0,0,
};

Just as we used a byte array to define each tile, the TiledBackground itself can be designed using a byte array. Each byte has a different meaning:
0—. This tile is transparent.1—. This tile is pure white.2—. This tile is pure black.3and up—The is a custom user-defined tile.
For example, you can create a TiledBackground as follows:
final static private byte map[] = {
0,0,0,0,0,0,0,0, //line with predefined transparent tiles
1,1,1,1,1,1,1,1, //line with predefined white tiles
1,1,1,1,1,1,1,1, //line with predefined white tiles
2,2,2,2,2,2,2,2, //line with predefined black tiles
2,2,2,2,2,2,2,2, //line with predefined black tiles
3,3,3,3,3,4,4,4, //line of hills (3) and trees (4)
3,3,3,3,3,4,4,4, //line with mixed tiles
3,3,3,3,3,4,4,4, //line with mixed tiles
};
You could then draw the new TiledBackground as follows:
TiledBackground tiledBack = new TiledBackground(GraphicObjectManager. createTextureBits(8,16,tiles_pixels), null, map, 8,8); tiledBack.setPositionInMap(0,0); GraphicObjectManager spriteManager= new GraphicObjectManager(); spriteManager.addObject(tiledBack); spriteManager.paint(offscreen, 0, 0); //draw to doublebuffer image
You could then draw the double buffer offscreen image in your paint method:
g.drawImage(offscreen, 0, 0, Graphics.LEFT | Graphics.TOP)
A sample tiled screen appears as in Figure 23.5, with a bird sprite in the foreground, a ring pattern set of tiles behind that, an 8-ball graphic in the next layer, and a set of geometric tile shapes in the background. Everything moves at once, smoothly and easily. The code for creating this effect can be found in the src directory of the Siemens Toolkit.
Tiling, as you can see, is a great feature that really adds depth and texture to games.
One neat little trick your game can perform is to flash the phone's backlight. This is a great way of getting the player's attention. You can flash things whenever your hero gets hit, whenever you open a new door to your dungeon, or even create an atmospheric game with real-time day and night.
To do this, just use the Light class. It couldn't be simpler:
Light.setLightOn();
or
Light.setLightOff();
There is something mobile phones offer that most other gaming appliances cannot—vibrations. Most modern mobile phones have the capability to produce acute vibrations when the user is called as a means of silently letting the user know that somebody is trying to reach him.
Of course, the vibrator can also be used for more entertaining purposes. For example, when player flies a spaceship through a swarm of meteors, the device can vibrate after every collision.
Siemens offers a MIDP extension that enables you to manipulate the device's vibrator. To produce vibration, the com.siemens.mp.game.Vibrator class is used. The class provides the following static methods:
So, you could add vibrations to the racing game that we have been developing using code similar to the following:
private void checkCollision()
{
  if (enemyList.collide(player))
  {
    player.setEnergy(player.getEnergy() –
        COLLIDE_ENERGY);
    Vibrator.triggerVibrator(100);
  }
}
When two sprites collide together, the vibrator's static method triggerVibrator() is called. The vibrator is invoked for a duration of 100 milliseconds.
One thing that is notably lacking from most MIDP games is decent sound. The Siemens classes comprise one of the best mobile sound APIs on the market.
To play sounds, you need only access the com.siemens.mp.game.Sound class. This class has only one static method: playTone(int freq, int time).
This method plays a tone of the specific frequency for a specified amount of time given in milliseconds. For example, to play a tone at 400Hz for 100 milliseconds, you would use the following line:
com.siemens.mp.game.Sound.playTone(400, 100);
If you are musically inclined, you can combine many of these calls together to perform neat sound effects.
In addition to the generic Sound method, the Siemens API also enables you to take predefined musical notes and piece them together, creating rich and beautiful sounding themes, sound effects, and melodies. Siemens extensions offer the com.siemens.mp.game.Melody class to play melodies composed with the com.siemens.mp.game.MelodyComposer class.
The melodies are based on the custom ring-tones that Siemens users can download to personalize their phones. The melodies have the following features:
Three full octaves and 8 notes above the third octave
Multiple note durations, from 1/16 to a whole note, including dotted notes.
For example, you can use various durations of the musical notes C, D, E, F, G, A, H (The H replaces the B in the Siemens API), as well as others, to easily compose complex, rich tunes.
The MelodyComposer class has the following methods:
setBPM(int bpm)—. Sets beats per minute (the default value is 60bpm).appendNote(int note, int length)—. Appends a predefined note of predefined length to the melody composer. All predefined notes are represented as constants. A list of valid notes appears in Table 23.1. Valid lengths can be found in Table 23.2.
Table 23.1. Notes You Can Play With
NO_TONE
| Silence |
TONE_C0–TONE_C4
| The C note played at various octaves |
TONE_CIS0–TONE_CIS4
| The C semitone note played at various octaves |
TONE_D0–TONE_D4
| The D note played at various octaves |
TONE_DIS0–TONE_DIS4
| The D semitone note played at various octaves |
TONE_E0–TONE_E4
| The E note played at various octaves |
TONE_F0–TONE_F4
| The F note played at various octaves |
TONE_FIS0–TONE_FIS4
| The F semitone note played at various octaves |
TONE_G0–TONE_G4
| The G note played at various octaves |
TONE_GIS0–TONE_GIS4
| The G semitone note played at various octaves |
TONE_A0–TONE_A4
| The A note played at various octaves |
TONE_AIS0–TONE_AIS3
| The A semitone note played at various octaves |
TONE_H0–TONE_H3
| The H note played at various octaves |
TONE_MARK
| Sets a marker at a specific point, enabling you to create a variant to be repeated |
TONE_PAUSE
| Pauses the melody |
TONE_REPEAT
| Repeats the melody n times from the beginning. Set n in the length parameter |
TONE_REPEAT_MARK
| Repeat n times from the last TON_MARK call
|
TONE_REPEV
| Repeat forever from the very beginning of the melody |
TONE_REPEV_MARK
| Repeat forever from the last TON_MARK call
|
TONE_REPON
| Repeat n times from the beginning, then continue on |
TONE_REPON_MARK
| Repeat n times from the preceding TON_MARK call, then go on
|
TONE_STOP
| Stop the current sequence |
Table 23.2. Tone Length Values
There are many Siemens ring tones published on the Web. If you a do a simple search, you can find numerous tunes to use in your games. For example, the song “Say You'll Be There” by the Spice Girls can be created using the following sequence:
Ais2(1/8) Ais3(1/8) F3(1/8) Gis3(1/8) Dis3(1/8) Cis3(1/16) Ais2(1/8) P(1/16) F3(1/8) Dis3
After a melody is composed, you can retrieve the Melody object using getMelody(), then calling the play() method within the melody to start the tune a-crankin'. The melody can be stopped by calling the stop() method.
For example, to play a little ditty when the game is over, use the following code:
private void checkCollision()
{
  // Other stuff goes here...
  if (player.getEnergy() <= 0)
  {
      running = false;
      MelodyComposer  comp = new MelodyComposer();
      comp.setBPM(120);
      try
      {
        comp.appendNote(MelodyComposer.TONE_E1,
            MelodyComposer.TONELENGTH_1_4);
        comp.appendNote(MelodyComposer.TONE_D1,
            MelodyComposer.TONELENGTH_1_2);
        comp.appendNote(MelodyComposer.TONE_C3,
            MelodyComposer.TONELENGTH_1_4);
      } catch (Exception ex) {}
      Melody melody = comp.getMelody();
      melody.play();
    }
  }
A MelodyComposer object is constructed without any parameters. To make the melody quick, the beats per minute value is doubled to 120bpm. When the energy goes below zero, the melody E-D-C is played, with the D duration stretched getMelody(), then calling the twice as long as the other notes.
The com.siemens.mp.gsm package enables you to perform phone-specific functions, such as accessing the phone book, dialing a voice call number, or sending an SMS message.
Would you like to create a game that actually dials the police department if your character performs an illegal action? Although it is highly not recommended to do so, you can using the Siemens API!
Simply call the static start() method of the com.siemens.mp.gsm.Call() object, passing in the phone number:
Call.start("212-555-1212");
Note that once you begin a call, the currently running Java application will automatically be terminated. An IllegalArgumentException is thrown if the number is in an illegal format, or if the phone does not allow calls to be made from Java.
To get all the Missed Dialing Numbers (MDN) currently within the phone's address book, call the getMDN() method within the com.siemens.mp.gsm.PhoneBook object:
String n[] = PhoneBook.getMDN();
If all goes well, a String array with all the numbers will be returned.
Yes, it's true! You can send an SMS message using the Siemens API. To do so, just activate the static send() method within the com.siemens.mp.gsm.SMS object, passing in the destination's phone number and the message you want to send:
SMS.send("212-555-1231","Hi there!");
Most phones will display a dialog box asking the user to confirm whether or not she wants to actually send the SMS.
If the number or the text message is missing or in an incorrect format, an IllegalArgumentException will be thrown. If the SMS network is not available, an IOException will be thrown.
The Siemens API not only lets you send SMS messages and initiate calls, but it also enables you to load and save files to the local file system, or send or receive data via the mobile phone's serial or infrared port.
To actually send some data, use the com.siemens.mp.io.Connection class. Construct the Connection class as follows:
Connection conn = new Connection(String connectTo);
The connectTo parameter can be one of several values:
SMS:number—. Connects via SMS to a specific phone number.IRDA:—. Connects through the infrared port.INTERNAL:—. Connects through the phone's internal port.
You can then call the send(byte[] data) method to actually send some data. To get a response, use the setListener(ConnectionListener listener) method.
To create a listener, just create a class that implements com.siemens.mp.io.ConnectionListener. You must then add this method to the class
public void receiveData(byte[] data)
If any data is received from the given port, this method will be triggered.
The Siemens SL45i phone, unlike many other mobile devices, has an explicit file system with directories that you can read or write to.
The com.siemens.mp.io.File package contains a bunch of methods that enable you to easily create a file, write to a file, read from a file, or even delete a file.
For security reasons, you may only access files beneath the current Java applet's path. As such, only relative pathnames are valid, and you may not access parent directories using the .. directive.
The first time you run the File class, a special storage directory will be created beneath your applet's directory.
public int open(String filename)—. Opens a file namedfilenameand prepares the file for reading or writing, in binary (untranslated) mode. If the specified file does not already exist, it will be created. Returns a file descriptor integer that can be used to access the file.public int close(int fileDescriptor)—. Closes the file associated with the givenfileDescriptor.public int write(int fileDescriptor, byte[] buf, int offset, int numBytes)—. WritesnumBytesfrom the byte arraybufat a given offset into the file associated withfileDescriptor. Writing will begin at the current position of the file pointer. After writing a set number of bytes, the file pointer is increased by that number. To change the pointer, use theseek()method.public int read(int fileDescriptor, byte[] buf, int offset, int numBytes)—. ReadsnumBytes(or less) from the file associated withfileDescriptorinto the byte arraybufat a given offset. The read operation begins at the current position of the file pointer. After the read operation, the file pointer points to the next unread character. The method returns the total number of bytes read. If the value is less than zero, an error has occurred.public static int debugWrite(String filename, String infoString)—. A useful way of creating debug logs for your program; this method adds a given string to the indicated filename.public static int exists(String filename)—. Returns true if the given filename exists.public int seek(int fileDescriptor, int seekpos)—. Moves the file pointer for the specifiedfileDescriptorto the specifiedseekposlocation.public int length(int fileDescriptor)—. Returns the length of the file. Length will be less than zero if there is an error.public static int delete(String fileName)—. Removes a specific file from the storage directory. Returns –1 if successful.public static int spaceAvailable()—. Returns how many free bytes are currently available within the phone's file system.public static int rename(String source, String dest)—. Renames the given source file to the new destination name.public static int copy(String source,String dest)—. Copies the given source file as a new file with the destination name.
Although the API in this chapter applies only to the Siemens SL45i phone, it also gives you a glimpse of where J2ME profiles are heading.
With better graphic rendering, slicker sprites, tiled backgrounds, delightful audio, and telephonic features, it's possible to design and develop truly kick-butt games.