References, Namespaces, and Imports
As you move through the rest of this book, it is important that you understand this set of concepts—references, namespaces, and imports. These are relatively complex concepts, but they come up right from the beginning so they need to be covered now.
References
If you have programmed in Visual Basic 6.0, the concept of references should not be new to you; you add a reference to an external library (usually a DLL or an OCX) so that your code can use the classes contained within that library. This concept still exists in Visual Basic .NET, and you even have an Add Reference dialog box, which allows you to add references to either .NET or COM libraries. We will get into the difference between adding a reference to a COM object and a .NET object in Chapter 9, “Integrating with COM,” but for now the two can be treated as the same.
Visual Studio .NET adds a few references to your project(s) by default, but you can always see what references have been added by viewing a project's references folder in the Solution Explorer window.
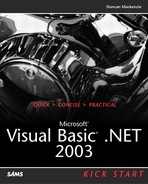
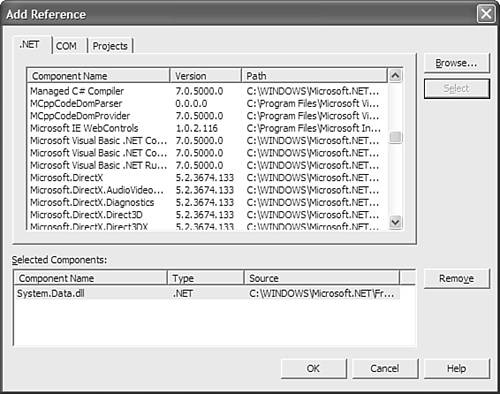
To add a new reference, right-click the References folder (see Figure 2.2) and pick Add Reference from the menu that appears. This will bring up the Add Reference dialog box (see Figure 2.3) where you can select a .NET or COM reference from the list of available libraries, or browse the file system to find the appropriate file.
Figure 2.2. The References folder lists all the library references that have been added to a specific project.

Figure 2.3. The References dialog box allows you to specify external libraries for use in your project.
Adding a reference to a library is required if you are going to use any of its features, just like in Visual Basic 6.0. What can be confusing is how the classes contained within a library are named and structured, and that is all based around the concept of namespaces.
Namespaces
A namespace is an abstract concept used to group a number of classes or modules, allowing you to logically categorize all these objects within a single higher-level object. So, by having a Namespace Chapter2 at the top of your classes and a corresponding End Namespace at the bottom, you effectively create a grouping called Chapter2 that contains all the classes within it. After this namespace exists, it is used by default for object references made in code within the same namespace, but can also be explicitly stated (Dim objMyClass as Chapter2.Class1).
There are many reasons why you might want to create and use namespaces, not the least of which is the basis for the moniker “namespace,” as a way to create a private area to ensure that your class names are unique. By defining a namespace, the class Class1 becomes Chapter2.Class1, and therefore will not conflict with any other class created with the name Class1.
Another more subtle reason to use namespaces is because they produce easier code to maintain. The grouping of classes under higher-level namespaces leads to code that is clearly defined by some categorization scheme and is therefore more readable and easy to maintain. Note that the .NET Framework itself is defined as a deep hierarchy of namespaces. For example, System.Data.SqlClient.SqlConnection is a class within the Framework, it is really the class SqlConnection within the System.Data.SqlClient namespace.
This method of grouping classes is similar to the concept of variable scope; a class only has to be unique within its particular namespace. If you do happen to make a class that shares its name with a class that exists in another namespace, you will need to make sure that you are specifying the full name of the class whenever you reference it from outside its own namespace. So if you had a Class1 in the namespace NS1 and another Class1 in the namespace NS2, you would have to use the full name of the class (NS1.Class1) in any situation where there could be confusion.
Namespaces are hierarchical, which allows you to create a multiple level scheme for grouping your classes and objects, just like within the .NET Framework. There are two ways to create a lower-level namespace: Either define the namespace using the fully qualified name as in Listing 2.26, or nest namespace definitions (see Listing 2.27).
Listing 2.26. Declaring a Multipart Namespace
Listing 2.27. Using Nested Namespaces to Create Object Hierarchies
Within your applications, you can use namespaces as a way to group conceptually related code together, but other than their effect on the scope of classes, namespaces are not required for building a system. You will usually end up using at least one namespace whether you want to or not, because your entire project is considered to be contained within a single namespace. That namespace is defined on the General tab of the Project properties dialog box; whatever value is in the Root Namespace field (see Figure 2.4) becomes the overall namespace for your entire project. It is possible to blank this field and therefore remove the concept of a root namespace completely for a given project.
Figure 2.4. The Root Namespace contains all of your classes and other code contained within your project.
It can be either a single name (like HelloWorld) or you can use a multi-level namespace as the root for your project (SAMS.Samples.VB.HelloWorld would be fine). Any additional namespaces you create in your code are nested below that project-level namespace, as are your classes and other items. As long as you are working only in a single project, you likely won't notice or care about the root namespace. All of your project code is contained under the root and therefore it is not necessary to specify the root namespace when referring to code within the same project.
Imports
The Imports statement is often confused with the concept of references, but they are not the same thing. As discussed in the section on namespaces, the full name of a class includes its namespace. The Form class, for example, is actually System.Windows.Forms.Form. We don't want to use the full name throughout our code though, and that is where the Imports statement comes in. An Imports statement specifies a namespace; by placing one or more Imports statements at the top of your code file, you can use classes from those namespaces without using the full path. So, if you want to refer to the System.Windows.Forms.Form class as just Form (as shown in Listing 2.28), you can add an Imports System.Windows.Forms statement to the top of the code file (.VB file).
Listing 2.28. Using Imports Avoids the Need for Fully Specified Class Names
Imports System.Windows.Forms

Public Class ShowStuff
    Sub ShowAForm(ByVal myForm As Form)
        myForm.Show()
    End Sub
End Class
|
The Imports line (Line 1) allows you to refer to System.Windows.Forms.Form as just Form (Line 4), and makes for cleaner code. You don't have to import the full namespace name, if you had Imports System at the top of the code file, you could refer to a form as Windows.Forms.Form.
DEFAULT IMPORTS CAN BE CONFUSINGVisual Studio .NET and Visual Basic can make the whole imports concept more confusing than it already is, because they include a set of “default” imports when you create a new project. If you check out the project properties window (select Properties from the Project menu on Visual Studio's main menu bar) and select the Imports option, you will see a list of default imports that are considered to be always on (see Figure 2.5). Figure 2.5. Project can include a default list of imports that are considered to be always on.
|
I have seen quite a few posts on Internet forums and newsgroups that confuse the concept of imports and references. If you want to use a library (System.Xml for example), you need to have a reference to it, either by default due to the wonders of Visual Studio .NET, or because you explicitly added one. That is it; if you have the reference, you can use the classes contained within that library. No Imports statement is required; just use the fully qualified name of the class (System.Xml.XmlDocument) and everything should work fine. Now, once you have a reference, if you want to use the classes within a certain namespace without having to fully qualify them, you need to add an Imports statement.
Two general points about Imports:
Add Imports statements to the individual code files, not to the project-level settings (as shown in Figure 2.4). That way if you pass a (.VB) code file around independently of the project, the imports won't be lost.
The System.Xml namespace is contained within System.Xml.dll. That is just a happy alignment of namespace and filename due to a naming convention within Microsoft, it is not required to be this way and it often won't be; you will often find that the namespace and the library filename don't match.