Data Binding in Windows Forms
In the last section you learned how to retrieve data from the Customers table in the Northwind database, with barely any code. This is a good thing. Visual Studio .NET helps you do a lot of the repetitive work that you don't really want to, so you have more time to focus on more important aspects of your applications. Data Binding won't be an exception to that statement. Let's take the previous example and learn how to bind it to the UI. Because you now have a table of data to work with, you can display it in the control that is appropriate for that job—the DataGrid.
To shorten the code even further, you can move the DataSet that you declared in the load event earlier, to the Forms Designer. To create a new DataSet at design time, locate the ToolBox window and click on the Data tab. You will then see the DataSet class and can drag a new one onto your form. A wizard will pop up asking if you'd like to create a typed dataset or an untyped dataset. Select untyped dataset and click the OK button. A new DataSet will now show up in the component tray. Change the Name property of this new DataSet to dsNorthwind and change the DataSetName property to Northwind. Now click the ellipsis at the right side of the Tables property and you will see the Table collection Designer. Click the Add button to add a new DataTable and change Name property to dtCustomers and the TableName property to Customers. You can now change the form's loading code to one simple line, as shown in Listing 5.2.
Listing 5.2. Filling a DataSet
Private Sub Form1_Load( _
        ByVal sender As Object, _
        ByVal e As System.EventArgs) _
        Handles MyBase.Load
     SqlDataAdapter1.Fill(dsNorthwind)
End Sub
|
When you call the Fill method now, you will instead pass in the DataSet this time. The DataAdapter will notice that you're pulling from the Customers table to get the data and dsNorthwind has a Customers table in it, so it will fill in the columns and rows in that DataTable in the DataSet. What's great about this is that you can now access the DataTable by its name instead of by Index, which makes for more readable and dynamic code.
MsgBox(CStr(dsNorthwind.Tables ("Customers").Rows(0)("ContactName")))
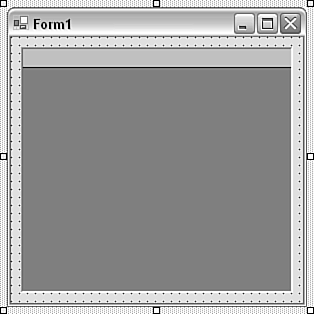
With this aside, you are now ready to data bind. Add a DataGrid control to the form. Set its Dock property to Fill and change the DockPadding.All property of the form to 10. The end result should look like Figure 5.4. For more information on docking, refer to Chapter 3.
Figure 5.4. A DataGrid docked to fill in a form.
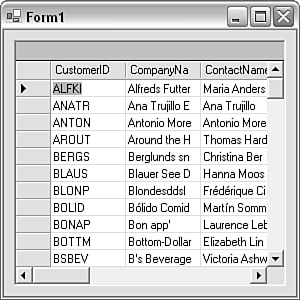
Select the DataGrid in the forms designer and check out the Property window. The properties of interest to you right now are in the Data section. If you click and select the DataSource property, you'll notice a little down arrow. Click that arrow and you will see the DataSet and DataTable you have created there. Select dsNorthwind from the drop-down list because you want to have the grid display data from it. Now click the DataMember property and click the down arrow. You should see a list of all the DataTables contained inside the DataSet selected in the DataSource property. In this case, you will see Customers; select it. Now run this application and you will see that lo and behold, without writing but a single line of code, you now have a form that will show you all the customers as shown in Figure 5.5. How cool is that?
Figure 5.5. A form that displays all the customers.
There are quite a few other ways you can use Data Binding for different types of data layouts and situations. The next section illustrates simple binding.
Simple Binding
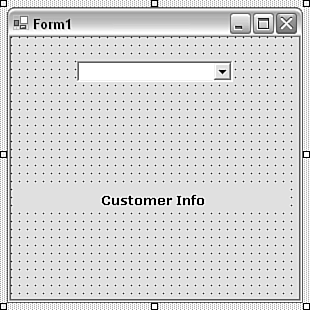
Simple binding refers to binding a set of data to a control that is capable of displaying only one piece of data at a time, such as the TextBox or ComboBox. To keep things simple, this example uses the same data structure as the last example. Create a new Windows Forms project on the default form, and place a ComboBox and a Label. Name them cmbCustomers and lblCustomerInfo, respectively. Your form should look like Figure 5.6.
Figure 5.6. A form to display customers and information about them one at a time.
After setting up the UI, you will need to set up the connection, DataAdapter, and DataSet again like you did for the first example. Once you have all of that set up, you're ready to write some code. This time around, you're going to do all the Data Binding in code instead of at design time so you can see that it works exactly the same. Like last time, you'll need to fill the DataSet when the form loads, but this time, you'll also write a bit of code to bind the Customers table to cmbCustomers. Listing 5.3 shows this process.
Listing 5.3. Binding the ComboBox to the Customers Table
This code introduces a couple new properties—DisplayMember and ValueMember. These properties exist on several controls in Windows Forms that support Data Binding to a list of data, including the ListBox, CheckedListBox and the ComboBox. Both properties are strings and in the case of binding to a DataTable, represent the field names. The DisplayMember is the field that you would like to be shown in the control per row in the DataTable. ValueMember is the field you would like to use to identify the currently selected item. This is usually the identification field. As before, the DataSource property is set to the Customers table, because that's what you want to bind to.
That little bit of code is enough to properly bind to the ComboBox. If you run the application, you will see that cmbCustomers now has all the customers bound to it and because you set the DisplayMember property to ContactName, that field is displayed for you to visually recognize each row. Now let's see what the ValueMember field is going to do for you.
In the SelectedIndexChanged event of cmbCustomers, you can add in the code listed in Listing 5.4 to set a value into the label on the form.
Listing 5.4. Show the SelectedValue
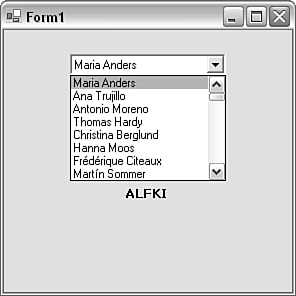
Again, you're introduced to a new property called SelectedValue. This property returns the value of “ValueMember” field for the currently selected row, which in this case was CustomerID. The code snippet in Listing 5.4 takes the value of that field and displays it in the label. If you run the application, the result should look like Figure 5.7.
Figure 5.7. The ComboBox is now bound to the Customers table and the SelectedValue returns the CustomerID.
This is all really great, but there's a lot more power built into Data Binding than just getting the selected value from the ComboBox.
When you set the DataSource property, each DataRow in the Customers DataTable is actually getting bound to the Items collection of the ComboBox, so if you were to try to retrieve the first item in the Items collection of the ComboBox, it would actually return a reference to the first row. Using the SelectedItem property of the ComboBox you can obtain the currently selected row of the data source. So let's say you wanted to show the address instead of the CustomerID in the label; you could easily change the line from Listing 5.4 to this:
lblCustomerInfo.Text = _
   DirectCast( _
   cmbCustomers.SelectedItem, _
   DataRowView)("Address").ToString
SelectedItem returns an object so you must properly cast it to another type so that you can deal with it. In this case, it's actually an instance of the DataRowView class. This mirrors what is in the underlying DataRow and in fact has access to the actual DataRow through the Row property. The reason you're seeing a DataRowView instead of a DataRow is that when you bind to a DataTable in Windows Forms, you are actually binding to the default DataView, and a DataView's rows are exposed as DataRowView objects. This will become important and I will talk about it shortly. Now with the DataRowView of the currently selected DataRow, you can access whatever field you'd like in that row. In this case, you'll grab the value of the Address field; make sure it's a string and display it. The big picture here is that Data Binding in Windows Forms actually binds to the objects themselves, so you can easily access them and do whatever you want with it. This is extremely powerful.
This takes you to the final subject of this chapter. You can combine what you've learned so far to create an even more powerful DataBinding solution.
