
In this chapter, we will discover what's new in ESB Toolkit Version 2.2, and how to install and configure it.
We will also walk through installing and configuring the ESB Management Portal sample that is provided with the toolkit.
The new features in ESB Toolkit Version 2.2 are:
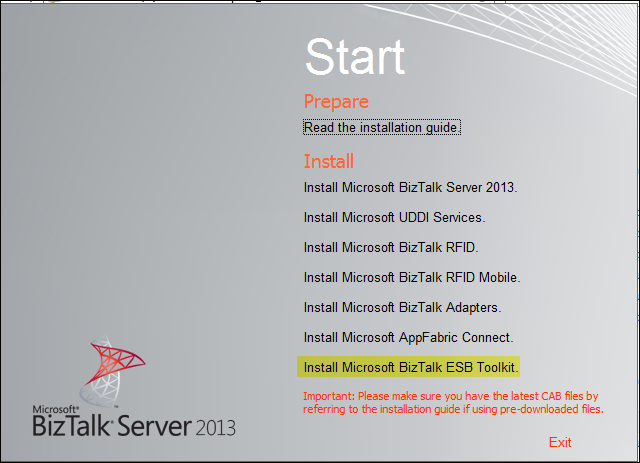
- BizTalk Server 2013 now includes the ESB Toolkit 2.2. It is no longer a separate application that we need to download and install.
- Installation and configuration is much simpler.
The ESB Toolkit is no longer a separate installation. It is now an installation option included with BizTalk 2013, as shown in the following screenshot:
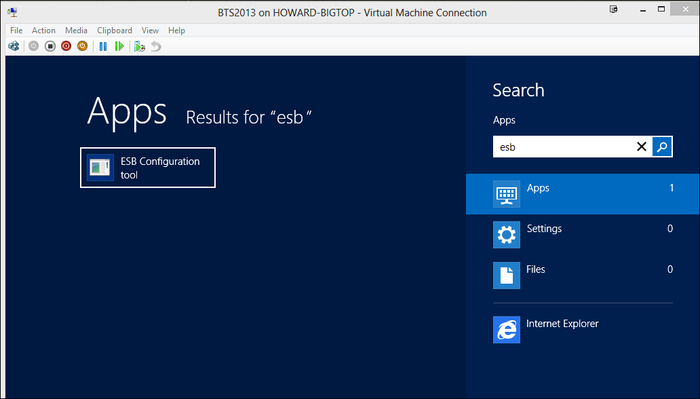
After installing the ESB Toolkit 2.2, we need to configure it. We will use the ESB Configuration Tool. In order to start the tool we must select it from the new Windows User Interface (UI).
Press the Windows key to switch to new Windows User Interface (UI) and then type esb as shown in the following screenshot:
Once we have clicked on ESB Configuration tool in the Apps menu, the tool is started on our Desktop as shown in the following screenshot:
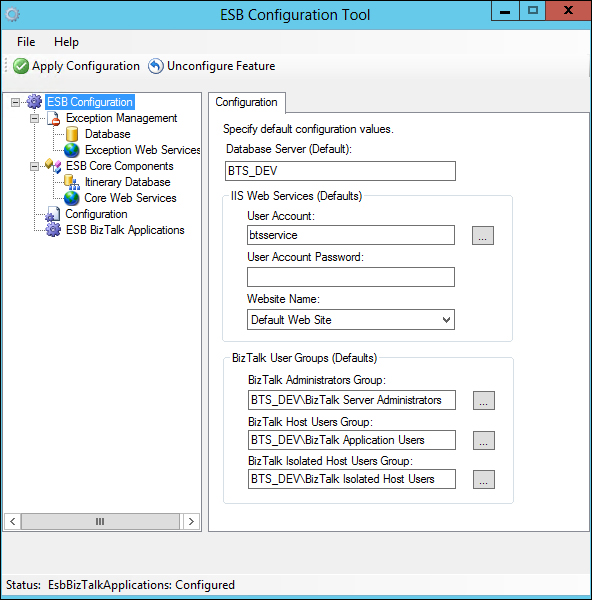
As you can see, the configuration is similar to the one in ESB Toolkit 2.1 with the following differences:
- We can do a basic configuration by entering the information in the configuration tab as shown in the preceding screenshot. We then click on the Apply Configuration button and our services are deployed and configured.
- We can customize our configuration of the Exception Management and ESB Core Services separately as was done in ESB Toolkit 2.1.
In order for to perform a custom configuration we must follow certain steps.
The following are the steps we take to configure the ESB databases and services:
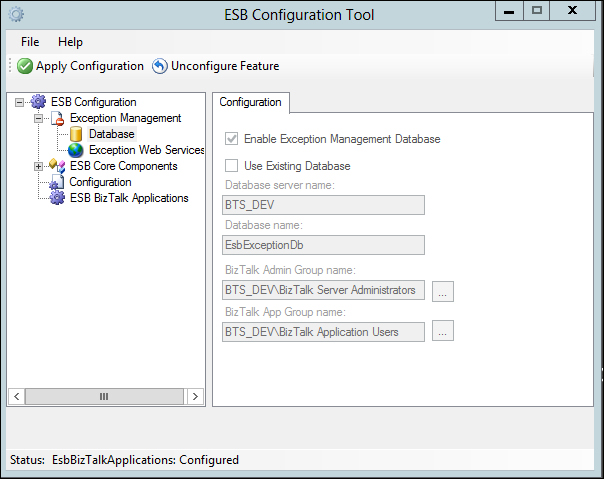
- We start off by configuring the Exception Management Database as shown in the following screenshot. Check the Enable Exception Management Database checkbox.
- Both the Database server name and Database name values will be auto-populated.
- We have the option to change the BizTalk Admin Group and BizTalk App Group names.
- Click on the Apply Configuration button to apply the changes.
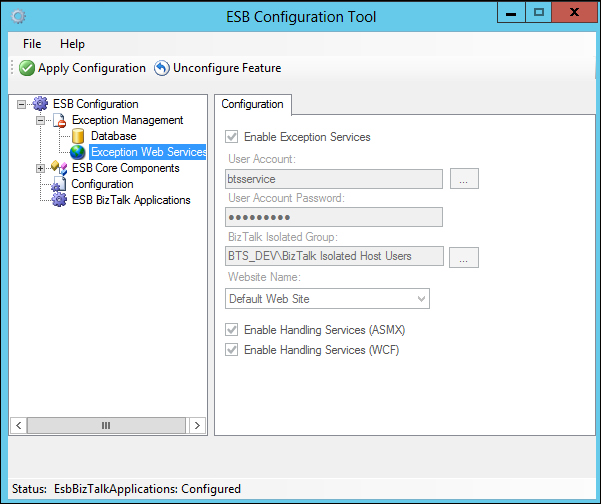
Next configure the Exception Service as shown in the following screenshot:
- Click on the Enable Exception Services button.
- We have the option of selecting values for User Account, BizTalk Isolated Host Group, and Website name.
- We also have the option of selecting the type of Handling Service, either ASMX or WCF, or both.
- Click on the Apply Configuration button to apply the changes.
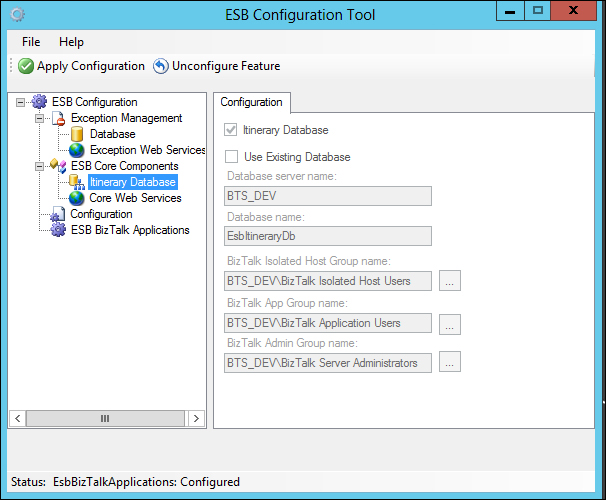
Then we configure the Itinerary Database as shown in the following screenshot:
- Click on the Itinerary button.
- We have the option to set the name for BizTalk Isolated Host Group, BizTalk App Group, and BizTalk Server Admin Group.
- Click on the Apply Configuration button to apply the changes.
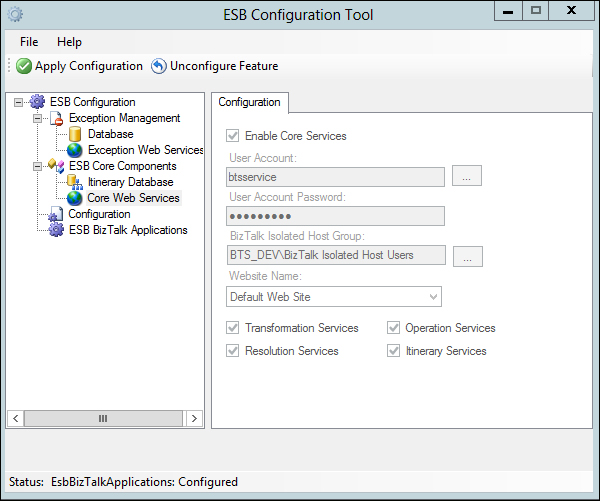
Our Core Web Services are configured as shown in the following screenshot:
- Click on the Enable Core Services button.
- Next configure User Account, BizTalk Isolated Host Group, and select the Website name.
- We can select one or more of the following services:
- Transformation Services
- Operation Services
- Resolution Services
- Itinerary Services
- Then click on the Apply Configuration button to apply the changes.
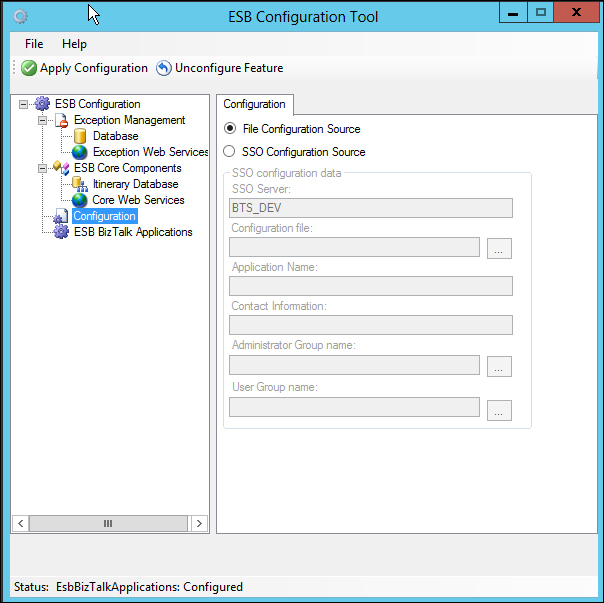
There is a new configuration option in the tool, ESB BizTalk Applications. We use this configuration to enable ESB core components and/or JMS/WMQ components in BizTalk Server 2013 as shown in the following screenshot:
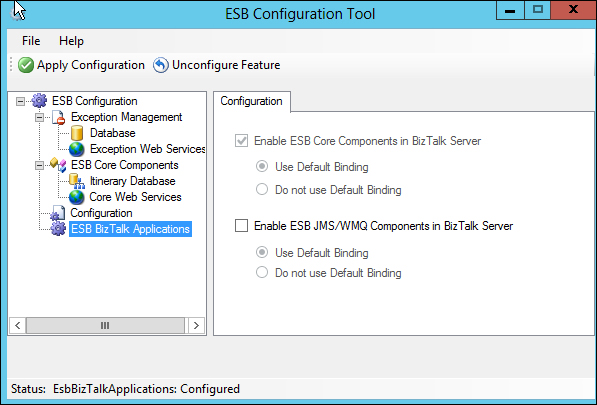
By enabling the Core Components, and clicking on Apply Configuration, they are deployed to the BizTalk Server. We also have the choices: Use Default Binding or Do not use Default Binding.
If we select Use Default Binding the standard binding included with the ESB Toolkit is used. Otherwise, if we select Do not use Default Binding, the components are installed, but not bound. This allows us to use a custom binding file.