© Peter Himschoot 2020
P. HimschootMicrosoft Blazorhttps://doi.org/10.1007/978-1-4842-5928-3_7

7. Single-Page Applications and Routing

Peter Himschoot1 
(1)
Melle, Belgium
 

Blazor is a .NET framework you use for building single-page applications (SPA), just like you can use popular JavaScript frameworks such as Angular, React, and Vue.js. But what is a SPA? In this chapter, you will use routing to jump between different sections of a SPA and send data between different components.

What Is a Single-Page Application?

At the beginning of the Web, there were only static pages. A static page is an HTML file somewhere on the server that gets sent back to the browser upon request. Here the server is really nothing but a file server, returning HTML pages to the browser. The browser renders the HTML. The only interaction with the browser then was that you could click a link to get another page from the server. Later came the rise of dynamic pages. When a browser requests a dynamic page , the server runs a program to build the HTML in memory and sends the HTML back to the browser (this HTML never gets stored to disk; of course, the server can store the generated HTML in its cache for fast retrieval later). Dynamic pages are flexible in the way that the same code can generate thousands of different pages by retrieving data from a database and using it to construct the page. Lots of commercial websites like amazon.com use this. But there is still a usability problem. Every time your user clicks a link, the server must generate the next page from scratch and send it to the browser for rendering. This results in a noticeable wait period, and of course, the browser re-renders the whole page.

Then web pages started to use JavaScript to retrieve parts of the page when the user interacts with the UI. One of the first examples of this technique was Microsoft’s Outlook Web Application. This web application looks and feels like Outlook, a desktop application, with support for all user interactions you expect from a desktop application. Google’s Gmail is another example. They are now known as single-page applications. SPAs use certain sections of the web page that are replaced at runtime depending on the user’s interaction. If you click an email, the main section of the page is replaced by the email’s view. If you click your inbox, the main section gets replaced by a list of emails, and so on.

A SPA is a web application that replaces certain parts of the UI without reloading the complete page. SPAs use JavaScript (or C# when you’re using Blazor) to implement this manipulation of the browser’s control tree (also known as the DOM), and most of them consist of a fixed UI and a placeholder element where the contents are overwritten depending on where the user clicks. One of the main advantages of using a SPA is that you can make a SPA state-full. This means that you can keep information loaded by the application in memory. You will look at an example of a SPA, built with Blazor, in this chapter.

Using Layout Components

Let’s start with the fixed part of a SPA. Every web application contains UI elements that you can find on every page, such as a header, footer, copyright, menu, and so on. Copy-pasting these elements to every page would be a lot of work and would require updating every page if one of these elements needed to change. Developers don’t like to do that so every framework for building websites has had a solution for this. For example, ASP.NET WebForms uses master pages; ASP.NET MVC has layout pages. Blazor also has a mechanism for this called layout components.

Blazor Layout Components

Layout components are Blazor components . Anything you can do with a regular component, you can do with a layout component, like dependency injection, data binding, and nesting other components. The only difference is that they must inherit from the LayoutComponentBase class.

The LayoutComponentBase class defines a Body property as in Listing 7-1.
// Copyright (c) .NET Foundation. All rights reserved.
// Licensed under the Apache License, Version 2.0. See License.txt in the project root for license information.
namespace Microsoft.AspNetCore.Components
{
  /// <summary>
  /// Optional base class for components that represent a layout.
  /// Alternatively, components may implement <see cref="IComponent"/> directly
  /// and declare their own parameter named <see cref="Body"/>.
  /// </summary>
  public abstract class LayoutComponentBase : ComponentBase
  {
    internal const string BodyPropertyName = nameof(Body);
    /// <summary>
    /// Gets the content to be rendered inside the layout.
    /// </summary>
    [Parameter]
    public RenderFragment Body { get; set; }
  }
}
Listing 7-1

The LayoutComponentBase class

As you can see from Listing 7-1, the LayoutComponentBase class inherits from the ComponentBase class. This is why you can do the same things as with normal components. Let’s look at an example. Open the MyFirstBlazor solution from previous chapters. Now, look at the MainLayout.razor component in the MyFirstBlazor.Client’s Shared folder, which you’ll find in Listing 7-2.
@inherits LayoutComponentBase
<div class="sidebar">
  <NavMenu />
</div>
<div class="main">
  <div class="top-row px-4">
    <a href="http://blazor.net" target="_blank" class="ml-md-auto">About</a>
  </div>
  <div class="content px-4">
    @Body
  </div>
</div>
Listing 7-2

MainLayout.razor

On the first line, the MainLayout component declares that it inherits from LayoutComponentBase. Then you see a sidebar and main <div> element, with the main element data-binding to the inherited Body property.

In Figure 7-1, you can see the sidebar on the left side (containing the links to the different components) and the main area on the right side with the @Body emphasized with a black rectangle (which I added to the figure). Clicking the Home, Counter, or Fetch Data link in the sidebar will replace the Body property with the selected component, updating the UI without reloading the whole page .
../images/469993_2_En_7_Chapter/469993_2_En_7_Fig1_HTML.jpg
Figure 7-1

The MainLayout component

Selecting a @layout Component

Every component can select which layout to use by stating the name of the layout component with the @layout directive. For example, start by copying the MainLayout.razor file to MainLayout2.razor. This will generate a new layout component called MainLayout2, inferred from the file name. Change the About link’s text to Layout as in Listing 7-3.
@inherits LayoutComponentBase
<div class="sidebar">
  <NavMenu />
</div>
<div class="main">
  <div class="top-row px-4">
    <a href="http://blazor.net" target="_blank" class="ml-md-auto">
      Layout
    </a>
  </div>
  <div class="content px-4">
    @Body
  </div>
</div>
Listing 7-3

A second layout component

Now open the Counter component and add a @layout as in Listing 7-4.
@page "/counter"
@layout MainLayout2
<h1>Counter</h1>
  ...
}
Listing 7-4

Choosing a different layout with @layout

Run the application and watch the layout change (the text of the link in the top right corner) as you alternate between Home and Counter.

You can also use the LayoutAttribute if you’re building your component completely in code.

So where is the default layout defined? Find and open App.razor from the client projects. As you can see in Listing 7-5, the RouteView defines the default layout.
<Router AppAssembly="@typeof(Program).Assembly">
  <Found Context="routeData">
    <RouteView RouteData="@routeData" DefaultLayout="@typeof(MainLayout)" />
  </Found>
  <NotFound>
    <LayoutView Layout="@typeof(MainLayout)">
      <p>Sorry, there's nothing at this address.</p>
    </LayoutView>
  </NotFound>
</Router>
Listing 7-5

Default layout pages are defined in App.razor

_Imports.razor

Most components will use the same layout. Instead of copying the same @layout directive to every page, you can also add a _Imports.razor file to the same folder as your components. Open the Pages folder from the MyFirstBlazor.Client project and add a new _Imports.razor file, which can be found in Listing 7-6.
@layout MainLayout2
Listing 7-6

_Imports.razor

Any component in this folder (or subfolder) that does not explicitly declare a @layout component will use the MainLayout2 component.

Anything that is shared between all your components can be put in _Imports.razor , especially @using statements. A component can always override the @layout by explicitly adding the layout as in Listing 7-6.

Nested Layouts

Layout components can also be nested. You could define the MainLayout to contain all the UI that is shared between all components, and then define a nested layout to be used by a subset of these components. For example, add a new Razor View called NestedLayout.razor to the Shared folder and replace its contents with Listing 7-7.
@inherits LayoutComponentBase
@layout MainLayout
<div class="container-fluid">
  <div class="row bg-primary text-white">
    <div class="col-sm-12">
      <h2>This is a nested layout</h2>
    </div>
  </div>
  <div class="row">
    <div class="col-sm-12">
      @Body
    </div>
  </div>
</div>
Listing 7-7

A simple nested layout

To build a nested layout, you @inherit from LayoutComponentBase and set its @layout to another layout, for example, MainLayout. Now make the Counter component use this nested layout as in Listing 7-8.
@page "/counter"
@layout NestedLayout
<h1>Counter</h1>
...
Listing 7-8

The Counter component is using the nested layout

Run your application and select the Counter component, as shown in Figure 7-2.
../images/469993_2_En_7_Chapter/469993_2_En_7_Fig2_HTML.jpg
Figure 7-2

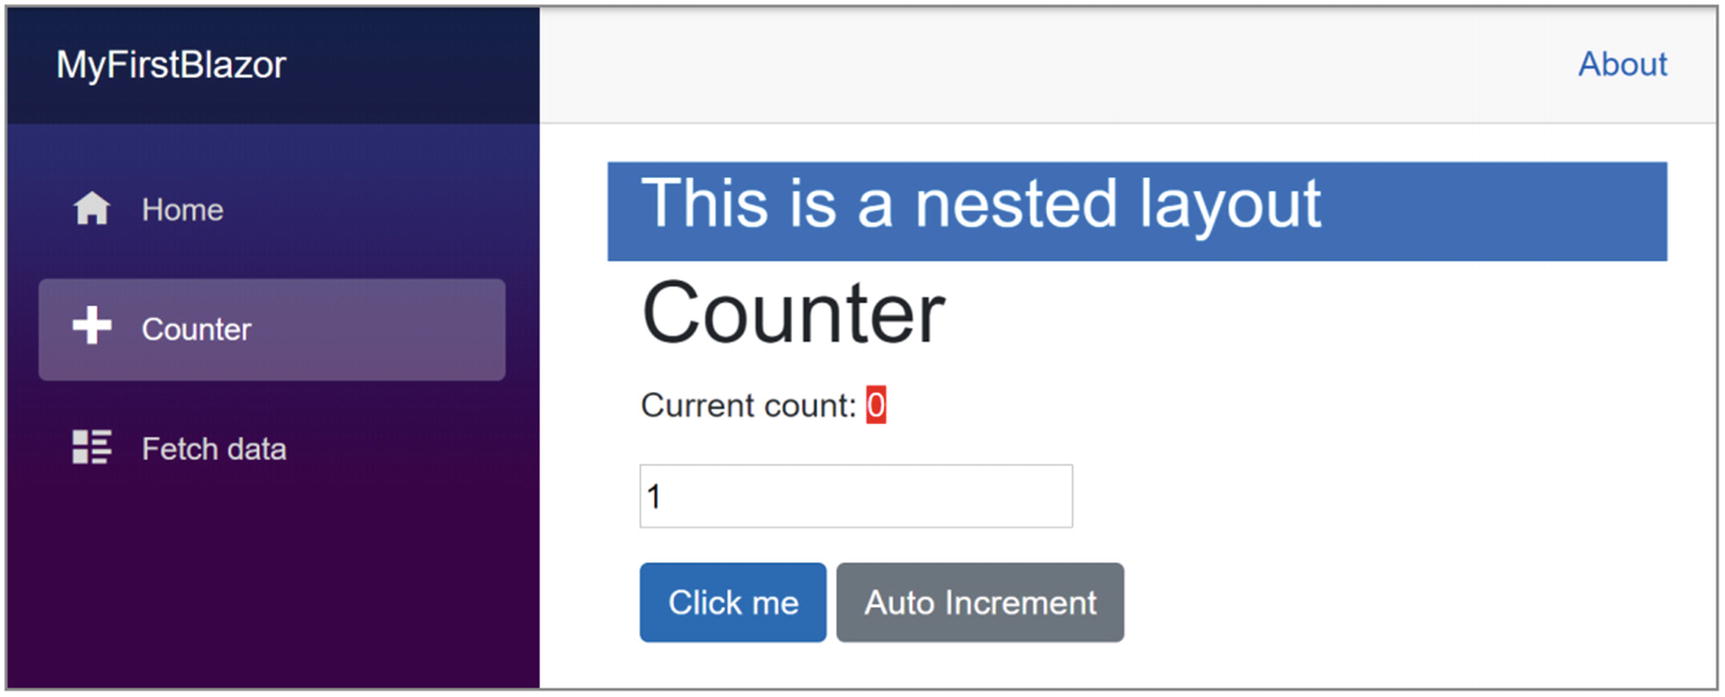
The Counter component using the nested layout

Understanding Routing

Single-page applications use routing to select which component gets picked to fill in the layout component’s Body property. Routing is the process of matching the browser’s URI to a collection of route templates and is used to select the component to be shown on screen. That is why every component in as Blazor SPA uses a @page directive to define the route template to tell the router which component to pick.

Installing the Router

When you create a Blazor solution from scratch, the router is already installed, but let’s have a look at how this is done. Open App.razor. This App component only has one component, the Router component, as shown in Listing 7-9.
<Router AppAssembly="@typeof(Program).Assembly">
  <Found Context="routeData">
    <RouteView RouteData="@routeData" DefaultLayout="@typeof(MainLayout)" />
  </Found>
  <NotFound>
    <LayoutView Layout="@typeof(MainLayout)">
      <p>Sorry, there's nothing at this address.</p>
    </LayoutView>
  </NotFound>
</Router>
Listing 7-9

The App component containing the router

The Router component is a templated component with two templates. The Found template is used for known routes, and the NotFound is shown when the URI does not match any of the known routes. You can replace the contents of the last to show a nice error page to the user.

The Found template uses a RouteView component which will render the selected component with its layout (or default layout).

The router will look for all components that have the RouteAttribute (the @page directive gets compiled into a RouteAttribute) and pick the component that matches the current browser’s URI. You will look at setting this RouteAttribute a little later in this chapter, but first, you need to look at the NavMenu component.

The NavMenu Component

Review the MainLayout component from Listing 7-2. On the fourth line, you will see the NavMenu component. This component contains the links to navigate between components. Open the MyFirstBlazor solution and look for the NavMenu component in the Shared folder, which is repeated in Listing 7-10.
<div class="top-row pl-4 navbar navbar-dark">
  <a class="navbar-brand" href="">MyFirstBlazor</a>
  <button class="navbar-toggler" @onclick="ToggleNavMenu">
    <span class="navbar-toggler-icon"></span>
  </button>
</div>
<div class="@NavMenuCssClass" @onclick="ToggleNavMenu">
  <ul class="nav flex-column">
    <li class="nav-item px-3">
      <NavLink class="nav-link" href="" Match="NavLinkMatch.All">
        <span class="oi oi-home" aria-hidden="true"></span> Home
      </NavLink>
    </li>
    <li class="nav-item px-3">
      <NavLink class="nav-link" href="counter">
        <span class="oi oi-plus" aria-hidden="true"></span> Counter
      </NavLink>
    </li>
    <li class="nav-item px-3">
      <NavLink class="nav-link" href="fetchdata">
        <span class="oi oi-list-rich" aria-hidden="true"></span> Fetch data
      </NavLink>
    </li>
  </ul>
</div>
@code {
  private bool collapseNavMenu = true;
  private string NavMenuCssClass => collapseNavMenu ? "collapse" : null;
  private void ToggleNavMenu()
  {
    collapseNavMenu = !collapseNavMenu;
  }
}
Listing 7-10

The NavMenu component

The first part of Listing 7-10 contains a toggle button which allows you to hide and show the navigation menu. This button is only visible on displays with a narrow width (e.g., mobile displays). If you want to look at it, run your application and make the browser width smaller until you see the hamburger button in the top right corner, as in Figure 7-3. Click the button to show the navigation menu and click it again to hide the menu again.
../images/469993_2_En_7_Chapter/469993_2_En_7_Fig3_HTML.jpg
Figure 7-3

Your application on a narrow display shows the toggle button

The remaining markup contains the navigation menu, which consists of NavLink components. Let’s look at the NavLink component.

The NavLink Component

The NavLink component is a specialized version of an anchor element <a/> used for creating navigation links. When the browser’s URI matches the href property of the NavLink, it applies a CSS style (the active CSS class if you want to customize it) to itself to let you know it is the current route. For example, look at Listing 7-11.
<li class="nav-item px-3">
  <NavLink class="nav-link" href="counter">
    <span class="oi oi-plus" aria-hidden="true"></span> Counter
  </NavLink>
</li>
Listing 7-11

The counter route’s NavLink

When the browser’s URI ends with /counter (ignoring things like query strings), this NavLink will apply the active style. Let’s look at another one in Listing 7-12.
<li class="nav-item px-3">
  <NavLink class="nav-link" href="" Match="NavLinkMatch.All">
    <span class="oi oi-home" aria-hidden="true"></span> Home
  </NavLink>
</li>
Listing 7-12

The default route’s NavLink

When the browser’s URI is empty (except for the site’s URL), the NavLink from Listing 7-12 will be active. But here you have a special case. Normally, NavLink components only match the end of the URI. For example, /counter/55 matches the NavLink from Listing 7-11. But with an empty URI, this would match everything! This is why in the special case of an empty URI you need to tell the NavLink to match the whole URI. You do this with the Match property, which by default is set to NavLinkMatch.Prefix . If you want to match the whole URI, use NavLinkMatch.All as in Listing 7-12.

Setting the Route Template

The Routing component from Blazor examines the browser’s URI and searches for a component’s route template to match. But how do you set a component’s route template? Open the counter component shown in Listing 7-4. At the top of this file is the @page "/counter" directive. It defines the route template. A route template is a string matching a URI, and that can contain parameters, which you can then use in your component.

Using Route Parameters

You can change what gets displayed in the component by passing parameters in the route. You could pass the id of a product, look up the product’s details with the id, and use it to display the product’s details. Let’s look at an example. Change the counter component to look like Listing 7-13 by adding another route template which will set the CurrentCount parameter.
@page "/counter"
@page "/counter/{CurrentCount:int}"
@layout NestedLayout
<h1>Counter</h1>
<p>
  Current count:
  <span>@CurrentCount</span>
</p>
<button class="btn btn-primary"
        @onclick="IncrementCount">
  Click me
</button>
@code {
  [Parameter]
  public int CurrentCount { get; set; } = 0;
  private void IncrementCount()
  => CurrentCount += 1;
}
Listing 7-13

Defining a route template with a parameter

Listing 7-13 adds route template @page "/counter/{CurrentCount:int}". This tells the router component to match a URI like /counter/55 and to put the number in the CurrentCount parameter of your Counter component. You encase parameters in curly brackets. The Router component will put the value from the route in the property with the same name. You can also specify multiple parameters. Blazor does not allow you to specify default parameters, and therefore you need to specify two route templates. The first route template will pick the Counter component , with the CurrentCount set to its default value of 0. The second route template will pick the Counter component and set the CurrentCount parameter to an int value. It must be int because of the int route constraint.

Filter URIs with Route Constraints

Just like routes in ASP.NET MVC Core , you can use route constrains to limit the type of parameter to match. For example, if you were to use the /counter/Blazor URI, the route template would not match because the parameter does not hold an integer value and the router would not find any component to match.

Constraints are even mandatory if you’re not using string parameters; otherwise, the router does not cast the parameter to the proper type. You specify the constraint by appending it using a colon, for example, @page, "/counter/CurrentCount:int".

A list of other constraints can be found in Table 7-1. Each of these maps to the corresponding .NET type.
Table 7-1

Routing Constraints

Route Constraints

Bool

Datetime

Decimal

Double

Float

Guid

Int

Long

If you are building your components as pure C# components, apply the RouteAttribute to your class with the route template as an argument. This is what the @page directive gets compiled into.

Redirecting to Other Pages

How do you navigate to another component using routing? You have three choices: use a standard anchor element, use the NavLink component, and use code. Let’s start with the normal anchor tag.

Navigating Using an Anchor

Using an anchor (the <a/> element) is effortless if you use a relative href. For example, add Listing 7-14 below the button of Listing 7-13.
<a class="btn btn-primary" href="/">Home</a>
Listing 7-14

Navigation using an anchor tag

This link has been styled as a button using Bootstrap 4. Run your application and navigate to the Counter component. Click the Home button to navigate to the Index component whose route template matches "/".

Navigating Using the NavLink Component

The NavLink component uses an underlying anchor, so its usage is similar. The only difference is that a NavLink component applies the active class when it matches the route. Generally, you only use a NavLink in the NavMenu component, but you are free to use it instead of anchors.

Navigating with Code

Navigating in code is also possible, but you will need an instance of the NavigationManager class through dependency injection. This instance allows you to examine the page’s URI and has a helpful NavigateTo method . This method takes a string that will become the browser’s new URI.

Let’s try an example. Modify the counter component to look like Listing 7-15.
@page "/counter"
@page "/counter/{CurrentCount:int}"
@layout NestedLayout
@inject NavigationManager uriHelper
<h1>Counter</h1>
<p>
  Current count:
  <span>@CurrentCount</span>
</p>
<button class="btn btn-primary"
        @onclick="IncrementCount">
  Click me
</button>
<a class="btn btn-primary" href="/">Home</a>
<button class="btn btn-primary" @onclick="StartFrom50">
  Start From 50
</button>
@code {
  [Parameter]
  public int CurrentCount { get; set; } = 0;
  private void IncrementCount()
  => CurrentCount += 1;
  private void StartFrom50()
  => uriHelper.NavigateTo("/Counter/50");
}
Listing 7-15

Using the NavigationManager

You tell dependency injection with the @inject directive to give you an instance of the NavigationManager and put it in the uriHelper field. Then you add a button that calls the StartFrom50 method when clicked. This method uses the NavigationManager to navigate to another URI by calling the NavigateTo method. Run your application and click the “Start from 50” button. You should navigate to /counter/50.

Understanding the Base Tag

Please don’t use absolute URIs when navigating. Why? Because when you deploy your application on the Internet, the base URI will change. Instead, Blazor uses the <base/> element and all relative URIs will be combined with this <base/> tag. Where is the <base/> tag? Open the wwwroot folder of your Blazor project and open index.html, shown in Listing 7-16.
<!DOCTYPE html>
<html>
<head>
  <meta charset="utf-8" />
  <meta name="viewport" content="width=device-width" />
  <title>MyFirstBlazor</title>
  <base href="/" />
  <link href="css/bootstrap/bootstrap.min.css" rel="stylesheet" />
  <link href="css/site.css" rel="stylesheet" />
  <link href="_content/MyFirstBlazor.Components/styles.css" rel="stylesheet" />
</head>
<body>
  <app>Loading...</app>
  <div id="blazor-error-ui">
    An unhandled error has occurred.
    <a href="" class="reload">Reload</a>
    <a class="dismiss">Ï</a>
  </div>
  <script src="_framework/blazor.webassembly.js"></script>
</body>
</html>
Listing 7-16

Index.html

If you are using Server-Side Blazor, the base tag can be found in _Host.cshtml.

When you deploy in production, all you need to do is to update the base tag. For example, you might deploy your application to https://online.u2u.be/selfassessment. In this case, you would update the base element to <base href="/selfassessment" />. So why do you need to do this? If you deploy to https://online.u2u.be/selfassessment, the counter component’s URI becomes https://online.u2u.be/selfassessment/counter. Routing will ignore the base URI so it will match the counter as expected. You only need to specify the base URI once, as shown in Listing 7-16.

Sharing State Between Components

When you navigate between different Blazor components with routing, you will probably encounter the need to send information from one component to another. One way to accomplish this is by setting a parameter in the destination component by passing it in the URI. For example, you could navigate to /pizzadetail/5 to tell the destination component to display information about the pizza with id 5. The destination component can then use a service to load the information about pizza #5 and then display this information. But in Blazor, there is another way. You can build a State class (most developers call this State, but this is just a convention and you can call it anything you want; State just makes sense) and then use dependency injection to give every component the same instance of this class. This is also known as the Singleton Pattern . This way, all your components share the same State instance, and this makes it easy to communicate between components that are not in a parent-child relationship. Your PizzaPlace application is already using a State class, so it should not be too much work to use this pattern.

Start by opening the Pizza Place solution from previous chapters. Open the Index component from the Pages folder (in the PizzaPlace.Client project) and look for the private State field. Remove this field (I’ve made it a comment) and replace it with an @inject directive as in Listing 7-17.
@page "/"
...
@inject IMenuService menuService
@inject IOrderService orderService
@inject State State
@code {
  // private State State { get; } = new State();
  protected override async Task OnInitializedAsync()
  {
    State.Menu = await menuService.GetMenu();
  }
  ...
}
Listing 7-17

Using dependency injection to get the State Singleton instance

Now configure dependency injection in Program.cs to inject the State instance as a singleton, as in Listing 7-18.
using Microsoft.AspNetCore.Blazor.Hosting;
using Microsoft.Extensions.DependencyInjection;
using PizzaPlace.Client.Services;
using PizzaPlace.Shared;
using System.Threading.Tasks;
namespace PizzaPlace.Client
{
  public class Program
  {
    public static async Task Main(string[] args)
    {
      var builder = WebAssemblyHostBuilder.CreateDefault(args);
      builder.RootComponents.Add<App>("app");
      builder.Services.AddTransient<IMenuService, MenuService>();
      builder.Services.AddTransient<IOrderService, OrderService>();
      builder.Services.AddTransient(sp => new HttpClient { BaseAddress = new Uri(builder.HostEnvironment.BaseAddress) });
      builder.Services.AddSingleton<State>();
      await builder.Build().RunAsync();
    }
  }
}
Listing 7-18

Configuring dependency injection for the State singleton

Run the application. Everything should still work! What you’ve done is to use the Singleton Pattern to inject the State singleton into the Index component. Let’s add another component that will use the same State instance.

You want to display more information about a pizza using a new component, but before you do this, you need to update the State class. Add a new property called CurrentPizza to the State class, as shown in Listing 7-19.
using System.Linq;
namespace PizzaPlace.Shared
{
  public class State
  {
    public Menu Menu { get; set; } = new Menu();
    public Basket Basket { get; set; } = new Basket();
    public UI UI { get; set; } = new UI();
    public decimal TotalPrice
      => Basket.Orders.Sum(id => Menu.GetPizza(id).Price);
    public Pizza CurrentPizza { get; set; }
  }
}
Listing 7-19

Adding a CurrentPizza property to the State class

Now when someone clicks a pizza on the menu, it will display the pizza’s information. Update the PizzaItem component by wrapping the pizza name in an anchor, like in Listing 7-20. Here we added a new ShowPizzaInformation parameter, and if this is non-null, we wrap it in an anchor which invokes the ShowPizzaInformation action.
<div class="row">
  <div class="col">
    @if (ShowPizzaInformation is object)
    {
      <a href=""
         @onclick="@(() => ShowPizzaInformation?.Invoke(Pizza))">
        @Pizza.Name
      </a>
    }
    else
    {
      @Pizza.Name
    }
  </div>
  <div class="col">
    @Pizza.Price
  </div>
  <div class="col">
    <img src="@SpicinessImage(Pizza.Spiciness)"
         alt="@Pizza.Spiciness" />
  </div>
  <div class="col">
    <button class="@ButtonClass"
            @onclick="@(async () => await Selected.InvokeAsync(Pizza))">
      @ButtonTitle
    </button>
  </div>
</div>
@code {
  [Parameter]
  public Pizza Pizza { get; set; }
  [Parameter]
  public string ButtonTitle { get; set; }
  [Parameter]
  public string ButtonClass { get; set; }
  [Parameter]
  public EventCallback<Pizza> Selected { get; set; }
  private string SpicinessImage(Spiciness spiciness)
      => $"images/{spiciness.ToString().ToLower()}.png";
  [Parameter]
  public Action<Pizza> ShowPizzaInformation { get; set; }
}
Listing 7-20

Adding an anchor to display the pizza’s information

When someone clicks this link, it should set the State instance’s CurrentPizza property. But you don’t have access to the State object. One way to solve this would be by injecting the State instance in the PizzaItem component . But you don’t want to overburden this component, so you add a ShowPizzaInformation callback delegate to tell the containing PizzaList component that you want to display more information about the pizza. Clicking the pizza name link simply invokes this callback without knowing what should happen.

You are applying a pattern here known as “Dumb and Smart Components.” A dumb component is a component that knows nothing about the global picture of the application. Because it doesn’t know anything about the rest of the application, a dumb component is easier to reuse. A smart component knows about the other parts of the application (such as which service to use to talk to the database) and will use dumb components to display its information. In our example, the PizzaList and PizzaItem are dumb components because they receive all their data through data binding, while the Index component is a smart component which talks to services.

Update the PizzaList component to set the PizzaItem component’s ShowPizzaInformation parameter as in Listing 7-21.
<h1>@Title</h1>
@if (Menu == null || Menu.Pizzas == null || Menu.Pizzas.Count == 0)
{
  <div style="height:20vh;" class="pt-3">
    <div class="mx-left pt-3" style="width:200px">
      <div class="progress">
        <div class="progress-bar bg-danger
                    progress-bar-striped
                    progress-bar-animated w-100"
             role="progressbar"
             aria-valuenow="100" aria-valuemin="0"
             aria-valuemax="100"></div>
      </div>
    </div>
  </div>
}
else
{
  @foreach (var pizza in Menu.Pizzas)
  {
    <PizzaItem Pizza="@pizza"
               ButtonClass="btn btn-success"
               ButtonTitle="Order"
               Selected="@Selected"
               ShowPizzaInformation="@ShowPizzaInformation"/>
  }
}
@code {
  [Parameter]
  public string Title { get; set; }
  [Parameter]
  public Menu Menu { get; set; }
  [Parameter]
  public EventCallback<Pizza> Selected { get; set; }
  [Parameter]
  public Action<Pizza> ShowPizzaInformation { get; set; }
}
Listing 7-21

Adding a PizzaInformation callback to the PizzaList component

You added a ShowPizzaInformation callback to the PizzaList component, and you simply pass it to the PizzaItem component. The Index component will set this callback, and the PizzaList will pass it to the PizzaItem component.

Update the Index component to set the State instance’s CurrentPizza and navigate to the PizzaInfo component, as shown in Listing 7-22.
@page "/"
<!-- Menu -->
<PizzaList Title="Our selection of pizzas"
           Menu="@State.Menu"
           Selected="@( async (pizza)
             => AddToBasket(pizza))"
           ShowPizzaInformation="ShowPizzaInformation"/>
<!-- End menu -->
<!-- Shopping Basket -->
<ShoppingBasket Title="Your current order"
                Basket="@State.Basket"
                GetPizzaFromId="@State.Menu.GetPizza"
                Selected="@( (pos) => RemoveFromBasket(pos))" />
<!-- End shopping basket -->
<!-- Customer entry -->
<CustomerEntry Title="Please enter your details below"
               ButtonTitle="Checkout"
               ButtonClass="btn btn-primary"
               @bind-Customer="@State.Basket.Customer"
               Submit="@PlaceOrder" />
<!-- End customer entry -->
<p>@State.ToJson()</p>
@inject IMenuService menuService
@inject IOrderService orderService
@inject State State
@inject NavigationManager uriHelper
@code {
    // private State State { get; } = new State();
  protected override async Task OnInitializedAsync()
  {
    State.Menu = await menuService.GetMenu();
  }
  private void AddToBasket(Pizza pizza)
  {
    Console.WriteLine($"Added pizza {pizza.Name}");
    State.Basket.Add(pizza.Id);
  }
  private void RemoveFromBasket(int pos)
  {
    Console.WriteLine($"Removing pizza at pos {pos}");
    State.Basket.RemoveAt(pos);
  }
  private async Task PlaceOrder()
  {
    await orderService.PlaceOrder(State.Basket);
  }
  private void ShowPizzaInformation(Pizza selected)
  {
    this.State.CurrentPizza = selected;
    Task.Run(() =>  this.uriHelper.NavigateTo("/pizzainfo"));
  }
}
Listing 7-22

The Index component navigates to the PizzaInfo component

The Index component tells the PizzaList component to call the ShowPizzaInformation method when someone clicks the information link from the PizzaItem component. The ShowPizzaInformation method then sets the State’s CurrentPizza property and navigates using the NavigateTo method to the /PizzaInfo route.

If you call NavigateTo as part of a callback, Blazor returns to the original route. That is why I use a background Task so Blazor will navigate after the callback…

Right-click the Pages folder and add a new Razor Component called PizzaInfo, as shown in Listing 7-23 (to save you some time and to keep things simple, you can copy most of the PizzaItem component). The PizzaInfo component shows information about the State’s CurrentPizza. This works because you share the same State instance between these components.
@page "/PizzaInfo"
<h2>Pizza @State.CurrentPizza.Name Details</h2>
<div class="row">
  <div class="col">
    @State.CurrentPizza.Name
  </div>
  <div class="col">
    @State.CurrentPizza.Price
  </div>
  <div class="col">
    <img src="@SpicinessImage(State.CurrentPizza.Spiciness)"
         alt="@State.CurrentPizza.Spiciness" />
  </div>
  <div class="col">
    <a class="btn btn-primary" href="/">Menu</a>
  </div>
</div>
@inject State State
@code {
  private string SpicinessImage(Spiciness spiciness)
    => $"images/{spiciness.ToString().ToLower()}.png";
}
Listing 7-23

Adding a PizzaInfo component

At the bottom of the markup, you add an anchor (and make it look like a button using bootstrap styling) to return to the menu. It’s an example of changing the route with anchors. Of course, in a real-life application, you would show the ingredients of the pizza, a nice picture, and other information. I leave this as an exercise for you.

Summary

In this chapter, you looked at two things, layouts and routing.

Layouts allow you to avoid replicating markup in your application and help keep your application’s look consistent. You also saw that layouts can be nested.

Routing is an important part of building single-page applications and takes care of picking the component to show based on the browser’s URI. You define route templates using the @page syntax where you use route parameters and constraints. Navigation in your single-page application can be done using anchor tags and from code using the NavigationManager class. You then modified the PizzaPlace application to show how to share information between different routes in a Blazor application.

..................Content has been hidden....................

You can't read the all page of ebook, please click here login for view all page.
Reset
18.188.10.246