In this chapter we will be looking at how ModSecurity can help us to create a chroot jail for Apache. A chroot jail is used to isolate a program from the rest of the file system. This is done so that if the program gets compromised (for example, if someone is able to exploit a hole in a web application to execute files with the privileges of the Apache server program) then the attacker will not be able to access the rest of the file system.
An attacker who is able to exploit a vulnerability in a server program running on a system will often want to gain additional privileges to get full control of the system. The initial exploit will almost always take place through one of the server processes (daemons) on a system that is exposed to the outside world—daemons such as FTP servers and HTTP servers are what an attacker has to work with if he wants to gain access to a system. The next step, once a vulnerability has been found, is to gain full control of the system.
When a process is confined to a chroot jail, the root directory of the process is set to the directory specified as the argument to the system call chroot(2). If, for example, the chroot directory is set to /chroot, then that means that if the process now requests any file under /, it is in reality accessing files located in /chroot/. Anything above /chroot/ in the directory hierarchy will not be accessible to the process.
Chroot was not originally intended to be a security feature. It was created in the early 1980s by Bill Joy—one of the co-founders of Sun Microsystems and contributor to the UNIX operating system—as a means to simplify building and testing software installations by confining them to a specific directory. Nevertheless, it has become commonplace to use the chroot(2) system call and associated binary to increase the security of processes.
Chroot jails do not provide absolute security. In particular, it may be possible for users who gain access to a jail to "break out" of the jail if processes inside the jail are running as root, or if there is a suid binary inside the jail that can be exploited to run commands as the root user. By default, Apache does not run as root—instead it uses a user account such as apache to avoid the security problems associated with a process running as the super-user account. In fact, it's not even possible to configure Apache to run as root unless you define the ‑DBIG_SECURITY_HOLE flag when building the server. The other concern—suid binaries who are set to run as root—can be avoided so long as you take care not to copy any such binaries to the jail once it has been created.
As an example of an attack that allows privilege escalation, imagine that an attacker was able to successfully exploit a bug in an FTP server daemon that would allow him to run commands of his choice as the root user. A smart attacker who wanted to gain full interactive shell access to the system could add a second user with root privileges by executing the following:
useradd -u 0 -g 0 -G 1,2,3,4,6,10 -o -M root2
The above adds a new user named root2, and sets its user ID (uid) and group ID (gid) to 0. Since uid 0 and gid 0 are associated with the root user, this creates a second root account. If the attacker is successful in executing the command he will have a shiny new root account waiting for him. There is only one problem—the account is disabled and doesn't have a password set for it. To set a password for an account you would normally use the Linux passwd command, however this requires that the new password is input at the command line—something which the attacker doesn't have access to yet. He can however use the expect command to work around this problem. Expect is a tool that allows programmatic simulation of keyboard interaction. In this case, an attacker can use it to add a password by having expect simulate typing the password in when passwd prompts for it. A simple shell script is all that is needed:
#!/usr/bin/expect
spawn passwd root2
expect "password:"
send "newpassword
"
expect "password:"
send "newpassword
"
The above shell script, when executed, changes the password of the user account root2 to "newpassword". An attacker can easily create this seven-line script using the echo command and then execute the script. After it runs, he can log in via SSH using the credentials root2/newpassword and will have complete control of the system.
This attack illustrates why a chroot jail can be very beneficial as a way to protect server processes with potential security flaws. The attack was made possible because several things helped the attacker gain control of the system:
The initial exploit in the FTP server gave the attacker a way to execute arbitrary commands on the system
The ability of the attacker to execute the programs
useradd, passwd, andexpectmade it possible for him to add a second root account and gain full interactive shell access to the system
The initial flaw can be hard to protect against—even the most well-written software packages can suffer from vulnerabilities that end up packaged as a "zero-day exploit". This is an exploit that is traded in the underground community and the name refers to the fact that the exploit code is available before any patch or knowledge of the vulnerability has been widely circulated.
The second step in the process the attacker used to gain control of the system is what a chroot jail would have prevented. Inside a jail, the attacker would not have had access to the binaries needed to add the second root account, and this would have stopped the attack. Even though the attacker had root access inside the jail, breaking out would have been difficult if there were just a minimum of binaries available inside the jail.
Chrooting the Apache process can be a tedious and error-prone process. The reason for this is that once the root directory changes, Apache still expects to find all the normal supporting libraries and other required files in their regular locations. If anything is missing, Apache will not start up, or will function abnormally.
Putting Apache in a chroot jail the traditional way (without the help of ModSecurity) involves at least the following steps:
Finding out which supporting library files Apache requires
Creating the proper directory structure inside the jail
Copying all needed library files to the chroot jail, making sure everything ends up in the right directory
Making sure the Apache configuration file, module files, and any other supporting files needed are available inside the jail
Setting up user accounts for Apache inside the jail
Finding out which files are needed by supporting modules (such as
mod_php)and putting them inside the jail
All of the above takes patience and tedious work to get right, and in practice you will often end up having to use debugging utilities (such as strace and ldd) to trace the Apache binary to find out why it silently stops working after you have put it in jail.
As an example, a typical dynamically built Apache httpd binary relies on at least 25 external library files, and all of these would have to be tracked down and placed inside the jail for Apache to function.
Luckily, we can use ModSecurity to simplify the process of putting Apache in jail. Let's see how.
When we use ModSecurity to put Apache in jail, it performs a chroot() system call from within the Apache process once Apache has finished loading all its required libraries and opened handles to things such as log files. This has the advantage of allowing Apache to completely initialize and avoids having to place all of Apache's required libraries and supporting files inside the chroot directory. Also, since log files have been opened and Apache has obtained a valid handle to them, logging will take place to the log files in their normal location outside the jail.
The ModSecurity directive used to perform the chroot jailing is SecChrootDir and it takes exactly one argument—the directory to be used as the new root directory for Apache:
SecChrootDir /chroot
It's essentially that simple! There are a few more touch-ups needed, and we will look at those in the next section, but that is nothing compared to the process outlined in the previous section on the traditional way to chroot Apache. ModSecurity can help save a lot of time and energy when you want to put Apache in jail. There is a slight trade-off in security since Apache was first started outside the jail and then became confined to the chroot jail, but this should be acceptable for anything but the most security-demanding circumstances.
To successfully be able to use SecChrootDir to jail the Apache process, we need to create the actual directory that we will confine Apache to, as well as a few more directories that Apache needs:
Using the p flag when executing mkdir ensures that sub-directories are created as needed and avoids the need to issue an mkdir call for each directory in the path. For example, the first command creates the following directories for us:
/chroot
/chroot/etc
/chroot/etc/httpd
/chroot/etc/httpd/run
Let's also change the permission of /chroot and the files and directories it contains so that the owner is the Apache user:
chown -R apache:apache /chroot
The final piece of the puzzle is to copy all the files in your web server's document root to the corresponding location under /chroot. For example, if you store your web content in /var/www, then you would need to copy this directory to /chroot/var/www:
mkdir p /chroot/var/www
cp R /var/www /chroot/var/
You could also move the document root to the chroot directory instead of copying it, but I prefer making a copy first to make sure everything works as intended. If it does, you can then later move the document root and create a symbolic link from /var/www to /chroot/var/www to make sure other programs that need to read or write files under /var/www still work as expected.
Now simply restart Apache (make sure that you have SecChrootDir /chroot in your ModSecurity configuration) and check the error log file to see if the restart succeeded:
[Tue May 19 15:06:41 2009] [notice] caught SIGTERM, shutting down
[Tue May 19 15:06:43 2009] [notice] suEXEC mechanism enabled (wrapper: /usr/sbin/suexec)
[Tue May 19 15:06:43 2009] [notice] ModSecurity: chroot checkpoint #1 (pid=25754 ppid=25752)
[Tue May 19 15:06:43 2009] [notice] ModSecurity for Apache/2.5.9 (http://www.modsecurity.org/) configured.
[Tue May 19 15:06:44 2009] [notice] Digest: generating secret for digest authentication ...
[Tue May 19 15:06:44 2009] [notice] Digest: done
[Tue May 19 15:06:44 2009] [notice] ModSecurity: chroot checkpoint #2 (pid=25756 ppid=1)
[Tue May 19 15:06:44 2009] [notice] ModSecurity: chroot successful, path=/chroot
[Tue May 19 15:06:45 2009] [notice] Apache/2.2.8 (Unix) mod_jk/1.2.27 DAV/2 configured -- resuming normal operations
The line containing ModSecurity: chroot successful, path=/chroot shows that the chroot() call made by ModSecurity was successful, and Apache is now running chrooted to the directory /chroot.
After using SecChrootDir, one problem you might encounter is that attempting to stop or restart Apache results in an error message similar to httpd (pid 12738?) not running. This is because Apache stores the process ID of the httpd parent server process inside a file called httpd.pid. This file will be created inside the jail, but the Apache restart script will attempt to access it at its original location. The solution is to create a symbolic link to the httpd.pid file inside the jail:
$ ln -s /chroot/var/run/httpd.pid /var/run/httpd.pid
Once a process has been jailed, the chroot directory will become the new root directory for the process. In our case, /chroot becomes the new /, and we can verify that things are working as expected by attempting to access a file in the root directory and see where the retrieved file is actually located in the real file system.
Let's create two files—both called testfile, but one located in the real root directory and the other located in /chroot:
$ echo "Inside the jail" > /chroot/testfile
$ echo "Outside the jail" > /testfile
To see if we are running inside or outside the jail, we want to create a web page that will display the contents of the file /testfile. If the text "Inside the jail" is displayed, we will know Apache was successfully jailed.
Apache comes with a feature called Server Side Includes (SSI), and one of the commands that is provided by this feature has the ability to execute a command and include the output of it in the web page. The syntax looks like this:
<!--#exec cmd="ls" -->
The above would include a directory listing in the web page if SSI support is enabled. To enable SSI support, these two lines need to be in the Apache configuration file:
AddType text/html .sthml
AddHandler server-parsed .shtml
This will enable SSI support for all files with a .shtml extension. We also need to enable the Includes option for the directory in which our .shtml file will reside:
<Directory /var/www>
Options +Includes
</Directory>
Now that we've configured Server Side Includes, let's use the exec feature to execute a shell command that displays the contents of the file /testfile. Put the following into the file /chroot/var/www/jailtest.shtml:
<!--#exec cmd="/bin/sh -c 'cat /testfile'" -->
Executing sh with the c option allows us to execute an arbitrary command via the shell. In this case the command uses cat to display the contents of /testfile.
Accessing /jailtest.shtml via a web browser unfortunately does not give the expected result—we get a blank page. Checking the Apache error log reveals why:
(2)No such file or directory: exec of '/bin/sh -c 'cat /testfile'' failed
The reason for the error message is that neither /bin/sh nor /bin/cat are available inside the jail. This is of course expected, so let's copy them to the correct location and try again:
cp /bin/sh /chroot/bin/
cp /bin/cat /chroot/bin/
Unfortunately, trying to access the page again results in a blank page and the same error message in the log file. The reason for this is that both sh and cat make use of shared libraries, and these libraries are not available inside the jail. To solve the problem we will need to find out which library files the programs use and then copy them to the jail. We can use the ldd tool to find out which libraries are required—this is a tool that lists all libraries that a program requires:
$ ldd /bin/sh
linux-gate.so.1 => (0x00110000)
libtinfo.so.5 => /lib/libtinfo.so.5 (0x009c2000)
libdl.so.2 => /lib/libdl.so.2 (0x00941000)
libc.so.6 => /lib/libc.so.6 (0x007d6000)
/lib/ld-linux.so.2 (0x007b6000)
$ ldd /bin/cat
linux-gate.so.1 => (0x00110000)
libc.so.6 => /lib/libc.so.6 (0x007d6000)
/lib/ld-linux.so.2 (0x007b6000)
The first entry in each listing, linux-gate.so.1, is not a real library. Instead, it is a "virtual" library that is mapped into the address space of each process by the kernel—there is no corresponding linux-gate.so.1 file on disk. Knowing this, it becomes clear that the following are the library files that we need to copy into our jail:
/lib/libtinfo.so.5
/lib/libdl.so.2
/lib/libc.so.6
/lib/ld-linux.so.2
Let's create a lib directory inside the jail and then copy the required library files into it:
$ mkdir /chroot/lib
$ cp /lib/libtinfo.so.5 /chroot/lib/
$ cp /lib/libdl.so.2 /chroot/lib/
$ cp /lib/libc.so.6 /chroot/lib/
$ cp /lib/ld-linux.so.2 /chroot/lib/
Now let's try to access the page jailtest.html again. This time, we are rewarded with something other than a blank web page:
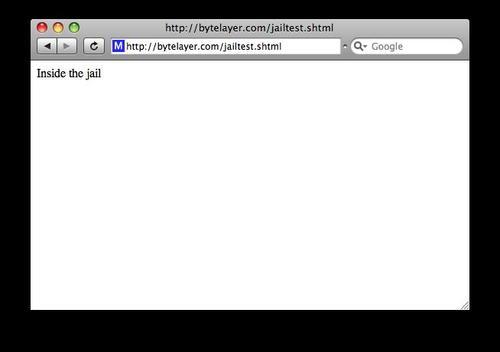
This shows that the chroot jail is working as expected, and the file /testfile is retrieved from the new root directory.
Using SecChrootDir works great for some setups, but not for others. If your site relies heavily on third-party modules or external programs (such as PHP or Perl) then trying to jail Apache may not be worth it because of all the extra effort required to get those external applications to work correctly while in jail. If you're just hosting plain HTML files, though, and want the extra security provided by a jailed Apache process then using SecChrootDir should be a straightforward process with a minimum of complications.
Here are some additional things to look out for when using SecChrootDir:
Restarting Apache may not work as expected. If a command such as
apachectl restartorapachectl gracefuldoes not work, try stopping and then starting Apache using two separate commands.Similarly, sending a SIGHUP to Apache to make it restart will not work as expected, as the required modules may not be available inside the jail and if they are, ModSecurity will be attempting to perform a second
chroot()call while already jailed, which will not work.Be aware of the preceding two points if you are running a log rotation script, and make sure that Apache does not die when log rotation takes place.
Certain log files, such as the audit logging files present in the directory specified by
SecAuditLogStorageDir, may be written inside the jail. This can cause problems with audit logging if you are usingmlogcto send data to a ModSecurity console. Make sure you test that audit logging is still working properly after jailing Apache.
Make sure you check the Apache error log if anything goes wrong or you encounter unexpected behavior—most errors that occur after jailing Apache will generate an error that is logged there.
In this chapter we learned what a chroot jail is, and how it can help increase security by isolating a server process by placing it inside a "jail" confined to a specific directory. We saw an example of the kind of attack that could be used to gain access to a system once a remote hole has been found, and how a jail would have stopped the attack since the binaries required to complete the attack would not be available inside the jail.
We looked at the traditional way of putting a process in jail by using the chroot binary or the chroot() system call, and saw how ModSecurity helps simplify the process by working from within Apache to achieve the chroot functionality after Apache has initialized. Finally, we learned some caveats to watch out for when using SecChrootDir.
In the next chapter we will be looking at REMO, which is a graphical editor to create ModSecurity rules.