
Chapter 12: Enabling CI/CD for Your Windows Applications
In the last few years, DevOps has become one of the most important trends in tech companies, and for a very good reason. There are multiple research reports and studies (please refer to the report here from DevOps Research and Assessment (DORA) team, Accelerate: State of DevOps: Strategies for a New Economy by N. Forsgren, J. Humble, and G. Kim) that demonstrate how companies that adopt a DevOps approach to software development are able to do the following:
- Reach the market faster
- Deploy changes and updates more often
- Recover faster in the case of bugs or issues
- Adapt more quickly to changes in requirements, either within the ecosystem or the market
DevOps is a complex topic that isn't just technical. In fact, DevOps isn't only about automating some operations or testing your code. Above all, it's about changing the mindset of how you envision, plan, and build your software projects, by introducing concepts such as the following:
- Continuous planning: By shifting to a different planning methodology (such as Agile), you can work on small-batch releases, increasing the opportunity of reducing any risks. Additionally, you can react better to changes in the ecosystem, customer requirements, or new technologies that are being released.
- Continuous integration: By continuously building and testing your code every time you make changes, you can find errors earlier in the development process, eliminate integration issues, and facilitate the collaboration and parallel development of new features.
- Continuous delivery: By automating the deployment of your software project, you can reduce the risk of errors. Additionally, you can quickly create environments to test your work before moving into production, and you can run experiments to validate theories.
Learning all the aspects of DevOps is beyond the scope of this book. In this chapter, we'll focus on two specific topics: Continuous Integration (CI) and Continuous Delivery (CD). We're going to learn how we can automate building, testing, and deploying Windows desktop applications by going through the following topics:
- Introducing CI/CD pipelines
- Building a Windows application in a CI/CD pipeline
- Supporting versioning
- Handling signing
- Automating the deployment
Let's get started!
Technical requirements
You need a GitHub account, which you can get for free at https://www.github.com.
The free account includes the following:
- Unlimited public and private repositories
- Unlimited automation minutes per month for public repositories and 2,000 minutes per month for private ones
- Unlimited storage for packages for public repositories and 500 MB for private repositories
The sample code can be found at the following URL:
Introducing CI/CD pipelines
Let's start with the basic concepts. What is a pipeline? It's a series of actions that are executed in an automated way on a build machine, which can be hosted on the cloud or on-premises.
The goal of a pipeline is to automate all the steps that you typically do on your own development machine when you want to release your software, such as building the solution with Visual Studio, generating a distributable package, publishing it on a website, and more. Typically, in DevOps, you have two types of pipelines:
- The CI pipeline takes care of building and testing your application, to make sure that the code can be built successfully and that you haven't introduced any regression.
- The CD pipeline takes care of taking the output of the CI pipeline (such as an MSIX package) and deploying it on the distribution platform of your choice (such as a web server or Microsoft Store).
In both cases, we're calling them continuous because these operations aren't manually triggered. Instead, they are automatically performed every time you take a specific action, such as committing new code to your source control repository. In most cases, these two pipelines are combined (hence, the usage of the term CI/CD): if the CI pipeline is successful, the CD pipeline is automatically triggered to deploy the artifacts that the CI pipeline has just produced. In this way, you can focus on the developmental aspect of your project rather than wasting resources and time every time you deploy an updated version of your application to your testers and your customers. Additionally, by doing it in an automated way, you reduce the chances of introducing human error.
These pipelines are executed and managed by a CI/CD platform, which takes care of orchestrating all of the operations. There are many solutions on the market; in this chapter, we're going to focus on the most popular development platform in the world: GitHub. This is a complete platform to manage the whole life cycle of a software project: from hosting the code to planning and from tracking issues to hosting packages. Of course, it also includes a CI/CD solution, called GitHub Actions.
What makes GitHub Actions (and, overall, all cloud-based solutions) so powerful is that, as part of the platform, you get access to hosted machines to perform the build, called GitHub-hosted runners. You can think of them as virtual machines, which are created on the fly whenever you execute a CI or CD pipeline. Additionally, they come with all the software you might need to build your application: Visual Studio, Java, the Windows 10 SDK, Node.js, and .NET are just a few examples. GitHub-hosted agents also come with a variety of operating systems: Windows, Linux, and macOS. This solution helps you to mitigate one of the most time and resource-consuming tasks of setting up a CI/CD environment: building and maintaining a pool of machines to build your software.
If, for any reason, you need tools that aren't available, or you need to access resources that you can't expose on the cloud, GitHub also gives you the option to use self-hosted runners. Thanks to a service provided by GitHub for Linux, Windows, and macOS, you can turn any machine (such as a physical machine, a virtual machine, or a machine in the cloud) into an agent. The software will manage the communication between the machine and GitHub so that it can execute your workflows. You can learn more about this option at https://docs.github.com/en/actions/hosting-your-own-runners/about-self-hosted-runners.
Another powerful feature offered by cloud services is the availability of premade tasks (called actions in GitHub), which can ease the execution of specific actions within your project. For example, you can find an MSBuild action that you can use to compile software that has been built with Visual Studio; alternatively, you can use an Azure App Service action that you can use to deploy a web application to an instance of Azure App Service and more. GitHub comes with many built-in actions, but there's a rich ecosystem of third-party actions available at https://github.com/marketplace?type=actions.
All the modern CI/CD platforms, including GitHub, have adopted YAML as the language to define a pipeline (which is also called a workflow on GitHub). This is a data serialization language that you can use to configure all the aspects of a pipeline, such as the following:
- The runner to use
- The various stages that make up the whole build and deployment process
- The tasks to perform and their sequence at each stage
What makes YAML powerful is that, with this approach, the whole configuration of the pipeline is stored in a plain text file, which becomes part of your project. This makes it easy to redistribute, branch, or fork the pipeline.
This is an example of a simple workflow for GitHub:
name: CI
on:
push:
branches: [ main ]
pull_request:
branches: [ main ]
workflow_dispatch:
jobs:
build:
runs-on: windows-2022
env:
message_name: world
steps:
- name: Checkout
uses: actions/checkout@v2
- name: Run a one-line script
run: echo Hello, ${{ env.message_name} !
- name: Run a multi-line script
run: |
echo Add other actions to build,
echo test, and deploy your project.
The workflow is defined with the following properties:
- name: This is the name of the workflow.
- on: This defines the condition that will execute the workflow. In this example, we specify that we want to run it every time there's a new push or a new pull request executed on the main branch. However, GitHub Actions can be used to automate everything, not just to implement CI/CD scenarios. You can have workflows that are triggered when a new issue is created or when a new package gets released. You can find a full list at https://docs.github.com/en/actions/learn-github-actions/events-that-trigger-workflows. By adding the workflow_dispatch condition, we are also setting up the option to manually run the workflow.
- jobs: This is a way to logically split your workflow into multiple stages. Each job is independent: it has its own set of actions, variables, and runners. By default, jobs run in parallel, but you can also define a dependency to run them in sequence (for example, a deployment job will need the build job to be completed before running). A workflow must have at least one job, such as in this example: here, we have a single job called build.
Each job can have multiple properties. In the preceding example, we can see the most important ones, as follows:
- runs-on: This defines the runner you want to use to execute the workflow. You can find the list of available runners at https://github.com/actions/virtual-environments. On the same website, for each runner, you can also find the list of tools that are installed on it, so you can determine which is the best platform for your project. For example, in our case, we can see that the runner called windows-2022 includes .NET 6, the Windows 10 SDK, and Visual Studio 2022, so it's the best fit in which to build a Windows application created with the technologies that we discussed in this book.
- env: You can use this to define the environment variables that can be referenced across the workflow. In this example, we have stored a string in a variable called message_name, which we can reference across the steps using the ${{ env.message_name }} syntax.
- steps: This is the list of actions that the job will perform one after the other. Each step can be defined by an action provided by GitHub, a third-party developer, or it can simply execute a script:
- Actions can do all the heavy lifting for you. You just need to include them using the uses keyword, followed by their identifier. Optionally, if the action can be customized, you can supply parameters using the with keyword. For example, the step called checkout uses an action, which we reference using its full identifier (actions/checkout@v2). The identifier uses the <company or developer name>/<action name>@<version> syntax.
- Scripts can execute any arbitrary operation. They are defined with the run keyword, followed by the script you want to execute. In the preceding example, there are two steps that execute a single line and a multiline script.
The starting point to create an action is the Actions tab on GitHub. GitHub will suggest a few starter templates (which provide a built-in configuration, series of steps, and more) based on the content of your repository:

Figure 12.1 – The starting point to create a new workflow in GitHub
For our scenario, we can simply click on the set up a workflow yourself link, which will create a basic workflow, similar to the one we saw in the previous example. GitHub will open the editor, which is a simple text editor but with a twist: on the right-hand side, you will see a panel titled Marketplace. You can use it to browse the catalog of first-party and third-party actions. For each action, you will get quick access to the documentation and the YAML snippet, which you must copy inside your workflow to use:

Figure 12.2 – The editor to create a new workflow in GitHub
Once you have completed the work, you can press Start commit to add your workflow file to your repository. If you are triggering the workflow automatically whenever there's a new commit, this action will also lead to the execution of the workflow, which you can monitor from the Actions tab of the repository.
For each execution, GitHub will provide a real-time logger, which displays the execution of the various steps and the output from each step. This is critical, especially when you have errors, to understand what went wrong:

Figure 12.3 – The execution of a workflow on GitHub
Now that we have learned about the basic concepts of using GitHub Actions, let's see how we can create a workflow to build our Windows applications.
Building a Windows application in a CI/CD pipeline
Most of the documentation and stories related to CI/CD that you read on the internet are about server-side applications: cloud services, APIs, and web applications. One of the reasons (of course, other than because they're very popular and widely adopted) is that they're a perfect fit to build a solid CI/CD story, especially when it comes to deployment. These kinds of applications are hosted on a server, which is exposed through an HTTP endpoint. With the power of the cloud, you can quickly create new servers as needed; for instance, PaaS services such as Azure App Services give you advanced scaling and staging capabilities. Thanks to all of these features, it's quite straightforward to define a pipeline that can automatically deploy a new version of the software in one or more environments, such as a staging server, a production server, and more.
When it comes to Windows desktop applications, it's more challenging. This is because they don't sit on a server but are distributed on each computer of our userbase. If our application is installed across 10,000 users, that means we must update 10,000 instances whenever we have a new version.
To solve these challenges, we're going to reuse the knowledge we acquired in Chapter 11, Publishing Your Application. We learned MSIX provides many features (such as more reliability, automatic updates, differential updates, and more) that can help us to define a solid CI/CD story for our desktop applications. In this chapter, we're going to use a WinUI application as a starting point, which we're going to package as MSIX and deploy on a website using App Installer.
Note that the same steps we're going to see in this chapter can also be applied to WPF and Windows Forms applications. As we learned in Chapter 1, Getting Started with the Windows App SDK and WinUI, we can just add a Windows Application Packaging Project to our solution to enable Visual Studio to create an MSIX package as part of the building project. This is another feature that makes MSIX a great fit for CI/CD scenarios: unlike other installer technologies (such as MSI), which require third-party tools and special Visual Studio extensions to be generated, MSIX can be created with a standard Visual Studio build. As we learned in the previous section, the GitHub-hosted runner template for Windows already comes with everything we need.
Let's take a look at the general configuration of our workflow:
name: WinUI application
on:
push:
branches: [ master ]
pull_request:
branches: [ master ]
jobs:
build:
runs-on: windows-2022
env:
Solution_Name: WinUIAppCICD.sln
steps:
. . .
This is the same setup as the template we saw earlier. There are only two important things to highlight:
- We must run this workflow on the GitHub-hosted runner called windows-2022, which already comes with the .NET 6.0 SDK and Visual Studio 2022 and all the workloads available, including the one for building .NET and Universal Windows Platform apps. Don't use the windows-latest runner; this is because, at the time of writing, it still refers to the windows-2019 image, which wouldn't work since it's based on the .NET 5.0 SDK and Visual Studio 2019.
- We set up an environment variable with the name of the solution so that we can easily change it later if we need to.
Now, let's see, step by step, the actions we need to perform in our job. We're going to add them under the steps section of the YAML file.
Pulling the source code
The first action to add is the following:
- name: Checkout
uses: actions/checkout@v2
with:
fetch-depth: 0
This is required for each workflow related to CI since it will pull the latest version of the code from the repository and will save it on the runner in a path that is exposed by the ${{ github.workspace }} environment variable.
Adding MSBuild to the system's path
The second action to add is the following:
- name: Setup MSBuild.exe
uses: microsoft/[email protected]
Here, we're using one of the actions available in the GitHub marketplace, provided by Microsoft, called setup-msbuild. This action will locate the path of the MSBuild executable (that is, the build engine provided by Visual Studio), and it will add it to the global path of the machine. In this way, the next actions will be able to use MSBuild just by invoking the msbuild.exe executable, without having to specify the full path.
Building the Windows application
The third action is the most important one since it's the one that will actually build our solution and generate the MSIX package:
- name: Create the app package
run: msbuild ${{ env.Solution_Name }} /restore
/p:Platform=${{ env.Appx_Bundle_Platforms }}
/p:AppxBundlePlatforms=${{ env.Appx_Bundle_Platforms }}
/p:Configuration=${{ env.Configuration }}
/p:UapAppxPackageBuildMode=${{ env.Appx_Package_Build_Mode
}} /p:AppxBundle=${{ env.Appx_Bundle }}
/p:AppxPackageDir=${{github.workspace}}AppPackages
/p:GenerateAppxPackageOnBuild=true
env:
Appx_Bundle: Never
Appx_Bundle_Platforms: x64
Appx_Package_Build_Mode: SideloadOnly
Configuration: Release
In this case, we aren't using an action, but we're just running a script. We're executing MSBuild by passing a series of parameters that will lead to the generation of an MSIX package with our application. The parameters we set are as follows:
- Platform: This is the CPU architecture that we want to target.
- Configuration: This is the configuration we want to use to build the project (Debug or Release). We set it to Release since we're building a package for distribution.
- AppxBundlePlatforms: In this scenario, it's also the CPU architecture that we want to target. This is a specific parameter required for generating the MSIX.
- UapAppxPackageBuildMode: This is the type of package that we want to generate. By setting it to SideloadOnly, we're generating a package for sideloading; if we're planning to publish the application in Microsoft Store, we can set this parameter to StoreUpload, which will also lead us to generate the .msixupload file.
- AppxBundle: This defines whether we want to generate a single package for each architecture or a bundle. In this scenario, we're setting it to Never, which will generate a single package.
- AppxPackageDir: This is the path where the MSIX package will be generated. To define it, we can use the environment variable we learned about earlier, ${{ github.workspace }}, which is automatically translated with the path where the repository has been cloned.
In this step, notice how variables can be defined not only at the workflow level but also at the step level. In this example, we're setting the MSBuild parameters with variables rather than a hardcoded string. We don't need them at the workflow level (since this is the only step that uses them), but having them as a variable will make it easier to change them at a later stage if we need them.
Publishing the artifact
Once the build has been completed, we can generate an artifact. An artifact is the output of the build process that we want to make available to the developer (via the GitHub dashboard) or other jobs of the same workflow. In our case, it's the folder that contains the MSIX package and all of its dependencies, so we set up our step as follows:
- name: Upload build artifacts
uses: actions/upload-artifact@v2
with:
name: MSIX Package
path: ${{github.workspace}}AppPackages
Here, we use a predefined action, this time provided directly by GitHub (the ones with actions as the company name are built into the platform). Compared to the other actions we have seen, in this scenario, we need to configure it. So, we use the with keyword to set up its properties:
- name: This is used to set the artifact name.
- path: This is used to set the path of the folder that contains the files we want to expose as a package. In our scenario, we set the same path that we have passed to the AppxPackageDir parameter of the MSBuild execution.
Testing the workflow
Once you commit to your updated workflow, it will be triggered immediately. If the configuration is correct, the workflow will complete successfully, and you will be able to download, as an artifact, the MSIX package that has been generated, as shown in the following screenshot:

Figure 12.4 – The workflow has been completed successfully, and the MSIX package is available as an artifact
However, if you try to download and install the MSIX package, you will fail, since it isn't signed. This is a task that we'll take care of during the deployment process. Now, let's move on to handle another important requirement for when you are working with MSIX packages: versioning.
Supporting versioning
Versioning is a critical part of a software release. When it comes to MSIX, it becomes even more important because it ensures that Windows can effectively manage updates. As such, supporting versioning as part of our CI/CD pipeline is critical: if every execution of the workflow could generate an MSIX package with the same version, we wouldn't be able to deploy it if the application was already installed, we would break the auto-update feature if using App Installer, and Microsoft Store wouldn't be able to accept it.
One of the most interesting tools that you can use to support versioning is called Nerdbank.GitVersioning. This is an open source project that is part of the .NET Foundation, which is hosted on GitHub at https://github.com/dotnet/Nerdbank.GitVersioning.
This tool has the following three features that make it a great fit for enabling versioning:
- Version numbers are generated using Git information, such as the Git height or the Git commit ID, which ensures that every generated version will be higher than the previous one. You can find out more information at https://github.com/dotnet/Nerdbank.GitVersioning#what-is-git-height.
- Version numbers aren't only calculated automatically; they take into account the information provided in the file that is included in the solution called version.json. Thanks to this file, you can decide which numbers should be updated manually and which ones should be automatically generated. This is especially helpful if you adopt semantic versioning as every number has a precise meaning (for example, you should increase the major number only when you introduce breaking changes or new features, so you only want your workflow to automatically increase the minor number or the revision number).
- It offers built-in support for cloud CI/CD environments. When you run it on a platform such as GitHub or Azure DevOps, it will automatically create a series of environment variables that store the generated version number so that you can reuse it across your workflow.
The best way to start using Nerdbank.GitVersioning is to install it as a .NET CLI tool. First, you must install it on your own development machine: here, we're going to use some of the CLI commands to set it up in our solution.
Open Windows Terminal (or Command Prompt on your machine) and run the following command:
dotnet tool install -g nbgv
Then, in the same Terminal, move to the folder that contains your solution and run the following command:
nbgv install
The tool will perform two actions:
- It will add a Directory.build.props file into the root of your solution, which will ensure that the Nerdbank.GitVersioning NuGet package is installed in all your projects.
- It will add the version.json file to the root of your solution.
Let's take a look at the content of the file:
{
"$schema": "https://raw.githubusercontent.com/AArnott
/Nerdbank.GitVersioning/master/src/NerdBank
.GitVersioning/version.schema.json",
"version": "1.0-beta",
"publicReleaseRefSpec": [
"^refs/heads/master$",
"^refs/heads/v\d+(?:\.\d+)?$"
],
"cloudBuild": {
"buildNumber": {
"enabled": true
}
}
}
The key property is called version, and it's the one that enables the flexible scenario we described earlier. The version we set in this property will never change automatically: the tool will only generate numbers for the subsequential numbers. For example, if we set it to 1.0, the tool will automatically generate version numbers such as 1.0.1, 1.0.2, 1.0.3, and more.
The default value is 1.0-beta, but we must change it to 1.0 to support our scenario: MSIX requires the version number to be x.y.z.0, and as such, we can't include alphabetical characters.
Instead, the publicReleaseRefSpec collection is used to specify which branches of our repository can be used to generate packages that are publicly distributed. Version numbers generated outside these branches will automatically include, in the end, the Git commit ID, such as in the following example:
1.0.24-g9a7eb6c819
Make sure that you match the branches you have on your repository; otherwise, you might generate a version number that isn't valid for the MSIX manifest.
The last section, called cloudBuild, enables one of the features I previously highlighted: the option to automatically create environment variables in a CI/CD environment with the generated version number.
This is what the version.json file we made:
{
"$schema": "https://raw.githubusercontent.com/AArnott
/Nerdbank.GitVersioning/master/src/NerdBank
.GitVersioning/version.schema.json",
"version": "1.0",
"publicReleaseRefSpec": [
"^refs/heads/master$",
"^refs/heads/main$",
"^refs/heads/v\d+(?:\.\d+)?$"
],
"cloudBuild": {
"buildNumber": {
"enabled": true
}
}
}
Now, it's time to go back to the workflow file to change it. You can go back to GitHub and use the visual interface. However, if you prefer, you can also use your favorite code editor. Remember that, thanks to YAML, the workflow is now a file that is stored inside the .githubworkflows folder of your project. If you use Visual Studio Code, you can find some interesting extensions that will make your authoring experience easier, for instance, by providing IntelliSense or the option to monitor a workflow execution directly from the editor. Here is an example: https://marketplace.visualstudio.com/items?itemName=cschleiden.vscode-github-actions.
Let's see the steps we need to add.
Installing the tool and generating the version number
The first step of our workflow is to install Nerdbank.Gitversioning on the runner, similarly to how we installed it on our development machine. However, we don't have to do this manually. This is because the author of the library has created a dedicated GitHub action that takes care of installing the tool on the runner and setting the environment variables. As such, you'll just need to add the following step at any point in the steps section, as long as it's placed before the execution of the MSBuild task:
- name: Use Nerdbank.GitVersioning to set version variables
uses: dotnet/[email protected]
with:
setAllVars: true
Setting the version number
The next step is to set the version number, which must be changed in the manifest. The easiest way to do this is with a PowerShell script as this scripting language provides a powerful set of APIs to manipulate XML files. This is what our step looks like:
- name: Update manifest version
run: |
[xml]$manifest = get-content ${{env.manifestPath}}
$manifest.Package.Identity.Version =
"${{env.NBGV_SimpleVersion}}.0"
$manifest.save("${{env.manifestPath}}")
env:
manifestPath: .WinUIAppCICDPackage.appxmanifest
First, we define a local environment variable with the full path of the manifest file, which is called Package.appxmanifest and is stored inside the folder of the main project (if we're using the single-project MSIX approach) or inside the Windows Application Packaging Project.
Using the PowerShell APIs, we read the whole XML, and then we change the value of the Package.Identity.Version node to the newer version number, which we can find in the NBGV_SimpleVersion variable that was generated in the previous task. However, we must add.0 at the end: remember that the MSIX versioning must always follow the x.y.z.0 syntax. Then, we use the save() method to save our changes, passing again the path of the manifest file so that it can be overwritten.
That's all we need to do. Just remember to add this step after the installation of the Nerdbank.GitVersioning tool and before the execution of the MSBuild task. With these changes, the MSBuild task will now generate an MSIX package using the version number we have just injected with our PowerShell script.
To check whether you have made the changes in the right way, you just need to commit them and trigger a new execution of the workflow. In the end, download the generated artifact and look inside the ZIP file: the filename of the MSIX package will include a higher version number instead of the default 1.0.0.0 version number:
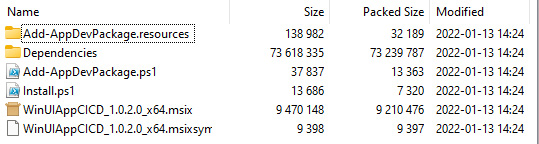
Figure 12.5 – The generated MSIX package has a higher version number
This step concludes our CI pipeline. Now we have an MSIX package that is ready to be deployed, so let's explore the CD pipeline.
Handling signing
So far, we have succeeded in creating an MSIX package, but we still can't use it. In Chapter 11, Publishing Your Application, we learned that an MSIX package should be as follows:
- It must be signed with a certificate.
- The certificate must be trusted by the machine.
- The Publisher defined in the manifest must match the subject of the certificate.
As such, we can't really use the package created by our CD pipeline since it isn't signed. If we try to install it, Windows will show the following error:

Figure 12.6 – The error displayed by Windows when we try to install an unsigned MSIX package
To solve this problem, we must sign the package as part of our workflow. Signing is a very delicate task as we must find a way to sign the package without exposing our certificate. If we don't protect it, a malicious developer could steal it and use it to sign other applications using our identity.
Visual Studio supports the possibility of signing the package as part of the build process, but this is a very fragile approach since it would require storing the certificate on the repository and making it accessible to every developer on the team (or to the broader developer community if we're talking about an open source project). Additionally, you might want to use different certificates based on the version of the application you're building: for instance, testing, production, and more.
Consequently, it's good practice to perform the signing task in the CD pipeline, right before the deployment. Let's see how we can do that by using the features provided by GitHub.
Storing the certificate on GitHub
This approach requires a few steps to be implemented since, at the time of writing, GitHub doesn't support safely storing files. Instead, it supports storing secrets, which are strings that are protected behind a repository: you can use their value inside a workflow, but you can't see them once you have set them.
As such, the first task is to convert our certificate into a base64 string that we can store as a secret. The starting point is a PFX file (which is protected by a password), which contains our certificate. If you don't have one, you can find many tutorials on the internet regarding how to export a certificate from the Windows certificate store into a PFX file.
These are the steps to follow:
- Open a PowerShell terminal and launch the following command:
$pfx_cert = Get-Content '.MyCertificate.pfx' -
Encoding Byte
[System.Convert]::ToBase64String($pfx_cert) | Out-File
'MyCertificate_Encoded.txt'
Assuming that your PFX file is called MyCertificate.pfx, this command will generate a text file called MyCertificate_Encoded.txt with the base64 version of the certificate.
- Go back to your repository on GitHub, and navigate to the Settings tab.
- Move to the Secrets section, and click on New repository secret.
- Set the name as CERTIFICATE and, for the value, copy and paste the content of the MyCertificate_Encoded.txt file.
- Click on New repository secret again to create a new secret.
- Set PASSWORD as the name and, for its value, use the password you just encoded to open the PFX certificate.
Now it's time to add the first task. Since we're moving on to the CD phase, we must first add a new job to our workflow, as shown in the following example:
name: WinUI application
on:
push:
branches: [ master ]
pull_request:
branches: [ master ]
workflow_dispatch:
jobs:
build:
runs-on: windows-2022
env:
Solution_Name: WinUIAppCICD.sln
steps:
. . .
deploy:
runs-on: windows-2022
needs: [ build ]
steps:
. . .
We have defined a new job called deploy, which will also be executed on a windows-2022 runner. By using the needs keyword, we specify that this job must only run when the build job has been completed successfully. If we don't set up this relationship, GitHub will execute the two jobs in parallel.
Now, let's add the steps. The first one downloads the artifact that was generated during the build job:
- uses: actions/download-artifact@v2
with:
name: MSIX Package
path: MSIX-package
We are downloading the artifact called MSIX Package (this is the name we used in the Upload build artifact step in the build job) into a folder called MSIX-package.
The next step is to convert the base64 string that we stored as a secret back into a PFX file:
- name: Decode the pfx
run: |
$pfx_cert_byte = [System.Convert]::FromBase64String
("${{ secrets.CERTIFICATE }}")
[IO.File]::WriteAllBytes("${{ github.workspace}}MSIX-
packageMyCertificate.pfx", $pfx_cert_byte)
The secret can be retrieved using the ${{ secrets.CERTIFICATE }} syntax. By using the .NET APIs available via PowerShell, we convert the base64 string back into a file called MyCertificate.pfx.
Now that we have the PFX file stored on the runner, we can use it to sign the MSIX package thanks to the signtool utility:
- name: Sign package
run: |
Get-ChildItem -recurse -Include *.msix | ForEach-
Object {
$msixPath = $_.FullName
& "C:/Program Files (x86)/Windows Kits/10
/bin/10.0.22000.0/x64/signtool.exe" sign /f "${{
github.workspace}}MSIX-packageMyCertificate.pfx
" /p ${{ secrets.PASSWORD }} /fd SHA256 $msixPath
}
We're using the Get-ChildItem and ForEach-Object commands in PowerShell to iterate through all the files inside the MSIX-package folder. This is so that we only extract the ones with .msix as an extension. When we find one, we use the signtool utility that is included in the Windows 10 SDK by invoking the following command:
C:/Program Files (x86)/Windows Kits/10/bin/10.0.22000.0/x64
/signtool.exe" sign /f <path of the PFX file> /p <password>
/fd SHA256 <path of the MSIX file>
Again, we use the secrets feature offered by GitHub to retrieve the password that we saved previously by using the ${{ secrets.PASSWORD }} syntax.
The last step, for security reasons, is to delete the PFX file. In theory, this isn't necessary because runners are automatically discarded at the end of the workflow, but being very sensitive information, it's better to be safe:
- name: Remove the pfx
run: Remove-Item -path "${{ github.workspace}}MSIX-
packageMyCertificate.pfx"
That's it! If you want to test that your CD pipeline works as expected, you can add another action to upload the signed MSIX package as an artifact:
- name: Upload build artifacts
uses: actions/upload-artifact@v2
with:
name: Signed MSIX Package
path: MSIX-package
This time, when the workflow completes, you will be able to find two different artifacts: MSIX Package (which is the original unsigned one) and Signed MSIX Package (which is the signed one). When you download and open the signed one, this time the Install button should be enabled:

Figure 12.7 – This time the package is signed, so Windows allows us to install it
If you want to adopt a safer approach to store your certificate, you can use a service provided by Azure called Key Vault, which you can use to protect secrets, passwords, and certificates. By supporting advanced security features, such as encryption and FIPS 140-2 Level 2 and Level 3-validated HSMs, this is the best way to store sensitive information such as a certificate. Additionally, the protected data never leaves the service, but the communication happens through a series of APIs. In our scenario, this approach adds an extra layer of security because the certificate is never stored on the repository or the runner.
The perfect companion for Azure Key Vault is Azure SignTool, which is an open source tool that is available at https://github.com/vcsjones/AzureSignTool and developed by Kevin Jones, who is part of the Security and Cryptography team at GitHub. This tool works like the original SignTool utility we learned about earlier; however, instead of requiring the local path of the PFX file or the password, it needs the URL, the client ID, and the client secret to connect to your Azure Key Vault instance. It's a command-line tool that is also available as a .NET global tool, so it can be easily installed and used in your CD pipeline to sign the MSIX packages you have generated.
In this chapter, we won't explain this approach in detail, but you can find a detailed step-by-step guide in the official documentation at https://docs.microsoft.com/en-us/windows/msix/desktop/cicd-keyvault.
Now that our package is signed, we can plan the deployment.
Automating the deployment
One of the key features of MSIX that can make it easier to deploy a Windows desktop application is the App Installer technology. In Chapter 11, Publishing Your Application, we learned how, thanks to an App Installer file, we can support features such as automatic updates, dependencies installation, and more.
Let's see how we can create it as part of our workflow.
Generating the App Installer file
The easiest way to generate the App Installer file is by leveraging Visual Studio, which can generate the file as part of the build, as we learned in the previous chapter. However, here, we are building a CI/CD pipeline, so we can't use the Publish wizard provided by Visual Studio to configure App Installer. As such, we need to add some extra parameters to the MSBuild step in the build job, as shown in the following example:
- name: Create the app package
run: msbuild ${{ env.Solution_Name }} /restore
/p:Platform=${{ env.Appx_Bundle_Platforms }}
/p:AppxBundlePlatforms=${{ env.Appx_Bundle_Platforms }}
/p:Configuration=${{ env.Configuration }}
/p:UapAppxPackageBuildMode=${{ env.Appx_Package_Build_Mode
}} /p:AppxBundle=${{ env.Appx_Bundle }}
/p:AppxPackageDir=${{github.workspace}}AppPackages
/p:GenerateAppxPackageOnBuild=true
/p:GenerateAppInstallerFile=true /p:AppInstallerUri=${{
env.AppInstallerUrl}} /p:HoursBetweenUpdateChecks=${{
env.UpdateFrequency }}
env:
Appx_Bundle: Never
Appx_Bundle_Platforms: x64
Appx_Package_Build_Mode: SideloadOnly
Configuration: Release
AppInstallerUrl: https://www.mywebsite.com
UpdateFrequency: 0
Here, we have added three parameters compared to the original implementation:
- GenerateAppInstallerFile: We set this to true.
- AppInstallerUri: We set this with the URL of the website or network share from which we're going to deploy our application. We set this information with an environment variable.
- UpdateFrequency: This indicates how often we want to check updates. By setting it to 0, Windows will check for new versions every time the application starts. This information is also set with an environment variable.
If you commit these changes and run your workflow again, this time you will notice that the generated artifact will include two additional files:
- One with extension.appinstaller, which has been configured using the information we passed as MSBuild parameters. If you're building a WinUI application, the App Installer file will already include all of the required dependencies, such as the Windows App SDK runtime.
- The other is called index.html, which is a web page that you can publish on your website to trigger the installation of the package.
If you need to further customize the App Installer file (for example, by enabling additional features such as the option to show a prompt when there's a new update available), you can add an App Installer template to your project, as we explained in Chapter 11, Publishing Your Application.
Before adopting this solution, there are a few important things to bear in mind:
- As mentioned in the previous chapter, at the time of writing, if you're building a WinUI application using the single-project MSIX approach, the App Installer file won't be generated even if you specify the dedicated parameters. Until this issue is fixed, the workaround is to create a WinUI application using a template called Blank App, Packaged with Windows Application Packaging Project (WinUI 3 in Desktop). If you're building a Windows Forms application or a WPF application, you should already have a Windows Application Packaging Project in your solution to enable MSIX packaging, so you don't have to take any extra steps.
- The index.html file that is generated as part of the build uses the ms-appinstaller protocol to enable the installation of the application. As explained in Chapter 11, Publishing Your Application, this protocol has been disabled in the recent releases of App Installer due to a security issue. Until the issue is resolved, you can't use the index.html file as it is, but you can change the installation URL to directly download the App Installer file on the user's machine.
For example, let's assume that the link on the page is defined as the following:
<a href='ms-appinstaller:?source=https://
www.mywebsite.com/WinUIAppCICD_ x64.appinstaller'>
<button>Install for x64</button></a>
You must change it into the following:
<a href='https://www.mywebsite.com/WinUIAppCICD
_x64.appinstaller'><button>Install for
x64</button></a>
Now that we have an App Installer file together with our MSIX package, we can deploy it on a website or network share.
Deploying our Windows application
Now that we have an MSIX package and an App Installer file, we can deploy it to the distribution platform of our choice. All you need is a static website that is accessible via HTTPS or a network share, so there are multiple options available. In this chapter, we won't go into the specific implementation details, since each option has its own different approach. However, thanks to GitHub Actions, you can easily hook your distribution platform into your CD pipeline, thanks to a wide range of available deployment actions.
For example, if you're using Azure as a cloud platform, there are multiple tutorials that cover the integration with GitHub Actions, including the following:
- Azure Storage with a static website: https://docs.microsoft.com/en-us/azure/storage/blobs/storage-blobs-static-site-github-actions
- Azure Static Web Apps: https://azure.microsoft.com/en-us/services/app-service/static/
- Azure App Service: https://docs.microsoft.com/en-us/azure/app-service/deploy-github-actions
If you aren't using Azure, you will find many actions to deploy your package to different cloud providers, such as AWS or Google Cloud. And, in the end, if you aren't using any cloud provider, you also have actions to deploy files via FTP, enabling the option to deploy your package virtually on any web server.
Thanks to MSIX and App Installer, we can enable a true CD story. Every time we push new changes to the repository, GitHub will create a new MSIX package with an updated App Installer file that we can push to our deployment website. Thanks to App Installer, whenever we deploy an updated package, all the users who have installed the application will automatically receive the update, without taking any manual action.
Improving the deployment story
Thanks to GitHub, you can improve the deployment story by adding extra features such as the following:
- A workflow can have as many jobs as you want. As such, you can define multiple stages to support multiple deployment environments. Your workflow could deploy the MSIX package on a testing website, which is only accessible in your company internally. Then, later, you could deploy it on the production website once all the validation tests have passed.
- Thanks to the concept of environments, you can enable an approval workflow in your deployment stages. In this way, you can pause the execution of a deployment workflow until a specific list of people you have defined have approved it. This way you can enable, for example, a workflow where the deployment to a staging environment is performed automatically once the build has been completed, but the deployment to the production environment is paused until the PM of the project approves it. You can learn more about this feature at https://docs.github.com/en/actions/managing-workflow-runs/reviewing-deployments.
This way, you can support more complex workflows to better adapt to the DevOps implementation within your company.
Summary
The adoption of the DevOps mindset and practices is becoming increasingly important to deliver successful software projects. CI and CD are critical parts of a successful DevOps implementation since they help you to ensure the quality of the applications you build and enable you to release updates more often and with confidence.
However, when it comes to adopting CI and CD for Windows desktop applications, there are a few challenges we must consider: versioning, signing, the need to distribute updates to a wide range of machines running the application, and more.
In this chapter, we explored how we can create a CI/CD pipeline for a Windows desktop application using one of the most popular platforms in the world for developers: GitHub. Thanks to GitHub Actions and the provided runners, we can automate all the tasks that are needed to produce a deployable Windows application: for instance, generating an MSIX package, versioning it, signing it with a certificate, and then deploying it to a website or a network share.
All the techniques we have learned in this chapter are mostly based on the scripts and CLI tools, so you can easily adapt the workflow we have created for other CI/CD platforms. Additionally, if you are using Azure DevOps as a DevOps platform, the MSIX team has created a dedicated set of extensions for Azure Pipelines, which you can integrate into your workflow to perform MSIX-related tasks such as generating an MSIX package, creating an App Installer file, or signing the MSIX package. You can learn about them in more detail at https://docs.microsoft.com/en-us/windows/msix/desktop/msix-packaging-extension?tabs=yaml.
What if, for any reason, you can't use MSIX, but you must use an unpackaged deployment? In this case, the story is more complicated since Microsoft doesn't provide built-in support in Visual Studio to generate custom setups or MSI installers. Microsoft offers a technology called ClickOnce to deploy unpackaged .NET apps (you can learn more at https://docs.microsoft.com/en-us/visualstudio/deployment/clickonce-security-and-deployment?view=vs-2022). However, at the time of writing, it's only supported from the user interface. You can't generate a ClickOnce installer as part of a CI/CD pipeline. To achieve this goal, you can evaluate third-party solutions, such as Squirrel (https://github.com/clowd/Clowd.Squirrel) and Wix (https://wixtoolset.org/), which can generate an installer as part of a Visual Studio build, or Advanced Installer (https://www.advancedinstaller.com/), which offers tasks for CI/CD platforms to generate an installer starting from their projects without user intervention.
This chapter concludes our journey into developing modern Windows applications. Now we have all the knowledge we need to start building new applications with WinUI, modernizing existing applications with the Windows App SDK, and deploying them using MSIX and CI/CD pipelines.
Questions
- If a GitHub-hosted runner doesn't satisfy the requirements to build your software, you can't use GitHub Actions, but you have to find an on-premises solution. Is this true or false?
- You can reuse a GitHub workflow on every other CI/CD platform (such as Azure DevOps) since they are all based on YAML. Is this true or false?
- You can use technologies other than MSIX to enable CI/CD for Windows desktop applications. Is this true or false?
Further reading
- Accelerate: The Science of Lean Software and DevOps: Building and Scaling High Performing Technology Organizations by Nicole Forsgren, Jez Humble, and Gene Kim.
- The Phoenix Project, by Gene Kim, Kevin Behr, and George Spafford.
- The Unicorn Project, by Gene Kim.
- The DevOps Handbook: How to Create World-Class Agility, Reliability, and Security in Technology Organizations, by Gene Kim, Jez Humble, Patrick Debois, and John Willis