A practical and easy-to-understand way of engaging your students, and encouraging them to start developing schema in an interactive way, is to create a glossary. In Moodle, the glossary is an activity. To add a glossary, follow these steps:
- Click on the Turn editing on button.
- Select Glossary from the Add an activity drop-down menu.
- On the Adding a new glossary page, give your new glossary a descriptive name.
- Describe the purpose of the glossary and provide instructions or background information, links, and so on in the Description area.
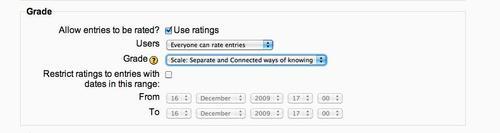
- Fill the general and grade options and the common module settings (see the following screenshot).
- Click on the Save and return to course button at the bottom of the page.
The following screenshot shows you what you will see when you describe the purpose of the glossary and provide the background information:

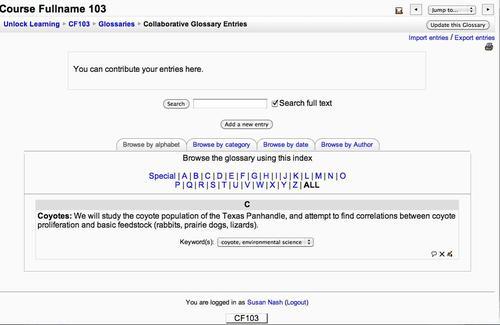
After you create a new glossary, let your students know that they will be organizing their entries alphabetically. The following screenshot shows how an entry for a collaborative glossary for Coyotes would appear:
Moodle can automatically link a term, wherever it appears in a course, to the term's glossary entry. Note that the following three things must be set for this to happen:
When you create a glossary, it is added to the course in which you created it. If you have administrator privileges on your Moodle site, you can make a glossary global, which makes it active for every course on your site.
Each course can have only one main glossary; it can also have many secondary glossaries. The content of each secondary glossary shows up in the main glossary. This enables easy and clear-cut segregation of the contents in the main glossary.
You can allow students to contribute to a glossary. Several features help you to manage this process.
By default, students can add new entries to a glossary. If you want to turn this OFF, you won't find it with the rest of the settings on the Editing Glossary page. Instead, you'll need to go to the Roles tab of the Editing Glossary page, select the Override roles sub tab, then select the Student role, and take away this permission.
By default, Duplicate entries allowed is set to No. If you are allowing student contributions to a glossary, you might want to set this to Yes. If you forbid duplicates, you might want to assign your students to specific entries so that they do not try to create duplicates. You might also want to set Allow comments on entries to Yes, so that if a student can't create the entry he/she wanted to, the student can still comment on it.
Approved by default determines if an entry created by a student is added to the glossary without the teacher's approval. If you've assigned each student specific glossary entries, you might want to set this to No. Then, when a student creates the assigned glossary entries, they appear under the Waiting approval tab of the glossary. This gives you a convenient place to check whether the student has completed the assignment. If you set this to Yes, then entries created by students go right into the glossary, and you need to search the entire glossary to determine if a student has completed the assigned entries.
Edit always allows you to decide if students can edit their entries at any time. If you set this to Yes, a student can always return to the entries he/she created and edit them. If you set this to No, a student cannot edit his/her entries after the editing time has passed. The editing time for a glossary is the same as for a forum posting. By default, Moodle gives a contributor 30 minutes to edit a glossary entry or forum posting before it is added. You can set this under site administration.

You can give students the ability to rate glossary entries, just like they can rate forum postings. The question is, which among the following do you want the students to rate:
- Clarity of the glossary entry
- Its helpfulness
- Your writing skill, in creating the entry
You'll need to consider what you want students to rate, and create a custom scale that supports the rating. You determine who can rate glossary entries, and what scale to use, on the Editing Glossary page.
You must have read about creating a custom scale in the Use a custom scale to rate relevance subsection in Chapter 2. Creating and applying a custom scale to glossary entries is the same as creating and applying it to forum entries.