13. Sharing Your Photos Digitally
In this chapter, you explore all of the digital ways to share your photos. You find out how to easily upload your pictures from iPhoto to iCloud, Flickr, Facebook, and Twitter. You also see how to send those photos via OS X’s Messages and via email—all from within iPhoto.
→ Sharing your photos through Apple’s iCloud photo streams
→ Uploading your pics to Flickr and Facebook right from iPhoto
→ Sending your pictures to friends via iPhoto’s messages and emailing features
→ Tweeting your pics to the world without leaving iPhoto
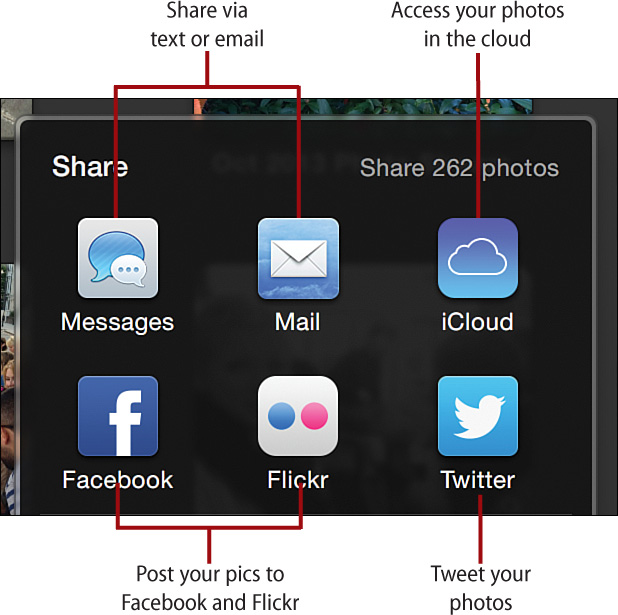
There’s no shortage of ways to share your photos digitally in iPhoto. Whether it’s by email, social networks, or instant messages, iPhoto lets you share your memories quickly and easily. Most of these ways of digital sharing are accomplished through the all-powerful Share button in iPhoto’s toolbar.
When you click the Share button, you see three subsections in the Share menu: Share, Create, and Print. It’s the Share subsection at the very top that handles all of the ways you can share your photos online. It contains six buttons: Messages, Mail, iCloud, Facebook, Flickr, and Twitter.
Before you can share your photos using the built-in sharing tools in iPhoto, you need to make sure you have accounts for all six of the digital sharing options—or at least those that you want to use.
As a Mac user, you’re entitled to a free iCloud account. Apple’s iCloud service gives you access to email, messages, online calendars and contacts, and more. It also enables you to share your photos online. You can sign up for a free iCloud account at www.iCloud.com.
For a Facebook account, head to www.facebook.com, if you don’t already have an account there. However, given that there are more than one billion Facebook users, chances are you do.
Flickr accounts can be set up at www.flickr.com. Basic Flickr accounts are free, but the service also offers paid Pro accounts as well.
Twitter is the microblogging site that has taken the world by storm in the last three years. It’s where you can post short 140-character “tweets” for all the world to see. It’s a powerful tool for keeping track of breaking news and following people you find interesting. A Twitter account is free, and you can sign up for it at www.twitter.com.
For Messages sharing, you need some kind of instant message account. The Messages app in OS X enables you to send instant messages to others via different services. If you have an iCloud or Gmail account, you can use Messages with those existing usernames. Messages also supports AIM and a host of other instant messaging services.
To use iPhoto to email pictures to your friends, you need an existing email account. If you’re an iCloud user, you can use your iCloud email address. Other free email accounts are Gmail, Yahoo! Mail, Outlook.com, and more.
Sharing Photos via iCloud
iCloud has a lot of features: email, calendars, and contacts. But the biggest iCloud feature that is integrated with iPhoto is My Photo Stream. My Photo Stream is a feature of iCloud that automatically stores the last 30 days of your photos and pushes them to all your Macs and iOS devices. So, if you take a photo with your iPhone, it’s automatically uploaded into your iCloud photo stream and will appear on your iPad and Mac, inside iPhoto. This is a great feature as it enables you to access all your photos no matter which device you are on.
Set Up Your iCloud Account
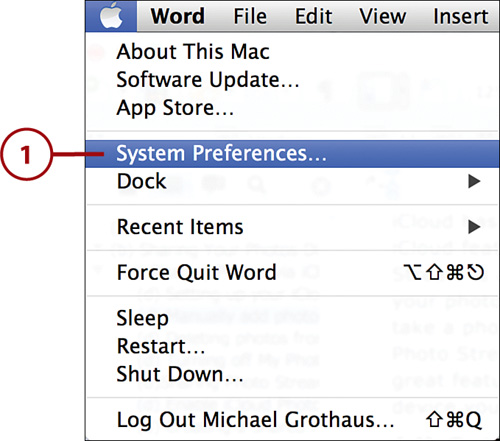
Before you can use My Photo Stream on your Mac, you must set up iPhoto to use your iCloud account.
1. Select System Preferences from the Apple menu on your Mac.
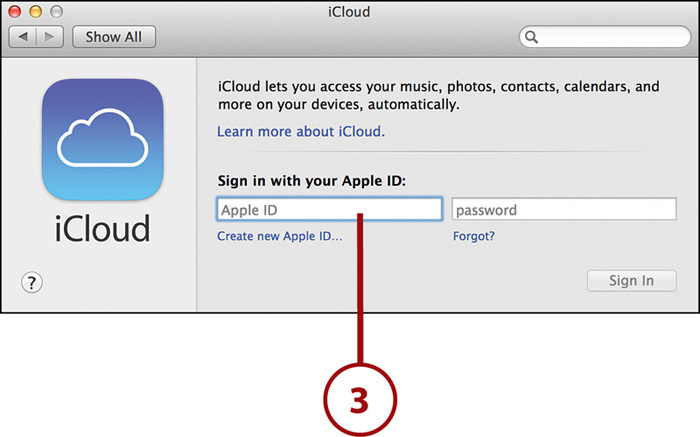
2. Click iCloud.

3. Enter your iCloud username and password.
4. Make sure Photos is enabled in the iCloud Settings pane by checking its box.
5. Click the Options button.
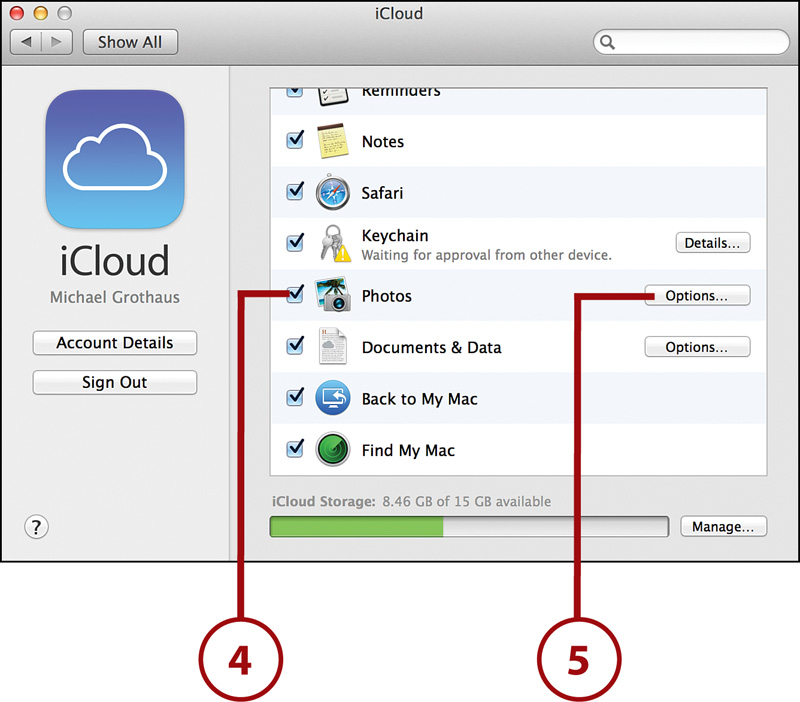
6. Check both My Photo Stream and Photo Sharing to enable them for use. iPhoto displays photo stream events in the app.

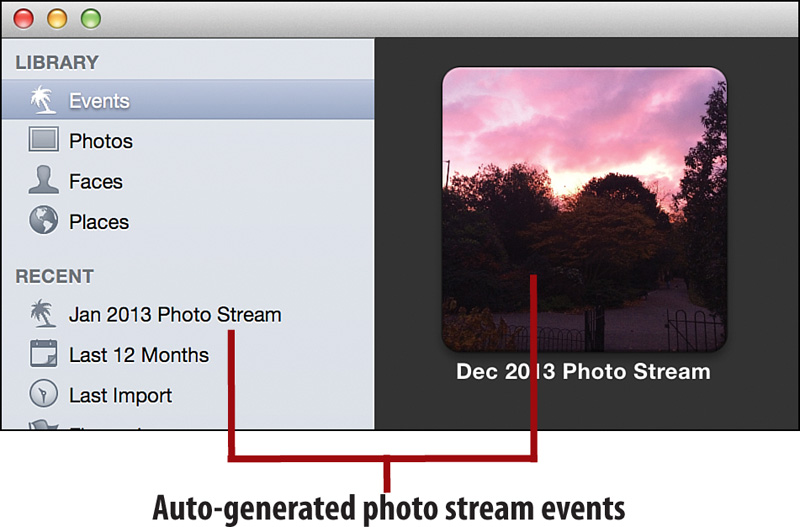
Photo Stream Events
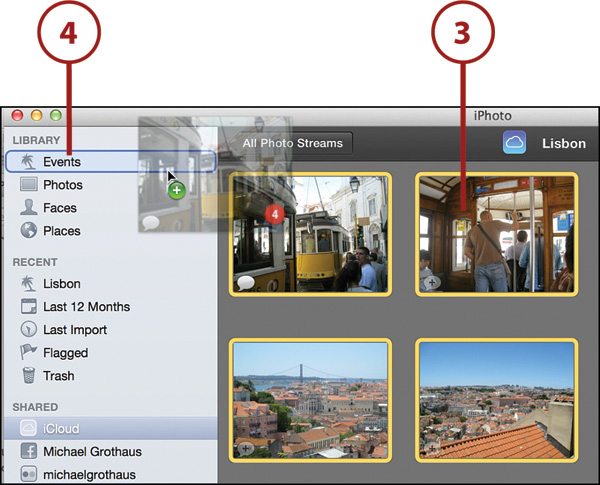
The photo stream events are grouped into months and appear as auto-generated events under Events in the source list. Each has a heading in the format of “Month, Year, Photo Stream,” such as “Dec 2013 Photo Stream.”
These auto-generated monthly photo stream events are great—as long as you open up iPhoto on your Mac once a month. All the pics you snap on your iPhone or iPad are automatically downloaded to iPhoto on your Mac; there’s no longer a need for you to sync your iPhone and iPad to import the pictures.
Turn Off Automatic Uploading to iCloud
The My Photo Stream feature of iCloud is awesome for enabling you to have your pics on all your Apple devices without needing to manually sync them. However, if you use a dedicated digital camera and import those pictures to iPhoto, iPhoto automatically uploads them all to your photo stream. This means your photo stream could get very crowded. In this case, it’s best to turn off automatic uploading in iPhoto.
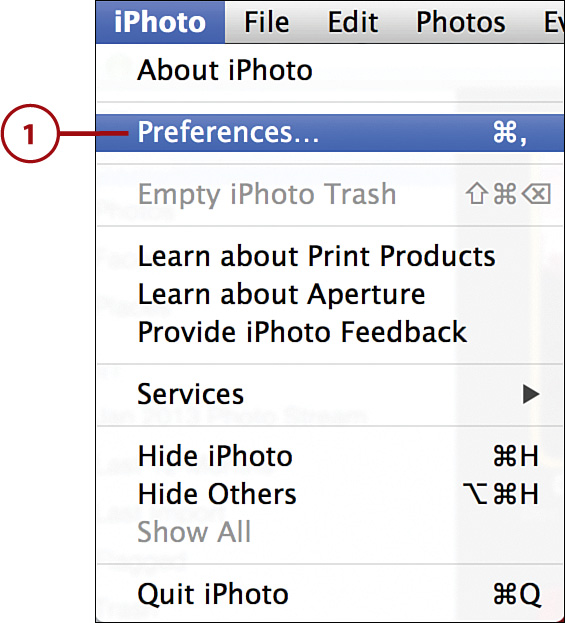
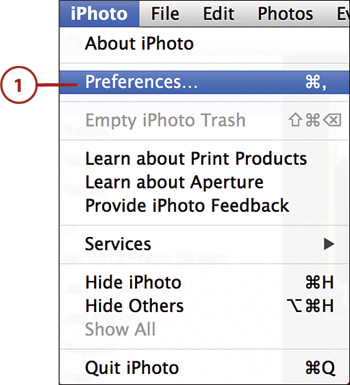
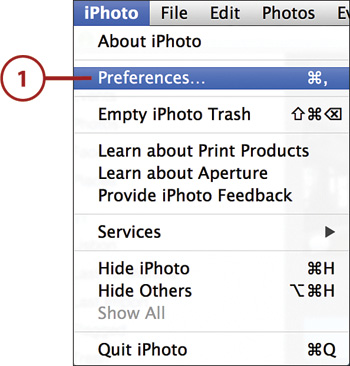
1. Select iPhoto, Preferences.
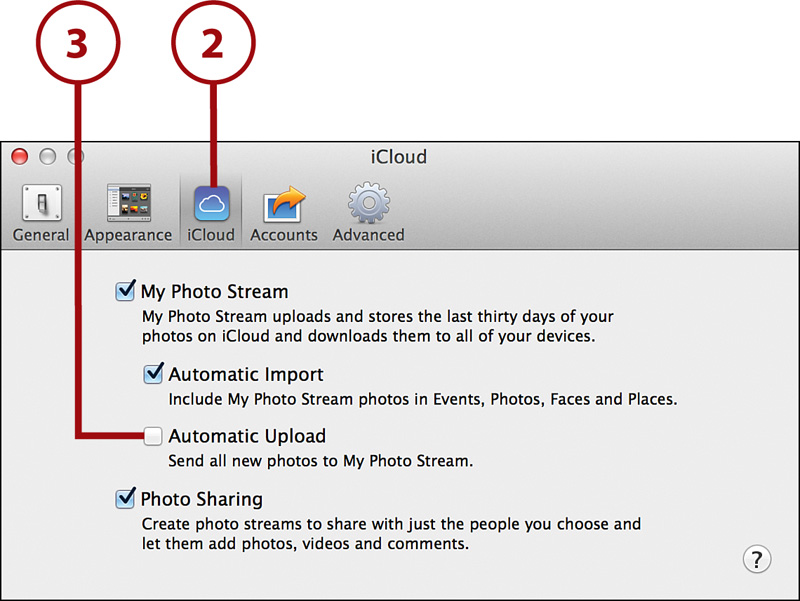
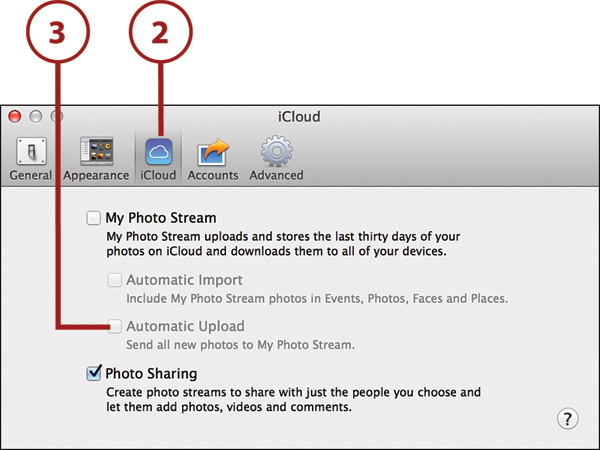
2. Click the iCloud tab.
3. Uncheck the Automatic Upload option. When you’ve turned off automatic uploads, any photos imported to iPhoto will not be uploaded to your photo stream unless you manually add them.
Manually Add Photos to My Photo Stream
1. Select the photos you want to upload.
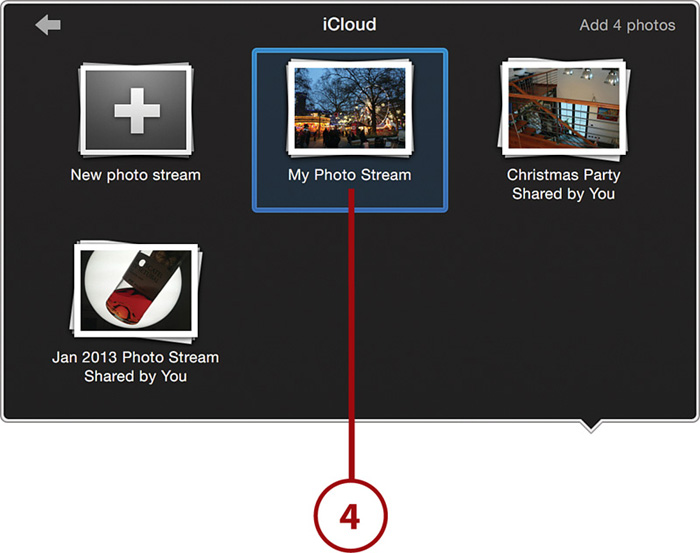
2. Click the Add To button.
3. Click the iCloud button.

4. Click the My Photo Stream button.
Delete Photos from My Photo Stream
If for whatever reason you want to delete a photo from My Photo Stream, you can easily do it right from iPhoto.
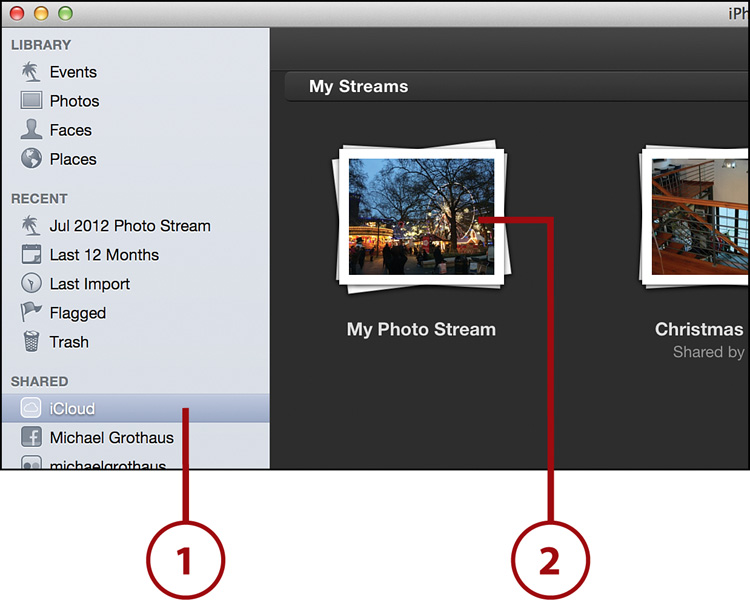
1. Choose iCloud from under the Shared header in iPhoto’s source list.
2. Click My Photo Stream.
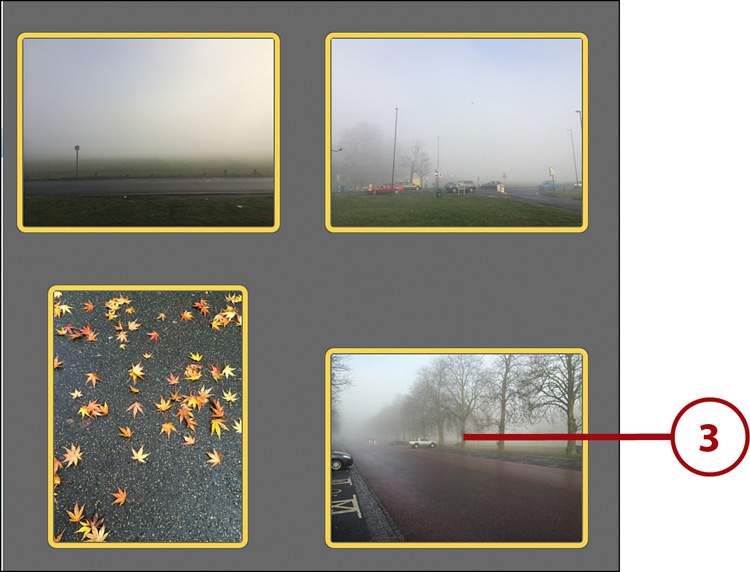
3. Select the photos you want to delete and press the Delete key on your keyboard.
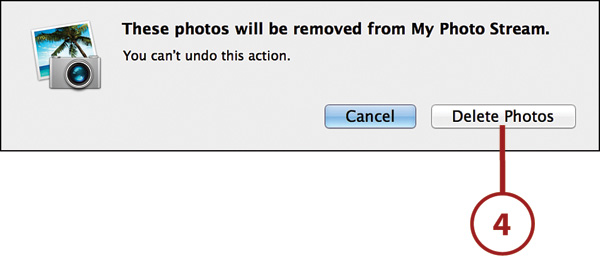
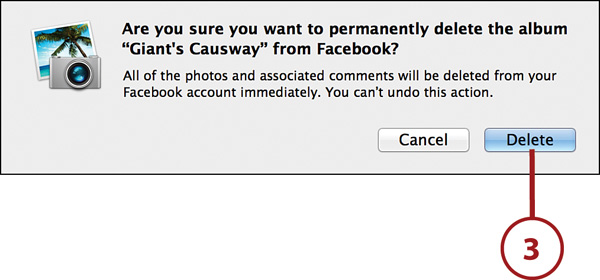
4. Click Delete Photos in the confirmation dialog box.
Turn Off My Photo Stream
My Photo Stream not your thing? You can turn it off all together.
1. Select iPhoto, Preferences.
2. Click the iCloud tab.
3. Uncheck the Automatic Upload option.
4. Click Turn Off in the confirmation dialog box. Or...
5. ...click Import Photos and Turn Off to first import the existing photos from My Photo Stream into your iPhoto Library.

Sharing Photo Streams
iCloud photo streams aren’t a solitary endeavor. You can use photo streams to share pictures with your family and friends, or the world at large. Sharing photo streams with others enables them to view your pictures inside their own versions of iPhoto and “like” and comment on them. To do this, however, they too must be iCloud members.
If you want to share your photo stream pics with people who aren’t iCloud members, you can do so via a web link, which enables them to view your photo stream pics online, although they won’t be able to “like” or comment on them.
Enable iCloud Photo Sharing
Before you can share your iCloud photo stream, you must first enable iCloud photo sharing.
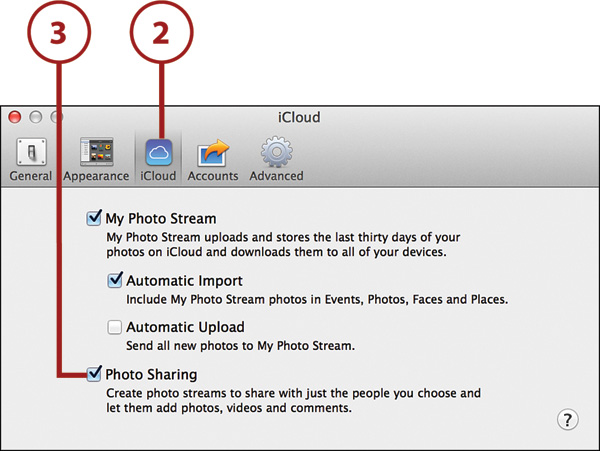
1. Select iPhoto, Preferences.

3. Check the Photo Sharing option.
Create a Shared Photo Stream
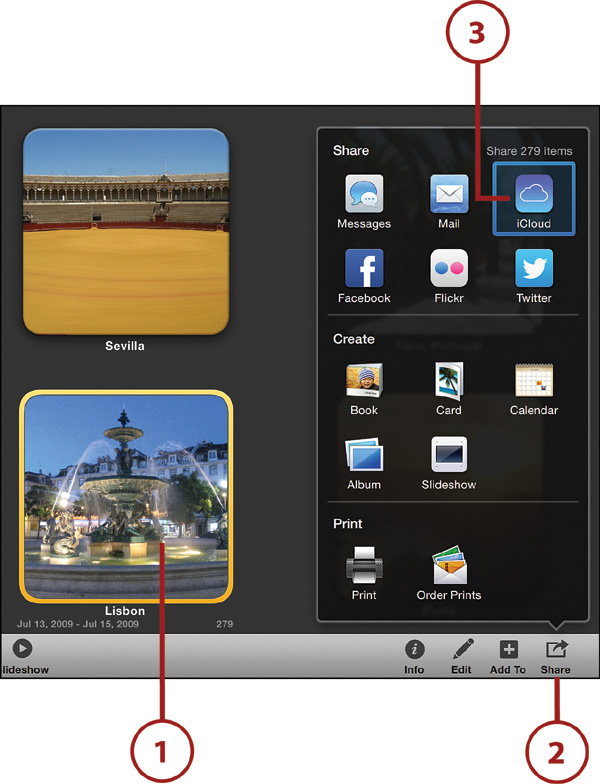
1. Select the photo or photos you want to publish from the library. You can also choose to publish an entire event or album by selecting the event by clicking it or choosing the album by clicking it in iPhoto’s source list.
2. Click the Share button.
3. Click iCloud.
4. Click any existing photo streams in your iCloud account to add your currently selected photos to that photo stream. You’ll get a confirmation that the photos were uploaded to it, and then you are done. Or...
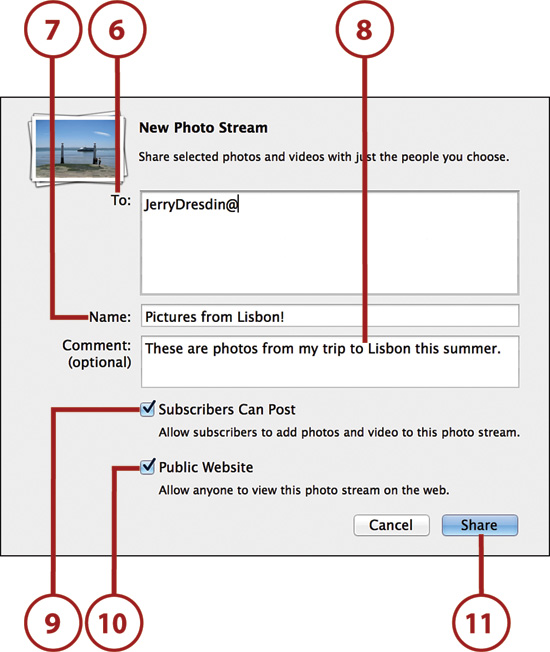
5. ...click the New Photo Stream button to create a new photo stream.

6. Enter the email addresses of the people you want to share your photo stream with.
7. Name your photo stream. By default, this is the name of the event or the iPhoto album from which you are uploading the photos. You can change it to any name you want in the text box.
8. Add your own comments to the photo stream to provide people with a description of the photos.
9. Check Subscribers Can Post so those with access to the photo stream are able to add their own pictures and videos to the photo stream.
10. Check Public Website so that anyone with the photo stream URL is able to view the photos on it.
11. Click the Share button.
View and Manage Your Shared Photo Streams
After you have published photos to your iCloud photo stream, you can view them in iPhoto or on the Web. You can also manage their settings at any time.
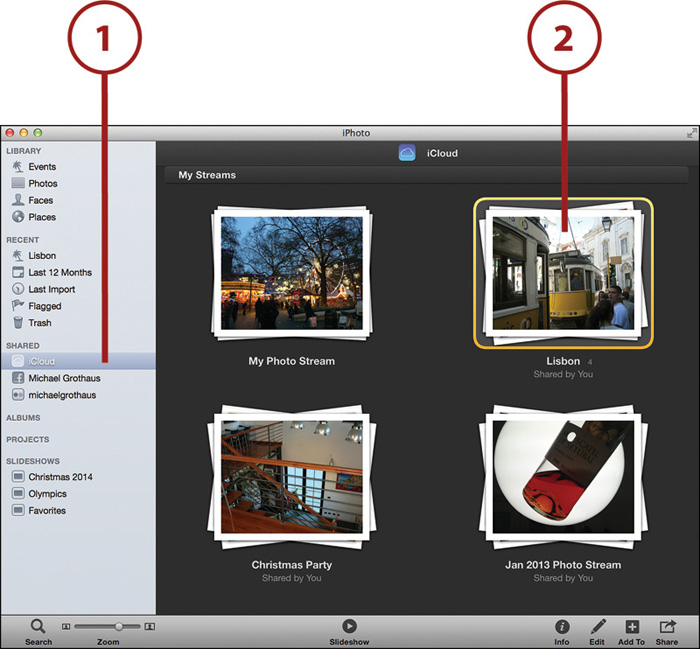
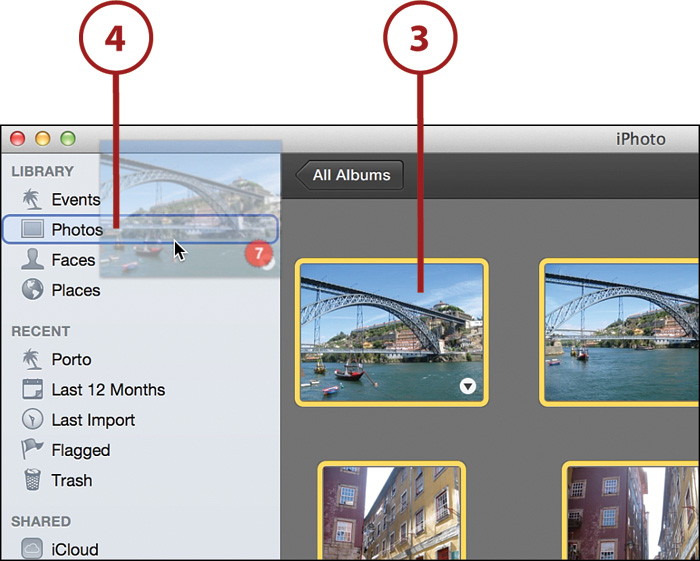
1. Select your iCloud account in iPhoto’s source list under the Shared header. Your iCloud photos are displayed in the body of iPhoto’s window.
2. Double-click the photo stream you want to view.
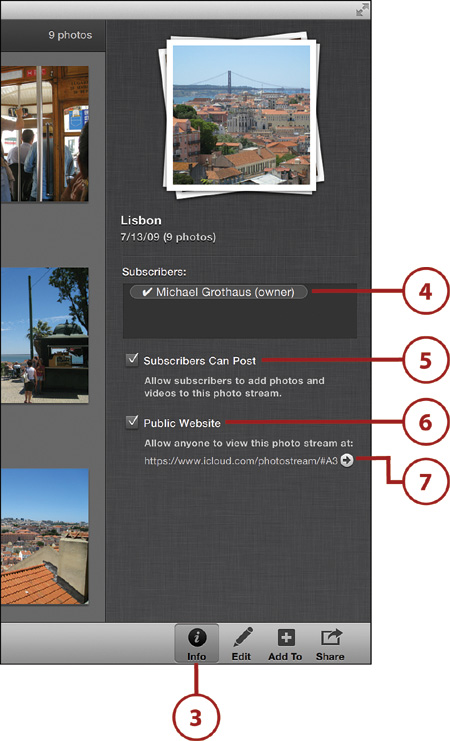
3. Click the Info button. In the Information Pane that appears, you can manage your photo stream settings.
4. Enter more email addresses in the Subscribers box to add subscribers to your photo stream, or you can select an existing name and press Delete on your keyboard to remove someone.
5. Check or uncheck Subscribers Can Post to toggle whether subscribers can upload photos and videos to your photo stream.
6. Check or uncheck Public Website to change the status of the photo stream.
7. Click the URL to view your photo stream in a web browser.
Delete Individual Photos from a Shared iCloud Photo Stream
If you want to delete a photo from a shared photo stream, you can easily do this right from iPhoto.
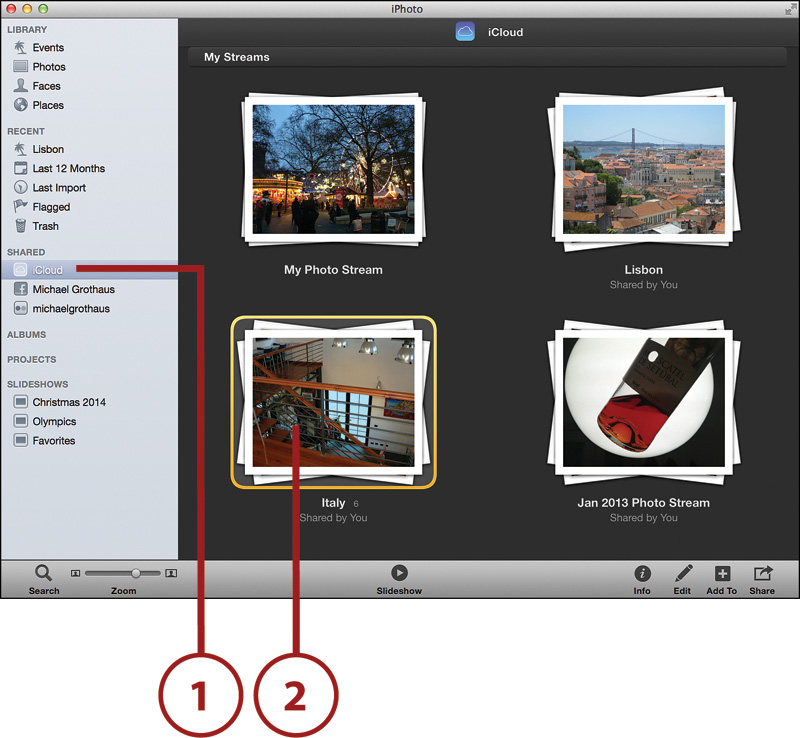
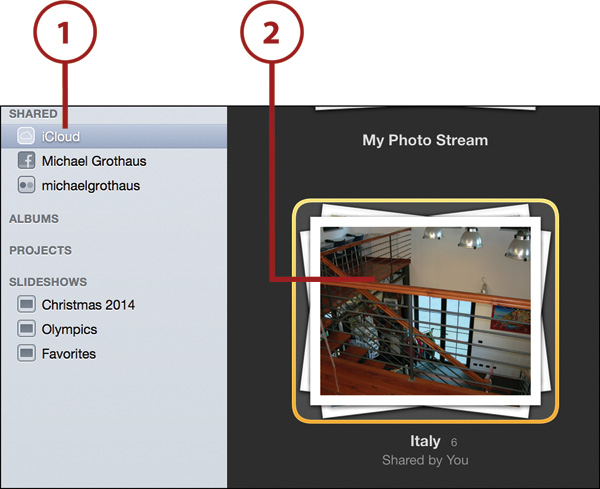
1. Choose iCloud from under the Shared header in iPhoto’s source list.
2. Click the shared photo stream that contains the photos you want to delete.
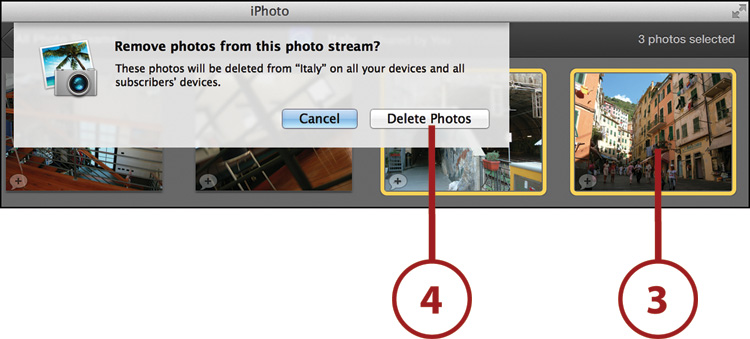
3. Select the photos you want to delete and press the Delete key on your keyboard.
4. Click Delete Photos in the confirmation dialog box.
Delete a Shared iCloud Photo Stream
If you want to delete an entire shared photo stream, you can easily do that, too.
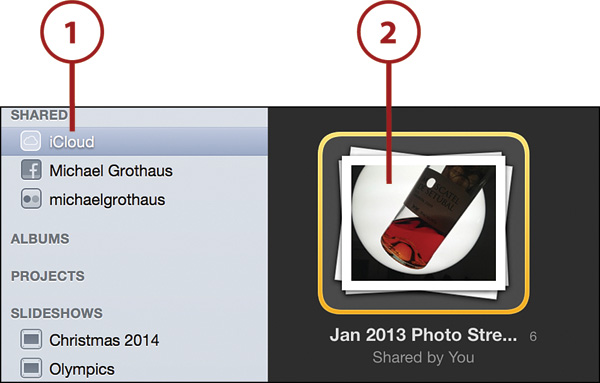
1. Choose iCloud from under the Shared header in iPhoto’s source list.
2. Select the shared photo stream that you want to delete and press Command+Delete on your keyboard.
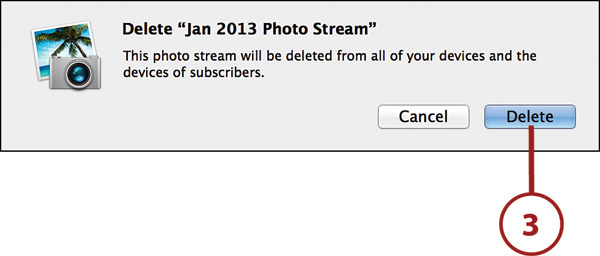
3. Click Delete in the confirmation dialog box. The photo stream is removed from your iCloud account; however, its photographs still remain in your main iPhoto Library if that is where they originated.
Save Photos Added by Others
When someone has uploaded a photo to your photo stream, the next time you open iPhoto, the photo stream syncs in iPhoto and displays any photos your friends have uploaded.
However, these synced photos have not been saved to your iPhoto Library. If you choose to delete the photos or the photo stream from your iCloud account, any photos your friends have uploaded to your photo stream will be deleted for good. So, before you delete an iCloud photo stream or individual photo in a photo stream through iPhoto, make sure you’ve saved any photos your friends have uploaded first.
1. Choose iCloud from under the Shared header in iPhoto’s source list.
2. Double-click the shared photo stream that contains the photo or photos you want to save.
3. Select the photo or photos you want to save.
4. Drag the photos to your Photos or Events header in iPhoto’s source list to add them to your iPhoto Library.
Sharing Photos via Flickr
Flickr has been a popular image hosting site since its launch in 2004. If you’re a current Flickr member, you’ll be happy that Apple has built-in Flickr support in iPhoto. If you’re not a member yet, you can go to www.flickr.com to create a free account.
Set Up Your Flickr Account to Use in iPhoto
If you have a Flickr account, you can sign in to it in iPhoto so you can begin sharing your photos to your Flickr page.
1. Select iPhoto, Preferences.
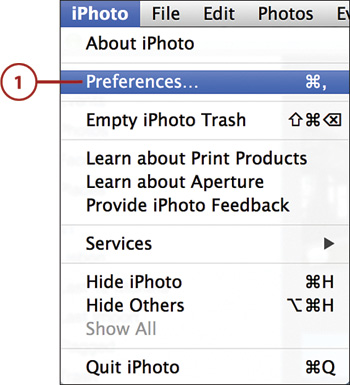
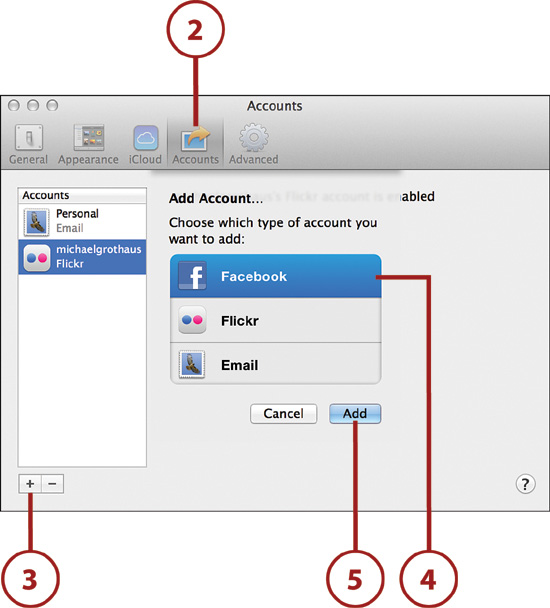
2. Click the Accounts tab.
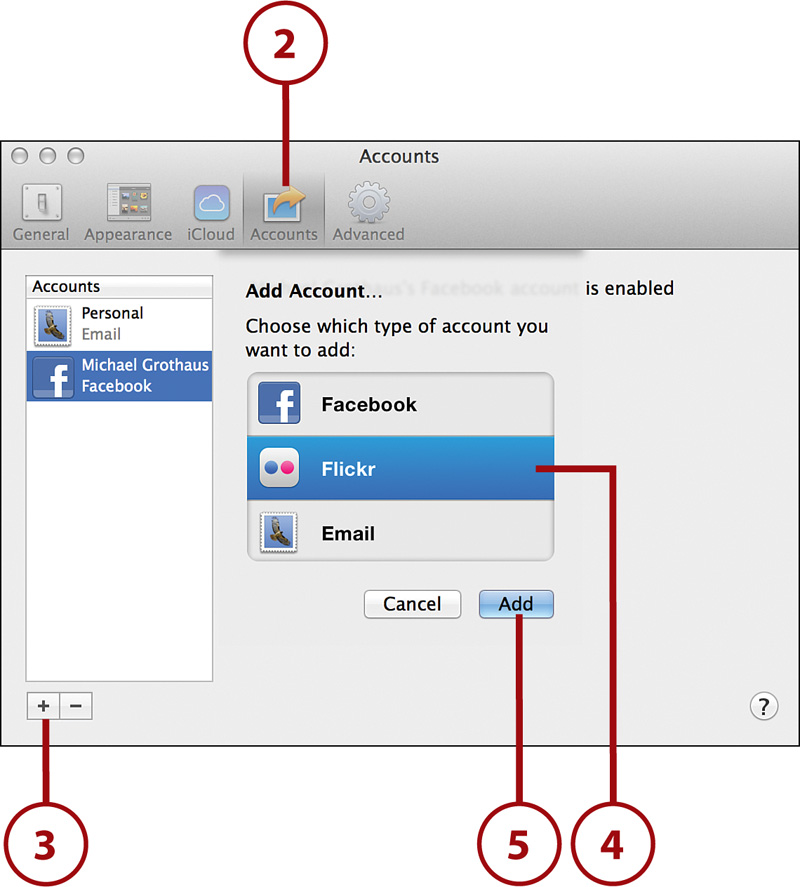
3. Click the + button to add a new account.
4. Select Flickr.
5. Click the Add button.
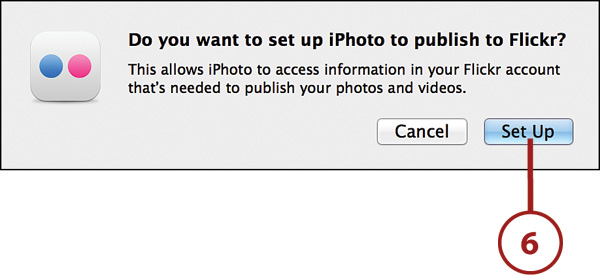
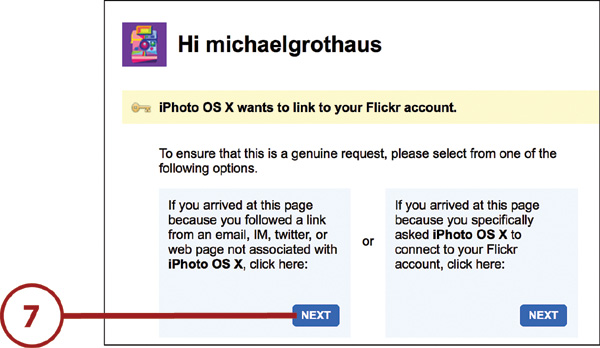
6. Click Set Up to confirm that you want to set up iPhoto to use with Flickr. On the Yahoo!/Flickr login page (not shown), enter your login details.
7. Click the Next button to indicate that you arrived at this page because you specifically asked iPhoto Uploader to connect to your Flickr account.
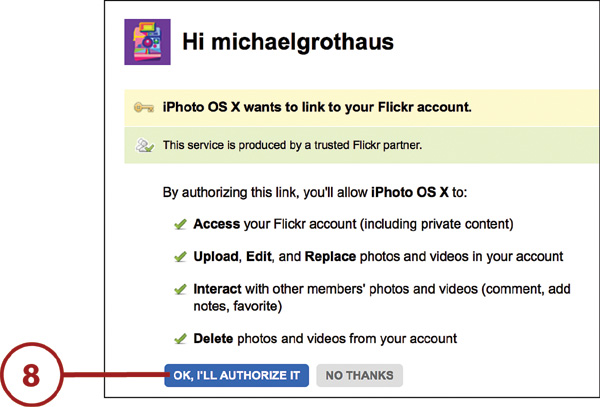
8. Click OK, I’ll Authorize It.
9. Close your web browser and return to iPhoto where your Flickr account is now enabled.
Publish Photos to Flickr
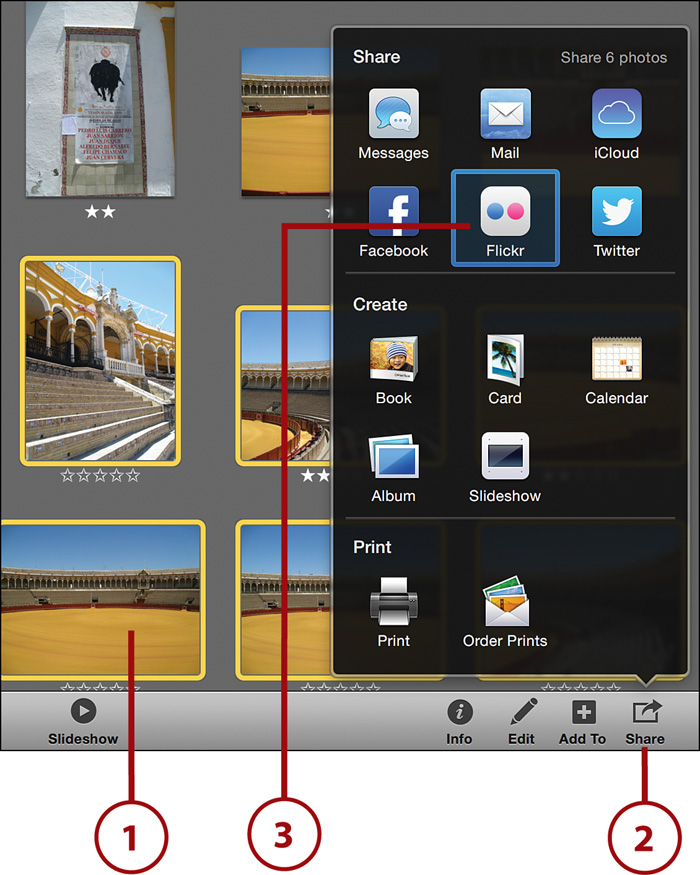
1. Select the photo or photos you want to publish. You can also choose to publish an entire event or album. To do so, simply select the event by clicking it, or choose the album by clicking it in iPhoto’s source list.
2. Click the Share button.
3. Click Flickr. The Share menu expands to become the Flickr Sets menu.
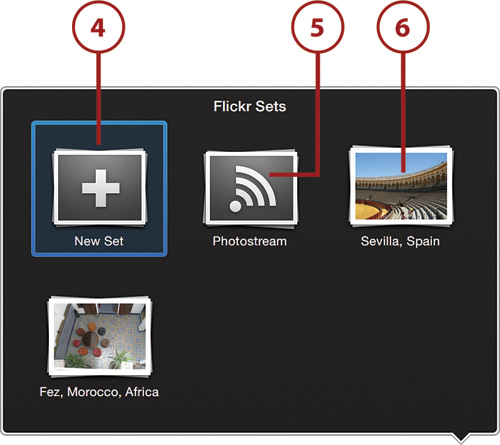
4. Click New Set, which creates a new photo set on your Flickr page containing the photos you have selected. (A set is what Flickr calls an album.) Skip to step 7. Or...
5. ...click the Photostream button to add the selected photos right to your Flickr photostream. Skip to step 8. Or...
Flickr Photostream Versus iCloud Photo Stream
A photostream on Flickr is simply a collection of the latest photos you’ve uploaded. A Flickr photo-stream is completely different than iCloud’s photo stream.
6. ...click any of the existing Flickr sets you’ve already created to add your currently selected photos to that set. Skip to step 8.
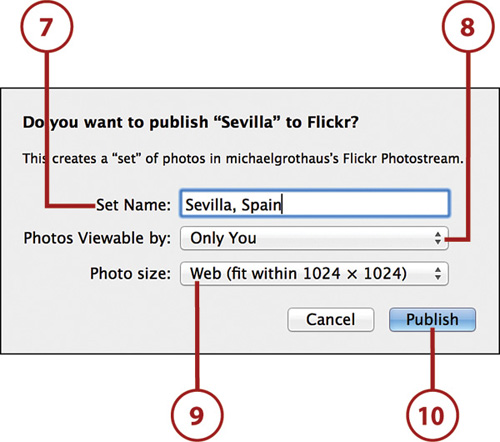
7. Enter the set’s name.
8. Use the Photos Viewable By drop-down menu to set your photos’ privacy settings. Choose who can view them, including you, just your friends, just your family, both your friends and family, or anyone.
9. Use the Photo Size drop-down menu to set the size of your uploaded photos. You can choose from three options: Web, Half-size, or Full-size.
10. Click Publish. Your photos begin uploading to your online Flickr account.
View Your Flickr Sets
After you have published photos to Flickr, you can view them in iPhoto or on the Web.
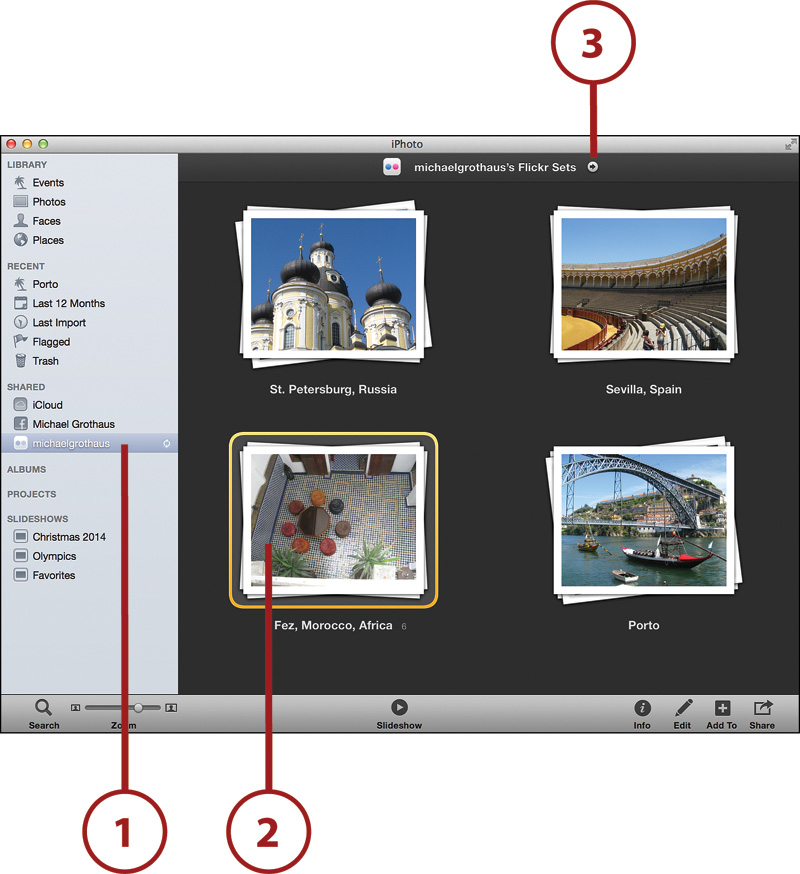
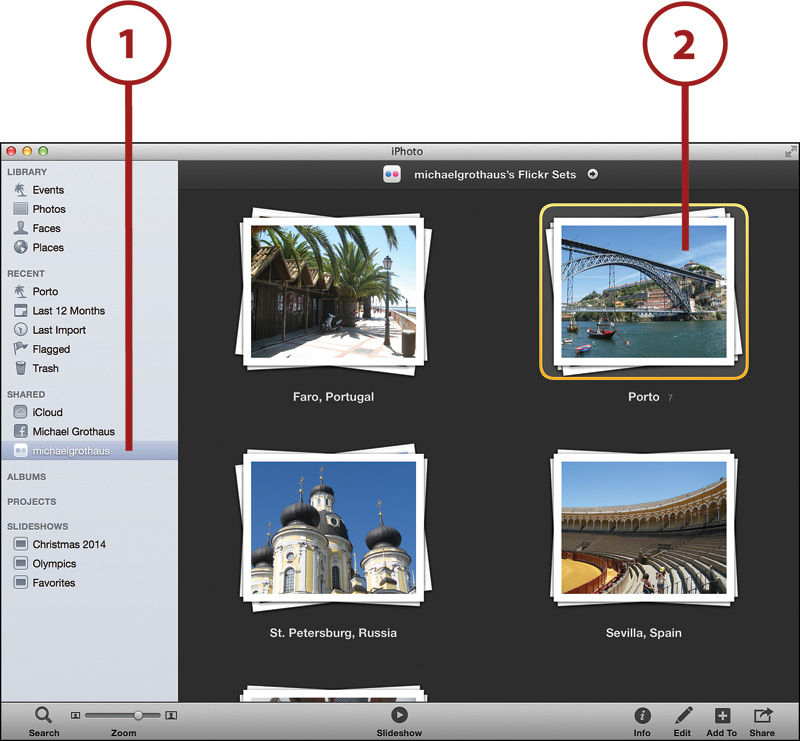
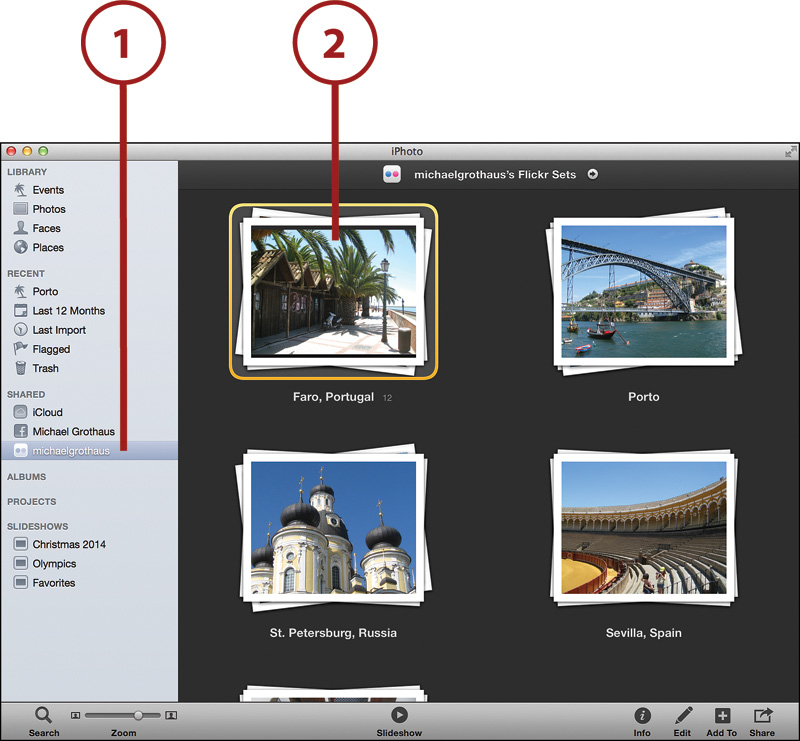
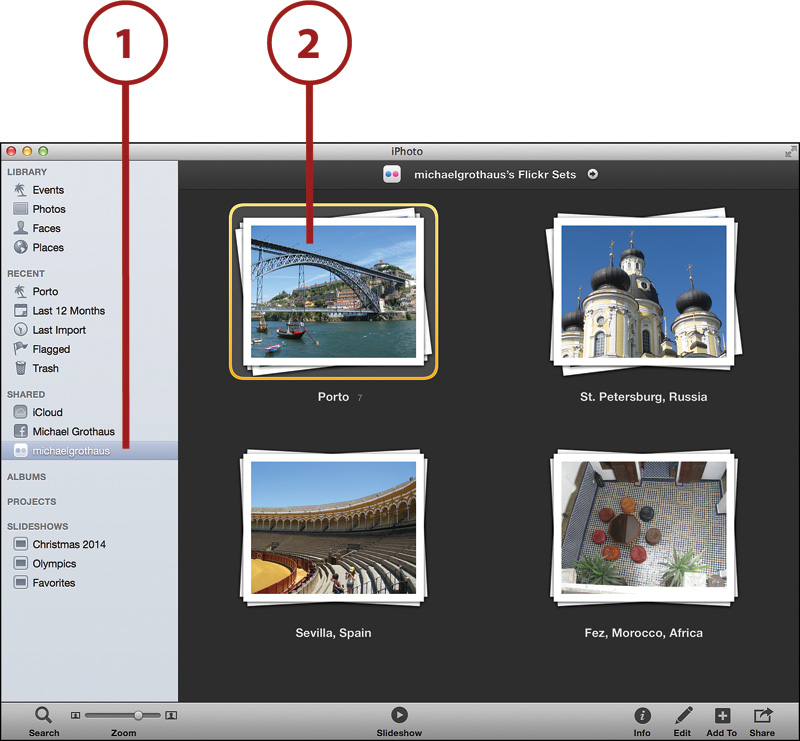
1. Select your Flickr account in iPhoto’s source list under the Shared header. Your Flickr sets are displayed in the body of iPhoto’s window.
2. Double-click the set you want to view. Or...
3. ...click the link at the top to open up your web browser and view your images on Flickr.com.
Delete Photos from a Flickr Set
If you want to delete a photo from a Flickr set, you can easily do this right from iPhoto.
1. Choose your Flickr account in iPhoto’s source list.
2. Double-click the set the photos are in.
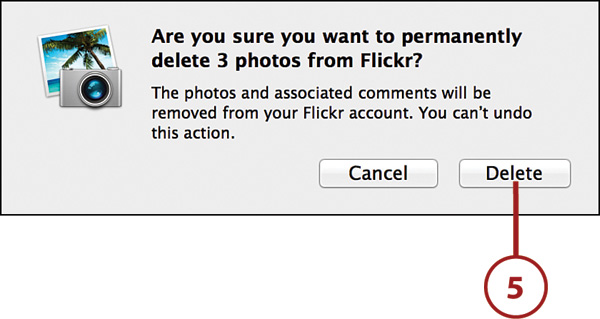
3. Select the photo or photos you want to delete and press the Delete key on your keyboard.
4. Click Remove Photo in the confirmation dialog box.
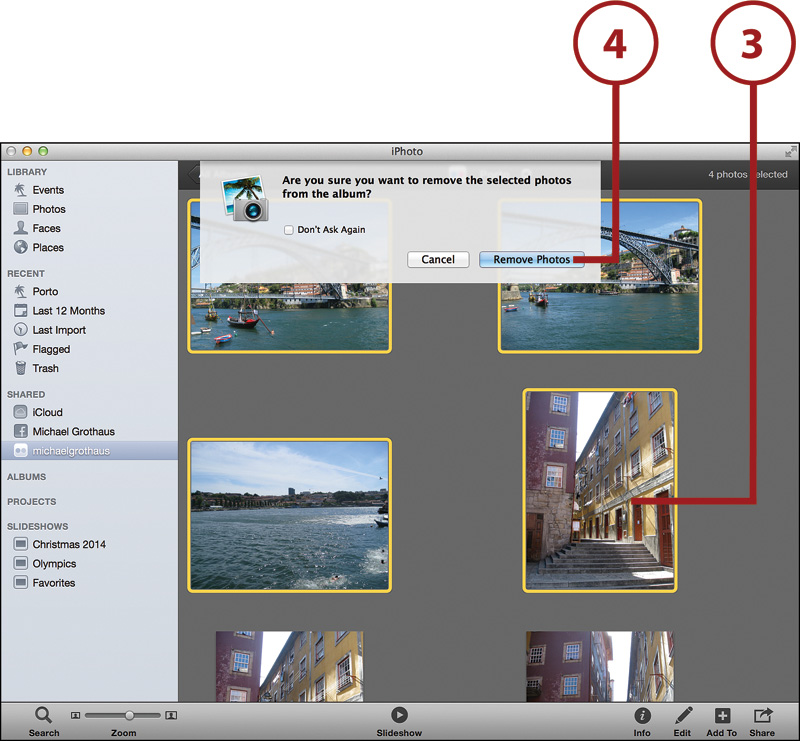
5. Click Delete to confirm you want to remove the photo.
Deleted from Flickr, Not iPhoto
The photos are removed from your online Flickr account; however, if you uploaded them from your iPhoto Library, they still remain in your main iPhoto Library. Any photos synced from Flickr that have not been manually imported to your iPhoto Library are moved to iPhoto’s trash unless you choose to import them first.
Delete a Flickr Set
1. Choose your Flickr account in iPhoto’s source list.
2. Select the set you want to delete and press Command+Delete on your keyboard.
3. Select whether you want to import the photos to your iPhoto Library before deleting the Flickr set.
4. Click Delete Set if you want to delete only the set and have the photos in the set still reside in your Flickr photostream online. Or...
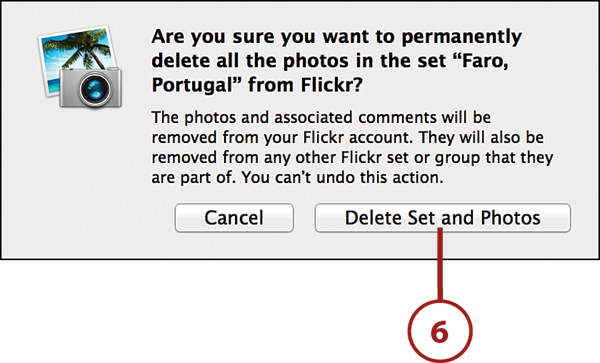
5. ...click Delete Set and Photos if you want to delete both the set and the photos it contains.

6. Click Delete Set or Delete Set and Photos to confirm. Depending on the option you choose, the set and/or its contents are removed from your online Flickr account. Any photos downloaded from Flickr that have not been imported to your iPhoto Library are moved to iPhoto’s trash unless you choose to import them first.
Save Photos Added by Others
Flickr allows you or others to add photos to your sets via the Web and email. When someone uploads a photo to your Flickr account, the next time you open iPhoto, your Flickr sets sync in iPhoto and display any photos that have been added to your sets through sources other than iPhoto.
However, these photos have not been saved to your iPhoto Library, and if you choose to delete the photos or sets from your Flickr account, any photos uploaded to your account outside of iPhoto are deleted as well. Before you delete a Flickr set or photo through iPhoto, make sure you’ve saved any photos you want to keep that were not originally part of your iPhoto Library.
1. Choose your Flickr account in iPhoto’s source list.
2. Choose the set the photos are in.
3. Select the photo or photos you want to save.
4. Drag the selected photos to your Photos or Events header in iPhoto’s source list. This adds them to your iPhoto Library, so even if you delete them from your Flickr account, you still have them saved on your computer.
Sharing Photos via Facebook
Unless you live under a rock, you’ve heard of Facebook. It’s the wildly popular social networking site that has more than a billion members and has spawned an Oscar-winning movie. Facebook lets you keep in touch with your friends, send messages, chat, play games, and, yes, upload and post photos.
Of course, given Facebook’s massive popularity, it’s no surprise Apple has built-in Facebook photo sharing to iPhoto.
Set Up Your Facebook Account to Use in iPhoto
If you have a Facebook account, you can sign in to it in iPhoto so you can begin sharing your photos to your Facebook page.
1. Select iPhoto, Preferences.
2. Click the Accounts tab.
3. Click the + button to add a new account.
4. Click Facebook.
5. Click the Add button.
6. Enter the email associated with your Facebook account.
7. Enter your Facebook password.
8. Check the box stating you agree to Facebook’s terms.
9. Click Login.

Publish Photos to Facebook as Albums
1. Select the photo or photos from your iPhoto Library that you want to publish. You can also choose to publish an entire event or album. To do so, simply select the event by clicking it, or choose the album by clicking it in iPhoto’s source list.
2. Click the Share button.
3. Click Facebook. The Share menu expands to become the Facebook Albums menu.

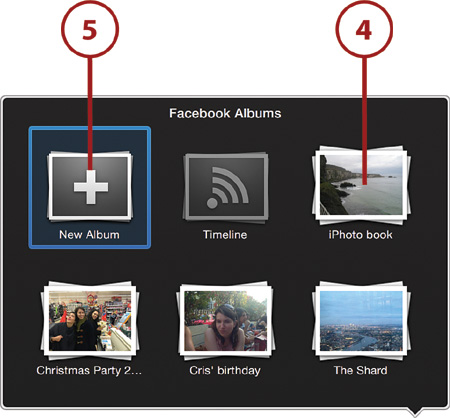
4. Add photos to an existing Facebook album by clicking that album. You see a confirmation that the photos were uploaded to it, and then you are done. Or...
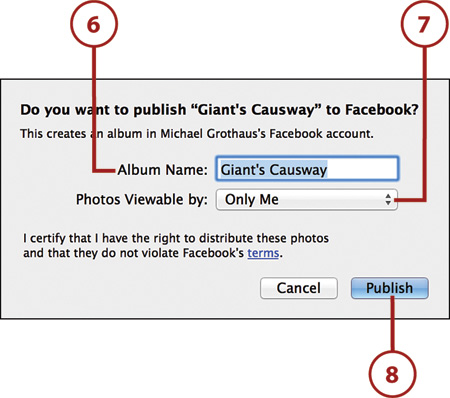
5. ...click the New Album button.
6. Enter the album name. By default, the album is named with the title of the event or iPhoto album you are uploading the photos from. You can change it to any name you want in the text box.
7. Choose your photos’ privacy settings in the Photos Viewable By drop-down menu. Options include Everyone, Friends of Friends, Only Friends, or Only Me.
8. Click Publish. Your photos begin uploading to a new album in your Facebook gallery.
View and Manage Your Facebook Albums
After you have published photos to Facebook, you can view them in iPhoto or on the Web.
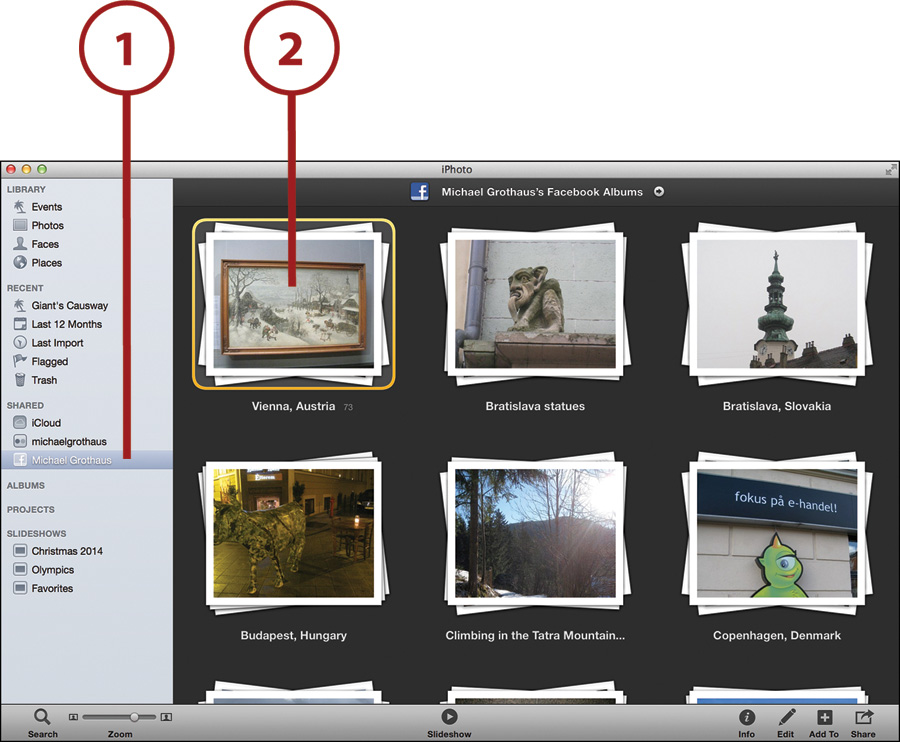
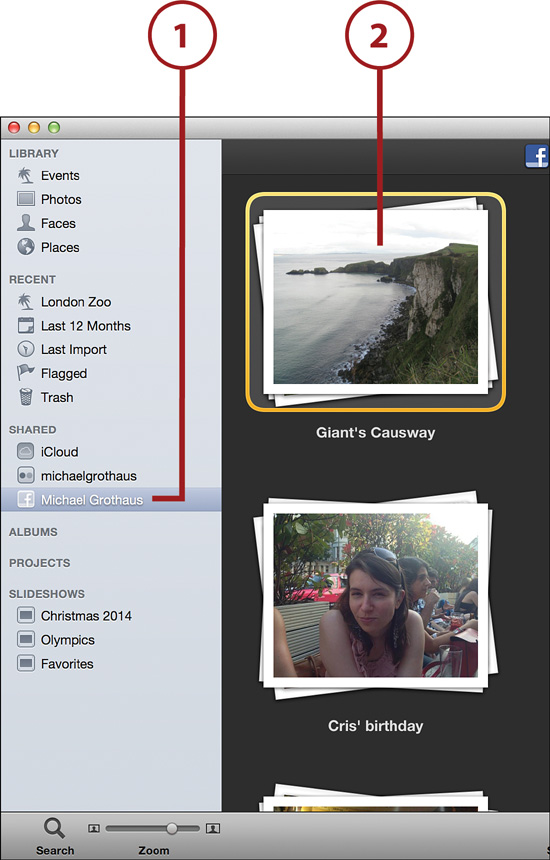
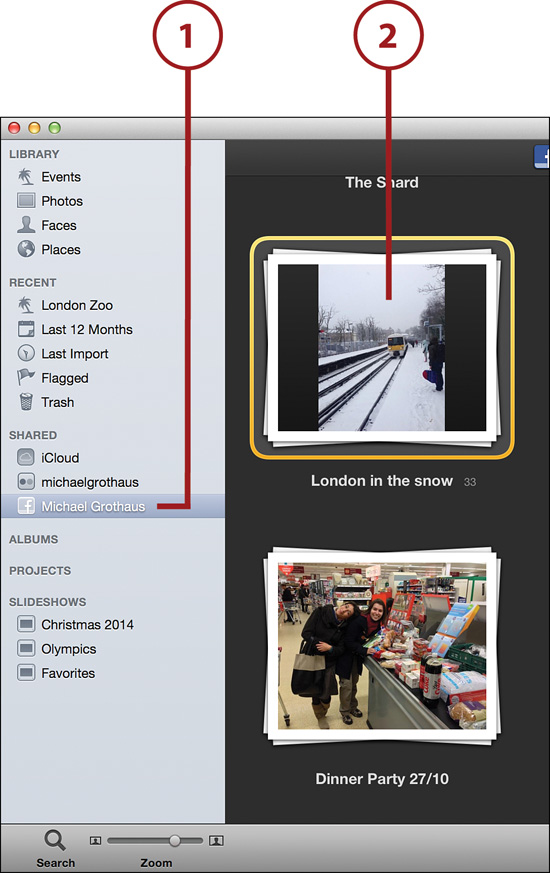
1. Select your Facebook account in iPhoto’s source list under the Shared header. Your Facebook albums are displayed in the body of iPhoto’s window.
2. Double-click the album you want to view.
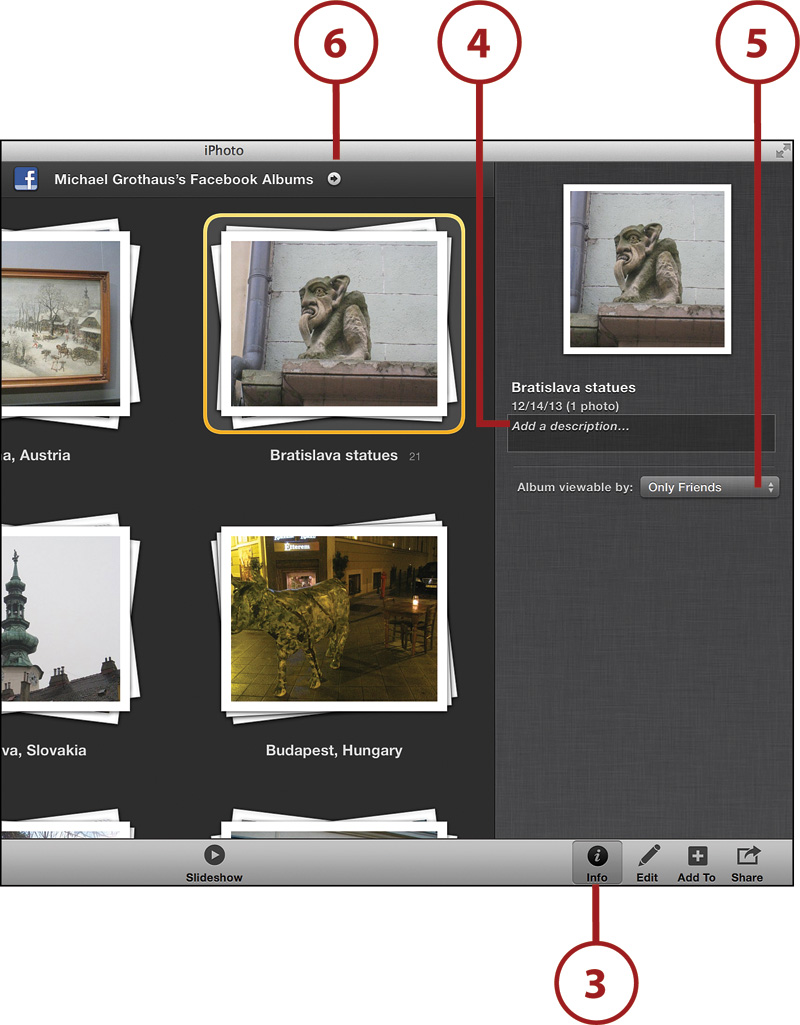
3. (Optional) Click the Info button. The Information Pane displays very limited information for the selected album. This information includes the name of the album, the dates its photos were taken, and how many photos the album contains.
4. (Optional) Enter a brief description of the album if you want.
5. (Optional) Change who has access to view the albums via the drop-down menu. Choose from Everyone, Friends of Friends, or Only Friends.
6. Click the link at the top to open up your web browser and view your images on Facebook.com.
Publish a Photo to Your Facebook Timeline
The primary feature of Facebook is the Timeline. It’s where you can post status updates, links, and individual photos. iPhoto lets you quickly and easily post a single photo to your Timeline. Keep in mind that you can post only one photo to your Timeline at a time. If you have multiple photos selected, you will not be able to select the Timeline button.
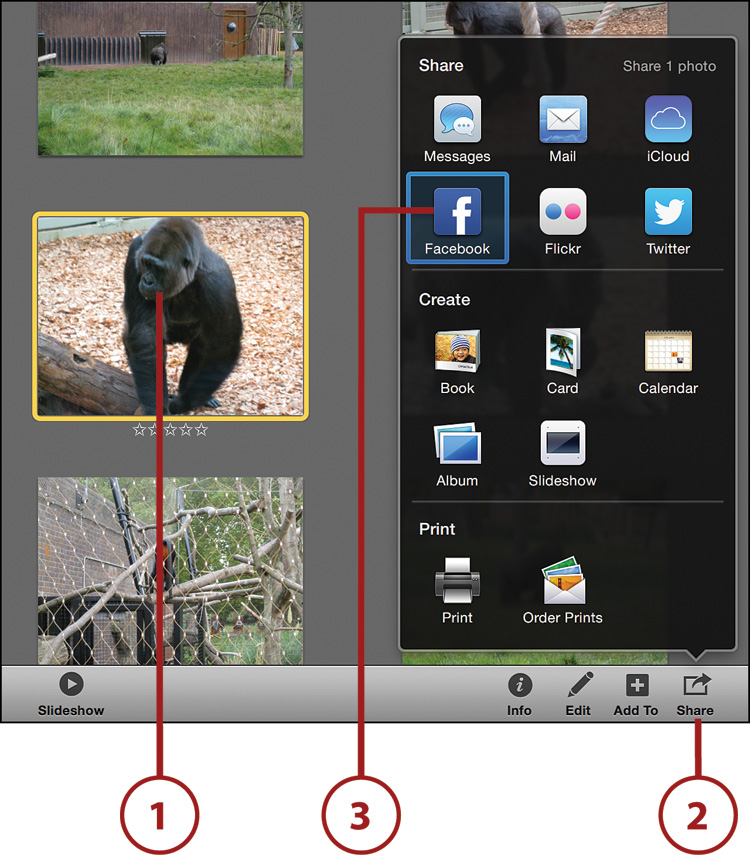
1. Select the photo you want to post to your Timeline.
2. Click the Share button.
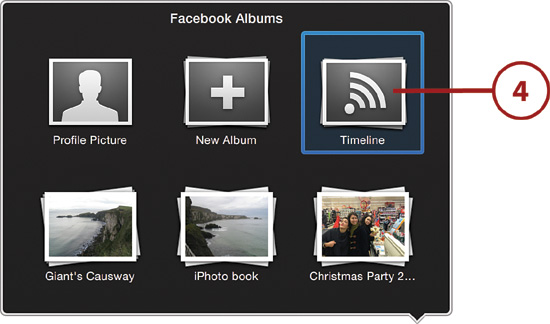
3. Click Facebook. The Share menu expands to become the Facebook Albums menu.
4. Click the Timeline button.
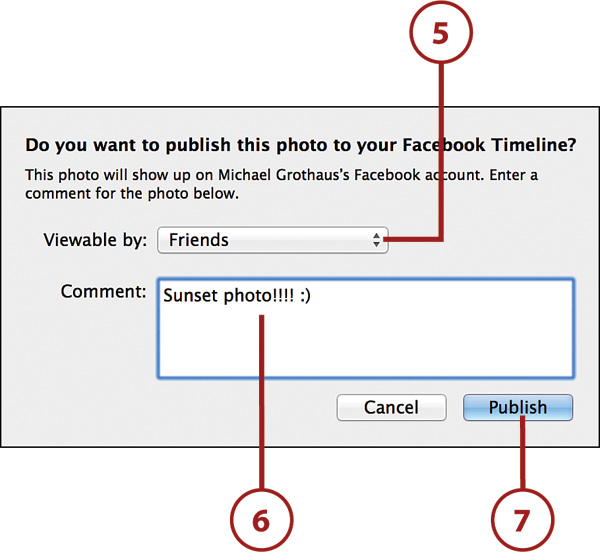
5. Select who the photo is viewable by: Everyone, Friends of Friends, Friends, or Only Me.
6. Add a comment about the photo if you want. This comment appears on your Timeline beneath the photo.
7. Click the Publish button, and your photo and its comment are posted to your Timeline. Note that photos you have uploaded to your Timeline do not appear in your Facebook albums in iPhoto.
Change Your Facebook Profile Picture from Within iPhoto
iPhoto allows you to change your Facebook profile picture from within iPhoto itself.
1. From your iPhoto Library, select the photo from your iPhoto Library that you want to use as your profile picture. Make sure to edit and crop it to your liking before you upload it.
2. Click the Share button.
3. Choose Facebook. The Share menu expands to become the Facebook Albums menu.
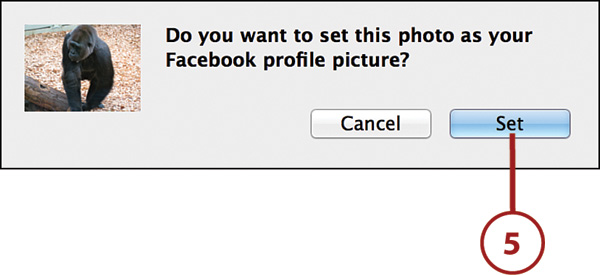
4. Click the Profile Picture button.
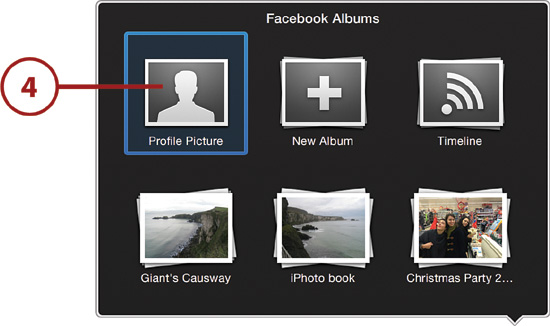
It Only Works with One
Note that you see the Profile Picture button when you have only one photo selected. If you have more than one photo selected, the button is not displayed.
5. Click Set to confirm that you want to set the photo as your profile picture.
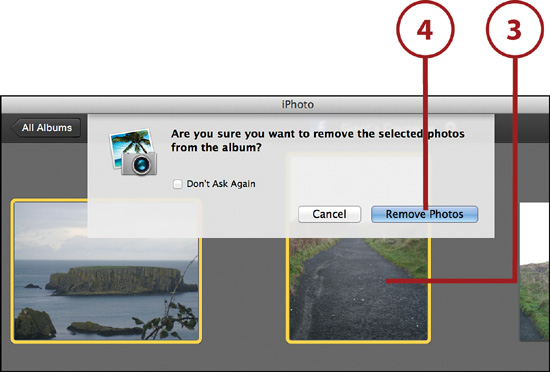
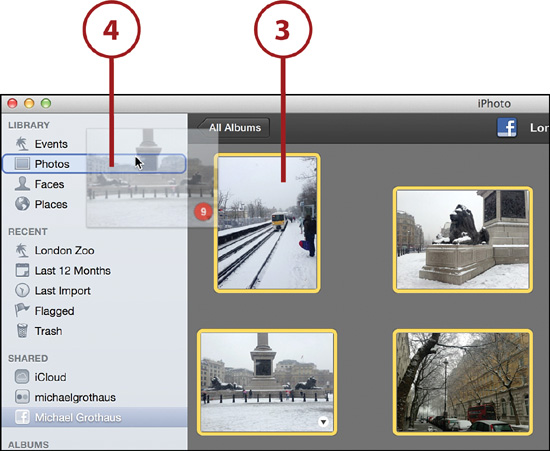
2. Double-click the album the photos are in.

3. Select the photo or photos you want to delete and press the Delete key on your keyboard.
4. Click Remove Photo to confirm that you want to remove the selected photo(s).
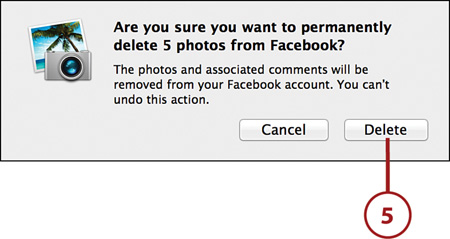
5. Click Delete in the confirmation dialog box.
Removed from Facebook, Not iPhoto
The photos are removed from your online Facebook account; however, if you uploaded them from your iPhoto Library, they still remain in your main iPhoto Library. But any photos synced from Facebook that have not been manually imported to your iPhoto Library are moved to iPhoto’s trash unless you choose to import them first.
2. Select the album you want to delete and press Command+Delete on your keyboard.
3. Click Delete in the confirmation dialog box, and your album is deleted from your online Facebook account. Any photos synced from Facebook that have not been imported to your iPhoto Library are moved to iPhoto’s trash unless you choose to import them first.
Save Photos Added to Facebook Albums Outside of iPhoto
Facebook allows you to add photos to your account via the Web. When you externally upload a photo to your Facebook account, the next time you open iPhoto, your Facebook albums will sync in iPhoto and display any photos that have been added to your albums through sources other than iPhoto.
However, these photos have not been saved to your iPhoto Library, and if you choose to delete the photos or albums from your Facebook account, any photos uploaded to your account outside of iPhoto are deleted as well. So, before you delete a Facebook album or photo through iPhoto, make sure you’ve saved any photos that were not originally part of your iPhoto Library.
1. Choose your Facebook account in iPhoto’s source list.
2. Choose the album the photos are in.
3. Select the photo or photos you want to save.
4. Drag that photo or photos to your Photos or Events header in iPhoto’s source list. This adds them to your iPhoto Library, so even if you delete them from your Facebook account, they are still saved on your computer.
Sharing Photos via Messages
Messages is OS X’s instant messaging app. It comes free in OS X 10.8 or above. With it, you can chat to people via your GoogleTalk, iCloud, AIM, and Yahoo! accounts. You can also send up to 10 photos at a time in your chat via Messages right from within iPhoto.
Set Up Your Messages Account to Use in iPhoto
Before you can use the Messages sharing function in iPhoto, you must first have the Messages app on your Mac set up for use. To do this, you need an existing Apple ID, or a GoogleTalk, Yahoo!, or AIM ID.
1. Click the LaunchPad icon in the Dock.
2. Click the Messages app.
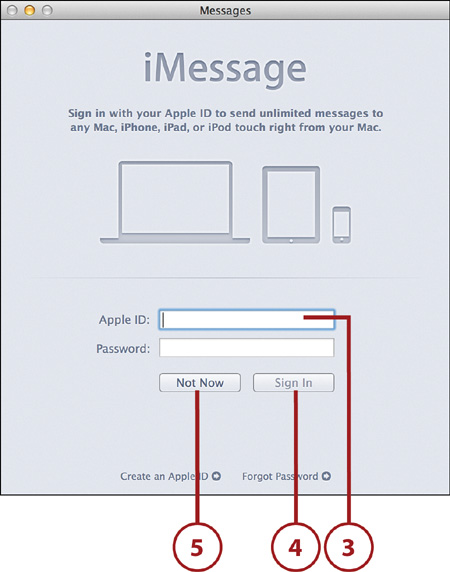
3. Enter your Apple ID username and password. (Your Apple ID username is your @icloud.com email or the same email and password you log in to the iTunes Store with.)
4. Click the Sign In button.
5. (Optional) If you don’t want to use your Apple ID, click the Not Now button.
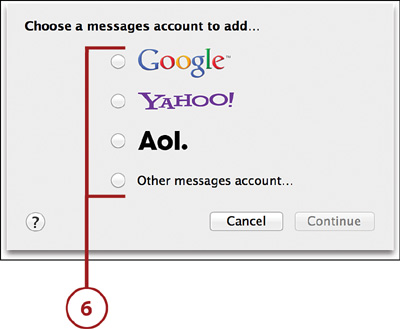
6. Choose the service of the existing ID you want to use.
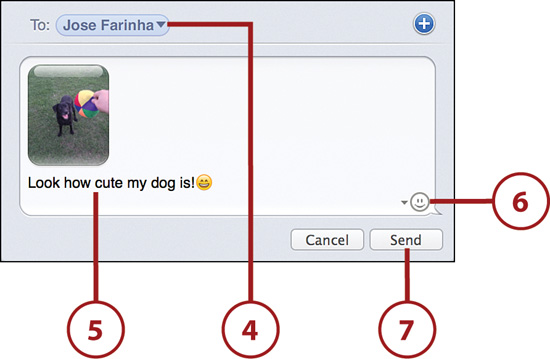
Share a Photo via Messages
After you’ve set up Messages on your Mac, sharing a photo via Messages is easy.
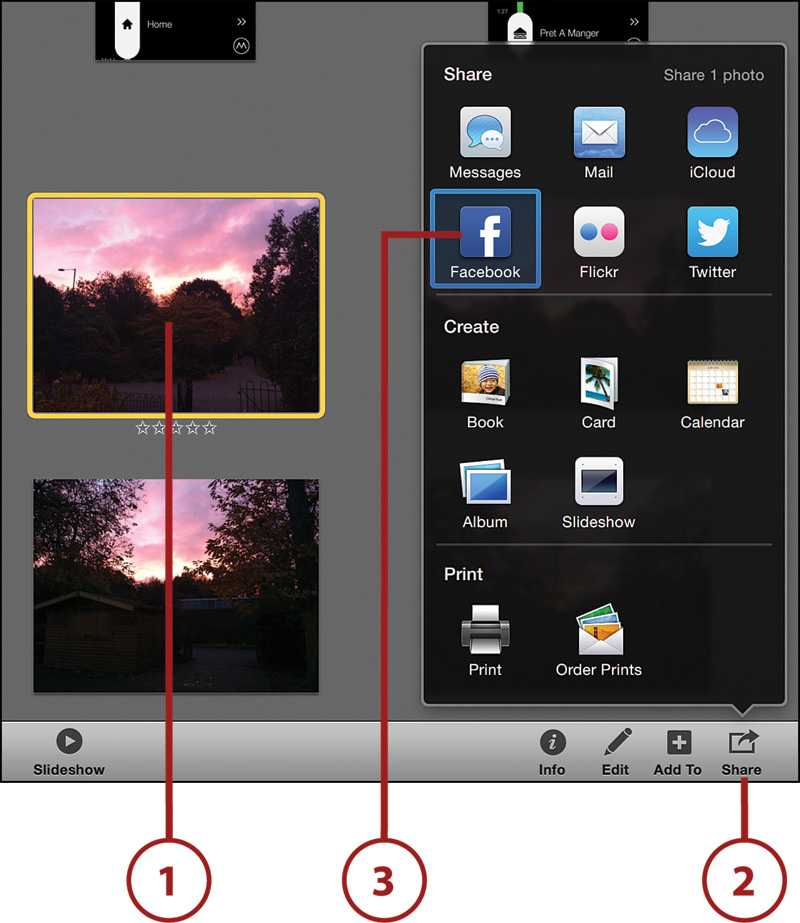
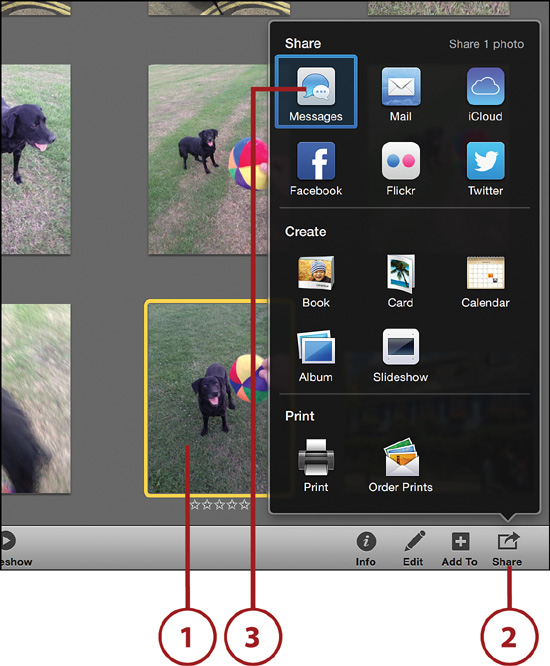
1. Select the photo or photos you want to send (you can choose up to 10).
2. Click the Share button.
3. Click the Messages button.
4. Enter the name of your recipients in the message window.
5. Add a text message to the photo if you want.
6. Insert a smiley face or other emoticon if you want.
7. Click Send.
Sharing Photos via Twitter
Twitter is the hot new social network on the Net. It has Facebook quaking in its boots and the media world in love with it. If you have a Twitter account, you can tweet one photo at a time right from iPhoto. Note, however, that each photo takes up 21 characters (for the image URL) out of your 140-character tweet limit.
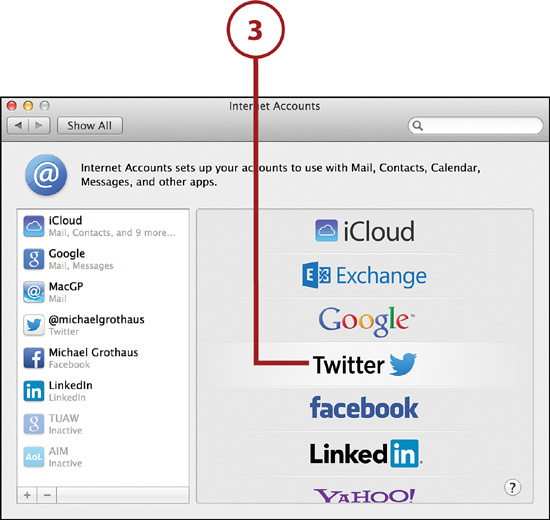
Set Up Your Twitter Account to Use in iPhoto
Before you can tweet from within iPhoto, you must first have your Twitter account set up on your Mac. This only takes a few seconds and you only have to do it once.
1. Select System Preferences from the Apple menu.

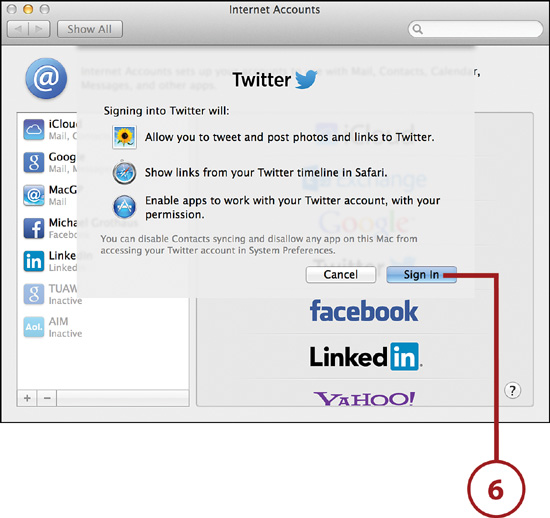
2. Click Internet Accounts.
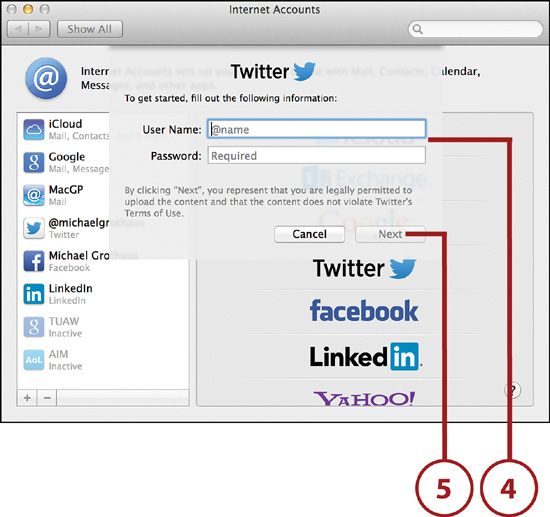
4. Enter your Twitter username and password.
5. Click Next.
6. Allow all of OS X to access your Twitter account by clicking Sign In.
Share a Photo via Twitter
After you’ve set up your Twitter account on your Mac, you’ll be tweeting your photos in no time.
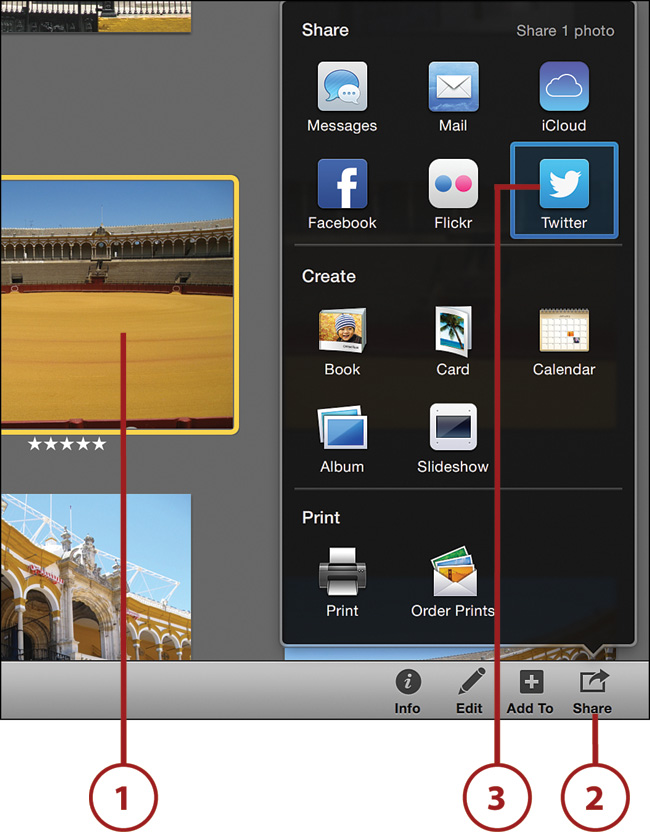
1. Select the photo you want to send (you can only choose one).
2. Click the Share button.
3. Click the Twitter button.
4. Enter any text you want to tweet with your photo. Remember, you only have about 123 characters left of your 140-character total.
5. Click the Add Location button if you want to embed your current location in the tweet.
6. Click Send, and the tweet is sent.

Sharing Photos via Email
It wasn’t long ago that email was the preferred way to share digital photos. Now, however, with the rise of social networking sites, email is quickly being usurped. In fact, email usage has dropped more than 40% in the last five years, largely because of social networking sites and texting. Maybe, however, people just need a cooler way to email their photos. That’s where iPhoto comes in.
Using iPhoto, you can create cool themes in the body of your email to display your photos. These themes allow you to arrange your photos in interesting ways, kind of like if you were laying them out on a poster. You can then add and format your own text, change the layout of the photos, and more, all from within iPhoto!
iPhoto offers 10 email themes, including classic, journal, snapshots, corkboard, cardstock, announcement, celebration, collage, letterpress, and postcard. However, Apple frequently issues new, free updates to iPhoto, which might include new themes from time to time.
Set Up an Email Account to Use with iPhoto
Before you can send photos from within iPhoto, you need to make sure you’ve entered your email information. If you are already using OS X’s Mail app, iPhoto automatically imports your email information and settings, so you’re ready to go. If you check your email only in a web browser, however, you need to manually enter your email settings in iPhoto.
1. Choose iPhoto, Preferences.
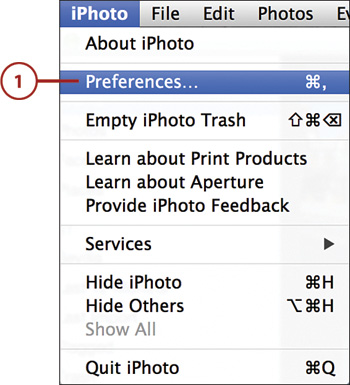
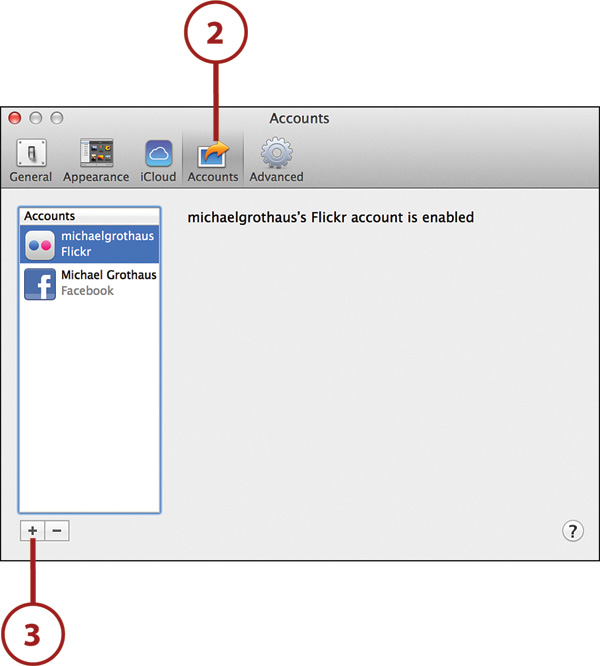
2. Select the Accounts tab. The Accounts pane appears and displays any accounts you already have set up.
3. Click the + button.
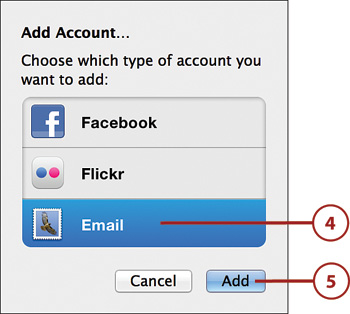
4. Select Email in the Add Account box.
5. Click Add.
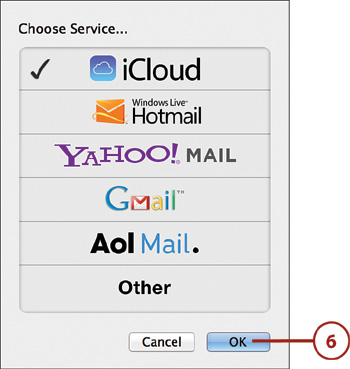
6. Select your email provider and then click OK.
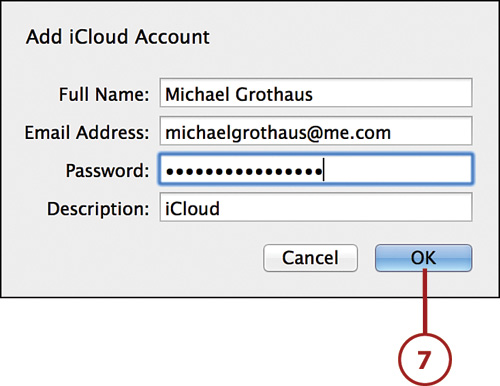
7. Enter your email account information, and click OK. Your username and password are validated, and the account is added to the Accounts list.
Email Photos from Within iPhoto
After you have set up your email account, you are now ready to use iPhoto’s built-in email features.
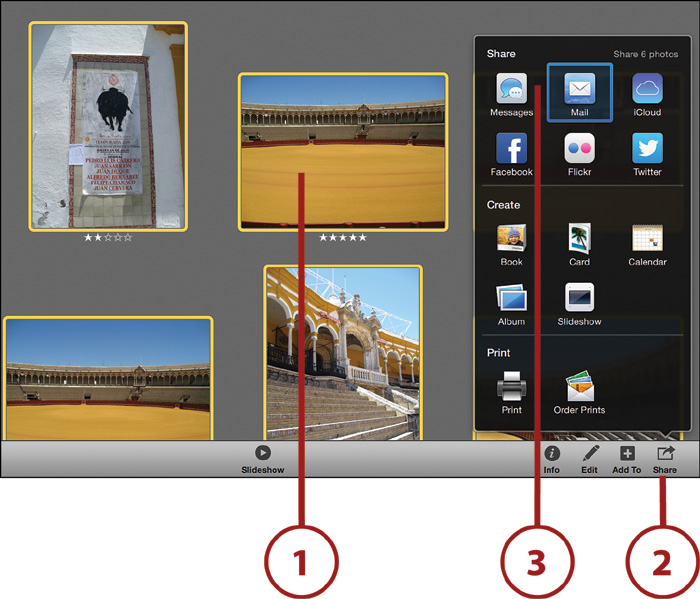
1. Select the photos you want to email. You can choose up to 10 photos to email in one message if you are using any of the themes. However, if you want to send more than 10 photos at a time, you’re limited to the Classic and Journal themes.
2. Click the Share button.
3. Click Mail.
4. Enter the email addresses of the recipients.
5. Enter the subject of your email.
6. If you have more than one email account set up in iPhoto, select the email account you want to send your email from.
7. Choose which theme you want to display your photos in in the body of the email.
8. Check Attach Photos to Message if you want to include downloadable versions of the photos you are sharing as a single attachment. This option allows your recipient to save the photos to his or her computer and not just view them in the body of the email. If you choose not to include the photos as an attachment, the email contains only what you see in the body of the message, effectively a single image of text and photos.
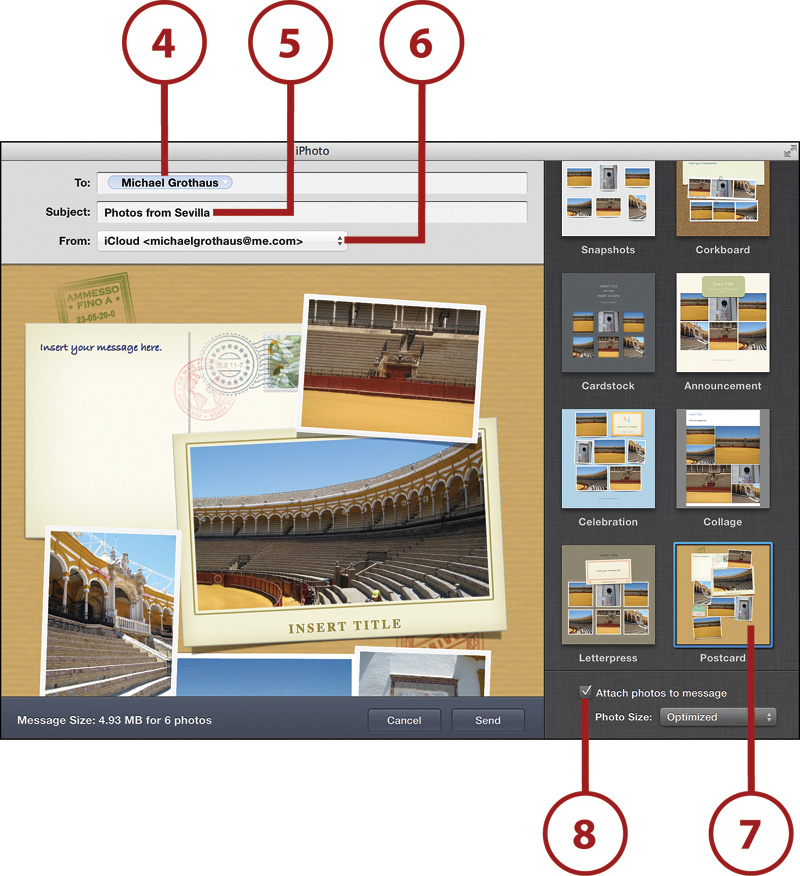
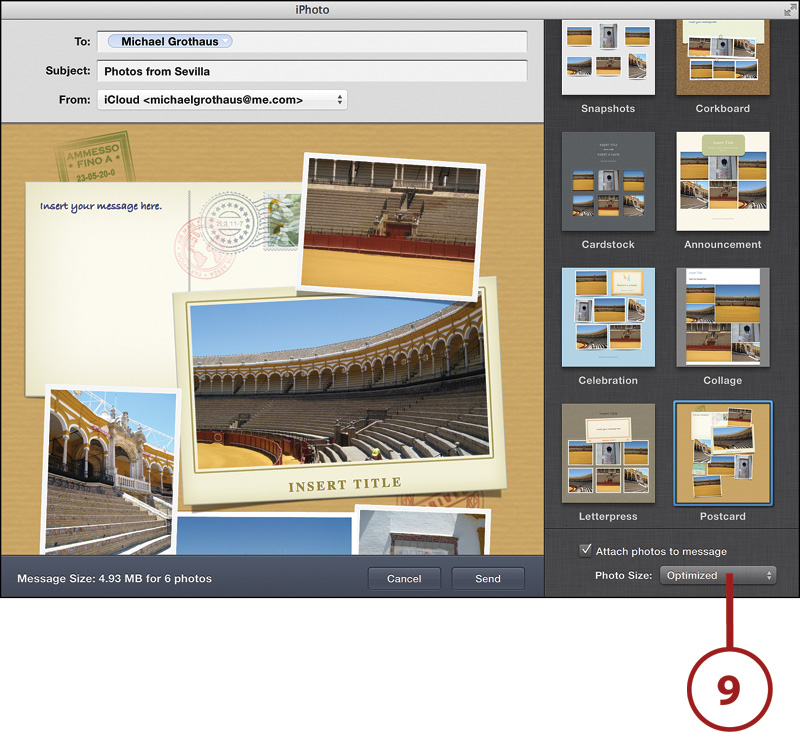
9. Use the Photo Size drop-down menu to choose the size of your photo attachments, including Optimized (which chooses the best size for emailing), Small, Medium, Large, or Actual Size.
10. Enter text into any of the text holders in the body of the email.
11. Adjust fonts and sizes using the pop-up menus that appear when you are editing a text field.

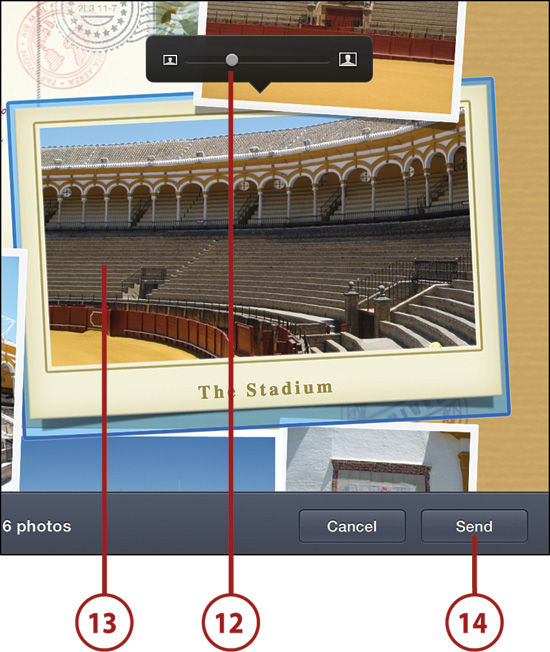
12. Select any of the photos to show the Zoom slider, then drag it to zoom in or out.
13. Click and hold a photo to drag it around the frame. Drag photos from one frame to the next to swap their positions.
14. Click the Send button, and your email is sent.
Viewing Sharing Information for a Photo
iPhoto keeps an entire history for each photo you share. This is helpful in keeping track of where your photos are being published.
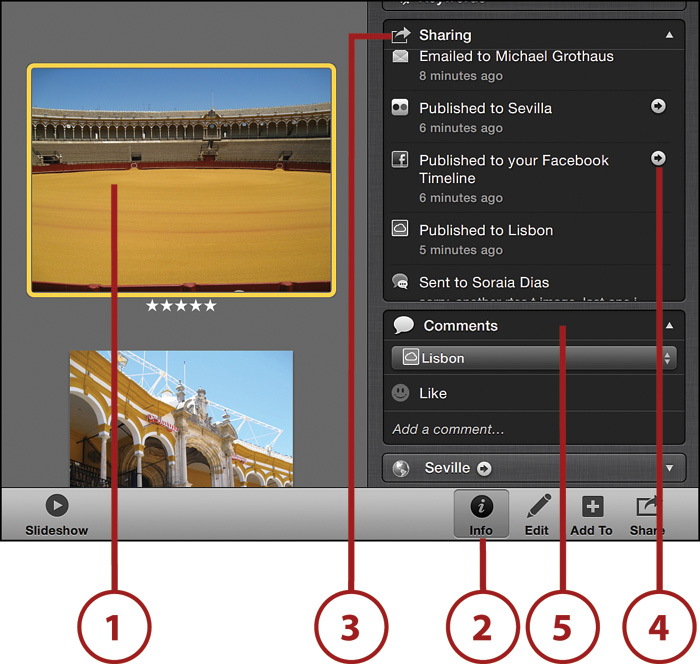
1. Select the photo.
2. Click the Info button.
3. Click the Sharing header so it’s expanded and you can see all the ways you’ve shared the selected photo, including the dates and times you shared it. Information that shows up in the Sharing header can show you any of the following: email and messages history, Twitter, Facebook shares, and Flickr and iCloud photo streaming publishings.
4. Click any link arrow to go to the website the photo was shared on (for example, Twitter or Flickr).
5. Any comments or likes you have received on the photo also show up under the Comments header.
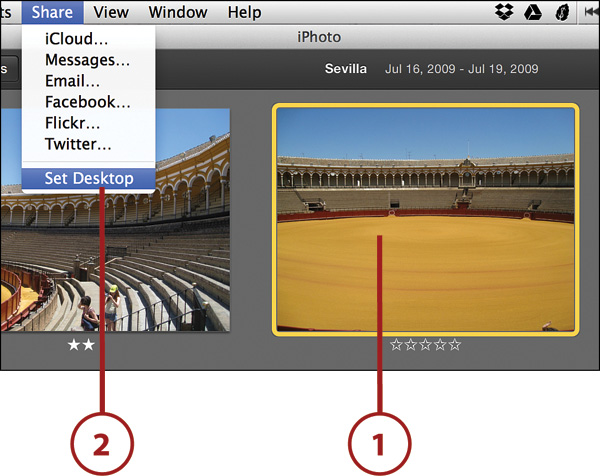
Setting a Photo as Your Desktop Picture
Sometimes it’s just cool to display your favorite photo as your desktop picture. Apple has made it easy to do this from within iPhoto.
1. Select the photo you want to use as your desktop picture.
2. Select Share, Set Desktop. The selected photo appears as your desktop picture.