
Going to the art supply store can be both exciting and a little overwhelming because there are so many supplies to choose from—at such a wide range of prices! It is important to buy the best quality you can afford. Higher-quality products last longer and produce better results than “budget brands.” The next few pages cover the basics, but for more information, refer to Oil Painting Materials by William F. Powell in Walter Foster’s Artist’s Library series.
Oil paints are available in two distinctive qualities: artists’ grade and students’ grade. Stick with artists’ grade; they contain better-quality pigments and fewer additives. It’s worth the extra money to obtain the more intense, longer-lasting colors of artists’ grade oil paints. You don’t need to purchase every color you see; you can mix just about any color from just a few, such as the colors suggested in the beginner’s palette shown at right. You can always add to this palette later as your skills develop—and your budget allows! Keep in mind that colors vary slightly from brand to brand, so experiment with a few different manufacturers to find which ones you like best.
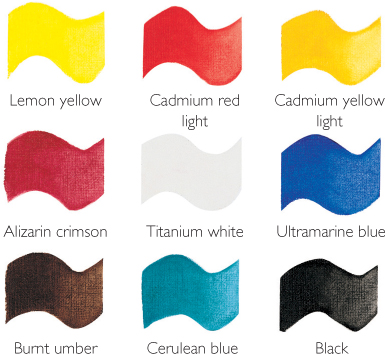
Basic Palette Each artist develops his or her own favorite palette of colors—and you will, too, with practice. The nine colors shown above provide a good basic palette to get you started.
For the lessons in this book, you’ll need to add the colors listed below to your basic palette. (Refer to each project for a complete listing of colors needed.)
![]() cadmium orange
cadmium orange
![]() cadmium yellow medium
cadmium yellow medium
![]() cadmium yellow deep
cadmium yellow deep
![]() Naples yellow lt.
Naples yellow lt.
![]() yellow ochre
yellow ochre
![]() burnt sienna
burnt sienna
![]() quinacridone rose
quinacridone rose
![]() cadmium red medium
cadmium red medium
![]() phthalocyanine (“phthalo”) blue
phthalocyanine (“phthalo”) blue
![]() cobalt blue
cobalt blue
![]() viridian green
viridian green
![]() sap green
sap green
The surface you paint on is called the “support.” You can apply oils to just about any kind of support—canvas, glass, wood, cardboard, paper, even metal. You just need to apply a primer (such as polymer gesso) to give the oils something to stick to and to prevent the paint from shrinking, peeling, or cracking. Ready-to-use canvases are either mounted on heavy cardboard or pre-stretched and stapled to wood frames, and they are available in a variety of sizes and textures. The texture—called the “tooth”—can range from a fine, dense weave (which is smooth) to a coarse, loose weave (which is rougher and so has more texture).
Oil paintbrushes are made with either natural or synthetic hair or bristles and come in a wide variety of styles and sizes. Hake and fan brushes are designed for making soft blends. Liners are suited for fine detail work. Soft-hair flats are great for long, soft blends and strokes. Soft-hair rounds hold a point, and they allow you to vary the widths of your brushstrokes. Brights have shorter bristles, making them good for more aggressive brushwork. Stiff, bristle-hair filberts are flat brushes with slightly rounded tips and are good for applying a lot of paint and for creating texture. (You may want to start out with three filberts: small, medium, and large.)

Starter Set These seven brushes are all you need to get started painting in oil (from left): hake, fan, liner (also called a “rigger”), soft-hair flat, soft-hair round, medium-size bright, and bristle filbert.
Good brushes are expensive, but if you take care of them, they can last for several years. Never allow paint to dry in the hair or bristles; oil is destructive and tends to cling deeply in the bristles next to the ferrule (the metal band). Wash your brushes thoroughly after each painting session, first with thinner (such as turpentine or mineral spirits), then with soap and warm (but not hot!) water.
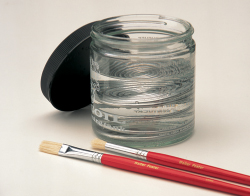
Coil Jar Coil jars, available at art stores, are used to clean your brushes. Fill the jar with thinner and rub your brush against the coils to loosen the paint from the bristles.
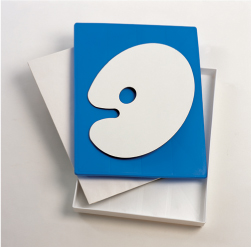
Palettes When selecting a palette, make sure it’s large enough for mixing all the colors you want to use.
A palette is used for laying out colors and for mixing colors. They’re available in various shapes, sizes, and materials—from ceramic and plastic to metal and glass. When you’re done painting, clean your palette and be sure to scrape off any mixed paint. (It’s a good idea to always place your colors in the same order on your palette; this way, you won’t waste time searching for the color you want.)
Palette knives are ideal for mixing colors on the palette, but they can also be used to apply paint to the support. Palette knives are gently rounded, whereas painting knives are narrower and more pointed, with more flexible tips. Available in diamond, pear, and trowel shapes, knives are useful for scraping away paint, creating textures, and blending large areas on the canvas.

Knives The knives on the left are painting knives; those on the right are palette knives. The steep angle in the neck of painting knives keeps your hand from getting in the paint.
Make sure you have a well-lit work area. Many artists prefer working under natural light from a window, but artificial light is necessary for painting at night. (Most lamps can be fitted with blue “daylight simulation” bulbs.) Oil paints and solvents have strong fumes and some are toxic, so be sure your space is well ventilated. Your easel selection should be based on where you paint and what size supports you plan to use; there is a wide variety of tabletop or stand-alone easels from which to choose. Finally, don’t forget a comfortable chair!
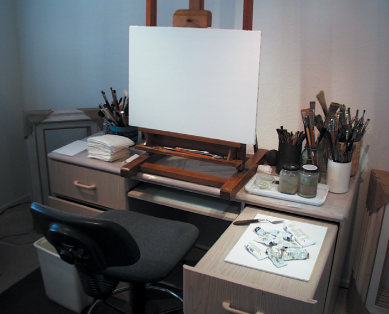
Your Work Space When painting indoors, you’ll need plenty of space so you can keep all your painting materials within easy reach.
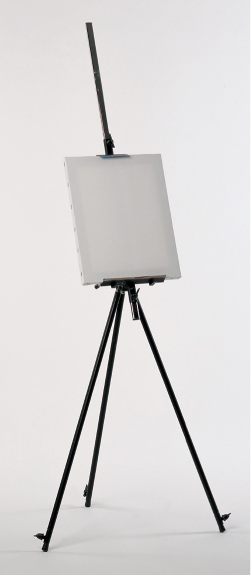
Easel If you have limited space in which to paint, choose a compact, collapsible easel like this one.
Although painting from life is ideal, it isn’t always practical. Keep a reference file (often called an “artist’s morgue”) of things you’re interested in painting. Use a scrapbook, an envelope, file folders, or a shoebox to start collecting postcards, photographs, clippings from magazines—anything you’d like to include in your oil paintings or refer to for inspiration.
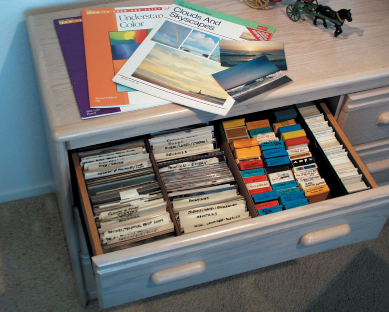
Organizing References You may want to keep your references organized by subject, such as people, animals, landscapes, trees, flowers, and so on.
Below is a list of the materials you’ll need to purchase to get started painting in oils. (For specifics, refer to the suggested brushes and colors on pages 4–5).
![]() Paintbrushes
Paintbrushes
![]() 8 oil colors
8 oil colors
![]() Painting supports
Painting supports
![]() Easel
Easel
![]() Mixing palette
Mixing palette
![]() Palette knife
Palette knife
![]() Medium (linseed oil, copal)
Medium (linseed oil, copal)
![]() Thinner (mineral spirits, turpentine)
Thinner (mineral spirits, turpentine)
![]() Containers for additives
Containers for additives
![]() Rags or paper towels
Rags or paper towels
It’s economical and easy to prime your own supports. Gesso—a polymer product with the same base ingredients as acrylic paint—is a great coating material because it primes and seals at once. It’s also fast-drying and is available at any art supply store. Use a standard 1/8” pressed-wood panel from the lumber store, and sandpaper its surface until the shine is gone. Then apply two or three coats of gesso, sanding the surface in between coats and using both horizontal and vertical strokes for even coverage and to give the surface some texture.
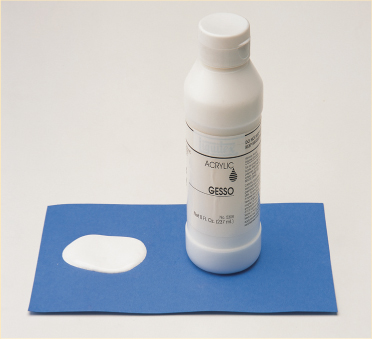
Applying Gesso Gesso is usually white, but it is also available in other colors. Apply gesso directly to your support with a brush, a palette knife, a spatula, or any large, flat application tool.
Most oil painters use additives (such as mediums and thinners) to change the paint consistency. For the projects in this book, we recommend using additives primarily to thin the paint, but many artists apply transparent glazes of mediums to expedite the paint’s drying time. Linseed oil is the most popular medium, while turpentine and mineral spirits are common solvents.
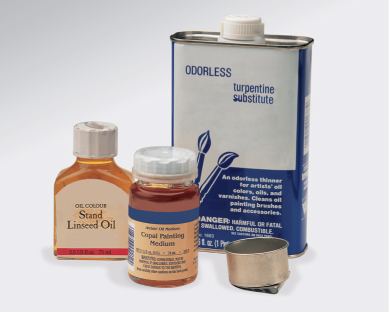
Choosing Mediums Each additive does something a little different. Linseed oil gives paints a buttery, glossy, more transparent quality, while turpentine dilutes oil paints to a thin, workable consistency. Both of these additives make oil paints easier to apply and blend.
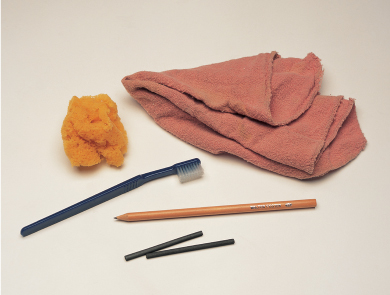
Extras There are a variety of helpful tools that you can use to blend colors directly on your support. Toothbrushes, paper towels, and natural sponges are some of the most common blending tools.
In addition to the essentials, there are several extra items that you may want to purchase to make your work sessions easier. Pencils or charcoal for drawing, glass or metal cups for your mediums, and a paint box with a lot of compartments are all handy items to have.