
Today, many web applications are released in the cloud, to provide service through the public Internet. Ten years ago, all of these applications were hosted on a hosting service on a virtualized machine. Whenever a new machine was needed in the cloud, this new machine was only generated by a service provider. However, some customers didn’t want to give this permission. Therefore, Docker changed this with a new-generation virtualization solution that was particularly useful to startup companies.
Docker is an open source project that manages multiple virtual images in a service. Docker provides continuous integration and continuous deployment, particularly with GitHub and Jenkins, for improving development flow. Docker creates clone machines in a few minutes from the cloud. This saves customers time, as they can create new machine configurations, such as hardware, network, etc., with a few clicks, without burdening their customers with an additional workload. Docker is developed with multiple layers, including infrastructure, operating, and Docker system. Therefore, all such items are unified at a single point.
The Docker system provides virtualized service geared to develop applications in multiple IT environments. Traditionally, IT systems are not transparent to other services, but Docker supports transparency between cloud machines. For example, if you have one machine for developing Java and WebLogic, but this system no longer accepts an additional workload, normally you might have to create and configure one machine again, causing much time to be spent on this process. Furthermore, the project might expire as the result of a time-related issue. Therefore, the Oracle Container Cloud Service is designed to provide a high degree of availability and scalability .
Docker architecture is divided into two parts :
Container: The Docker container is managed by the Container service, and this service’s main aim is to manage all Docker images, so that they work properly with one another.
Image: A Docker image is created for building new services, such as an application server, database, and other IT applications, and this image aims to work applications on container. Furthermore, all images are working on a container, thus disks will be saved.
Docker Architecture
Docker has a unique design (Figure 5-1), although it offers multiple products for the IT world. Traditional virtual machine (VM) ser vers don’t support API-based solutions to create and manage new virtual machines. Docker is powered by the cloud, thus developers don’t need comprehensive knowledge to manage the service. Docker works with two main elements.
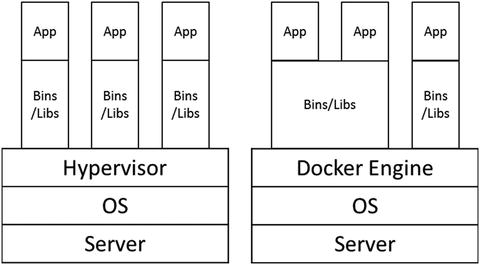
Figure 5-1. Differences between the VM and Docker container
Namespace: This service aims to isolate service and control this isolation.
Cgroups: This service adjust resource size to work properly within a system.
Oracle Cloud Container
Oracle understood Docker technologies’ power to add value to cloud solutions, thus Oracle’s interest in how to easily manage Docker services through third-party cloud service. Oracle Cloud services helps users to make containers, and this service offers the ability to create services quickly and easily, thereby increasing a company’s productivity. This service uses special production, testing, and pre-production environments. Oracle Container Cloud Service’s main aim is to manage Docker and improve control for systems to work properly.
Management: As you know that time is an important asset for productivity, if you have to set up Docker on infrastructure quickly, Oracle Container Cloud helps to sets up Docker in a few clicks.
Configuration: Oracle offers flexibility to change Docker infrastructure.
Following is how the service is created:
Container Cloud is released by Oracle. Click Container Cloud Service (Figure 5-2).

Figure 5-2. Oracle Container Cloud Service Console
The overview page indicates the starting date, ending date, and CSI number.
Starting Date: This information shows the create machine time. Start your service time until your end time.
End Date: This information shows the ending service time.
Datacenter: This information shows which data center keeps your data.
Customer Account: Cloud owner name
Status: This information indicates the status of the cloud.
Check your container billing metrics for using the service (Figure 5-3).

Figure 5-3. Metrics for billing
Click Open Service Console on Overview and Welcome to Container Cloud Service (Figure 5-4).
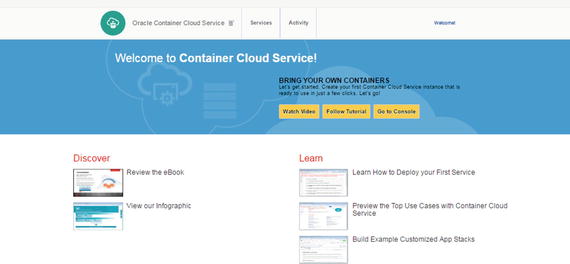
Figure 5-4. Services
Check your container service status in the Services section (Figure 5-5).

Figure 5-5. Checking container service status
Check your container service activity in the Activity section (Figure 5-6).

Figure 5-6. Monitoring activity
Create a container service with the Create Service button (Figure 5-7).

Figure 5-7. Services
Enter the public key from the keys generated. (Chapter 2 explains how to generate SSH.) (See Figure 5-8.)

Figure 5-8. SSH
Specify the admin password, compute shape, and data volume (Figure 5-9).
Admin password: This password specifies the administrator password for accessing the service.
Compute Shape: This section specifies CPU and RAM sizes.
Master node: This node is for managing worker nodes and orchestrations nodes.
Worker node: This node is responsible for different resource pool managing requests.

Figure 5-9. Details
Check selection summary at top right (Figure 5-10).

Figure 5-10. Selection Summary
Check your service to confirm your configurations (Figure 5-11).

Figure 5-11. Confirmation of configurations
Check your machine status (Figure 5-12).
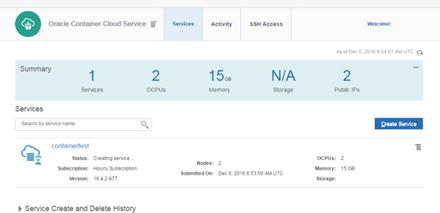
Figure 5-12. Services status
Finally, the created service is ready to use (Figure 5-13).
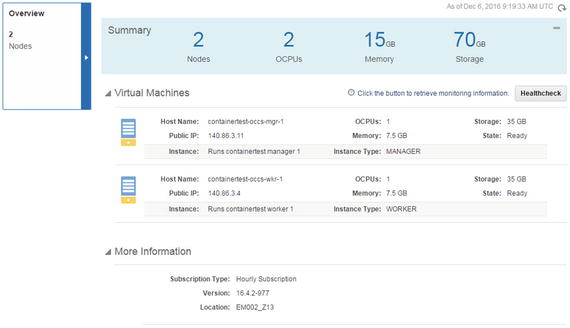
Figure 5-13. Service overview
Log in with your credentials (Figure 5-14).
Username: This service provides a default username, which is admin.
Password: The password you specify.

Figure 5-14. Panel
Check your service status from the dashboard (Figure 5-15).

Figure 5-15. Dashboard
First, add the new registry by clicking the New Registry button (Figure 5-16).

Figure 5-16. Registries
Fill in the information for registering the system (Figure 5-17).
URL: A URL can be added from the Docker account or a specific registry domain.
Username: Required login information
Password: Required login information
Email: Registered e-mail address

Figure 5-17. Edit Registry
Click Resource Pools and create a pool for Docker (Figure 5-18).

Figure 5-18. Pool
Enter your details for building a new pool, which creates resources for deploying services across different hosts (Figure 5-19).

Figure 5-19. New Pool
Click Move Hosts under Resource Pools (Figure 5-20).

Figure 5-20. Resource Pools
Select a hostname and click Add Selected Hosts (Figure 5-21).

Figure 5-21. Hosts
Finally, specify hostname in Pools (Figure 5-22).
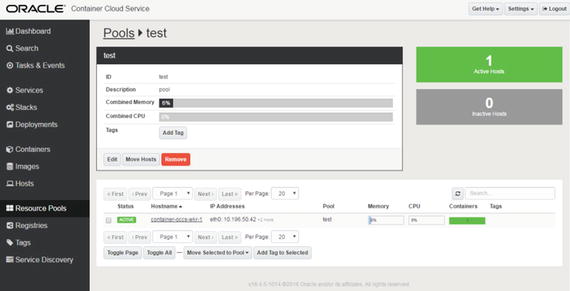
Figure 5-22. Pools
Click the Services section to deploy the service. This service shows all the preconfigured services that use the Oracle Container Cloud Service container console (Figure 5-23).

Figure 5-23. Service
Fill in the blanks with information, especially the service name and Docker run command for starting the service. Oracle Container Cloud works with different methods, such as Docker RUN, Docker Compose(YAML), and User Interface views (Figure 5-24).

Figure 5-24. Service Editor
Click the Deploy button (Figure 5-25).

Figure 5-25. Deploy button
The system asks the deployment resource pool for this sample and selects your built resource pool (Figure 5-26).
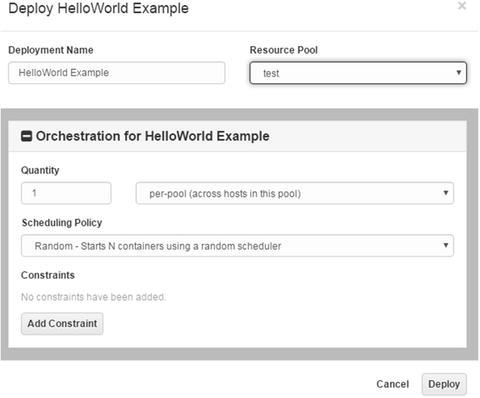
Figure 5-26. Example
Finally, click the Deploy button (Figure 5-27).

Figure 5-27. Deploy button
Summary
In this chapter, I explained what the container service is and how to use it. You’ve seen how to facilitate interactions between Oracle and Docker. Oracle supports new-generation startup technologies, and it has built new cloud applications, using the Docker architecture. As you know, Oracle Container Cloud supports management and configuration of the Docker system, and Oracle also harnesses the power of open source technology. Oracle tries to accommodate other open source technologies and will continue to support open source software and software development environments.