Creating your own PHP classes is remarkably simple. As I explained in the previous chapter, a class is basically a collection of related variables and functions surrounded by a pair of curly braces and labeled with the class name. Of course, there is more to it than that, so this chapter explains the finer details.
By the end of this chapter, you should have a good understanding of the following:
Creating a class and instantiating objects from it
Controlling access to class properties and methods with visibility modifiers
Creating a subclass and overriding its parent's properties and methods
Preventing a class, its properties, or methods from being overridden
Loading classes automatically
Throwing and catching exceptions
Writing comments in the PHPDoc format to generate automatic documentation
I'll also cover some more advanced subjects, such as using interfaces, and abstract classes and methods. To illustrate how to write the code, I'll use an example from the section on inheritance in the previous chapter and show how to create a Product class and related subclasses. The examples are deliberately simple to illustrate the principles behind writing OOP and are not intended for use in a real-world situation. At times, the exercises will backtrack, undoing things that you have just created. Again, this is deliberate. When developing code in real life, it's frequently necessary to refactor (redesign or improve the code structure). It's also easier to assimilate new concepts one step at a time, rather than having everything thrown at you at once. You'll get down to writing real live code in Chapter 3.
If you're completely new to OOP, you might find some of this chapter heavy going. However, it's important to have an understanding of the basic syntax and concepts before diving into real code. The chapter is divided into two halves, with advanced material in the second half. Read through the first half of this chapter and do the exercises, but don't attempt to memorize all the details. This chapter is designed to act as a reference that you can come back to later when you need to refresh your memory about a particular aspect
Note
If you skipped the introduction and first chapter, be warned that the code in this book does not work with PHP 4. This book concentrates exclusively on the OOP syntax used in PHP 5 and PHP 6, although I occasionally point out major changes for the benefit of readers who have worked with the old objectoriented model.
First of all, since classes are often reused by other people, I think it makes sense to follow an accepted standard for formatting code.
One of the joys of PHP is that it's very flexible, and that flexibility extends to how you lay out your code. As long as you observe the basic rules, such as terminating each command with a semicolon and wrapping code blocks in curly braces, you can format your code however you like, because PHP ignores whitespace inside code blocks. As a result, many different styles of coding have sprung up. There's nothing inherently right or wrong with any of them. As long as the code is readable—and works—that's all that really matters.
However, if you exchange code with others or work on a team project, it makes sense for everybody to adhere to an agreed standard. The standard I have chosen for this book is the Zend Framework PHP Coding Standard. There's no obligation for you to follow the same conventions, because that's all they are—conventions. If you prefer to use your own style, ignore the next section.
I have chosen this particular set of coding conventions because it comes from the source. Zend is the company founded by the creators of the core PHP scripting engine, Zeev Suraski and Andi Gutmans, who remain key contributors to PHP. The standard was developed for the Zend Framework, a vast library of advanced PHP classes that you should explore after finishing this book. The emphasis throughout is on making your code easy to read and understand. The full details are at http://framework.zend.com/manual/en/coding-standard.html, so I'll go through only the main points.
Naming conventions:
Use class names that map to the directory structure in which the class is stored by prefixing the class name by the name of each directory followed by an underscore. All classes in this book are in the Pos directory, so the class in
Validator.phpis calledPos_Validator.Capitalize only the first letter of each word in file and directory names.
Use descriptive names for methods and properties. They should be as verbose as practical to increase understandability. Names should begin with a lowercase character, but where they consist of more than one word, each subsequent word should begin with an uppercase letter (camel case).
Begin the names of private and protected properties with an underscore (private and protected properties are explained later in this chapter).
Use uppercase characters only for constants, and separate each word with an underscore.
Coding style:
Always use the full opening PHP tag (
<?php).Omit the closing PHP tag (
?>) in files that contain only PHP code. The closing PHP tag is optional, provided nothing else (e.g., HTML) comes after the PHP code. Leaving out the closing tag has the advantage of preventing unwanted whitespace triggering the "headers already sent" error when using includes (http://docs.php.net/manual/en/language.basic-syntax.instruction-separation.php).Indent code four spaces (I have followed this convention in the download files, but I have used only two spaces in the book because of restrictions of the printed page).
Where practicable, restrict lines to a maximum of 80 characters. The printed page allows me only 72, so I have used an arrow like this

Always use single quotes for strings, unless they contain variables to be processed or other quotation marks.
Use a combination of single and double quotes in preference to escaping quotes.
Put a space either side of the concatenation operator (
.) for readability.Insert a trailing space after commas for readability.
Break associative arrays into multiple lines, and use whitespace padding to align both keys and values.
Put the opening and closing braces of classes and functions on separate lines.
Put the opening brace of a conditional statement on the same line as the condition, but the closing brace on a line of its own.
Use PHPDoc formatted comments.
Even if you don't follow the Zend Framework guidelines to the letter, it's a good policy to use verbose, descriptive names for methods and properties. Descriptive names act as a reminder of the role played by a particular property or method and help make much of your code self-documenting. There can be little doubt, for example, what the checkTextLength() method in the Pos_Validator class does. Yes, it means more typing, but this isn't a problem if you use a dedicated PHP IDE, such as Zend Studio for Eclipse or PhpED, that automatically generates code hints. Since PHP code remains on the server, there's no advantage in obfuscating code to prevent others from stealing your brilliant ideas. The only people likely to be confused are yourself when, in six months' time, you come to review your code or your colleagues if you're working in a team.
PHP has many built-in classes, some of which you will use later in the book, such as DateTime, XMLWriter, and XMLReader. However, the focus in this chapter is on building your own classes. Once a class has been defined, you use it in exactly the same way as any of the built-in ones.
A class normally contains both properties and methods. There are no rules about the order in which they should appear inside the class, but the normal convention is to declare all the properties first, followed by the methods. Throughout this chapter, I'm going to use examples based on an imaginary e-commerce application that sells a small range of products. So, this is how you define a class called Product:
class Product
{
  // properties defined here
  // methods defined here
}
That's actually a valid class. It doesn't do anything because it contains only comments, but it's perfectly valid.
There are no rules about where you should define classes, but it's considered best practice to define each class in a file of its own, as it makes it easier to redeploy classes in different projects. Unlike some languages, such as ActionScript, there's no restriction on what you call the file, but it makes life easier if you use the same name as the class. So, the Product class would be defined in Product.php. Since Product is likely to be a common class name, it's recommended to give it a three- or four-character prefix to avoid name clashes. I'm following the Zend Framework PHP Coding Standard, so I'll give it a name that maps to the Ch2 directory where all the examples for this chapter are stored: Ch2_Product. Figure 2-1 shows the structure of my site and the basic skeleton for the class in Zend Studio.
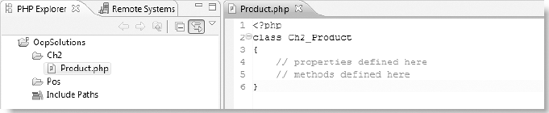
Figure 2.1. To prevent clashes, it's common practice to prefix a class name with the name of the directory it is stored in.
The class is no use without any properties or methods. These are the same as variables and functions, but before adding them, you need to understand visibility modifiers.
As I explained in Chapter 1, encapsulation is a key concept in OOP, so you need to control the visibility of a class's properties and methods. Visibility determines whether a property or method can be accessed directly by any part of a script that uses a class, or whether it remains internal to the class. This is the principle of the black box. To maintain the reliability of a finely tuned car engine, a mechanic doesn't want any Tom, Dick, or Harriet to tinker with the timing of the plugs. Equally, if a class is to produce reliable results, certain parts of its inner workings need to be hidden from sight. You do this by preceding the property or method definition with one of the following keywords: public, protected, or private. Table 2-1 explains the meaning of each keyword.
Table 2.1. PHP visibility (access control) modifiers
Modifier | Meaning |
|---|---|
| This means the property or method can be accessed by any part of a script both inside and outside the class definition. All methods are regarded as public unless preceded by a different modifier. |
| This prevents external access to a property or method, but permits access internally and to parent and child classes. |
| Private properties and methods can be accessed only within the class where they are defined. |
Although you can omit the visibility modifier for a method, in which case it will default to public, it's not considered good practice.
Properties must always be preceded by a visibility modifier. It's a common convention (and one followed by this book) to use an underscore as the first character of protected or private properties. This serves as a reminder to the developer that access is restricted.
So, which should you choose? At the risk of oversimplification, methods often serve as the interface to a class's functionality, so they need to be public. Properties, on the other hand, should almost always be hidden away as protected or private to prevent them from being changed accidentally. When you need to expose or change the value of a property, the normal way to do so is through a getter or setter method.
However, there are no hard and fast rules. It's often useful to create methods that solely perform a task inside the class. For example, in Chapter 4 you'll build a class to validate user input. You don't want anyone to be able to change the source of the input arbitrarily, so the method that retrieves the values from the $_POST or $_GET array needs to be hidden away inside the class as either protected or private.
Note
If in doubt as to which visibility modifier to use, select protected, as it lets you extend the class. Use private only if you definitely don't want a method or property to be accessed outside the class.
If this sounds confusing, all should become clear through the following exercise.
The code for all the exercises in this chapter is in the Ch2 and ch2_exercises folders of the download files. Each file has a basic name, such as Product.php or product_test.php. To show the code at different stages of development, the download files are numbered in sequence (e.g., Product_01.php, Product_02.php, and so on). When doing the exercises yourself, I suggest that you use the basic name for each file, just updating the code in each step. If you need to check your code—or simply want to test the download versions—refer to the numbered versions listed at the appropriate point of each exercise.
Experimenting with visibility
This exercise shows what happens when you attempt to access a protected property outside the class definition and demonstrates how to create getter and setter methods.
Create a PHP site within your server root. The name is unimportant, but I have called mine
OopSolutions.Create a folder called
Ch2, and create a file calledProduct.phpwithin theCh2folder.Insert the following code in
Product.php:<?php class Ch2_Product { // properties defined here protected $_type = 'Book'; // methods defined here }This defines the
Ch2_Productclass with a single protected property called$_type. For convenience, I have given the$_typeproperty a default value ofBook, but setting a default value isn't necessary. The value of a property can be set in a number of different ways.In the site root, create a folder called
ch2_exercises. Inside the new folder, create a file calledproduct_test.php, and insert the following code:// include the class file require_once '../Ch2/Product.php';
To use a class, it must be included in your script. Later in the chapter, I'll explain how to load classes automatically, but for the moment I have used
require_once. When you include a class file like this, the PHP engine defines the class ready for use. Like functions, classes can be defined only once in a script, so it's a good idea to userequire_once, rather than justrequire, to prevent triggering a fatal error.Next, you need to create an instance of a class. Add the following code to
product_test.php:// create an instance of the Ch2_Product class $product = new Ch2_Product();
The syntax is very simple. You use the
newkeyword in front of the class name and place an empty pair of parentheses after the class name. The parentheses aren't strictly necessary in this case, but it's good practice to use them. As you'll see later in the chapter, you can pass arguments to a class in the same way as with a function.The instance of the class is stored in an ordinary variable, in this case
$product. $productis now an object.Let's try to display the value of the object's
$_typeproperty. To access an object's properties or methods, you use the->operator (a dash followed by a greater-than symbol with no space in between).Add the following code to
product_test.php:// display the $_type property echo $product->_type;
When accessing properties with the
->operator, you drop the dollar sign ($) from the beginning of the property name, so$product->_typerefers to the$_typeproperty of the$productobject.Save both files, and launch
product_test.phpin a browser. You should see a result similar to Figure 2-2. (If you just want to look at the code in the download files, useproduct_test_01.phpandProduct_01.php.)This is visibility and encapsulation at work. The
$_typeproperty is so well protected that attempting to access it triggers a fatal error.Note
If you see only a blank screen, it means the
display_errorsdirective is turned off. For development and testing, it's essential to be able to see error messages. Either turn ondisplay_errorsinphp.ini, or add the following command at the top of each script:set_ini('display_errors', '1'),.Throughout this book, I assume thatdisplay_errorsis on.Go back to
product_test.php, and try changing the value of$_typelike this (the code is inproduct_test_02.php):$product->_type =
'DVD';If you test the page again, the result should be the same: a fatal error. You can neither display
$_typewith echo nor change its value. The property is protected inside the class and cannot be accessed by an external script.To access a protected or private property, you need to create getter and setter methods inside the class file. Both are very simple, and use a special variable called
$this, which refers to the current object. Add the following code to theCh2_Productclass (the code is inProduct_02.php):// methods defined here
public function getProductType(){return $this->_type;}public function setProductType($type){$this->_type = $type;}Both methods need to be accessed from outside the class, so their visibility is set to
public. Although OOP refers to them as methods, they are, in fact, functions, and you use thefunctionkeyword in exactly the same way as in procedural code.Note that I have used verbose, descriptive names. This not only makes it easier to understand what they do, I needed to avoid using
getType(), which is the name of a built-in PHP function.The getter function,
getProductType(), returns$this->_type, in other words, the$_typeproperty of the current object.The setter function,
setProductType(), takes a single argument,$type, and assigns its value to$this->_type. Note the use of$type(without an underscore). It's common practice to give an argument the same name—minus the underscore—as the property to which you assign its value. This makes the code easy to understand, but be careful not to mix up the two.To display the value of
$_type, change the code in step 6 like this (the code is inproduct_test_03.php):echo $product->
getProductType();If you run
product_test.phpnow, you should seeBookdisplayed onscreen.To change the value of
$_type, alter the code in the previous step like this (the code is inproduct_test_04.php):$product->setProductType('DVD'),echo $product->getProductType();Run the script again, and you should see DVD onscreen. So, although the
$_typeproperty is protected, you can change its default value fromBookby usingsetProductType().Try changing the visibility of the
setProductType()andgetProductType()methods toprotectedorprivate. When you do, it should come as no surprise that the script in step 11 triggers a fatal error. The visibility modifiers control methods in the same way as properties.

As you can see, protecting properties comes at the expense of longer code. Newcomers to OOP (and some old hands, too) often find this tedious, but the ability to restrict access to properties and methods gives you much greater control over the integrity of your data.
At this stage, you're probably wondering, "What's the point? Why go to all the bother of protecting a property if it can be changed with a setter method?" In the preceding exercise, there is very little point, indeed, apart from demonstrating the basic syntax. However, once you start working with real classes, you'll see that most protected and private properties don't have getter and setter methods. They remain encapsulated within the class.
Some properties have only getter methods. This allows an external script to access the property's value, but the lack of a setter method means you cannot change it. For example, the class in Chapter 4 validates and filters user input and stores it in a property called $_filtered. By declaring $_filtered protected and creating only a getter method, the class gives access to the filtered values but prevents anyone from tampering with them. Setter methods tend to be used mainly for initializing the value of a property. Once the value has been set, the protected or private status of the property prevents the value from being changed accidentally.
Note
Give yourself a bonus point if you spotted that setProductType() exercises no control over what sort of value is assigned to the $_type property. In a real-world situation, you need to check the data passed to the method as an argument. I kept the script deliberately simple to illustrate the basic principle.
Although that was quite a trivial example, it contained a lot of information, which is probably worth reviewing. Here are the main points to remember:
All properties must be declared and be preceded by one of the visibility keywords:
public, protected, orprivate. (As with every rule, there is one exception when the visibility keyword is optional. This is explained in "Creating static properties and methods" later in the chapter.)Using a visibility keyword is optional when defining a method, but is recommended. If no visibility keyword is used, the method is automatically treated as public.
"Method" is simply OOP terminology for a function inside a class. Use the
functionkeyword when defining a method.You must include the class file in your script for the class to be available. Use
require_onceto avoid accidentally redefining the class, as this triggers a fatal error.Use the
newkeyword to create an instance of a class (an object).The
$thisvariable inside a class refers to the current object.Use the
->operator to access an object's methods or properties.When accessing a property with the
->operator, omit the$sign.Attempting to access a protected or private property or method from an external script triggers a fatal error.
Use getter and setter methods to access protected and private properties and methods from an external script.
Note
In PHP 3 and PHP 4, you could reassign the value of $this to another object. Doing so now causes a fatal error. Since PHP 5, $this refers only to the current object.
In the preceding exercise, you gave the $_type property a default value. Although that's sometimes what you want, you gain more flexibility by specifying properties at the time of instantiating the object. You do this in exactly the same way as passing an argument to a function. When you create an instance of a class, PHP automatically looks for the class's constructor method (or constructor). As the name suggests, a constructor builds the object, applying default values and assigning to properties values passed to the class when an object is instantiated.
In many languages, the constructor is a method that shares the same name as the class. This is how PHP objects were built in PHP 3 and 4. However, since PHP 5, the constructor for all classes is called __construct() (with two leading underscores). As you saw from the previous exercise, using a constructor is optional, but most classes do use one.
Note
For backward compatibility, PHP looks for a method with the same name as the class if it can't find __construct(), but this might not always be the case, so you should always use __construct().
The constructor works like a setter method, so any values passed to it as arguments can be assigned to properties by using $this to refer to the current object like this:
public function __construct($value)
{
   $this->_property = $value;
}
Note
The constructor method is used exclusively for creating a new object, so ti should not use return.
Let's update the Ch2_Product class to use a constructor.
Passing Values to a constructor
This exercise builds on the previous one by adding a constructor that takes two arguments: one to set the product type and the other to set its title. Continue working with the same files as before.
Since the product type will be set by passing an argument to the constructor, you need to remove the default value of
$_type(Book). Also create a new protected property called$_title. The properties at the top of theCh2_Productclass should now look like this:// properties defined here protected $_type;
protected $_title;The constructor needs to take two arguments, one for each of the properties, and assign them to the object's protected properties. Add the following code immediately after the properties (and remember that there are two underscores before "construct"):
// constructor
public function __construct($type, $title){$this->_type = $type;$this->_title = $title;}Because the value of
$_typeis being set by the constructor, you no longer need the setter method. So delete it, and add a getter method to retrieve the value of the$_titleproperty. The amended class (which is inProduct_03.php) should look like this:class Ch2_Product { // properties defined here protected $_type; protected $_title; // constructor public function __construct($type, $title) { $this->_type = $type; $this->_title = $title; } // methods defined here public function getProductType() { return $this->_type; }public function getTitle(){return $this->_title;}}You instantiate the object in exactly the same way as before, using the
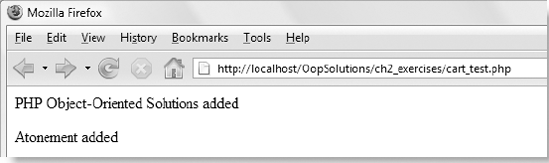
newkeyword. However, the class constructor now expects two arguments. To keep the code simple, I haven't added any code to check the type of data passed as arguments, but let's assume that both are meant to be strings. Test the revised class by amending the code inproduct_test.phpas follows (it's inproduct_test_05.phpin the download files):$product1 = new Ch2_Product(
'Book', 'PHP Object-Oriented Solutions'),$product2 = new Ch2_Product('DVD', 'Atonement'),echo '<p>$product1 is a ' . $product1->getProductType();echo ' called "' . $product1->getTitle() . '"</p>';echo '<p>$product2 is a ' . $product2->getProductType();echo ' called "' . $product2->getTitle() . '"</p>';When you run
product_test.php, you should see something similar to Figure 2-3.
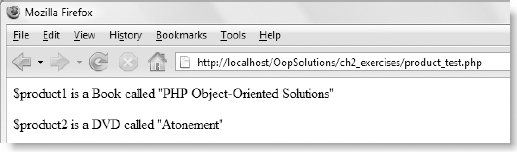
Admittedly, this isn't the most exciting result in the world, but the purpose at this stage is to understand basic PHP OOP syntax without introducing any distractions.
The code in the final step of the exercise created two independent objects: one a Book, the other a DVD. On the face of it, this might not seem any different from creating two associative arrays like this:
$product1 = array('type' => 'Book',
'title' => 'PHP Object-Oriented Solutions'),
$product2 = array('type' => 'DVD',
'title' => 'Atonement'),However, the differences are enormous, namely:
The values of an array element can be changed at any time. Protected and private properties of an object cannot be changed unless the class provides a method to do so.
You have no control over the type of data stored in an array, so a string could be changed arbitrarily to a number or a database resource. Code inside a class constructor or setter method can reject any data that doesn't conform to its specifications (e.g., you could use
is_string()to ensure that the value is a string before assigning it to the property).Unlike array elements, objects can have methods capable of processing data. Up to now, the only methods you have seen are very simple, but you'll see increasingly complex ones as you work through the book.
The previous exercise used the constructor to assign values passed in from outside to the object's properties, but you can use the constructor to do any initial setup for all objects of the same class. So, for example, if all products are made by the same manufacturer, you could use the constructor to assign the default value to a protected property called $_manufacturer. If you want all objects to share the same value, there's no need to pass it to the constructor as an argument.
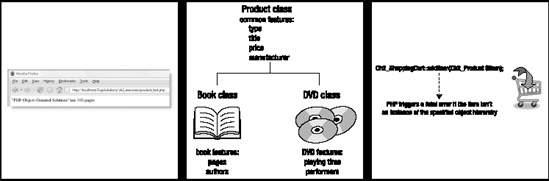
Using a constructor has made the Ch2_Product class more flexible, but it also introduces a problem. Although you can create objects to represent different types of products, books and DVDs have different features. Books have pages, but DVDs don't. DVDs have a duration or playing time, but books don't. You could get around this by creating a property called $_length and using conditional statements to determine whether this refers to the number of pages or the playing time, depending on the type of product. You could, but it's messy. A much better solution is to use inheritance and create specialized subclasses.
The Ch2_Product class started out handling only books. Then you added DVDs. Even if you add a whole range of new products, all will have some features in common, such as price, available stock, and so on. Even though the values are different, the properties are common to all of them, so they can be handled by a common class. An appropriate subclass should handle features particular to a specific type of product. Figure 2-4 illustrates the inheritance hierarchy that you might adopt for books and DVDs.
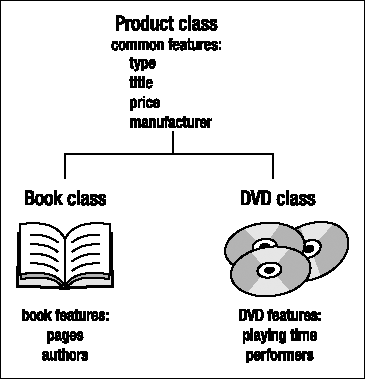
Figure 2.4. The parent class contains the common features, which are inherited by the child classes.
To define a child class, simply use the extends keyword together with the name of the parent class like this:
classChildClassNameextendsParentClassName{ // class definition goes here }
The child class needs access to the file where the parent class is defined, so you need to include the parent file before defining the child class. Since the child class depends on it, you should normally use require_once to include the parent file.
So let's create two child classes that inherit from Ch2_Product.
Creating the Book and DVD child classes
This exercise creates two child classes from Ch2_Product and shows what happens when you add a new property to a child class. Continue working with Product.php and product_test.php from the preceding exercise. You can see the finished code in Book_02.php and DVD_01.php in the Ch2 folder and product_test_07.php in ch2_exercises.
Create a new file called
Book.phpin theCh2folder, and insert the following code (it's inBook_01.phpin the download files):require_once 'Product.php'; class Ch2_Book extends Ch2_Product { // class definition goes here }This includes the parent class with
require_onceand uses theextendskeyword to indicate that theCh2_Bookclass is a child ofCh2_Product. There is no need to add anything between the curly braces. As it stands, this is a complete definition of the new class, which inherits all the properties and methods of its parent.Create a new file called
DVD.phpin theCh2folder, and insert the following code (seeDVD_01.phpin the download files):require_once 'Product.php'; class Ch2_DVD extends Ch2_Product { // class definition goes here }Apart from the name of the child class, this is identical to the code in the previous step.
Amend the code in
product_test.phplike this (the code is inproduct_test_06.php):require_once '../Ch2/Book.php';require_once '../Ch2/DVD.php';$product1 = newCh2_Book('Book', 'PHP Object-Oriented Solutions'), $product2 = newCh2_DVD('DVD', 'Atonement'), echo '<p>$product1 is a ' . $product1->getProductType(); echo ' called "' . $product1->getTitle() . '"</p>'; echo '<p>$product2 is a ' . $product2->getProductType(); echo ' called "' . $product2->getTitle() . '"</p>';Instead of including
Ch2_Product, this includes the two child class files and creates one instance each of theCh2_BookandCh2_DVDclasses.Run
product_test.php. The output should be exactly the same as before (see Figure 2-3).At the moment, the child classes are identical to their parent class. So let's add a new property called
$_pageCountto theCh2_Bookclass and set its value by passing a third argument to the constructor. Make the new property protected, and add a getter method to retrieve its value. Amend the code inBook.phplike this (it's inBook_02.php):class Ch2_Book extends Ch2_Product {protected $_pageCount;public function __construct($type, $title, $pageCount){$this->_pageCount = $pageCount;}public function getPageCount(){return $this->_pageCount;}}To check that everything is working as expected, amend
product_test.phplike this (the code is inproduct_test_07.php:require_once '../Ch2/Book.php';
$book= new Ch2_Book('Book', 'PHP Object-Oriented Solutions',300);echo '<p>"' . $book->getTitle() . '" has ' . $book->getPageCount() .' pages</p>';When you run the script, you should see the output shown in Figure 2-5.
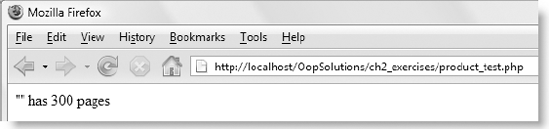
The script doesn't generate any warnings, so there are no syntax errors. The getTitle() method of the parent class has been inherited by the child class, so it's legitimate to use it. However, it has produced no output. I expect that most readers will already be yelling, "Of course it hasn't, because you haven't assigned the value of $title to the object's $_title property."
That's true, but I also said that a child class inherits all its parent's properties and methods. So you would also be justified in wondering why it didn't use the Ch2_Product constructor. After all, it did so when you tested the child classes in step 4. The answer is that this is polymorphism in action: a child class inherits its parent's methods and properties, but you can also redefine (or override) them. You're no longer creating a Ch2_Product object, but a Ch2_Book object.
By defining a constructor in the child class, you have overridden the parent constructor. The child class does only what its own constructor tells it to do. It accepts three arguments but does nothing with the first two ($type and $title). To assign the value of these arguments to the $_type and $_title properties, you either need to do so explicitly in the child class's constructor or find some way of invoking the parent constructor.
First, let's take a look at this second option.
The ability to override a parent class's methods or properties is very convenient, but there are times when you want to access them in a child class. To do this, you need to use the scope resolution operator.
The scope resolution operator is a pair of colons (::). The name of the class goes on the left side of the operator, and the name of the method or property goes on the right like this:
ClassName::methodOrPropertyName
PHP doesn't object if you put whitespace on either side of the scope resolution operator, but the normal convention is to write everything as a single entity.
The scope resolution operator has the following uses:
It gives access to overridden properties or methods of a parent class.
It is used to call the static methods and properties of a class (this is covered in "Creating static properties and methods" later in this chapter).
It gives access to class constants (see "Using class constants for properties" later in the chapter).
It is the conventional way of referring to a class method or property in documentation. For example, instead of referring to "the
getPageCount()method of theCh2_Bookclass," this is shortened toCh2_Book::getPageCount().
Because Ch2_Book overrides the Ch2_Product constructor, you need to call the parent constructor inside the child constructor. Using the syntax outlined earlier, you could call the Ch2_Product constructor like this:
Ch2_Product::__construct($type, $title);
However, PHP provides two handy keywords that work with the scope resolution operator, namely:
parent: This refers to the parent or any ancestor of the current class.self: This refers to the current class. Although this sounds the same as$this, which you met earlier,selfrefers to the class in general, whereas$thisrefers to the current instance of the class (in other words, an object created from the class).
So, to call the parent constructor of the Ch2_Book class, you can amend the previous code like this:
parent::__construct($type, $title);The advantage of the parent and self keywords is that you don't need to change them if you rename any of the classes to which they refer. The next exercise shows how to call the parent constructor in an overridden method.
Note
The scope resolution operator has the unusual name, paamayim nekudotayim, the Hebrew for "double colon." It was chosen by the creators of the original Zend engine that powered PHP 3 (Zeev Suraski and Andi Gutmans) and for some reason has stuck. As well as being a fascinating piece of trivia that might come in handy during a pub quiz for geeks, it's useful to be able to recognize this name, as it occasionally pops up in error messages. If you see it, you know to look for the double colon.
Calling the parent constructor
This brief exercise amends the code in the preceding exercise to call the parent constructor when overriding it in a child class. Continue working with the same files.
Amend the constructor in
Book.phpto look like this (the full code is inBook_03.php):public function __construct($type, $title, $pageCount) {parent::__construct($type, $title);$this->_pageCount = $pageCount; }This calls the constructor from the parent class (
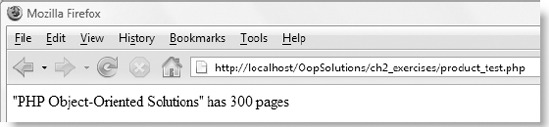
Ch2_Product) and passes it$typeand$titleas arguments. The parent constructor method assigns these values to the$_typeand$_titleproperties, respectively. Since both properties are inherited, they become properties of the child class. The value of the$_pageCountproperty is assigned in the same way as before.Run
product_test.php. This time you should see the result shown in Figure 2-6. (If you're using the download files, the code is inproduct_test_08.php. The only difference is that it calls the updated version of theCh2_Bookclass.)
I won't bother making the same changes to the Ch2_DVD class, because you have probably realized there's no point setting the $_type property in the constructor when you have separate classes for different types of products. However, this was a handy way of demonstrating the use of parent with the scope resolution operator.
Setting the $_type property in the constructor is not only redundant but it breaks the principle of encapsulation by allowing an arbitrary value to be assigned to a property that should be fixed. A book is a book is a book... Instead of calling the parent constructor to set its value, I'm going to hard-code the $_type property in the child constructor. As you'll see later in the chapter, the parent constructor is no longer needed. For those of you who already know the basics of OOP, I plan to turn the Ch2_Product class into an abstract class. If you don't know what that means, don't worry; by the end of the chapter, you will.
Creating separate constructors for books and DVDs
When you originally added the $_pageCount property to Ch2_Book, the child constructor overrode the parent one without setting the $_type and $_title properties. Let's now put that right. Continue working with the same files.
The
$_typeproperty of aCh2_Bookobject will always be book, so you can hard-code that value in the constructor, but the$_titleproperty needs to be set by passing an argument to the constructor. This means you need to pass only two arguments to theCh2_Bookconstructor (for the title and page count). Amend the class like this (the code is inBook_04.php):class Ch2_Book extends Ch2_Product { protected $_pageCount; public function __construct($title, $pageCount) {$this->_title = $title;$this->_pageCount = $pageCount;$this->_type = 'book';} public function getPageCount() { return $this->_pageCount; } }Notice that the
$_titleand$_typeproperties are not declared at the top of the child class, yet they are referred to in the constructor as$this->_titleand$this->_type. This is because the child class inherits the properties of the parent class, and treats them as its own.Note
Although the properties come from the parent, they have not been overridden, so you don't refer to them with the
parentkeyword. You're creating aCh2_Bookobject, which is an enhanced form ofCh2_Product.It's important to realize that inheritance is a one-way process. ACh2_Productobject has no access to the$_pageCountproperty orgetPageCount()method. These are exclusive toCh2_Bookobjects.When creating a
Ch2_Bookobject, you now pass it only two arguments: the title and page count. Amend the code inproduct_test.phplike this (it's inproduct_test_09.php):$book = new Ch2_Book(
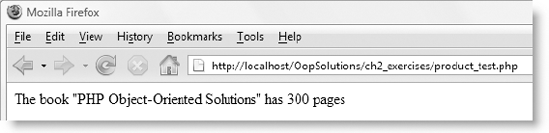
'PHP Object-Oriented Solutions', 300); echo '<p>The ' . $book->getProductType(). ' "' . $book->getTitle() .'" has ' . $book->getPageCount() . ' pages</p>';The extra code in the
echostatement uses$book->getProductType()to display the value of$_type.Run
product_test.php. You should see the result shown in Figure 2-7.Instead of a page count, the
Ch2_DVDclass needs a property to store the playing time and a getter method to retrieve its value. The code is very similar to the revised version ofCh2_Book, so it doesn't require any explanation. The full listing is here (and inDVD_02.php):class Ch2_DVD extends Ch2_Product {protected $_duration;public function __construct($title, $duration) {$this->_title = $title;$this->_duration = $duration;$this->_type = 'DVD';}public function getDuration(){return $this->_duration;}}
The constructor method in each of these rewritten child classes does everything you need, so it no longer uses the parent keyword to call the parent constructor. Deciding whether to call the parent constructor depends entirely on the design of the child class. Let's say you have a class with two properties, $_a and $_b, which are set by passing two arguments to the constructor like this:
class ParentClass
{
protected $_a;
protected $_b;
public function __construct($a, $b){
$this->_a = $a;
$this->_b = $b;
}
}You want to create a child class that has another property $_c in addition to $_a and $_b. The best way to extend it is like this:
class ChildClass extends ParentClass
{
protected $_c;
public function __construct($a, $b, $c)
{
parent::__construct($a, $b);
$this->_c = $c;
}
}In this deliberately simple example, calling the parent constructor saves only one line of code, but a real class might have a constructor that is much longer. However, the important consideration is not how much typing you save, but the principle of inheritance. Any changes you make to the parent constructor will automatically apply to the child class. If you override the parent constructor completely, as I have done in Ch2_Book and Ch2_DVD, the parent-child relationship becomes much more tenuous. However, as the chapter progresses, you will see that I have done this deliberately as a prelude to converting Ch2_Product into an abstract class. Abstract classes are an advanced OOP concept covered in the second half of this chapter.
Overriding is very useful, but there are times when you don't want it to happen. The main reason you might want to prevent something from being overridden is because doing so would violate the logic of your application or perhaps some business principle. For example, you might create a method that uses a fixed formula to calculate the commission earned by a sales person. If you allow the method to be overridden, someone could create a child class and double the commission. Nice for the sales people; not so nice for the integrity of your class.
You can prevent a whole class from being overridden or apply restrictions to individual methods and properties. The way you handle individual properties is different, so I'll describe that after dealing with whole classes and individual methods.
To prevent a class or method from being overridden, precede the class name or the method's visibility modifier (see Table 2-1) with the keyword final.
So, to prevent the Ch2_Book class from being overridden, just change the first line like this:
final Ch2_Book extends Ch2_Product
{
// class definition omitted
}This covers the whole class, including all its methods and properties. Any attempt to create a child class from Ch2_Book would now result in a fatal error.
However, if you want to allow the class to be subclassed but prevent a particular method from being overridden, the final keyword goes in front of the method definition like this:
class Ch2_Book extends Ch2_Product
{
protected $_pageCount;
public function __construct($title, $pageCount)
{
$this->_title = $title;
$this->_pageCount = $pageCount;
$this->_type = 'book';
}
final public function getPageCount()
{
return $this->_pageCount;
}
}This lets you create as many subclasses of Ch2_Book as you want, but none of them will be able to override the getPageCount() method. This particular example has little practical value, but declaring a method as final can be extremely useful if you want to ensure that certain aspects of subclasses work in exactly the way you designed.
In practice, you are unlikely to need to use the final keyword very often, but it's important to understand the following subtle differences in its use:
Declaring a class as final prevents it from being subclassed—period; it's the end of the line.
Declaring every method in a class as final allows the creation of subclasses, which have access to the parent class's methods, but cannot override them. The subclasses can define additional methods of their own.
The
finalkeyword controls only the ability to override and should not be confused with theprivatevisibility modifier (see Table 2-1). A private method cannot be accessed by any other class; a final one can.
You can't use the final keyword with properties. The closest equivalent to final is to use a class constant. You should be familiar with constants from core PHP syntax. A constant is a value that never changes like π (pi) or the conversion ratio from pounds to kilograms. Unlike variables, constants don't begin with a dollar sign, and they are normally written entirely in uppercase. The normal way to define a constant in PHP is with define() like this:
define('MILES_TO_KILOMETERS', 1.609344);When you use define(), PHP creates a global constant. In other words, it's available to every part of your script. In OOP, this isn't always what you want, so PHP provides a way of defining class constants. You declare a class constant in a similar way to assigning a value to a variable (except without the dollar sign) and precede the declaration with the const keyword. So, to create a POUNDS_TO_KILOGRAMS constant for the Ch2_Product class, you would add it to the list of properties in the class definition like this:
class Ch2_Product
{
// properties defined here
protected $_type;
protected $_title;
const POUNDS_TO_KILOGRAMS = 0.45359237;
// rest of class omitted
}Defined inside the class like this, the POUNDS_TO_KILOGRAMS constant becomes available to the Ch2_Product class and all classes derived from it. However, to use it anywhere inside the class hierarchy, you need to prefix it with the self keyword and the scope resolution operator like this:
self::POUNDS_TO_KILOGRAMSWith class constants, the self keyword refers to a constant defined not only in the current class but in any ancestor class further up the hierarchy.
Because constants don't change, it can sometimes be useful to use them outside a class. There's no need to instantiate an object to do so. As long as your script has access to the class, just use the class name and the scope resolution operator like this:
Ch2_Product::POUNDS_TO_KILOGRAMS
Although the value of a class constant cannot be changed inside its own class, you can override it in a child class, as the following example shows (the code is in override_constant.php in ch2_exercises):
class classA
{
const FIXED_NUMBER = 4;
}class classB extends classA
{
const FIXED_NUMBER = 20;
}
echo classA::FIXED_NUMBER . '<br />';
echo classB::FIXED_NUMBER;If you run the preceding script, it displays 4 and 20. Preventing changes to the value of a property by declaring it as a class constant is limited to the class itself. If you need to guarantee that a value can never be changed, you need to create a global constant with define(). However, global constants are slower than class constants, so you need to weigh the balance of speed against the need for an immutable value.
The value assigned to a constant cannot be the result of a calculation, a variable, or something like a database resource. However, you can use a different type of construct to handle more complex elements that you want to have fixed values by making them static.
A static property or method is sometimes referred to as a class property or class method in the sense that it belongs to the whole class and not to an individual instance of the class (or object).
To make a property or method static, insert the keyword static after the visibility modifier. In some respects, a static property acts very much like a class constant, but unlike a constant, you can restrict its scope by using the protected or private keywords. For example, instead of creating a class constant POUNDS_TO_KILOGRAMS as in the previous section, you could restrict its use to the Ch2_Product family of classes by making it protected like this:
protected static $_lbToKg = 0.45359237;
The first thing to notice is that a static property looks like any other variable in that it must start with a dollar sign. However, the similarity ends there. To use a static property inside its own class or any of its descendents, use self with the scope resolution operator like this:
self::$_lbToKg
Since $_lbToKg has been defined as protected, you cannot access it outside the Ch2_Product hierarchy. However, if you use the public keyword when defining a static property, or omit the visibility modifier altogether, you can access it anywhere. The following definitions are the equivalent of each other:
publicstatic$lbToKg= 0.45359237; static$lbToKg= 0.45359237;
The $lbToKg static property can now be accessed in any part of a script using the class name and the scope resolution operator like this:
Ch2_Product::$lbToKg
Note that I removed the leading underscore from the property's name to indicate that it's publicly accessible. The underscore doesn't have any magic properties; it's simply a convention. What controls where you can use a property is the visibility modifier.
Note
Defining a property as static is the only time you can omit the visibility modifier when declaring a property. Leaving out the modifier automatically makes a static property public. This is for backward compatibility with PHP 4. However, best practice is always to specify the visibility explicitly, as it leaves no room for doubt about the way you intend the property to be used.
The preceding example assigns a fixed value to the static property, but unlike constants, static properties can represent dynamically generated values. Static properties are commonly used to store a database connection, as you normally don't want multiple connections to be created by a script.
In fact, the value of a static property can change as the result of internal calculations inside the class, as demonstrated by the following example, which can be found in static_counter.php in ch2_exercises:
class classC
{
protected static $_counter = 0;
public $num;
public function __construct()
{
self::$_counter++;
$this->num = self::$_counter;
}
}
$object1 = new classC();
echo $object1->num . '<br />';
$object2 = new classC();
echo $object2->num;In this example, $_counter is declared both protected and static, so its value can't be changed outside the class definition. However, each time you create an instance of classC, the value of $_counter is increased by 1, and the result is assigned to the public property $num. If you run the script in static_counter.php, you should see the numbers 1 and 2 displayed onscreen. So in this case, static doesn't indicate an unchanging value; it means that the class as a whole, as opposed to individual objects, is keeping track of the value.
You create a static method the same way by prefixing the method's definition with the static keyword. Since the conversion ratio of pounds to kilograms is little use on its own, you could replace it with a static method like this:
public static function convertLbToKg($pounds)
{
return $pounds * 0.4535923;
}To use this static function inside the class where it is defined or any of its descendent classes, use self like this:
$weight = self::convertLbToKg(5); // $weight is 2.2679615
To use it elsewhere, use the class name instead of self like this:
$weight = Ch2_Product::convertLbToKg(5); // $weight is 2.2679615Of course, you can use a static method outside its class hierarchy only if it is declared public. The class where it is defined also needs to be accessible to the script.
The last few pages have covered a lot of ground, so let me try to summarize the main features:
To define a child class (or subclass), use the
extendskeyword followed by the name of the parent class.The child class must have access to the parent class, either by being included or being loaded automatically (see the following section).
A child class can have only one parent but can have many children of its own.
A child class inherits and has access to all the properties and methods of its parent, as well as to any other classes higher up the hierarchy. The only exception is if the property or method is declared as private.
Inherited methods and properties can be overridden by redefining them in the child class.
To access a parent's overridden method or property, use the
parentkeyword followed by the scope resolution operator (::).Use the
finalkeyword to prevent a class or individual methods from being overridden.If the class itself has been declared final, no further child classes can be created from it.
If a method has been declared final, it can be inherited, but not overridden, by a child class.
Define class constants with the
constkeyword.Use the
statickeyword in combination with one of the visibility modifiers to create static methods and properties.Access class constants and static methods and properties through
parent, self, or the class name, followed by the scope resolution operator.
Before you can use a class, you need to include it in your script, usually with require_once. The more classes you use, the more include commands you need. On a big project, this becomes time consuming, so PHP provides a way of automating the process with __autoload(). Like __construct(), the name begins with two underscores.
Using __autoload() depends on two things, namely:
Each class must be defined in a separate file.
You must adopt a consistent naming convention for both classes, and the file structure they are stored in.
If you give each class the same name as the file where it is defined, __autoload() is very simple. Just add the following code at the beginning of the main file of your application:
function __autoload($class)
{
require_once $class . '.php';
}This concatenates the .php file name extension onto the class name and calls require_once. So, if you have a class called MyClass and store it in MyClass.php, PHP will automatically search your include_path for MyClass.php the first time that you create an instance of MyClass.
The naming convention that I have adopted in this book combines the folder name with the file name. So Ch2_Product is in Ch2/Product.php. This involves just a little extra coding inside __autoload() to create the correct file path like this:
function __autoload($class)
{
$parts = explode('_', $class);
$path = implode(DIRECTORY_SEPARATOR, $parts);
require_once $path . '.php';
}This breaks the class name at each underscore into an array and rebuilds it into the path name using the PHP DIRECTORY_SEPARATOR constant. Finally, it concatenates the .php file name extension onto the class name and includes the class file.
Attempting to redefine a function causes a fatal error, so it's a good idea to put the __autoload() definition in an external file and include it using require_once. Needless to say, it must be included before your script attempts to instantiate any objects.
Both examples of __autoload() assume that your classes are in your PHP include_path. If they are outside the include_path, you need to define the full path in the __autoload() function. For example, on my Windows testing machine, the OopSolutions site is located in C:htdocsOopSolutions. So, I need to amend the second example like this:
function __autoload($class)
{
$parts = explode('_', $class);
$path = 'C:htdocsOopSolutions' . implode(DIRECTORY_SEPARATOR,
$parts);
require_once $path . '.php';
}The double backslash is needed at the end of the path to prevent PHP from interpreting the closing quote as an escaped character. On a Mac or Linux, the path is written with forward slashes, so the final slash should not be doubled. Note that you need to use a physical path to the folder containing the classes, not a URL.
With __autoload() there's no need to use require_once to include a class file before using it. PHP loads the class definition on the fly. It does this only once for each class, so the impact on performance is normally minimal.
Throughout the rest of this book, I use require_once instead of __autoload(), because the projects and examples use only a small number of files, and the relative paths should work on any test installation. If you set up your own __autoload() script, you can omit all the include commands in subsequent chapters.
Note
The chapter so far has covered all the basic syntax of writing OOP in PHP. Most of the rest of the chapter is devoted to more advanced topics, which you might want to skip on a first read through, although you should take a quick look at "Handling errors with exceptions." Come back to the other parts of the chapter later when you encounter a new concept.
All the examples of inheritance in the first half of this chapter extend a class that can be instantiated in its own right, but PHP also lets you define classes that cannot be instantiated—abstract classes and interfaces. An abstract class defines the basic structure of its child classes but cannot be instantiated on its own. An interface dictates which methods a class should have but leaves the actual implementation up to the individual classes.
At first glance, this might sound rather pointless; but these are common features in OOP languages, and once you understand how they work, you'll find them very useful. Seeing actual examples should make things clearer. Other advanced features covered in this section are type hinting, magic methods, and destructors. First, though, let's take a look at abstract classes.
If you worked through the exercises from the beginning of this chapter, you might be wondering if the Ch2_Product class is really necessary. As a result of inheritance, you have specialized classes for books and DVDs. If further products are added to the range, you can create new child classes and would probably never create a Ch2_Product object on its own. In fact, to maintain control, it's a good idea to prevent generic products from being created. However, without the parent class, it would be necessary to declare the common properties and methods in each child class. By making the parent class abstract, you get all the benefits of inheritance but prevent the parent class from being instantiated.
To make a class abstract, add the keyword abstract in front of class and the class name in the class definition. So, the revised Ch2_Product class looks like this (the code is in Product_04.php):
abstract class Ch2_Product
{
// properties defined here
protected $_type;
protected $_title;
// methods defined here
public function getProductType()
{
return $this->_type;
}
public function getTitle()
{
  return $this->_title;
  }
}The only differences are the addition of the abstract keyword in the first line and the removal of the constructor. I could have left the constructor if all child classes used the same one, but they don't. All that's left are the common properties and methods.
However, let's say you want all child classes to implement a particular method but know that the details of the method will be different for each class. Instead of defining a method in the abstract class and overriding it in each child class, you can define an abstract method. An abstract method simply names the method and sets its visibility but leaves the details to the child class. In our theoretical online store, you might want to create a method to display the details of each product. Because the details of each type of product are different, the implementation will differ. The following listing shows the Ch2_Product class with the addition of an abstract method called display() (the code is in Product_05.php):
abstract class Ch2_Product
{
  // properties defined here
  protected $_type;
  protected $_title;

  // methods defined here
  public function getProductType()
  {
    return $this->_type;
  }

  public function getTitle()
  {
    return $this->_title;
  }

  abstract public function display();
}
Declaring an abstract method like this forces all child classes to define the details of the method. Failure to do so triggers a fatal error. So, in essence, this says all classes in the Ch2_Product hierarchy must have a display() method, but acknowledges that the implementation will be different for each class. For the Ch2_Book class, it might look like this (the code is in Book_05.php):
public function display()
{
  echo "<p>Book: $this->_title ($this->_pageCount pages)</p>";
}
For Ch2_DVD, it might look like this (the code is in DVD_03.php):
public function display()
{
  echo "<p>DVD: $this->_title ($this->_duration)</p>";
}
You can then create instances of both classes and use the display() method to output the appropriate data for each type of object. The following code (in product_test_10.php) outputs the display shown in Figure 2-8:
$book = new Ch2_Book('PHP Object-Oriented Solutions', 300);
$movie = new Ch2_DVD('Atonement', '2 hr 10 min'),
$book->display();
$movie->display();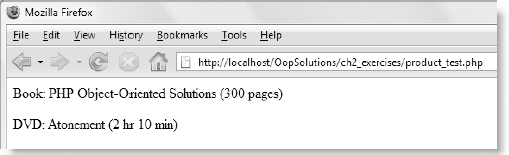
Figure 2.8. By declaring an abstract method, each child class is forced to implement its own version.
Note
An abstract class does not need to contain any abstract methods, but as soon as you declare an abstract method within a class, the whole class must be declared abstract.
An interface is very similar to an abstract class, but it has no properties and cannot define how methods are to be implemented. Instead, it is simply a list of methods that must be implemented. Moreover, all methods must be public. While this sounds bizarre, it has two main purposes, namely:
An interface ensures that all classes that implement it have a common set of functionality.
Although a child class can have only one parent, it can implement multiple interfaces.
This second characteristic is what makes interfaces very powerful. Let's say that the hypothetical e-commerce application in the examples throughout this chapter sells both downloadable products and ones that need to be delivered. It makes sense for all downloadable products to have a common set of features that won't be applicable to the deliverable goods. An interface offers a way of inheriting from a single parent while sharing an extra set of common features that don't necessarily apply to all child classes.
To create an interface, use the interface keyword followed by the name of the interface and a pair or curly braces. Inside the braces, declare the methods without defining their contents. A common convention is to prefix the name of an interface with an uppercase I, but the Zend Framework PHP coding standard that I'm following in this book ends the name with _Interface instead. Because the coding standard maps class and interface names to the directory structure, an interface called Ch2_Downloads_Interface would be stored as Interface.php in a folder called Ch2/Downloads. This can result in a large directory structure, but it has the advantage of consistency and clarity. However, you can choose whichever convention you like. An interface for downloadable items might look something like this:
interface Ch2_Downloads_Interface
{
  public function getFileLocation();
  public function createDownloadLink();
}
To use an interface, include it automatically with __autoload() or manually with require_once and follow the class name with the keyword implements and the name of the interface in the class definition like this (since I haven't implemented the methods, there are no download files for this example):
require_once 'Downloads/Interface.php';
class Ch2_Ebook extends Ch2_Product implements Ch2_Downloads_Interface
{
  // properties and other methods

  public function getFileLocation()
  {
    // details of method
  }

  public function createDownloadLink()
  {
    // details of method
  }
}
A class can implement multiple interfaces. Just list them as a comma-delimited list after the implements keyword. The big question is, "Why bother?" To understand that, we need to take another look at class hierarchy.
The obvious value of inheritance from a common class is that it avoids the need to repeat code in the child classes. But if that were the only advantage, inheritance and overriding would be little more than a glorified way of selectively including code from a common file. A fundamental aspect of OOP is exercising greater control over the way code works. Inheritance ensures that all related objects share common features and work in a similar way—just like all dogs bark and wag their tails when happy.
In the same way that a dachshund and a spaniel are instances of their own breeds (in object-oriented terms, classes), they are also both dogs. In turn, they are also animals, but they belong to a specialized branch of animals known as mammals. So, a dachshund can be classified as an instance of any of these particular types.
The same applies to objects in PHP. If you created an object from the Ch2_Ebook example in the preceding section, it would not only be an instance of the Ch2_Ebook class but also of Ch2_Downloads_Interface and Ch2_Product.
To find out which class an object belongs to, use the get_class() function like this:
$book = new Ch2_Book('PHP Object-Oriented Solutions', 300);
echo get_class($book);  // displays Ch2_Book
To find out its parent class, use get_parent_class() like this:
echo get_parent_class($book); // displays Ch2_ProductThere are two ways to find out whether a class is a subclass of another. The first is to use the is_subclass_of() function. This takes two arguments: the object you want to check and a string containing the name of the class that you want to know whether it's one of the object's parents, for example:
if (is_subclass_of($book, 'Ch2_Product')) // equates to trueThe other way is to use the instanceof operator like this (note that the name of the class is not in quotes):
if ($book instanceof Ch2_Product) // equates to trueThe important thing to note about instanceof is that it can also be used to determine whether an object implements a particular interface. The functions, get_class(), get_parent_class(), and is_subclass_of(), test only for direct inheritance.
Knowing whether an object is an instance of a particular class or interface is important in being able to control program flow. To go back to the animal analogy from earlier, you might be happy to let such animals as cats and dogs into your home, but few people are likely to welcome a crocodile. In object-oriented terms, checking whether an animal implements the Pet interface could save you from a nasty shock.
Let's say that you have developed the simple examples in this chapter ready for deployment in an e-commerce application. Such an application is likely to have a class for the shopping cart and a method called addItem() to add the user's purchases to the cart. To avoid errors, you need to check that the item being added belongs to an acceptable data type. One way of doing so would be to use the instanceof operator like this:
public function addItem($item)
{
  if ($item instanceof Ch2_Product) {
    // It's OK, add it to the cart
  } else {
    // Reject it
  }
}
PHP also offers a limited version of type hinting, a common feature in OOP languages that restricts the type of acceptable data. PHP supports type hinting for objects and (since PHP 5.1) arrays when passed as arguments to methods or functions. You create type hints at the time of defining a function or method by preceding the argument with the type of data you require. If you want a particular type of object, use the class name; for an array, use the word array. The basic syntax looks like this:
functionfunctionOrMethodName(TypeRequired $argumentName)
If an argument passed to the function or method is of the wrong type, it generates a fatal error.
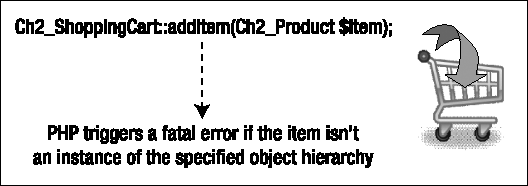
The data type of a Ch2_Book object is not only Ch2_Book but also Ch2_Product. Figure 2-9 summarizes how to restrict the type of data accepted by the addItem() method of a shopping cart; and the following exercise shows the basic code involved.
Experimenting with type hinting
This exercise creates the world's least fully featured shopping cart to demonstrate how type hinting restricts the type of data that can be passed as an argument.
Create a file called
ShoppingCart.phpin theCh2folder, and define theCh2_ShoppingCartclass like this (the code is inShoppingCart_01.phpin the download files):class Ch2_ShoppingCart { public function addItem(Ch2_Book$item) { echo '<p>' . $item->getTitle() . ' added</p>'; } }The class has a single method,
addItem(), which displays the title of the item together with the word "added." To start off with, the method will accept onlyCh2_Bookobjects, so theCh2_Bookclass name is added as a type hint in front of the$itemparameter. That's all there is to it. (I told you it was the world's least featured shopping cart).Create a file called
cart_test.phpin thech2_exercisesfolder, and insert the following code (it's incart_test_01.php):require_once '../Ch2/Book.php'; require_once '../Ch2/ShoppingCart.php'; $book = new Ch2_Book('PHP Object-Oriented Solutions', 300); $cart = new Ch2_ShoppingCart(); $cart->addItem($book);This includes the class files for the
Ch2_BookandCh2_ShoppingCartclasses, creates an instance of each class, and adds the$bookobject to the cart.Note
As explained earlier, the exercises refer to individual files by a basic name. If you have been doing the exercises yourself,
Book.phpshould contain the correct code. However, the class definition has changed several times throughout the chapter, so the download files use numbers at the end of each filename to ensure the correct one is loaded.Test the page, and you should see the result shown in Figure 2-10. No surprises:
$bookis aCh2_Bookobject, and that's what the type hint inCh2_ShoppingCart:: addItem()specifies.Now let's try adding a DVD to the cart. You need to include the
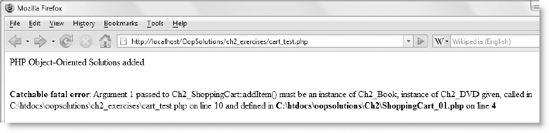
Ch2_DVDclass file and create an instance of the class. Amend the code incart_test.phplike this (it's incart_test_02.php):require_once '../Ch2/Book.php'; require_once '../Ch2/ShoppingCart.php';
require_once '../Ch2/DVD.php';$book = new Ch2_Book('PHP Object-Oriented Solutions', 300); $cart = new Ch2_ShoppingCart(); $cart->addItem($book);$movie = new Ch2_DVD('Atonement', '2 hr 10 min'),$cart->addItem($movie);Test the page again. This time you should see the error of your ways (well, mine since I told you to do it), as shown in Figure 2-11.
To fix the problem, change the type hint in
Ch2_ShoppingCart::addItem()like this (the code is inShoppingCart_02.php):public function addItem(
Ch2_Product$item)Test the page again (the download file is
cart_test_03.phpbecause it needs to include the amendedCh2_ShoppingCartclass). This time, both items are accepted, as shown in Figure 2-12, because theaddItem()method expects an object of their parent class,Ch2_Product.
When using type hints, you can specify only one type, so you need to be careful how you structure your class hierarchy. This is where interfaces can be handy. If you have a method that applies only to downloadable items, all of which implement an interface called Downloads_Interface, you can use Downloads_Interface as the type hint to prevent the wrong type of object being passed to it.
Type hinting is optional, so even if you provide a type hint for one argument, it's not necessary to provide one for every argument in the same method or function. In fact, you very often can't. Unlike other languages, there is no type hinting support for other data types, such as integers or strings; nor can you specify the type of data to be returned by the method or function. In spite of these limitations, the support for object type hinting means that you can easily test that the right type of object is being passed as an argument.
If you look closely at Figure 2-11, you'll see that the fatal error is described as "catchable." This refers to the error handling model known as exceptions introduced in PHP 5. Exceptions and how to catch them are explained In "Handling errors with exceptions" later in this chapter.
PHP reserves all function names beginning with a double underscore (like __construct() and __autoload()) as "magical" in the sense that they are automatically invoked in specific circumstances. For example, __construct() is run automatically when you instantiate an object with the new keyword. You can find details of the magic methods in the PHP online documentation at http://docs.php.net/manual/en/language.oop5.magic.php. The following sections cover the most important ones.
One of the first things you learn about working with arrays in PHP is that you can't use echo or print to display the contents of an array. All you see onscreen is the word Array. If you attempt to use echo or print with an object, the result is even less user friendly. Using an object in any situation where a string is expected results in a fatal error.
However, it's often useful to be able to display an object as a string, so the magic method __toString() lets you specify what to display in such a context. The method simply needs to return a string; what it contains is entirely up to you. For example, if you want the Ch2_Book class to display the title of the book when used with echo, define the __toString() method inside the class like this (you can see the full class definition in Book_06.php):
class Ch2_Book extends Ch2_Product
{
  // existing properties and methods

  public function __toString()
  {
    return $this->_title;
  }
}
You can test this by running product_test_11.php in Ch2_exercises. It simply displays the title of this book, but you could expand the definition of __toString() to display a much more detailed description of the object.
Note
Don't use echo or print inside __toString(). The method must return a string, not try to display it.
Since PHP 5, when you assign an object to another variable, you don't make a copy of it; instead, PHP creates a reference to the same object. Take this simple example:
$x = new MyObject();
$y = $x;
If you do this, $x and $y both point to the same object. Any changes you make to the properties of object $y will automatically be made to object $x. They are indivisible.
To make a copy of an object, you need to clone it with the clone keyword like this:
$y = clone $x;This creates what is known as a shallow copy of the original object's properties. This means a copy is made of each property that contains a value, which can then be changed independently. However, any property that contains a reference to another object or resource remains a reference.
An example should make this clearer. I'm going to create a Ch2_Manufacturer class to store the details of a product's manufacturer. To keep things simple, the class has only one property, but in the real world, it would store many more: contact details, bank account, credit rating, and so on. The class looks like this (the code is in Manufacturer.php in the Ch2 folder of the download files):
class Ch2_Manufacturer
{
  protected $_name;

  public function setManufacturerName($name)
  {
    $this->_name = $name;
  }

  public function getManufacturerName()
  {
    return $this->_name;
  }
}
To associate the manufacturer with a particular product, you use a technique known as aggregation. This simply means that one object acts as a container for one or more other objects. To add a manufacturer to the Ch2_Book and Ch2_DVD classes, you need to amend the abstract Ch2_Product class like this (the code is in Product_06.php in the Ch2 folder):
require_once 'Manufacturer.php';abstract class Ch2_Product { protected $_type; protected $_title;protected $_manufacturer;public function __construct(){$this->_manufacturer = new Ch2_Manufacturer();}public function getProductType() { return $this->_type; }
public function getTitle()
  {
    return $this->_title;
  }

  abstract public function display();

  public function setManufacturerName($name)
  {
    $this->_manufacturer->setManufacturerName($name);
  }

  public function getManufacturerName()
  {
    return $this->_manufacturer->getManufacturerName();
  }
}
The changes to the Ch2_Product class are highlighted in bold. The constructor creates a new instance of the Ch2_Manufacturer class and assigns it to the $_manufacturer property. This property is an object, but it doesn't exist in its own right; it's wrapped inside a Ch2_Product. So, to set or get its name, getter and setter methods inside the Ch2_Product class use the $_manufacturer object (referred to as $this->_manufacturer) to call the equivalent Ch2_Manufacturer methods.
Because the Ch2_Product class now has a constructor, the child classes need to call the parent constructor like this (for simplicity, I'm showing just the Ch2_Book constructor; the full code is in Book_07.php):
public function __construct($title, $pageCount)
{
  parent::__construct();
  $this->_title = $title;
  $this->_pageCount = $pageCount;
  $this->_type = 'book';
}
With these changes to the classes, you can create a Ch2_Book object and assign the name of the manufacturer like this:
$book = new Ch2_Book('PHP Object-Oriented Solutions', 300);
$book->setManufacturerName('friends of ED'),
The problem arises if you decide to clone the $book object. To demonstrate the different way clone treats properties depending on whether they refer to an object or resource, the revised version of Ch2_Book in Book_07.php contains a method that lets you change the title of the book. The three lines of code highlighted in bold in the following script in product_test_12.php clone $book and give the cloned version a new title and manufacturer:
require_once '../Ch2/Book_07.php';

$book = new Ch2_Book('PHP Object-Oriented Solutions', 300);
$book->setManufacturerName('friends of ED'),
echo '<p>' . $book->getTitle() . ' is manufactured by '.
  $book->getManufacturerName() . '</p>';
$book2 = clone $book;
$book2->setTitle('Website Disasters'),
$book2->setManufacturerName('enemies of ED'),
echo '<p>' . $book2->getTitle() . ' is manufactured by '.
  $book2->getManufacturerName() . '</p>';
echo '<p>' . $book->getTitle() . ' is manufactured by '.
  $book->getManufacturerName() . '</p>';
Figure 2-13 shows what happens when you run this script. The $_title property is a string, so changing the title of the cloned object doesn't affect the original. However, even though the manufacturer's name is also a string, it belongs to a Ch2_Manufacturer object inside $book. The shallow copy performed by the clone keyword results in the cloned object still pointing to the original Ch2_Manufacturer object. Changing the manufacturer's name for $book2 changes it for both books.
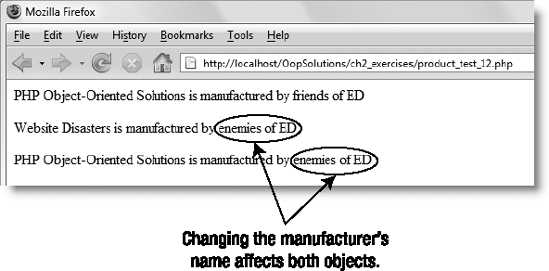
The __clone() magic method gets around this problem. Whenever you copy an object using the clone keyword, PHP checks if you have defined a __clone() method and calls it automatically. This magic method lets you specify any changes you want made to the object being cloned. If a property contains a reference to another object, you need to clone the property itself. Doing so breaks the reference by producing a copy of the object, which can then be changed without affecting the original. You define __clone() just like any other method. So, to break the reference to the original Ch2_Manufacturer object in the $_manufacturer property, you need to add the following to the Ch2_Product class definition (the full code is in Product_07.php):
public function __clone()
{
  $this->_manufacturer = clone $this->_manufacturer;
}
If you run the same script as before, the manufacturers' names are now independent of each other, as shown in Figure 2-14. You can test this in product_test_13.php in the download files. (product_test_13.php includes a different version of Ch2_Book, because Ch2_Book needs to inherit the revised version of Ch2_Product. The only difference in the code is the addition of the __clone() method in the Ch2_Product class.)
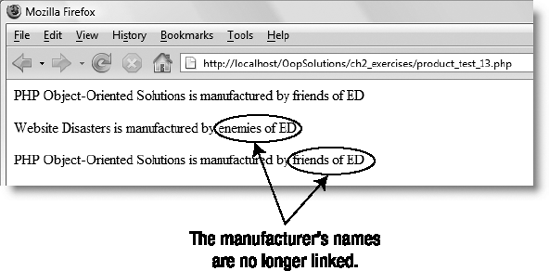
Figure 2.14. The __clone() magic method creates a clone of the aggregated object, making it independent of the original.
You can also use the __clone() magic method to change any other values when cloning an object. For instance, you might want to reset an ID property to zero, so the clone doesn't end up with the same ID as the original object.
Note
For a more detailed discussion of aggregation, see PHP 5 Objects, Patterns, and Practice, Second Edition by Matt Zandstra or Head First Design Patterns by Eric Freeman and Elizabeth Freeman.
Some developers find writing getter and setter methods for private and protected properties tedious, so PHP provides two magic methods, __get() and __set(), that handle everything automatically for you. Before you get too excited by this prospect, I should warn you that if you create both __get() and __set(), the value of any property handled this way is treated as public and can be changed arbitrarily by outside code. Although creating individual getter and setter methods is more time consuming, it gives you much greater control over how protected and private properties can be changed or inspected.
A common way of using __get() and __set() is to create a protected or private property to store the values of undeclared properties as an associative array. The __get() method checks whether the array element exists; if it does, it returns the value. The __set() method simply adds the value to the array. This behavior is not enabled by default, so you need to define the __get() and __set() methods explicitly in your class like this:
class Lazy
{
  // property to hold undeclared properties
  protected $_props;

  // magic methods
  public function __get($name)
  {
    if (isset($this->_props[$name])) {
      return $this->_props[$name];
    } else {
      return false;
    }
  }

  public function __set($name, $value)
  {
    $this->_props[$name] = $value;
  }
}
Using __get() isn't always bad. As you'll see in the next chapter, it's useful for creating read-only properties.
The __call() magic method is used to call methods that don't exist in the current class. While this might sound illogical, it's useful when using aggregation. In the section titled "Cloning an object" earlier in the chapter, I wrapped the getter and setter methods for the Ch2_Manufacturer class in methods of the same name in Ch2_Product. Doing this for just one or two methods is fine, but it becomes a burden in terms of code manageability when there are a lot of them.
Even though a Ch2_Product object can store a reference to a manufacturer object, it can't invoke any of the other class's methods. If you define the __call() magic method, though, PHP calls the other class's method as if it belonged to the Ch2_Product class.
The __call() magic method takes two arguments: the method name and an array of arguments to be passed to the method. You pass these in turn to call_user_func_array() and return the result. However, you need to tell call_user_func_array() which class the method belongs to. So, the first argument to call_user_func_array() must be an array that contains the aggregated object and the local variable containing the method name.
The code for the __call() magic method is always the same. The only thing that you need to change is the name of the property (highlighted in bold in the following script) that contains the object whose methods you want to call automatically. Taking the example of an object stored by aggregation in a protected property called $_manufacturer, this is how you would define the __call() magic method:
public function __call($method, $arguments)
{
  // check that the other object has the specified method
  if (method_exists($this->_manufacturer, $method)) {
    // invoke the method and return any result
    return call_user_func_array(array($this->_manufacturer, $method),
$arguments);
  }
}
The download files contain a revised version of Ch2_Product in Product_08.php. The setManufacturerName() and getManufacturerName() methods have been deleted, and the __call() magic method has been defined.
If you run the script in product_test_14.php, you should see the same result as in Figure 2-14. Instead of using its own getter and setter methods for the manufacturer's name, the Ch2_Product class now directly accesses those defined in the Ch2_Manufacturer class.
Normally, PHP handles memory management through garbage collection—the automatic removal of variables and objects when they're no longer needed by a script. However, there are occasions when you might want to delete a resource, such as a database connection, when an object is no longer needed. Just as PHP calls the __construct() method whenever you create a new object, it looks for the __destruct() magic method immediately before removing an object from memory and runs the destructor automatically if it has been defined.
You define a destructor just like any other method:
public function __destruct()
{
  // code to clear up resources before object is deleted
}
A destructor cannot take any arguments. It's also advisable to avoid calls to other objects in a destructor, as there is no way to dictate the order in which objects are deleted, and the other object might already have been deleted by the time the destructor attempts to access it.
PHP 5 introduced a new way of handling errors known as exceptions, a concept that is common in many other languages. An exception is when something goes wrong in a block of code. Instead of handling the error at that particular point, you throw the exception and catch it in a special block. This has the advantage of keeping all your error handling in a single place, rather than being scattered throughout your script. PHP has a built-in Exception class, which you can either use as is, or extend to create your own custom exceptions. If you're new to exceptions, it might sound esoteric, but it's quite simple in practice. First, let's look at how to throw an exception.
When writing scripts, it's normal practice to test the type of data passed to a function. This often results in complex conditional statements that determine what should happen if the data is of the wrong type. The advantage of using exceptions is that it reduces complexity by handling what should be done in a separate part of the script. This is particularly important with OOP, because classes should be designed to be as project neutral as possible. So, when a problem arises with data passed to a method, keep things simple by throwing an exception inside the method, and leave it to the main application script to determine how to handle it.
The way you throw an exception is with the throw keyword like this:
if (the sky falls in) {
  throw new Exception('Oops, the sky has fallen in!'),
}
Following the throw keyword, you instantiate a new Exception object, which takes one argument: a string that identifies the nature of the problem. Technically speaking, this argument is optional; if you omit it, PHP uses the default value, "Unknown exception." You can also pass a number as an optional second argument. The number has no significance other than to identify the exception. This allows you to set up your own system of error codes.
Once an exception has been thrown, it needs to be caught.
Whenever you use code that might throw exceptions, wrap the code in a try block and catch any exceptions in a catch block. This structure is similar to an if . . . else conditional statement, except that it uses try and catch instead of if and else. The basic structure looks like this:M
try {
  // code that might throw exceptions
} catch (Exception $e) {
  // handle the exception here
}
The try block could be dozens, even hundreds of lines long. If the code throws an exception, the script jumps immediately to the catch block, where the code decides how to handle the problem. In a development environment, you normally want to display a descriptive error message; but in a production environment, you could redirect the user to a custom error page, while sending an email with details of the problem to the server administrator.
The parentheses after the catch keyword should contain a variable to capture the details of the exception. It's also a good idea to use type hinting (see "Restricting acceptable data with type hinting" earlier in the chapter) to indicate what type of exception you want to deal with. In addition to the basic Exception class, the Standard PHP Library (SPL) defines a number of specialized exception classes that you can use in your class definitions (see Chapters 8 and 9). You can also create your own custom exceptions. Using different types of exceptions enables you to have multiple catch blocks that handle problems in different ways. For example, you might create custom exceptions called InvalidDataException and DatabaseErrorException. You could then handle them like this:
try {
  // script to be processed
} catch (InvalidDataException $e) {
  // redirect user to input page with appropriate error message
} catch (DatabaseErrorException $e) {
  // redirect user to database error page
} catch (Exception $e) {
  // handle any generic exceptions
}
The catch block for generic exceptions must come last. Otherwise the type hinting won't work, as custom exceptions need to extend the built-in Exception class, and therefore belong to the same data type.
Once you have caught an exception in a catch block, you can extract information about the error and where it occurred by using the Exception class's built-in methods. Table 2-2 lists the methods and the type of information they provide.
Table 2.2. Methods provided by the Exception class
Method | Type/visibility | Description |
|---|---|---|
| The text of the message passed as the first argument to the exception. | |
| The error code passed as the optional second argument to the exception. The default is 0. | |
| Not the current script, but the file containing the class definition. | |
| The number of the line on which the exception was thrown—again, not the current script, but the class definition. | |
| An associative array containing details of the script that resulted in the exception being thrown, including filename, line, function (method), and arguments. | |
| The same information as provided by | |
| Combines the output of |
Because the Exception class has a built-in __toString() method, the simplest way to find out the details of the error is to use echo followed by the variable used to catch the exception like this:
echo $e;
It can't get much simpler than that.
As you can see from Table 2-2, all the built-in methods, except __toString(), are final. This means __toString() is the only one that can be overridden.
The other methods provide a finer level of detail, so you can display or log the information in a more user-friendly way. Note that the getLine() method refers to the class definition. This reflects the fact that it's the class that throws the exception, not the script that utilizes the class. However, what you're usually interested in is locating whatever it was in your script that caused the class to throw an exception. To find that information, you need to extract it from the line element of the array returned by getTrace(). An actual example should clarify how exceptions work.
Throwing and catching an exception
This exercise expands the Ch2_Book class from the examples earlier in the chapter to demonstrate how to throw an exception when invalid data is passed to a Ch2_Book object. It also shows what happens when you fail to catch the exception, and the type of information that can be extracted from an exception that has been caught. Continue working with Book.php from earlier in the chapter. If you no longer have the file, save Book_09.php in the Ch2 folder as Book.php.
The
Ch2_Bookclass as defined earlier in the chapter performs no checks on the data passed to the constructor, so it doesn't generate an error if completely meaningless data is passed to it. This is a good case for throwing an exception. For the sake of this exercise, we'll check only that the page count is a number. Amend the constructor method like this:public function __construct($title, $pageCount) {if (!is_numeric($pageCount) || $pageCount < 1) {throw new Exception('Page count must be a positive number'),}parent::__construct(); this->_title = $title; $this->_pageCount =(int)$pageCount; $this->_type = 'book'; }The conditional statement (in bold type) uses
is_numeric()with the negative operator to check if$pageCountisn't a number, and since there's no point in allowing a negative number, also whether the value is less than 1. If either condition evaluates totrue, the code inside the braces throws a new exception with an appropriate message. There's no need for anelseclause, because throwing an exception terminates whatever PHP was doing and jumps straight to the first availablecatchblock, assuming there is one.Just for the sake of tidiness, I have added
(int)in front of$pageCountin the line that assigns its value to the$_pageCountproperty. This casts the value to an integer, if anyone decides to add a decimal fraction to the number. For details of type casting, see the PHP online manual athttp://docs.php.net/manual/en/language.types.type-juggling.php#language.types.typecasting.Let's see what happens if you now try to pass invalid data as the second argument to the
Ch2_Bookconstructor. Create a new file calledexception_test.phpinch2_exercises, and insert the following code (it's inexception_test_01.php):require_once '../Ch2/Book.php'; $book = new Ch2_Book('PHP Object-Oriented Solutions', 'Wednesday'), $book->display();This passes the string "Wednesday" instead of a number as the second argument to the
Ch2_Bookobject.Since the
Ch2_Bookclass can now throw exceptions, you should wrap the code inexception_test.phpin atry . . . catchblock. But let's first see what happens if you don't. Test the page. You should see a result similar to Figure 2-15.
Figure 2.15. Even if you don't catch an exception, PHP generates an error message with all the details.
As you can see, PHP displays a lengthy error message, giving all the details of the exception. If you're being lazy in a development environment, this is all you really need. However, failing to catch exceptions in a production environment is very bad practice, so get into good habits by catching them in your development environment as well.
Let's see what information is provided by each of the
Exceptionclass methods listed in Table 2-2. Wrap the last two lines of the code in step 2 in atryblock, and display the output of each method in thecatchblock. The code should look like this (if you don't want to go to the trouble of typing out everything yourself, useexception_test_02.phpin the download files):try {$book = new Ch2_Book('PHP Object-Oriented Solutions', 'Wednesday'), $book->display();} catch (Exception $e) {echo '<p><strong>Message:</strong> ' . $e->getMessage() . '</p>';echo '<p><strong>Code:</strong> ' . $e->getCode() . '</p>';echo '<p><strong>File:</strong> ' . $e->getFile() . '</p>';echo '<p><strong>Line:</strong> ' . $e->getLine() . '</p>';echo '<p><strong>Trace:</strong> ';print_r($e->getTrace());echo '</p>';echo '<p><strong>Trace as string:</strong> ' .$e->getTraceAsString() . '</p>';echo '<p><strong>Using echo:</strong> ' . $e . '</p>';}Test the page now, and you should see the output shown in Figure 2-16.
As you can see, the output of
getFile()andgetLine()doesn't refer to the current script, but to the location of the conditional statement that throws the exception in theCh2_Bookclass. The reference to the part of the script that triggered the exception (line 5 inexception_test.php) is contained in the output ofgetTrace(), getTraceAsString(), and__toString().
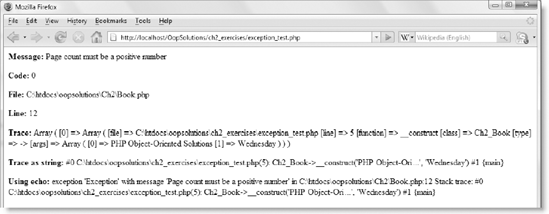
This exercise shows only the information that you can extract from the Exception class methods. What you put in a catch block is entirely up to you. Since an exception brings a script to a halt, the catch block in a production environment should find some way of handling the error gracefully without exposing sensitive details about your server or online application.
In addition to the methods listed in Table 2-2, the Exception class has the four properties described in Table 2-3.
Table 2.3. Default properties of the Exception class
Property | Visibility | Default value | Description |
|---|---|---|---|
|
| Unknown exception | Message describing error |
|
| 0 | User-defined exception code |
|
| Name of the file containing the class that triggered the exception | |
|
| Line in the class file where the exception was triggered |
Because these properties are protected, they are available in any custom class that extends the Exception class.
I won't go into detail about extending the Exception class, because you extend it in exactly the same way as any other class. You can define your own properties and methods. If you override the constructor in your custom class, it is recommended that you call the parent constructor explicitly to ensure that all available data has been properly assigned. The following example taken from the PHP manual shows how you should do it:
// Redefine the exception so message isn't optional
public function __construct($message, $code = 0)
{
  // your own custom code
  // make sure everything is assigned properly
  parent::__construct($message, $code);
}Commenting scripts is a chore but a necessary one. It doesn't matter whether you're working on your own or in a team, you need to comment your scripts. Even if no one else ever uses your scripts, you still need to remind yourself of how you intended everything to work, as it's a lot quicker to read comments than to try to fathom things out by reading the code several weeks or months later.
One practice that makes a lot of code virtually self-documenting is to use descriptive names for properties and methods, as recommended in the Zend Framework PHP Coding Standard, which I'm following in this book. Another valuable technique is to use the PHPDoc format. If you're using an IDE such as Zend Studio for Eclipse or PhpED that offers code introspection, PHPDoc comments are automatically converted into code hints (see Figures 1-4 through 1-7 in the previous chapter).
The download files for the remaining chapters contain comments in PHPDoc format. The next section gives just a brief overview to enable you to understand how they're written. You can find full details of PHPDoc at www.phpdoc.org, and a tutorial at www.phpdoc.org/tutorial.php.
The normal practice with PHPDoc is to place a comment block before each function (or method) describing its purpose, the arguments it expects, and what it returns (if anything). You can also use comment blocks to describe properties and other variables.
The following example comes from the Pos_Date class in the next chapter and describes the setDate() method.
/**
 * Changes the date represented by the object.
 *
 * Overrides the default DateTime setDate() method, and checks
 * that the arguments supplied constitute a valid date.
 *
 * @param  int   $year   The year as a four-digit number.
 * @param  int   $month  The month as a number between 1 and 12.
 * @param  int   $day    The day as a number between 1 and 31.
 */
The comment block begins with a forward slash followed by two asterisks (/**). This is a signal to the PHPDoc parser that a PHPDoc comment block is starting. Each subsequent line should also begin with an asterisk. The comment block ends like a normal multiline comment with an asterisk followed by a forward slash (*/).
The first line of the comment block should contain a brief description of what's being commented. The second section contains a more detailed description. The final section contains PHPDoc tags. Each tag must be on a new line and begin with an @ mark. Nothing should precede the tag except whitespace and the asterisk at the start of the line. The preceding example contains three instances of the @param tag.
The @param tag describes an argument accepted by the method. Each argument is listed in the order expected by the method. Following @param is a keyword indicating the required data type. In this case, all three arguments are expected to be integers (int). Then follow the name of the argument, and a brief description.
Table 2-4 lists the most commonly used PHPDoc tags, what should follow the tag, and a description of its use. Where more than one type of data is expected after a tag, separate them with whitespace, not commas.
The following PHPDoc tags should not be used: @abstract, @final, and @static. They were created for PHP 4, which didn't support the abstract, final, or static keywords. Using the keywords in the class definition is now sufficient.
Note
The code listings in this book don't include PHPDoc comments, because the purpose of each method and how it works is described in the text. However, the download class files are fully commented.
Table 2.4. Commonly used PHPDoc tags
Tag | Expected data | Description |
|---|---|---|
| Author's name | The author's name can be followed by an email address, which should be enclosed in angle brackets, for example, |
| Copyright information | The information is displayed unaltered. |
| Version information | Notifies users that an element should no longer be used. The version information is displayed unaltered, so can contain anything (or be left blank). |
| Data type, variable name, description | Describes a parameter (argument) expected by a function or method. The data type should be a valid PHP type. If more than one data type is acceptable, use |
| Data type, description | Describes the return value of a function or method. |
| Data type, description | Describes a property or variable. |
| Version details | The information is displayed unaltered, so it can be in any format. |
This chapter has covered just about everything you need to know about OOP syntax in PHP. None of it is particularly difficult if you are already familiar with creating your own functions, but absorbing it all at one sitting is likely to be a challenge. I have deliberately put all the theory in this chapter so you can come back to it to refresh your memory whenever necessary.
In the next chapter, you'll start to put this theory into practice by creating a class that extends the built-in DateTime class, giving you hands-on experience of class definition, inheritance, and overriding.