8.2. Accessing the Uploaded File
File uploads work differently than standard inputs, which means you must handle them a little differently. In this case, you must modify update.inc.php to deal with uploaded images.
You don't want to force your users to upload an image to post a new entry, so you need to check whether a file was uploaded after you verify that the rest of the entry form was filled out. To check whether a file was uploaded, you look in the $_FILES superglobal array.
8.2.1. A Quick Refresher on the $_FILES Superglobal Array
You learned about the $_FILES superglobal in Chapter 3, but it might be helpful to review what it does before moving on.
Whenever a file is uploaded via an HTML form, that file is stored in temporary memory and information about the file is passed in the $_FILES superglobal. You can see this in action by taking a look at what's being passed to your update.inc.php script. To do this, add the code in bold to the top of the file:
<?php

// Include the functions so you can create a URL
include_once 'functions.inc.php';

if($_SERVER['REQUEST_METHOD']=='POST'
    && $_POST['submit']=='Save Entry'
    && !empty($_POST['page'])
    && !empty($_POST['title'])
    && !empty($_POST['entry']))
{
    // Create a URL to save in the database
    $url = makeUrl($_POST['title']);

    // Output the contents of $_FILES
    echo "<pre>"; // <pre> tags make the output easy to read
    print_r($_FILES);
    echo "</pre>";

    /*
     * You don't want to save this test, so you exit the script to
     * prevent further execution.
     */
    exit;
After you save this file, you can navigate to create a new entry and try uploading an image by pointing your browser to http://localhost/simple_blog/admin/blog.
Click the Browse... button on the file input and select any image off your computer. You can fill in the Title and Entry fields with any information you want because this information won't be saved (see Figure 8-1).
Figure 8.1. An image selected in the new file input in admin.php
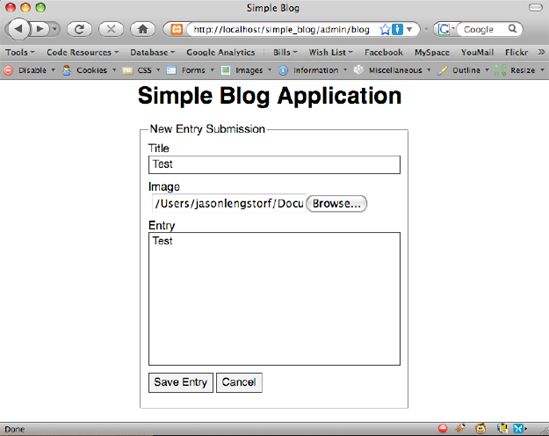
Click the Save Entry buttonto send this information to update.inc.php, which will display the contents of $_FILES and stop execution. The output will look similar to this:
Array
(
   [image] => Array
      (
          [name] => IMG001.jpg
          [type] => image/jpeg
          [tmp_name] => /Applications/XAMPP/xamppfiles/temp/phpHQLHjt
          [error] => 0
          [size] => 226452
      )

)
Examining this output enables you to determine that your image is stored in the array located at $_FILES['image'] (named for the name attribute of the file input) and that five pieces of information were stored:
$_FILES['image']['name'] : The name of the uploaded file
$_FILES['image']['type'] : The MIME type of the uploaded file
$_FILES['image']['tmp_name'] : The temporary location of the uploaded file
$_FILES['image']['error'] : An error code for the upload (0 means no error)
$_FILES['image']['size'] : The size of the uploaded file in bytes
You're ready to start processing the uploaded image now that you know what information is being sent from your form to update.inc.php.
8.2.2. Object-Oriented Programming
To handle your uploaded images, you need to leverage object-oriented programming (OOP) to write a class that handles your image processing. Classes and objects are extremely useful in programming; both have been well supported in PHP scripts since the release of PHP 5.
8.2.2.1. Drill Down on Objects
An object is a collection of information in a program. An object behaves similarly to an array, except that the information in an object provides a little more flexibility in how the information can be accessed and processed. To use objects in PHP, you must define a class to provide a structure for the object.
8.2.2.1.1. Classes vs. Objects
It's not uncommon to hear the terms "class" and "object" used interchangeably when talking about programming, but it's important to recognize that classes and objects are not the same thing, albeit they are bound tightly together.
A class is a blueprint for information. It provides a map of properties and methods that give a collection of information meaning. However, a class by itself doesn't really mean anything.
Objects contain a mass of information that conforms to the blueprint laid out by the class: an object is to a class as a house is to a blueprint. Each object is an instantiation of a class—just as each house built from a blueprint is an instantiation of the blueprint.
Here's another example that might help you understand the difference between a class and an object. Imagine that you have a toy robot that stores one property, or class-specific variable (its name) and one method, or class-specific function (the ability to write its name). The methods and properties that describe and define your robot are the class. However, before your toy robot can actually perform any of its abilities, you must first supply it with its required information—its name, in this case. The robot's name represents an object.
8.2.2.2. Why Objects Are Useful
One neat feature about objects: they enable you to have multiple instances of a given class that run simultaneously, but use different information.
Let's continue with the toy robot example. If you have two toy robots that are exactly the same, you can store the name "Tom" in the first robot, and the name "Jim" in the second, and they will both perform their duties in the same way, but with different information. If you set them loose at the same time, they will both start writing their names—Tom and Jim, respectively.
The advantage of using classes and objects in programming over procedural code is that an object can save its state. This means that you can set a property in an object once, then reference it for as long as the object exists.
In procedural code, you would need to pass that same property to every function to take advantage of it. This makes function calls cumbersome, and this process can prove confusing if the same functions must handle two or more sets of data.
8.2.2.2.1. Imagining Your Robot as a PHP Class
Let's explore the benefits of OOP by building your toy robots with PHP.
Begin by defining the class, which you should call ToyRobot. Do this using the reserved class keyword, followed by the class name, and then a pair of curly braces to enclose the class's properties and methods.
Next, create a new test file called ToyRobot.php in your simple_blog project, then define the class by adding the following code:
<?php

class ToyRobot
{

}

?>A property in a PHP class behaves similarly to a regular variable. The difference is that a class property is specific to the instance of your class and available to the methods without being passed as an argument.
In your ToyRobot class, you have only one property: the robot's name. You want to control how the robot's name is accessed and manipulated, so set this property as private, which ensures that only the ToyRobot class's methods can access the property's value.
MEMBER VISIBILITY IN OOPDepending on how you use your classes, you need to assign the appropriate visibility declarations to their methods and properties. The available visibility declarations include:
You must assign all properties with a visibility declaration. Methods declared without a declaration default to public visibility. In PHP4, developers used the var keyword to define object properties because visibility declarations weren't supported yet. For the sake of backward compatibility, PHP5 recognizes var as an alias for public, although it does raise an E_STRICT warning. For more information on visibility declarations, read the entry on it in the PHP manual, which you can find at http://us.php.net/manual/en/language.oop5.visibility.php. |
To declare a private property in your ToyRobot class, you need to add the lines in bold to test.php:
<?php

class ToyRobot
{
    // Stores the name of this instance of the robot
    private $_name;
}

?>
NOTE
Using an underscore before a private property name ($_name) is a widely accepted way of denoting private properties.
Each instance of the ToyRobot class will likely have a different name, so you don't specify a value for the $_name property; instead, you accomplish this using the object's constructor.
PHP5 introduced magic methods, which are essentially methods that execute when a certain action occurs in a script. There are several available, but this book won't delve into them because they don't apply to your blogging application. You can learn more about magic methods in its PHP manual entry at http://us.php.net/manual/en/language.oop5.magic.php.
Constructors are one of the most commonly used magic methods available in PHP5. A constructor is called when an object is instantiated, or first created. This allows you to initialize certain parameters or other settings for an object when you create the object. You can leverage a constructor in your ToyRobot class by declaring it in the __construct() magic method. You use this constructor to define the $_name property.
Test this by adding the following code in bold to test.php:
<?php

class ToyRobot
{
    // Stores the name of this instance of the robot
    private $_name;

    // Sets the name property upon class instantiation
    public function __construct($name)
    {
        $this->_name = $name;
    }
}

?>
Note the use of $this in your class. In object-oriented PHP, $this is a reserved variable that refers to the current object.
$this enables an object to refer to itself without needing to know what it's called. This enables multiple instances of a class to exist without conflict.
Next, consider the use of an arrow (->) after the $this keyword. This arrow indicates that you're accessing a property or method contained within the object. Again, this enables you to have multiple instances of a class without conflict.
Finally, the preceding script lets you add the name of the property or method you want to access (the $_name property, in this case). When accessing properties, you leave off the dollar sign because you already use it with $this.
Your declared constructor will now allow you to define the name of each ToyRobot instance right as you create it. The next step is to create the method that enables your ToyRobot class to write its name.
Class Methods
You define a method in your ToyRobot class much as you declare a function in a procedural script. The only difference is the visibility declaration and the ability to access class properties without needing to accept them as function arguments.
You en able your ToyRobot to write its name by defining a public method called writeName(). Add the code in bold to test.php:
<?php

class ToyRobot
{
    // Stores the name of this instance of the robot
    private $_name;

    // Sets the name property upon class instantiation
    public function __construct($name)
    {
        $this->_name = $name;
    }

    // Writes the robot's name
    public function writeName()
    {
        echo 'My name is ', $this->_name, '.<br />';
    }
}

?>
This method is straightforward: when called, it causes the robot to introduce itself. All that's left is to learn how to use objects in your scripts.
Using Classes in Your Scripts
The toy robot example initially discussed two robots: Tom and Jim. You're now ready to use your new PHP skills to build this pair of robots.
You use the new keyword to create a new instance of an object, followed by the name of the class. You use the name of the class like a function call, which allows you to pass arguments (assuming any are necessary) to your constructor.
Begin building Tom by adding the lines in bold to test.php:
<?php

// Create an instance of ToyRobot with the name "Tom"
$tom = new ToyRobot("Tom");

class ToyRobot
{
    // Stores the name of this instance of the robot
    private $_name;
// Sets the name property upon class instantiation
public function __construct($name)
{
$this->_name = $name;
}
// Writes the robot's name
public function writeName()
{
echo 'My name is ', $this->_name, '.<br />';
}
}
?>At this point, you have created and instantiated your first PHP class. Passing Tom as an argument to the object enables you to set the private $_name property to Tom, effectively giving your robot its name.
Now you can have Tom write his name by calling his writeName() method. Add the lines in bold to test.php:
<?php
// Create an instance of ToyRobot with the name "Tom"
$tom = new ToyRobot("Tom");
// Have Tom introduce himself
$tom->writeName();
class ToyRobot
{
// Stores the name of this instance of the robot
private $_name;
// Sets the name property upon class instantiation
    public function __construct($name)
    {
        $this->_name = $name;
    }

    // Writes the robot's name
    public function writeName()
    {
        echo 'My name is ', $this->_name, '.<br />';
    }
}

?>Now you have some actual output to look at. Load test.php in your browser to see what Tom had to say:
My name is Tom.
You're now ready to build Jim and have him introduce himself; add the bold to test.php:
<?php

// Create an instance of ToyRobot with the name "Tom"
$tom = new ToyRobot("Tom");

// Have Tom introduce himself
$tom->writeName();

// Build Jim and have him introduce himself
$jim = new ToyRobot("Jim");
$jim->writeName();

class ToyRobot
{
    // Stores the name of this instance of the robot
    private $_name;

    // Sets the name property upon class instantiation
    public function __construct($name)
    {
        $this->_name = $name;
    }

    // Writes the robot's name
    public function writeName()
    {
        echo 'My name is ', $this->_name, '.<br />';
    }
}

?>
You should see the following when you load test.php in a browser:
My name is Tom.
My name is Jim.
Your ToyRobot class is admittedly simple, but it exemplifies the power of using objects with PHP. You can have two instances in use at the same time without any conflicts and without needing to keep track of a bunch of variables.
Even if your objects are mixed in together, you still get the proper result. For instance, you can replace the class instantiations in test.php with the following:
<?php

$tom = new ToyRobot("Tom");
$jim = new ToyRobot("Jim");

$tom->writeName();
$jim->writeName();

?>
This still outputs the following:
My name is Tom.
My name is Jim.
Armed with your new understanding of OOP, you're ready to take on a new task: writing a class to handle images.