8.5. Resizing Images
Resizing images is a little tricky, but you can break the process down into small sections. Resizing an image requires several steps:
Determine new dimensions based on the defined maximum dimensions
Determine which image handling functions are necessary for resampling
Resample the image at the proper size
8.5.1. Determining the New Image Dimensions
Begin the process of resizing an image by determining what size the image should actually be. Unfortunately, you can't simply tell your script that all images should be 350 pixels by 240 pixels because forcing an image to match dimensions that aren't proportional to an image's original dimensions causes distortion, which doesn't look good.
Instead, you need to determine the proportional size of the image that will fit within the maximum dimensions you set. You can accomplish this following several math steps:
Determine which side of the image is the longer
Divide the maximum dimension that corresponds to the long side by the long side's size
Use the resulting decimal point to multiply both sides of the image
Round the product to keep an integer value
Use the product of this multiplication as the new width and height of the image
8.5.1.1. Adding a Property for Maximum Dimensions
Before you can start performing any resizing, you need to define maximum dimensions for uploaded images. This might need to change at some future point, so you define a new property in the ImageHandler class, called $max_dims. This property stores an array of the maximum width and height allowed for uploaded images.
You set this property in the constructor, but be aware that you need to use a default value so that it doesn't need to be set for the class to work.
At the top of the ImageHandler class, modify the property declarations and constructor as shown by the code in bold:
class ImageHandler
{
    public $save_dir;
    public $max_dims;

    public function __construct($save_dir, $max_dims=array(350, 240))
    {
        $this->save_dir = $save_dir;
        $this->max_dims = $max_dims;
    }
The maximum dimensions of 350 pixels by 240 pixels are acceptable for the layout of your current site. These are the default values, so don't worry about adding maximum dimensions to the class instantiation. However, if you needed to change the size of your images, you can change the dimensions using the following instantiation of ImageHandler:
$obj = new ImageHandler('/images/', array(400, 300));This snippet sets the maximum dimensions allowed to 400 pixels wide by 300 pixels high.
8.5.1.2. Creating the Method to Determine New Width and Height
You have your maximum dimensions prepared; next, you need to define a new private method in the ImageHandler class. Place this method at the bottom of the class and accept one argument: the image for which you need new dimensions.
In images.inc.php, add the following method declaration:
/**
     * Determines new dimensions for an image
     *
     * @param string $img the path to the upload
     * @return array the new and original image dimensions
     */
    private function getNewDims($img)
    {
        // Get new image dimensions
    }
You can determine the original dimensions of your image with a function called getimagesize().This function returns the width and height of the image supplied as an argument (as well as other information I'll address in a moment).
You use the list() function to define the first two array elements as the $src_w (source width) and $src_h (source height) variables.
Next, you use the maximum dimensions that you just added to the class. Again, use the list() function to separate their values into $max_w (maximum width) and $max_h (maximum height), then add the following code in bold to getNewDims():
/**
     * Determines new dimensions for an image
     *
     * @param string $img the path to the upload
     * @return array the new and original image dimensions
     */
    private function getNewDims($img)
    {
        // Assemble the necessary variables for processing
        list($src_w, $src_h) = getimagesize($img);
        list($max_w, $max_h) = $this->max_dims;

        // Finish processing
    }
Before you start resizing your image, you need to check that it is, in fact, larger than your maximum dimensions. Otherwise, small images will be blown up, which can make them look bad. You accomplish this by checking whether either the original image's width or height is greater than the maximum corresponding dimension.
If so, you need to determine the scale to which you should resize the image. You can determine this by dividing the maximum length of both sides by the original length and returning the smaller of the two values using the min() function, which compares two or more expressions and returns the lowest value.
After you know what side is longer, you use the corresponding maximum dimension to determine the scale. You determine the scale by dividing the smaller maximum dimension by the original dimension, which gives you a decimal value (for instance, if your maximum size is 60 pixels, and the original size is 100 pixels, the scale is .6).
In the event that your image is smaller than the maximum allowed dimensions, you want to keep it the same size. Do this by setting the scale to 1.
Add the code in bold to getNewDims() to determine the scale:
/**
     * Determines new dimensions for an image
     *
     * @param string $img the path to the upload
     * @return array the new and original image dimensions
     */
    private function getNewDims($img)
    {
        // Assemble the necessary variables for processing
        list($src_w, $src_h) = getimagesize($img);
        list($max_w, $max_h) = $this->max_dims;

        // Check that the image is bigger than the maximum dimensions
        if($src_w > $max_w || $src_h > $max_h)
        {
            // Determine the scale to which the image will be resized
            $s = min($max_w/$src_w,$max_h/$src_h);
        }
        else
        {
            /*
             * If the image is smaller than the max dimensions, keep
             * its dimensions by multiplying by 1
             */
            $s = 1;
        }

        // Finish processing
    }
Finally, you need to multiply the original dimensions by the scale you've just determined, then return the new dimensions (as well as the old dimensions for reasons I'll cover momentarily) as an array.
To accomplish this, insert the lines bold into getNewDims():
/**
     * Determines new dimensions for an image
     *
     * @param string $img the path to the upload
     * @return array the new and original image dimensions
     */
    private function getNewDims($img)
    {
        // Assemble the necessary variables for processing
        list($src_w, $src_h) = getimagesize($img);
        list($max_w, $max_h) = $this->max_dims;

        // Check that the image is bigger than the maximum dimensions
        if($src_w > $max_w || $src_h > $src_h)
        {
            // Determine the scale to which the image will be resized
            $s = min($max_w/$src_w,$max_h/$src_h);
        }
        else
        {
            /*
             * If the image is smaller than the max dimensions, keep
             * its dimensions by multiplying by 1
             */
            $s = 1;
        }

        // Get the new dimensions
        $new_w = round($src_w * $s);
        $new_h = round($src_h * $s);

        // Return the new dimensions
        return array($new_w, $new_h, $src_w, $src_h);
    }
8.5.2. Determining Which Image Functions to Use
You use two functions when resampling your images: one to create an image resource and one to save your resampled image in a format of your choosing.
Your blog accepts three types of image files (JPEG, GIF, and PNG),, and each of these image types requires an individual set of functions to create and save images. Specifically, you use imagecreatefromjpeg(), imagecreatefromgif(), or imagecreatefrompng() to create the images, depending on the named file type.
Similarly, you save the images using imagejpeg(), imagegif(), or imagepng()—again, depending on the appropriate file type.
You want to eliminate redundant code, so you need to write a method that checks what type of image you're using and returns the names of the functions you should use with the uploaded image.
Call this private method getImageFunctions(); you will use it to return an array containing the names of the functions for creating and saving your images, which you determine with a switch statement.
Your original $type variable is out of the scope for this method, so use the getimagesize() function again. However, this time you need to access the array element that holds the image's MIME type, which you access using the mime array key.
In images.inc.php, declare the getImageFunctions() method and store the output of getimagesize(). Next, pass the MIME type to a switch statement that returns the proper array of function names. You accomplish all of this by adding the following method at the bottom of the ImageHandler class:
/**
     * Determines how to process images
     *
     * Uses the MIME type of the provided image to determine
     * what image handling functions should be used. This
     * increases the perfomance of the script versus using
     * imagecreatefromstring().
     *
     * @param string $img the path to the upload
     * @return array the image type-specific functions
     */
    private function getImageFunctions($img)
    {
        $info = getimagesize($img);

        switch($info['mime'])
        {
            case 'image/jpeg':
            case 'image/pjpeg':
                return array('imagecreatefromjpeg', 'imagejpeg'),
                break;
            case 'image/gif':
                return array('imagecreatefromgif', 'imagegif'),
                break;
            case 'image/png':
                return array('imagecreatefrompng', 'imagepng'),
                break;
            default:
                return FALSE;
                break;
        }
    }
Now you're able to get functions specific to the image type quickly; I'll cover how you use these in a moment.
8.5.3. Resampling the Image at the Proper Size
Finally, you're ready to resample the image. You do this inside a new private method called doImageResize(), which accepts one argument: the image to be resampled.
This method performs its magic in five steps:
It determines the new dimensions for the image
It determines the functions needed to resample the image
It creates image resources to use in the resampling
It resamples the image at the proper size
It saves the resampled image
The first two steps are already done; you simply need to call the getNewDims() and getImageFunctions() methods you defined previously.
Begin by defining your method in ImageHandler and calling your methods. Add the following to images.inc.php in the ImageHandler class:
/**
     * Generates a resampled and resized image
     *
     * Creates and saves a new image based on the new dimensions
     * and image type-specific functions determined by other
     * class methods.
     *
     * @param array $img the path to the upload
     * @return void
     */
    private function doImageResize($img)
    {
        // Determine the new dimensions
        $d = $this->getNewDims($img);

        // Determine what functions to use
        $funcs = $this->getImageFunctions($img);

        // Finish resampling
    }
Next you need to create the image resources that PHP uses to deal with images. For your resampling, you need to create two resources. The first is the original image, which you save as a resource using the first of your two functions specific to the image type. The second is a new, blank image resource, which you copy the resampled image into. You create the second image resource with a different function called imagecreatetruecolor(); this function accepts two arguments: the width and height of the new image resource you want to create.
To create your image resources, add the lines in bold to doImageResize():
/**
     * Generates a resampled and resized image
     *
     * Creates and saves a new image based on the new dimensions
     * and image type-specific functions determined by other
     * class methods.
     *
     * @param array $img the path to the upload
     * @return void
     */
    private function doImageResize($img)
    {
        // Determine the new dimensions
        $d = $this->getNewDims($tmp);

        // Determine what functions to use
        $funcs = $this->getImageFunctions($img);

        // Create the image resources for resampling
        $src_img = $funcs[0]($img);
        $new_img = imagecreatetruecolor($d[0], $d[1]);

        // Finish resampling
    }
Note that you're calling your image type-specific function with the snippet, $funcs[0]($img). This is a trick available to developers for instances just like this one, where the function you want to call varies based on the current data being handled.
So far you have your image resources; next, you can copy the original image into the new image resource using the complicated-looking imagecopyresampled() function, which accepts a whopping ten arguments:
$dst_image: This is the destination image that serves as your new image resource ($new_img).
$src_image: This is the source image that you copy your new image from ($src_img).
$dst_x: This is the offset from the new image's left-hand side; you use this to start inserting the source image. This value is usually 0, but if you overlay something like a watermark, you might need to insert the source image in the bottom-right corner, which would require a different value.
$dst_y: The is the offset from the new image's top; you use this to start inserting the source image.
$src_x: This is the offset from the source image's left-hand side; you use this to start copying image data. This value is usually 0, but this value can vary if you're cropping an image.
$src_y: This is the offset from the top of the source image; you use this to start copying the source image.
$dst_w : This argument specifies thewidth at which you should insert the copied image. You use the new width value stored at $d[0].
$dst_h: This argument specifies the height at which you insert the copied image. You use the new height value stored at $d[1].
$src_w: This argument describes the distance from the starting point to copy horizontally. Usually, this value matches the original size of the image, but this value can shorter than the original width if your image is cropped. You use the original width value stored at $d[2].
$src_h: This argument describes the distance from the starting point to copy vertically. You use the original height value stored at $d[3].
You need to check whether the imagecopyresampled() call is successful, then destroy the source image ($src_img) to free system resources because you won't need it again. If the function fails for some reason, you throw a new exception to create a custom error message. To do this, add the following code in bold to doImageResize():
/**
     * Generates a resampled and resized image
     *
     * Creates and saves a new image based on the new dimensions
     * and image type-specific functions determined by other
     * class methods.
     *
     * @param array $img the path to the upload
     * @return void
     */
    private function doImageResize($img)
    {

        // Determine the new dimensions
        $d = $this->getNewDims($tmp);

        // Determine what functions to use
        $funcs = $this->getImageFunctions($img);

        // Create the image resources for resampling
        $src_img = $funcs[0]($img);
        $new_img = imagecreatetruecolor($d[0], $d[1]);
if(imagecopyresampled(
$new_img, $src_img, 0, 0, 0, 0, $d[0], $d[1], $d[2], $d[3]
))
{
imagedestroy($src_img);
// Finish resampling
}
else
{
throw new Exception('Could not resample the image!'),
}
}Now $new_img contains the resized and resampled image. All that's left to do at this point is to save the image. You can accomplish this by using the second image type-specific function that saves the image resource to a location of your choosing. You can save it over the top of the original image because you no longer need it at its original size in your blog application.
You need to make sure that the image type-specific function fires successfully, then destroy the new image resource ($new_img) to free the memory it consumes. If the function fails, you throw an error. Add the following code in bold to doImageResize() to complete your function:
/**
     * Generates a resampled and resized image
     *
     * Creates and saves a new image based on the new dimensions
     * and image type-specific functions determined by other
     * class methods.
     *
     * @param array $img the path to the upload
     * @return void
     */
    private function doImageResize($img)
    {

        // Determine the new dimensions
        $d = $this->getNewDims($tmp);

        // Determine what functions to use
        $funcs = $this->getImageFunctions($img);

        // Create the image resources for resampling
        $src_img = $funcs[0]($img);
        $new_img = imagecreatetruecolor($d[0], $d[1]);
if(imagecopyresampled(
$new_img, $src_img, 0, 0, 0, 0, $d[0], $d[1], $d[2], $d[3]
))
{
imagedestroy($src_img);
if($new_img && $funcs[1]($new_img, $img))
{
imagedestroy($new_img);
}
else
{
throw new Exception('Failed to save the new image!'),
}
}
else
{
throw new Exception('Could not resample the image!'),
}
}You can now resize any JPEG, GIF, or PNG image to fit within your maximum dimensions. Next, add a call to your new method to processUploadedImage() and try it out!
8.5.3.1. Adding Your New Method to processUploadedImage()
You need to add only one line of code to the function to resample images processed with processUploadedImage(). In images.inc.php, add the lines in bold to processUploadedImage():
/**
     * Resizes/resamples an image uploaded via a web form
     *
     * @param array $upload the array contained in $_FILES
     * @param bool $rename whether or not the image should be renamed
     * @return string the path to the resized uploaded file
     */
    public function processUploadedImage($file, $rename=TRUE)
    {
        // Separate the uploaded file array
        list($name, $type, $tmp, $err, $size) = array_values($file);

        // If an error occurred, throw an exception
        if($err != UPLOAD_ERR_OK) {
            throw new Exception('An error occurred with the upload!'),
            exit;
        }
// Generate a resized image
$this->doImageResize($tmp);
// Rename the file if the flag is set to TRUE
if($rename===TRUE) {
// Retrieve information about the image
$img_ext = $this->getImageExtension($type);
$name = $this->renameFile($img_ext);
}
// Check that the directory exists
$this->checkSaveDir();
// Create the full path to the image for saving
$filepath = $this->save_dir . $name;
// Store the absolute path to move the image
$absolute = $_SERVER['DOCUMENT_ROOT'] . $filepath;
// Save the image
if(!move_uploaded_file($tmp, $absolute))
{
throw new Exception("Couldn't save the uploaded file!");
}
return $filepath;
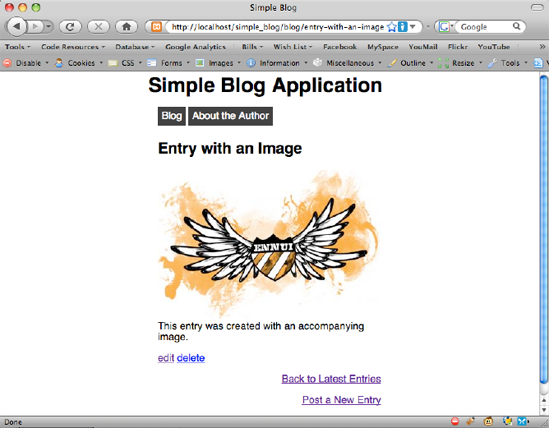
}You can test this by re-uploading your original image to the "Entry with an Image" entry. Navigate to the entry in a browser at http://localhost/simple_blog/entry-with-an-image and click the edit link to bring up the admin form. Select the image you uploaded previously and click the Save Entry button. You should now see that the resampled, properly-sized image (see Figure 8-8).
Figure 8.8. A resized image that is displayed with an entry