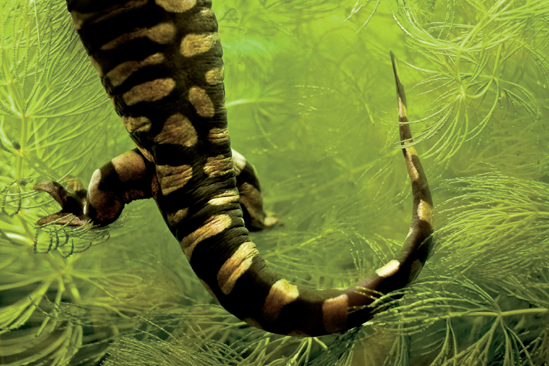
Detail of a western tiger salamander in the National Zoo's Amazonia exhibit. Taken at ISO 1600, f/4, 1/50 second with a 50mm lens.
The National Zoo, part of the Smithsonian Institution, is best known for its three giant pandas: Tian Tian, Mei Xiang and their cub, Tai Shan. However, the National Zoo is much more than just a place where you can see pandas and elephants. It is essentially a specialized university that focuses on being a leader in the studies of animal care, science, education, and sustainability. There's so much to see that a photographer could spend weeks here. The zoo's peaceful atmosphere and creative layout make for hours of exploration.
You can take great photographs inside the National Zoo from many locations. The following sections highlight some options.
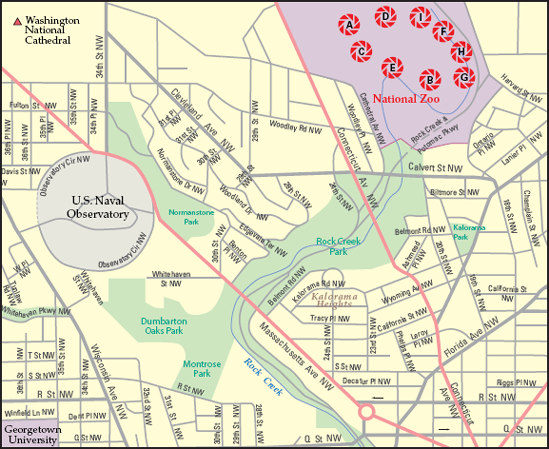
Figure 13.1. The best locations from which to photograph the National Zoo: (A) African Savanna, (B) Amazonia, (C) Asia Trail, (D) Asian Elephants, (E) Bird House, (F) The Great Ape House and The O Line, (G) Great Cats, (H) Invertebrates, and (I) Small Mammal House.
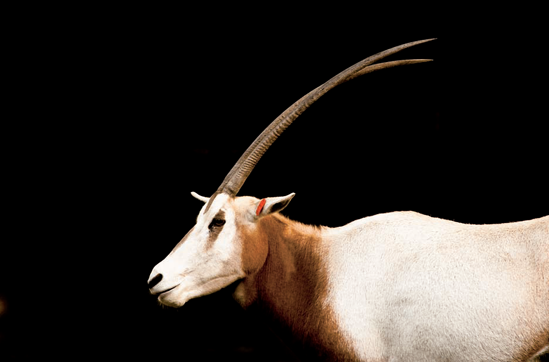
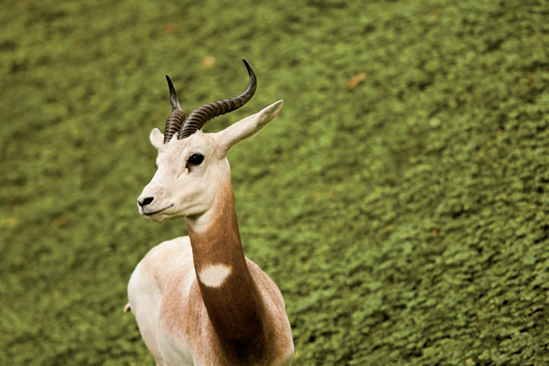
If there's any place in the zoo that makes you want to wear a pith helmet and talk about your near-death experience with a lion in an East African savanna, this is it. This area includes several cheetahs, as well as zebras, a scimitar-horned oryx (see Figure 13.1), maned wolves, gazelles (see Figure 13.2), and tammar wallabies.
All the animals are within very close proximity and are easy to photograph. It still takes some patience, but zooming in on them with your camera is a great way to study their behavior and marvel at their beauty.
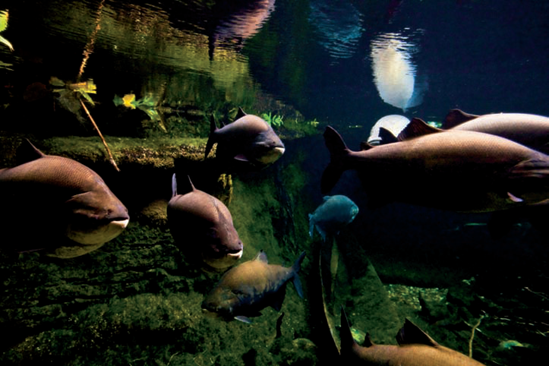
The National Zoo's largest and most complex exhibit is also easily missed, mostly because of its location off the main Olmsted Walk. It's also relatively far from the main entrance and parking areas. But this is to its advantage because crowds here tend to be lessened, relative to the rest of the zoo. At peak visitation times, however, lines will form to enter here because zoo officials only allow a certain number of visitors at a time.
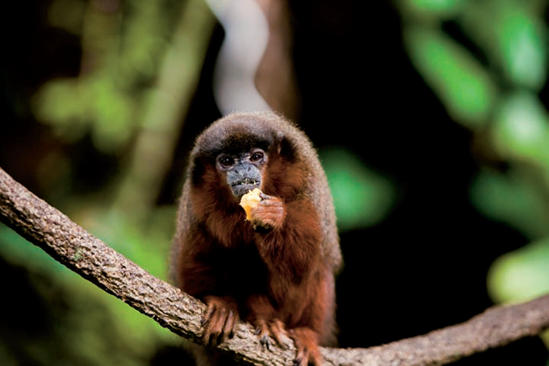
Inside, you find 15,000 square feet of rainforest, including a tropical river and an aquarium. The animals within the exhibit are generally free to move about on their own. The aquarium houses mammoth fresh water fish (see Figure 13.3), above which are 50-foot trees where titi monkeys zip about (see Figure 13.4).
Here the photography experience is much more like that in the wild — the notable exception being the lack of bugs feasting on you. You need some patience and a keen eye in the rainforest to spot the various animals.
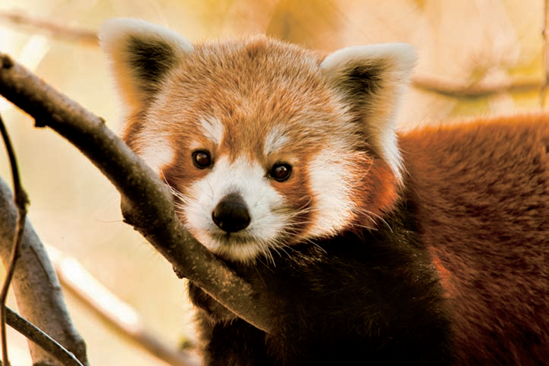
The Asia Trail is home to six Asian species, including the National Zoo's prized exhibit: the giant pandas (see Figure 13.5). There are also sloth bears, the ever-cute red panda (see Figure 13.6), as well as small-clawed otters and clouded leopards.
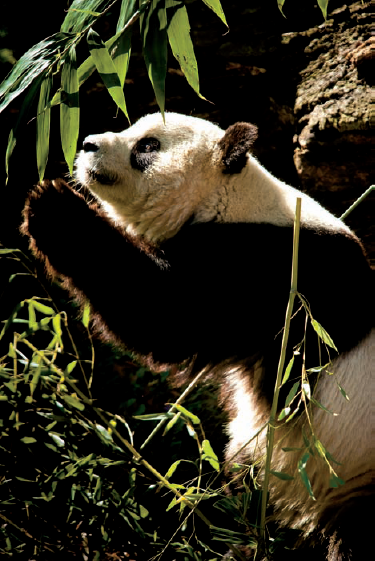
Figure 13.6. Mei Xiang finds some bamboo to her liking at the National Zoo (see C on the map). Taken at ISO 400, f/4, 1/320 second with a 265mm lens.
Red pandas often sit in trees that are only a few feet from a viewing area, while the otters watch you as much as you are watching them. They are, however, constantly on the move, so getting good photos of them takes some time. The red pandas, however, are model-like in their demeanor: They practically pose for you on the trees.
The giant pandas are one of the most popular attractions at the zoo. Getting photos of them is easier when they are outside and active — when it's colder, and early and late in the day. They otherwise may not be visible or close enough to get good photos. When they are active, they play and eat close to the spectator areas, at which point they are rather easy to photograph.
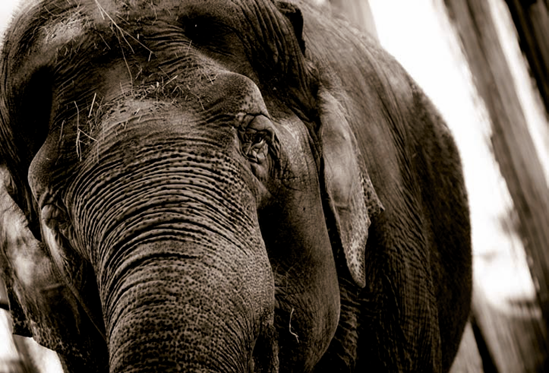
The National Zoo has three Asian elephants: Ambika, Shanthi, and Kandula.
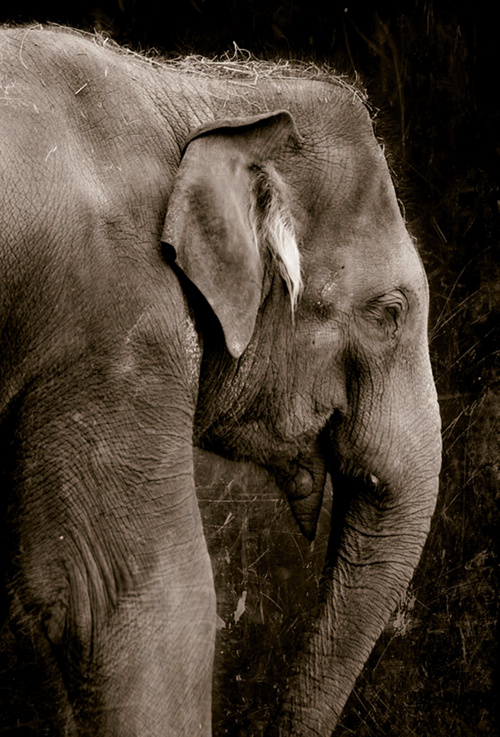
Elephants make for great photography subjects because of their relatively slow speed and large size, and you can get rather close to them at the National Zoo. They are also beautiful — their wrinkly skin alternatively soaks up and reflects light, and their form is all at once prehistoric, bizarre, and elegant (see Figure 13.7).
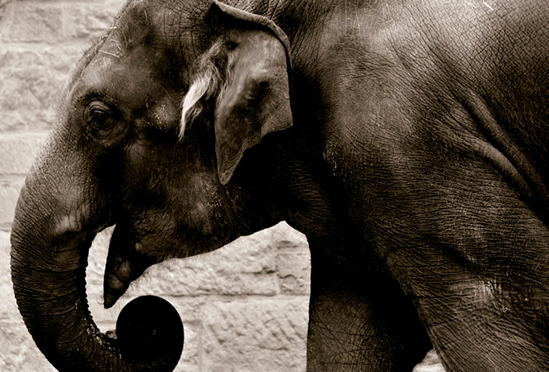
They make for great black-and-white photographs as well. The simplicity of a black-and-white photograph emphasizes their details and form and greatly accents the light and dark areas of their bodies (see Figure 13.8).
The zoo's elephant habitat, Elephant Trails, is under construction until 2011. However, the elephants are on display outside during exhibit hours.
Bird watching and bird photography, in particular, can be an extremely specialized form of photography. Serious bird photographers go to great lengths to get close to birds of all kinds and use some very specialized lenses to do so — some nearing the size of a telescope.
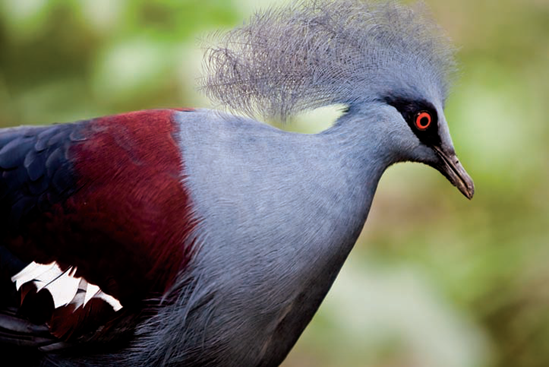
The bird exhibits present a rare chance to get up close to many different varieties of birds, and many are at relative ease with people watching them, too (see Figure 13.9).
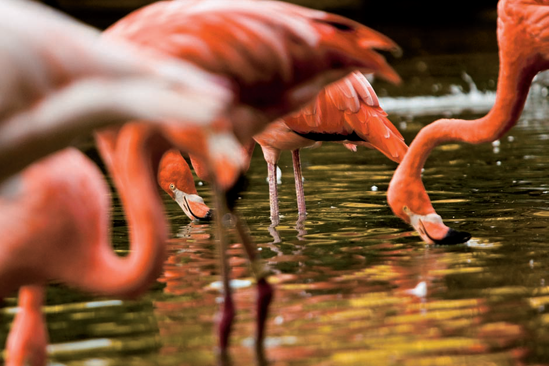
Although photographing birds at the zoo definitely takes some of the sport out of the entire affair, it's also a nice chance to get some interesting photos (see Figure 13.10).
Several areas encompass the bird exhibits: the Bird House, which has an indoor area of enclosed exhibits, and an Indoor Flight Room. There is an Outdoor Flight Cage (the birds of the Outdoor Flight Cage move indoors between November 1 to April 30), as well as several outdoor exhibits that include birds with glorious names, such as the double-watted cassowary and the white-crested laughing thrush.
The O Line, or the Orangutan Transport System, was created by the National Zoo staff as a novel solution to a problem they had: They wanted to include the orangutans in the zoo's Think Tank exhibit, but they didn't have the space for all the animals there.
To solve the problem they created the O Line to let them travel back and forth from the Think Tank to their Great Ape House along suspended cables connected to 50-foot towers. The whole system is almost 500 feet in length and crosses the main pedestrian thoroughfare of Olmsted Walk twice. The best time to see the orangutans on the O Line is between 11 a.m. to 12:30 p.m. on warm days (see Figure 13.11).
The outdoor yards of The Great Ape House are a good place to photograph the apes because there is ample light, plenty of locations from which to work, and the apes are often frolicking about in the area. You have to shoot through some thick glass — look for areas where you can put your lens directly against the glass so that you can minimize distortion and reflection.
Also, try to keep your camera pointed straight through the glass. Doing so helps to reduce the amount of glass you are shooting through as well as keep reflections on the glass out of your photos. Also, you'll most likely have to use software after you shoot to deal with the contrast and white balance, because the glass can alter both a fair amount.
Tip
It may seem counterintuitive, but keeping the glass, wire fences, and other distracting objects as close to the lens as possible reduces the impact these items have on your photos.

The lions and tigers are always a zoo favorite, but there's one small catch: They are strong, agile, and fast. To keep this from being a liability, it's necessary for the zoo to keep the edge of their habitats a good distance away from the viewing area. That means it's a bit tougher to photograph them because of the sheer distance involved (see Figure 13.12).

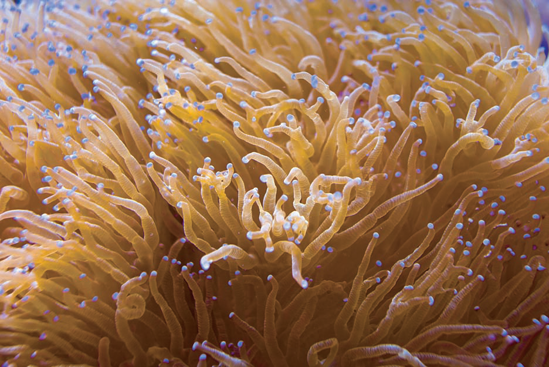
If there is a group of animals that need a good public relations kick, the invertebrates are it. Perhaps it's because of their rather broad classification based on the fact that they don't have a vertebral column. It could be because some are downright scary (think tarantulas and scorpions), or that we consider them routine food (American lobsters and crayfish) or pests (ants and roaches).
However, invertebrates make up more than 90 percent of all known living species and are essential to the existence of life as we know it on our planet, yet they just don't seem to garner the attention at the zoo like the elephants or lions. But what they lack in cuteness, they make up for in extreme color, wild looks, and complete accessibility at the zoo (see Figure 13.13). This is also a good area for standard photography equipment — big telephoto lenses aren't necessary here.
Although it doesn't have an exotic sounding name, the Small Mammal House is a worthwhile exhibit to visit for a good photographic challenge. The exhibit is indoors, so there's limited natural light, but the access you have to a variety of animals outweighs that. All the animals here are not too small yet not too big — as the National Zoo Web site says, they are all "no bigger than a breadbox."
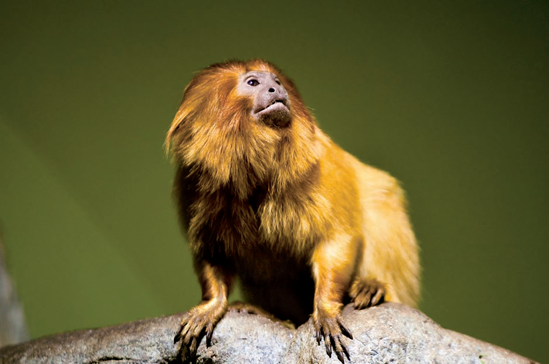
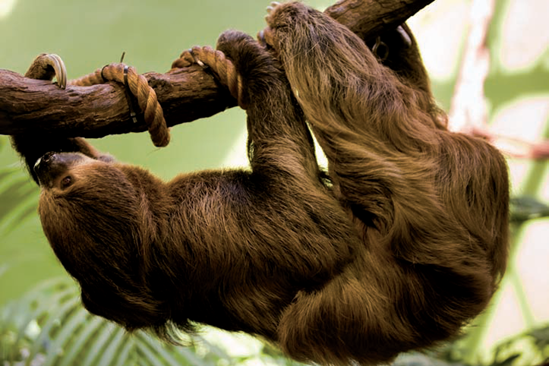
You can find an array of wild-looking creatures most people rarely see, including the endangered golden lion tamarins (see Figure 13.14), two-toed sloths (see Figure 13.15), shrews, and porcupines.
Tip
Check out the zoo's Web site at http://nationalzoo.si.edu to plan your trip.
Good photographs from the National Zoo are a result of understanding the various areas to shoot in and how well your gear will work with them.
Big lenses are a fairly common sight at the zoo, but many great shots can be made with more common gear as well.
For many outdoor exhibits, you need a telephoto lens of at least 200mm. For large, fast animals, such as cheetahs, lions and tigers, focal lengths of 300, 400, and 600mm are necessary to get in close (see Figure 13.16), which is probably the hallmark of good zoo photography: The closer you are, the better the photos.
Another option is to compose your photos to include the habitat of the animal, which means that you don't need as long of a lens because you can take photos that show more of the animal's environment. If you wait and keep at it, you can usually find a composition that doesn't include many man-made features and graces the animal well with shorter lenses.
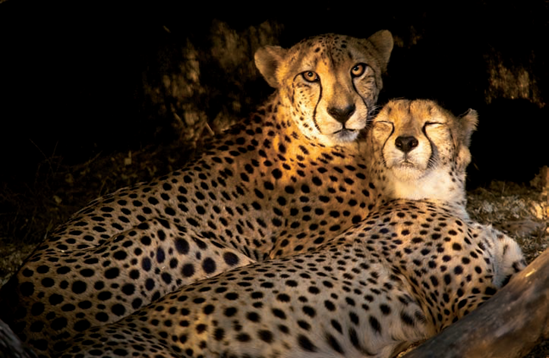
Figure 13.17. Two of the National Zoo's cheetahs in the late afternoon (see A on the map). Taken at ISO 1600, f/4, 1/160 second with a 360mm lens.
If you have a good quality, fast telephoto lens (such as a 70–200mm zoom), adding a 1.4X teleconverter is one option for longer focal lengths. Using this lens reduces the light entering your camera by 1.4X as well as increases its focal length by the same amount. For example, if you have a 70–200mm f/2.8 lens, it will turn into a 98–280mm f/4 lens with a 1.4X teleconverter.
Another option is to borrow, rent, or purchase a long lens such as a 100–400mm f/4 – 5.6 zoom, or if you want to lug one around, a professional prime lens of anywhere from 300mm on up. These are big and heavy lenses, though, and are wickedly expensive. However, you can rent them from local camera stores in the D.C. area or from online rental houses.
dSLRs that have a 1.3X or 1.6X crop factor are at an advantage here. Whereas a full-frame dSLR needs a 600mm lens for certain shots, a 1.6X crop camera requires a 375mm lens for the same shot. Be sure you consider your camera's crop factor before making a choice of what lens to bring. Of course, having too long of a lens is often not a problem at the zoo.
However, having a long telephoto lens isn't a requirement at all. Plenty of photos in this chapter were taken with wide to normal focal length lenses (those between 16–200mm, which are more common lens focal lengths), as demonstrated by Figure 13.17. Take some time to figure out what exhibits will work best with the gear you have.
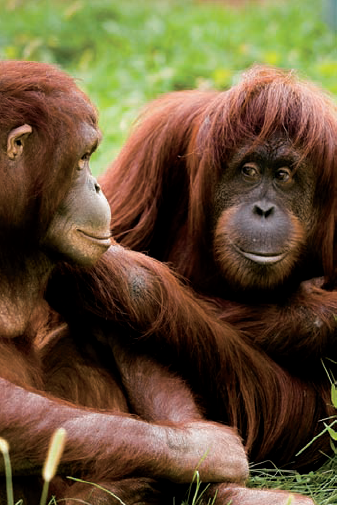
Figure 13.18. Orangutans at the Great Ape House of the National Zoo (see F on the map). Taken at ISO 640, f/5, 1/250 with a 150mm lens.
Because the light may often be lower than what is optimal and many exhibits require using longer lenses, stabilize your camera on railings or fences that often surround the exhibits. Doing so helps you avoid camera-shake motion blur, which is especially important with longer focal length lenses that are much harder to hold completely steady.
One consideration to keep in mind as well is that new generations of cameras are coming out that have incredibly high ISO values — reaching over 100,000. Although the shallow depth of field of a large aperture value is nice, being able to use an f/4 lens instead of a much bigger and heavier f/2.8 lens will likely be an option in the not-too-distant future thanks to the greater sensitivity of these new cameras.
Lens filters at the zoo aren't extraordinarily necessary and, in fact, may actually pose more problems than they are worth. Anything placed over your lens reduces the amount of light entering it, and more often than not at the zoo you need all the light you can get. You can always add software-based graduated filters after the fact to control some of the light better. In general, you want to concentrate more on the animals than on messing around with filters.
A monopod is a good choice over a tripod for supporting your camera. Monopods are much lighter, easier to maneuver, and are less prone to being tripped on by small kids.
Next, wear dark clothing. Why? By doing so, you reflect less in the glass of the various exhibits. You can also bring a black shirt or cloth with you to hold against the glass to reduce reflections in the area you are pointing your lens through. If you have a friend coming along, have him wear dark clothing, too, so he can block the light that is reflecting on the glass just by standing near you.
Finally, be sure to have your lens hood with you. These control excess light from entering the camera's lens and bouncing all around, which reduces image quality. A lens hood also helps to block extraneous light from hitting the glass you are shooting through. You can also use a hood to hold your lens directly against the glass or a wire fence without worrying about damaging it.
When shooting at the zoo, anticipation of an animal's movements is the first requirement. The next is to have your camera ready for the action. If you see an animal sitting in a nice spot (see Figure 13.18), go ahead and focus on it and set your camera to what you'll want to capture before anything happens.
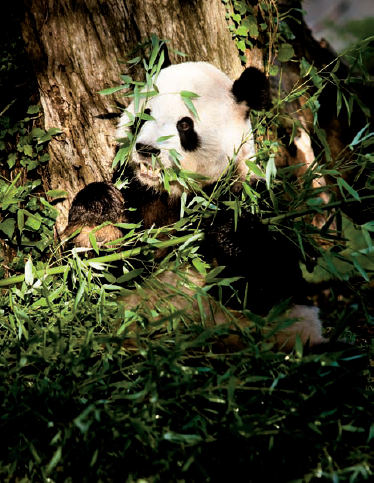
Figure 13.19. Tian Tian devours some bamboo in the morning at the National Zoo's Fuji Film Giant Panda Habitat (see C on the map). Taken at ISO 800, f/4, 1/250 second with a 360mm lens.
If you're using a full auto mode, take a few test pictures to see how your camera is handling the exposure. Sometimes areas of extreme contrast will confuse your camera — if the picture looks too dark or light, try composing the shot so that very dark or very light areas aren't in the frame. If you're comfortable using a priority mode, a good idea is to use Aperture Priority mode and set a smaller aperture value, such as f/4 or f/5.6 to blur out the background and make sure that the ISO you have chosen is allowing your camera to give you a relatively fast shutter speed of between 1/500 and 1/1000 seconds.
Tip
If your camera doesn't allow you to set the aperture, take a look at the manual. It often states which automatic modes use a smaller depth of field: Portrait mode often does this, but you also want to make sure it doesn't do something else also, like turn on the flash. It's a good idea to get accustomed to what each creative mode will do.
After you have your camera ready, work on composition ideas before the animal does anything. Go ahead and frame it up and see what you like. Look around to see if you can tell where the animal will go next. Many animals follow patterns of behavior repeatedly and will have a well-worn path in the dirt or grass. The goal is to have the camera ready and have a photo in mind and mostly composed. When the animal begins eating or looks right at you, you'll be ready. When the moment strikes, be sure to take many photos (see Figure 13.19); the animal may not repeat that behavior for the rest of the day.
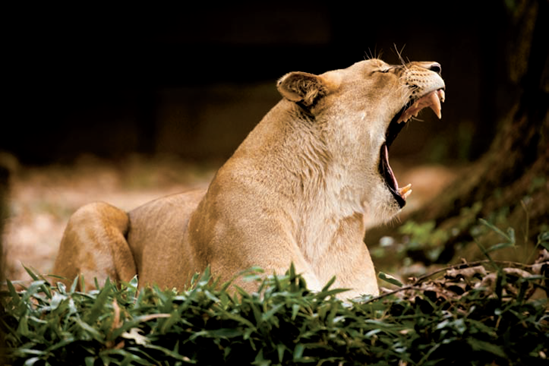
Figure 13.20. A lioness has a late morning yawn (see G on the map). Taken at ISO 800, f/4, 1/400 second with a 600mm lens.
As you go on shooting the same scene, you can be more creative with composition and framing. Try taking some images both horizontally and vertically. You basically want to "sketch" with your camera and experiment. It doesn't matter if your original idea for the composition didn't pan out. The point is that you were ready for something and that you had some ideas already hatched about what you wanted. Try to get the odds on your side — this is my best advice for zoo photography. That means having your camera ready, knowing where the nice light is relative to the animal you're shooting, figuring out a little of its behavior patterns, and thinking about your composition beforehand.
When photographing at the zoo, concentrate on avoiding anything man-made in your photos, like bars, cables, boxes, lights, and so on. Your photos can be greatly improved by showing the animals in as much of their natural environment as possible.
A lot of animals at the zoo, especially those that live outdoors, are most active in the morning and then again late in the day (see Figure 13.20), which means photographs that are more dynamic and more easily attainable. The light is typically more interesting earlier and later in the day as well, but it can also be a bit harder to work with since it will be less bright and many areas will only be partially lit. That said, there's plenty to see at all hours here, so it really depends on what you are most interested in seeing.
Interesting weather at the zoo can add some difficulty because there may be less light, but it can also greatly enhance your experience. Snowy days are excellent for the pandas and many other animals that are used to such conditions. Luckily, during the zoo's open hours, several indoor places are available in which to take refuge if it's raining too much or too cold to stay outside for a long time.