
Chapter 4. Quick Fix Edits
In This Chapter
As you’ll discover in the rest of the book, Photoshop Elements is a sophisticated image editor, enabling anyone to make photo corrections that would have been absurdly difficult years ago. But sometimes you don’t want to be an image expert. Let the computer do the work for you, analyzing photos and correcting them automatically.
When you don’t want to mess with the particulars, or when you know that a photo needs just a bit of tweaking but you want a bit more control over the adjustments, turn to the Quick Fix features. You can experiment on your photo—ranging from slight tonal changes to radical tints and lighting adjustments—and then undo those changes if they seemed better in your mind’s eye than they look on the screen.
The concepts behind the tools in Quick Fix, such as adjusting levels and sharpening, are dealt with later in the book. Use this chapter as a jumping-off point.
Making Quick Fix Edits
When you want Elements to take over and make corrections according to its analysis of a photo, the speediest method is directly in the Quick Edit pane.
Using the Quick Fix editor
Quick Fix is a component of the Editor workspace and gives you a bit more control than the buttons in the Fix pane.
To edit photos in Quick Fix:
Open a file in Elements and then click the Quick option in the Edit pane. The Quick Fix workspace opens ![]() .
.
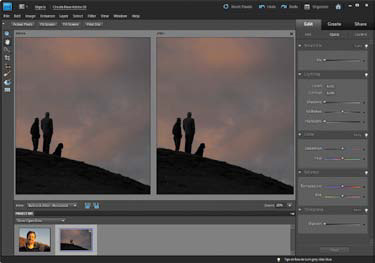
![]() The Quick Fix workspace includes your image and a set of common photo manipulations.
The Quick Fix workspace includes your image and a set of common photo manipulations.
To set view options:
• From the View menu located below the photo, choose whether you want to see the end result (After Only), the original (Before Only), or a comparison layout (both the Before and After options) ![]() .
.
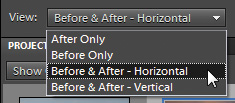
![]() The Before and After options offer split-screen views of how fixes are affecting the photo.
The Before and After options offer split-screen views of how fixes are affecting the photo.
• Use the Zoom field and slider to specify how zoomed-in you want to be ![]() . In the Before and After views, the zoom level applies to both versions.
. In the Before and After views, the zoom level applies to both versions.
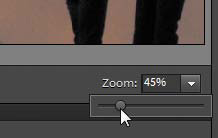
![]() Use the Zoom field or slider to view the photo close-up.
Use the Zoom field or slider to view the photo close-up.
When the Zoom or Hand tool is active, you can also click the Actual Pixels, Fit Screen, or Print Size buttons in the options bar to switch to those zoom levels.
• If Elements did not rotate your image correctly during import, click the Rotate buttons to turn it clockwise or counterclockwise in 90-degree increments.
Walk Through Adjustments Using Guided Edit Mode
If you want to start with a little more hand-holding than what’s offered by Quick Fix, try the Guided Edit mode; access it by choosing Guided in the Edit pane.
Clicking a task in this mode provides step-by-step instruction on performing common editing tasks ![]() .
.
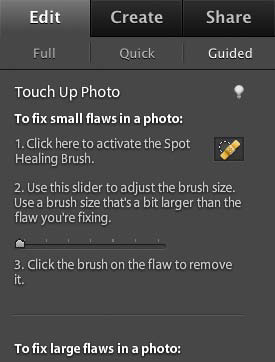
![]() The Guided Edit interface.
The Guided Edit interface.
When you’ve accomplished each step, click the Done button to apply the changes, or click Cancel to discard them. You can also click the Reset button that appears in each category to go back to the state before you applied those particular edits if you want to try a different setting.
Some Guided Edit options include:
• Basic adjustments such as Brightness and Contrast and Enhance Colors.
• The Guide for Editing a Photo, which walks you through all of the edit steps.
• Photomerge tools such as Scene Cleaner and Style Match (see Chapter 6 for more information).
• Photographic effects such as Old Fashioned Photo and Line Drawing.
• Fun Edits such as adding a reflection or making part of the photo pop out from the rest of the image ![]() .
.
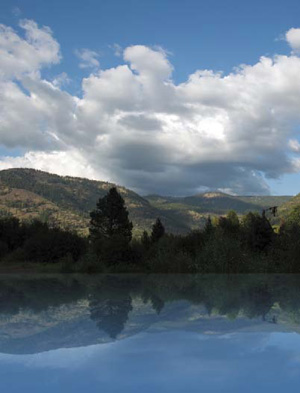
![]() The Reflection guided edit created a lake where one didn’t exist before.
The Reflection guided edit created a lake where one didn’t exist before.
Applying Quick Fixes
The following tools perform common image correction tasks, but we want to start with the most important command first: Reset.
To reset and undo changes:
• After making an adjustment using the tools described in this chapter, click the Cancel button that appears in the tool’s title bar ![]() .
.
![]() Clicking the Cancel button restores the image to the state before you made the adjustment(s).
Clicking the Cancel button restores the image to the state before you made the adjustment(s).
• Choose Undo from the Edit menu to undo the previous command.
• If you’ve made several edits and want to revert to the original image, click the Reset button. This removes any Quick Fix adjustments.
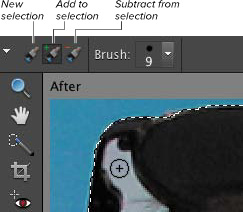
To select areas for applying edits:
- Select the Quick Selection tool from the toolbar.
- Draw within an area that you want to select. Elements makes a selection based on the colors of the pixels you drew upon
 .
.
 Drawing with the Quick Selection tool creates a selection based on that area.
To apply lighting, color, and sharpening fixes:
- To apply fixes to a specific area of the image, use the Quick Selection tool to select an active area. Otherwise, skip to the next step.
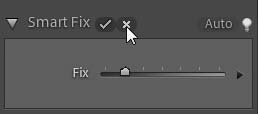
- Click the Auto button for one or more fixes in the Smart Fix, Lighting, Color, or Sharpness panels.
- Drag the sliders for specific adjustments (such as Shadows) to fine-tune the settings
 .
.
 Use the sliders associated with each type of fix to adjust the After image.
 - Click the Commit button (the check mark) to apply the fixes.
To apply fixes using previews:
- Click the triangle icon to the right of an adjustment slider to reveal thumbnails of the range of that fix’s settings.
- Move your pointer over a thumbnail to preview the edit
 .
.
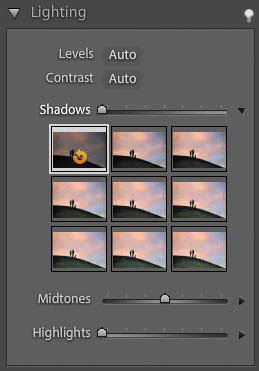 The preview grid gives you an immediate sense of how the adjustment will appear.
The slider is still available for fine-tuning, but there’s a better way. Click and drag left or right within the thumbnail to make smaller adjustments.
- Click the thumbnail to apply the setting.
To crop the image:
- Select the Crop tool from the toolbar.
- In the image’s After version, drag to select the area you wish to keep
 .
.
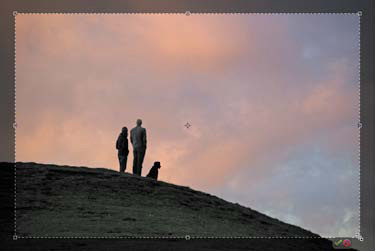 Drag a selection using the Crop tool to keep only that area and discard the rest of the image.
 - Click the Commit button (the check mark) that appears outside the selection to apply the crop.
To remove red eye:
In the General Fixes area, click the Auto button next to Red Eye Fix.
Or
- Select the Red Eye Removal tool from the toolbar.
- In the After version, drag a selection around the red-eye area. The fix applies when you release the mouse button.
To apply all edits:
- Choose File > Close, or click the close button in the upper-right corner of the workspace.
- When prompted, save your changes.
Tip
It never hurts to play with the Smart Fix slider. Smart Fix adjusts lighting, color, and sharpening based on its algorithms. In some cases, this may be the only edit you need.
Making Touch Up Edits
A few tools in the Quick Fix editor are designed to easily fix some specific situations. In the Quick pane, note the addition of four tools in the Tools panel: Red Eye Removal Tool, Whiten Teeth, Make Dull Skies Blue, and Black and White–High Contrast ![]() .
.
![]()
![]() Touch Up tools.
Touch Up tools.
Unlike the other Quick Fix edits, which apply their adjustments to the entire image or to an area that you first specify using the Quick Selection tool, these Touch Up tools perform the selection and apply the edit in one step.
To make a Touch Up edit:
- With a photo active in the Editor, click one of the Touch Up tool icons to select it.
- Click and drag to define the area to be edited; for example, with the Make Dull Skies Blue tool active, drag in the sky area.
Elements makes a selection and applies the effect
 .
. The Make Dull Skies Blue applies a blue gradient to the selected area.
 - Adjust the affected area using the selection tools
 .
.
 Use the selection tools to refine where the effect is applied.
Tip
You can apply multiple Touch Up tool edits to the same image. When you click an icon, any adjustment you’ve already made is highlighted for further editing.
Tip
The Touch Up tools are actually simplified versions of edits that the Smart Brush makes. You can apply one and then edit it further in the Full Edit mode later. See Chapter 6 for more information.
Run Automated Actions with the Guided Edit Action Player
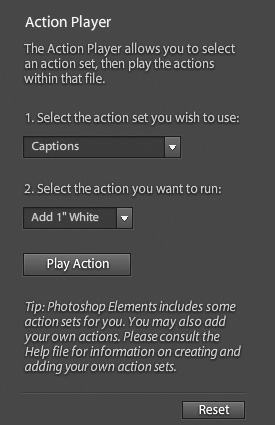
The Action Player is a feature found in the Guided Edit pane for applying preset effects such as creating captions or applying combination edits like changing a photo’s colors to sepia and adding grain to the image. In the Guided Edit pane, click Action Player under Automated Actions to reveal a set of automated effects that ship with Elements ![]() . Choose a set, pick a specific action, and then click the Play Action button.
. Choose a set, pick a specific action, and then click the Play Action button.
![]() The Action Player can run automated combinations of adjustments.
The Action Player can run automated combinations of adjustments.
That’s not the whole story, though. The Action Player can run any action created in Photoshop CS. So, for example, if a friend of yours uses Photoshop extensively and has created an action that resizes an image and adds a border and photo credit, you could run that action in Elements instead of performing each step. (Elements can currently only run actions, not create them.)
Adding a new action isn’t straightforward, however. Here’s how to do it:
Take a Photoshop action file—it ends in the extension .atn—and place it in the following directory on your hard disk (each slash represents a folder; you may need to specify that hidden folders are visible by opening a Windows Explorer window and choosing Filder and search options from the Organize menu):
ProgramDataAdobePhotoshop Elements9.0Localeen_usWorkflow Panelsactions
Relaunch Elements, go to the Guided Edit pane of the Editor, and you’ll see the action set appear in the first drop-down menu.