
![]()
Spring Boot and WebSocket
Although they are not yet part of the certification exam, Spring Boot and Spring WebSocket are included in this book because of the potential that these two projects have in the future development of Spring Web applications.
What Is Spring Boot?
Spring Boot is a promising Spring project that makes it really easy for developers to create Spring-powered, production-grade applications and services. It makes configuration less of a hassle, offering complete, but easy-to-use defaults bits and pieces that you can stack up together like LEGO bricks. (Yes, the LEGO analogy again.) Spring Boot can be used to create stand-alone Java applications or web applications and its primary goals are to do the following:
- Provide a faster, practical, and more accessible way to start development with Spring
- Provide a default set of customized infrastructure beans, which can be easily overridden if a specific configuration is required
- Provide a large set of features common to large classes of projects (embedded servers, security, metrics, etc.)
- Offer the option of dropping any XML configuration or the necessity of generating code
When developing web applications, a container is necessary. Usually, an application server or a web server is necessary to run a web application.
A web server like Apache HTTP, for example, is dedicated to sending HTML to the client and forwarding requests to application servers. It handles only static resources.
An application server, like Apache Tomcat is built around a web server and is dedicated to the efficient execution of program and routines; it supports different types of applications, load balancing, transaction demarcation, and so forth; and it is specifically designed to handle dynamic resources.
Apache TomEE is a full-blown Java EE container and an application server based on Apache Tomcat. This type of application server is also called an enterprise server because it is designed to support complex applications like ERPs.1
The Jetty server was used in the examples in this book. Jetty is an embedded server. Application/web servers are separate applications that you install, start up, maybe customize the configuration, and deploy your artifact on. An embedded server does not need all that. An embedded HTTP server is software that implements the HTTP protocol; it can be embedded into the application that you are developing. It is limited to handling HTTP requests and can be plugged in with the default configuration, or it can be customized. Up until now, the Jetty embedded server was plugged in at runtime by using the Gradle Gretty plugin. Using Spring Boot, this is no longer needed. All that is needed is to configure the spring-boot-starter-jetty as a compile-time dependency for the application.
Usage and Configuration
A simple sample for this case is the 08-chapter-01-solution project, a module of book-code. If you open the project, you will notice the following:
- A new version element was added in the ext element of the Gradle configuration of the build.gradle file (the book-code parent project):
springBootVersion = '1.2.7.RELEASE'
- In the same file, a new dependencies array named boot was added:
boot = [
   springBootPlugin: "org.springframework.boot:spring-boot-gradle-plugin:
                                                  $springBootVersion",
   starterWeb      : "org.springframework.boot:spring-boot-starter-web:
                                                  $springBootVersion",
   starterJetty    : "org.springframework.boot:spring-boot-starter-jetty:
                                                  $springBootVersion",
   actuator         : "org.springframework.boot:spring-boot-starter-actuator:
                                                  $springBootVersion",
   yaml             : "org.yaml:snakeyaml:1.16"
]
- The Gradle configuration file for 08-chapter-01-solution has the following contents:
apply plugin: 'spring-boot'

buildscript {
    repositories {
        mavenCentral()
    }
    dependencies {
        classpath boot.springBootPlugin
    }
}

dependencies {
    compile (boot.starterWeb){
        (*)exclude module : "spring-boot-starter-tomcat"
    }
    compile boot.starterJetty, boot.actuator, boot.yaml

    testCompile misc.junit
}
And this is all. The Gradle Gretty plugin, was replaced by the Spring-Boot plugin that is needed for running Spring Boot applications. The default web runtime that Spring Boot uses (Tomcat) was excluded, and spring-boot-starter-jetty was added as a dependency using the variable assigned to the boot.starterJetty library. This is enough to develop and run a simple web application.
![]() ! The spring-boot-starter-actuator added using the boot.actuator variable is not really necessary in the examples for the book, but you need to know that this library exists. It should be used when you want to add production-ready features like metrics and monitoring to your application. Also, if you look in the log after the application starts, you will see a few lines that look like this:
! The spring-boot-starter-actuator added using the boot.actuator variable is not really necessary in the examples for the book, but you need to know that this library exists. It should be used when you want to add production-ready features like metrics and monitoring to your application. Also, if you look in the log after the application starts, you will see a few lines that look like this:
Mapped "{[/]}" onto public java.lang.String com.book.web.
       HelloWorldController.index()
Mapped "{[/error],produces=[text/html]}" onto public o.s.web.servlet.
       ModelAndView
Mapped "{[/beans],methods=[GET]}" onto public java.lang.Object
Mapped "{[/trace],methods=[GET]}" onto public java.lang.Object
Mapped "{[/metrics/{name:.*}],methods=[GET]}" onto public java.lang.Object
o.s.boot.actuate.endpoint.mvc.MetricsMvcEndpoint.value(java.lang.String)
apped "{[/health]}" onto public java.lang.Object
o.s.boot.actuate.endpoint.mvc.HealthMvcEndpoin
     t.invoke(java.security.Principal)
These are a set of RESTful endpoints added to the application to provide access to management services provided by Spring Boot. Try accessing http://localhost:8080/metrics or http://localhost:8080/health after the application starts with the default configuration (otherwise, the port and the contextPath might be different) and check out the data returned to you by Spring Boot.
The YAML dependency is covered later.
The core class of this application is the com.book.Application class:
[commandchars=+
package com.book;

import org.springframework.boot.SpringApplication;
import org.springframework.boot.autoconfigure.SpringBootApplication;
import org.springframework.context.ApplicationContext;

@SpringBootApplication
public class Application {

    public static void main(String args) {
        ApplicationContext ctx = SpringApplication.run(Application.class, args);
        assert(ctx!=null);
    }

}
If you run this class, you get a web application run on Jetty that is available at http://localhost:8080/. The most important element in this class is the @SpringBootApplication annotation. Spring Boot code is available to the public, and if you look for the annotation code on GitHub, this is what you will find:
package org.springframework.boot.autoconfigure;

...// import statements

@Target(ElementType.TYPE)
@Retention(RetentionPolicy.RUNTIME)
@Documented
@Inherited
@Configuration
@EnableAutoConfiguration
@ComponentScan
public @interface SpringBootApplication {
        /**
         * Exclude specific auto-configuration classes
           such that they will never be applied.
         * @return the classes to exclude
         */
         Class<?> exclude() default {};

}
When placed on a class, this annotation has the following effect:
- It indicates that this a configuration class that can be used to instantiate beans via @Bean annotated methods (because this annotation is itself annotated with @Configuration).
- It triggers component scanning on the package in which the class is defined (because of the @ComponentScan annotation).
- It automatically adds @EnableWebMvc when spring-webmvc is in the classpath. This is ensured by the spring-boot-starter-web being a dependency of this project. This marks the application as a web application, so Spring Boot knows to set up a DispatcherServlet.
- The @EnableAutoConfiguration annotation does exactly what the name of the annotation says: it enables the autoconfiguration of a Spring context. So Spring Boot wraps up a configuration by basically guessing which beans are necessary, given the little configuration there is. Autoconfiguration is quite intelligent and if some custom configuration is provided, the provided beans override the default ones that Spring Boot comes with.
The scope of this annotation is enriched, starting with Spring Boot 1.3.0, which wasn’t yet released when this book was written, but the code is available on GitHub.2
The preceding main method uses the SpringApplication.run convenient method to launch an application. Thus, no XML was needed anywhere to create this web application. This method returns the created ApplicationContext instance. The created context is autowired into the HelloWorldController, which is a simple REST controller used to display all the beans in the context. In the spirit of keeping things simple, a complex configuration involving a view resolver was avoided, because the scope of this module is to show the power of Spring Boot and what exactly it does in the background. The autowired context is used to create an HTML string that is rendered when accessing http://localhost:8080/ and shows the name of all the beans created by Spring Boot or defined in the application; thus, you can analyze what Spring Boot is doing in the background. The simple controller looks like this:
@RestController
public class HelloWorldController {
    @Autowired
    ApplicationContext ctx;

    @RequestMapping("/")
    public String index() {
        StringBuilder sb = new StringBuilder("<html><body>");

        sb.append("Hello there dear developer,
           here are the beans you were looking for: </br>");

        String beanNames = ctx.getBeanDefinitionNames();
        Arrays.sort(beanNames);
        for (String beanName : beanNames) {
            sb.append("</br>").append(beanName);
        }
        sb.append("</body></htm>");
        return sb.toString();
    }
}
This is roughly what you see in the browser:
Hello there dear developer, here are the beans you were looking for:

actuatorMetricRepository
application
applicationContextIdFilter
auditEventRepository
auditListener
autoConfigurationAuditEndpoint
basicErrorController
beanNameHandlerMapping
beanNameViewResolver
beansEndpoint
characterEncodingFilter
configurationPropertiesReportEndpoint
counterService
...
healthEndpoint
healthMvcEndpoint
helloWorldController
...
Of course, the list is incomplete here—just a small snippet is depicted. You have to run the application yourself to see the complete list.
![]() ! And you can view the same list of beans in JSON format if you access the actuator service available at http://localhost:8080/beans.
! And you can view the same list of beans in JSON format if you access the actuator service available at http://localhost:8080/beans.
Also, if you want to know where the implementation for these beans comes from, just look at the dependencies for your project in Gradle view in Intellij IDEA. You should see something similar to what is depicted in Figure 8-1, but the list will be way bigger.

Figure 8-1. Transitive dependencies added by Spring Boot to a web application project
So far, only the default configuration inferred by Spring Boot has been presented. This application is roughly similar to the one in the official tutorial at https://spring.io/guides/gs/spring-boot/; but in this book, things are spiced up a little.
Customizing Spring Boot
There are a few ways that Spring Boot configuration can be externalized”
- use properties files
- use YAML files
- use environment variables
- use command-line variables (when a Spring Boot command-line interface is installed)
In the previous example, the controller and the configuration class were in the same package, and by default, the configuration class annotated with SpringBootApplication scans only the current package and its subpackages. This can be changed by annotating the same class with @ComponentScan and specifying different package groups.
In the 08-chapter-02-solution module, the Application was moved to the com.book.init package, and HelloWorldController was moved to com.book.web, as depicted in Figure 8-2.

Figure 8-2. Spring Boot with beans and configuration in different packages
The new configuration class code looks like this:
package com.book.init;

import org.springframework.boot.SpringApplication;
import org.springframework.boot.autoconfigure.SpringBootApplication;
import org.springframework.context.ApplicationContext;
import org.springframework.context.annotation.ComponentScan;
import org.springframework.context.annotation.Import;

@SpringBootApplication
@ComponentScan(basePackages = {"com.book.*"})
//or @ComponentScan(basePackages = {"com.book.init", "com.book.web"})
public class Application {

    public static void main(String args) {
       SpringApplication.run(Application.class, args);
    }
}
But what if you want the application to be available on a different port and in a different context path? There are a few ways to do this.
The simplest way is to create a customized bean class that implements the org.springframework.boot.context.embedded.EmbeddedServletContainerCustomizer interface and provides a concrete implementation for the customize method:
package com.book.init;

import org.springframework.boot.context.embedded.ConfigurableEmbeddedServletContainer;
import org.springframework.boot.context.embedded.EmbeddedServletContainerCustomizer;
import org.springframework.stereotype.Component;

/**
 * Created by iuliana.cosmina on 9/23/15.
 */
@Component
public class CustomizationBean implements EmbeddedServletContainerCustomizer {
    @Override
    public void customize(ConfigurableEmbeddedServletContainer container) {
        container.setPort(8083);
        container.setContextPath("/boot");
    }
}
By adding this bean to the configuration, the application can now be accessed at http://localhost:8083/boot.
Another way to do this is by using a customized factory bean for JettyEmbeddedServletContainerFactory. Aside from port and contextPath, some settings for the optimization of the embedded Jetty server used to run the application can be provided. The @Bean annotated method that declares this bean can be added to any configuration class that is taken into consideration by Spring Boot.
package com.book.init;

import org.eclipse.jetty.server.Server;
import org.eclipse.jetty.util.thread.QueuedThreadPool;
import org.springframework.beans.factory.annotation.Value;
import org.springframework.boot.context.embedded.jetty.
         JettyEmbeddedServletContainerFactory;
import org.springframework.boot.context.embedded.jetty.
        JettyServerCustomizer;
import org.springframework.context.annotation.Bean;
import org.springframework.context.annotation.Configuration;

/**
 * Created by iuliana.cosmina on 9/27/15.
 */
@Configuration
public class JettyFactoryConfig {

@Bean
 public JettyEmbeddedServletContainerFactory
    jettyServletContainerFactory(@Value("${server.port:8085}") final String port,
        @Value("${jetty.threadPool.maxThreads:200}") final String maxThreads,
        @Value("${jetty.threadPool.minThreads:8}") final String minThreads,
        @Value("${jetty.threadPool.idleTimeout:60000}") final String idleTimeout) {
        final JettyEmbeddedServletContainerFactory factory =
           new JettyEmbeddedServletContainerFactory(Integer.valueOf(port));
        factory.setContextPath("/boot");
        factory.addServerCustomizers(new JettyServerCustomizer() {
            @Override
            public void customize(final Server server) {
                // Customize the connection pool used by Jetty to handle
                //incoming HTTP connections
                final QueuedThreadPool threadPool =
                     server.getBean(QueuedThreadPool.class);
                threadPool.setMaxThreads(Integer.valueOf(maxThreads));
                threadPool.setMinThreads(Integer.valueOf(minThreads));
                threadPool.setIdleTimeout(Integer.valueOf(idleTimeout));
            }
        });
        return factory;
    }
}
By adding this bean to the configuration, the application can now be accessed at http://localhost:8085/boot.
Values for the customizations can be provided, directly as done before, but they also can be provided using properties files or YAML files. In order to provide the configuration via a properties file, a file named application.properties has to be created and applied to the application from the outside, or it can be packaged in the jar. If multiple profiles are used, multiple files can be added. Their naming matches the application-{profile}.properties template.
SpringApplication looks for an application.properties file in the following locations, and adds them to the Spring environment:
- a /config directory under the current directory
- the current directory
- a classpath /config package
- the classpath root
Being a resource file, application.properties must be located during development under src/main/resources.
The preceding list is ordered by precedence, so Spring Boot looks for property files by traversing the list from top to bottom. The first properties file found is taken into consideration, and it does not matter if the subsequent locations have a properties file defined.
The default name of the properties file is application.properties. Spring Boot looks for it, unless it was changed by setting the environment variable named spring.config.name.
The location of the file can also be provided as the value for the environment variable named spring.config.location.
So if the 08-chapter-02-solution application is packaged into a runnable jar called boot.jar, the application could be run from the command line with the following arguments:
#Spring Boot will search in the classpath for a file named boot.properties
$ java -jar boot.jar --spring.config.name=boot

#Spring Boot will read the properties the specified file
$ java -jar boot.jar --spring.config.location=/Users/myuser/config/default.properties
In the preceding example, the file is saved under book-code/08-chapter-02-solution/src/main/resources and has the following contents:
#application.properties
app.port=8084
app.context=/boot
These property values are injected using the @Value annotation into a customization bean that is picked up and used by Spring Boot. The application is then accessed at http://localhost:8084/boot.
package com.book.init;

import org.springframework.beans.factory.annotation.Value;
import org.springframework.boot.context.embedded.ConfigurableEmbeddedServletContainer;
import org.springframework.boot.context.embedded.EmbeddedServletContainerCustomizer;
import org.springframework.stereotype.Component;

@Component
public class PropertiesConfBean implements EmbeddedServletContainerCustomizer {

    @Value("${app.port}")
    private Integer value;

    @Value("${app.context}")
    private String contextPath;

    @Override
    public void customize(ConfigurableEmbeddedServletContainer container) {
        container.setPort(value);
        container.setContextPath(contextPath);
    }
}
The EmbeddedServletContainerCustomizer interface is used for customizing autoconfigured embedded servlet containers. Any beans of this type are instantiated and used to initialize the configuration of the embedded server before the container itself is started.
Without an EmbeddedServletContainerCustomizer bean, the contents of application.properties look different, because they must match the standard property names3 that Spring Boot looks for, as follows:
#application.properties
server.port=8084
server.context-path=/boot
When the snakeyaml library is in the classpath, YAML files can be used instead of properties files. YAML is a well-known format within the Ruby community. It is a superset of JSON, and as such, it is a very convenient format for specifying hierarchical configuration data. In the previous example, if the application.properties file is replaced by application.yml, with the following contents, the behavior will be exactly the same, because the internal org.springframework.beans.factory.config.YamlPropertiesFactoryBean converts the contents of the YAML file into the properties in the initial application.properties file.
#application.yml
app:
  port:8082
  context:/boot
![]() ! Both application.properties and application.yml can be used in the same project, because for bigger projects, the configuration list could be quite large and migration could be a long duration process; it is convenient to be able to do the migration gradually. Be careful not to have the same properties defined in both files, because if this happens, properties defined in application.properties take precedence.
! Both application.properties and application.yml can be used in the same project, because for bigger projects, the configuration list could be quite large and migration could be a long duration process; it is convenient to be able to do the migration gradually. Be careful not to have the same properties defined in both files, because if this happens, properties defined in application.properties take precedence.
YAML properties can be used in a different way. A class can be designed to have its fields initialized from a YAML file. The following AppSettings class is such a class.
package com.book.init;

import org.slf4j.Logger;
import org.slf4j.LoggerFactory;
import org.springframework.boot.context.properties.ConfigurationProperties;
import javax.annotation.PostConstruct;
import javax.validation.constraints.NotNull;
@ConfigurationProperties(prefix="app")
public class AppSettings {

    private static Logger logger = LoggerFactory.getLogger(AppSettings.class);

    @NotNull
    private Integer port;

    @NotNull
    private String context;

    public Integer getPort() {
        return port;
    }

    public void setPort(Integer port) {
        this.port = port;
    }

    public String getContext() {
        return context;
    }

    public void setContext(String context) {
        this.context = context;
    }

    public AppSettings() {
    }

    @PostConstruct
    public void check() {
        logger.info("Initialized {} {}", port, context);
    }
}
The annotation that allows this is @ConfigurationProperties, which marks a class to be used for initialization with property values by the Spring DataBinder utilities. The advantage here is that usage of the @Value annotation and hard-coding the property names is avoided. Validators can also be added on the fields (notice the @NotNull annotations).
The prefix attribute is used to refer to the parent element in the YAML file. This bean is then autowired into the YamlConfBean, which uses its properties as needed.
package com.book.init;

import org.springframework.beans.factory.annotation.Autowired;
import org.springframework.boot.context.embedded.ConfigurableEmbeddedServletContainer;
import org.springframework.boot.context.embedded.EmbeddedServletContainerCustomizer;
import org.springframework.stereotype.Component;

@Component
public class YamlConfBean implements EmbeddedServletContainerCustomizer {

    @Autowired
    private AppSettings appSettings;

    @Override
    public void customize(ConfigurableEmbeddedServletContainer container) {
        container.setPort(appSettings.getPort());
        container.setContextPath(appSettings.getContext());
    }
}
For Spring Boot to know to create and initialize a bean of type AppSettings, a modification must be made to the Application class. The @EnableConfigurationProperties (AppSettings.class) annotation must be added to the class definition at the same level as @SpringBootApplication. If the class name (AppSettings in this case) is not specified in the annotation, Spring Boot will scan, create, and initialize beans of all classes annotated with ConfigurationProperties.
package com.book.init;

import org.springframework.boot.SpringApplication;
import org.springframework.boot.autoconfigure.SpringBootApplication;
import org.springframework.boot.context.properties.EnableConfigurationProperties;
import org.springframework.context.annotation.ComponentScan;

@SpringBootApplication
@ComponentScan(basePackages = {"com.book.init", "com.book.web"})
@EnableConfigurationProperties(AppSettings.class)
public class Application {

    public static void main(String args) {
        SpringApplication.run(Application.class, args);
    }

}
When using Spring Boot, a Spring ASCII banner is printed in the console at application startup, like the one shown in Figure 8-3.

Figure 8-3. Spring Boot console banner
This too can be customized. The instructions can be found in the official documentation at http://docs.spring.io/spring-boot/docs/1.2.6.RELEASE/reference/htmlsingle/#boot-features-banner. A banner.txt file needs to be created under the resources directory; a text-to-ASCII generator should be used to create the desired banner. The one presented in module 08-chapter-03-solution is shown in Figure 8-4.
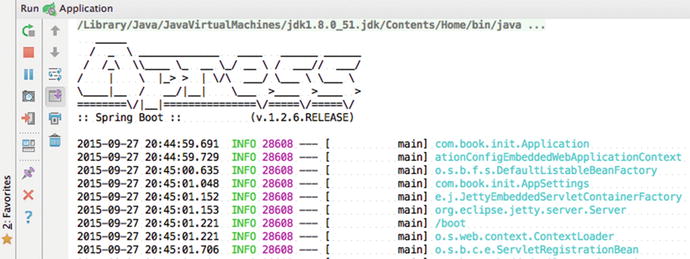
Figure 8-4. Apress Spring Boot console banner
Importing Additional Configuration Elements
If an application is migrated to Spring Boot, a lot of the configuration classes and even XML configuration elements can be imported into the Spring Boot configuration class. Additional configuration classes can be imported using the @Import annotation or by adding a @ComponentScan to the Spring Boot core initialization class (the one with the main method in it) and setting the basePackages attribute value with the package name where the class can be found, which ensures that Spring automatically picks up all Spring components, including @Configuration classes.
XML configuration can be imported using the @ImportResource annotation, as the Spring Boot initialization class is nothing more than a more complex @Configuration class.
If you are using a Unix system, you can also test the examples attached to the chapter using the curl command. Just open a console and execute:
curl localhost:8080/boot
#modify port or contextPath accordingly
In the console, you should see an output similar to what you see in the browser.
Running Spring Boot Applications
The main difference between using Spring Boot and developing web applications in the typical way is that when the Gradle spring-boot plugin is used, a web archive (*.war) is no longer created, because there is no need for it. The war file is strictly a deployable file that needs to be run using a web server or an application server. Spring Boot can be used to have an embedded server in the application. So when the Gradle spring-boot plugin is used instead of a war, an executable Java archive (*.jar) is created.
The created archive can be found under the [project_root]/build/libs and can be executed just like any jar. In the 08-chapter-03-solution.gradle configuration file, there is the line jar.archiveName = "boot.jar", which is used to specify the name of the final archive. Without it, the name of the resulting jar would be 08-chapter-03-solution.jar, which is long and unpractical.
To build the project, create the jar and then execute the application. The following lines can be executed in the console (shell or command prompt):
#this will work only if you have Gradle installed on the system
$ gradle clean build
$ java -jar build/libs/boot.jar
But what if we want the result to be a web archive that should be deployed on an application server or a web server? That can be done too, in three simple steps:
- Modify the application to provide a Servlet initializer for the servlet environment. This is done by making the class annotated with @SpringBootApplication to extend the Spring Boot convenient class org.springframework.boot.context.web.SpringBootServletInitializer and overriding its configure method:
@SpringBootApplication
@ComponentScan(basePackages = {"com.book.init", "com.book.web"})
@EnableConfigurationProperties(AppSettings.class)
public class Application extends SpringBootServletInitializer {

    @Override
    protected SpringApplicationBuilder
          configure(SpringApplicationBuilder application) {
        return application.sources(Application.class);
    }

    public static void main(String args) {
        SpringApplication.run(Application.class, args);
    }
} - Leave all the Spring Boot components as dependencies, but use the Gradle war plugin. (Basically, replace apply plugin: 'spring-boot' with apply plugin: 'war'.)
- Set the embedded server dependency as provided:
apply plugin: 'war'
war.archiveName = "boot.war"

buildscript {
    repositories {
        mavenCentral()
    }

    dependencies {
        classpath boot.springBootPlugin
    }
}

dependencies {

    compile (boot.starterWeb){
        exclude module : "spring-boot-starter-tomcat"
    }
    compile boot.actuator, boot.yaml
    providedCompile boot.starterJetty
    //previous 2 lines replaced:
    //compile boot.starterJetty, boot.actuator, boot.yaml

    testCompile misc.junit, misc.hamcrestCore,
        misc.hamcrestLib, boot.starterTest
}
After these changes, if the project is built under the build/libs directory, a boot.war should be created that can be deployed on any web or application server.
![]() ! Try to modify the configurations for the 08-chapter-03-solution to create a deployable war, as described before. You can use Jetty to run the war on by adding the Gretty plugin that was used in the examples for this book until Spring Boot was introduced, by adding
! Try to modify the configurations for the 08-chapter-03-solution to create a deployable war, as described before. You can use Jetty to run the war on by adding the Gretty plugin that was used in the examples for this book until Spring Boot was introduced, by adding
apply from:
  'https://raw.github.com/akhikhl/gretty/master/pluginScripts/gretty.plugin'
in the 08-chapter-03-solution.gradle file, and then running the appStart Gradle task.
When deploying the war to an application server or a web server, keep in mind that the relevant embedded server settings read from the application.yml file are ignored (because they are relevant only to Spring Boot) when a class annotated with @SpringBootApplication is used to run the application; so the application is available on the port and location that you set for that server. When using Gretty, the location that your application can be accessed is printed in the console log.
...
INFO Jetty 9.2.10.v20150310 started and listening on port 8080
INFO 08-chapter-03-solution runs at:
INFO   http://localhost:8080/08-chapter-03-solution
...
Testing Spring Boot Applications
Applications built with Spring Boot can be tested using unit tests. Spring Boot provides a library to do just that in the most practical manner possible. It is called spring-boot-starter-test. It must be added as a dependency of the project to use it.
As for common Spring Web applications, the servlet context must be mocked, and only the controller behavior is tested. The HelloWorldController is too simple to test, so a proper one is needed.
@RestController
public class MessageController {

    @Value("${app.message:Hello World}")
    private String message = "Hello World";

    @RequestMapping("/message")
    public String message(){
        return message;
    }
}
The default value for the message property is set to Hello World, if it is not present in the application.yml file:
app:
  port: 8084
  context: /boot
  message: Testing, is this thing on?
The class to instantiate and test this controller in a mock environment looks like this:
import static org.hamcrest.Matchers.equalTo;
import static org.springframework.test.web.servlet.result.
    MockMvcResultMatchers.content;
import static org.springframework.test.web.servlet.result.
      MockMvcResultMatchers.status;

import org.junit.Before;
import org.junit.Test;
import org.junit.runner.RunWith;
import org.springframework.boot.test.SpringApplicationConfiguration;
import org.springframework.http.MediaType;
import org.springframework.mock.web.MockServletContext;
import org.springframework.test.context.junit4.SpringJUnit4ClassRunner;
import org.springframework.test.context.web.WebAppConfiguration;
import org.springframework.test.web.servlet.MockMvc;
import org.springframework.test.web.servlet.request.MockMvcRequestBuilders;
import org.springframework.test.web.servlet.setup.MockMvcBuilders;

@RunWith(SpringJUnit4ClassRunner.class)
@SpringApplicationConfiguration(classes = MockServletContext.class)
@WebAppConfiguration
public class MessageControllerTest {

    private MockMvc mvc;

    @Before
    public void setUp() throws Exception {
        mvc = MockMvcBuilders.standaloneSetup(new MessageController()).build();
    }
    @Test
    public void getMessage() throws Exception {
        mvc.perform(MockMvcRequestBuilders.get("/message")
          .accept(MediaType.APPLICATION_JSON))
                .andExpect(status().isOk())
                .andExpect(content().string(equalTo("Hello World")));
        // testing the default value for this field
    }
}
The MockServletContext is used as argument for the @SpringApplicationConfiguration annotation, which provides a mock context where the MessageController can be instantiated. The MockMvcBuilders utility class is used to instantiate the controller instance that is to be tested.
In Chapter 3, MockitoJUnitRunner.class was used to test a controller, but the Spring Test library offers more appropriate and intuitive methods, especially for REST controllers.
The MockMvc should be familiar from Chapter 3. It is used here for the same purpose: to send HTTP request to the DispatcherServlet, and the status and content methods come into place to help test the results.
![]() ! Notice that the value returned by the content method is expected to be HelloWorld, and this is because the mock context does not include the application.yml. To include the YAML file in the context and test the value configured there, integration testing is needed.
! Notice that the value returned by the content method is expected to be HelloWorld, and this is because the mock context does not include the application.yml. To include the YAML file in the context and test the value configured there, integration testing is needed.
Applications built with Spring Boot can be tested using integration tests. These can be written easily for REST controllers because of a class provided by Spring Boot named org.springframework.boot.test.TestRestTemplate that extends the classical RestTemplate. The extra feature of this class is that secured resources can be tested too.
import com.book.init.AppSettings;
import com.book.init.Application;
import org.junit.Before;
import org.junit.Test;
import org.junit.runner.RunWith;
import org.springframework.beans.factory.annotation.Autowired;
import org.springframework.boot.test.IntegrationTest;
import org.springframework.boot.test.SpringApplicationConfiguration;
import org.springframework.boot.test.TestRestTemplate;
import org.springframework.http.ResponseEntity;
import org.springframework.test.context.junit4.SpringJUnit4ClassRunner;
import org.springframework.test.context.web.WebAppConfiguration;
import org.springframework.web.client.RestTemplate;

import java.net.URL;
import static org.hamcrest.Matchers.equalTo;
import static org.junit.Assert.assertThat;

@RunWith(SpringJUnit4ClassRunner.class)
@SpringApplicationConfiguration(classes = Application.class)
@WebAppConfiguration
@IntegrationTest
public class MessageControllerIT {

    @Autowired
    AppSettings appSettings;

    private URL base;
    private RestTemplate template;

    @Before
    public void setUp() throws Exception {
        this.base = new URL("http://localhost:" + appSettings.getPort() +"/" +
              appSettings.getContext() + "/message");
        template = new TestRestTemplate();
    }
    @Test
    public void getMessage() throws Exception {
        ResponseEntity<String> response =
             template.getForEntity(base.toString(), String.class);
        assertThat(response.getBody(),
             equalTo("Testing, is this thing on?"));
    }
}
Because real configuration classes are used to create the context in integration tests, beans can be injected and used inside the test class. In the previous example, the AppSettings bean is used to load the configuration details from the application.yml file, so the resulting endpoint for the MessageController is exactly the same as when the application is run with Spring Boot, and so is the content returned by the message method.
The @IntegrationTest annotation is another convenient feature provided by Spring Boot to start the embedded server on which the test will be run. It is designed to be used in conjunction with @SpringApplicationConfiguration. The server is started on the port value and it is injected using the AppSetting.port property value.
Interaction between a user and a software service implies some type of communication. In the Web 2.0 era, software services are provided via web or mobile application, and communication is done over different protocols, the most common being HTTP. HTTP is a request-response model, with the client making the request (initiating a transaction) and the application providing the request service sending a response.
But more and more is needed from web applications, and the HTTP request-response model is becoming insufficient because information can be transmitted from the server to the client only after a request is received; the server cannot send data in between requests or without being asked for it by the client first.
Think about a shopping application. Users need to insert personal data into a form to place an order. But while a user fills the form, the service that receives and processes orders might become inaccessible because of an internal issue. Wouldn’t it be nice if the server could send a message to the browser to inform the user that his order cannot be processed, saving him from wasting time inserting data into the form?
There are workarounds that can be implemented to implement this type of behavior, such as HTTP long polling, which is a technique involving the client to poll the server for new information and the server to keep that request open until new data is available. But this technique might cause trouble when the connection between the client and the server gets interrupted frequently (like when switching between Wi-Fi and cellular networks); messages get lost and the server might keep requests open that no longer need to be. To overcome these situations, a communication management system must be implemented—so things get even more complicated.
To provide a proper and practical solution, the WebSocket protocol was standardized in 2011 as RFC 6455.4 Most web browsers now implement a client API that supports it. As the official documentation says: “The goal of this technology is to provide a mechanism for browser-based applications that need two-way communication with servers that does not rely on opening multiple HTTP connections.”
Spring WebSocket Implementation
Oracle has released JSR 356 as part of the JEE7 standard. It is the Java API for WebSocket that should be implemented to integrate WebSocket into web applications on the Java client and server sides. Client applications can be developed in any technology, and as long as they are compliant with the RFC 6455, they will be able to communicate with the server. The situation and the possibilities are depicted in Figure 8-5.

Figure 8-5. A client-server application leveraging WebSocket schema
In Spring 4.1, a module named spring-websocket was introduced to provide support for WebSocket-based, two-way communication between the client and the server in web applications. The implementation is a JSR-356-compatible Java WebSocket API and it also includes SockJS-based fallback options. The SockJS is a JavaScript library that provides a WebSocket-like object (WebSocket behavior is emulated). It is most suitable when the application needs to be supported in older browsers that do not support the WebSocket protocol.
The Spring Framework WebSocket infrastructure is based on the Spring Messaging Foundation. Infrastructure beans like MessageChannel and MessageHandler are used as building blocks for the WebSocket environment.
In the spring-messaging module, support for STOMP5 was added, providing an annotation programming model for routing and processing messages from WebSocket clients. This means that controller methods can be used to process HTTP requests (when methods are annotated with @RequestMapping) and can also be used to process WebSocket messages when methods are annotated with @MessageMapping, an annotation that was introduced in Spring 4.0.
The complementary operation, sending the result of the method back to the client, is implemented using the @SendTo annotation, which is used to mark a subscription endpoint to which all the potential clients are registered; this way, they are identified as receivers of messages from the server. The communication between clients and the server application using the WebSocket protocol is asynchronous, and when the server is overloaded, it can have delays in sending the messages.
The WebSocket protocol is streaming, and messages can be sent to/received from a WebSocket at the same time, so a connection and a WebSocketSession implementation is needed to provide the infrastructure through which the messages will be exchanged.
The following are the steps to create a WebSocket-compliant application using Spring WebSocket:
- Define the format for the STOMP message and the POJO to model it.
- Define the format for the server reply message and the POJO to model it.
- Create a message-handling controller.
- Configure Spring for WebSocket communication handling.
- Create a client application.
- Create an executable server application.
To get familiarized with WebSocket Spring components, you’ll follow steps to create a mIRC6-like application that uses the WebSocket protocol. The application will be quite simple: it will require a username to allow connection to the server, but no authentication will be implemented. The server will receive messages from users and redistribute them to all connected clients. The server will communicate the time every 60 seconds and it will censor bad words, like bomb and murder. The source code to do this is explained later in the section.
[STEP 1] The STOMP message is a JSON representation containing the username and a message that the sends to the server:
{
    'name' : 'jules',
    'content' : 'Hello World!'
}
The POJO is quite simple and contains two properties (the JSON key names from the previous snippet) and getters.
package com.book.ws;

import com.fasterxml.jackson.annotation.JsonProperty;
import com.fasterxml.jackson.annotation.JsonPropertyOrder;

@JsonPropertyOrder({ "name", "content"})
public class ChatMessage {

    @JsonProperty("content")
    private String content;

    @JsonProperty("name")
    private String name;

    public String getName() {
        return name;
    }

    public String getContent() {
        return content;
    }
}
JSON-specific annotations can be used, so POJO fields can be named differently than the key names in the JSON message and can also be used to customize the serialization. For example, the @JsonPropertyOrder is used here to define ordering of properties at serialization time. In the previous code, the annotation ensures that the resulting JSON object will always have “name” as the first property and “content” as the second.
![]() ! The JSON annotations are used abusively in the previous example, simply for demonstration purposes. As the field names of the class are one and the same with the JSON property names, the @JsonProperty can be removed because it doesn’t have any effect on the code. The same goes for the @JsonPropertyOrder, which can be removed because the order of the properties in the resulting JSON object is not really important in this case.
! The JSON annotations are used abusively in the previous example, simply for demonstration purposes. As the field names of the class are one and the same with the JSON property names, the @JsonProperty can be removed because it doesn’t have any effect on the code. The same goes for the @JsonPropertyOrder, which can be removed because the order of the properties in the resulting JSON object is not really important in this case.
[STEP 2] Upon receiving a ChatMessage and extracting the information, the server application processes it and responds with a ServerMessage instance that is sent to a separate queue that the client is subscribed to. The response is serialized to a JSON representation. Defining a format for the server is easy in a mIRC application; all that is needed is a JSON representation with one property:
{
        'content' : 'It is 18:13'
}
The POJO class that will be serialized could look like this:
package com.book.ws;

public class ServerMessage {
    private String content;

    public ServerMessage(String content) {
        this.content = content;
    }

    public String getContent() {
        return content;
    }
}
Spring uses the Jackson JSON library to serialize and deserialize instances used for WebSocket communication.
[STEP 3] Creating a message-handling controller is also quite easy when using the @MessageMapping @SendTo annotations.
package com.book.ws;

import org.springframework.stereotype.Controller;
import org.springframework.messaging.handler.annotation.MessageMapping;
import org.springframework.messaging.handler.annotation.SendTo;
import java.util.Random;

@Controller
public class ChatController {

    @MessageMapping("/mirc")
    @SendTo("/topic/chat")
    public ServerMessage process(ChatMessage message) throws Exception {
        //generate random lag
        Random rn = new Random();
        Thread.sleep((rn.nextInt(5) + 1) * 1000);
        return MessageProcessor.build(message);
    }
}
The MessageProcessor is a utility class used to build the ServerMessage instances, which is serialized and sent to the client. The implementation is not really relevant for this section, as it only contains a static method used to build a ServerMessage instance based on a ChatMessage instance.
package com.book.ws;
public class MessageProcessor {
    public static ServerMessage build(ChatMessage message) {
        if (message.getContent() != null && !message.getContent().isEmpty()) {
            if (message.getContent().contains("bomb")) {
               //censoring using string.replace(...)
                return new ServerMessage
                ("[" + message.getName() + "]: "
                  + message.getContent().replace("bomb", "****"));
            } else if (message.getContent().contains("murder")) {
              //censoring using string.replace(...)
                return new ServerMessage
                ("[" + message.getName() + "]: "
                  + message.getContent().replace("murder", "****"));
            }
            return new ServerMessage
              ("[" + message.getName() + "]: " + message.getContent());
        }

        return new ServerMessage("[server]: Welcome " +message.getName());
    }
}
In the preceding code snippet, the process method is mapped to the destination "mirc", so if a message is sent to this destination, the method is called. This behavior is provided by annotating the method with @MessageMapping("/mirc") . Any message received from the client application(s) is deserialized, resulting in a ChatMessage instance that is used as an argument for the process method call.
The Thread.sleep call is used to simulate a delay. The Random instance is used to generate a random duration for the delay with a maximum of 5 seconds. This artifice was added to demonstrate that communication between the client application and the server is indeed asynchronous.
Spring WebSocket Configuration
[STEP 4] To configure Spring for WebSocket communication handling with STOMP messages, a configuration class needs to be created.
package com.book.init;

import org.springframework.context.annotation.Configuration;
import org.springframework.messaging.simp.config.MessageBrokerRegistry;
import org.springframework.web.socket.config.annotation.
    AbstractWebSocketMessageBrokerConfigurer;
import org.springframework.web.socket.config.annotation.EnableWebSocketMessageBroker;
import org.springframework.web.socket.config.annotation.StompEndpointRegistry;

@Configuration
@EnableWebSocketMessageBroker
public class WebSocketConfig extends AbstractWebSocketMessageBrokerConfigurer {

    @Override
    public void configureMessageBroker(MessageBrokerRegistry config) {
        config.enableSimpleBroker("/topic");
        config.setApplicationDestinationPrefixes("/app");
    }

    @Override
    public void registerStompEndpoints(StompEndpointRegistry registry) {
       registry.addEndpoint("/mirc").withSockJS()
            .setStreamBytesLimit(512 * 1024)
            .setHttpMessageCacheSize(1000)
            .setDisconnectDelay(30 * 1000);
    }
}
Each of the elements in the previous class declaration has a specific responsibility. The following describes each of them.
- @EnableWebSocketMessageBroker enables WebSocket message handling using a message broker.
AbstractWebSocketMessageBrokerConfigurer is a Spring convenient class implementing the WebSocketMessageBrokerConfigurer interface to provide empty method bodies for optional methods that are now needed for a minimal configuration of a WebSocket application.
- The configureMessageBroker() method implementation is used to configure a message broker. The config.enableSimpleBroker("/topic") enables a simple memory-based message broker used to filter destinations prefixed with "/topic" targeting the broker. The config.setApplicationDestinationPrefixes("/app") method designates the prefix for messages that need to be handled by methods annotated with @MessageMapping.
- The registerStompEndpoints() registers the "/mirc" STOMP endpoint, and enables and configures the SockJS fallback options. The subsequent chained method calls are used to configure streaming details.
Streaming transports save responses on the client side and do not free the memory occupied by delivered messages, so the connection needs to be recycled from time to time. WebSocket communication is based on HTTP Streaming, which works by pushing content continuously to browser. The memory usage is kept accumulated in browser. Basically, the browser needs to close and reconnect the streaming channel to release memory. So there are a limited number of bytes that can be sent before the HTTP streaming connection is closed. The default value set by SockJS is 128K; the .setStreamBytesLimit(512 * 1024) call sets it to 512K.
The number of server-to-client messages that can be cached in a session waiting for the next HTTP request polling is also limited. The default is 100 and it is set by the web server; the .setHttpMessageCacheSize(1000) call sets it to 1000.
The number of milliseconds after an inactive client is disconnected is 5 seconds and it is set by the web server, but the .setDisconnectDelay(30 * 1000) call sets it to 30.
To use all of these elements, the spring-websocket and spring-messaging libraries must be added as dependencies. When using Spring Boot, only the spring-boot-starter-websocket dependency is necessary. Spring Boot adds all the necessary dependencies.
Aside from this, the entry point of the application is the com.init.Application class, which is a typical boot-up Spring Boot class.
package com.book.init;

import org.springframework.boot.SpringApplication;
import org.springframework.boot.autoconfigure.SpringBootApplication;
import org.springframework.context.annotation.ComponentScan;

@SpringBootApplication
@ComponentScan(basePackages = {"com.book.init, com.book.ws"})
public class Application {

    public static void main(String args) {
        SpringApplication.run(Application.class, args);
    }
}
WebSocket Client Application
As depicted in Figure 8-5, client applications for a Spring WebSocket server application can be written in any programming language for which a WebSocket implementation or Socket-compatible implementation exists. For the example in this section, the simplest way to create a client application is the plain old HTML and JavaScript pair.
[STEP 5] Creating a browser client application is easy, and for the scope of this book, it is part of the same application and deployed on the same embedded container. The application is a JavaScript client that sends and receives messages from the server.
The module project for this section can be found under the book-code project and it is called 08-chapter-04-solution. The module is a Spring Boot WebSocket project organized as follows:
- The sources for the WebSocket server-application can be found under src/main/java. The configuration classes are placed in the com.book.init package. All classes involved in WebSocket communication are placed under the com.book.ws package.
- The sources for the JavaScript client application can be found under src/main/resources/static. The client application can be accessed at index.html. The functions that get called on specific HTML events are all gathered in the index.js file. The JavaScript external libraries used in the project are under the static/ext directory.
- jQuery is used to simplify the development of the JavaScript code used to handle HTML user events.
- SockJS is used to emulate WebSocket and provides a WebSocket-like API.
- The STOMP library is used to help create STOMP messages.
The structure of the full Spring Boot WebSocket project is depicted in Figure 8-6.

Figure 8-6. The 08-chapter-04-solution project structure
The client application when no client is connected is depicted in Figure 8-7.
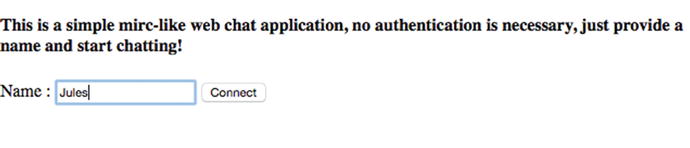
Figure 8-7. The client application before connection
Here is the static front-end that is written in HTML and represented by the index.html file:
<!DOCTYPE html>
<html>
<head>
    <title>WebSocket mIRC-like sample application</title>
    <script src="ext/sockjs-0.3.4.js"></script>
    <script src="ext/stomp.js"></script>
    <script src="ext/jquery-2.1.4.js"></script>
    <script src="index.js"></script>
    <link rel="stylesheet" href="css/general.css">
</head>
<body>
<noscript><h2 style="color: #ff0000">Seems your browser doesn’t support
   JavaScript! Websocket relies on Javascript being enabled.
    Please enableJavascript and reload this page!</h2></noscript>
This is a simple mirc-like web chat application,
   no authentication is necessary, just provide a name and start chatting!</h4>

<div class="header">
    Name : <input id="name" type="text"/>
    <input id="connection" type="button"/>
</div>
<div class="chatDiv">
    <textarea class="chat"></textarea>
</div>
<div class="footer">
    <input id="content" type="text"/>
    <input id="send" type="button" value="Send"/>
</div>

</body>
</html>
The following describes the four JavaScript functions in index.js:
- setConnected(boolVal): The argument is a boolean value. The method is called with true when connecting to the server application and with false when disconnecting. The same button is used for connecting and disconnecting. The label on the button changes depending on the current state of the application. When the application is accessed for the first time, a name is required to connect to the application.
function setConnected(connected) {
    \ set label for the connect/disconnect button
    connected ? $("#connection").attr("value", "Disconnect") :
           $("#connection").attr("value", "Connect");

     \ disable name textfield so the name cannot be modified
     \ after connecting
    $("#name").prop("disabled", connected);

    \hide the chat window
    connected ? $(".chatDiv").show() : $(".chatDiv").hide();

    \hide the insert message textfield
    connected ? $(".footer").show() : $(".footer").hide();

    \empty the chat window
    $(".chat").html("");
} - The function attached to the Connect/Disconnect button. When the application is accessed for the first time, a name is required to connect to the application.
$("#connection").click(function () {
        name = $("#name").val();
        if (name != "") {
            if ($("#connection").val() == "Connect") {
                //connecting
                var socket = new SockJS("/mirc");
                stompClient = Stomp.over(socket);
                stompClient.connect({}, function (frame) {
                    setConnected(true);
                    stompClient.subscribe("/topic/chat", function (message) {
                        showMessage(JSON.parse(message.body).content);
                    });
                    stompClient.send("/app/mirc", {},
                        JSON.stringify({"name": name, "content": ""}));
                });
            } else {
                //disconnecting
                stompClient.disconnect();
                setConnected(false);
            }
        }
    });
If a name is provided, SockJS and STOMP are used to open a connection to /mirc, that has the ChatController waiting for messages. After the connection has succeeded, the client subscribes to the "/topic/chat" destination where messages from the server application are published. When a server message is published to that destination, it is added to the chat text area.
- The showMessage(message) function appends the message received from the server application to the chat text area. The "" character set represents a new line in HTML.
function showMessage(message) {
    $(".chat").append(message + "’);
} - The function attached to the Send button is used to read the name and the message inserted by the user. The STOMP client is used to send the data to the "/app/mirc" destination (where the ChatController is waiting for messages).
$("#send").click(function () {
        var name = $("#name").val();
        var content = $("#content").val();
        stompClient.send("/app/mirc", {},
              JSON.stringify({"name": name, "content": content}));
        $("#content").val("");
    });
To test the application, it first has to be built with Gradle by running the build task in the command line or in Intellij IDEA. This results in the creation of a jar archive under build/libs named ws-mirc.jar. The application can be run from a terminal by executing
java -jar ws-mirc.jar.
Or the com.book.init.Application class can be executed with an Intellij IDEA launcher, as depicted in Figure 8-8.

Figure 8-8. Intellij IDEA launcher can be used to run a Spring WebSocket application
The application can support multiple clients. In Figure 8-9, the application is accessed from a Firefox browser by a user named Jules and it is accessed from a Safari browser by a user named John.

Figure 8-9. Two clients accessing the same server
Configure the Server Application to Send Scheduled Messages
The server application should be able to send messages that tell the time to clients every 60 seconds. This can be done using a @Scheduled annotated method that publishes messages to the destination where clients expect messages from the server to be published. This method can be added in any class annotated with a stereotype annotation on it (@Component, @Controller, @Service, etc.), but in the book samples, it is added in the ChatController to keep related components together.
//ChatController.java
   @Autowired
    SimpMessagingTemplate template;

    @Scheduled(fixedDelay = 60000)
    public void setNotification() throws Exception {
        LocalTime now = LocalTime.now();
        this.template.convertAndSend("/topic/chat", new ServerMessage
         ("server: It is " now.getHour() ":" now.getMinute()));
    }
The SimpMessagingTemplate bean is initialized by Spring Boot when the WebSocket support is enabled by having a configuration class annotated with @EnableWebSocketMessageBroker. But there is another thing to do—declaring a scheduled method is not enough. Scheduling must be enabled for the method to be picked up. As expected, there’s an annotation for that: @EnableScheduling, which can be used on any @Configuration class in the application. When using Spring Boot, the most obvious way is to place it on the Application class.
Monitoring and Debugging
When using the WebSocket protocol for communication between a client and a server application, a connection must exist and be opened between the two. The first contact between the client and the server is often called a handshake, which involves the client sending a connection request to the server and a reply being sent from the server, confirming the connection. When using stomp.js, information regarding the internals of communication between the client and the server can be tracked into the Firebug console. Every time a message is sent from the client and one is received from the server, you can see it in the console, as depicted in Figure 8-10. Notice that the handshake between the client and the server are the first two messages in the list.

Figure 8-10. stomp.js monitoring
Debugging a JavaScript client application can be done by using console.log() messages in the JavaScript code and/or by using the debugger; statement to set the breakpoint in the JavaScript code and control execution from there.
Debugging a server-side Java application can be done easily during development, especially with a smart development tool like Intellij IDEA. All that you have to do is start the application as usual, but instead of a normal launcher, choose the debugging launcher. Figure 8-11 shows the debugging launcher on the menu.

Figure 8-11. Intellij IDEA debugging launcher
Then place a breakpoint in the ChatController.process() message and send a message from the client to test it. Execution is paused, so you can inspect Spring beans and objects involved in the communication. A debug snippet using Intellij IDEA is shown in Figure 8-12.

Figure 8-12. Server application paused in a breakpoint in Intellij IDEA
In Figure 8-12, the breakpoint is placed in line 23 of class ChatController. On the bottom left of the figure, you can see the name of the method currently being executed, process(), and on the right, you see the contents of a ChatMessage instance.
![]() ! Since the topics in this chapter are not covered in the certification exam, there is neither a quiz section nor a practice section. But if you want to test your knowledge and understanding of Spring Boot, a recommended exercise is to try switching the Personal Records manager project to Spring Boot.
! Since the topics in this chapter are not covered in the certification exam, there is neither a quiz section nor a practice section. But if you want to test your knowledge and understanding of Spring Boot, a recommended exercise is to try switching the Personal Records manager project to Spring Boot.
_____________________
1Enterprise resource planning (ERP) is business-management software. It is typically a suite of integrated applications (see https://en.wikipedia.org/wiki/Enterprise_resource_planning).
2View the code at https://github.com/spring-projects/spring-boot/blob/master/spring-boot-autoconfigure/src/main/java/org/springframework/boot/autoconfigure/SpringBootApplication.java
3The property names standard list for application.properties or application.yml is at http://docs.spring.io/spring-boot/docs/current/reference/htmlsingle/#common-application-properties.
4https://tools.ietf.org/html/rfc6455
5STOMP is an acronym for Simple Text-Orientated Messaging Protocol. It defines a message format that any available STOMP clients can use to communicate with any STOMP server application. Basically, it represents a standard communication unit independent of languages and platforms.
6A popular Internet Relay Chat (IRC) used extensively in the 1990s (see http://www.mirc.com).