Chapter 14: Interacting with systemd and Kubernetes
In the previous chapters, we learned how to initialize and manage containers, starting with simple concepts and arriving at advanced ones. Containers represent a key technology for application development in the latest Linux operating system releases. For this reason, containers are only the starting point for advanced developers and system administrators. Once this technology becomes widely adopted in an enterprise company or a technical project, the next step will be to integrate it with the base operating system and with -system orchestration platforms.
In this chapter, we're going to cover the following main topics:
- Setting up the prerequisites for the host operating system
- Creating the systemd unit files
- Managing container-based systemd services
- Generating Kubernetes YAML resources
- Running Kubernetes resource files in Podman
- Testing the results in Kubernetes
Technical requirements
To complete this chapter, you will need a machine with a working Podman installation. As we mentioned in Chapter 3, Running the First Container, all the examples in this book were executed on a Fedora 34 system or later but can be reproduced on your choice of operating system (OS).
Having a good understanding of the topics that were covered in Chapter 4, Managing Running Containers, Chapter 5, Implementing Storage for the Container's Data, and Chapter 9, Pushing Images to a Container Registry, will help you grasp the topics we'll cover regarding advanced containers.
You should also have a good understanding of system administration and Kubernetes container orchestration.
For the examples related to the Kubernetes section, you will require Podman version 4.0.0 because of a bug in version 3.4.z that prevents container environment variables from being created (https://github.com/containers/podman/issues/12781). This bug was fixed in v4.0.0 but it hasn't been backported to Podman v3 at the time of writing.
Setting up the prerequisites for the host operating system
As we saw in Chapter 1, Introduction to Container Technology, containers were born to help simplify and create system services that can be distributed on standalone hosts.
In the following sections, we will learn how to run MariaDB and a GIT service in containers while managing those containers like any other service – that is, through Systemd and the systemctl command.
First, let's introduce systemd, a system and service manager for Linux that runs as the first process on boot (as PID 1) and acts as an init system that brings up and maintains userspace services. Once a new user logs in to the host system, separate instances are executed to start their services.
The systemd daemon starts services and ensures priority with a dependency system between various entities called units. There are 11 different types of units.
Fedora 34 and later has systemd enabled and running by default. We can check if it is running properly by using the following command:
# systemctl is-system-running
running
In the following sections, we are going to work with system unit files of the service type. We can check the current ones by running the following command:
# systemctl list-units --type=service | head
UNIT LOAD ACTIVE SUB DESCRIPTION
abrt-journal-core.service loaded active running Creates ABRT problems from coredumpctl messages
abrt-oops.service loaded active running ABRT kernel log watcher
abrt-xorg.service loaded active running ABRT Xorg log watcher
abrtd.service loaded active running ABRT Automated Bug Reporting Tool
Please Note
The systemd service and its internals are more complex, so they cannot be summarized in a few lines. For additional information, please refer to the related Linux manual.
In the next section, we are going to learn how to create the systemd unit files for any running container service on our operating system.
Creating the systemd unit files
The unit files on our system define how systemd starts and runs services.
Each unit file represents a single component as a simple text file that describes its behavior, what needs to run before or afterward, and more.
Unit files are stored in a few different places on a system and systemd looks for them in this order:
- /etc/systemd/system
- /run/systemd/system
- /usr/lib/systemd/system
Unit files that are in the earlier directories override the later ones. This lets us change what we need in the /etc directory, where configuration is expected, leaving the default configuration files in /usr, for example.
But what does a unit file look like? Let's find out.
First, we can get the location of a default unit file by asking systemd about it:
# systemctl status sshd
○ sshd.service - OpenSSH server daemon
Loaded: loaded (/usr/lib/systemd/system/sshd.service; disabled; vendor preset: disabled)
Active: inactive (dead)
Docs: man:sshd(8)
man:sshd_config(5)
Here, we executed the status command while passing the sshd service name as a filter.
In the systemd output, the default unit file path can be inspected with the following example command:
# cat /usr/lib/systemd/system/sshd.service
But what about Podman? Well, Podman makes systemd integration easier with its dedicated sub-command:
# podman generate systemd -h
Generate systemd units.
Description:
Generate systemd units for a pod or container.
The generated units can later be controlled via systemctl(1).
Usage:
podman generate systemd [options] {CONTAINER|POD}
...
The podman generate systemd command will output a text file representing the unit file that was created. As we can see from the help output, we can set up several options to adjust our settings.
We should always save the generated file and place it on the right path, as described in the previous output. We'll explore this command by providing a full example in the next section.
Managing container-based systemd services
In this section, you will learn how to use the podman generate systemd command through a practical example. We will create two system services based on containers to create a GIT repository.
For this example, we will leverage two well-known open source projects:
- Gitea: The GIT repository, which also offers a nice web interface for code management
- MariaDB: The SQL database for holding the data that's produced by the Gitea service
Let's start with the example. First, we need to generate a password for our database's user:
# export MARIADB_PASSWORD=my-secret-pw
# podman secret create --env MARIADB_PASSWORD
53149b678d0dbd34fb56800cc
Here, we exported the environment variable with the secret password we are going to use and then leveraged a useful secrets management command that we did not introduce previously: podman secret create. Unfortunately, this command holds the secret in plain text, though this is good enough for our purpose. Since we are running these containers as root, these secrets are stored on the filesystem with root-only permissions.
We can inspect the secret with the following commands:
# podman secret ls
ID NAME DRIVER CREATED UPDATED
53149b678d0dbd34fb56800cc MARIADB_PASSWORD file 10 hours ago 10 hours ago
# podman secret inspect 53149b678d0dbd34fb56800cc
[
{
"ID": "53149b678d0dbd34fb56800cc",
"CreatedAt": "2022-02-16T00:54:21.01087091+01:00",
"UpdatedAt": "2022-02-16T00:54:21.01087091+01:00",
"Spec": {
"Name": "MARIADB_PASSWORD",
"Driver": {
"Name": "file",
"Options": {
"path": "/var/lib/containers/storage/secrets/filedriver"
}
}
}
}
]
# cat /var/lib/containers/storage/secrets/filedriver/secretsdata.json
{
"53149b678d0dbd34fb56800cc": "bXktc2VjcmV0LXB3"
}
# ls -l /var/lib/containers/storage/secrets/filedriver/secretsdata.json
-rw-------. 1 root root 53 16 feb 00.54 /var/lib/containers/storage/secrets/filedriver/secretsdata.json
Here, we have asked Podman to list and inspect the secret we created previously and looked at the underlying filesystem for the file holding the secrets.
The file holding the secrets is a file in JSON format and, as we mentioned previously, is in plain text. The first string of the couple is the secret ID, while the second string is the value Base64 encoded. If we try to decode it with the BASE64 algorithm, we would see that it represents the password we just added – that is, my-secret-pw.
Even though the password is stored in plain text, it is good enough for our example because we are using the root user and this filestore has root-only permission, as we can verify with the last command of the previous output.
Now, we can continue setting up the database container. We will start with the database setup because it is a dependency on our GIT server.
We must create a local folder in the host system where we can store container data:
# mkdir -p /opt/var/lib/mariadb
We can also look at the public documentation of the container image to find out the right volume path and the various environment variables to use to start our container:
# podman run -d --network host --name mariadb-service –v
/opt/var/lib/mariadb:/var/lib/mysql:Z –e
MARIADB_DATABASE=gitea -e MARIADB_USER=gitea –e
MARIADB_RANDOM_ROOT_PASSWORD=true
--secret=MARIADB_PASSWORD,type=env docker.io/mariadb:latest
61ae055ef6512cb34c4b3fe1d8feafe6ec174a25547728873932f0649217 62d1
We are going to run and test the container as standalone first to check if there are any errors; then, we will transform it into a system service.
In the preceding Podman command, we did the following:
- We ran the container in detached mode.
- We assigned it a name – that is, mariadb-service.
- We exposed the host network for simplicity; of course, we could limit and filter this connectivity.
- We mapped the storage volume with the newly created local directory while also specifying the :Z option to correctly assign the SELinux labels.
- We defined the environment variables to use at runtime by the container's processes, also providing the password's secret with the --secret option.
- We used the container image name we want to use – that is, docker.io/mariadb:latest.
We can also check if the container is up and running by using the following command:
# podman ps
CONTAINER ID IMAGE COMMAND CREATED STATUS PORTS NAMES
61ae055ef651 docker.io/library/mariadb:latest mariadbd 56 seconds ago Up 57 seconds ago mariadb-service
Now, we are ready to check the output of the podman generate systemd command:
# podman generate systemd --name mariadb-service
...
[Unit]
Description=Podman container-mariadb-service.service
Documentation=man:podman-generate-systemd(1)
Wants=network-online.target
After=network-online.target
RequiresMountsFor=/run/containers/storage
[Service]
Environment=PODMAN_SYSTEMD_UNIT=%n
Restart=on-failure
TimeoutStopSec=70
ExecStart=/usr/bin/podman start mariadb-service
ExecStop=/usr/bin/podman stop -t 10 mariadb-service
ExecStopPost=/usr/bin/podman stop -t 10 mariadb-service
PIDFile=/run/containers/storage/overlay-containers/61ae055ef6512cb34c4b3fe1d8feafe6ec174a25547728873932f064921762d1/userdata/conmon.pid
Type=forking
[Install]
WantedBy=default.target
As you can see, the output has been published directly in the console. Here, we used the --name option to instruct Podman that we want to manage the container with that name through systemd.
Podman generated a unit file with all the required command instructions to integrate our container into the operating system.
In the [Unit] section, we can see that it declared a dependency of this service from the network through the network-online.target unit. It also states the need for the storage mount point for /run/containers/storage containers.
In the [Service] section, Podman defined all the instructions for describing how to start and stop the containerized service.
Now, let's look at the GIT service. First, we will create the storage directory:
# mkdir -p /opt/var/lib/gitea/data
After that, we can look at the project documentation for any configuration that's needed for the Gitea container image to be built correctly and complete the podman run command:
# podman run -d --network host --name gitea-service
-v /opt/var/lib/gitea/data:/data:Z
docker.io/gitea/gitea:latest
ee96f8276038f750ee3b956cbf9d3700fe46e6e2bae93605a67e623717e 206dd
In the previous Podman command, we did the following:
- We ran the container in detached mode.
- We assigned it a name – that is, gitea-service.
- We exposed the host network for simplicity; of course, we can limit and filter this connectivity.
- We mapped the storage volume with the newly created local directory while specifying the :Z option to correctly assign the SELinux labels.
Finally, we can check if the service is running properly by inspecting its logs:
# podman logs gitea-service
Server listening on :: port 22.
Server listening on 0.0.0.0 port 22.
2022/02/16 00:01:55 cmd/web.go:102:runWeb() [I] Starting Gitea on PID: 12
...
2022/02/16 00:01:56 cmd/web.go:208:listen() [I] Listen: http://0.0.0.0:3000
2022/02/16 00:01:56 cmd/web.go:212:listen() [I] AppURL(ROOT_URL): http://localhost:3000/
2022/02/16 00:01:56 ...s/graceful/server.go:61:NewServer() [I] Starting new Web server: tcp:0.0.0.0:3000 on PID: 12
As we can see, the Gitea service is listening on port 3000. Let's point our web browser to http://localhost:3000 to install it with the required configuration:

Figure 14.1 – Gitea service installation page
In the preceding screenshot, we defined the database's type, address, username, and password to complete the installation. Once done, we should be redirected to the login page, as follows:
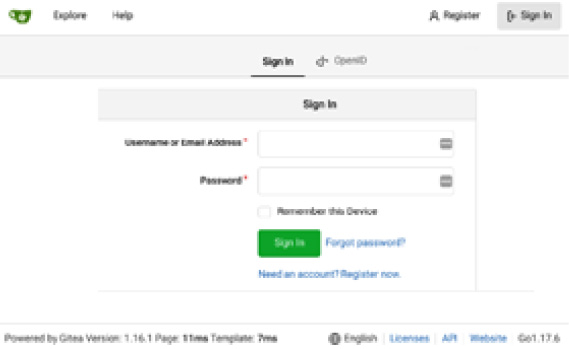
Figure 14.2 – Gitea service login page
Once the configuration is complete, we can generate and add the systemd unit files to the right configuration path:
# podman generate systemd --name gitea-service > /etc/systemd/system/container-gitea-service.service
# podman generate systemd --name mariadb-service > /etc/systemd/system/container-mariadb-service.service
Then, we can manually edit the Gitea service unit file by adding a depending order to the MariaDB service through the special Requires instruction:
# cat /etc/systemd/system/container-gitea-service.service
...
[Unit]
Description=Podman container-gitea-service.service
Documentation=man:podman-generate-systemd(1)
Wants=network-online.target
After=network-online.target
RequiresMountsFor=/run/containers/storage
Requires=container-mariadb-service.service
...
Thanks to the Requires instruction, systemd will start the MariaDB service first, then the Gitea service.
Now, we can stop the containers by starting them through the systemd units:
# podman stop mariadb-service gitea-service
mariadb-service
gitea-service
Don't worry about the data – previously, we mapped both containers to a dedicated storage volume that holds the data.
We need to let the systemd daemon know about the new unit files we just added. So, first, we need to run the following command:
# systemctl daemon-reload
After that, we can start the services through systemd and check their statuses:
# systemctl start container-mariadb-service.service
# systemctl status container-mariadb-service.service
● container-mariadb-service.service - Podman container-mariadb-service.service
Loaded: loaded (/etc/systemd/system/container-mariadb-service.service; disabled; vendor preset: disabled)
Active: active (running) since Wed 2022-02-16 01:11:50 CET; 13s ago
...
# systemctl start container-gitea-service.service
# systemctl status container-gitea-service.service
● container-gitea-service.service - Podman container-gitea-service.service
Loaded: loaded (/etc/systemd/system/container-gitea-service.service; disabled; vendor preset: disabled)
Active: active (running) since Wed 2022-02-16 01:11:57 CET; 18s ago
...
Finally, we can enable the service to start them when the OS boots:
# systemctl enable container-mariadb-service.service
Created symlink /etc/systemd/system/default.target.wants/container-mariadb-service.service → /etc/systemd/system/container-mariadb-service.service.
# systemctl enable container-gitea-service.service
Created symlink /etc/systemd/system/default.target.wants/container-gitea-service.service → /etc/systemd/system/container-gitea-service.service.
With that, we have set up and enabled two containerized system services on our host OS. This process is simple and could be useful for leveraging the containers' features and capabilities, extending them to system services.
Now, we are ready to move on to the next advanced topic, where we will learn how to generate Kubernetes resources.
Generating Kubernetes YAML resources
Kubernetes has become the de facto standard for multi-node container orchestration. Kubernetes clusters allow multiple pods to be executed across nodes according to scheduling policies that reflect the node's load, labels, capabilities, or hardware resources (for example, GPUs).
We have already described the concept of a pod – a single execution group of one or more containers that share common namespaces (network, IPC, and, optionally, PID namespaces). In other words, we can think of pods as sandboxes for containers. Containers inside a Pod are executed and thus started, stopped, or paused simultaneously.
One of the most promising features that was introduced by Podman is the capability to generate Kubernetes resources in YAML format. Podman can intercept the configuration of running containers or pods and generate a Pod resource that is compliant with Kubernetes API specifications.
Along with pods, we can generate Service and PersistentVolumeClaim resources as well, which reflect the configurations of the port mappings and volumes that are mounted inside containers.
We can use the generated Kubernetes resources inside Podman itself as an alternative to the Docker Compose stacks or apply them inside a Kubernetes cluster to orchestrate the execution of simple pods.
Kubernetes has many ways to orchestrate how workloads are executed: Deployments, StatefulSets, DaemonSets, Jobs, and CronJobs. In every case, Pods are their workload-minimal execution units and the orchestration logic changes based on that specific behavior. This means that we can take a Pod resource that's been generated by Podman and easily adapt it to be orchestrated in a more complex object, such as Deployments, which manages replicas and version rollouts of our applications, or DaemonSets, which guarantees that a singleton pod instance is created for every cluster node.
Now, let's learn how to generate Kubernetes YAML resources with Podman.
Generating basic Pod resources from running containers
The basic command to generate Kubernetes resource from Podman is podman generate kube, followed by various options and arguments, as shown in the following code:
$ podman generate kube [options] {CONTAINER|POD|VOLUME}
We can apply this command to a running container, pod, or existing volume. The command also allows you to use the -s, --service option to generate Service resources and -f, --filename to export contents to a file (the default is to standard output).
Let's start with a basic example of a Pod resource that's been generated from a running container. First, we will start a rootless Nginx container:
$ podman run –d
-p 8080:80 --name nginx
docker.io/library/nginx
When the container is created, we can generate our Kubernetes Pod resource:
$ podman generate kube nginx
# Save the output of this file and use kubectl create -f to import
# it into Kubernetes.
#
# Created with podman-4.0.0-rc4
apiVersion: v1
kind: Pod
metadata:
creationTimestamp: "2022-02-10T23:14:25Z"
labels:
app: nginxpod
name: nginx_pod
spec:
containers:
- args:
- nginx
- -g
- daemon off;
image: docker.io/library/nginx:latest
name: nginx
ports:
- containerPort: 80
hostPort: 8080
securityContext:
capabilities:
drop:
- CAP_MKNOD
- CAP_NET_RAW
- CAP_AUDIT_WRITE
Let's describe the generated output. Every new Kubernetes resource is always composed of at least four fields:
- apiVersion: This field describes the API version schema of the resource. The Pod object belongs to the v1 version of the core APIs of Kubernetes.
- kind: This field defines the resource kind, which is Pod in our example.
- metadata: This field is an object that holds a set of resource metadata that usually includes name, namespace, labels, and annotations, along with additional dynamic metadata that's created at runtime, such as creationTimestamp, resourceVersion, or the resource's uid.
- spec: This field holds resource specifications and varies among different resources. For example, a Pod resource will contain a list of containers, along with their startup arguments, volumes, ports, or security contexts.
All the information that's embedded inside a Pod resource is enough to start the pod inside a Kubernetes cluster. Along with the fields described previously, a fifth status field is dynamically created when the pod is running to describe its execution status.
From the generated output, we can notice an args list for every container, along with their startup commands, arguments, and options.
When you're generating a Pod from a container with mapped ports, the following ports list is created inside the Pod resource:
ports:
- containerPort: 80
hostPort: 8080
This means that port 80 must be exposed to the container and port 8080 must be exposed on the host running it. This information will be used by Podman when we create containers and pods with the podman play kube command, as we will see in the next section.
The securityContext object defines capabilities that must be dropped for this container. This means that the CAP_MKNOD, CAP_NET_RAW, and CAP_AUDIT_WRITE capabilities won't be enabled on a pod that's created from this configuration.
We can apply the output of the podman generate kube command directly to a Kubernetes cluster or save it to a file. To save it to a file, we can use the -f option:
$ podman generate kube nginx –f nginx-pod.yaml
To apply the generated output to a running Kubernetes cluster, we can use the Kubernetes CLI tool, kubectl. The kubectl create command applies a resource object inside the cluster:
$ podman generate kube nginx | kubectl create -f -
The basic Pod generation command can be enriched by creating the related Kubernetes services, as described in the next subsection.
Generating Pods and services from running containers
Pods running inside a Kubernetes cluster obtain unique IP addresses on a software-defined network that's managed by the default CNI plugin.
These IPs are not routed externally – we can only reach the Pod's IP address from within the cluster. However, we need a layer to balance multiple replicas of the same pods and provide a DNS resolution for a single abstraction frontend. In other words, our application must be able to query for a given service name and receive a unique IP address that abstracts from the pods' IPs, regardless of the number of replicas.
Important Note
Native, cluster-scoped DNS name resolution in Kubernetes is implemented with the CoreDNS service, which is started when the cluster's control plane is bootstrapped. CoreDNS is delegated to resolve internal requests and to forward ones for external names to authoritative DNS servers outside the cluster.
The resource that describes the abstraction in one or more pods in Kubernetes is called Service.
For example, we can have three replicas of the Nginx pod running inside our cluster and expose them with a unique IP. It belongs to a ClusterIP type, and its allocation is dynamic when the service is created. ClusterIP services are the default in Kubernetes and their assigned IPs are only local to the cluster.
We can also create NodePort type services that use Network Address Translation (NAT) so that the service can be reached from the external world. We can do this by mapping the service VIP and port to a local port on the cluster worker nodes.
If we have a cluster running on an infrastructure that allows dynamic load balancing (such as a public cloud provider), we can create LoadBalancer type services and have the provider manage ingress traffic load balancing for us.
Podman allows you to create services along with pods by adding the -s option to the podman generate kube command. This allows them to be potentially reused inside a Kubernetes cluster. The following example is a variation of the previous one and generates the Service resource along with the previously described Pod:
$ podman generate kube -s nginx
# Save the output of this file and use kubectl create -f to import
# it into Kubernetes.
#
# Created with podman-4.0.0-rc4
apiVersion: v1
kind: Service
metadata:
creationTimestamp: "2022-02-12T21:54:02Z"
labels:
app: nginxpod
name: nginx_pod
spec:
ports:
- name: "80"
nodePort: 30582
port: 80
targetPort: 80
selector:
app: nginxpod
type: NodePort
---
apiVersion: v1
kind: Pod
metadata:
creationTimestamp: "2022-02-12T21:54:02Z"
labels:
app: nginxpod
name: nginx_pod
spec:
containers:
- args:
- nginx
- -g
- daemon off;
image: docker.io/library/nginx:latest
name: nginx
ports:
- containerPort: 80
hostPort: 8080
securityContext:
capabilities:
drop:
- CAP_MKNOD
- CAP_NET_RAW
- CAP_AUDIT_WRITE
The generated output contains, along with the Pod resource, a Service resource that exposes the Nginx pod using a selector field. The selector matches all the pods with the app: nginxpod label.
When the service is created inside a Kubernetes cluster, an internal, non-routed VIP is allocated for the service. Since this is a NodePort type service, a destination NAT (DNAT) rule is created to match incoming traffic on all the cluster nodes on port 30582 and forward it to the service IP.
By default, Podman generates NodePort type services. Whenever a container or pod is decorated with a port mapping, Podman populates the ports object with a list of ports and their related nodePort mappings inside the manifest.
In our use case, we created the Nginx container by mapping its port, 80, to port 8080 on the host. Here, Podman generated a Service that maps the container's port, 80, to port 30582 on the cluster nodes.
Important Note
The nodePort mapping is applied to Kubernetes cluster nodes only, not to standalone hosts running Podman.
The value of creating Kubernetes services and pods from Podman is the ability to port to a Kubernetes platform.
In many cases, we work with composite, multi-tier applications that need to be exported and recreated together. Podman allows us to export multiple containers into a single Kubernetes Pod object or to create and export multiple pods to gain more control over our application. In the next two subsections, we will see both cases applied to a WordPress application and try to find out what the best approach is.
Generating a composite application in a single Pod
In this first scenario, we will implement a multi-tier application in a single pod. The advantage of this approach is that we can leverage the pod as a single unit that will execute multiple containers and that resource sharing across them is simplified.
We will launch two containers – one for MySQL and one for WordPress – and export them as a single Pod resource. We will learn how to work around some minor adjustments to make it work seamlessly later during run tests.
Important Note
The following examples have been created in a rootless context but can be seamlessly applied to rootfull containers too.
A set of scripts that will be useful for launching the stacks and the generated Kubernetes YAML files are available in this book's GitHub repository at https://github.com/PacktPublishing/Podman-for-DevOps/tree/main/Chapter14/kube.
First, we must create two volumes that will be used later by the WordPress and MySQL containers:
$ for vol in dbvol wpvol; do podman volume create $vol; done
Then, we must create an empty pod named wordpress-pod with the necessary pre-defined port mappings:
$ podman pod create --name wordpress-pod -p 8080:80
Now, we can populate our pod by creating the WordPress and MySQL containers. Let's begin with the MySQL container:
$ podman create
--pod wordpress-pod --name db
-v dbvol:/var/lib/mysql
-e MYSQL_ROOT_PASSWORD=myrootpasswd
-e MYSQL_DATABASE=wordpress
-e MYSQL_USER=wordpress
-e MYSQL_PASSWORD=wordpress
docker.io/library/mysql
Now, we can create the WordPress container:
$ podman create
--pod wordpress-pod --name wordpress
-v wpvol:/var/www/html
-e WORDPRESS_DB_HOST=127.0.0.1
-e WORDPRESS_DB_USER=wordpress
-e WORDPRESS_DB_PASSWORD=wordpress
-e WORDPRESS_DB_NAME=wordpress
docker.io/library/wordpress
Here, we can see that the WORDPRESS_DB_HOST variable has been set to 127.0.0.1 (the address of the loopback device) since the two containers are going to run in the same pod and share the same network namespace. For this reason, we let the WordPress container know that the MySQL service is listening on the same loopback device.
Finally, we can start the pod with the podman pod start command:
$ podman pod start wordpress-pod
We can inspect the running containers with podman ps:
$ podman ps
CONTAINER ID IMAGE COMMAND CREATED STATUS PORTS NAMES
19bf706f0eb8 localhost/podman-pause:4.0.0-rc4-1643988335 About an hour ago Up About an hour ago 0.0.0.0:8080->80/tcp 0400f8770627-infra
f1da755a846c docker.io/library/mysql:latest mysqld About an hour ago Up About an hour ago 0.0.0.0:8080->80/tcp db
1f28ef82d58f docker.io/library/wordpress:latest apache2-foregroun... About an hour ago Up About an hour ago 0.0.0.0:8080->80/tcp wordpress
Now, we can point our browser to http://localhost:8080 and confirm the appearance of the WordPress setup dialog screen:

Figure 14.3 – WordPress setup dialog screen
Important Note
The pod also started a third infra container. It is based on a minimal podman-pause image that initializes the pod's network and the IPC namespaces of our example. The image is built directly in the background on the host the first time a pod is created and executes a catatonit process, an init micro container written in C that's designed to handle system signals and zombie process reaping.
This behavior of the pod's infra image is directly inherited from Kubernetes's design.
Now, we are ready to generate our Pod YAML manifest with the podman generate kube command and save it to a file for reuse:
$ podman generate kube wordpress-pod
-f wordpress-single-pod.yaml
The preceding command generates a file with the following content:
# Save the output of this file and use kubectl create -f to import
# it into Kubernetes.
#
# Created with podman-4.0.0-rc4
apiVersion: v1
kind: Pod
metadata:
creationTimestamp: "2022-02-13T11:06:38Z"
labels:
app: wordpress-pod
name: wordpress-pod
spec:
containers:
- args:
- mysqld
env:
- name: MYSQL_PASSWORD
value: wordpress
- name: MYSQL_USER
value: wordpress
- name: MYSQL_ROOT_PASSWORD
value: myrootpasswd
- name: MYSQL_DATABASE
value: wordpress
image: docker.io/library/mysql:latest
name: db
ports:
- containerPort: 80
hostPort: 8080
resources: {}
securityContext:
capabilities:
drop:
- CAP_MKNOD
- CAP_NET_RAW
- CAP_AUDIT_WRITE
volumeMounts:
- mountPath: /var/lib/mysql
name: dbvol-pvc
- args:
- apache2-foreground
env:
- name: WORDPRESS_DB_HOST
value: 127.0.0.1
- name: WORDPRESS_DB_PASSWORD
value: wordpress
- name: WORDPRESS_DB_USER
value: wordpress
- name: WORDPRESS_DB_NAME
value: wordpress
image: docker.io/library/wordpress:latest
name: wordpress
resources: {}
securityContext:
capabilities:
drop:
- CAP_MKNOD
- CAP_NET_RAW
- CAP_AUDIT_WRITE
volumeMounts:
- mountPath: /var/www/html
name: wpvol-pvc
restartPolicy: Never
volumes:
- name: wpvol-pvc
persistentVolumeClaim:
claimName: wpvol
- name: dbvol-pvc
persistentVolumeClaim:
claimName: dbvol
status: {}
Our YAML file holds a single Pod resource with two containers inside. Note that the previously defined environment variables have been created correctly inside our containers (when using Podman v4.0.0 or later).
Also, notice that the two container volumes have been mapped to PersistentVolumeClaim objects, often referred to as PVC objects.
PVCs are Kubernetes resources that are used to request (in other words, claim) a storage volume resource that satisfies a specific capacity and consumption modes. The attached storage volume resource is called a PersistentVolume (PV) and can be created manually or automatically by a StorageClass resource that leverages a storage driver that's compliant with the Container Storage Interface (CSI).
When we create a PVC, StorageClass provisions a PersistentVolume that satisfied our storage requests, and the two resources are bound together. This approach decouples the storage request from storage provisioning and makes storage consumption in Kubernetes more portable.
When Podman generates Kubernetes YAML files, PVC resources are not exported by default. However, we can also export the PVC resources to recreate them in Kubernetes with the podman generate kube <VOLUME_NAME> command.
The following command exports the WordPress application, along with its volume definitions, as a PVC:
$ podman generate kube wordpress-pod wpvol dbvol
The following is an example of the dbvol volume translated into a PersistentVolumeClaim:
apiVersion: v1
kind: PersistentVolumeClaim
metadata:
annotations:
volume.podman.io/driver: local
creationTimestamp: "2022-02-13T14:51:05Z"
name: dbvol
spec:
accessModes:
- ReadWriteOnce
resources:
requests:
storage: 1Gi
status: {}
This approach has the advantage of providing the necessary PVC definitions to recreate the whole application in a Kubernetes cluster, but it is not necessary to recreate the volume resources in Podman: if they're not available, an empty volume with the same name will be created automatically.
To recreate all the resource dependencies in a Kubernetes cluster, we can also export the application's Service resource.
The following command exports everything in our WordPress example, including pods, services, and volumes:
$ podman generate kube -s wordpress-pod wpvol dbvol
Before we move on, let's briefly dig into the single pod approach logic that was described in this subsection and look at its advantages and possible limitations.
One great advantage of executing all the containers in a single pod is the simpler networking configuration – one network namespace is shared by all the running containers. This also means we don't have to create a dedicated Podman network to let the containers communicate with each other.
On the other hand, this approach does not reflect the common Kubernetes pattern of executing pods. In Kubernetes, we would prefer to split the WordPress pod and the MySQL pod to manage them independently and have different services associated with them. More separation implies more control and the chance to update independently.
In the next subsection, you'll learn how to replicate this approach and generate multiple pods for every application tier.
Generating composite applications with multiple Pods
One of the features of Docker Compose is that you can create different independent containers that communicate with each other using a service abstraction concept that is decoupled from the container's execution.
The Podman community (and many of its users) believe that a standardization toward Kubernetes YAML manifests to describe complex workloads is useful to get closer to the mainstream orchestration solution.
For this reason, the approach we'll describe in this section can become a full replacement for Docker Compose while providing Kubernetes portability at the same time. First, we will learn how to prepare an environment that can be used to generate the YAML manifests. After that, we can get rid of the workloads and only use the Kubernetes YAML to run our workloads.
The following example can be executed with rootless containers and networks.
Important Note
Before continuing, make sure that the previous example pod and containers have been completely removed, along with their volumes, to prevent any issues with port assignment or WordPress content initialization. Please refer to the commands in this book's GitHub repository as a reference: https://github.com/PacktPublishing/Podman-for-DevOps/tree/main/AdditionalMaterial.
First, we need to create a network. We have chosen the name kubenet to identify it easily and leave it with the default configuration for the sake of our example:
$ podman network create kubenet
Once the network has been created, the two dbvol and wpvol volumes must be created:
$ for vol in wpvol dbvol; do podman volume create $vol; done
We want to generate two distinct pods – one for each container. First, we must create the MySQL pod and its related container:
$ podman pod create –p 3306:3306
--network kubenet
--name mysql-pod
$ podman create --name db
--pod mysql-pod
-v dbvol:/var/lib/mysql
-e MYSQL_ROOT_PASSWORD=myrootpasswd
-e MYSQL_DATABASE=wordpress
-e MYSQL_USER=wordpress
-e MYSQL_PASSWORD=wordpress
docker.io/library/mysql
Notice the port mapping, which we can use to access the MySQL service from a client and create the correct port mapping later in the Kubernetes service.
Now, let's create the WordPress pod and container:
$ podman pod create -p 8080:80
--network kubenet
--name wordpress-pod
$ podman create --name wordpress
--pod wordpress-pod
-v wpvol:/var/www/html
-e WORDPRESS_DB_HOST=mysql-pod
-e WORDPRESS_DB_USER=wordpress
-e WORDPRESS_DB_PASSWORD=wordpress
-e WORDPRESS_DB_NAME=wordpress
docker.io/library/wordpress
There is a very important variable in the preceding command that can be considered the key to this approach: WORDPRESS_DB_HOST is populated with the mysql-pod string, which is the name that's been given to the MySQL pod.
In Podman, the pod's name will act as the service name of the application and the DNS daemon associated with the network (dnsmasq in Podman 3 or aardvark-dns in Podman 4) will directly resolve the pod name to the associated IP address. This is a key feature that makes multi-pod applications a perfect replacement for Compose stacks.
Now, we can start the two pods and have all the containers up and running:
$ podman pod start mysql-pod &&
podman pod start wordpress-pod
Once again, pointing our browsers to http://localhost:8080 should lead us to the WordPress first setup page (if everything was set up correctly).
Now, we are ready to export our Kubernetes YAML manifest. We can choose to simply export the two Pod resources or create a full export that also includes services and volumes. This is useful if you need to import to a Kubernetes cluster.
Let's start with the basic version:
$ podman generate kube
-f wordpress-multi-pod-basic.yaml
wordpress-pod
mysql-pod
The output of the preceding code will contain nothing but the two Pod resources:
# Save the output of this file and use kubectl create -f to import
# it into Kubernetes.
#
# Created with podman-4.0.0-rc4
apiVersion: v1
kind: Pod
metadata:
creationTimestamp: "2022-02-13T21:32:48Z"
labels:
app: wordpress-pod
name: wordpress-pod
spec:
containers:
- args:
- apache2-foreground
env:
- name: WORDPRESS_DB_NAME
value: wordpress
- name: WORDPRESS_DB_HOST
value: mysql-pod
- name: WORDPRESS_DB_PASSWORD
value: wordpress
- name: WORDPRESS_DB_USER
value: wordpress
image: docker.io/library/wordpress:latest
name: wordpress
ports:
- containerPort: 80
hostPort: 8080
resources: {}
securityContext:
capabilities:
drop:
- CAP_MKNOD
- CAP_NET_RAW
- CAP_AUDIT_WRITE
volumeMounts:
- mountPath: /var/www/html
name: wpvol-pvc
restartPolicy: Never
volumes:
- name: wpvol-pvc
persistentVolumeClaim:
claimName: wpvol
status: {}
---
apiVersion: v1
kind: Pod
metadata:
creationTimestamp: "2022-02-13T21:32:48Z"
labels:
app: mysql-pod
name: mysql-pod
spec:
containers:
- args:
- mysqld
env:
- name: MYSQL_ROOT_PASSWORD
value: myrootpasswd
- name: MYSQL_DATABASE
value: wordpress
- name: MYSQL_USER
value: wordpress
- name: MYSQL_PASSWORD
value: wordpress
image: docker.io/library/mysql:latest
name: db
ports:
- containerPort: 3306
hostPort: 3306
resources: {}
securityContext:
capabilities:
drop:
- CAP_MKNOD
- CAP_NET_RAW
- CAP_AUDIT_WRITE
volumeMounts:
- mountPath: /var/lib/mysql
name: dbvol-pvc
restartPolicy: Never
volumes:
- name: dbvol-pvc
persistentVolumeClaim:
claimName: dbvol
status: {}
The resulting file is also available in this book's GitHub repository:
As we will see in the next section, this YAML file is enough to recreate a fully working WordPress application on Podman from scratch. We can persist and version it on a source control repository such as Git for future reuse.
The following code exports the two Pod resources, along with the PersistentVolumeClaim and Service resources:
$ podman generate kube -s
-f wordpress-multi-pod-full.yaml
wordpress-pod
mysql-pod
dbvol
wpvol
The output of this command is also available in this book's GitHub repository:
This full manifest is useful for importing and testing our application on a Kubernetes cluster, where the Service and PersistentVolumeClaim resources are necessary.
Now, we are ready to test our generated resources in Podman and learn how to reproduce full stack deployments with simple operations.
Running Kubernetes resource files in Podman
Now that we've learned how to generate Kubernetes YAML files containing the necessary resources to deploy our applications, we want to test them in a real scenario.
For this book, we will use the WordPress application again, both in its simple form with a single container and in its multi-pod variation.
The following examples are also available in this book's GitHub repository – you can choose to use the resources that have been generated from your labs or use the prepared manifests in this book's repository.
Important Note
Don't forget to clean up all the previous workloads before testing the creation of Kubernetes resources with Podman.
For all our examples, we will use the podman play kube command. It offers us an easy and intuitive interface for managing the execution of complex stacks with a good degree of customization.
The first example will be based on the single-pod manifest:
$ podman play kube wordpress-single-pod.yaml
The preceding command creates a pod called wordpress-pod that's composed of the two containers, along with the necessary volumes. Let's inspect the results and see what happened:
$ podman pod ps
POD ID NAME STATUS CREATED INFRA ID # OF CONTAINERS
5f8ecfe66acd wordpress-pod Running 4 minutes ago 46b4bdfe6a08 3
We can also check the running containers. Here, we expect to see the two WordPress and MySQL containers and the third infra-related podman-pause:
$ podman ps
CONTAINER ID IMAGE COMMAND CREATED STATUS PORTS NAMES
46b4bdfe6a08 localhost/podman-pause:4.0.0-rc4-1643988335 4 minutes ago Up 4 minutes ago 0.0.0.0:8080->80/tcp 5f8ecfe66acd-infra
ef88a5c8d1e5 docker.io/library/mysql:latest mysqld 4 minutes ago Up 4 minutes ago 0.0.0.0:8080->80/tcp wordpress-pod-db
76c6b6328653 docker.io/library/wordpress:latest apache2-foregroun... 4 minutes ago Up 4 minutes ago 0.0.0.0:8080->80/tcp wordpress-pod-wordpress
Finally, we can verify if the dbvol and wpvol volumes have been created:
$ podman volume ls
DRIVER VOLUME NAME
local dbvol
local wpvol
Before we look at the more articulated (and interesting) example with the multi-pod manifest, we must clean up the environment. We can do this manually or by using the --down option of the podman play kube command, which immediately stops and removes the running pods:
$ podman play kube --down wordpress-single-pod.yaml
Pods stopped:
5f8ecfe66acd01b705f38cd175fad222890ab612bf572807082f30ab37fd 0b88
Pods removed:
5f8ecfe66acd01b705f38cd175fad222890ab612bf572807082f30ab37fd 0b88
Important Note
Volumes are not removed by default since it can be useful to keep them if containers have already written data on them. To remove unused volumes, use the podman volume prune command.
Now, let's run the multi-pod example using the basic exported manifest:
$ podman play kube --network kubenet
wordpress-multi-pod-basic.yaml
Notice the additional --network argument, which is used to specify the network that the pods will be attached to. This is necessary information since the Kubernetes YAML file contains no information about Podman networks. Our pods will be executed in rootless mode and attached to the rootless kubenet network.
We can check that the two pods have been created correctly by using the following command:
$ podman pod ps
POD ID NAME STATUS CREATED INFRA ID # OF CONTAINERS
c9d775da0379 mysql-pod Running 8 minutes ago 71c93fa6080b 2
3b497cbaeebc wordpress-pod Running 8 minutes ago 0c52ee133f0f 2
Now, we can inspect the running containers. The strings that are highlighted in the following code represent the main workload to differentiate from the infra containers:
$ podman ps --format "{{.Image }} {{.Names}}"
localhost/podman-pause:4.0.0-rc5-1644672408 3b497cbaeebc-infra
docker.io/library/wordpress:latest wordpress-pod-wordpress
localhost/podman-pause:4.0.0-rc5-1644672408 c9d775da0379-infra
docker.io/library/mysql:latest mysql-pod-db
The podman volume ls command confirms the existence of the two volumes:
$ podman volume ls
DRIVER VOLUME NAME
local dbvol
local wpvol
The rootless network configuration can be inspected with the podman unshare command:
$ podman unshare --rootless-netns ip addr show
Important Note
The --rootless-netns option is only available on Podman 4, which is the recommended version for this chapter.
Finally, let's inspect the DNS behavior. On Podman 4, the name resolution for custom networks is managed by the aardvark-dns daemon, while on Podman 3, it is managed by dnsmasq. Since we assume you're using Podman 4 for these examples, let's look at its DNS configuration. For rootless networks, we can find the managed records in the /run/user/<UID>/containers/networks/aardvark-dns/<NETWORK_NAME> file.
In our example, the configuration for the kubenet network is as follows:
$ cat /run/user/1000/containers/networks/aardvark-dns/kubenet
10.89.0.1
0c52ee133f0fec5084f25bd89ad8bd0f6af2fc46d696e2b8161864567b0a92 0b 10.89.0.4 wordpress-pod,0c52ee133f0f
71c93fa6080b6a3bfe1ebad3e164594c5fa7ea584e180113d2893eb67f6f3b 56 10.89.0.5 mysql-pod,71c93fa6080b
The most amazing thing from this output is the confirmation that the name resolution now works at the pod level, not at the container level. This is fair if we think that the pod initialized the namespaces, including the network namespace. For this reason, we can treat the pod name in Podman as a service name.
Here, we demonstrated how the Kubernetes manifests that are generated with Podman can become a great replacement for the Docker Compose approach while being more portable. Now, let's learn how to import our generated resources into a test Kubernetes cluster.
Testing the results in Kubernetes
In this section, we want to import the multi-pod YAML file, which is enriched with the Services and PVC configurations, on Kubernetes.
To provide a repeatable environment, we will use minikube (with a lowercase m), a portable solution, to create an all-in-one Kubernetes cluster as the local infrastructure.
The minikube project aims to provide a local Kubernetes cluster on Linux, Windows, and macOS. It uses host virtualization to spin up a VM that runs the all-in-one cluster or containerization to create a control plane that runs inside a container. It also provides a large set of add-ons to extend cluster functionalities, such as ingress controllers, service meshes, registries, logging, and more.
Another widely adopted alternative to spinning up a local Kubernetes cluster is the Kubernetes in Docker (KinD) project, which is not described in this book. KinD runs a Kubernetes control plane inside a container that's driven by Docker or Podman.
To set up minikube, users need virtualization support (KVM, VirtualBox, Hyper-V, Parallels, or VMware) or a container runtime such as Docker or Podman.
For brevity, we will not cover the technical steps necessary to configure the virtualization support for the different OSs; instead, we will use a GNU/Linux distribution.
Important Note
If you already own a running Kubernetes cluster or want to set up one in an alternative way, you can skip the next minikube configuration quick start and go to the Running generated resource files in Kubernetes subsection.
Setting up minikube
Run the following commands to download and install the latest minikube binary:
$ curl -LO https://storage.googleapis.com/minikube/releases/latest/minikube-linux-amd64
$ sudo install minikube-linux-amd64 /usr/local/bin/minikube
You can choose to run minikube with a virtualization or containerization driver. To run minikube as a virtual machine on the KVM driver, you must install the Qemu/KVM and libvirt packages.
On Fedora, run the following command to install all the mandatory and default packages using the @virtualization package group:
$ sudo dnf install @virtualization
Now, start and enable the libvirtd service:
$ sudo systemctl enable --now libvirtd
To grant the user running minikube the proper permissions, append it to the libvirt supplementary group (this operation requires a new login to load the new group):
$ sudo usermod -aG libvirt $(whoami)
The following command statically configures the kvm2 driver as the default:
$ minikube config set driver kvm2
When the preceding command is executed for the first time, minikube will automatically download the proper kvm2 driver binary before starting the VM.
Alternatively, you can choose to run minikube as a containerized service with Docker or Podman. Assuming Podman is already installed, we only need to ensure that the user running minikube can run passwordless sudo. This is necessary since the Kubernetes cluster must run in a rootfull container, so privilege escalation is necessary. To allow passwordless privilege escalation for Podman, edit the /etc/sudoers file with the following command:
$ sudo visudo
Once opened, add the following line to the end of the file to grant passwordless escalation for the Podman binary and save it. Remember to replace <username> with your user's name:
<username> ALL=(ALL) NOPASSWD: /usr/bin/podman
The following command statically configures the podman driver as the default:
$ minikube config set driver podman
Important Note
If your host is a virtual machine running on a hypervisor such as KVM and Podman is installed on the host, minikube will detect the environment and set up the default driver as podman automatically.
To use minikube, users also need to install the Kubernetes CLI tool, kubectl. The following commands download and install the latest Linux release:
$ version=$(curl -L -s https://dl.k8s.io/release/stable.txt) curl -LO "https://dl.k8s.io/release/${version}/bin/linux/amd64/kubectl $ sudo install -o root -g root
-m 0755 kubectl
/usr/local/bin/kubectl
Now, we are ready to run our Kubernetes cluster with minikube.
Starting minikube
To start minikube as a VM, use the CRI-O container runtime inside the Kubernetes cluster:
$ minikube start --driver=kvm2 --container-runtime=cri-o
The --driver option is not necessary if kvm2 has already been configured as the default driver with the minikube config set driver command.
To start minikube with Podman, use the CRI-O container runtime inside the cluster:
$ minikube start --driver=podman --container-runtime=cri-o
Again, the --driver option is not necessary if podman has been already configured as the default driver with the minikube config set driver command.
To ensure that the cluster has been created correctly, run the following command with the kubectl CLI. All the pods should have the Running status:
$ kubectl get pods –A
NAMESPACE NAME READY STATUS RESTARTS AGE
kube-system coredns-64897985d-gqnrn 1/1 Running 0 19s
kube-system etcd-minikube 1/1 Running 0 27s
kube-system kube-apiserver-minikube 1/1 Running 0 27s
kube-system kube-controller-manager-minikube 1/1 Running 0 27s
kube-system kube-proxy-sj7xn 1/1 Running 0 20s
kube-system kube-scheduler-minikube 1/1 Running 0 33s
kube-system storage-provisioner 1/1 Running 0 30s
Important Note
If one or more containers still have the ContainerCreating status, wait a little longer for the images to be pulled.
Also, notice that the output may differ slightly if you're running minikube with a Podman driver. In that case, an additional pod named kindnet will be created to help manage CNI networking inside the cluster.
With that, we have set everything up for a local Kubernetes environment and are ready to test our generated manifests.
Running generated resource files in Kubernetes
In the Generating a composite application with multiple Pods section, we learned how to export a manifest file from Podman that included the Pod resources, along with the Service and PersistentVolumeClaim resources. The need to export this set of resources is related to the way Kubernetes handles workloads, storage, and exposed services.
Kubernetes services are needed to provide a resolution mechanism, as well as internal load balancing. In our example, the mysql-pod pod will be mapped to a homonymous mysql-pod service.
PVCs are required to define a storage claim that starts provisioning persistent volumes for our pods. In minikube, automated provisioning is implemented by a local StorageClass named minikube-hostpath; it creates local directories in the VM/container filesystem that are later bind-mounted inside the pods' containers.
We can roll out our WordPress stack by using the kubectl create command:
$ kubectl create –f wordpress-multi-pod-full.yaml
If not specified, all the resources will be created in the default Kubernetes namespace. Let's wait for the pods to reach the Running status and inspect the results.
First, we can inspect the pods and services that have been created:
$ kubectl get pods
NAME READY STATUS RESTARTS AGE
mysql-pod 1/1 Running 0 48m
wordpress-pod 1/1 Running 0 48m
$ kubectl get svc
NAME TYPE CLUSTER-IP EXTERNAL-IP PORT(S) AGE
kubernetes ClusterIP 10.96.0.1 <none> 443/TCP 53m
mysql-pod NodePort 10.108.34.77 <none> 3306:30284/TCP 52m
wordpress-pod NodePort 10.96.63.142 <none> 80:30408/TCP 52m
Notice that the two mysql-pod and wordpress-pod services have been created with the NodePort type and mapped to a port on a 30000 or upper range. We will use the 30408 port to test the WordPress frontend.
The pods are mapped by the services using label matching logic. If the labels that have been defined in the service's selector field exist in the pod, it becomes an endpoint to the service itself. Let's view the current endpoints in our project:
$ kubectl get endpoints
NAME ENDPOINTS AGE
kubernetes 10.88.0.6:8443 84m
mysql-pod 10.244.0.5:3306 4m9s
wordpress-pod 10.244.0.6:80 4m9s
Important Note
The kubernetes service and its related endpoint provide API access to internal workloads. However, it is not part of this book's examples, so it can be ignored in this context.
Let's also inspect the claims and their related volumes:
$ kubectl get pvc
NAME STATUS VOLUME CAPACITY ACCESS MODES STORAGECLASS AGE
dbvol Bound pvc-4d4a047b-bd20-4bef-879c-c3d80f96d712 1Gi RWO standard 54m
wpvol Bound pvc-accd7947-1499-44b5-bac8-9345da7edc23 1Gi RWO standard 54m
$ kubectl get pv
NAME CAPACITY ACCESS MODES RECLAIM POLICY STATUS CLAIM STORAGECLASS REASON AGE
pvc-4d4a047b-bd20-4bef-879c-c3d80f96d712 1Gi RWO Delete Bound default/dbvol standard 60m
pvc-accd7947-1499-44b5-bac8-9345da7edc23 1Gi RWO Delete Bound default/wpvol standard 60m
The two PVC resources have been created and bound to two dynamically provisioned persistent volumes. So long as the PVC objects exist, the related PV will stay untouched, even if the pods are destroyed and recreated.
Now, the WordPress application can be tested. By default, minikube does not deploy an ingress controller (even though this can be enabled with the minikube addons enable ingress command), so we will use the simple NodePort service to test the functionalities of our application.
The current minikube VM/container IP must be obtained to reach the exposed NodePort service. Port 30408, which is associated with the wordpress-pod service, listens to the IP address that's produced by the following command:
$ minikube ip
10.88.0.6
Now, we can point our browser to http://10.88.0.6:30408 and see the WordPress first setup screen.
To remove the WordPress application and all its related content, use the kubectl delete command in the YAML manifest file:
$ kubectl delete –f wordpress-multi-pod-full.yaml
This command removes all the resources that have been defined in the file, including the generated PVs.
Summary
With that, we have reached the end of this book about Podman and its companion tools.
First, we learned how to generate Systemd unit files and control containerized workloads as Systemd services, which allows us to, for example, automate container execution at system startup.
After that, we learned how to generate Kubernetes YAML resources. Starting with basic concepts and examples, we learned how to generate complex application stacks using both single-pod and multiple pods approaches and illustrated how the latter can provide a great alternative (and Kubernetes compliant) to the Docker Compose methodology.
Finally, we tested our results on Podman and a local Kubernetes cluster that had been created with minikube to show the great portability of this approach.
This book's journey finishes here, but Podman's amazing evolution continues thanks to its growing adoption in many contexts and its vibrant and helpful community.
Before you move on, don't forget to join the community on IRC, Matrix, or Discord and subscribe to the relevant mailing lists. Feel free to ask for and give feedback and contribute to help with the growth of the project.
Thank you for your interest and dedication.
Further reading
To learn more about the topics that were covered in this chapter, take a look at the following resources:
- The Catatonit repository on GitHub: https://github.com/openSUSE/catatonit
- Kubernetes persistent volumes definition: https://kubernetes.io/docs/concepts/storage/persistent-volumes/
- The minikube project's home page: https://minikube.sigs.k8s.io/
- The KinD project's home page: https://kind.sigs.k8s.io/
- Podman community links: https://podman.io/community/