PRELIMINARY
Work
Subject & Point of View
Everything starts with selecting a subject to sketch or paint. I suggest that the subject itself really doesn’t matter—it’s what you do with it that counts. Sometimes the search for that perfect, inspirational scene intimidates us, and we are afraid to start, assuming that our feeble attempts to depict it will fall far short of our expectations. For example, you may love that photo of the Grand Canyon you took last summer. That would make an awesome painting! No doubt it would, but you may want to practice on something a little closer to home to begin with. How about a still life of your art supplies or the wooden bench in your backyard? Such simple subjects can be transformed into beautiful sketches and paintings.
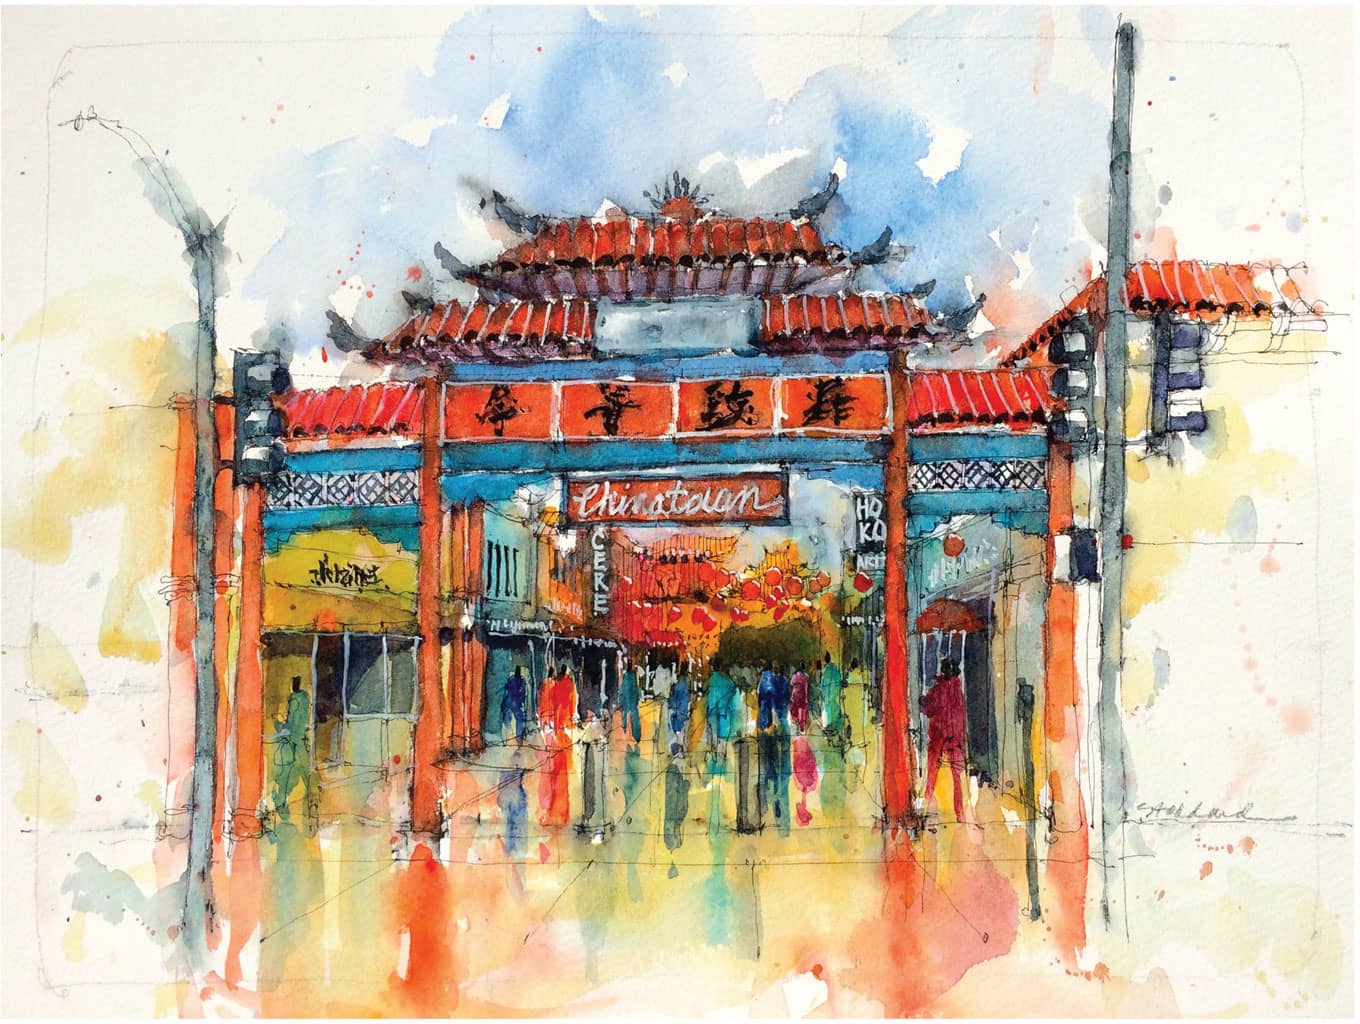
When I think of my favorite watercolors, they are usually of everyday scenes. Yes, I love the epic full-size painting of Yosemite during a dramatic summer storm, but it’s the familiar that rings truest for me.


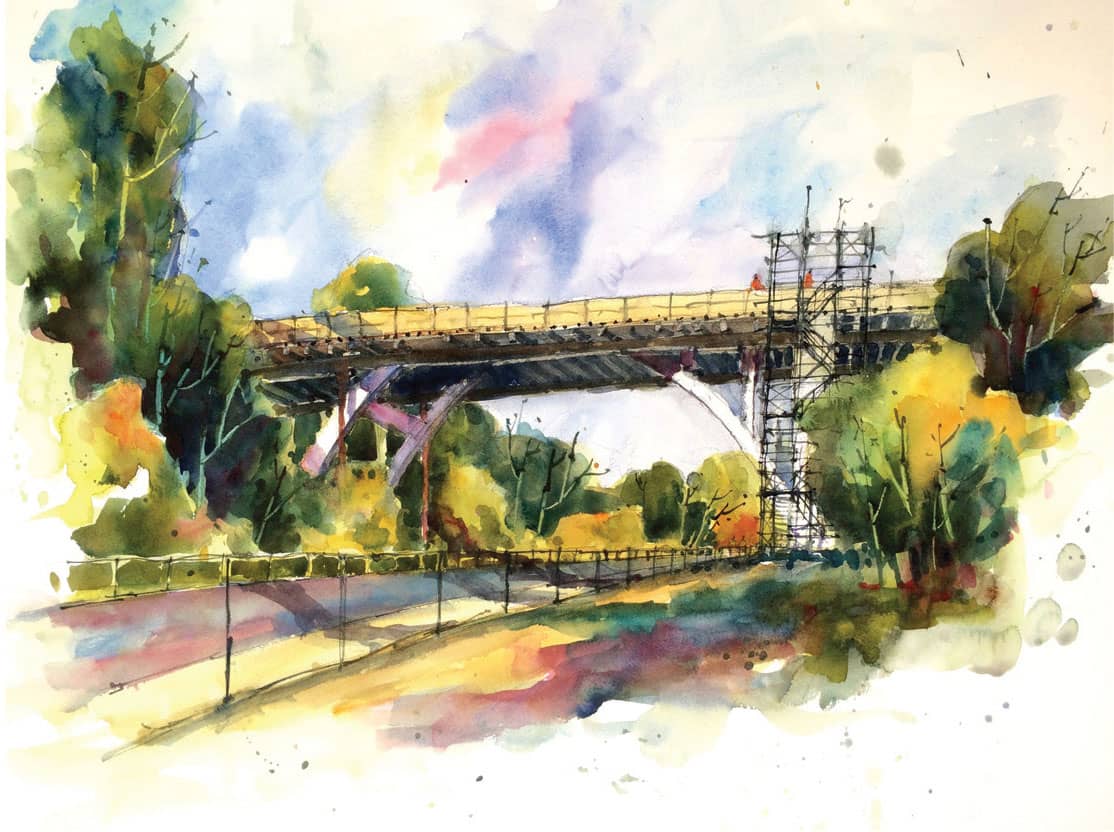
Another aspect of this topic is selecting a point of view that is a little unusual. I love painting an old concrete bridge near my home. It has been under reconstruction for a few years and was covered with scaffolding and surrounded by cranes. The other day I sketched it with all the construction activity going on, and it made an interesting and compelling scene. Here is the simple everyday place, in an unusual setting.
Sometimes I use my camera’s viewfinder to explore different views. Better yet, do a series of small, quick study sketches. I often do a few small study sketches before making my large study sketch.
Thumbnail Sketches
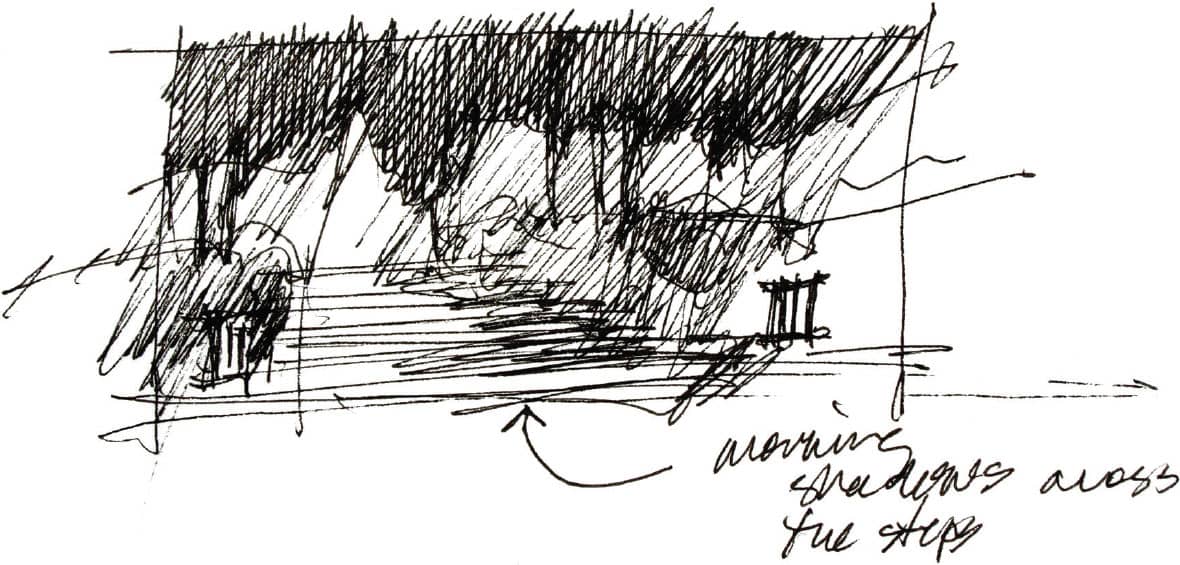
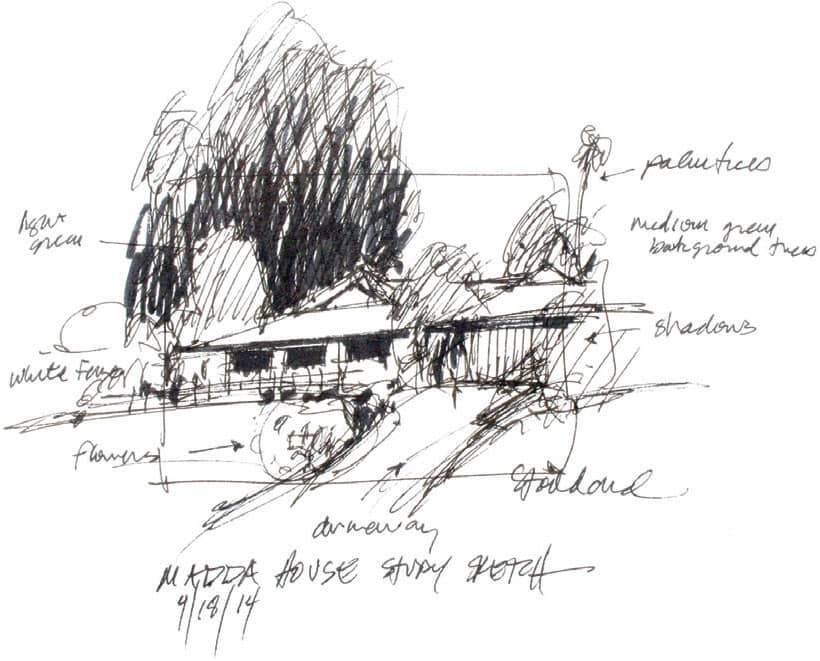
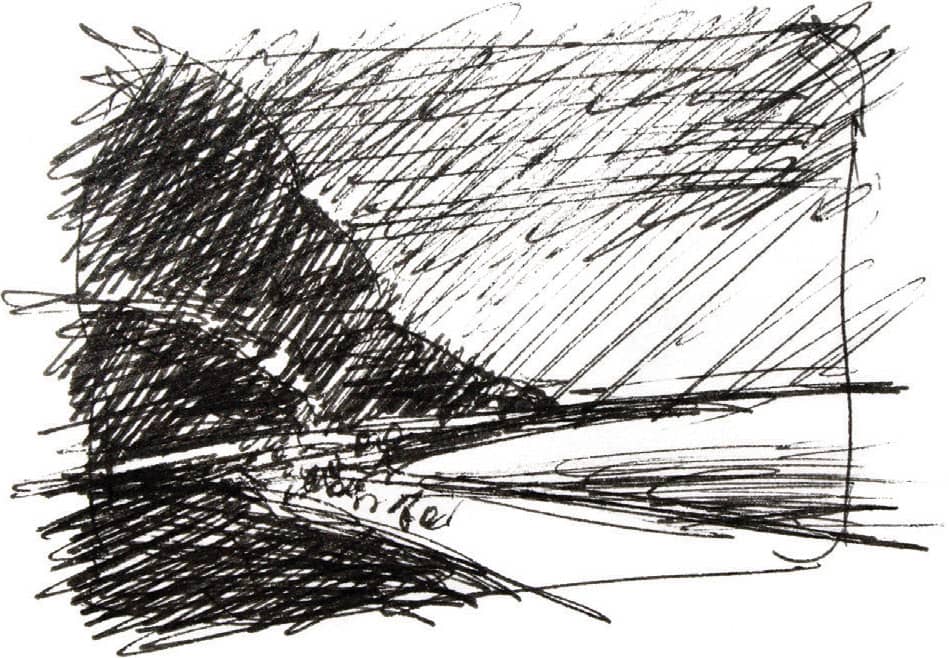
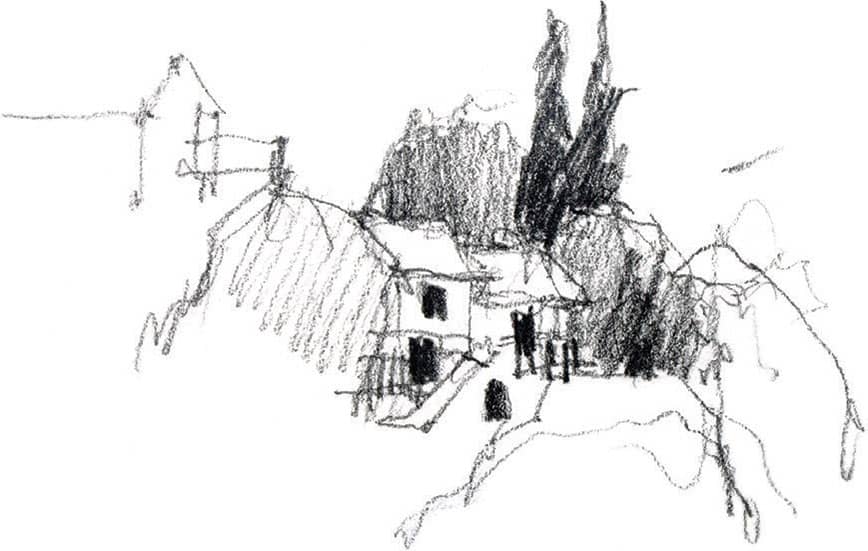
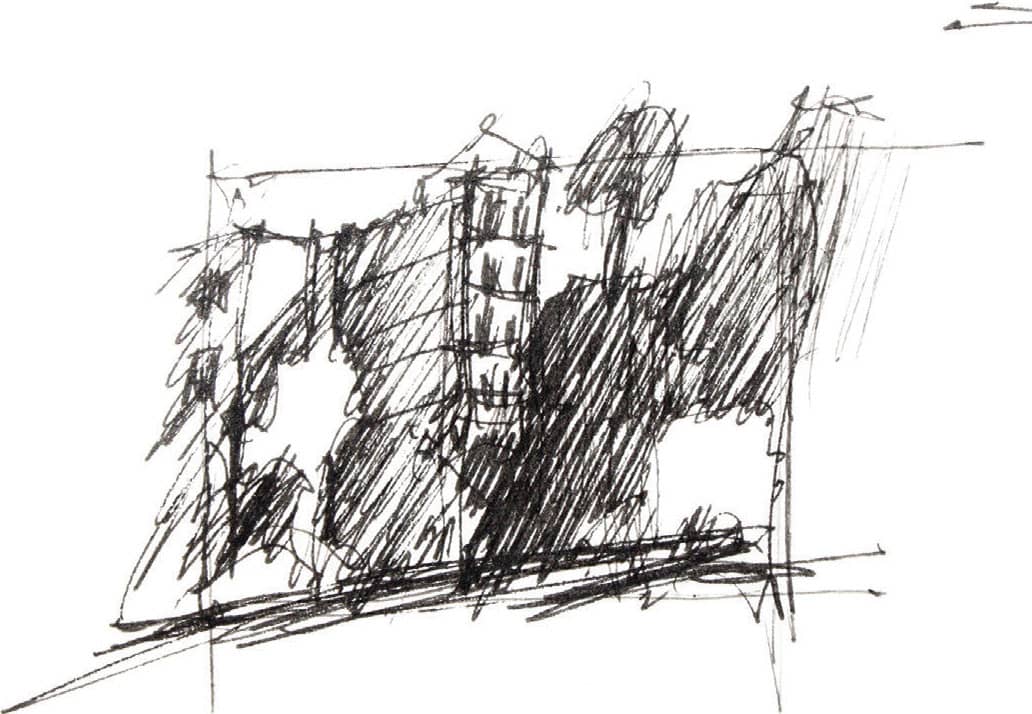
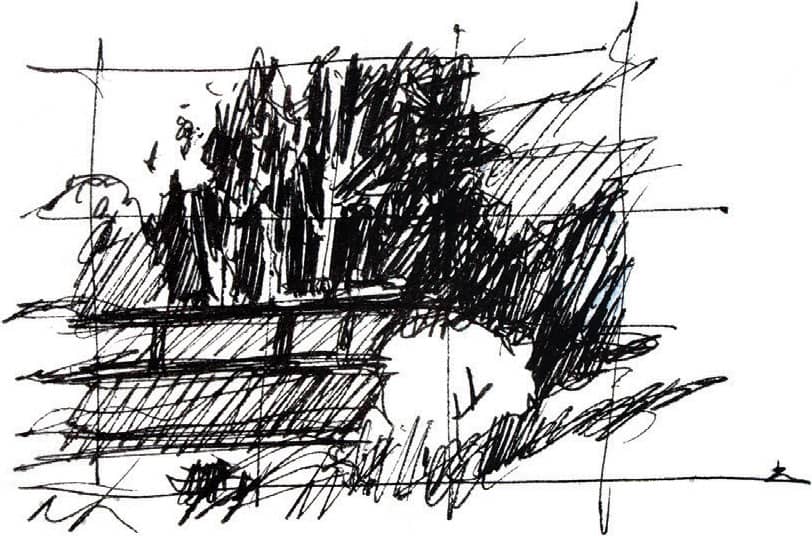
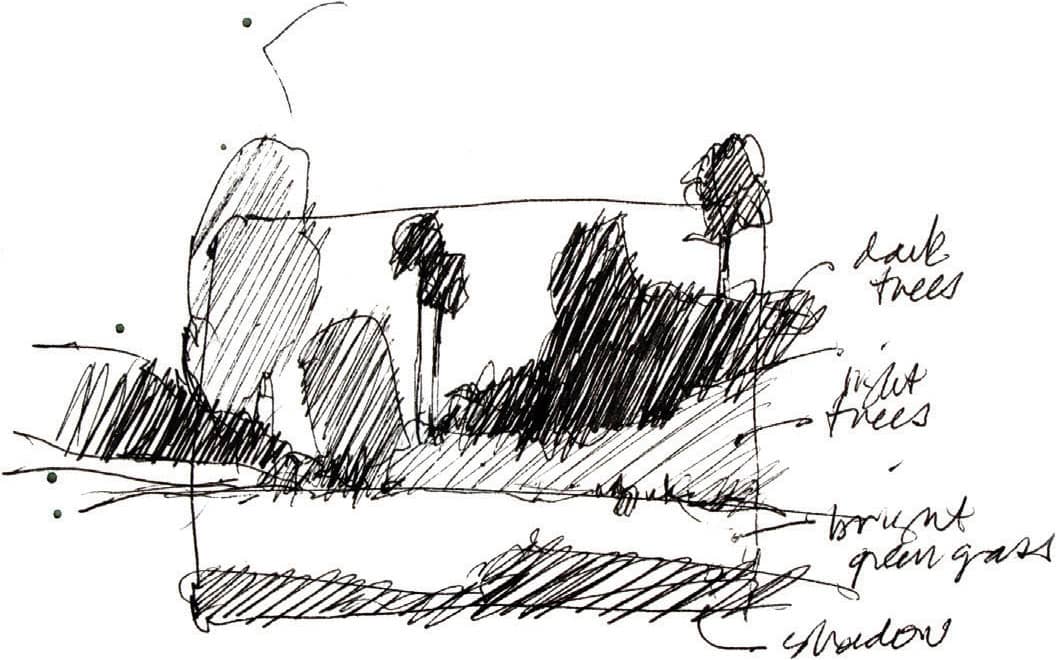
A thumbnail sketch is a small, simple drawing done very quickly. I do several of these for each painting, exploring different compositions and value patterns. I try to simplify the scene to make a strong, clear expression of the point of my painting.
I use four distinct values for these sketches: dark, medium, light, and the white of the paper. It’s a challenge to work this small, because you must work simply and eliminate the details. This enables you to view your ideas in a simplified, value-only state, creating a strong design-based painting that will look good enlarged. Don’t just scribble around; draw in clear, defined shapes. When working with pen, use crosshatching to render the values.

After I have done a few studies of the same scene, I select one that is simple and has a dramatic value pattern. This becomes my “roadmap” for the finished painting. The composition and values are worked out, and I know where I am going. This frees me to explore colors and paint with abandon, following the value study. Sometimes I do one or two larger studies in color, just to explore some additional options. This is another planning tool that helps you practice. Occasionally, I do my study adjacent to my painting, so it’s right in front of me as I work. It sometimes becomes a part of the final composition.
Look at the additional thumbnails on the following page. Note how little detail goes into each sketch.
Focal Point
A focal point is the part of the painting you look at first. It is also known as the center of interest. For most of my paintings, I like to have a clear focal point—a main idea, a reason I did the painting in the first place. Granted, sometimes my main idea is just a beautiful valley bathed in the light of a summer sunset. In that case, the whole painting is the main point.
Most often, however, I want to guide the viewer to something particular in the painting. Good composition usually requires a focal point. There are a variety of ways to do this.
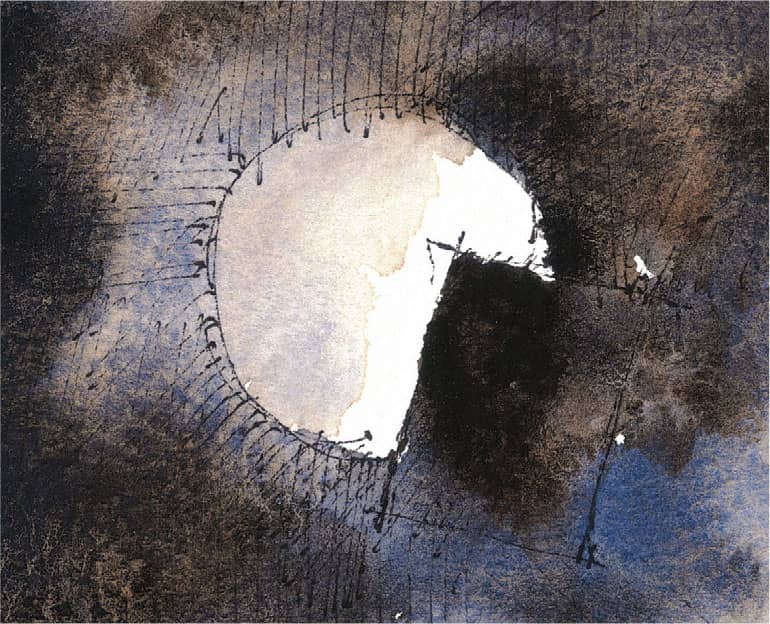
VALUE Place the darkest dark against the lightest light. Your eye will naturally be drawn to that contrast.
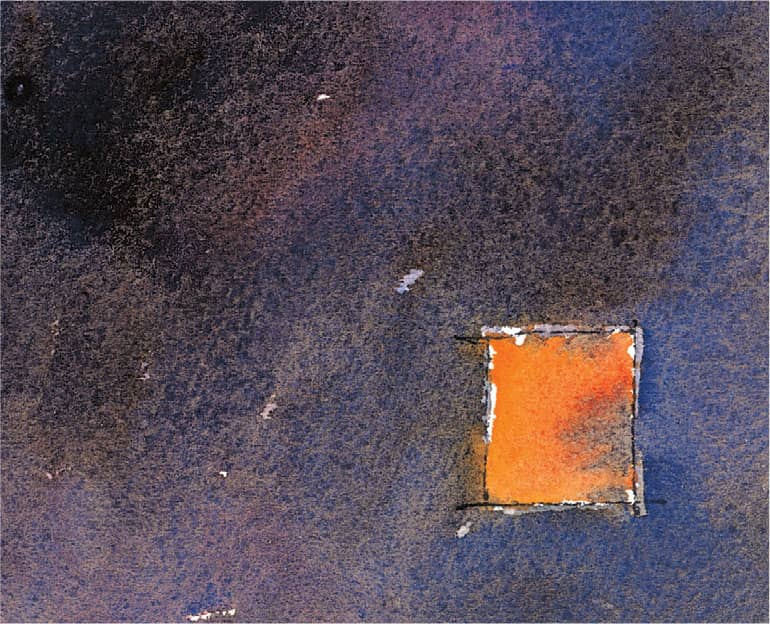
COLOR ACCENT Place a bright color in a muted painting.
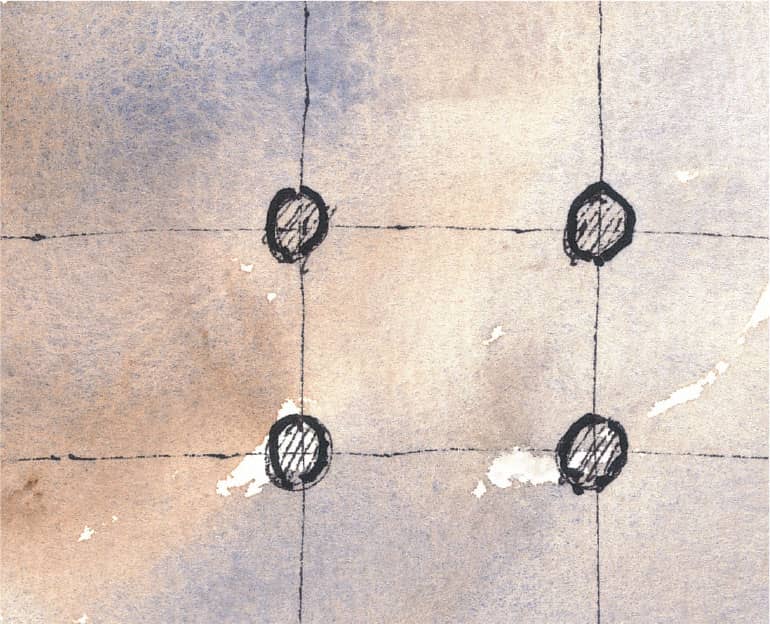
PAGE POSITION Divide the page into thirds, both horizontally and vertically. Where two of those lines cross is where the focal point should occur. Place something of interest (a car, person, phone pole, etc.) there. This is also called the “rule of thirds.”
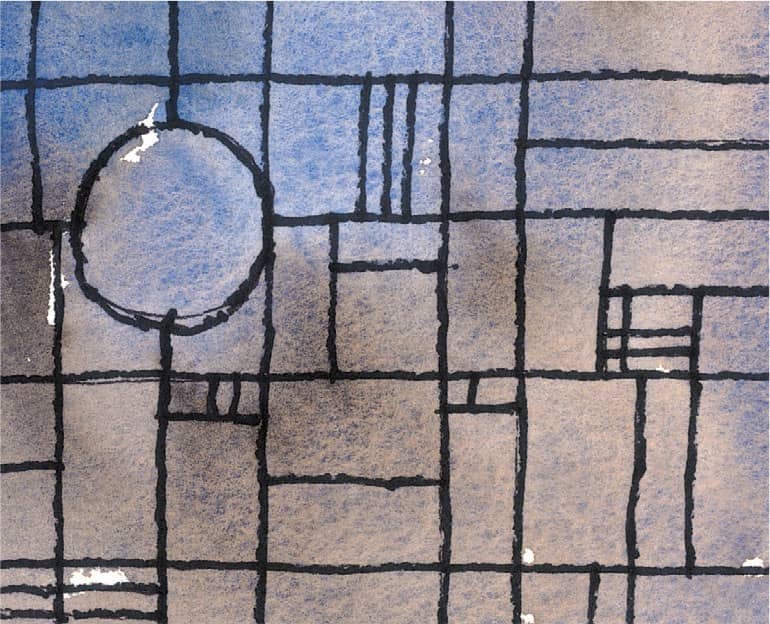
SHAPE CONTRAST Place a smooth-sided object within a background of irregular shapes.
CLARITY Position a defined object within an abstract background.

COMPLEMENTARY COLORS Place a red object in a sea of green. (Or a purple object in a sea of yellow, or a blue object in a sea of orange, etc.)
TEMPERATURE Paint a warm-colored object against a cool background.
LINE WORK & DETAIL Include more line work and detail for an object placed within a minimalist and undefined background.
JUXTAPOSITION Place a vertical line in a horizontal painting, or a horizontal line in a vertical painting.
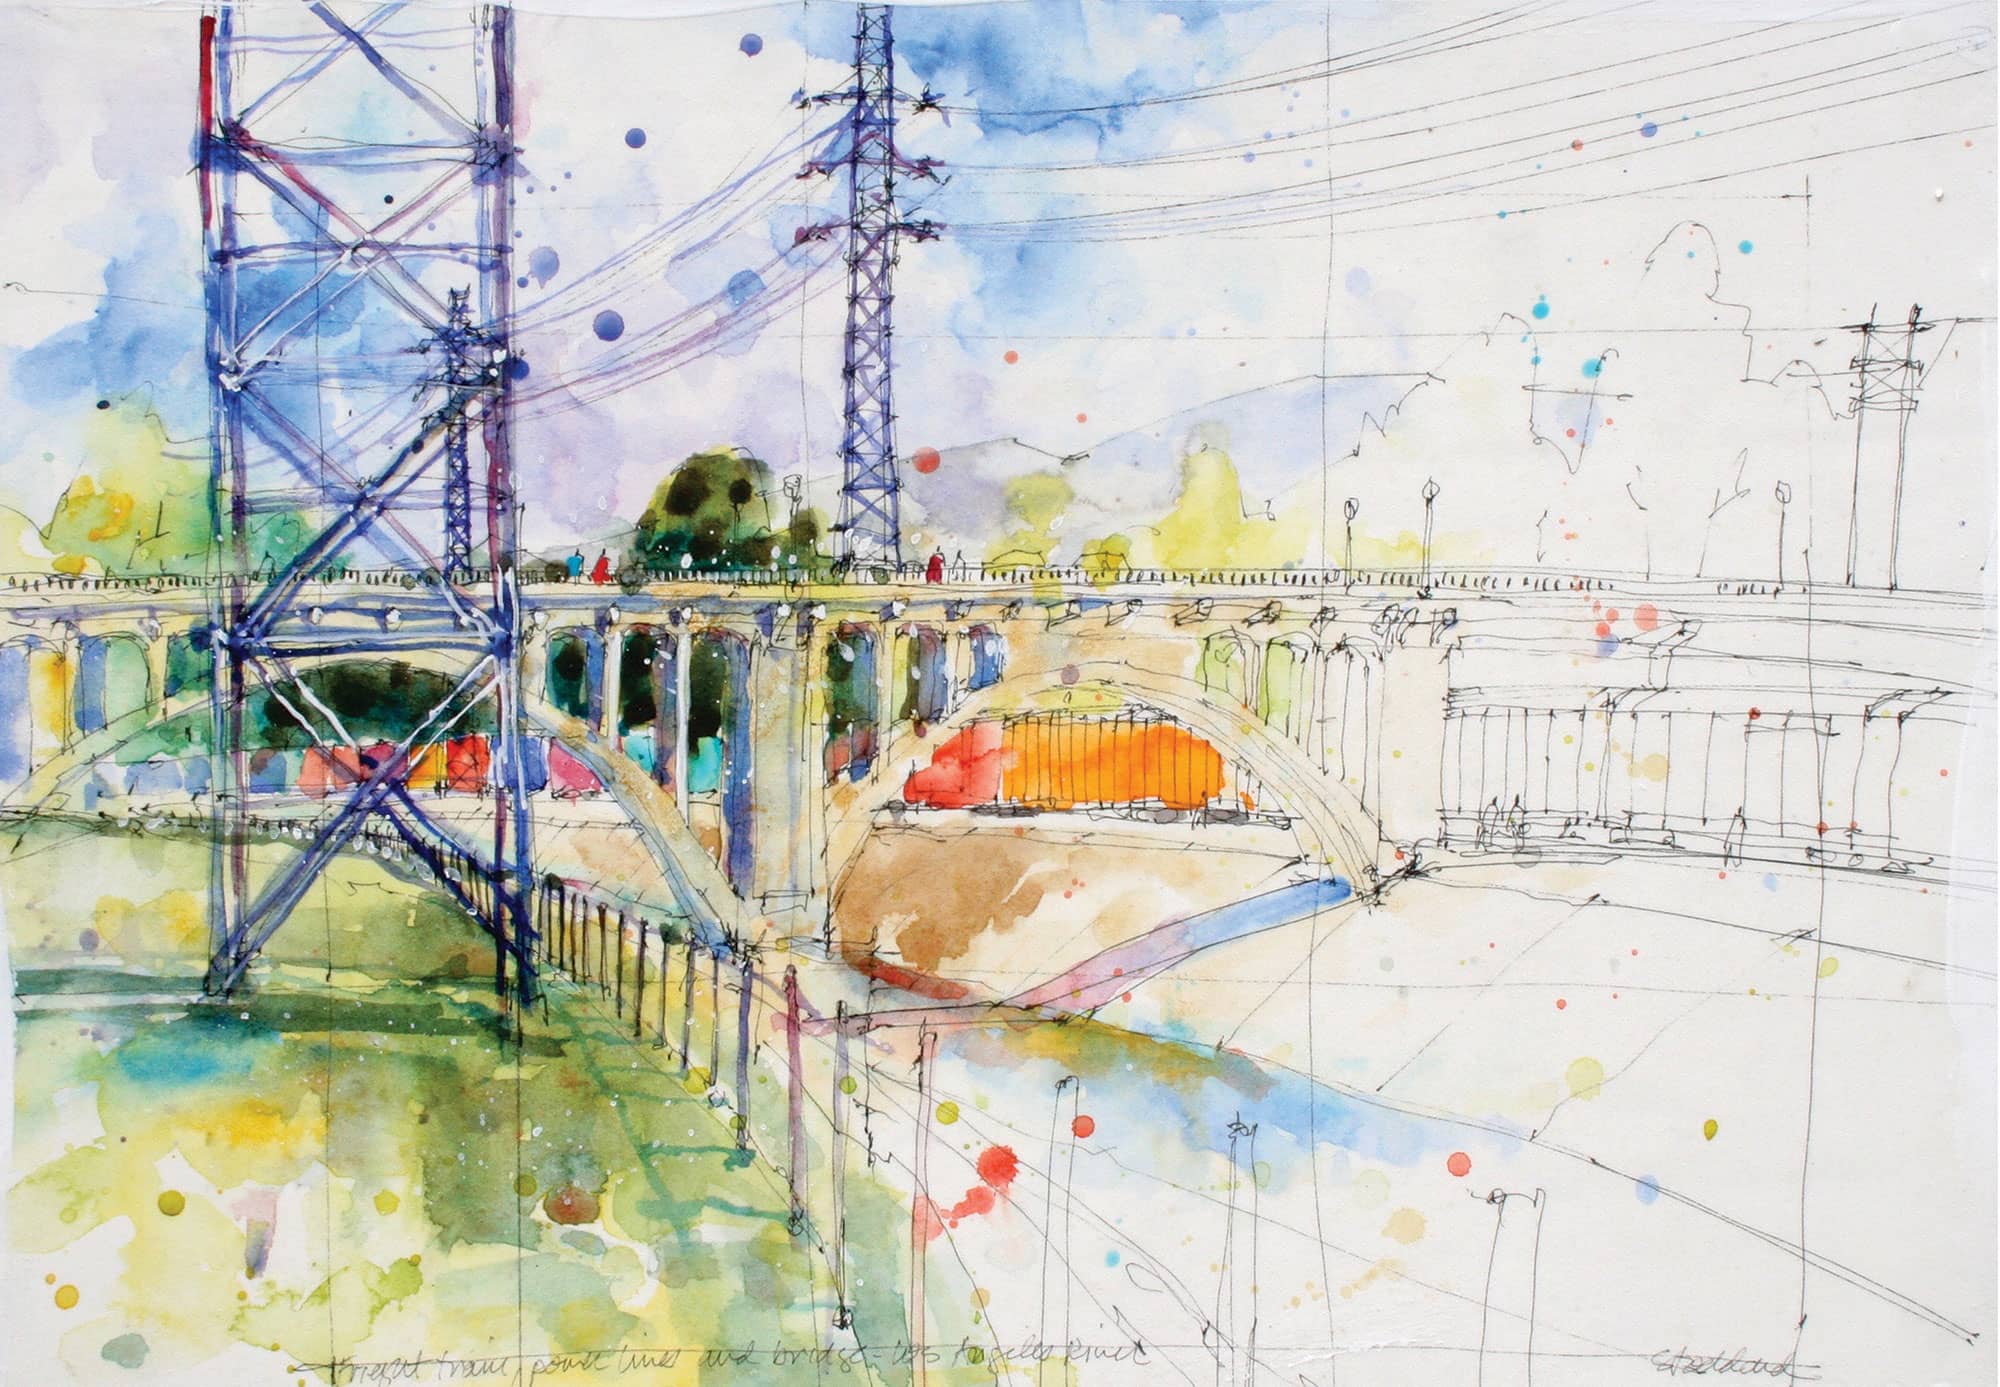
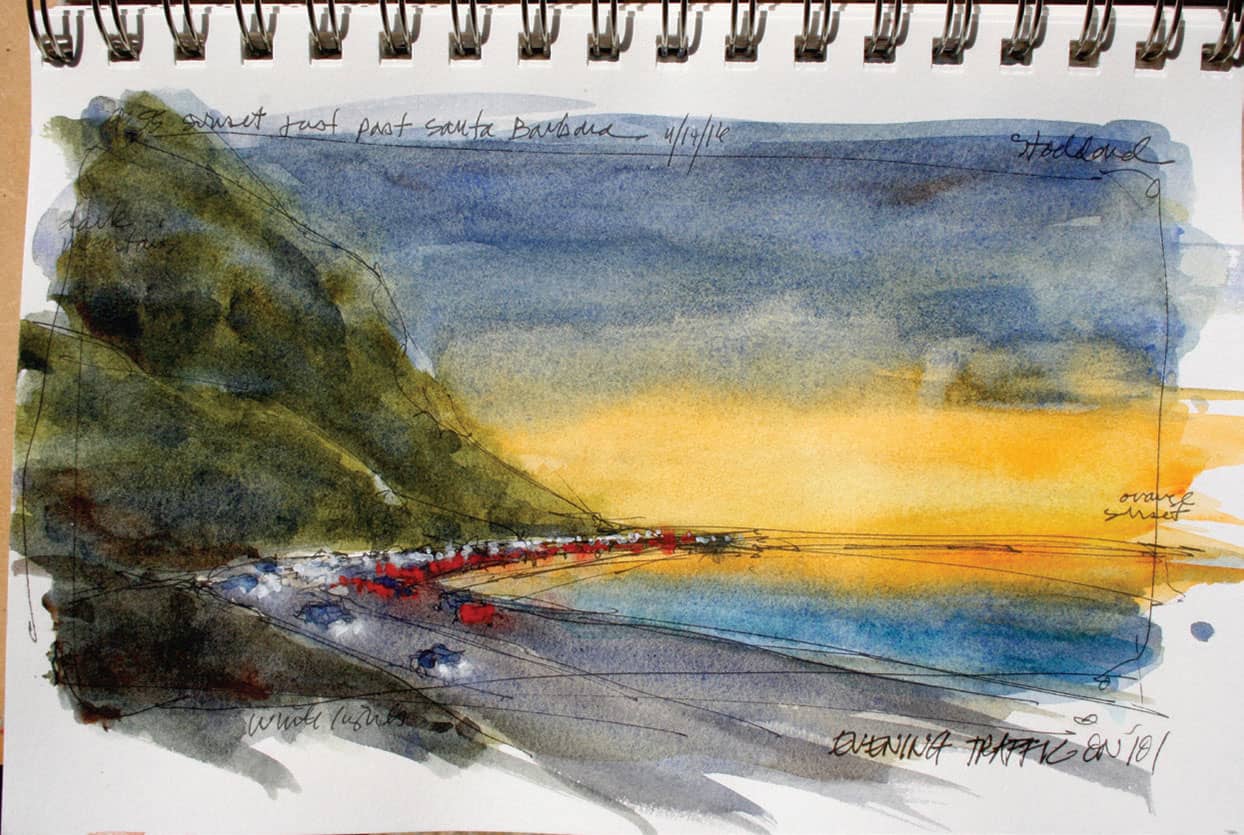
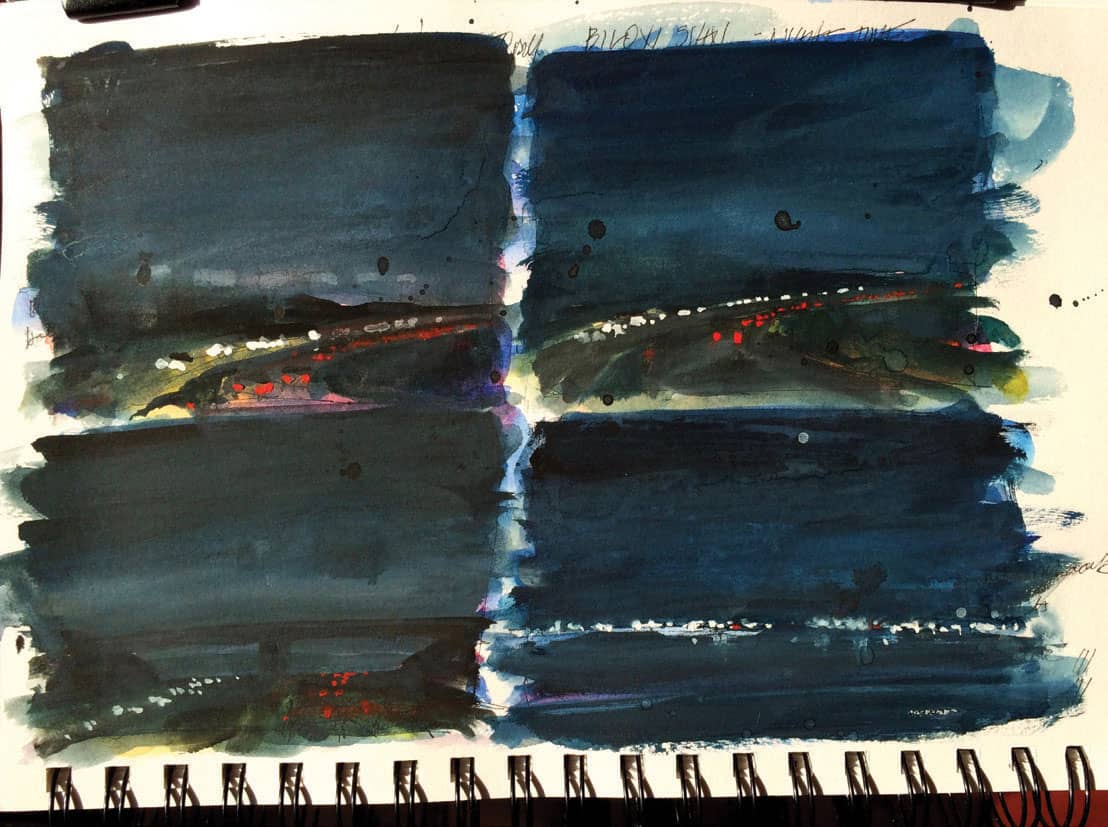
Quick Sketching
Whenever the opportunity presents itself, I like to practice quick sketching. The best way to do so is while riding in a car, train, or plane. The goal is to capture the essence of a passing scene in just a few seconds. It’s difficult to paint that quickly, so I limit myself to pen-and-ink line-work compositions with a few value notes. I paint them later, relying on my notes and memory for the colors. The advantage to creating a simple line-drawing landscape with no color notes is I can just make something up. Often, those made-up color studies become my favorite little sketches.
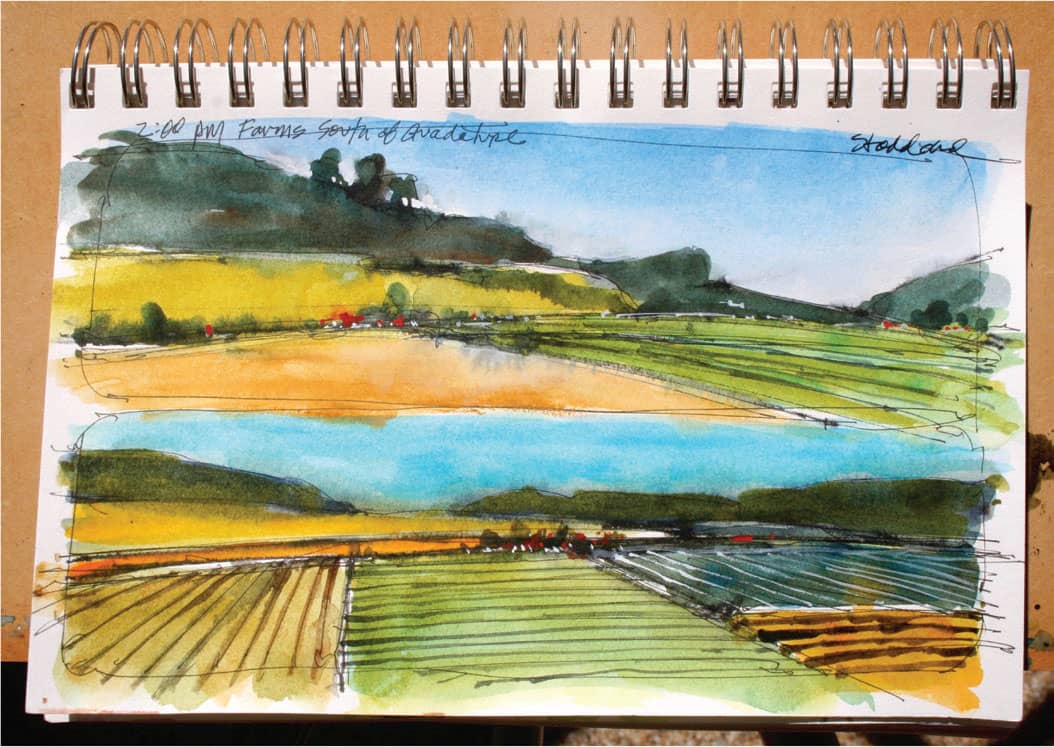
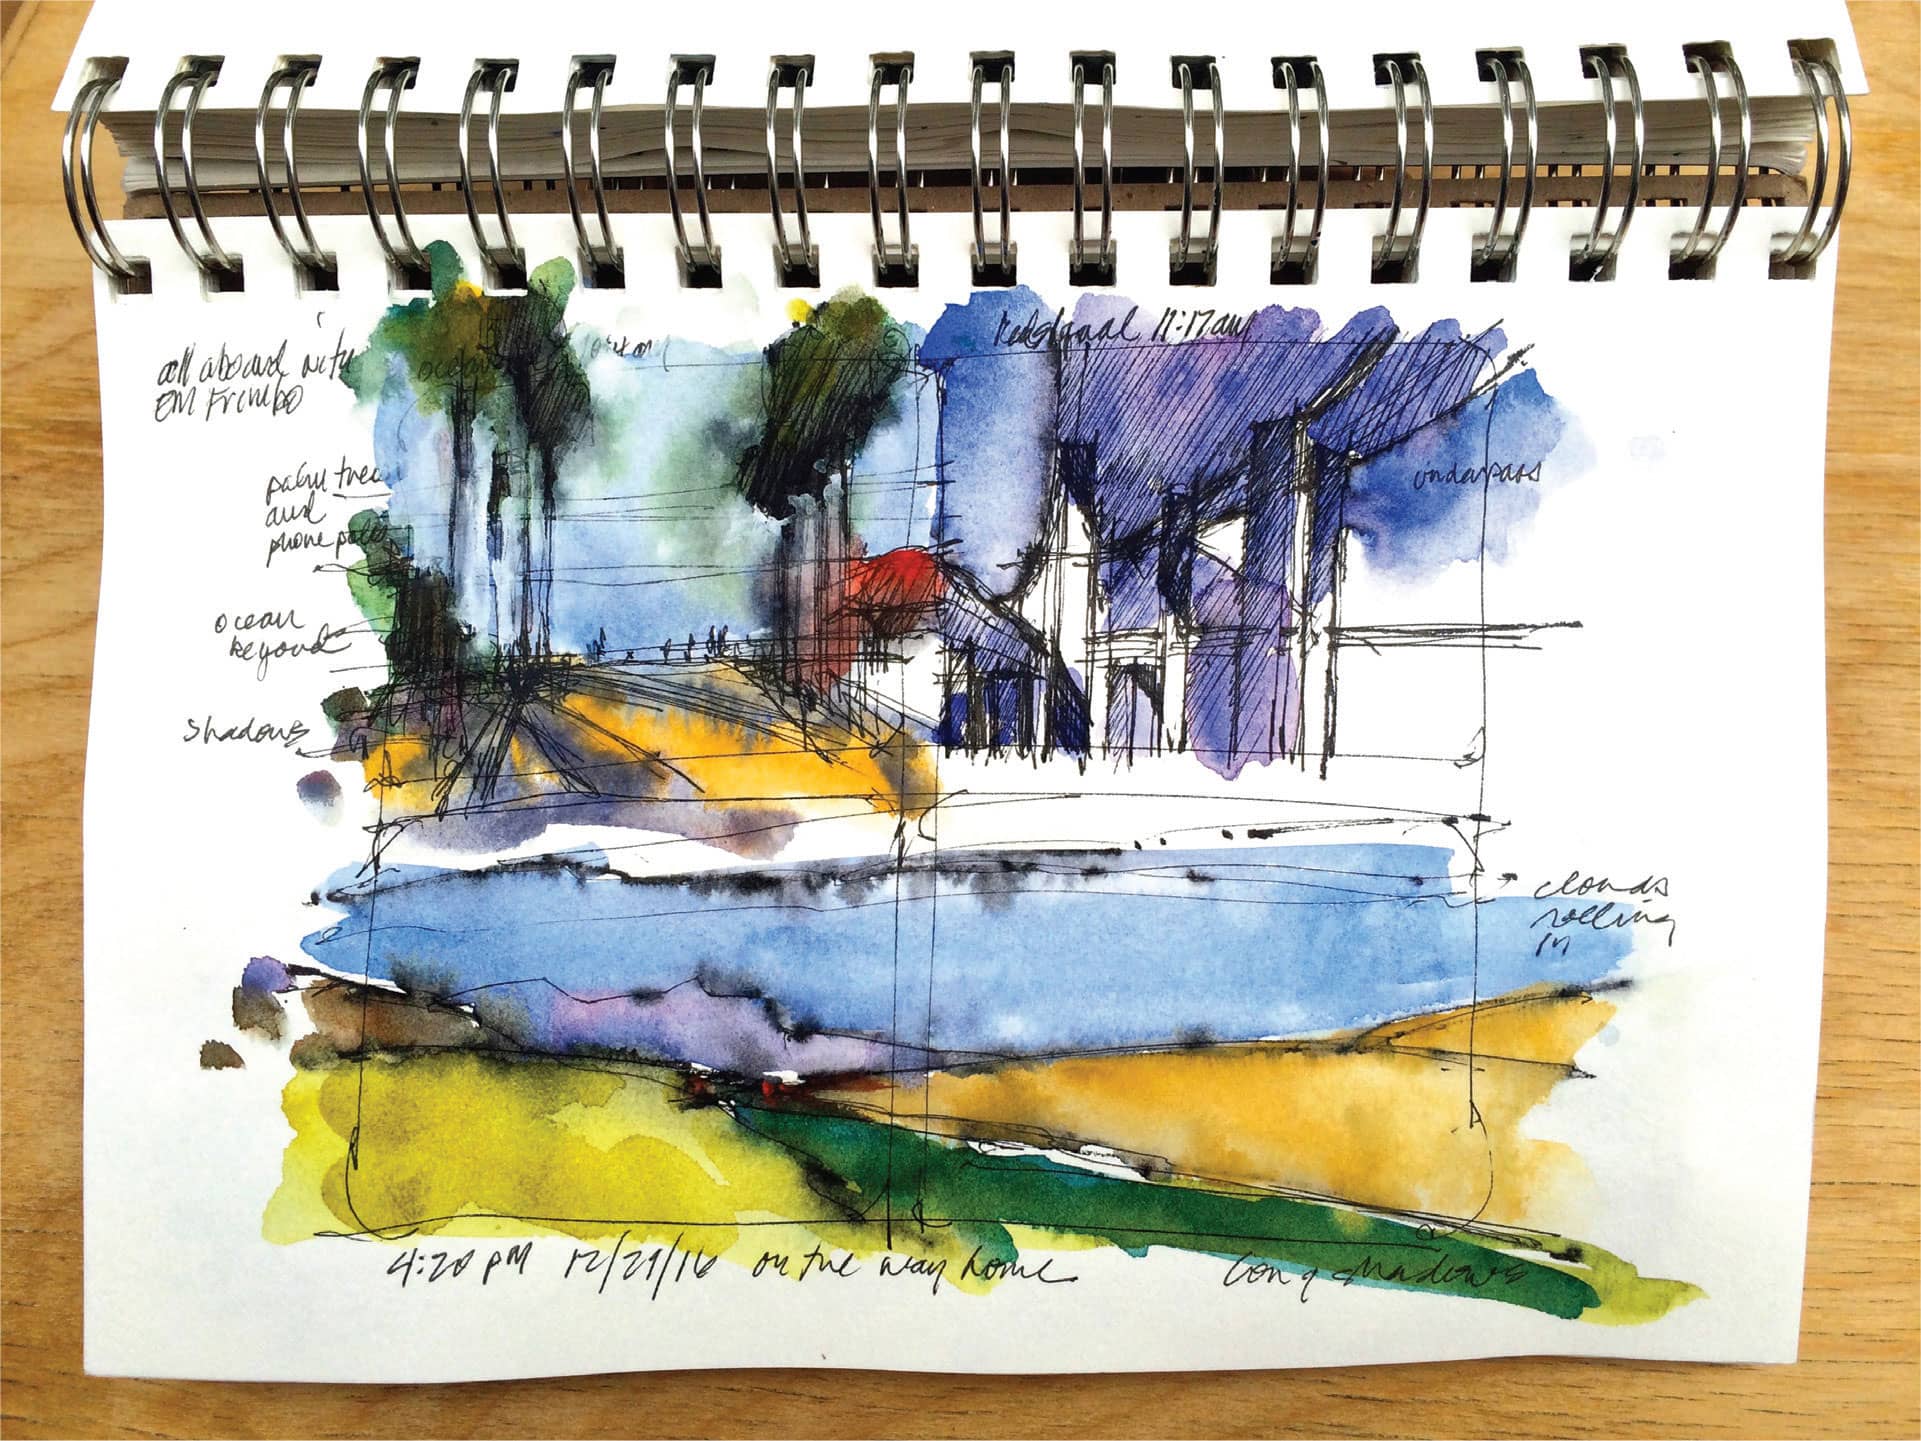
I begin with a series of boxes on a page of my sketchbook. Then, as scenes pass by, I look for ones with an interesting shape and composition—something I can grab onto that tells the story in very simple terms.
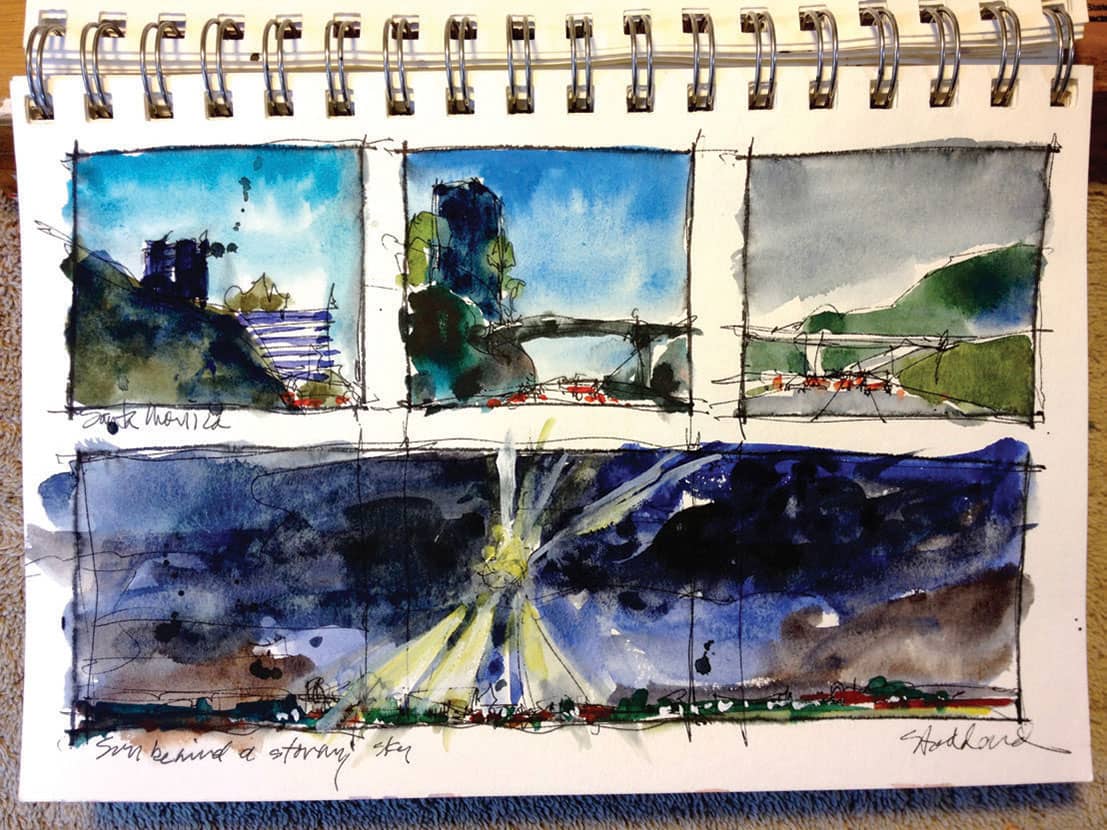
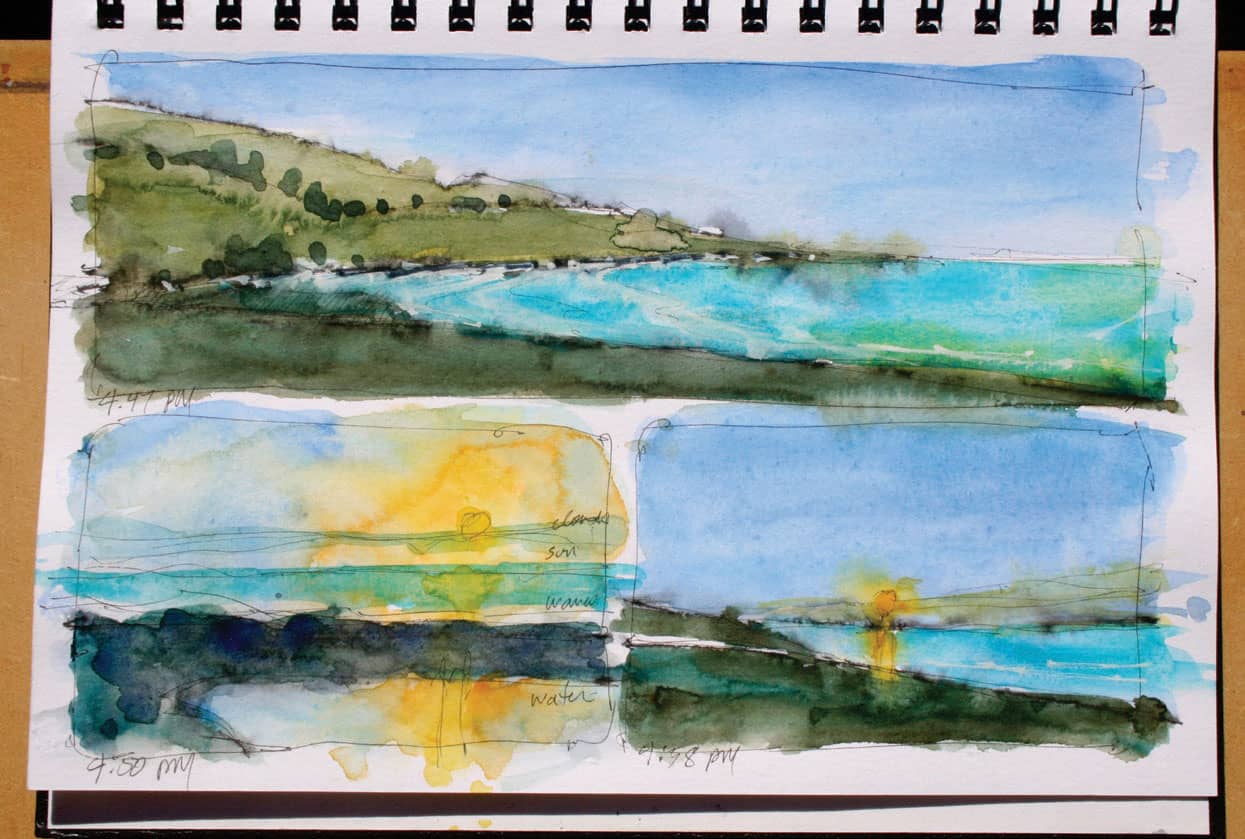
This exercise trains your eye to find strong, dynamic shapes and lines, and render them immediately. There is no time to thoughtfully ponder and carefully draw. This is action drawing, and it’s a nice counter-discipline to the usual approach.
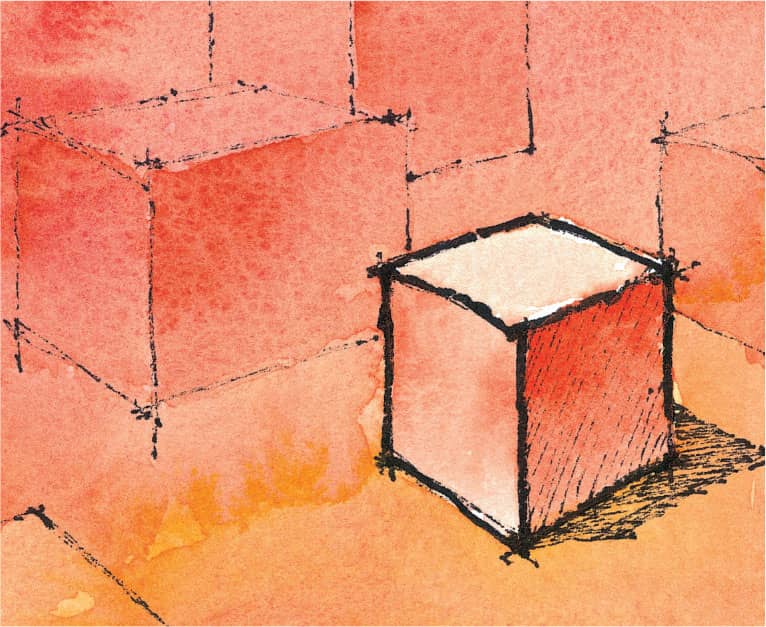
Perspective
The concept of perspective is what gives paintings and sketches depth. The subject itself gives the artist a good start in communicating perspective. A scene with a field, a tree, a house, and a mountain in the distance has a certain sense of dimension, but we can enhance and even force that perception of space and distance by paying particular note to the following:
SIZE For the most part, objects in the distance are smaller than objects in the foreground. This is most obvious when there are two or more of the same object in your scene, such as people or vehicles.
SPACING Objects spaced more closely together seem farther away. Imagine a row of telephone poles next to a railroad track receding into the distance. They get closer together the farther away they are.
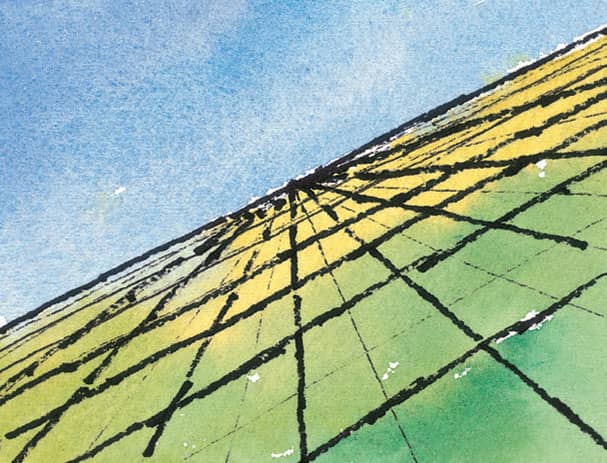
LINE WORK Horizontal lines that get closer together as they near the horizon seem to define a recession in space. Imagine the railroad tracks again.
OVERLAPPING Objects in front of other objects give the illusion of distance.
TEXTURE As objects get farther away, their texture becomes softer and less distinct.
DETAIL Objects in the distance have less and more subtle detail.
FOCUS Distant objects are slightly out of focus.
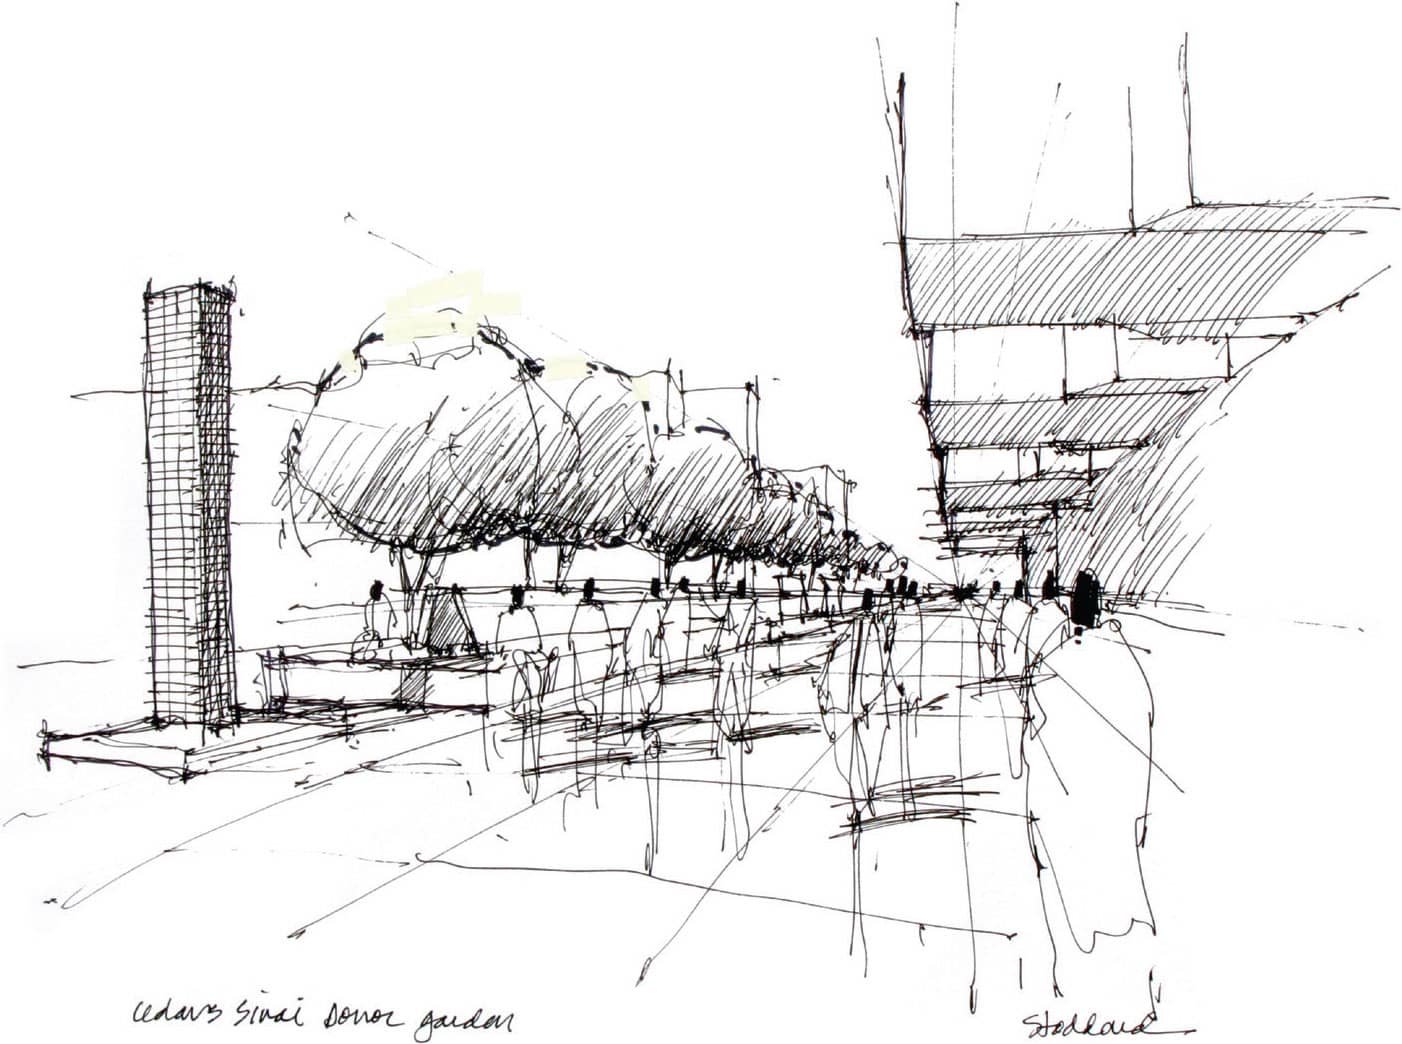
PLACING PEOPLE IN A SCENE
Look at a photograph taken from your last vacation. Notice the people in the scene. Assuming you were standing when you took it, you will see that everyone’s heads generally line up with the horizon line. Use this guideline when placing people shapes in your paintings.
ATMOSPHERIC PERSPECTIVE
Color and value can also be used to communicate perspective. Generally, the farther away things are, the more the effects of the atmosphere become apparent. Particles in the air interfere with our perception, which causes loss of contrast, detail, and focus. This is known as atmospheric (or aerial) perspective. Leonardo da Vinci referred to this as the “perspective of disappearance.” This phenomenon tends to make objects take on a cooler, blue-gray middle value as they recede into the distance. What does that mean to watercolor artists? Here are a few color notes to remember:
DISTANT OBJECTS
1. Colors are muted and less intense.
2. Colors are cooler.
3. Colors tend to be bluer and grayer, with more middle values.
4. There is less contrast.
5. Shadows are paler.
6. Detail is minimized.
7. As objects recede, they become cooler in tone.
CLOSER OBJECTS
1. Colors are brighter and more intense.
2. Colors are warmer.
3. The lights are lighter and the darks are darker.
4. There is more contrast.
5. Shadows are deeper and richer, with more color.
6. Detail is maximized.
7. Foreground objects are warmer in tone.

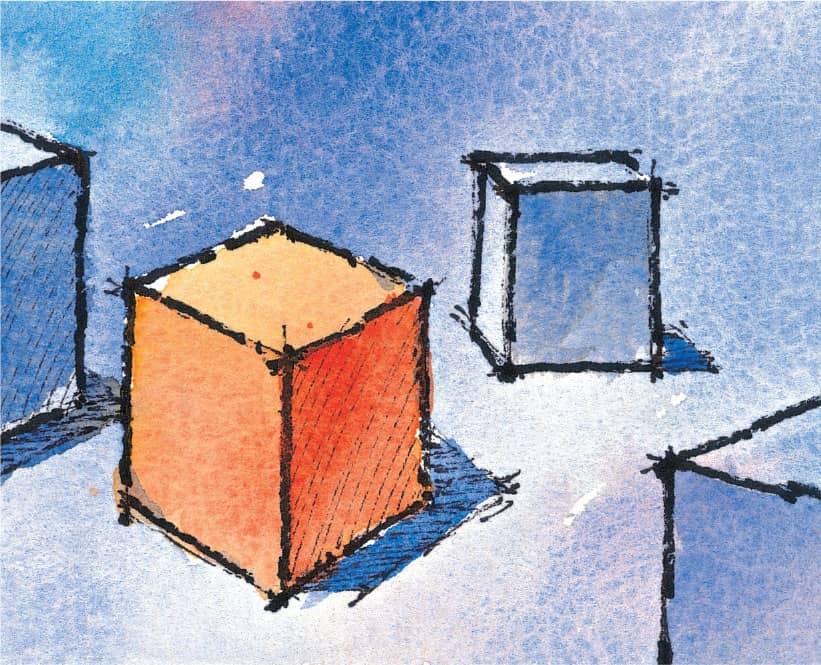
Size Objects in the distance appear smaller than objects in the foreground.
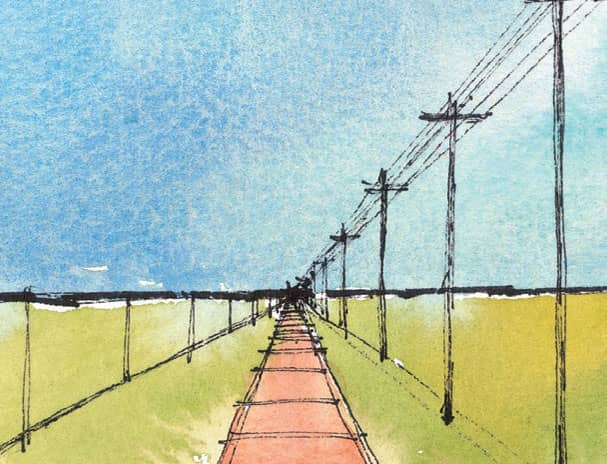
One-Point Perspective Vertical and horizontal lines appear closer together as they move toward the horizon.

Overlapping Placing objects in front of other objects helps produce the illusion of distance.
Detail Objects in the distance have less detail and appear subtler than closer objects.

Focus Objects that are far away appear slightly out of focus.

Temperature Foreground objects are warmer in tone. As objects recede, they become cooler.
Photography
Photography is a good servant, but a poor master. I don’t know who said that, or if anyone did, but I strongly believe it. I love photography. I own—and still use—two film cameras, two digital cameras, and my cell-phone camera. All my paintings are documented both in 35mm color transparencies and digitally, and I have thousands of reference photos and travel slides, all cataloged in carefully labeled notebooks and photo boxes.
I use photography extensively in my painting work as well. Sometime I’m not able to go back to a location to do a sketch or a plein air painting. In those instances, photography is a necessary tool, and I embrace it. I take a quick reference shot after I have completed my study sketch to help me remember any interesting details or color notes. I treat the photo reference as raw material, however, from which I have the freedom to manipulate and modify as needed to express myself more fully.
You should use your own photos if possible. Magazine images are professionally done and may look magnificent, but it’s better to use something you have taken that has personal meaning to you. In addition, if you work from someone else’s photograph, you should credit the photographer wherever your work may appear and try to obtain permission to use the photo.
Use photos sparingly. If the only paintings I ever did were from photographs, my art would suffer. It would lack dimension, volume, and the sense of the experience of being there. So, whenever possible, sketch from reality.
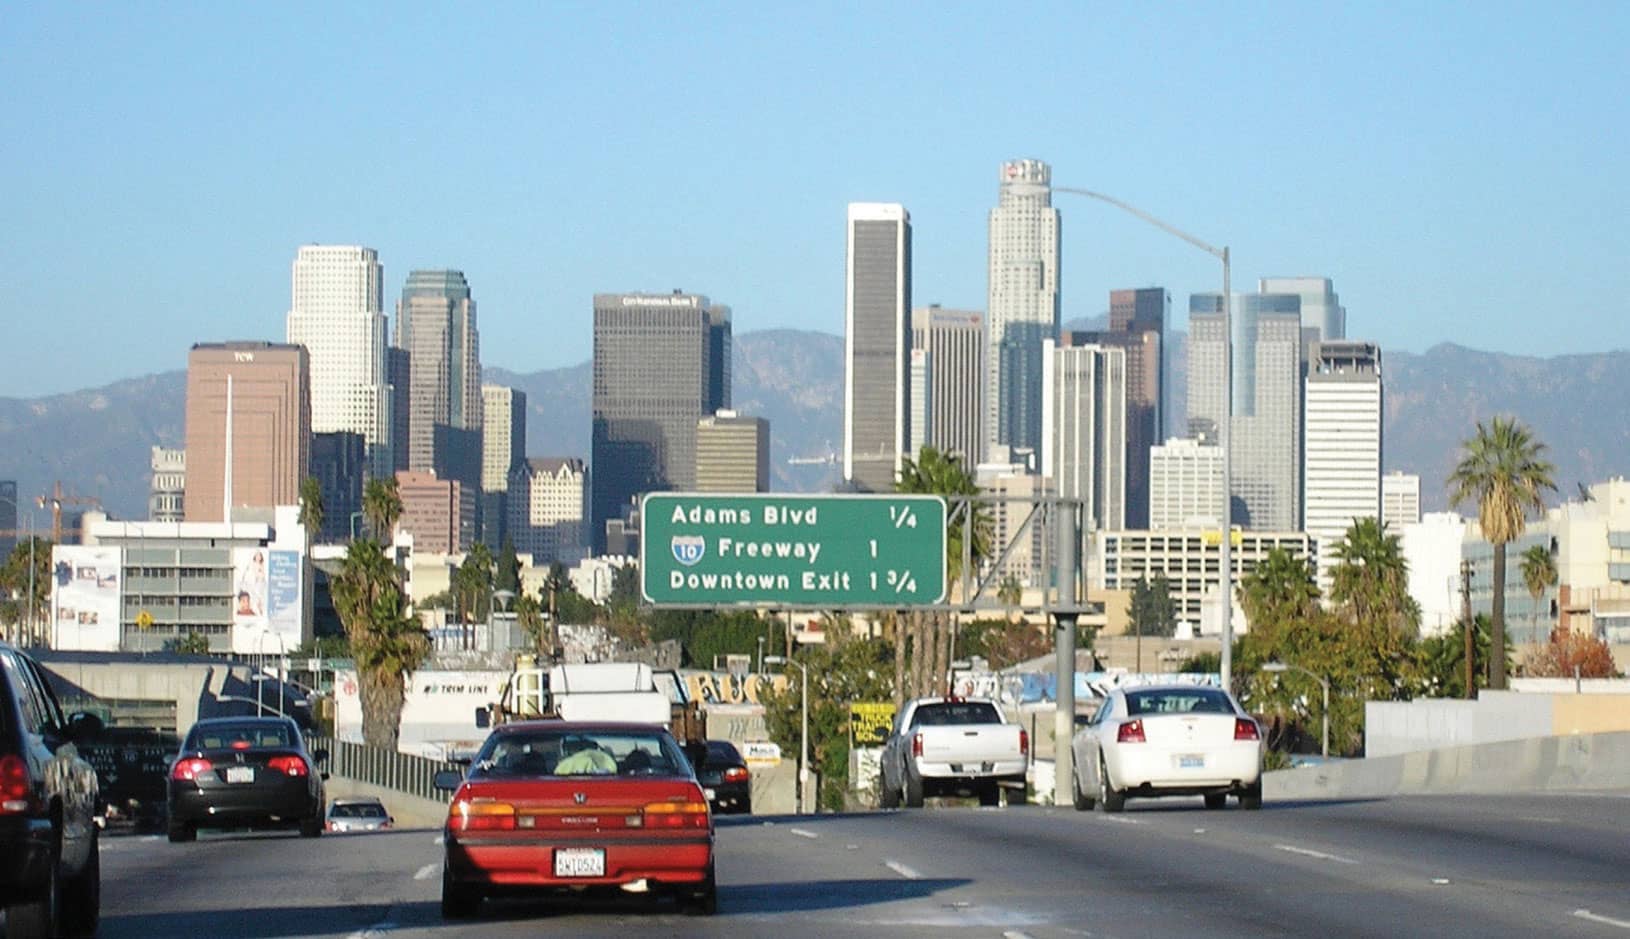
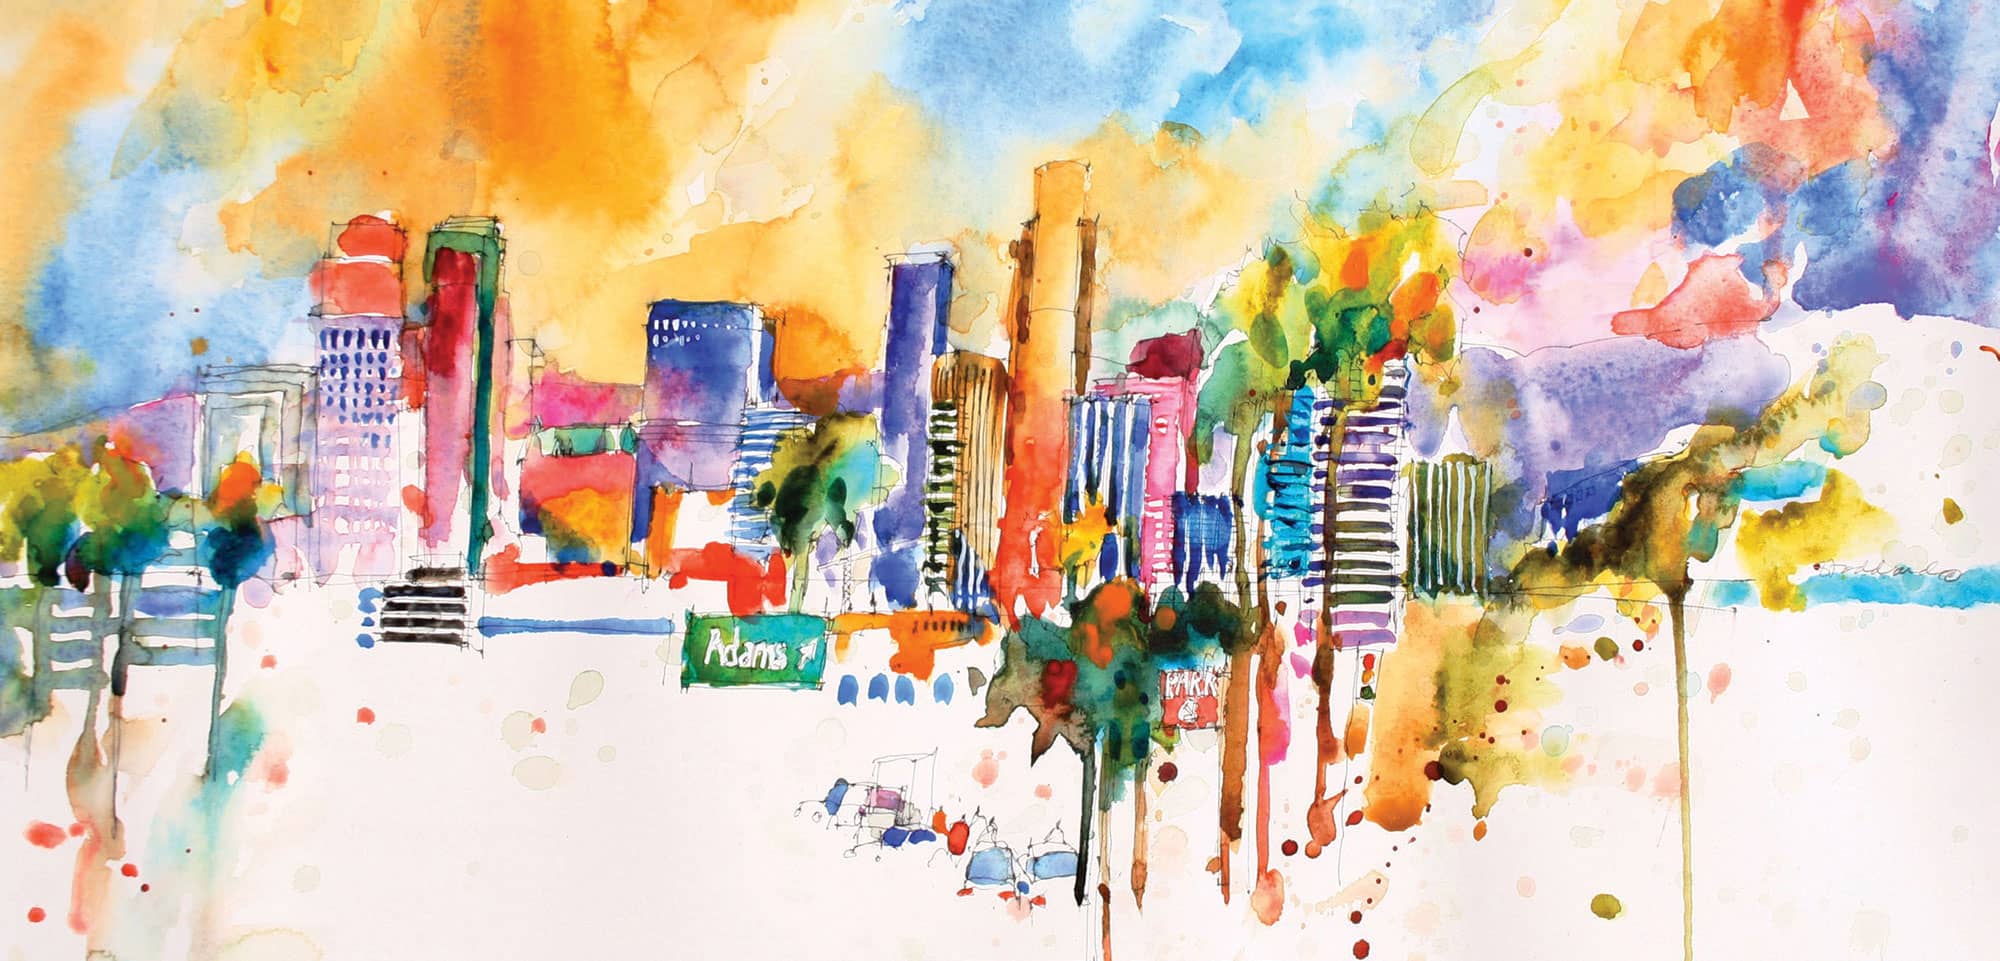
ARTISTIC LICENSE
As an artist, you never have to paint exactly what you see in your reference photo, or in front of you when painting from life. A dull and lifeless scene might have plenty of potential for an exciting painting, simply by making a few adjustments. You can adjust color or temperature, create dramatic contrast, or even leave out distracting elements. This is taking artistic license, and sometimes it’s just what you need to turn a mundane scene or image into an energetic and powerful work of art.
The example on this page illustrates how you can create a dynamic and colorful painting from a traditional photograph.