Getting started in Aurelia gives you a lot of freedom. There are a lot of different approaches you can take to setting up your environment just the way you like. This is one of the biggest attractions to Aurelia: it is very unobtrusive.
Build Options
Let’s take a look at several different options you have with regard to getting your environment set up using Aurelia:
- Aurelia CLI
- Webpack
- JSPM
Each of these options provides you with building and bundling your application. Aurelia CLI is by far the newest one and is constantly being updated with new features. Webpack is probably the most popular on the market. JSPM is still viable but no longer the new shiny build tool the other two represent.
For the remainder of this book, we will be focusing on the Aurelia CLI, but everything that we will cover that is specific to the Aurelia CLI is possible with either Webpack or JSPM.
Configuring your machine
There are a few dependencies that you will need to have installed in order to use Aurelia effectively. The following is a list of dependencies
:
- Node.js – install NodeJS version 4.x or above
- Git – install your favorite Git client
After you have these dependencies installed, we will move on with using the Node Package Manager (NPM) to install the Aurelia CLI. From a command line, execute the following command:
npm install -g aurelia-cli
This command will install the Aurelia CLI globally.
Note
If your OS is Mac or Linux, it is recommended to always run your command from a Bash prompt. You may also need to use sudo when you execute global commands.
If everything was successful, then you should have an output similar to Figure 2-1.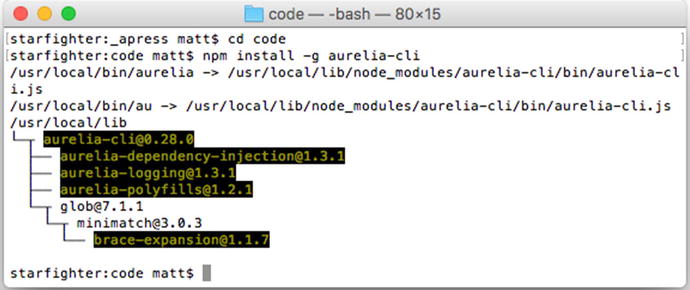
Figure 2-1
Installing
aurelia-cli
ES6 and TypeScript
Aurelia is one of the available frameworks that are future facing. What this means is that it was written targeting the latest features of the ECMAScript specification. This allows us to use features that are part of the ECMAScript 2015 and ECMAScript 2016 specification. Most developers will either choose to develop their applications using ECMA-2015 version of JavaScript or use TypeScript. TypeScript is a transpiler that provides typing plus a ton of other great features for developing large JavaScript applications. If you are familiar with C# or Java, you will find using TypeScript very easy to use.
We will be using ECMAScript 2015
as our basis for developing our applications. We still get a lot of cool features that will make creating your Aurelia application very fun. As not all browsers support all of the features currently, we will be using Babel as our transpiler to generate ECMAScript 5.
Note
Beginning in Chapter 3, we will be using Chrome as our browser.
NodeJS
Although NodeJS is used heavily with all of the build systems available for Aurelia, you do not need to be an expert on NodeJS. There are only a handful of useful commands that you must be aware of:
- npm install --save aurelia-dialog
This statement installs the Aurelia Dialog plug-in and saves it in the package.json. You will notice a little later that the Aurelia CLI also provides a similar feature that not only installs the plug-in but also configures it so that it is bundled correctly.
- npm install --save https://github.com/<account>/<project>
The preceding statement
provides you the ability to install packages that reside on GitHub but have not yet been published to NPM. You will find that not all of the packages that you want have been published to NPM, and this will still give you the flexibility to use both.
Note
If you are new to using NodeJS or NPM, it might be helpful to familiarize yourself so that you understand the syntax and how it works.
Aurelia CLI
Alright, let’s turn our attention to the Aurelia CLI and walk through all the steps required with setting up your first application. Open up a terminal window or command prompt and execute the following code:
au new
You should see something similar to the output in Figure 2-2.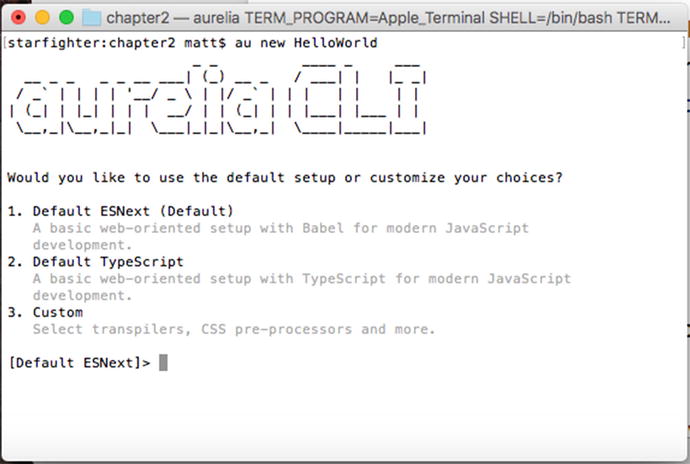
Figure 2-2
Aurelia-CLI
As you can see, the Aurelia CLI really tries to help you even if you have never used it before. Let’s go ahead and try creating our first project. We will call it "HelloWorld". Execute the following statement in your terminal:
au new helloworld
You should see the output shown in Figure 2-3.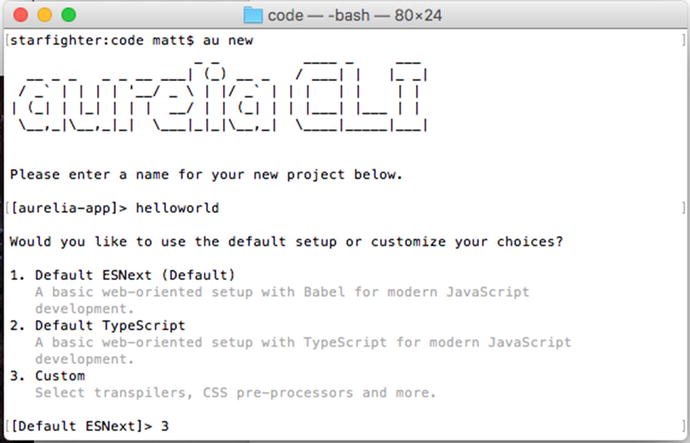
Figure 2-3
Aurelia-CLI new project
We are presented with three different options. We could simply hit enter and select the default setting as it is what we will be using in the book. Select number 3 and you’ll be presented with two more default transpilers (Babel or TypeScript) as shown in Figure 2-4.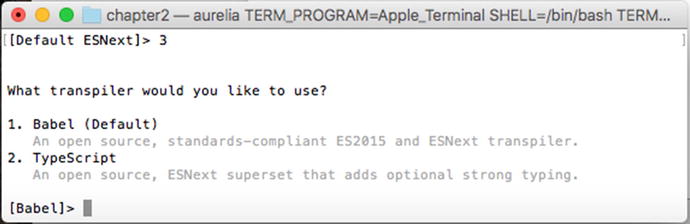
Figure 2-4
Aurelia-CLI selecting transpiler
Select Babel (1) and we are asked about how we would like our templates set up. Here, we have three options as to the level of minification we want the bundler to do (Figure 2-5). When we deploy an application, we are going to want to have the smallest footprint. We will go ahead and select option 3 for maximum minification.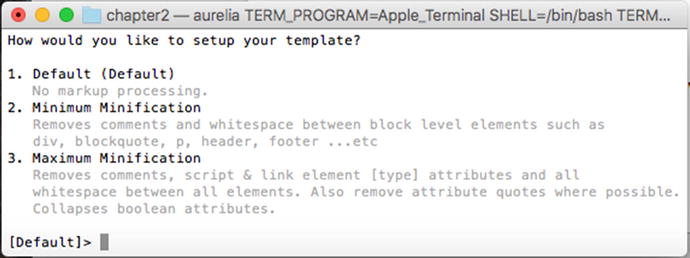
Figure 2-5
Aurelia CLI template minification
Again, we are given options as to what type of CSS development we wish to use. We will be using pure CSS, so let’s go ahead and select option 1 (Figure 2-6).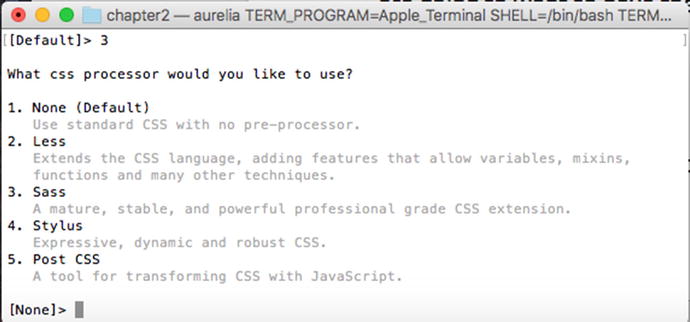
Figure 2-6
Aurelia CLI CSS processor
We are now presented with the option to have our project configured to handle unit tests. Let’s go ahead and select option 1 (Figure 2-7).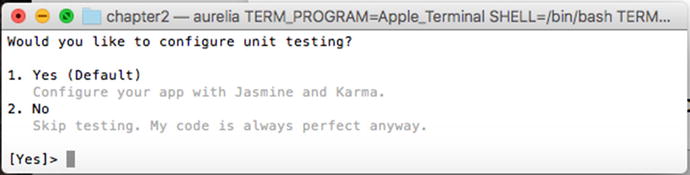
Figure 2-7
Aurelia CLI unit testing
Next, we are presented with a selection of editors that we are going to use. Visual Studio Code has quickly become a very popular editor in its short lifespan. Although you can use any of the options in Figure 2-8, select default editor (option 1).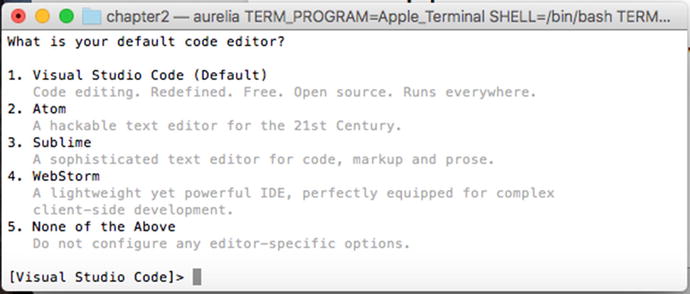
Figure 2-8
Aurelia CLI code editor
We are finally getting close to finishing the project. A project review screen shows all of our selections (Figure 2-9). Here, you can continue and create the project, restart the wizard, or completely abort. Let’s keep moving forward to select Yes (Option 1).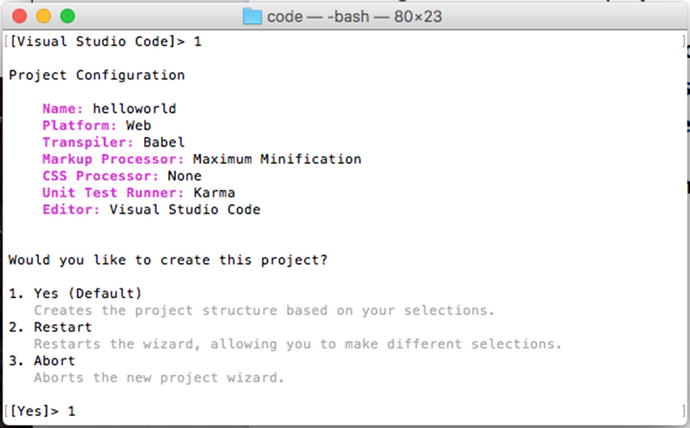
Figure 2-9
Aurelia CLI project review
We are now presented with our final question. We can choose either to have the CLI install all of our dependencies or to decide not to do it now. You can still install the dependencies by executing the following command if you so desire:
npm install
We are going to let the CLI handle the installation for us and select the default option 1 (Figure 2-10).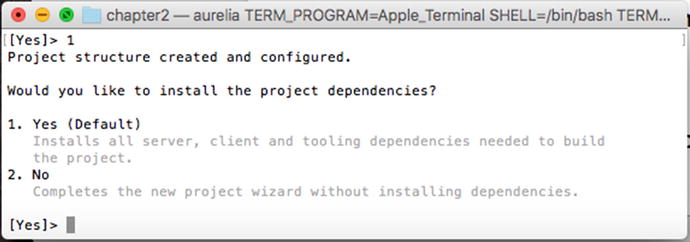
Figure 2-10
Aurelia CLI install dependencies
Congratulations! We now have a project configured and ready to use (Figure 2-11).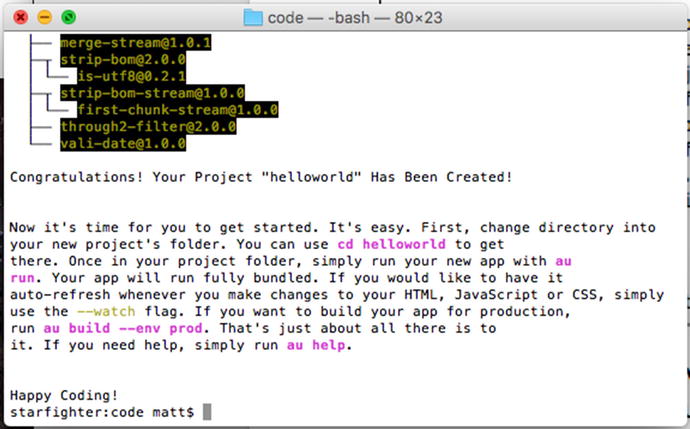
Figure 2-11
Aurelia CLI install complete
We are given a few tips that are worth noting for future reference, namely, the commands that we can do to run and build our application. Let’s list them out next:
- au run
- au run --watch
- au build
- au build --env prod
- au help
With these commands, we will be able to handle running our application as well as bundling it. As the documentation states, it is possible use a watch flag so that any changes saved in your editor will automatically relaunch your browser so that you don’t have to build with every code change.
Now that we have the project set up, let’s see what kind of help we get from the CLI:
cd helloworld
au help
Figure 2-12 shows the output that the CLI will generate for us.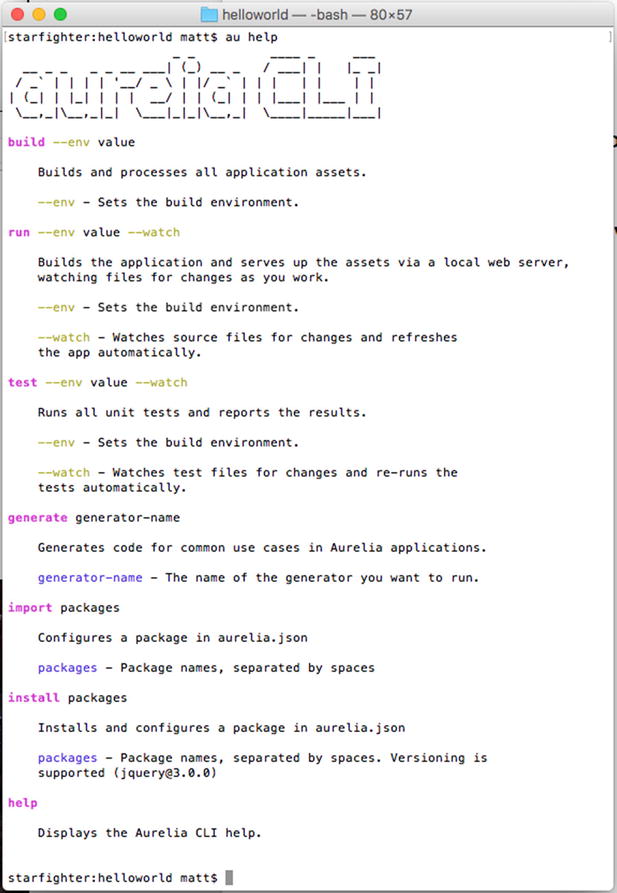
Figure 2-12
Aurelia CLI help
The following describes the options listed in Figure 2-12:
- build – allows us to build application as well target a specific environment
- run – allows us to run our application targeting a specific environment as well as setting the watch flag for automatic updates to the browser
- test – provides testing your application as well as targeting a specific environment. You can also use the watch flag for your tests
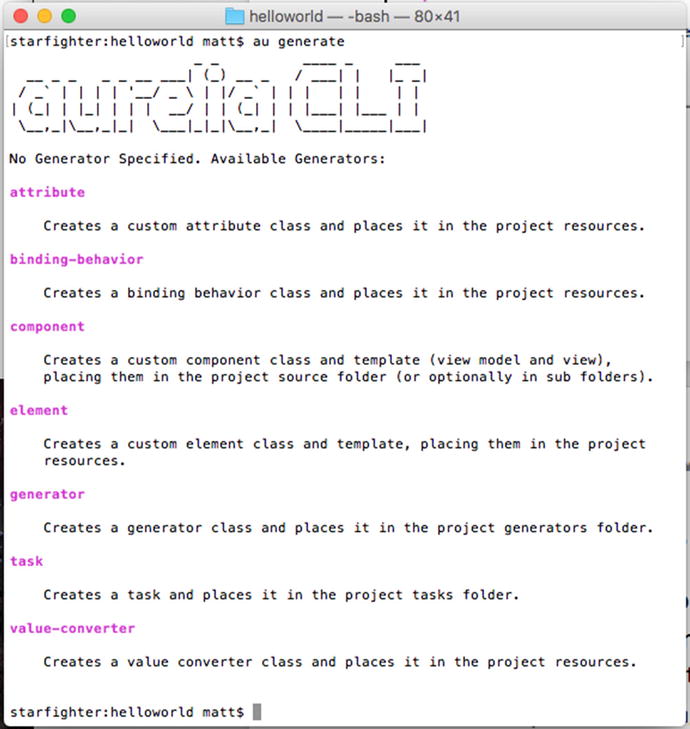
- generate – provides the ability to generate common use cases, as shown in Figure 2-13
- import – provides the ability to configure packages in the aurelia.json file. These packages have already been installed typically by using: ‘npm install …’
- install – provides the ability to install and configure a package in the aurelia.json file
- help – provides help documentation
Figure 2-13
Aurelia CLI generate
As you can see from the preceding image, you have several options. If you have used scaffolding tools, such as Yeoman, then this should be very familiar. One nice thing about this generator is that you can extend it and create your generator as well.
Hello World
We have exhausted what we can do the Aurelia CLI. Let’s wrap up by running the application. Execute the following statement in your bash terminal:
au run
You should see something like the output in Figure 2-14.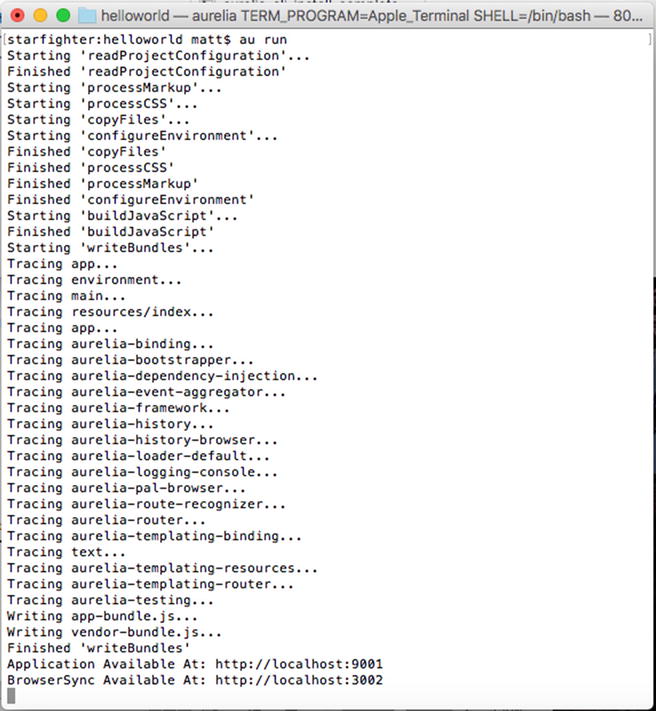
Figure 2-14
Aurelia CLI run
Now, in a browser of your choice if you navigate to the URL http://localhost:9001, you should see the result in Figure 2-15.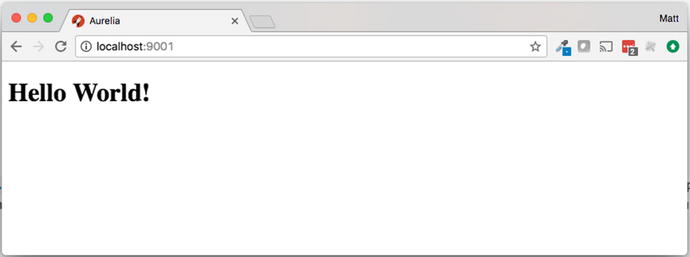
Figure 2-15
Aurelia CLI browser
Summary
We have covered a lot of ground here. We now have a fairly good understanding of the Aurelia CLI and the requirements for getting a project up and running. Remember that there is always help online and with the CLI itself if you get stuck or are not sure of something. There are also a lot of example applications that you can clone from GitHub and use for further understanding.