
6 Production aesthetics
1. Better looking films
You’ve spent a while looking at how to stretch the potential of your camera without spending any cash on the film itself. Now you need to look at what kind of ‘feel’ you want in your film and how the overall look of it can be achieved. Working with a small budget, you may not be able to rely on well-known actors or sets to make your film stand out from the competition, so you need to become more confident about what you can achieve with those tools that don’t cost anything: what the camera sees.
Make your camera work harder, make your film look better
The aim of this section is to go through some of the basics of getting the most from the camera; how to get the right shots and how to find those elusive, special shots that will make your film rise above the rest. But as well as knowing the shortcuts to getting these kinds of shots, we need to look at how you can depict something in a professional way, to industry standards. This doesn’t mean you are going to produce dull, uninspiring images; we are just going to concentrate on learning a few rules in camerawork so that later you can feel free to break them.
Use the rules and bend them
It may seem that if you know what kind of film you want to make you shouldn’t need to know how other people work. It’s true that no one knows better than you what kind of film you want, but this next step is not about copying how other filmmakers do it, it is about learning how to get your preferred shots more quickly. When you know how a certain shot is often filmed it gives you a starting point — you can either go with the norm or reject it. It can make you think faster. Furthermore, if you find yourself working with a crew of other people also committed to making films, they will expect you to know what works when filming — and what does not.
Conveying mood
Mood is a nebulous concept, but to attempt some definition, we could say that it is the integration of the various style elements of a film with the core theme of that film. Lighting, music and camera angle are the main tools behind the camera helping you to achieve this. It may shift throughout the film, but a pervasive atmosphere will dominate if the film is to be coherent and consistent. Mood is something that is evoked rather than described explicitly, so you have to rely on subtle methods to add a particular slant to a scene. Being able to manipulate mood is useful because it enables you to specify what sort of emotions are dominating a scene and how we as the audience should interpret it.
Let’s suppose you want to shoot a scene in a drama. There is a character who is afraid of something; he is in a dark room and is apprehensive about something that is about to happen. You decide you want lots of tension and you want to increase the sense of drama. Now your job as a director is to shoot that scene in the most effective way, conveying clearly the atmosphere evoked by this character in this room in this situation. If you know some of the ways other people have produced tension or fear in a shot, then it immediately gives you something to start with. When you know the rules you then start adding something of yourself to them; indeed, your own personal style is the way you respond to the rules and in what particular way you break, bend or stick with them. So, in this instance, you may use lighting with higher contrast and with the camera may use close-ups to exaggerate the facial expressions of the actor, or long, wide shots to emphasize the sense of isolation and vulnerability of the character in the room.
Composition
Let’s concentrate now just on what the camera can achieve in showing the plot and conveying mood. We can look at how shots are more effective if you think about how you are arranging the objects within the frame. The position and angle you select for the camera relative to the subject and its surroundings is called the ‘composition’.
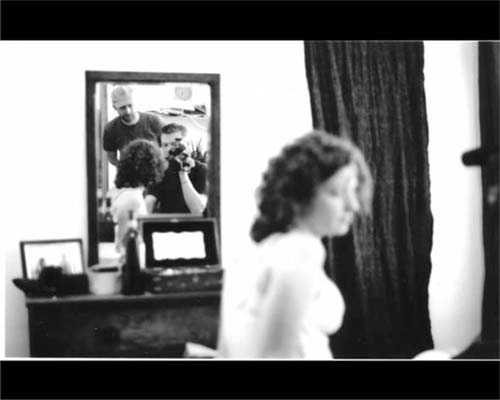
Figure 6.1 Setting up a well-composed shot takes time. In this production shot, director Carl Tibbets tries to use the mirror to give pictorial interest.
Composition in filmmaking has developed mainly from the ideas of painters in Renaissance Europe; many cinematographers will freely admit to being inspired by great paintings of this time. But the great filmmaker Eisenstein has suggested that we need framing for all our art because we tend to look at the world through windows.
Tip Try looking at Renaissance works by Masaccio and Giotto to see where classic, epic staging originates, or look at the sumptuous attention to light by northern Renaissance artists such as Jan van Eyck or, later, Vermeer.
Tip Sergei Eisenstein is credited with having established some of the fundamental ideas behind montage in his ground-breaking films such as Battleship Potemkin (1925) and Strike (1924).
Composition helps a low budget
Going back to our scared-man-in-the-room scene above, it is quite likely your budget averages your monthly disposable income and you definitely can’t stretch to dry ice or a specially composed score. The lower your budget, the more you must try to get your camera to work harder. It’s no coincidence that directors making their debut feature will display quite high levels of ingenuity with the camera, showing off a number of different compositions to make up for a lack of expensive props or effects to point the camera at.
But don’t show everything
You are also going to rely on the audience to imagine some images. A good director would not have to display all the action or spell out the whole narrative and will use imaginative compositions to suggest and evoke, allowing the audience to fill in the gaps. But this sort of filming is quicker and more successful with a good grasp of the basic rules. If you watch The Haunting(Robert Wise, 1963), you can see how a small budget was somehow irrelevant. The film’s scariest moments rely on clever composition, pointing the camera at a certain shape, shadow or object and at a certain angle to give a feeling of unease. As if to prove the theory that what we don’t see is scarier than what is spelled out for us, the remade film in 1999 (directed by Jan De Bont) made much of the implicit horror explicit and was widely condemned as not scary enough.
Basic starting points in composition
- The clarity of the objects in view
- The amount that is not in view
- The use of shapes to denote particular theme or mood
- The angle of the camera.
Within this there are certain kinds of composition that are more suited to certain situations. The eminent cinematographer Nestor Almendros used a lifetime of experience to describe the following principles:
- Horizontal lines suggest serenity and calm
- Vertical lines denote strength or authority
- Diagonal lines suggest action or movement
- Curved lines suggest fluidity and sensuality
- Moving a camera forward to enter a scene suggests ‘bringing the audience into the heart of the narrative’
- The opposite movement, away from a scene, is often used as a way of ending a film.
(A Man with a Camera, Faber & Faber, 1982, p. 14.)
Placing action in the viewfinder
To get to grips with composition, start by looking at the way you use the whole. Try a short exercise: get a sheet of paper the same shape as the screen you intend to work with.
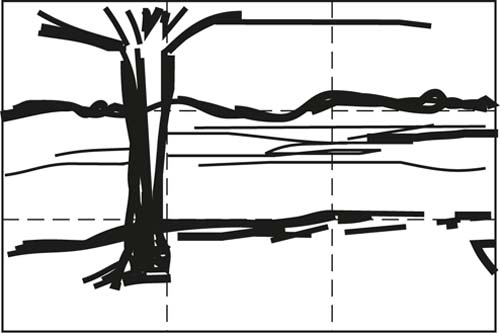
Figure 6.2 Use the division of thirds on the paper to place objects within the composition. ‘Hooking’ them onto the verticals or horizontals gives rise to depth in the image.
The shape is what is called the ‘aspect ratio’ of your screen. Aspect ratio refers to the height and width of the screen. The common standard for European television is 16:9. Most filmmakers like to work on a slightly rectangular screen because, in terms of composition, it is easier to get a more interesting arrangement than using a square. This shape has evolved over time as one which will most help you in finding a good arrangement.
An A4 sheet of paper is as good a shape as any to start. Fold it into thirds both horizontally and vertically so you have nine rectangles. Try to imagine the sheet as your viewfinder on the camera and look at any shots you have so far on your camera, noticing in which rectangle the action tends to be in each scene.
Lazy parts of the screen
If we number the rectangles from 1 to 9 across the rows, you might find that most of the action in your footage takes place in the fifth box — the centre of the screen. Whether you are shooting a very still scene such as a conversation, or a running chase scene, it is common to find that the focus of attention is in the middle and all the other boxes are unused. This is easy to shoot — you just place the subject in the centre of the screen and stand back — but it makes for bad composition. It’s predictable and boring, but your job is to grab an audience’s attention as much as possible, even in quiet scenes. Have a look at some of your own images on your films: is box no. 5 doing all the work or are the others pulling their weight too? To encourage you to find new camera angles, keep moving the camera around until the action is spread throughout the nine boxes. Every box doesn’t have to be used in each shot, but there should be a spread throughout the film. After trying this method for a while you will soon find that you naturally want to compose the frame rather than just shooting into the middle of it.
You can be aware of this during the planning stage, so that when you do storyboards you can stop the bad ones in their tracks and redo that frame. But if you find that you have poor compositions when you are actually filming you need to rectify it on location, under pressure. If you have an LCD viewfinder you could place a sheet of clear acetate with a grid over it to keep a check on how you are dividing up the screen.
To assess how you use the screen, you could shoot a simple scene (such as making a cup of coffee), but avoid putting the action in box no. 5, in the middle. Avoid the tendency to depict the action squarely in the centre and try constantly to be aware of the whole screen. Although you would not want to avoid the centre box all the time when making a movie, this exercise of abstaining from the centre does force you to give added weight to other areas of the screen.
You can then try watching feature films and notice how much of the screen is used. You might start to notice some of the conventions that filmmakers use. For example, placing a character to the edge of the screen can heighten the dramatic content of that scene and tilting it can give a sense of unease. Don’t forget, however, that there are many times when a centrally framed shot is just right for your film. The director Stanley Kubrick made this kind of shot his trademark, as he found it gave some shots a kind of claustrophobic feel.
Film View
Watch Paths of Glory (1957), Stanley Kubrick’s film set in World War One, to see how a one-point perspective shot can work as he takes us around the trenches. In other Kubrick films we often see shots where we look down a corridor or narrow space. The Shining (1980) is full of long corridors with unknown horrors waiting around the corner. In the earlier Killer’s Kiss we see a similar clip of moving down a narrow street, as the main character has a nightmare.
Composition dividing lines
With a bit of practice you may now see separate areas when you look through the viewfinder, dividing up the image. But the four dividing lines that separate the boxes can also be very useful. You can start to use these as ‘hooks’ to peg your actors or action on. Let’s use an example of, for instance, a simple dialogue between two people. When you watch other films you start to notice the most common composition for placing the face within the frame. Heads can be very difficult to place because you need to make sure the mouth is visible all the time and the eyes are prominent. Try putting the eyes on the upper line (see Figure 6.2) - don’t worry about how much of the forehead you have to lose — then place the nose on either of the vertical lines.
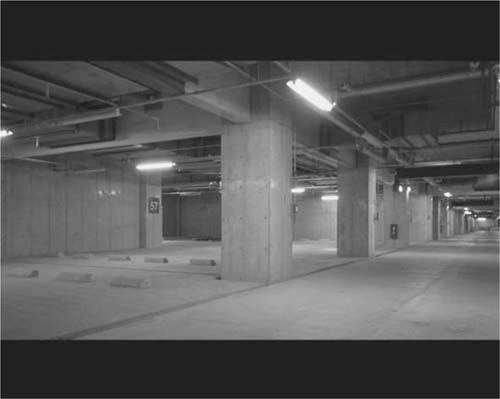
Figure 6.3 The right framing can create an atmosphere out of the least inspiring places. In this case, director Jake Knight shot an underground car park as part of his short, B3.

Figure 6.4 In this image from director Jo Price, the two actors are placed to the left, in line with the golden section, leaving room for depth in the background.
Feel free to break this rule, but it is a good place to start for a well-composed shot. Avoiding overusing the centre of the frame works because it moves the focus of attention away from the place where we lazily and automatically want to look and allows other objects or people to occupy the spaces left over, adding more interest to the film.
The same goes for landscape shots: place the horizon on one of the horizontal lines and any distinguishing features such as trees or a building on the verticals. You are making the audience look at different parts of the screen and this makes for a less predictable experience. If you make the audience look around the screen constantly it starts to work in your favour, as they will then start noticing everything in the shot. Of course, if it is done badly it is distracting, but every kind of filmmaker tries to make his or her film more interesting to look at. In fact, now that Hollywood has discovered computergenerated images, directors can also achieve unusual, daring shots in large-scale action sequences such as the extraordinary city sweeps in Spider-Man 2 (Sam Raimi, 2004).
Using depth in your shots
We have looked at how to use dividing lines to help you get good compositions. One of the things created by these compositions is something called ‘depth’. Don’t confuse it with meanings in your film; this is pictorial depth. Basically, depth is your way of inviting the audience into a scene. If you follow the ideas in the last chapter about dividing up the screen you will almost certainly have put some depth into the shot without trying. Depth is achieved where one object or person is close to the camera and something else is further away. The space you create in the middle is called depth. It is disarmingly simple, but if you are conscious of it when setting up your camera then you are going to get a much higher success rate in terms of getting great-looking shots. Once you’ve understood it you can then start to use it to your advantage, putting greater depth where you want a more dramatic scene.
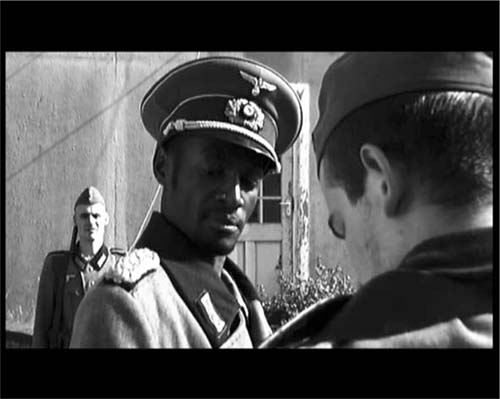
Figure 6.5 John Sealey’s short film, The Greatest Escape, raises fascinating issues of race while dealing with the Second World War.
Using tripods for composition
The tripod is a very useful, essential piece of equipment, but it is expensive. It can be very restrictive, but on balance it’s probably a good idea to have some sort of support for the camera occasionally. If the cost puts you off, try a mini-tripod, which is a shorter and smaller version but does need a tabletop or other surface to rest on. Some wildlife filmmakers use a beanbag on which to rest the camera, as this enables the user to move quickly to various camera angles and doesn’t require a flat surface. It also helps you to get a range of steady shots without having to fumble around altering the tripod constantly. Alternatively, you could get rid of the tripod altogether. There is a school of thought which says that the tripod stops your film from having vitality and spontaneity. Filmmaker Robert Rodriguez suggests that, ‘If you have a tripod you are going to leave the camera stuck on it. It looks nice — and your film is going to look dead.’ Good advice for the lazy filmmaker, but remember also that filming without a tripod requires skill. Keep the camera under control, giving us a view of the action from one viewpoint, just as if it is another actor, watching rather than participating in the action. Feel free to alter this viewpoint throughout the scene.
Tip Watch out for ‘hosepiping’, which occurs when the filmmaker waves the camera around without providing the audience with a firm place from which to view the action. Apparently, when watching The Blair Witch Project, more people felt ill from the violently moving camera than from the violent events it showed us.
Tripods can inhibit good composition
The idea goes that as soon as you have placed your camera on a tripod you effectively close the decisionmaking process, removing the possibility of other ideas coming up which could improve a scene. So, if you are using camera support, you need to be certain that you have got the right shot before you get out the tripod. Try setting the composition to begin with without any support, looking continually through the lens to make sure you try out every conceivable angle and then, when you are sure you have found the shot that works best for you, set it on a tripod. This method ensures that the camera angle does not have to compromise to suit the tripod’s limitations.
Tip There are many other filmmakers who reject camera support. The Danish group Dogme believes that any use of tripods adds further layers of artificiality to a film and takes its audience one step further removed from it.
Finding and using unexpected shots
It is reasonable to suppose that if you have planned a film properly you should never need to find extra shots. Many filmmakers, however, believe that the combined energy and input of a lot of people on set can throw up unforeseen opportunities for quite unexpected shots. It is already accepted that actors may ad lib in a scene, only to find that the director keeps their off-the-cuff lines and removes the written part of the script. It is the same with filmmaking; you have to be aware that there are many shots you are not getting because you are sticking rigidly to your storyboard.
It is poor practice to shoot endless amounts of footage that you have then to trawl through in postproduction, but try to strike a balance between letting new ideas enter into your plans while shooting and sticking to the plans worked out earlier. Many first films look too precious in their choice of footage, as if each frame was a life and death decision, while some of the most captivating are those that let less well-considered shots into the final edit. In writing terms this would be the equivalent of communicating solely in formal language, as in legal small print, where each sentence is perfectly chosen and in perfect English. But less formal language can be more affecting sometimes and may enable you to communicate more directly to the audience. In both the editing and shooting stages, look for and keep footage that veers from your plans. Let these ‘slang’ shots enter into the language of the movie later.
Spare shots
There is another good reason for allowing more footage to be gathered than first intended. When we look at editing in Chapter 8:1, you will see how useful it is to have spare shots with which to patch over parts of a scene now and then to add interest and keep the audience watching. The kind of shots that turn up when you are simply experimenting to find the right angle or lighting effect can add variety and spark to a film.
What kind of shots?
Inevitably, preparation work is capable of preparing you too well; you end up knowing exactly what you want and will probably end up making a good, honest movie. But filmmaking remains an art form as well and as such needs to have some allowance made for the unexpected during shooting. It is this that marks the line between the average, workaday movie and the one that grabs the audience and makes the movie a more dynamic experience. The kind of shots you can use to sprinkle over the movie later are the ones that you would usually discard, either because they don’t fit in with the rest of the scene or because they have some slight fault in them. You might stumble across some of the most unusual compositions when you have occasionally departed from your plans and might have considered the result a mistake. But when you get to edit the movie later, revisit these unwanted parts of your footage tapes and give them a chance.
Let’s take our earlier example of a straightforward scene with dialogue between two characters. Filming this scene will be relatively easy as you have to show only two actors, but after a minute or so you could start inserting the occasional shot of the two from a distance, or a shot taken in close-up as the actors were rehearsing earlier. However, don’t show faces on these ‘patched’ shots if the actors are speaking, as the new shots would be out of sync with the rest of the scene. Try to film shots of the actors’ hands moving; this can emphasize drama in certain scenes and is vital for covering up the join between two takes of the same scene.
In American Grafitti (1973), George Lucas made his first full-length feature by filming virtually everything from every angle and leaving decisions about how the film would look to the editing stage. The result is a drama that has the realism of a fly-on-the-wall documentary.
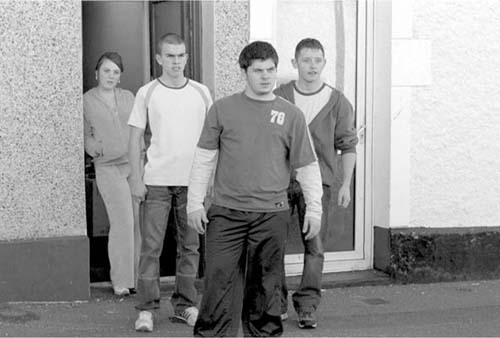
Figure 6.6 In this still from Amma Asante’s A Way of Life (2004) the characters stride towards the audience - and the action.
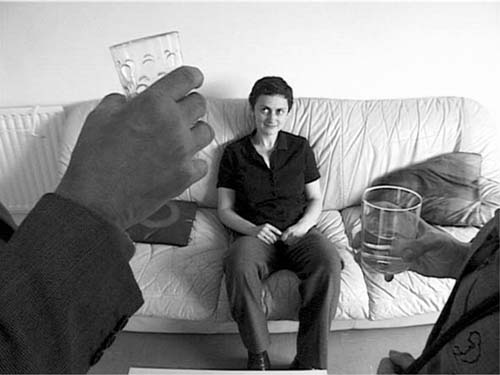
Figure 6.7 In this still from Lisa Gornick’s Do I Love You?, the main character is framed by two unseen hands and we are left with the impression that plans are being made for her.
Camera language
Camera language is something that is going to apply as much to narrative films as to non-fiction work. We have seen what good composition can do for a film, but here we need to know how the camera can convey certain meanings and use these as part of a repertoire of shots to say what you want without having to use words. Take a health check, however, on any slide into thinking that camera language is like verbal language. In film, there are so many other variables which alter the meaning of a shot that it is impossible to ascribe definite meaning to a certain sort of frame, track or tilt. Just use the ideas below as starting points to which you can add more meaning in your own way.
Camera framing
Camera language is an important way of conveying your ideas. Subtle changes in camera angle, height or movement all affect what you are showing. Over time, a broad vocabulary has been established in which certain angles of shot correspond to certain feelings or views of a subject. Much of this has been developed by the early masters of narrative cinema, such as Hitchcock. Being aware of this language is useful in being able to adhere to, or subvert, convention.
For example:
- Close-up shot. This kind of shot will often raise the dramatic tension in a scene. It evokes intimacy and sensuality, but also suggests enclosure or claustrophobia. Directing the viewer’s attention so tightly to one aspect of a scene also makes clear your own interpretation on the subject.
- Tilt. In this shot, the camera is tilted so that the viewer sees the world at an angle. The general effect is to suggest imbalance, a situation not quite right, a character unable to find his bearings. A slight tilt of perhaps 70 degrees (where 90 degrees is vertical) will give a more subtle indication of this state, while more exaggerated angles increase this feeling.
- Camera looking down on the subject. This can suggest vulnerability in the subject. It indicates that the viewer is higher than the subject and is therefore more powerful than the subject.
- Camera looking up at the subject. As the reverse of the above, this shot can suggest that the subject holds power by placing us below.
Camera language is similar to spoken languages in that it evolves and is a result of its usage rather than being formulated in advance and adhered to. Certain devices are seen to work but change considerably over the years, partly as a result of the increased sophistication of the audience. So-called ‘Hollywood grammar’, popular in the middle of the twentieth century, has evolved so far as to be unrecognizable.
Multiple meanings in camera language
As with narrative film, non-fiction film takes full advantage of the uses this kind of camera language brings and enjoys subverting one sign with another. For example, a happy, optimistic image can be altered slightly, suggesting some underlying unhappiness by slowly withdrawing the camera from the subject to reveal an isolated subject. One way to illustrate this is to look at spoken language. When we listen to someone, we take on board what they say but also watch the way they move their arms, their whole body language. Interesting juxtapositions can be made when one form of communication contradicts the other.
Film View
Some films use cinematography as a significant way of conveying meaning. In Paris, Texas (Wim Wenders, 1984) every scene seems like there is an extra actor present - the landscape. It carries the weight of the theme of alienation and loss like an Oscar winner, but only does so because of the judgement of the cinematographer. Many filmmakers use the American landscape to show similar themes, focusing on the deserts and midwestern flatlands to throw into relief the feelings of the protagonists. See also Terrence Malick’s Badlands (1974), Napoleon Dynamite (2004) and David Lynch’s Wild at Heart (1990). Australian landscape develops similar themes in films such as The Adventures of Priscilla, Queen of the Desert (Stephan Elliot, 1994), Walkabout (Nic Roeg, 1970) and Rabbit-Proof Fence (Phillip Noyce, 2003).
How we read images
Another factor is that the image the camera gives us is read as both a mental and optical phenomenon, hitting the brain in two ways. When we see an image, we read it as (1) a simple array of patterns on a mental or cognitive level and (2) as a cultural reference point. Take, for example, a shot where a character is standing in a doorway with strong light on the face, the door framed by black shadow. We can track how we perceive this image by focusing on both the mental and optical.
Optically, we see the figure before we see the blackness, and we respond strongly to the impact of the bright light shining on the face and the high contrast of black and white. We feel a need to decipher it and will pursue whatever little information we are given, and yet our interpretation of what we decide the image is saying is influenced by the impact of the optical effect the image has on us. This is why some camera compositions and lighting effects are particularly useful for the filmmaker.
But the image of the figure in the doorway will strike us for other reasons, on a cultural level. We have preconceived ideas regarding shadow and others regarding faces lit in the darkness. An air of mystery may surround it, or a sense of something spiritual or perhaps menacing. The face may also have a particular expression, drawing in our memories and feelings about the particular emotion we are seeing; one section of the human brain has the sole function of analysing every other human face we see, for recognition of the familiar tribe or family, so we also search for anything that resembles a face, also linking into the optical view of the image. Our response is determined by our culture, affecting the significance of certain signs in the image.
It is the combination of both cultural and optical that work together to come up with a single idea of what is being signified. The signifier is nearly always visual, while the signified is necessarily a mental picture.
When you frame a shot, you are therefore setting up a range of responses in the viewer. Being able to control all of these responses is outside anyone’s reach, but it is possible to manipulate response to a certain degree.
Tip For more reading about the area of visual perception and art, try art theory classic The Hidden Order of Art, by Anton Ehrenzweig.
The Crunch
- Make your films look good
- Get to know the rules of composition
- Know when to use the conventional approach and when to try something new
- Good composition can give a low-budget film a high-budget look
- Be aware of the whole screen when shooting
- Use composition to allow for pictorial depth
- Try unexpected shots, found during bad takes
- Show you are a master of conventional filmmaking and a master of doing it your own way.
Project 14. Close-ups
What this project is for: to improve camera technique
Time: allow a day to plan, another to shoot and two to edit
What this project is about
This project concentrates on the use of the camera and how it can help you in conveying narrative. In this project we will be making a straightforward movie using a simple plot, but will be doing it with a particular restriction: the entire film will be filmed using close-up shots only.
If narrative is concerned with information then the purpose in working with close-ups is to focus attention on what is important in a scene and prioritize the various elements within. In conveying the story you develop, you should be able to see in the final film a positive linear progression of the plot through the use of this device. The close-up enables the viewer to see what is important in the shot and demands that you determine this in advance of shooting, with implications for the way your story is conveyed. As an example, in filming a dialogue between two actors, some people would be inclined to show more of the human reaction to a set of events, training the camera on the faces and hands of the actors to show the emotion behind the story. Others may prefer to focus on the mechanics of the action, with more emphasis on how the actual events are occurring and perhaps delivering a simpler reading of the action.
Controlling information
Visual and stylistic aspects of filmmaking are described in Chapter 6:1 and help in describing the means with which we convey the story. This project, however, focuses entirely on the ability to control this drip-feed of information making up the narrative to the audience and, when used alongside the previous projects, may help you deliver not only the plot, but also much more.
Stage 1
In preparing the plot for this film, it would be more effective to find something simple, a familiar plot that an audience can relate to. But if you want to try more advanced versions of this project, make the narrative more complex. Use simple linear stories, taking the audience from event A to event B, such as a delivery, a heist-and-getaway or a confrontation between two people.
Stage 2
Developing this film is going to be slightly different from other projects. When you have completed the visualizations stage and are ready to move on to the storyboard, work instead on much larger frames. Draw a frame the size of CD box or larger.
When you have completed a first draft of the storyboard you will then need to start drawing smaller frames around certain parts of the image, trying to home in on the essential parts of that shot. To do this, you could try making a number of window frames out of paper, at anything from one-quarter to one-sixteenth of the frame size. The aim is to see if you can isolate images within the frame which convey the primary information in that scene. Look at what is the most important section of that frame, what is the next most important, and so on.
Multiple shots in one frame
As can be seen in Figure 6.8, the single frame here contains several frames that are telling different parts of the story. The primary source of information is probably the gun on the table and the hand resting on it. But a close second are the two frames showing the faces of the actors. After this, you could look at the foot tapping nervously under the table and the clock ticking on the wall. All these sections of the frame give portions of the overall information contained within and it is for the director to prioritize each part when deciding how to point the camera. Does the hand on the gun need to be centrally placed in the frame? There are infinite ways to order the shot depending on what you want to show the audience and how much you want to ‘spoonfeed’ them the plot. Bringing unlikely elements to the fore now and then can add layers of meaning to a scene. Hitchcock demonstrates this many times as he draws our attention to a minor part of scene, often showing human quirks and frailties in the process.

Stage 3
When you have completed this exercise with all the frames in the original storyboard you are ready to begin sorting the new images taken from the larger frames into some kind of order. We need to build a new storyboard out of these images, paying careful attention to the order in which the close-up shots appear and the frequency with which they recur. It is likely that you will need to have more shots of shorter duration than in a similar film made without this device.
Stage 4: Shooting
Shooting this film is going to take slightly longer than other narrative films. Although you will be setting up more shots than in other films, you can make your task much simpler by asking your actors to play a scene several times while you take various shots from different angles. If you have access to additional cameras this would save time and make continuity problems less evident by shooting different parts of the scene simultaneously.
In obtaining the close-up, it is better to move the camera closer to the action rather than rely on the zoom control. Zoom tends to increase camera wobble and removes the opportunity, to a certain extent, for you to track or pan the camera.
Shooting tips for this project
Focusing
Like just about every aspect of filmmaking, even something as technical as focusing can be a creative tool. When working in close-up, the aspect of focus is even more emphasized due to the laws of optics. You can choose which part of the screen the audience look at when you decide which area will be in sharp focus; the focus tool is like an arrow pointing to the crucial part of that shot. But there is no reason why you should not challenge this convention by settling attention elsewhere in the scene. The director Kieslowski has some memorable images in his films obtained through a creative use of focusing.
Film View
Near the start of Three Colours: Blue (Krzysztof Kieslowski, 1993), we see a doctor enter a ward containing the victim of a car crash. From the point of view of the victim we see a close-up, focusing on a few feathers on her pillow moving with her breath, while the doctor is a blurred figure in the background. This tells us that the victim is alive but also conveys something of the sense of bewilderment felt by her. The next shot is equally impressive: the camera fills the screen with her right eye and we see the pupil contract as a reflection of the doctor appears in the iris.
You may also find that some camcorders are designed to focus the object in the centre of the frame and reject your attempts at creative focusing, particularly if you want something on the side of the frame in focus and the main object in the centre not. If you do have a manual focus option, see the instructions in Chapter 2:3 for getting round this problem.
Camera wobble
When shooting close-ups you will find that the camera is going to reveal more shakes and wobbles than in other shots. Although a tripod is advisable for many shots, it would be useful to devise a more flexible solution that did not restrict the range of angles available to you, such as using a beanbag or similar movable, soft support.
Lighting
When you are working close to the action, lighting becomes an important factor. There are some lighting conditions that will aid you in trying to convey information and some that may confuse the scene. Avoid flat, dispersed light from fluorescent lights and household bulbs. Use light that is sharper and more directed at the action, so that the shapes of the subject are revealed and contrasting shadows are thrown. This will help to reduce the amount of extraneous information we see and draw attention quickly to what is important in the shot.
Extra shots
Finally, when you are shooting, it would be useful to get additional shots you had not previously planned for. When you feel you have shot all the parts of a scene you needed, look around the scene for anything else that could be used to break up the rigidity of the final edit. If we are constantly given crucial information the film becomes hard work, but if you can occasionally cut away to something not so crucial it may make for a more rounded, less frenetic film.
Stage 5: Editing
There are a number of points to consider when editing this sort of film with its dominance of close shots. As well as having a greater number of shots than other films, these may be shorter and you may find that it is useful to use cutaways - cutting to and from a shot repeatedly. For example, if we consider Figure 6.8, you may cut from the hand on the gun, to the face of actor 1, to the face of actor 2, and back to the gun. You will need to avoid bewildering the audience, however, and include regular longer cuts: too many short, sharp edits can be physically hard to cope with. To vary your shots when filming, you could try tracking and panning to link two close-ups together.
Evaluation
Much of the evaluation for this project can be seen as assessing how you told the story and what you emphasized. This project reveals your individual preference in how a story can be told, as well as encouraging you to focus on the essentials of a scene, simply by asking you to draw our attention to what you feel is the most important part of it. This sort of self-knowledge is worth a lot in helping you towards a personal approach to the medium.
- When you were shooting, were the shots you filmed close to the storyboard you prepared? You don’t lose points for deviating. It is more useful to assess which is the better document: the tape or the storyboard. For many filmmakers it is the former, since the camera shows you what you can achieve while the paper version only shows what might be achieved.
- How did your use of light alter? Did you become more aware of where you were placing lighting to reveal certain parts of a scene? Did the use of strong, directed light help you in simplifying the frame and making better compositions?
- Focusing will also have been a useful tool for composition - did it prove useful in close-up?
- When you were editing the movie, how did you feel the flow of the story was interrupted by the need to cut between the elements of the scene? You may have found it useful to use one particular shot as the dominant one and insert others now and then. The length of each shot itself tells the audience something about your priorities for the story and determines how they will read it, according to which shots are dominant. You may have decided to dwell on a particular, seemingly less significant, part of a scene in order to challenge the presumed priorities for that scene, changing the way we expect a scene to be shown.
I want something more challenging
To push this project further, try turning your attention to non-narrative ideas rather than action-orientated ones. You may find that you are then having to focus more on symbols and other signifiers of meaning rather than just signifiers of action. Expect to have to work hard on suggesting significance in each shot because the action in the frame won’t do it for you.
2. Continuity
Continuity in narrative filmmaking refers to the way shots go together to create a seamless chain of events. It is going to be the invisible tool that helps you bind your film together and link it as a single, whole experience. It is going to hide the nuts and bolts of filmmaking, creating an illusion of reality and merging separate pieces of film - sometimes recorded days apart - into one stretch of fictional time.
The need for continuity arises because the audience does not see everything. Time is compressed and space is shown only selectively, cropping the imaginary world we see. To illustrate this effect, try a test where you look only through a small tube. You start to feel the need for more information to tell you about your environment. If someone leaves your small frame of view, you want to know whether they have left the room. It is unsettling if there is a gap in your internal map of the room you are in. Watching a film is very much like this test, so one of your tasks is to provide the viewer with a complete sense of where we are, who is there and when any part of this changes.
Good continuity keeps the audience with you. The audience’s dependence on you for information is made more acute when you factor in the editing process. Now shots are broken up into small pieces and it becomes essential that some way is devised of maintaining the smooth flow of events on film.
Continuity is disrupted easily: the slightest object out of place, a confusing camera angle or a shift in the style in the film can all break the audience’s involvement with the illusion. The effect of broken continuity is unusually shocking; it momentarily drops the viewer from the fairground ride experience of watching the film and sends them back to earth with a knock. Of course, with such a noticeable effect, discontinuity is just one more trick for the filmmaker to utilize. If you are aware of the positive and negative effects of keeping continuity and disrupting it, you can choose when and how you employ these tools. To use the fairground ride analogy again, you can choose when to keep the ride smooth and when to give an unexpected jolt to the passengers, without risking the whole ride falling apart. In other words, maintain continuity closely and you then have the option of editing against it for sudden effects.
Narrative continuity
In narrative film, continuity is crucial. Various elements have the potential to cause problems during shooting and editing, including:
- technical factors such as changes in picture quality
- plot factors such as omitting crucial explanatory scenes
- prop and set factors such as clocks out of sync
- style factors such as a shift in the look of the film
- unexplained implausible moments such as exaggerated compression of time.
Know the rules, know how to break them
It is worth noting that bad continuity is not necessarily good discontinuity. In other words, simply ignoring the rules of continuity will not automatically lead to a ground-breaking film that has its own innovative look. Every film needs to have an internal logic where any disruption of the basic ideas of continuity is planned and incorporated into the film as a whole, so that it corresponds to its own rules. This may sound vague because each film has its own individual needs but, in general, rules are broken in a planned way rather than arbitrarily.
Go to: Chapter 4:5 to see how to plan effectively for an alternative approach.
Figure 6.9 In any location shoot, continuity of action is crucial, especially when dealing with several characters, as in this still from David Casals’s On Off.
Avoiding bad continuity
How do you set about ensuring that continuity is under control? The range of issues outlined below need to be considered.
Tape quality
This is less of an issue for digital tape but is important nonetheless. Use the same quality of tape throughout production, new ones if possible. Digital tape degrades far less than analogue tapes through reuse because it is built very differently, but there are other ways in which tape can be affected through length of use, so it is safer to buy new tapes and use a consistent number of times, usually less than 10.
Camera features
Make sure you remain with the same camera settings throughout production. If you start the film using, for example, an aspect ratio of 16:9 (sometimes called‘cinema’ on the camera), stay with it throughout unless you have a scripted reason to change. Set the white balance to the same values each time you shoot. White balance is often automatic on many models but check before every shoot; any unknown changes in lighting and you could end up with one shot having a warm, orange cast to it and the next having a cold, blue cast to it. Altering the white balance on purpose can be a valid tool, of course, allowing you to change the look of a scene.
Plot disruption
Even the minor absence of some small part of a plot can be baffling for an audience. For example, a shot showing a character in one location, a beach perhaps, followed by a cut immediately to the same character in an entirely different location, perhaps back home, needs some explaining. We have soon assumed that the character jumped in a car and drove home between the two shots, but we need to be shown it or told it with a subtitle, even if it is just a glimpse of the car speeding on the road for a couple of seconds or a title saying ‘later’. A narrative is like a ladder; its upward, linear progress depends on having all the rungs in place. Miss out a few rungs and the ladder still works but requires considerable effort to climb, and eventually you lose faith in the overall structure.
Closure: the viewer fills in the gaps
However, before we start handing the audience everything on a plate, there is a concept called ‘visual closure’ that refers to the ability of the mind to fill gaps in a narrative to make it into a coherent whole. If you draw a circle but leave out a few degrees of it or draw one with dotted lines, you will still recognize it as this shape, but the crucial point is that enough information has been given for us to conclude that it is a circle. Just a few lines in the right place and we can fill in the rest, just as in the example above we needed to see only a fraction of the car journey to see that it had taken place. Leave out the scene that connects the two locations and you risk losing the shape of the film as a whole.
Sound
One of the more subtle but still noticeable continuity problems is often in the soundtrack. Ambient sound, or sounds that are recorded in the background to each scene, will differ greatly, even those recorded on the same day in the same place. The reasons for this are looked at more fully in Chapter 5:3, but bear in mind that ambient sound has the capacity to make or break continuity. The use of devices to smooth over the changes in presence are one of the hallmarks of professional filming.
Go to: Chapter 5:3 to find out more about sound recording and Chapter 7:4 for ideas about editing with sound.
Style disruption
Style is something that occurs naturally as a result of the numerous decisions you make about camera angle, composition, music, editing and so on. Once you have noted the constant elements in the film, such as the kind of shots you use, dominant colours or style of acting, you need to nail these down and stick to them. There will be times in the film when you want to disrupt this conformity of style - for instance, in dream or fantasy sequences and flashbacks or to denote a radical change in the film’s pace. At these points you will certainly devise a very different look to the film, but it is a constant style throughout the rest of the film that allows you to lift other sections out of it so neatly. Try to establish the look of the film early on in the planning stage. Use a timeline to indicate the dominant style and where it is to be broken.
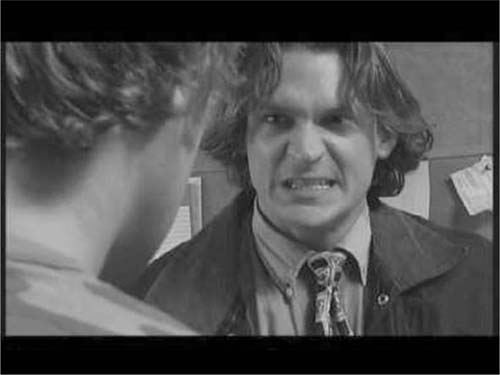
Figure 6.10 Over-the-shoulder shots like this help preserve a sense of continuity in dialogue scenes. Still from Crazy by Noel Stephens.
The action line
Among the devices we have looked at to ensure smooth continuity, one of the most useful regards the placing of the camera. This rule is also known as the 180-degree rule and has evolved to ensure that the fictional space created by a scene is sustained throughout. Both shooting and editing play a role in this. Every new shot has the potential to suggest that we are in a new location or at a new point in time. The purpose of the 180-degree rule is to reassure the audience that we are in the same place and that the events are happening in the same short space of time.
How the action line works
It works by drawing an imaginary line between characters in a scene and drawing a semi-circle that runs 180 degrees around them, on one side only. The camera must shoot from one side of the line, from any position. If we look at Figure 6.11, we can see what the camera records if it stays on one side of the line. In this shot the two actors are on opposite sides of the frame, actor 1 on the left, actor 2 on the right. The audience notes the position of the two actors and sets up a kind of internal map of the room accordingly. But if the camera goes onto the other side of the line, near the window, the actors seem to have changed sides, with 1 on the right and 2 on the left. The audience then ask questions: Did an actor move? Or did an edit go missing?
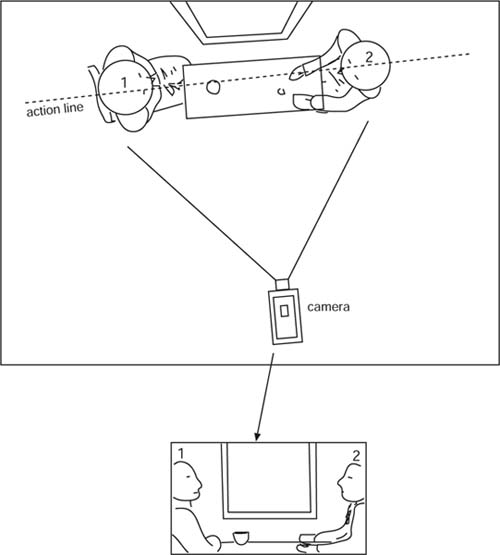
Figure 6.11 The action line.
The action line and the jump cut
A further use of the line is in avoiding the ‘jump cut’. A jump cut is an abrupt cut between two clips when the camera of each gives a slightly different angle or view of the subject. When framing a figure we will notice a disruption of our view by moving the camera slightly to the side and cutting between the two shots. It is as if you had filmed a tracking shot and left out a small piece of tape as the camera moves, as you may expect to see in badly preserved old silent movies. The effect does not destroy the scene but does introduce some hiccup in the flow of the film. As with all discontinuity, this is also a useful tool as it produces dissonance against the harmony of the overall continuity and, as anyone working with music will tell you, dissonance is a valued element in music composition.
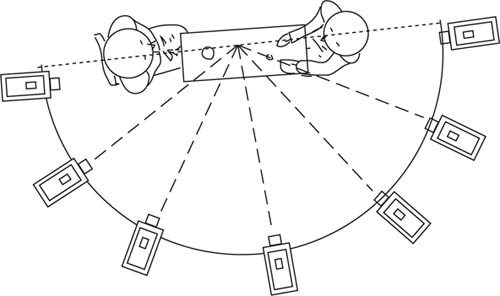
The 30-degree rule
To avoid this effect, however, cameras are placed at certain locations around the action. Imagine a semicircle radiating around the main action, as if the camera is in the auditorium of a theatre looking at a stage. Cameras can be placed at least 30 degrees apart from each other around this semi-circle, but no closer. If cameras are closer than this and the two resulting close shots are edited together, the effect will disrupt the space of that scene. Cuts to new angles have to be sufficiently different to justify their occurrence.
Motion within the screen
The rectangle within which we see the film, whether it is a television or projection screen, is also a tool in achieving continuity in that we construct a map of the invented world of the film. Movement within and off screen needs to be handled particularly carefully. Explaining this gets a little complicated, but here goes.
There is a difference between scenes that are stationary and scenes involving forward movement, such as a chase or journey. Let’s take the first kind to begin with. Say you have a scene involving, for instance, some people within a room or in a particular defined space. If a figure walks off the screen we adjust our internal map of the scene and place a mental marker regarding where they are now. If they go left, we expect them to return from the left; if they exit right, that’s where they should re-enter. Ignoring this makes for an unholy mess in continuity. At worst, your audience are going to lose faith in the whole movie and start watching for more such continuity errors. Even a simple plot is then in peril, as now nothing the filmmaker is offering to the audience can be relied upon.
The other kind, and you were warned it gets confusing here, involves the reverse of this. Suppose you have a scene in which one character is chasing another. Maybe a policeman is pursuing a villain, or a Tyrannosaurus rex is chasing a jeep. In these kinds of scenes the participant will exit right (usually) and re-enter left, showing us that the journey or chase is constantly in the same direction, left to right, left to right. If you follow the piece on the action line earlier, then much of this problem is solved.
There is a convention regarding the direction actors will be moving when filmed. If a figure is going forwards or onwards metaphorically, in the script, perhaps to a new location or new part of the plot, we expect the figure to travel consistently from left to right across the screen, and the reverse when seen to be returning from somewhere. There are times when you need to imply onward or returning motion and this device becomes even more useful when you have few location landmarks to help orientate the audience. In David Lean’s Lawrence of Arabia, the exhausted Lawrence is journeying across a barren desert, and we see him go from left to right. When he later learns that one of his party has fallen from his camel many miles back, he returns for him and we see him go from right to left across the screen. With no landscape elements to help us to judge which direction he is going in, this becomes essential.
Film View
An interesting example of how movement from left to right is used can be seen in David Lynch’s The Straight Story (1999), in which an ageing and car-less man travels hundreds of miles on his only mode of transport, a lawnmower, to visit his long-lost and ailing brother. In many shots, Lynch places him travelling from right to left, thereby hinting that the man is returning home, travelling back to the place he needs to be.
Light quality and intensity
Since light is one of your tools for showing the passage of time, you need to ensure that light is constant throughout a scene if the audience are to view the events of that scene as contemporaneous. This means light should reflect only those changes to the scene that the audience can perceive — for instance, the approach of dawn, a car headlamp moving past and so on. Lighting used in a scene should be maintained at predetermined levels; if you are unhappy with the lighting of your scene, do not change it halfway through, redo the whole scene. If filming takes place over days or weeks, make careful notes of the position and intensity of lights. Similarly, daylight is notoriously unpredictable; a temporary cloud can radically alter the colour and lighting of a scene. The weather may influence the day you shoot a lengthy scene. Hollywood grew up where it did because it enjoyed near-perfect clear, blue skies almost every day. Continuity becomes easy, even if two parts of the same scene are shot days apart.
Continuity in non-narrative movies
Non-narrative movies demand a very different approach to narrative. They require that you embed continuity as a part of the whole structure of the film, not as an afterthought during filming. Nonnarrative movies such as music videos, abstract movies and multimedia projections used in live concerts are particularly susceptible to looking fragmented. At their most out of control, they look like you are channel surfing, looking at a number of clips of movies by different people. Of the following ideas, the more effective ones are those that are part of the planning and shooting stages rather than those placed over the film in post-production.
Methods of ensuring continuity in non-narrative
Single filter effect (edit software filters, not camera filters)
If your editing software has special effects that you can use to alter the look of clips — for instance, to make them change colour, stretch or change contrast and tone - you could apply one of these to the whole film, or at regular points. Restrict yourself to one filter only.
Tracking
A tracking shot — where the camera moves while it shoots, tracking the action - can make a good way of connecting shots. Decide on a constant speed of tracking and stick with it throughout the film. To enhance the effect, keep to one direction in the screen - for example, left to right. For example, you could show a slow, left-to-right movement of the camera along a beach, cutting then to a similar constant shot along a busy street.
360-degree movement
This device is particularly effective in linking shots. Decide on the height of the camera and the speed of the camera as it moves, then shoot everything while moving 360 degrees around the subject, at every location, throughout the film.
Common space
This involves including an object or space in the background that is present in each shot, and could be as simple as a fireside with picture frame. This is commonly used in scenes with dialogue where it is useful to be able to locate two actors within the same space by showing some common space or object in each actor’s frame. In a non-narrative film you could choose a single prop that is present throughout.
Transitions
At the editing stage, you will need to decide how you cut between scenes. The most common - the straight cut and the cross dissolve - could be developed by trying something a little more noticeable. An example could be to fade fast to white as the picture cuts, suggesting flash photography.
The length of the shot
A style of editing that uses short cuts, with a high turnover of clips, will encourage the viewer to see these clips as linked in some way, even if the subject matter is not. Therefore, we tend to see a montage sequence consisting of a lot of quick images because the diversity of images needs to be balanced by speed of perception. But what is a ‘long cut’ or a ‘short cut’? In this case you could think of a quick cut as half a second or less and a slow cut as anything from three to five seconds, but your subject matter will dictate how fast your cuts will be.
Motif
In non-narrative films, a motif can be used with some thought to what kinds of objects or colours add to the overall theme of the movie. For example, in an interpretation of the word ‘anger’, we could justifiably use the colour red as a motif in the film. To stand as a motif you would have to see the object or colour recur often enough to be noticed. Alternatively, you could use images of a clenched fist or a brick hurtling towards a window, letting us see more and more of it as the film proceeds.
Linked imagery
For this idea we could take a look at Kubrick’s 2001: A Space Odyssey (1968). After a lengthy start where we see ancient pre-human apes, Kubrick needed a way of jumping tens of thousands of years into the future without disrupting the flow of the movie. If ever there was a time to use a continuity device, this was it. His response was to have the camera follow a bone thrown high into the air, and immediately cut to a similar-shaped, bone-like spacecraft, occupying the same space in the frame. This is a daring way of connecting two shots that could not be more dissimilar, visually. While shooting, you could look for parts of the scene that visually resemble a part of another, with the aim of linking the two later.
Sound
This is a last resort method of connecting shots and is not the most effective way. A single piece of music is dubbed over the whole film as with a music video. If you want to use sound in this way, try to use a particularly noticeable home-made soundtrack of sounds, rather than music, and one where you have altered the sounds or looped them, producing a repetitive, rhythmic effect.
The Crunch
- In narrative, continuity is crucial
- In non-narrative, broken continuity can be a useful tool
- Get to know the rules of keeping continuity and break them wisely
- Continuity is developed both in the script stage and also while shooting
- In non-narrative movies, beware that the movie doesn’t look fragmented - use continuity devices in editing or shooting
- Get to know the action line and the 30-degree rule
- Use good quality sound and take care of ambient sound.
Project 15. Urban legends
What this project is for: to create a narrative movie
Time: allow a week to plan, another to shoot and two weeks to edit
What this project is about
This project enables you to put into practice many of the ideas looked at in narrative storytelling. Continuity, camera work, lighting, sound, scriptwriting, genre editing, all contribute to this short film.
The inspiration for it rests on the many urban legends or myths that are present in every community. These tales may or may not be true, but are certainly spooky and tend to be atmospheric, tense, with occasional spots of action and delivering certain veiled messages - in other words, perfect for narrative films. They also tend to play on the audience’s fears, phobias and nightmares, engaging spurious moral codes - for instance, in Final Destination (James Wong, 2000), Scream (Wes Craven, 1996), A Nightmare on Elm Street (Wes Craven, 1984), Halloween (John Carpenter, 1978) and My Little Eye (Marc Evans, 2002). More original movies rely on mythical events where fantasy and reality can be merged to dramatic effect.
Stage 1
See Chapters 4:4 and 4:5 to help work on a story. For ideas, look in local newspapers, paranormal journals such as Fortean Times and weblinks to urban legend sites. Look for:
- A strange event that took place near where you live
- A supernatural tale
- A myth from indigenous peoples (Native American, aboriginal, for instance) that could be updated - see Whale Rider (Niki Caro, 2002) for a good example
- A cautionary tale (most horror films today tend to have such moral overtones).
Weblink
http://www.forteantimes.com/ Journal of the weird and unlikely.
Stage 2
See Chapter 4:7 for help with developing a visual style to the movie. Look at #c5-1">Chapters 5:1 and 5:4 on location shooting, Chapter 5:2 on lighting and Chapter 5:3 on sound recording to help with technical aspects. When shooting, make sure you stick to what is available — use friends as actors, props you already own and your own house as location. Close-ups are going to help in this movie more than any other kind of shot; they obscure imperfections in your non-professional actors’ performances and also heighten tension and drama.
Stage 3
Make sureyou stay within genre editing as outlined in Chapter 8:1, but feel free to experiment with a looser narrative style similar to the kind seen in music promos with simple stories. After the first cut, leave the film for a week or more and then come back to it with a more objective eye; you will then be able to do a re-edit where you try to reduce the length of shots. One of the most common faults of short films is shots that have not been cut enough. Try shaving off a few frames and watching the results, although make sure you keep a master copy of the first version safe to return to if necessary.
Evaluation
It is important with this movie to let it have an outside life beyond your friends and crew. Take it to local screenings and get comments from other filmmakers. If you get good responses, send it further afield to festivals or cable TV slots.
Go to: Chapters 9:10 and 9:11 to get more details on getting your work seen.
I want something more challenging
Option 1
To stretch your skills further, try writing a script that adds layers of meaning to the film. Look at Chapter 3:2, ‘How films work’, to get ideas about this. Stretch the cultural and social connotations more by offering connections to bigger world events. Urban myths by their nature tend to be localized, but some have engaged wider fears about the world, such as the fear of Native American ghosts in Poltergeist (Tobe Hooper, 1982), which perhaps reflected a wider awareness of historical and current political issues about Native Americans.
Option 2
Alternatively, try making a silent movie - one where there are sounds but no spoken dialogue. It will push your skills of storytelling to the limit, resting all information on what the camera can show rather than the cheap shortcut that is dialogue. It is also a great way to learn about sound environments (see Chapter 5:3 for details on sound environments).
3. Documentary
The current period of documentary is arguably approaching a kind of golden age. Factual films have earned huge receipts in the global box-office in films such as Fahrenheit 9/11 (Michael Moore, 2004), Touching the Void (Kevin MacDonald, 2003), Super Size Me (Morgan Spurlock, 2004), Capturing the Friedmans (Andrew Jarecki, 2003) and The Fog of War (Errol Morris, 2003). The industry and critics have responded in the awards ceremonies, most controversially by awarding Moore the Cannes Palme D’Or in 2004 for his searing look at post-9/11 America. But it wasn’t just his partisan view that caused a big stir - it was the point at which it broke through the $100 million barrier in box-office receipts, a return not seen before in documentary films. Suddenly, fact could be as enticing as fiction.
At some point it became acceptable for a documentary to be entertainment, but it is the filmgoers who have driven this change rather than the distributors, who failed to see that audiences were receptive to films that looked at social or political issues. Andy Glynne, director of the London Documentary Group, acknowledges the change:
‘Touching the Void is a great documentary, has done incredibly well in the cinema and has helped to change what people think of as a documentary. This idea that it had to be really didactic and straightforward has gone. Now you see dramatic reconstructions, animation, drama documentary, music video sequences, and you see it getting into feature films like American Splendour, which uses fake documentary-style footage and archive footage as part of the film.’
Documentary on a low budget
The low-budget sector is seen to be dominated by the short film, the calling card of the future feature director. But equally vibrant in this level is the documentary filmmaker. To a certain extent, this kind of filmmaker is more self-sufficient than others due to the size of the crew needed - the one-person self-shooter and editor is common. They also have few opportunities for funding, with many television companies cutting factual budgets before more popular dramas. The political nature of some documentaries - but by no means the majority - is also an obstacle. For award-winning documentary maker Phil Grabsky this is a problem, but not one without a solution.
‘Generally speaking, there has been a general lack of nerve of TV people as well as a slavish rush to secure the highest possible audience, even if that means the lowest possible standards. But things are starting to change - and largely because digital technology has allowed filmmakers, including myself, to say “Hey, we can make the films we want with much less reliance on TV.” At the same time, audiences are seemingly less happy with TV and are now going to cinemas to watch docs.’
Often, filmmakers seek other routes for finance so as to continue making the films they want to make without interference from outside agencies. Britain’s Spanner Films, for example, runs a successful training company to help other filmmakers, and sells DVDs direct to the market. Its 2003 movie Drowned Out told the story of Indian villagers refusing to leave their land to make way for a hydroelectric dam. A version was sold to an American cable TV company, which helped fund more work. A later movie, Baked Alaska, focusing on oil drilling in the northern state and global warming, raised finance by asking for small donations from viewers of their previous films.
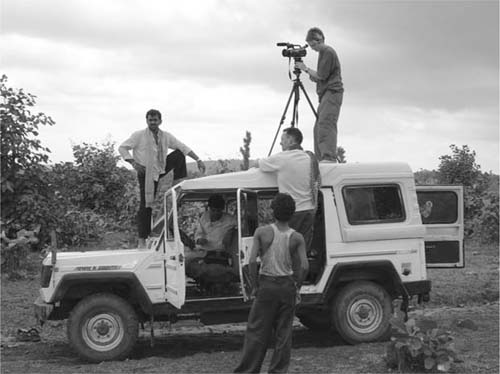
Figure 6.13 Director Franny Armstrong of Spanner Films shoots her film, Drowned Out, portraying the fight by Indian villagers against the destruction of their homes by a reservoir.
The severe financial and physical obstructions (the extensive travelling and research) would suggest that this field of the low-budget sector should be diminishing. But the very particular survival skills of its exponents have created an industry shaped by realism and able to overcome these obstacles.
Interview
‘I attended NYFA and mostly went on sets and observed the director at work, visualizing myself as the external director working on the same film because my ambition was to be in his position. I have worked in different positions on small productions that have not made it on TV - basically showreels. I read a lot of practical filmmaking books till I felt that it was possible to make my own documentary and believe me it is possible.’
Amaru Amasi, documentary filmmaker, USA
Background to the revival
Documentary started its revival in the mid-1980s. Errol Morris’s The Thin Blue Line (1988) made a great impact by incorporating dramatic devices usually seen in fiction movies. Its production values were high, it had a classy soundtrack by Philip Glass and it used narrative reconstructions to illustrate what had happened. The film told the story of the wrongful conviction of a man currently serving a sentence. The film attracted attention by meticulously laying out the evidence against the conviction, leading to a successful appeal after the film was released. Morris himself preferred the term ‘non-fiction’ to describe his film, reflecting his sense that it signalled a departure from previous documentary films. It also allowed him to enter the film for festivals where the documentary tag would have barred his entry.
The term ‘non-fiction film’ itself was first coined by a group of influential documentary filmmakers of the 1960s, Drew Associates. Within this group, working primarily for television, were the brothers Albert and David Maysles and Don Pennebaker, who made the Bob Dylan portrait Don’t Look Back (1967). Prior to this group we could go back further to a group of French filmmakers in the early 1960s who for the first time admitted that the presence of the camera made a difference to what was being filmed. This ‘cinéma-vérité’, as it was known, changed the way documentary was perceived and led towards the form becoming more subjective and perhaps more honest about its capabilities in that it could not claim to be entirely impartial and dispassionate.
Broomfield and Moore
A further step was taken with the work of British filmmaker Nick Broomfield and American writer/filmmaker Michael Moore. They have placed themselves firmly within their films, showing how the presence of the filmmaker affects the subject of the documentary and positively trading on this fact. Antecedents in this can be seen in the books of Hunter S. Thompson, such as Fear and Loathing in Las Vegas, which sparked a whole new kind of news reportage called gonzo stories, where the writer was firmly a part of the subject.
In Moore’s Roger and Me (1989), the director tries in vain for three years to track down General Motors’ chairman Roger Smith in order to confront him with the human consequences of GM corporate policy of redundancy in Moore’s home state. Moore jumbles chronology and places his own feelings about the subject at the heart of the film - both these ideas would have once been outside the parameters of documentary. Moore’s motivation was the sense that facts don’t adequately portray the situation, that they need illuminating somehow by meeting human response. In successive films since then he has sought to display the human consequence of his subject matter in what may seem to some like headline-grabbing stunts or to others like original ways to pierce a cloak of secrecy.
In Bowling for Columbine, Moore took a teenage victim of the high school massacre referred to in the title to the headquarters of the store where the bullets that were still lodged in his body were bought. The store then promised to remove the sale of these bullets from local stores. In this sequence we could see the transformation of the documentary from detached observer to slightly subjective view and finally to subject of itself. It was less a description of the situation than an attempt to intervene and make a new situation. Less successfully, Moore’s Fahrenheit 9/11 asked senators to sign up their grown children for Iraq tours of duty in the armed forces. Documentary filmmakers remain divided about Moore’s tactics, with many suggesting that his films remake the documentary form too radically.
Nick Broomfield deserves a place in this chart of the changes within documentary as a filmmaker who has sought out subjects which say something about wider society and avoided explicit political aims. As a result, films such as Biggie and Tupac and Aileen Wuornos: The Selling of a Serial Killer, with their subtle exposition, result in highly charged political statements, without having to resort to rhetoric.
Documentary convergence
Although much used in media circles, the term ‘convergence’ has something to tell us in describing the emergence of documentary in its newest incarnation. It has begun to sprout offshoots that are clearly documentary but incorporate other elements we normally expect to see in narrative film, including montage editing, the reconstructing of events to show what happened rather than simply tell it, the use of unusual and challenging structure, and imaginative use of the camera.
Go to: Chapter 10:2 for more ideas on what convergence means to the film industry.
Music video-style sequences are now common devices for breaking up less easily digested facts into more audience-friendly chunks. Animation has also crept in, allowing the filmmaker to use satire and metaphor to illustrate points, as in Super Size Me, which uses brief animations extensively throughout. An extended sequence in Bowling for Columbine made by South Park creator Matt Stone (a former resident of Columbine) combines a set of ideas that would have tested the attention span of most filmgoers if presented in any other form. By using cartoon characters and an offbeat narration the sequence can raise complex questions, in this case the relationship between American history, a state of social fear and gun culture.
These animated or music video sequences allow the filmmaker to state clearly that this is a very separate part of the film, thereby allowing a new set of rules to come into play. In much the same way, a narrative film uses montage to denote that certain sequences are to be seen as separate to the rest of the film, perhaps as flashbacks or intimations of the inner state of characters.
A further significant movement has seen the documentary form spill out into narrative, creating a hybrid movie. Jonathan Caouette’s accomplished Tarnation (2003) uses archival footage to tell his own turbulent story, a strange combination of documentary and drama in an entirely new variation.
Film View
Made for $218 and edited with Apple’s iMovie software, Caouette’s movie Tarnation moved documentary and drama beyond the constraints of either form, and was a correspondingly big hit at the Cannes Film Festival in 2004. Caouette started making films at the age of 11, borrowing a neighbour’s camera to document his turbulent childhood. After 20 years of hoarding tapes and photographs, he embarked on a rough cut of the footage as a side project. After a festival director saw the movie, the tape was passed to director Gus Van Sant, who signed on as producer, calling it ‘a brilliant and devastating biographical documentary’. The official website is http://www.i-saw-tarnation.com/
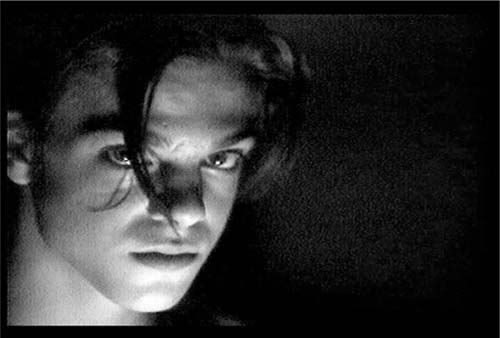
Figure 6.14 Jonathan Caouette’s debut feature Tarnation (2003).
Other films have also obscured the division between forms in this way, such as American Splendour, highlighted at the start of this chapter, while other films appropriate documentary devices for narrative ends, exploiting the unpredictability and rawness of the form, as in The Blair Witch Project or My Little Eye (Marc Evans, 2003).
‘My advice for first-time documentary makers? I now have what I term the Nike mentality — just do it. Look out on the streets, question yourself about things you don’t understand and find out the answers on camera from different societies.You don’t need to go to film school or have a rich uncle, just have film passion. Research your subject, sometimes you don’t need to because it unfolds before your lens into a story. Pick up a camera like the Sony or the Canon and start shooting. If you are not ready yet, read books on filmmaking or magazines like this one that’s the only way you can get advice on what to shoot with.’
Amaru Amasi, documentary filmmaker, USA
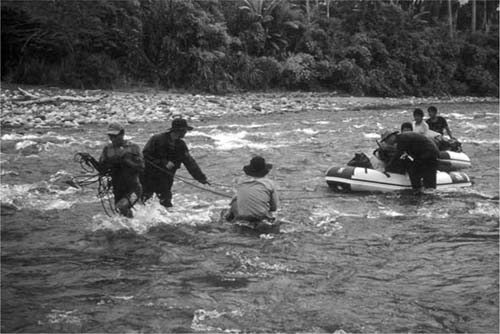
Figure 6.15 In the forests of South America, documentary filmmaker David Flemholc worked in particularly adverse conditions for his film House of the Tiger King (2004).
Where next?
To some extent, the non-fiction film is becoming more challenging and provocative than the narrative film, stealing from other forms but doing so with the aim of a truer representation of the events it is portraying. The difference is that we now question what the meaning of truth is, and how to locate it. Filmmakers agree that once you point a camera at a subject, it stops functioning as itself and becomes a part of film rather than a part of real life, something that anthropologists and sociologists realized years ago. If the camera makes the objective subjective, then the filmmaker is only following the logic of this by presenting a film that uses elements from fictional and factual forms.
The result is a form that is more attractive to the aspiring filmmaker. The low costs and opportunity to be as creative as with narrative film means that this form is a valid place for a filmmaker to work; it can teach a great deal about all forms of filmmaking.
The Crunch
- Documentary film has evolved into other forms
- This is a great place for the filmmaker to build knowledge about filming — try it out
- Non-fiction film often requires you to use narrative filmmaking methods, so it’s going to help your narrative movies too
- Always tell the truth (at least your own interpretation of it, anyway)
- Get to know how to convey ideas and opinions through images, through the way you use the camera
- Use non-fiction as a low-budget method of making movies (no actors, no sets).
Tip For further viewing, try the following, though they are not easy to find in video stores: Medium Cool (Emile de Antonio, 1969), about the 1968 Democratic Convention; Hearts and Minds (Peter Davis, 1975), about the US involvement in Vietnam; Italianamerican (Martin Scorsese, 1970), a portrait of the director’s parents;Day of the Fight (Stanley Kubrick, 1953), a portrait of preparations for a boxing match.
Project 16. My obituary
What this project is for: to investigate documentary filmmaking
Time: allow a few days to plan, a week to gather all the footage and another week to edit
What this project is about
The aim of this project is to try making a documentary which focuses on a mixture of fact and opinion and which offers opportunities to include other kinds of filmmaking within it. The inspiration for this comes from movies such as Super Size Me (Morgan Spurlock, 2004) and The Thin Blue Line (Errol Morris, 1988), and documentaries by Nick Broomfield.
The project centres on the slightly morbid premise that you are making your own obituary, but in a slightly light-hearted way. Friends and family members give their opinions about the life and times of you and offer anecdotes, some of which can be dramatized or re-created as music promo-style interludes. The aim is to create a documentary that is both entertaining and intriguing. The movie will be around five to seven minutes in length.
Stage 1
Begin by creating a rough chronology of the main points of your life, including first dates, accidents, high points at school and work, and so on. List those people you think could contribute and devise questions or starting points to jog their memories. Ask current friends to take part, contributing ideas about who you are, who you think you are and the gap in between.
Stage 2
While shooting make sure you keep the tone of the film constant; maintain a light-hearted look at serious subject matter, aiming for a kind of black humour or irony. While shooting the interviews maintain a constant approach to camera style, so that framing is similar throughout. Close-ups may suggest seriousness and may alter the tone of the film, so avoid anything too intense. Note how in many documentaries the interviewees are situated in similar positions in the frame, with certain colours in the background. Or you could opt for placing interviewees in locations which add to the story they are relating. Use props, too, to add symbolic elements to the image. For instance, in Capturing the Friedmans, a central person in the story is revealed to be a professional clown, and the director cunningly lets him talk in full costume, suggesting a level of pathos and poignancy impossible to achieve otherwise.
Stage 3
Take a look at the footage when you have finished gathering the interviews and look for places where it can be expanded. Look for moments which can be punctuated by cutaway shots to other images, or which could be dramatized. These dramatized sections need only be seconds in length, interspersed with cuts back to the interviewee, or could take up longer sections of the film.
Stage 4
In editing this film aim for a consistent pace, avoiding throwing us off guard with sudden changes in style or rhythm. Keep it steady and maintain a solid and strong structure, similar to that discussed in Chapter 4:4.
Keep interest sustained by, for instance, cutting from one interviewee to another or by mixing timelines, so that we go through your life by themes (love, career) rather than by chronology. Use text to emphasize points, perhaps for irony (for instance, an image of a younger you standing alone at the school dance, with the ironic caption: ‘I had great success with the opposite sex’).
Take a look at early Woody Allen films for some wry self-deprecating moments where Allen puts his life under the magnifying glass. Try Annie Hall, Manhattan, Husbands and Wives or Hannah and Her Sisters.
Evaluation
The success of this movie is in how it manages to tread a line between morbidity and entertainment. It is a typically unusual subject for documentary and so is good practice for devising similar ideas that combine real life issues with other forms of filmmaking, such as music video and drama.
When you watch the movie, look for threads of themes that appear throughout it. Can you learn anything about yourself through the way you edited the movie rather than what people said about you? Perhaps you emphasized certain characteristics above others, or glossed over other issues. As a filmmaker, if you can handle working with such close subject matter — it doesn’t get any closer than this — and still maintain a relatively objective approach, then you can handle any documentary idea and remain focused on your plans.
I want something more challenging
To push this project further, enhance the dramatizations, bringing them to the fore. Focus on three or four events and plan them in a similar way to other narrative movies. Aim for high production values, where lighting, sound quality and composition are treated as if you were working on a normal narrative film. Also, try to arrange the narrative chronology in a different way, so that certain themes dominate.
4. Music video and the VJ
The non-narrative movie that we call the music promo has become a central feature of the video landscape. The idea of putting together images to market a piece of music is not new and has probably already experienced its golden age as it gives rise to other forms such as VJ-ing and viral movies. Meanwhile, today’s promos have earned the right to be viewed as movies rather than ads, with festivals dedicated to them and cinema screenings for the best.
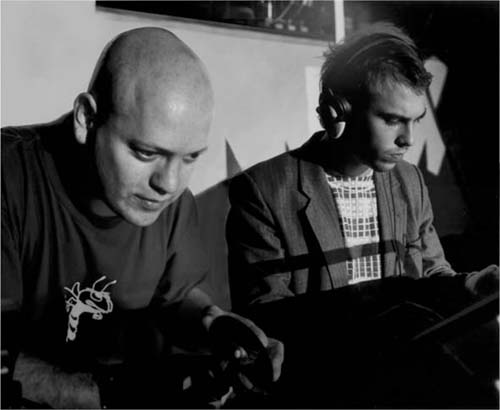
Figure 6.16 Members of British VJ group Addictive TV performing in Paris, 2004.
Today’s music video is in hot pursuit of new technology and has a keen appetite for anything new — new styles, new gadgets, but most of all new ideas. The promo is at the centre of the film industry in an unexpected way. More film directors are schooled in promos than in any other form; they take the techniques they learn — most usefully, how to stick to budget — and make some of the most original and ground-breaking films.
Graham Daniels, co-director of UK-based VJ company Addictive TV, sees promos as having travelled from commercial tools to art films:
‘The whole visual aspect to promos is now a thing in its own right, not just a part of a campaign. It’s kind of like the backing singers have come to the front and formed their own band — what used to be a commercial product to help a band’s sales has now become an art form itself.’
Beginnings
In a whistle-stop tour through 100 years of music promos, one thing is certain — it was never about the music. In fact, for some directors the music got in the way of a good movie. The history of the promo has always been dominated by the images rather than the music. Even the earliest photographic shows in 1900, where photographs were projected with music, were concerned more with how the images looked than whether the music was well served. By the time we get to MTV in 1981 the promo has developed into an entirely separate art form. If MTV execs thought viewers might also switch on and just listen, like a radio, they were quickly proven wrong, as it became more common to watch with the sound turned off, the music videos acting like a visual digest of the new, the cool and the soon to be mimicked.
Interview
‘It really frustrates me that people only see Britney Spears or P. Diddy spending £7m and you think, how can you possibly have spent £7m on that three-minute piece of nothing? But there’s this new stream of genuinely talented people doing stuff that knocks your socks off.’
Jordan McGarry, creative director, Shots magazine
Timeline
If we take a step back from the current whirlpool of change in the promo, we can see that it has had a surprisingly long life. The earliest use of image and music was created by American George Thomas, in Minnesota. His ‘Live Model Illustrated’ shows kicked off with a series of photos to accompany turn of the century one-hit wonder The Little Lost Child. Thomas’s shows became a phenomenon, with over a hundred being staged at one point in his state. But for the first use of music with moving image we have to go to Sergei Eisenstein’s 1938 movie Alexander Nevsky, with long sections to music by Prokofiev. This is seen as the first music ‘video’ because of the way the music led the cutting and rhythm of the movie, rather than having to fit around it. Before this, animation had started to investigate abstract cartoons set to music, with Oskar Fischinger’s surreal, and oddly psychedelic, short movies.
The first performance promo arose with blues singer Bessie Smith’s short Saint Louie Blues (1929). By the 1940s, another way of viewing sound and image was patented by jukebox-style ‘Soundies’, coin-operated boxes that showed reels of performances of popular songs, mostly by jazz musicians or crooners, a development that echoes the web-based ‘jukebox’ of many online promo sites.
The early 1950s saw the first wave of music videos as we would recognize them in Lou Snader’s Telescriptions, jazz/blues clips produced for local TV as fillers and for jukebox-style machines. The leap forward was the use of sets to illustrate the music rather than just performing to camera — these started to be interpretations of the music. But a series of allegations and rumours led to its early demise after just a few years, just missing the birth of rock ‘n’ roll by a whisker.
Breakthrough in movies
The landmark in the 1960s was not so much the films but their purpose — now we get to see films specifically designed as marketing for a band. Richard Lester’s Beatles vehicle A Hard Day’s Night (1964) is acknowledged as the first movie that took this approach; it became a marketing tool to reach out to fans and help crack new territories. Essentially, this and the later Help! were music video sequences contrived to fit together in a narrative that would be comprehensible to any viewer in any language without subtitling.
But the idea stuck that a band could present an image, beyond even a marketing concept, with music sequences. It wouldn’t be long before The Monkees’ TV show took this concept to its head-spinning conclusion and created an image but no real band. Meanwhile, the late 1960s saw the first forays into what would grow up 30 years later as the unruly offspring of the music video — the VJ. The first light shows at parties and concerts used Super 8 projections and lava lamp-style effects to create disorientating sensation events, where images created atmosphere — you didn’t actually watch them, just stayed in the same room as them. Chris Allen, of VJ pioneers The Light Surgeons, followed much the same route in the 1990s with celluloid and music, and used video to create half party, half art exhibition environments.
The modern promo
It took a performer with a wholly conceived image and identity to make the first promo that we would recognize as such today in 1972’s Jean Genie by David Bowie. An eclectic mix of location images made by photographer Mick Rock, it was shot for $350 in just three days.
By 1975 the promo voted one of the most popular was made by director Bruce Gowers. Queen’s Bohemian Rhapsody was made as a last-minute filler only when the group cancelled a planned appearance on UK music show Top of the Pops, and marked a new high level of production values, incorporating early video effects with dramatic lighting.
MTV
Within a few years plans were under way for wall-to-wall promos on TV and in 1981 MTV opened its doors to the relatively small promo industry. Opening on 1 August with Buggles’ Video Killed the Radio Star, it proved that they at least had a sense of humour. Ratings soared but it quickly became a bête noire among old-school rockers, who saw it as ushering in the dominance of image and style over music. But MTV was never intended as a channel for music aficionados. Instead, it aimed at a fast turnover of images. It cut videos when they got boring — never mind the song. It scheduled the videos they knew you wanted to watch rather than the music you wanted to listen to. And in its smartest move it evolved into a kind of visual wallpaper, like muzak: always on somewhere in the background. An advertiser’s dream, it grew into a powerful force in music.
Effects of MTV
One of the effects of MTV has been the changes it forced upon filmmakers, and in particular editors. Films had to deliver the goods fast, within seconds, had to be constantly catching the eye, and had to avoid repetition, deviation or hesitation. For filmmakers it was like dancing while someone shoots the sand at your feet, producing a frenetic style that has passed into the lexicon of film school professors everywhere as movie-making for ‘the MTV generation’, implying a short attention span of near medical proportions.
So which came first, the fast-edited promo or MTV? MTV merely responded to the audience’s need for something new, every day. It had to anticipate the viewers’ need to fast-forward through the boring bits of videos, so the logical conclusion of this was that directors found you got more air time if you had no moments where you lost the audience. But MTV also gave the promo a commercial buoyancy which allowed directors to try new ideas on a daily basis. Without this quest for originality based on a steady income of cash there would be no promo as we know it today.
The industry now
Today, the music promo has become probably the most fertile place for an emerging director to learn the craft of filmmaking. The TV commercial gave us directors like Ridley Scott and Adrian Lyne and producer David Puttnam in the 1980s, while the promo is giving us directors like Spike Jonze, Michel Gondry, David Fincher and Gore Verbinski.
The reason why the promo is such a good launch pad is its place at the crossroads of new technology, with motion graphics, CGI (computer-generated images) and animation used routinely by the betterfunded directors; on a promo, you get to learn a bit of everything. Many videos are made solely on animation software, creating abstract worlds that are picked up by front-line digital festivals like Onedotzero and Resfest.
But for many directors, the obsession with this kind of work has had its day and we are now seeing directors return to their live-action roots. Dave Drummond, director of Edinburgh Festival’s music promo strand Mirrorball, keeps a close eye on these developments. ‘Animation was a big deal once. But now that technology is accessible to everyone I think you have to do something different to make new stuff. People still see the benefit of traditional filmmaking. Shynola [Blur, Queens of the Stone Age], for instance, started out in animation, made their name in it, but have now started to do live action.’ Directors now use animation software as an integrated part of their work in live action.
But there have been big changes as the promo adapts to the new world of file sharing. Illegal music downloading has had a powerful effect on the music industry, leading many labels to cut back on marketing budgets. 2004 saw a 7 per cent decrease in funding for the sector in the UK and many smaller labels are starting to market in new ways. Viral movies are becoming more common — an ultra-short of carefully chosen video images and clips from music sent to phone users, who then pass it on to friends if they like it. These sail a wave of word of mouth, trading on their exclusivity.
Go to: Chapters 10:2 and 10:3 for ideas on how the new environment of downloading is affecting film studios.
Other labels instead concentrate on live video projections at concerts. John Hassey, founder of promo agency Colonel Blimp, has discovered some of the UK’s top promo directors. From his angle, things are changing. ‘The problem is that labels are having to think about where they can spend their decreasing budgets on a band. They put a lot of it now into tour support because a live gig gives people a whole night out rather than just three minutes on a cable channel.’ And with cable audiences now spread over more music channels than just MTV, this problem is multiplied.
So what’s it like elsewhere? Japan has experienced a particular growth in the promo, but its promos don’t necessarily travel well, at least not to the States. Dave Drummond says:
‘In Japan, culture is a lot different. Promos in Western culture tend to be more about shock value. In Japan the lifestyle is different — they don’t go for shocks. Over here it’s mutilation, effects and all that, but in Japan instead they do wacky stuff, really different.’
How music video converges with movies
One of the lasting legacies of the number of directors entering filmmaking from a background in VJ or promos is its effect on movies. Many films now routinely include sections that are essentially music promos, while others rely more subtly on music promo devices, such as dreamlike imagery in movies like Eternal Sunshine of the Spotless Mind (Michel Gondry, 2004), Being John Malkovich (Spike Jonze, 1999) and Adaptation (Spike Jonze, 2002). Elsewhere, movies such as Moulin Rouge (Baz Lurhmann, 2001) borrow freely from the music promo repertoire of swooping camera movement, extensive CGI and a breathless, frantic structure.
Ingredients of the music promo
Promos tend to fall into two groups: those that are marketing tools first and foremost, and those that are art films first and marketing tools second. This second group wouldn’t get their films made if they were pitched as such to record labels, but certain directors will add kudos to a band if their promo is unlike the rest of the field. The weirder the promo, the more word of mouth helps it sell the music that inspired it. An example is Chris Cunningham’s promo for Aphex Twin, Come to Daddy. The images are so striking and unsettling that the music takes a supporting role in the film. It is the sort of film that can be watched in cinemas, rather than MTV.
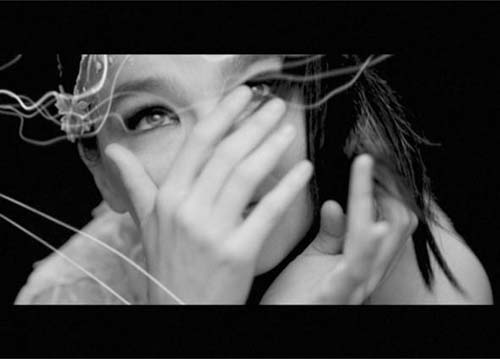
Figure 6.17 Music promo group Lynn Fox create organic and subtle images, as in this promo for Bjork’s Unravel.
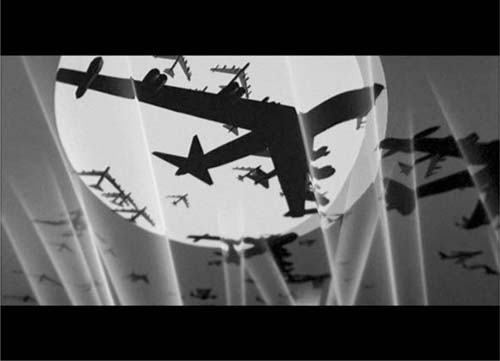
Figure 6.18 Lynn Fox’s video for Incubus’s Sad Sick Little World uses a typically stylized and polymedia approach.
To cut to what makes a good video, directors and agency executives point to the following as seen in many original and award-winning works:
- Simplicity. Some of the best films are the ones with the simplest of ideas, such as Spike Jonze’s California promo, which is essentially a single 12-second uncut shot slowed down to three minutes, showing a man on fire as he walks casually to catch a bus.
- Punchy. Many ideas tend to have twists or punchlines at the end, acting like a twist. It keeps us watching and delivers added interest just as it starts to lose our attention. It also means that cable channels won’t cut the video before the end.
- Style-conscious. Many videos are highly conscious of the style statements they are making, often referring to other style eras such as the 1950s (Spike Jonze’s retro video for Weezer, Undone).
- Low cost. Many directors never quite lose the ability to think low-budget, even when handed a large budget. The music promo director is used to turning out original effects without using expensive software; the trick is to originate visuals in front of the camera. Michel Gondry’s Eternal Sunshine, for instance, used extensive visual trickery to show houses falling down, books disappearing and so on. Gondry preferred to shoot these using glass sheets and simple animation rather than resort to CGI.
- Original. It is a difficult aim to keep inventing new ways of delivering surprises day after day, but promo directors somehow manage it. Paradoxically, it is often said the absence of big budgets forces the director to be more original, since they have to make a little go a long way.
Ingredients of VJ work
The VJ tends to work spontaneously, creating virtuoso performances of editing in much the same way as the DJ does with sound sampling. For pioneers of VJ work such as The Light Surgeons or Hexstatic, this medium enables the artist to create endless variations, tailored to the environment.
Go to: Chapter 8:2 for more about VJ-ing.
Ingredients of successful work tend to include:
- Multiple screens. Two or three screens arranged to surround the audience, leading to an immersive experience.
- Themed clips. Specifically shot by the artist and connected by an overall theme or idea. The use of downloaded clips of psychedelic fractals is especially overused in poor examples.
- Text. Meanings can be pinpointed through the use of snatches of words or sentences. It enables extra levels of juxtaposition derived from surrealist examples like painter René Magritte’s picture of a pipe, with caption ‘this is not a pipe’.
- Repetition. For the VJ repetition is a structural device. It’s a way of ordering the priorities of a piece by selecting certain images and highlighting them as motifs.
- Manual manipulation. The development of manufacturer Pioneer’s DVD mixer enables VJ-ers to work their video clips in a more hands-on manner, in exactly the same way as DJs use vinyl records. Before this, VJ-ers preferred to manually cut between clips and developed a dextrous style of quickly shifting around a range of clips.
- Anti-technology. Interestingly, many VJ-ers reject the hi
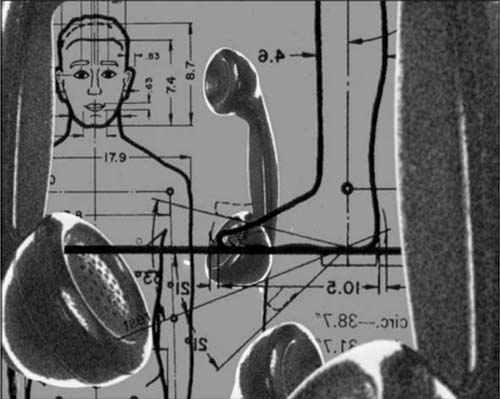
Figure 6.19 The influence of graphic design is evident in many music promos and VJ work, as in this still from Skitzophonic by the Mellowtrons.
Interview
‘My advice for anyone new to VJ-ing is — Remember: mess has meaning. But there’s a fine line between a mix and a mess. Keep it simple, less is more, stay away from wipes, never use special effects if you can help it. Be nice to people on the way up because you’ll greet them on the way down.’
Chris Allen, director/VJ artist, The Light Surgeons
Five music videos you must see:
Come to Daddy/Windowlicker — Aphex Twin. Chris Cunningham’s nightmare-inducing promos which helped redefine an industry. Brutal, brazen and clever.
Praise You — Fatboy Slim. Spike Jonze’s low-res ‘reality’ shoot of crazed community dancers taking over a shopping mall. Jonze himself is the uber-jerk lead dancer.
Fell in Love with a Girl — White Stripes. Eternal Sunshine director Michel Gondry’s typically dreamlike video of animated Lego models is a masterpiece of what he calls ‘punk animation’.
California — Wax. Spike Jonze’s promo of a listless Los Angeles street failing to notice the burning man running for a bus, it is a lesson in simplicity. Buy Jonze’s DVD collection on Palm Pictures series. Available in retailers.
Hayling — FC Kahuna. Lynn Fox’s fascinating arthouse promo is ahead of its time, even several years after its debut. An organic feast of weirdness like that glimpsed in 1960s sci-fi movie Fantastic Voyage.
Tip: top promo agencies in the USA and UK
Many top directors are represented by just a few agencies. If you want to send your showreel try:
Colonel Blimp: London-based agency headed by the legendary John Hassey, talentspotter who launched the careers of many of UK’s finest promo directors. See some of the best examples to download on their website: www.colonelblimp.com
RSA/Black Dog:RSA/Black Dog:Angeles and London. www.blackdogfilms.com
Anonymous Content: US-based empire representing many feature directors who also dabble in promos: David Fincher (Fight Club), Wong-Kar Wai (In The Mood for Love) and Gore Verbinski (Pirates of the Caribbean). www.anonymouscontent.com
Independent: London-based office representing many from the Anonymous Content stable plus other high profile UK directors, including Dominic Yeung. www.independ.net
Project 17. Music video
What this project is for: to make a music promo and investigate non-narrative filmmaking
Time: allow two days to plan, two days to shoot and three days to edit
What this project is about
The aim of this project is to put into practice the ideas covered in the previous section and to make a movie that relies wholly on images. A music video offers you ample chances to work whatever you want into the film, linking a wide array of unusual images together under the umbrella of the music track. You can be experimental, creative, and try tricks and ideas you normally can’t work into a more straightforward movie.
As with most videos, the aim is to convey the ideas and atmosphere of the piece of music with images that complement it or set off new meanings in it. Avoid the kind of music video that focuses solely on a band performing, as this will restrict your creative opportunities.
Stage 1
Decide what piece of music you will be using. Bear in mind at this stage that if you intend making this part of your showreel, the tape that hopefully gets you accepted in festivals or offered other work, or if you want to show this movie itself, you are going to need copyright clearance from the band or its music publisher. In almost all cases this is going to cost huge sums, so your options are to use this movie as a stepping stone to learning how to make better films, not expecting it to be seen beyond you and your friends, or to use the music of a local or unsigned band who may welcome a free music video in return for waiving any copyright fees.
The kind of music you need to use is that which you already know well, which sparks off images and ideas in your mind whenever you listen to it. If you feel you can relate to the song and get a sense of the atmosphere it conveys, then this will lead to a good range of images to match.
Stage 2
Get a piece of paper and, while listening to the track you will use, write down descriptive words that you feel convey the song. Then write these down a vertical column and start sketching images that match the words, similar to the process used in Project 3 on composition. In that project, you were trying to convey something more tangible: a place or event, while this project asks you to try to put into images something that you imagine in your mind, triggered off by the piece of music.
When you have attached images to each word, define and select these sketches, redoing some of the more obvious, predictable images (to get an idea of the range of music video clichés, watch a few hours of cable music television).
Stage 3
When you have enough images to sustain the three- or four-minute film, you can start to forge the underlying theme in the film. We need some constant thread that runs through each shot to connect the film and stop it looking like a collection of unrelated images. This means looking at the images you have evolved on paper and trying to find connections between them. For instance, you might find that all your images have a certain claustrophobic feel to them, or are dominated by the colour red, or use a similar prop or setting throughout. Get to know your images. When you have decided on the kind of theme running through your images, label one particular image as the central one. Use this one image as the main focus for your film and one that you return to now and then.
Stage 4
At this point you might start to work on a storyboard, working out the order in which these shots will appear, but in this instance it may be more useful to instead move directly on to shooting, leaving open the possibility to add to or expand on shots.
When you are shooting this movie, you will need to be aware of visual elements far more than on other kinds of movie. To a certain extent, a narrative film that uses images so dominantly may look overworked and contrived. A non-narrative movie, however, with only images to make it work, actually requires you to make images more compelling and dominant than any other aspect of the movie. Shooting, then, is going to need a great deal of attention to detail, in each and every shot, in each setting.
Working without storyboards, you need to remain in control of what you shoot by referring to your visualizations constantly. These are your base point, the central ideas that run through the film, and you need to be reminded of them often.
Stage 5
Editing a non-narrative music video is more enjoyable than other kinds of movie. There are many ways in which the film can be developed, even at this stage, rearranging your shots, setting off one against another to see the ideas that arise. It may be useful to take a look at the section on montage (8:3), which goes into more detail about what happens when disparate shots are combined.
Editing a non-narrative music video is more enjoyable than other kinds of movie. There are many ways in which the film can be developed, even at this stage, rearranging your shots, setting off one against another to see the ideas that arise. It may be useful to take a look at the section on montage (8:3), which goes into more detail about what happens when disparate shots are combined.
As with shooting, use the visualizations to return you to the central theme of the film, the main images which dominate it. If these have changed significantly while filming, don’t worry — check that you were aware of these changes during production and your decision-making in following them, and that they are not having to compete with your previous theme for dominance.
In terms of structure, try using one particular image as the central point in the film and use it as an image we cut to at regular intervals.
To make the project more effective, try to avoid using special effects in the editing stage, including unusual transitions (ways of cutting from one clip to the next).
Evaluation
- How far did your ideas develop during filming? Were they fully formed when you picked up the camera or did you perhaps allow for more development during filming, preferring to keep some options open at this stage?
- In terms of images, look at how they compare to each other. Which ones are the most successful in terms of composition, subject matter, colour, camera angle, lighting?
- Looking at lighting in more detail, what kinds of lighting did you use? Maybe you focused on dramatic, high-contrast lighting or low-key, naturalistic lighting. Are there some lighting effects that you felt worked well in terms of the atmosphere you are trying to convey?
- The structure of this movie is not determined by story, so you were free to put it together in any way you felt best illustrates the music. Look at the arrangement of images in the film: Did you place some images repeatedly throughout the film and was this successful? Were there moments when the film seemed to be going in a completely new direction? If there were, try removing these sections and viewing the film again, as they may have been contradicting the main purpose of the video.
- Finally, leave the movie for a few days or more and watch it without its soundtrack. Does it still evoke the same atmosphere or theme as the song?
I want something more challenging
Option 1
Music promo is a often a sledgehammer in filmmaking terms; it is emphatic, straight to the point and doesn’t take prisoners. If the promo is seen in these terms, is it possible to make one which bucks this trend? Could a promo have deeper levels to it, beyond the superficialities of surface image? In Chapter 3:3, we looked at the connotations that films can have, to the wider world, to other cultural references or just to other films. We saw how it is possible to create a film with layers of meaning that operates beyond the levels of action and appearance.
To push the promo project further, try making a film which does the opposite of many promos and ignores convention. Forget the fast cuts, the visual puns, the gimmicks and visual devices. But beware how you get more depth in your film. It will be tempting to throw in meaningful shots everywhere, but paradoxically this will reduce the overall depth of the film by contriving for meaning abruptly. Think about films you have seen where simple shots unencumbered with gimmicks have left a lasting impression. The low-budget American independent tradition has been particularly successful in achieving emotional, deep resonance in simple stories and images. Look at the films of Richard Linklater (Before Sunset, for instance), Todd Solondz (Happiness), Alexander Payne (Sideways) and Wes Anderson (Rushmore). In each of these films, visual poetry is made out of the most prosaic of situations. Is it possible to make such a promo?
Option 2
A further way of pushing this project forward is to incorporate animated or motion graphic elements. Use software like Maya or After Effects (see the book by Curtis Sponsler, Focal Easy Guide to After Effects) to create another layer to your film which pushes it to new levels of design.