Cucumber (Figure 6-1) is an awesome tool that allows you to develop your software using a Behavior-Driven Approach (BDA). It makes sure that business stakeholders transfer the software requirements to developers in an accurate and rigorous way so that the final software delivered fully satisfies those requirements. Also, the requirements are turned into executable specifications of the application developed, and they are executed on every new commit to make sure that no old features are broken when new ones are introduced. Cucumber is a great tool of collaboration, documentation, and test automation.
Figure 6-1
Cucumber, Gherkin, and Ruby
Learning Goals
1.
Learn how to install Cucumber.
2.
Learn about the cucumber executable.
3.
Learn how to initialize your project to use Cucumber.
4.
Learn how to identify the files that include the feature descriptions.
5.
Learn how to identify the files that include the step definitions.
6.
Learn about Gherkin.
7.
Learn how to apply the test-first approach to your project development using Cucumber.
8.
Learn how to write feature scenarios.
9.
Learn about pending steps.
10.
Learn how the step invocations can contain runtime arguments that can be used in step definitions.
11.
Learn how to remove duplication in your feature files using Scenario Outlines.
12.
Learn how to integrate RSpec with Cucumber.
Introduction
Cucumber is the tool that allows you to write the requirements of your software in almost plain English. It can then turn them into executable specifications. This means that
1.
Your business and product owners can read the Cucumber artifacts and understand what the application is supposed to be doing.
2.
You are sure that whenever you introduce a change in your application code, the specifications will be executed and any broken feature will be revealed, before it actually reaches the public.
Cucumber bridges the business aspect of the software with the technical aspect of it. I will come back to this later on. First, let’s try to use Cucumber so that you can have a better idea of its constituent parts.
The Project and Cucumber Installation
You will learn about Cucumber using a simple project, called calculator (Figure 6-2). So go ahead and create a new RubyMine project with the name calculator. Make sure that you integrate with rbenv (ruby version: 2.x).
Figure 6-2
calculator RubyMine Project
Next, add the Gemfile with reference to the gem cucumber (Listing 6-1).
# File: Gemfile
#
source 'https://rubygems.org'
gem 'cucumber'
Listing 6-1
Gemfile
Run bundle so that the cucumber gem is installed.
Note
You need to have a bundler installed. If you don’t have it, run gem install bundler when being at the root folder of your project. This will install the bundle executable that reads the Gemfile and installs the necessary gems for your project.
This is what happened on my machine when I ran bundle:
Using backports 3.17.0
Using builder 3.2.4
Using bundler 2.1.4
Using cucumber-tag_expressions 1.1.1
Using gherkin 5.1.0
Using cucumber-core 3.2.1
Using cucumber-expressions 6.0.1
Using cucumber-wire 0.0.1
Using diff-lcs 1.3
Using multi_json 1.14.1
Using multi_test 0.1.2
Using cucumber 3.1.2
Bundle complete! 1 Gemfile dependency, 12 gems now installed.
Use `bundle info [gemname]` to see where a bundled gem is installed.
As you can see, the gem cucumber version 3.1.2 has been installed. But other gems, its dependencies, have been installed too. One very important gem is the gherkin gem, which gives support for the actual language that you will be using when writing Cucumber executable specifications.
cucumber Executable
When you install gem cucumber, you have available the cucumber executable. Try the following command at the terminal prompt (make sure that you are in the root folder of your project):
Note
We invoke project-related commands using bundle exec. This makes sure that the correct project gem dependencies are used when running those commands.
$ bundle exec cucumber --version
3.1.2
$
You have just invoked the cucumber executable giving as runtime argument the option --version, and you’ve got back the version of the cucumber installed for your project.
This executable is going to be used to run your executable specifications.
Let’s Initialize
Now invoke the cucumber executable without any runtime arguments:
$ bundle exec cucumber
No such file or directory - features. You can use `cucumber --init` to get started.
$
cucumber is looking for the folder features in the root folder of your project. This is the folder your project requirements (or executable specifications) should be written into. Since you don’t have this folder yet in your project, it is complaining, but it is also suggesting that you run cucumber --init to initialize your project for cucumber. Let’s do that:
$ bundle exec cucumber --init
create features
create features/step_definitions
create features/support
create features/support/env.rb
$
Nice! The preceding invocation created the following folders and files in your project (Figure 6-3):
Figure 6-3
Cucumber – Initialize Folders and Files
1.
The folder features is going to contain files with name extension .feature. These files describe the application requirements using a language called Gherkin. Gherkin is very easy to write, and all the business stakeholders can understand it – very close to plain English. This is an example content of such a file:
Feature: Sign up
Sign up should be quick and friendly.
Scenario: Successful sign up
New users should get a confirmation email and be greeted
personally by the site once signed in.
Given I have chosen to sign up
When I sign up with valid details
Then I should receive a confirmation email
And I should see a personalized greeting message
As you can understand by reading it, with Gherkin it becomes very natural for the stakeholders to understand the application requirements given to developers for implementation. Imagine how useful this is going to be when developers will bind actual application code to this and, then, have an automated way to execute this file and make sure that everything that has been required is implemented.
2.
The folder features/step_definitions is going to contain files whose name will end with _steps.rb. These are files that contain Ruby code and implement the steps of the Scenarios given in the .feature files. But what are the steps? The steps are the constituent parts of the Scenarios that start with the keywords Given, When, Then, And, and But. In the preceding example, there is, for example, the step Given I have chosen to sign up. The developer is responsible to take this step declaration and define it inside a Ruby file inside the feature/step_definitions folder. I will talk about steps later on, using a practical example.
3.
The folder features/support is used to put any file that will support the automatic execution of the Scenarios. So it is test supporting code. cucumber has already prepared the file env.rb and has put that inside this folder. This will contain Ruby code that will allow cucumber executable to load your core Ruby application before you start executing the Scenarios. In other words, you will use env.rb to tell cucumber where your Ruby application code is (see next chapter for this).
Let’s Invoke cucumber
Now that the initialization has been done, let’s invoke cucumber once more:
$ bundle exec cucumber
0 scenarios
0 steps
0m0.000s
$
Perfect! cucumber now ran without any error. But, unfortunately, as it is reported, no scenarios for execution were found. That was expected, of course, since you have not written any scenarios yet.
Write Your First Scenario
Your calculator program is going to help you do, what else, calculations! Having said that, let’s write the first feature that this program should offer to the user, the feature of addition.
Create the file features/addition.feature with the following content (Listing 6-2).
# File: features/addition.feature
#
Feature: Adding
Scenario: Add two numbers
Given the input "2+2"
When the calculator is run
Then the output should be "4"
Listing 6-2
Addition Feature
When you edit the preceding file, make sure that you follow the next rules:
1.
Feature: line needs to start at the first column.
2.
Scenario: line needs to start with two spaces’ right indentation with regard to the Feature: starting column.
3.
The step declarations of the Scenario need to start with two spaces’ right indentation with regard to the Scenario: starting column.
More details about the Gherkin language will be provided to you later on as you progress with more scenario examples.
Before you go into further work with cucumber, ask yourself whether the scenario text is clear to you. It describes precisely what you want the calculator to come out with, if the input is 2+2. You need the result to be 4. The language used is plain English (with some restrictions that make sure you write something that is Gherkin compatible), so I guess that everybody can understand the logic of the scenario, both the business stakeholders and the developers who will be asked to implement the calculator.
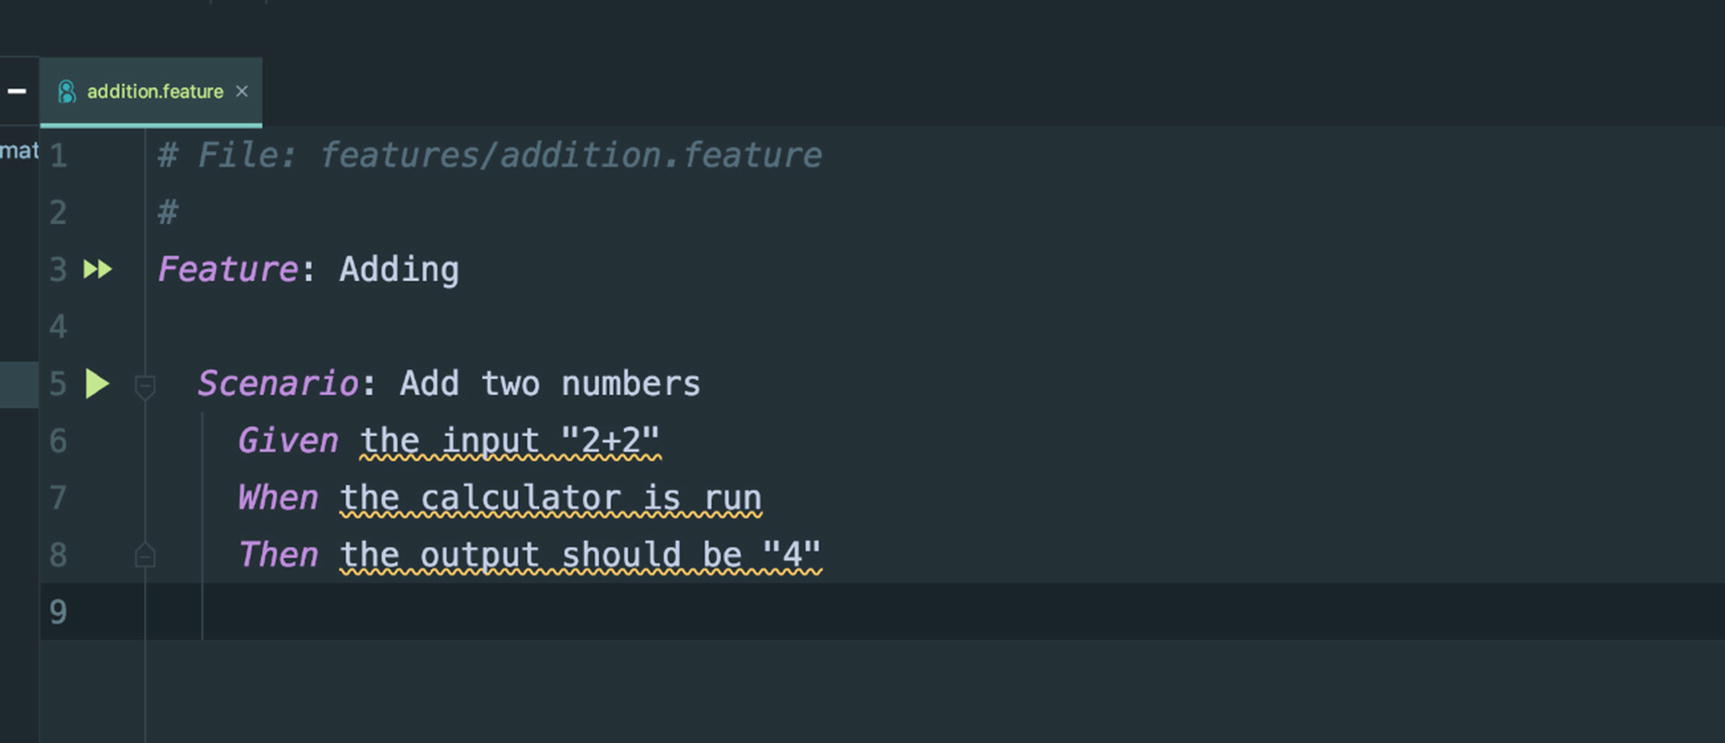
Note that, if you write your Feature and Scenario using RubyMine, you will see that RubyMine underlines the step invocations (Figure 6-4).
Figure 6-4
RubyMine Underlines Undefined Step Invocations
Step invocations (or sometimes called declarations) are underlined when the corresponding step definitions are not found by RubyMine. This is because RubyMine cannot find the step definitions of these steps. When you implement them, then RubyMine will remove this text decoration.
Let’s invoke cucumber again:
$ bundle exec cucumber
# File: features/addition.feature
#
Feature: Adding
Scenario: Add two numbers # features/addition.feature:5
Given the input "2+2" # features/addition.feature:6
When the calculator is run # features/addition.feature:7
Then the output should be "4" # features/addition.feature:8
1 scenario (1 undefined)
3 steps (3 undefined)
0m0.011s
You can implement step definitions for undefined steps with these snippets:
Given("the input {string}") do |string|
pending # Write code here that turns the phrase above into concrete actions
end
When("the calculator is run") do
pending # Write code here that turns the phrase above into concrete actions
end
Then("the output should be {string}") do |string|
pending # Write code here that turns the phrase above into concrete actions
end
$
That is a very useful output. Pay attention to the following:
1.
Your Cucumber suite has one scenario that is undefined: 1 scenario (1 undefined).
2.
It also has three steps that are undefined: 3 steps (3 undefined).
3.
cucumber outputs the snippets that you can use to define the steps. This is very useful; you can copy the snippets and put them directly into step definition files.
It is obvious that cucumber has found your .feature file and has parsed correctly the declaration of your scenario, but it cannot find the step definitions.
Defining Steps (with Pending Implementation)
Let’s make cucumber stop complaining for undefined steps by defining the steps it is expecting to find.
Create the file features/step_definitions/calculator_steps.rb with the following content. This is the content of the snippets that have been output earlier by your last run of cucumber. So just copy the content of this output and put it inside the file calculator_steps.rb (Listing 6-3).
features/addition.feature:6:in `Given the input "2+2"'
When the calculator is run # features/step_definitions/calculator_steps.rb:7
Then the output should be "4" # features/step_definitions/calculator_steps.rb:11
1 scenario (1 pending)
3 steps (2 skipped, 1 pending)
0m0.008s
$
Now cucumber is not complaining about undefined steps. It is complaining about pending implementation steps. Do you see that the step Given the input "2+2" has been flagged as pending? Note also that the whole scenario has been reported as pending and the last two steps, after the first pending one, have been skipped.
So cucumber is waiting for you to implement the steps one by one.
Note that the fact that a step definition is pending has been identified by cucumber, thanks to the Ruby statement pending which exists as part of the step definition (Figure 6-5).
Figure 6-5
How a Scenario Is Flagged as Pending
Implement the First Step
cucumber is waiting for you to implement the first step. Let’s do it. First, you need to understand how the steps are defined inside the step definition files. Look at this:
Given("the input {string}") do |string|
...
end
The step definition is in such a way that you can get the real runtime argument given at the step invocation as a block-level input argument in the step definition. In other words, the "2+2" that exists as part of the step invocation Given the input "2+2" is stored inside the block-level argument string in the step definition. This is done thanks to the literal string "the input {string}" that is given as argument to the Given(...) method invocation in the step definition. In particular, the part {string} matches to any given runtime argument when you use the step.
Cucumber Maps Step Invocations to Step Definitions
Let’s enhance the step with a puts command that would print the contents of the string block-level argument. Here is the new version of the file features/step_definitions/calculator_steps.rb (Listing 6-4).
pending # Write code here that turns the phrase above into concrete actions
end
Then("the output should be {string}") do |string|
pending # Write code here that turns the phrase above into concrete actions
end
Listing 6-4
Printing the Block-Level Argument Value
The only change is on line 4. Now, the implementation of the step is not invoking pending, but instead it prints the contents of the block-level variable string. Here is what you will see if you run the cucumber command again:
$ bundle exec cucumber
# File: features/addition.feature
#
Feature: Adding
Scenario: Add two numbers # features/addition.feature:5
Given the input "2+2" # features/step_definitions/calculator_steps.rb:3
*2+2*
When the calculator is run # features/step_definitions/calculator_steps.rb:7
TODO (Cucumber::Pending)
./features/step_definitions/calculator_steps.rb:8:in `"the calculator is run"'
features/addition.feature:7:in `When the calculator is run'
Then the output should be "4" # features/step_definitions/calculator_steps.rb:11
1 scenario (1 pending)
3 steps (1 skipped, 1 pending, 1 passed)
0m0.007s
$
Do you see the line *2+2*? This is the result of the puts invocation. Now the step is implemented, that is, no more pending. The pending flag was now raised for the next step (When the calculator is run).
The important thing to note from the preceding code is that the block-level variable string has the actual runtime value "2+2" as given when you use the step inside the Scenario (file .feature).
Let’s enhance the first step to have a more meaningful name for the block-level variable and do something useful that will be used in the next steps. Here is the new version of the step definitions file (Listing 6-5).
pending # Write code here that turns the phrase above into concrete actions
end
Then("the output should be {string}") do |string|
pending # Write code here that turns the phrase above into concrete actions
end
Listing 6-5
New Version of calculator_steps.rb
The enhancements are only on lines 3 and 4. You renamed string to input in order to make sure that you have a meaningful variable name, and you saved its value into an instance variable @input that will be used in the next steps to carry out the calculation.
Watch Out
When you create an instance variable (like the @input), this is available for the subsequent steps invoked for the same Scenario. But they don’t survive in between Scenarios.
Implement the Second Step
With the first step implemented, let’s proceed to the implementation of the next pending step, the second one.
You need to provide an implementation that would take the input and would generate some output. The output would then be evaluated at the next step.
Here is the new version of the step definitions file (Listing 6-6).
raise 'Calculator Failed To Run!' unless $?.success?
end
Then("the output should be {string}") do |string|
pending # Write code here that turns the phrase above into concrete actions
end
Listing 6-6
Implementation of the Second Step
The changes are for the second step definition, lines 8 and 9. These lines try to invoke the system command ruby with the argument calculator.rb and the value of the @input instance variable. In other words, for the Scenario at hand, it tries to invoke ruby calculator.rb '2+2'. It saves the output into the instance variable @output and then checks whether the exit status of the command, stored inside the global variable $?, is holding a success value. If not success, it raises an exception.
Let’s try to run the cucumber command again:
$ bundle exec cucumber
# File: features/addition.feature
#
Feature: Adding
Scenario: Add two numbers # features/addition.feature:5
Given the input "2+2" # features/step_definitions/calculator_steps.rb:3
Traceback (most recent call last):
ruby: No such file or directory -- calculator.rb (LoadError)
When the calculator is run # features/step_definitions/calculator_steps.rb:7
Calculator Failed To Run! (RuntimeError)
./features/step_definitions/calculator_steps.rb:9:in `"the calculator is run"'
features/addition.feature:7:in `When the calculator is run'
Then the output should be "4" # features/step_definitions/calculator_steps.rb:12
Failing Scenarios:
cucumber features/addition.feature:5 # Scenario: Add two numbers
1 scenario (1 failed)
3 steps (1 failed, 1 skipped, 1 passed)
0m0.450s
$
As you can see in the preceding code, the Scenario is now considered failed because there is a failed step.
The error was raised because the ruby calculator.rb ... command didn’t find the calculator.rb file to execute.
How do you fix this? Let’s create an empty file calculator.rb inside the root folder of your project. So now you have the following picture of folders and files (Figure 6-7).
Figure 6-7
The New Empty File Calculator
Information
You are following a test-first (or spec-first) approach to development here – TDD. Remember? When you use Cucumber, you are more to BDD (Behavior-Driven Development) rather than to TDD because you start from the functional black-box requirements of the application, its behavior.
Now that you have the file calculator.rb in place, let’s run the cucumber command again:
$ bundle exec cucumber
# File: features/addition.feature
#
Feature: Adding
Scenario: Add two numbers # features/addition.feature:5
Given the input "2+2" # features/step_definitions/calculator_steps.rb:3
When the calculator is run # features/step_definitions/calculator_steps.rb:7
Then the output should be "4" # features/step_definitions/calculator_steps.rb:12
TODO (Cucumber::Pending)
./features/step_definitions/calculator_steps.rb:13:in `"the output should be {string}"'
features/addition.feature:8:in `Then the output should be "4"'
1 scenario (1 pending)
3 steps (1 pending, 2 passed)
0m0.890s
$
Things have improved. Now both the first and second steps are passing. You only have the third step being pending.
Implement the Third Step
In the third step, you need to check that the output has the value that the step defines when called. Here is the proper step definition implementation (Listing 6-7).
raise 'Calculator Failed To Run!' unless $?.success?
end
Then("the output should be {string}") do |expected_output|
raise 'Expectation Not Met' unless @output == expected_output
end
Listing 6-7
Third Step Implementation
The changes are on lines 12 and 13. You check that the @output instance variable has the value expected, which is stored inside the block-level variable expected_output. For the Scenario that you have written, this step is invoked as Then the output should be "4" which means that the expected_output has the value "4".
If you run the cucumber (try using cucumber --format progress; it does not print verbose output of the Feature and Scenario text), then you will see this:
$ bundle exec cucumber --format progress
..F
(::) failed steps (::)
Expectation Not Met (RuntimeError)
./features/step_definitions/calculator_steps.rb:13:in `"the output should be {string}"'
features/addition.feature:8:in `Then the output should be "4"'
Failing Scenarios:
cucumber features/addition.feature:5 # Scenario: Add two numbers
1 scenario (1 failed)
3 steps (1 failed, 2 passed)
0m0.877s
$
The first green dots are for the successful execution of the first two steps. The last red F is for the last step whose execution failed. The execution failed because the RuntimeError exception with message Expectation Not Met was raised. This means that the @output didn’t have the value "4".
This was expected, because the calculator.rb file does process its input to generate a proper output. So you need to go to your application code (the calculator.rb file) and introduce the proper piece of code.
Implementing the Feature in Application Code
Now, your objective is to introduce the proper code in the calculator.rb file so that you can make the Scenario pass.
It is true that you need to implement a calculator that knows to carry out additions ("2+2"), but in order to make the Scenario pass, you can also introduce some dummy code like the following (Listing 6-8).
# File: calculator.rb
#
print '4'
Listing 6-8
Dummy Application Implementation
Save the preceding content into your calculator.rb file and then try to run cucumber again.
$ bundle exec cucumber --format progress
...
1 scenario (1 passed)
3 steps (3 passed)
0m0.977s
$
Bingo! Your feature is implemented, and your tests run successfully!
But is the calculator finished? Maybe it is. Maybe it is not. Looking at the .feature content that gives you the features of your calculator, you read that it can parse the "2+2" and come up with "4". Is that enough to call it a calculator that can parse any additional expression and produce the correct result?
No. You don’t feel confident with the feature content, and you decide to introduce another Scenario.
Introduce One More Scenario
The following is the new version of the .feature file (Listing 6-9).
# File: features/addition.feature
#
Feature: Adding
Scenario: Add two numbers
Given the input "2+2"
When the calculator is run
Then the output should be "4"
Scenario: Add two more numbers
Given the input "2+3"
When the calculator is run
Then the output should be "5"
Listing 6-9
Adding New Scenario
The second scenario is not much different from the first. It is trying to prove that the calculator works for another addition expression. Let’s run cucumber:
$ bundle exec cucumber --format progress
.....F
(::) failed steps (::)
Expectation Not Met (RuntimeError)
./features/step_definitions/calculator_steps.rb:13:in `"the output should be {string}"'
features/addition.feature:13:in `Then the output should be "5"'
Failing Scenarios:
cucumber features/addition.feature:10 # Scenario: Add two more numbers
2 scenarios (1 failed, 1 passed)
6 steps (1 failed, 5 passed)
0m1.923s
$
Now you have one passed and one failed Scenario. And the Scenario that has failed is the Add two more numbers.
It is obvious that your calculator.rb does not work for the "2+3" expression. So let’s fix its implementation so that it works for this too. You need to make sure that you don’t break the first Scenario though. Here is the new calculator.rb version (Listing 6-10).
# File: calculator.rb
#
expression = ARGV[0]
if expression == '2+2'
print '4'
elsif expression == '2+3'
print '5'
end
Listing 6-10
New Version of calculator.rb
If you save this version and you invoke the cucumber again, you will get this:
$ bundle exec cucumber --format progress
......
2 scenarios (2 passed)
6 steps (6 passed)
0m1.703s
$
Both of your Scenarios are now passing successfully.
But you know very well that your implementation wouldn’t survive a third scenario (Listing 6-11).
# File: features/addition.feature
#
Feature: Adding
Scenario: Add two numbers
Given the input "2+2"
When the calculator is run
Then the output should be "4"
Scenario: Add two more numbers
Given the input "2+3"
When the calculator is run
Then the output should be "5"
Scenario: Add two numbers again
Given the input "22+50"
When the calculator is run
Then the output should be "72"
Listing 6-11
Adding a Third Scenario
If you run the cucumber for the preceding .feature file, you will get this:
$ bundle exec cucumber --format progress
........F
(::) failed steps (::)
Expectation Not Met (RuntimeError)
./features/step_definitions/calculator_steps.rb:13:in `"the output should be {string}"'
features/addition.feature:18:in `Then the output should be "72"'
Failing Scenarios:
cucumber features/addition.feature:15 # Scenario: Add two numbers again
3 scenarios (1 failed, 2 passed)
9 steps (1 failed, 8 passed)
0m6.462s
$
And the story goes on! You can fix this Scenario too by amending the calculator.rb like this:
# File: calculator.rb
#
expression = ARGV[0]
if expression == '2+2'
print '4'
elsif expression == '2+3'
print '5'
elsif expression == '22+50'
print '72'
end
But this…does not scale!
It is obvious that such an implementation can only support hard-coded expressions. You need to change it to support any kind of addition expression.
Proper Implementation to Support Any Addition
The following is one version that would survive any addition expression (Listing 6-12).
# File: calculator.rb
#
expression = ARGV[0]
left, right = expression.split('+').map(&:to_i)
print left + right
Listing 6-12
Proper Addition Implementation
If you save this code and run cucumber again, it will give this:
$ bundle exec cucumber --format progress
3 scenarios (3 passed)
9 steps (9 passed)
0m2.895s
$
All the three Scenarios pass successfully. Let’s try with an extra one (Listing 6-13).
# File: features/addition.feature
#
Feature: Adding
Scenario: Add two numbers
Given the input "2+2"
When the calculator is run
Then the output should be "4"
Scenario: Add two more numbers
Given the input "2+3"
When the calculator is run
Then the output should be "5"
Scenario: Add two numbers again
Given the input "22+50"
When the calculator is run
Then the output should be "72"
Scenario: Add two numbers again and again
Given the input "125+32"
When the calculator is run
Then the output should be "157"
Listing 6-3
Add One More Scenario
If you run cucumber for this new version of .feature, that includes the Scenario for the expression "125+32", then you will get this:
$ bundle exec cucumber --format progress
4 scenarios (4 passed)
12 steps (12 passed)
0m3.519s
$
It seems that randomly added Scenarios with addition expressions are working ok. Your calculator.rb implementation seems to be ok, at least with regard to the addition expressions.
But hold on! You see a lot of duplication in the .feature file. If you want to write ten different Scenarios with ten different addition expressions, just to expand the scope of testing, do you have to repeat again and again the same Scenario Outline, inventing new names and creating a huge .feature file?
Removing Duplication with Scenario Outlines
You can remove the code duplication in your .feature files if you have Scenarios that are the same, but they only differ in the values they use for their variable parts. In order to do that, you use Scenario Outlines.
Here is a version of the file features/addition.feature using a Scenario Outline (Listing 6-14).
# File: features/addition.feature
#
Feature: Adding
Scenario Outline: Add two numbers
Given the input "<input>"
When the calculator is run
Then the output should be "<output>"
Examples:
| input | output |
| 2+2 | 4 |
| 2+3 | 5 |
| 22+50 | 72 |
| 125+32 | 157 |
Listing 6-14
Using Scenario Outlines
In the preceding code, you can see how I have turned four different Scenarios into one Scenario Outline without actually changing any of the step definitions. Only the step invocations have been changed. Instead of taking a specific addition expression, they are invoked by calling the step using a variable enclosed in angle brackets. The variables then are being used inside the Examples section in a table having as columns the same names as the variables. The table has values the values that were previously literally encoded inside the distinct Scenarios (Figure 6-8).
Figure 6-8
Scenario Outline
Let’s now run the cucumber command again:
$ bundle exec cucumber --format progress
4 scenarios (4 passed)
12 steps (12 passed)
0m3.514s
$
Nothing new! Again, you have four Scenarios. But you have collapsed them behind a Scenario Outline definition. Cool! Isn’t it?
RSpec Integration
Before you finish the introduction to Cucumber, let’s see how this tool is integrated with RSpec. Why would you want to do that? You would like to do that in order to replace check expectation lines like this
raise 'Expectation Not Met' unless @output == expected_output
with lines like this
expect(@output).to eq(expected_output)
that is, to use RSpec matchers. If you do that, RSpec will take care of raising the correct exceptions, and also you can make your code read much easier.
Add rspec in Gemfile
First things first. Let’s amend the Gemfile to reference the rspec gem (Listing 6-15).
# File: Gemfile
#
source 'https://rubygems.org'
gem 'cucumber'
gem 'rspec'
Listing 6-15
Gemfile Referencing RSpec
Then run bundle. You will get something like this:
$ bundle
Using backports 3.17.0
Using builder 3.2.4
Using bundler 2.1.4
Using cucumber-tag_expressions 1.1.1
Using gherkin 5.1.0
Using cucumber-core 3.2.1
Using cucumber-expressions 6.0.1
Using cucumber-wire 0.0.1
Using diff-lcs 1.3
Using multi_json 1.14.1
Using multi_test 0.1.2
Using cucumber 3.1.2
Using rspec-support 3.9.2
Using rspec-core 3.9.1
Using rspec-expectations 3.9.1
Using rspec-mocks 3.9.1
Using rspec 3.9.0
Bundle complete! 2 Gemfile dependencies, 17 gems now installed.
Use `bundle info [gemname]` to see where a bundled gem is installed.
$
Lots of gems are being incorporated. But the main gem is rspec. The others are dependencies of it.
Use RSpec Matchers
Now you are ready to use RSpec matchers. Let’s change the step definitions accordingly. The following is the new version of the file features/step_definitions/calculator_steps.rb which uses RSpec matchers (Listing 6-16).
expect($?).to be_success, 'Calculator Failed To Run'
end
Then("the output should be {string}") do |expected_output|
expect(@output).to eq(expected_output)
end
Listing 6-16
Using RSpec Matchers
You have replaced the code on lines 9 and 13. You are now using RSpec methods and matchers. If you run the cucumber command again, then you will see the four Scenarios succeed as before.
Task Details
Please Write The Cucumber Features For The Following Application And Implement The Application Itself
The application is a Ruby command-line application (let’s call the program camelizer) that takes input a string and converts it to a camel-formatted string. Camel-formatted string is the string that capitalizes the first letter of each word and concatenates the words of the string into one big string without blanks. For example, if the input string is “hello world,” it returns “HelloWorld.”
Other examples are as follows:
If the input is “Foo bar,” it should return “FooBar.”
If the input is “bar,” it should return “Bar.”
If the input is “foo_bar,” it should return “Foo_bar.”
If the input is “helloWorld,” it should return “Helloworld.”
If the input is “this Is gOOd,” it should return “ThisIsGood.”
Write the features and the program itself. Make sure that you use all the techniques (including RSpec integration) described in this chapter.
Key Takeaways
You had a first encounter with Cucumber and how you can write your requirements using the Gherkin language. Then you turned them to executable specifications. The step definition implementations bound the requirements to our application code (Figure 6-9).
Figure 6-9
Cucumber Binds to Application
With Cucumber, business stakeholders and developers can work together. Business stakeholders use a formal language (Gherkin) to express the requirements of the software, and developers implement the step definitions in a way that their implementation binds to the actual application code. When any step fails to be executed, you know that the application has a flaw and needs to be corrected or a new feature needs to be implemented.
In the next, last chapter of this book, you will learn about some of the advanced features of Cucumber, and you will implement a more complex project.