
![]()
Disrupting the Request Life Cycle
In previous chapters, I described the ASP.NET request life cycle and explained how the global application class, modules, and handlers work together to process requests and generate content. In this chapter, I am going to explain how to disrupt the normal flow of a request and take direct control of the life cycle.
Disrupting the life cycle can be useful for optimizing the performance of a web application or taking fine-grained control over the way that particular requests are processed. The life cycle is also disrupted when unhandled exceptions occur, and knowing the nature of the disruption means you can receive notifications when this happens.
Disrupting the request life cycle can also be useful for changing the behavior of an application without having to modify any of its code, through the addition of a module or a handler. There are a lot of badly designed and implemented ASP.NET applications in the world, and if you inherit one of them, you may find that making even the slightest change triggers unexpected problems that are hard to predict and difficult to debug and test. Such applications are brittle, and being able to change the way that requests are handled by adding custom modules or handlers can help extend the life of the application. All brittle applications eventually throw up problems that can’t be patched, but the techniques I show you in this chapter can help keep things ticking along while a properly designed replacement is developed. Table 6-1 summarizes this chapter.
Table 6-1. Chapter Summary
Preparing the Example Project
I am going to create a new project called RequestFlow for this chapter. To get started, select New Project from the File menu to open the New Project dialog window. Navigate through the Templates section to select the Visual C# ![]() Web
Web ![]() ASP.NET Web Application template and set the name of the project to Request, as shown in Figure 6-1.
ASP.NET Web Application template and set the name of the project to Request, as shown in Figure 6-1.
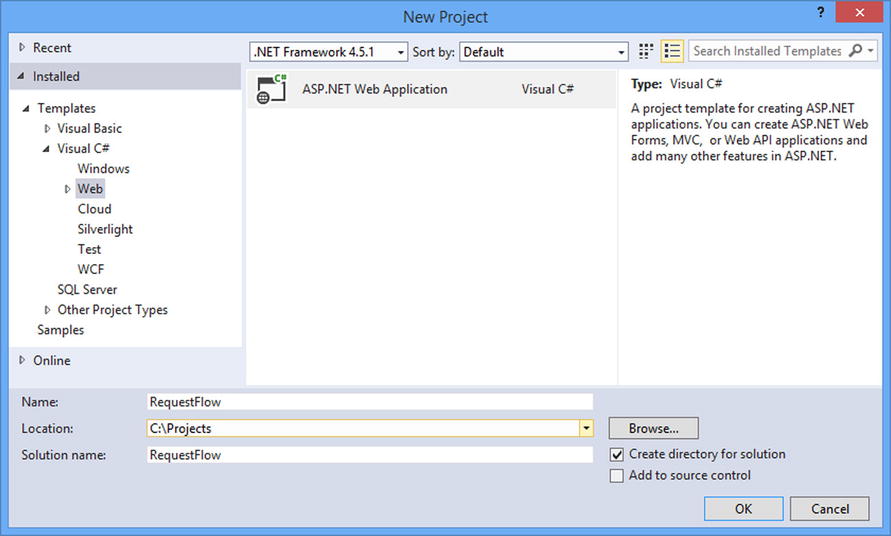
Figure 6-1. Creating the Visual Studio project
Click the OK button to move to the New ASP.NET Project dialog window. Ensure that the Empty option is selected and check the MVC option, as shown in Figure 6-2.
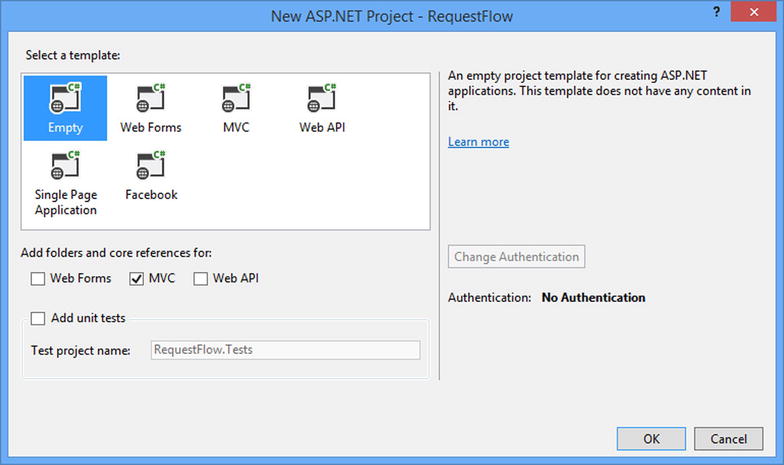
Figure 6-2. Configuring the ASP.NET project
Click the OK button, and Visual Studio will create a new project called RequestFlow.
Open the console by selecting Package Manager Console from the Tools ![]() Library Package Manager menu and enter the following command:
Library Package Manager menu and enter the following command:
Install-Package -version 3.0.3 bootstrapVisual Studio will download and install the Bootstrap library into the RequestFlow project.
Right-click the Controllers folder in the Visual Studio Solution Explorer and select Add ![]() Controller from the pop-up menu. Select MVC 5 Controller – Empty from the list of options and click the Add button. Set the name to be HomeController and click the Add button to create the Controllers/HomeController.cs file. Edit the new file to match Listing 6-1.
Controller from the pop-up menu. Select MVC 5 Controller – Empty from the list of options and click the Add button. Set the name to be HomeController and click the Add button to create the Controllers/HomeController.cs file. Edit the new file to match Listing 6-1.
Listing 6-1. The Contents of the HomeController.cs File
using System.Web.Mvc;

namespace RequestFlow.Controllers {
    public class HomeController : Controller {

        public ActionResult Index() {
            return View();
        }
    }
}
The controller contains a single action method, called Index. The action method contains no logic and simply returns the result from the View method to have the MVC framework render the default view.
Right-click the Index action method in the code editor and select Add View from the pop-up menu. Ensure that View Name is Index, that Template is set to Empty (without model), and that the boxes are unchecked, as shown in Figure 6-3.
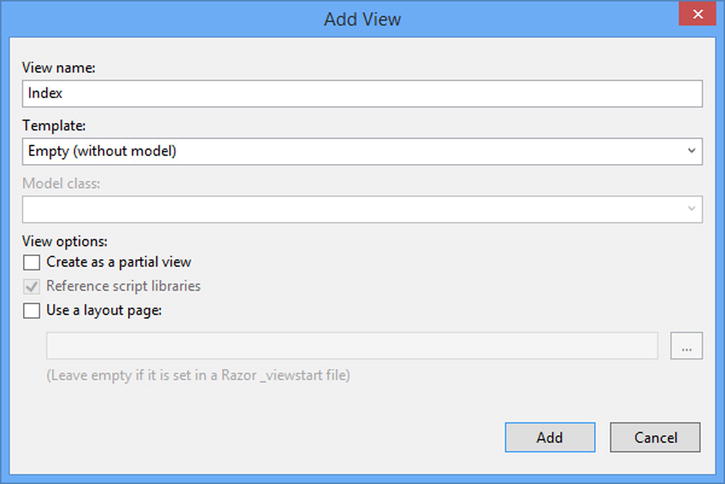
Figure 6-3. Creating the view
Click the Add button to create the Views/Home/Index.cshtml file. Edit the file to match Listing 6-2. The view simply reports that the content has been rendered from the Index view associated with the Home controller, which is all that I will need to demonstrate the techniques for managing request execution.
Listing 6-2. The Contents of the Index.cshtml File
@{
    Layout = null;
}

<!DOCTYPE html>

<html>
<head>
    <meta name="viewport" content="width=device-width" />
    <title>Index</title>
    <link href="∼/Content/bootstrap.min.css" rel="stylesheet" />
    <link href="∼/Content/bootstrap-theme.min.css" rel="stylesheet" />
</head>
<body>
    <div class="container">
        <h3 class="text-primary">This is the Home/Index view</h3>
    </div>
</body>
</html>
Testing the Example Application
To test the example application, select Start Debugging from the Visual Studio Debug menu. The example application displays a simple message in the browser, as shown in Figure 6-4.
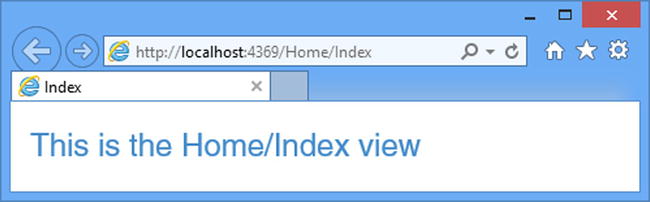
Figure 6-4. Testing the example application
I am going start with a simple technique to demonstrate how you can control request handling to achieve tasks that would otherwise be handled deep within the MVC framework. If you have been using the MVC framework for a while, you will know that you can redirect requests to alternate URLs by returning the result from methods such as Redirect and RedirectPermanent.
The MVC framework provides a set of redirection methods that can target a literal URL, a URL route, or another action method, and these redirections can be combined with other logic such that redirections happen only under certain circumstances (such as when requests contain particular form data values or originate from mobile devices).
However, in mature projects, the most common reason for adding new redirections to action methods is to hide changes in the application structure. An example that I have seen a lot lately comes when a project switches from performing authentication locally to relying on a third-party such as Microsoft, Google, or Facebook. This could be addressed by changes in the routing configuration, but often the routes become so complex that performing the redirection in the controller is seen as the safer option. The action methods that would usually have received the authentication requests are replaced with redirections to new URLs that can initiate the third-party authentication process.
![]() Tip I demonstrate how to authenticate users through third parties in Part 3.
Tip I demonstrate how to authenticate users through third parties in Part 3.
In this section, I am going to explain how redirections normally work in the MVC framework and how you can optimize this process by disrupting request execution and perform the redirection in a module. Table 6-2 puts module redirection in context.
Table 6-2. Putting Module Redirection in Context
Question |
Answer |
|---|---|
What is it? |
Module redirection is the process of intercepting requests and redirecting them in a module, rather than letting the request be handled by the MVC framework. |
Why should I care? |
Action methods that perform only redirection incur relatively high overheads that can be avoided by using a module. |
How is it used by the MVC framework? |
This technique is about disrupting the normal request life cycle and is not used by the MVC framework. |
Understanding the Normal Redirection Process
I have added a new action method to the Home controller that contains a redirection, as shown in Listing 6-3.
Listing 6-3. Adding an Action Method to the HomeController.cs File
using System.Web.Mvc;

namespace RequestFlow.Controllers {
    public class HomeController : Controller {

        public ActionResult Index() {
            return View();
        }

        public ActionResult Authenticate() {
            return RedirectToAction("Index", "Home");
        }
    }
}
The action method I added is called Authenticate, and it represents the scenario that I described: an action method whose original implementation has been replaced with a redirection. In this example, I perform the redirection by returning the result of the RedirectToAction method, which allows me to specify the names of the action method and the controller that the client will be redirected to.
You can see the effect of targeting the Authenticate action method by starting the application and requesting the /Home/Authenticate URL in the browser. You can see the sequence of requests to the application and the responses that are returned using the browser F12 developer tools (so called because they are accessed by pressing the F12 key), as illustrated by Figure 6-5.
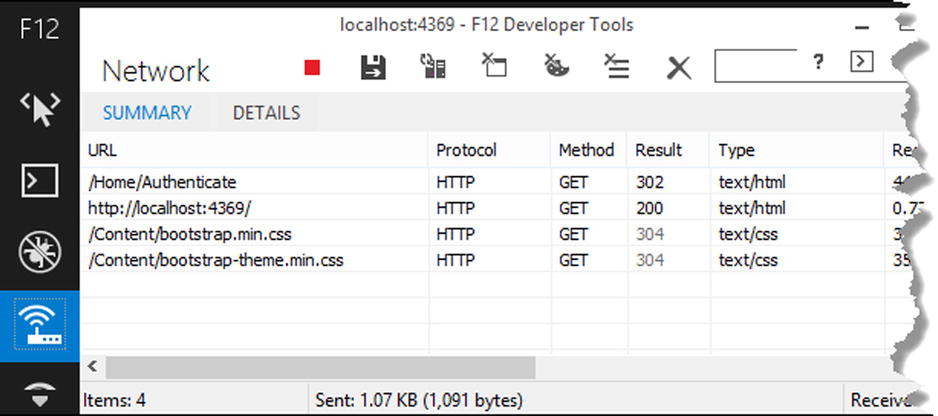
Figure 6-5. Tracing the requests and responses in a redirection
![]() Tip To see all the requests and responses, you must disable the Clear Entries on Navigate option at the top of the developer tools window.
Tip To see all the requests and responses, you must disable the Clear Entries on Navigate option at the top of the developer tools window.
The sequence of requests and responses is exactly like you would expect. The browser asks the server for /Home/Authenticate but receives a 302 response, which tells the browser to request a different URL. I specified the Index action method in the Home controller, which corresponds to the default URL (/) in the default routing configuration, and that’s what the browser is redirected to. The browser makes the second request, and the server sends the content generated by the Index action method, which includes link elements for Bootstrap CSS files. The sequence is completed when the browser requests and receives the content of CSS files.
If the only thing that an action method is doing is issuing a redirection, then it becomes an expensive operation—something that is easy to forget about, especially when refactoring a mature application where the focus is on the new functionality. The MVC framework is flexible and configurable, and it has to do a lot of work to get to the point where the RedirectToAction method in Listing 6-3 is invoked and the result is evaluated. The list includes the following:
- Locating and instantiating the controller factory
- Locating and instantiating the controller activator
- Locating and instantiating the action invoker
- Identifying the action method
- Examining the action method for filter attributes
- Invoking the action method
- Invoking the RedirectToAction method
At every stage, the MVC framework has to figure out which implementation is required and usually has to create some new objects, all of which takes time and memory. The RedirectToAction method creates a new RedirectToRouteResult object, which is evaluated and does the work of performing the redirection.
Simplifying the Redirection Process
The result of all the work that the MVC framework has to go through to produce the RedirectToRouteResult object is one of the methods described in Table 6-3 being invoked on the HttpResponse context object associated with the request.
Table 6-3. The Redirection Methods Defined by the HttpResponse Class
I can avoid having the MVC framework do all of that work by instead performing the redirection in a module. To demonstrate how this works, I created a folder called Infrastructure and added to it a class file called RedirectModule.cs. You can see the contents of the class file in Listing 6-4.
Listing 6-4. The Contents of the RedirectModule.cs File
using System;
using System.Web;
using System.Web.Mvc;
using System.Web.Routing;

namespace RequestFlow.Infrastructure {
    public class RedirectModule : IHttpModule {

        public void Init(HttpApplication app) {
            app.MapRequestHandler += (src, args) => {

                RouteValueDictionary rvd
                    = app.Context.Request.RequestContext.RouteData.Values;

                if (Compare(rvd, "controller", "Home")
                    &&  Compare(rvd, "action", "Authenticate")) {
                        string url = UrlHelper.GenerateUrl("", "Index", "Home", rvd,
                           RouteTable.Routes, app.Context.Request.RequestContext, false);
                        app.Context.Response.Redirect(url);
                    }
            };
        }

        private bool Compare(RouteValueDictionary rvd, string key, string value) {
            return string.Equals((string)rvd[key], value,
                StringComparison.OrdinalIgnoreCase);
        }

        public void Dispose() {
            // do nothing
        }
    }
}
This module handles the MapRequestHandler life-cycle event, which means the handler has been selected and is about to be asked to generate the content for the request. Prior to this event, the UrlRoutingModule processes the request in order to match it to a route and, as part of this process, creates and associates a RequestContext object with the HttpRequest instance.
![]() Tip You might be wondering how I know that the UrlRoutingModule processes the request before the MapRequestHandler event. In fact, I looked at the source code for the module class and found that the request is processed in response to the PostResolveRequestCache event, which proceeds MapRequestHandler in the life cycle I described in Chapter 3. You can get the source code for the .NET Framework, including the ASP.NET platform from http://referencesource.microsoft.com/netframework.aspx. This is separate from the source code for the MVC framework and the Web API, which are available from http://aspnetwebstack.codeplex.com. Be sure to read the licenses carefully because there are restrictions on how the source code can be used, especially for the .NET Framework code.
Tip You might be wondering how I know that the UrlRoutingModule processes the request before the MapRequestHandler event. In fact, I looked at the source code for the module class and found that the request is processed in response to the PostResolveRequestCache event, which proceeds MapRequestHandler in the life cycle I described in Chapter 3. You can get the source code for the .NET Framework, including the ASP.NET platform from http://referencesource.microsoft.com/netframework.aspx. This is separate from the source code for the MVC framework and the Web API, which are available from http://aspnetwebstack.codeplex.com. Be sure to read the licenses carefully because there are restrictions on how the source code can be used, especially for the .NET Framework code.
The RequestContext object provides information about the URL route that has matched the request and is accessed through the HttpRequest.RequestContext property. The RequestContext class defines the properties described in Table 6-4.
Table 6-4. The Properties Defined by the RequestContext Class
Name |
Description |
|---|---|
HttpContext |
Returns the HttpContext object for the current request. This isn’t useful in this scenario because the HttpContext is used to obtain the RequestContext object. |
RouteData |
Returns a System.Web.Routing.RouteData object that describes the route matches to the request by UrlRoutingModule. |
It is the RouteData object that gives me access to the information that I need, and I have described the three useful properties that RouteData defines in Table 6-5.
Table 6-5. The Properties defined by the RouteData Class
Name |
Description |
|---|---|
Route |
Returns the Route object that represents the route that has matched the request. |
RouteHandler |
Returns the IRouteHandler implementation that specifies the IHttpHandler that will generate content for the request. See Chapter 5 for an example of using the IRouteHandler interface. |
Values |
Returns a RouteValueDictionary that contains the values extracted from the request to match the route variables. |
In my module, I use the RouteValueDictionary to determine the controller and action route values, which are used by the MVC framework to identify the controller and action method that the request will target. If the values match the Authenticate action on the Home controller, then I perform a redirection, like this:
...
if (Compare(rvd, "controller", "Home")&&  Compare(rvd, "action", "Authenticate")) {
    string url = UrlHelper.GenerateUrl("", "Index", "Home", rvd,
        RouteTable.Routes, app.Context.Request.RequestContext, false);
    app.Context.Response.Redirect(url);
}
...
I could have specified the target URL for the redirection as a literal string value, but that would mean my module would have to be updated every time the routing configuration for the application changed, which is just the kind of thing that leads to brittle applications in the first place. Instead, I have used the UrlHelper class from the System.Web.Mvc namespace to generate a URL based on the name of the action method and controller that I want to target, as follows:
...
if (Compare(rvd, "controller", "Home") &&  Compare(rvd, "action", "Authenticate")) {
    string url = UrlHelper.GenerateUrl("", "Index", "Home", rvd,
        RouteTable.Routes, app.Context.Request.RequestContext, false);
    app.Context.Response.Redirect(url);
}
...
Once I have generated the URL from the routing configuration, I call the HttpResponse.Redirect method to send the response to the client and terminate any further request handling. Listing 6-5 shows how I registered the module in the Web.config file using the same approach I described in Chapter 4.
Listing 6-5. Registering the Module in the Web.config File
<?xml version="1.0" encoding="utf-8"?>

<configuration>
  <appSettings>
    <add key="webpages:Version" value="3.0.0.0" />
    <add key="webpages:Enabled" value="false" />
     <add key="ClientValidationEnabled" value="true" />
    <add key="UnobtrusiveJavaScriptEnabled" value="true" />
  </appSettings>
  <system.web>
    <compilation debug="true" targetFramework="4.5.1" />
    <httpRuntime targetFramework="4.5.1" />
  </system.web>
  <system.webServer>
    <modules>
      <add name="Redirect" type="RequestFlow.Infrastructure.RedirectModule"/>
    </modules>
  </system.webServer>
</configuration>
To test the module, start the application and request the /Home/Authenticate URL. You can set a debugger breakpoint on the Authenticate action method in the controller class to prove that the method isn’t invoked when a request is redirected.
Managing Handler Selection
An alternative way to manage request flow is to control the selection of the handler. This allows you to preempt the normal handler selection process or to transfer a request from one handler to another. Table 6-6 puts handler selection in context.
Table 6-6. Putting Handler Selection in Context
Question |
Answer |
|---|---|
What is it? |
Handler selection lets you override the process that would usually match a handler to a request. |
Why should I care? |
Controlling handler selection lets you create applications that are more adaptable and flexible than would otherwise be possible. |
How is it used by the MVC framework? |
The MVC framework relies on a module to implement URL routing. The routing module preempts handler selection to ensure that handlers defined by routes are used to process requests—including the MvcHttpHandler class, which is the handler for MVC framework requests. |
Preempting the handler selection allows you to explicitly select a handler and bypass the process by which ASP.NET locates a handler for a request. The HttpContext class defines several members that relate to handler selection, as described by Table 6-7. The RemapHandler method allows me to override the normal selection process and explicitly specify the handler that will be used to generate content for the current request.
Table 6-7. The HttpContext Members That Manage Handler Selection
Name |
Description |
|---|---|
CurrentHandler |
Returns the handler to which the request has been transferred. |
Handler |
Returns the handler originally selected to generate a response for the request. |
PreviousHandler |
Returns the handler from which the request was transferred. |
RemapHandler(handler) |
Preempts the standard handler selection process. This method must be called before the MapRequestHandler event is triggered. |
First, I need to create a handler so that I have something to select with the RemapHandler method. I added a class file called InfoHandler.cs to the Infrastructure folder and used it to define the handler shown in Listing 6-6.
Listing 6-6. The Contents of the InfoHandler.cs File
using System.Web;

namespace RequestFlow.Infrastructure {
    public class InfoHandler : IHttpHandler {

        public void ProcessRequest(HttpContext context) {
            context.Response.Write("Content generated by InfoHandler");
        }

        public bool IsReusable {
            get { return false; }
        }
    }
}
I can now create a module that explicitly selects the handler for certain requests. I added a class file called HandlerSelectionModule.cs to the Infrastructure folder and used it to define the module shown in Listing 6-7.
Listing 6-7. The Contents of the HandlerSelectionModule.cs File
using System;
using System.Web;
using System.Web.Routing;

namespace RequestFlow.Infrastructure {
    public class HandlerSelectionModule : IHttpModule {

        public void Init(HttpApplication app) {
            app.PostResolveRequestCache += (src, args) => {
                if (!Compare(app.Context.Request.RequestContext.RouteData.Values,
                    "controller", "Home")) {
                        app.Context.RemapHandler(new InfoHandler());
                }
            };
        }

        private bool Compare(RouteValueDictionary rvd, string key, string value) {
            return string.Equals((string)rvd[key], value,
                StringComparison.OrdinalIgnoreCase);
        }

        public void Dispose() {
            // do nothing
        }
    }
}
![]() Tip You can also preempt normal handler selection by using the URL routing system, which calls the RemapHandler method when it matches a request to a route. This was what happened in Chapter 5 when I registered a handler using a route.
Tip You can also preempt normal handler selection by using the URL routing system, which calls the RemapHandler method when it matches a request to a route. This was what happened in Chapter 5 when I registered a handler using a route.
I have used the routing values in order to detect requests that target controllers other than Home. For such requests, I preempt the handler selection by calling the RemapHandler method and passing an instance of the handler class that I want to use, which is InfoHandler. I have to call the RemapHandlerbefore the MapRequestHandler event is triggered, so my module is set up to perform its preemption in response to the PostResolveRequestCache event, which preceded MapRequestHandler in the sequence I described in Chapter 3.
In Listing 6-8, you can see that I have registered the module in the Web.config file. I don’t need to register the handler because the module instantiates it directly.
Listing 6-8. Registering a Module in the Web.config File
<?xml version="1.0" encoding="utf-8"?>

<configuration>
  <appSettings>
    <add key="webpages:Version" value="3.0.0.0" />
    <add key="webpages:Enabled" value="false" />
     <add key="ClientValidationEnabled" value="true" />
    <add key="UnobtrusiveJavaScriptEnabled" value="true" />
  </appSettings>
  <system.web>
    <compilation debug="true" targetFramework="4.5.1" />
    <httpRuntime targetFramework="4.5.1" />
  </system.web>
  <system.webServer>
    <modules>
      <add name="Redirect" type="RequestFlow.Infrastructure.RedirectModule"/>
      <add name="Select" type="RequestFlow.Infrastructure.HandlerSelectionModule"/>
    </modules>
  </system.webServer>
</configuration>
You can test the selection preemption by starting the application and requesting a URL such as /Test. This request will be matched to the default URL routing configuration in the App_Start/RouteConfig.cs file but doesn’t target the Home controller. This means that the HandlerSelectionModule will preempt the normal selection process (which would have led to the MVC framework handler being asked to generate content) and force InfoHandler to be used instead, as illustrated by Figure 6-6.
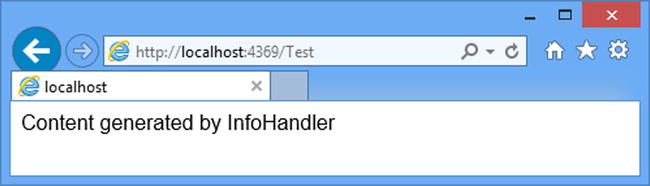
Figure 6-6. Preempting handler selection
Transferring a Request to a Different Handler
Handlers can decide that they are not best suited to generate the content for a request and pass the request on to a different handler for processing. This is equivalent to redirecting a request within ASP.NET without sending a redirection response to the client and is useful when you need finer-grained control over handler selection than is possible through the Web.config registration of handlers. Requests are transferred using the HttpServerUtility.TransferRequest method, which is available in the overloaded versions described by Table 6-8.
Table 6-8. The HttpServerUtility TransferRequest Method
Name |
Description |
|---|---|
TransferRequest(url) |
Transfers the request to the handler for the specified URL, which need not be the URL from the current request. |
TransferRequest(url, preserve) |
Transfers the request to the handler for the specified URL. The form and query string data are passed to the new handler if the preserve argument is true. |
TransferRequest(url, preserve, method, headers) |
Like with the previous version, except that the method argument specifies the HTTP method for the transferred request, and the headers collection specifies the headers. |
TransferRequest(url, preserve, method, headers, preserveUser) |
Like with the previous version, except that the preserveUser argument will preserve the user identity associated with the request when set to true. See Part 3 for details of user identities. |
![]() Tip The HttpServerUtility class also defines a Transfer method, but this can be used only with Web Forms and skips a number of the life cycle events after generating content for a request. Use with caution.
Tip The HttpServerUtility class also defines a Transfer method, but this can be used only with Web Forms and skips a number of the life cycle events after generating content for a request. Use with caution.
To demonstrate the use of the TransferRequest method, I have modified the InfoHandler class from the previous section to transfer the request for a specific URL, as shown in Listing 6-9.
Listing 6-9. Transferring a Request in the InfoHandler.cs File
using System.Web;
using System.Web.Mvc;
using System.Web.Routing;

namespace RequestFlow.Infrastructure {
    public class InfoHandler : IHttpHandler {

        public void ProcessRequest(HttpContext context) {

            if (context.Request.RawUrl == "/Test/Index") {
                context.Server.TransferRequest("/Home/Index");
            } else {
                context.Response.Write("Content generated by InfoHandler");
            }
        }

        public bool IsReusable {
            get { return false; }
        }
    }
}
I decide whether to transfer the request based on the value of the HttpRequest.RawUrl property. In a real project, I tend to use the routing information as demonstrated in the previous section (see Listing 6-7), but I have used the RawUrl property for simplicity in this example.
If the URL that has been requested is /Test/Index, then I obtain an instance of the HttpServerUtility class through the HttpContext.Server property and call the TransferRequest method, specifying a URL that will target the MVC framework Home controller in the example application. You can see the effect by starting the application and requesting the /Test/Index URL. If you monitor the HTTP requests made by the browser using the F12 developer tools, you will see that no HTTP redirections are sent to the client. Instead, the client requests the /Test/Index URL but gets the content from the /Home/Index URL instead, as shown in Figure 6-7.

Figure 6-7. Transferring a request from one handler to another
The HttpApplication.CompleteRequest method can be used to terminate the normal flow of a request through its life cycle and jump straight to the LogRequest event. This technique is useful if you are able to respond to a request entirely within a module and don’t want other modules or a handler to alter the response that will be sent to the client, essentially bypassing the rest of the application. Table 6-9 summarizes terminating request handling using the CompleteRequest method.
Table 6-9. Terminating Request Handler Context
Question |
Answer |
|---|---|
What is it? |
The CompleteRequest method terminates the normal request handling life cycle and jumps directly to the LogRequest event. |
Why should I care? |
Using the CompleteRequest method stops other modules from processing the request and prevents handler selection and content generation. |
How is it used by the MVC framework? |
This method is not used by the MVC framework. |
You can use the CompleteRequest method in any situation when you can service the request completely from within a module. I use this technique in two main ways: to create special debug URLs that provide insights into the application during development and to prevent requests from being processed by a troublesome component in a brittle application.
Responding to a Special URL
It can often be helpful to get insight into the overall state of the application during development, especially when tracking down bugs. There are some useful tools for understanding how an ASP.NET application is running, some which I describe in Chapter 8, but they tend to be general in nature. Sometimes you need a snapshot of specific information, and a module can help provide useful insights without requiring a lot of additional development. The use of the CompleteRequest method allows you to create modules that service special URLs without touching the rest of the application. As a demonstration, I added a class file called DebugModule.cs to the Infrastructure folder and used it to define the module shown in Listing 6-10.
Listing 6-10. The Contents of the DebugModule.cs File
using System.Collections.Generic;
using System.Web;

namespace RequestFlow.Infrastructure {
    public class DebugModule : IHttpModule {
        private static List<string> requestUrls = new List<string>();
        private static object lockObject = new object();

        public void Init(HttpApplication app) {

            app.BeginRequest += (src, args) => {
                lock (lockObject) {
                    if (app.Request.RawUrl == "/Stats") {
                        app.Response.Write(
                            string.Format("<div>There have been {0} requests</div>",
                                requestUrls.Count));
                        app.Response.Write("<table><tr><th>ID</th><th>URL</th></tr>");
                        for (int i = 0; i < requestUrls.Count; i++) {
                            app.Response.Write(
                                string.Format("<tr><td>{0}</td><td>{1}</td></tr>",
                                    i, requestUrls[i]));
                        }
                        app.CompleteRequest();
                    } else {
                        requestUrls.Add(app.Request.RawUrl);
                    }
                }
            };
        }

        public void Dispose() {
            // do nothing
        }
    }
}
![]() Caution Be sure to disable your debug modules before deploying the application because they can represent a security risk. If you need to enable the modules in production to track down live problems (which is something you should do only as a last resort for serious issues that you can’t reproduce in the test environment), then make sure you restrict access to authorized users with the techniques I described in Part 3.
Caution Be sure to disable your debug modules before deploying the application because they can represent a security risk. If you need to enable the modules in production to track down live problems (which is something you should do only as a last resort for serious issues that you can’t reproduce in the test environment), then make sure you restrict access to authorized users with the techniques I described in Part 3.
This module looks for requests for the /Stats URL and responds by generating details of the requests that the application has received since it started and then calling the CompleteRequest method to terminate request handling.
For all other requests, the URL that has been asked for is added to a static collection. The collection must be static so that all instances of the module class can store details of the requests they are asked to process. ASP.NET processes requests concurrently, so I have taken the precaution of using the lock keyword to synchronize access to the collection object. Listing 6-11 shows the registration of the module in the Web.config file.
Listing 6-11. Registering the Module in the Web.config File
<?xml version="1.0" encoding="utf-8"?>

<configuration>
  <appSettings>
    <add key="webpages:Version" value="3.0.0.0" />
    <add key="webpages:Enabled" value="false" />
     <add key="ClientValidationEnabled" value="true" />
    <add key="UnobtrusiveJavaScriptEnabled" value="true" />
  </appSettings>
  <system.web>
    <compilation debug="true" targetFramework="4.5.1" />
    <httpRuntime targetFramework="4.5.1" />
  </system.web>
  <system.webServer>
    <modules>
      <add name="Redirect" type="RequestFlow.Infrastructure.RedirectModule"/>
      <add name="Select" type="RequestFlow.Infrastructure.HandlerSelectionModule"/>
      <add name="Debug" type="RequestFlow.Infrastructure.DebugModule"/>
    </modules>
  </system.webServer>
</configuration>
![]() Caution You should be wary of using synchronization in web applications because it limits the concurrent throughput of your servers. The lock keyword in the listing ensures that I get accurate debug data, but it does so by allowing only one module instance update the collection at a time. Make sure you disable any modules that rely on synchronization once you have finished debugging. See Chapter 8 for details of collecting statistics without causing this kind of performance problem.
Caution You should be wary of using synchronization in web applications because it limits the concurrent throughput of your servers. The lock keyword in the listing ensures that I get accurate debug data, but it does so by allowing only one module instance update the collection at a time. Make sure you disable any modules that rely on synchronization once you have finished debugging. See Chapter 8 for details of collecting statistics without causing this kind of performance problem.
You can test the module by starting the application and requesting other URLs such as /Home/Index and /Test/Index followed by /Stats. You can see a typical result in Figure 6-8.
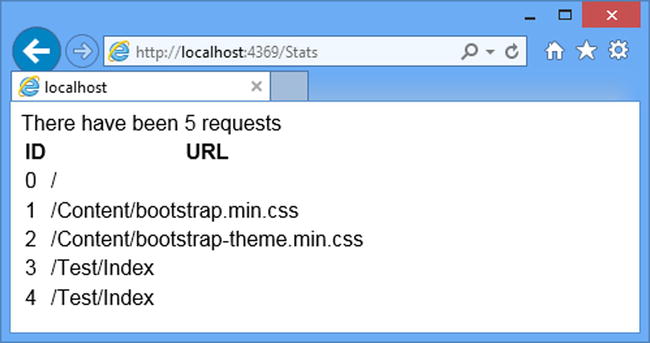
Figure 6-8. The output from a module that services a special URL
Avoiding Brittle Application Components
The second use for the CompleteRequest method is to prevent requests from being processed by some part of a brittle application. The details will vary in different applications, but to give a sense of the kind of code I sometimes require, I added a class file called DeflectModule.cs to the Infrastructure folder and used it to define the module shown in Listing 6-12.
Listing 6-12. The Contents of the DeflectModule.cs File
using System.Web;

namespace RequestFlow.Infrastructure {
    public class DeflectModule : IHttpModule {

        public void Init(HttpApplication app) {
            app.BeginRequest += (src, args) => {
                if (app.Request.RawUrl.ToLower().StartsWith("/home")) {
                    app.Response.StatusCode = 500;
                    app.CompleteRequest();
                }
            };
        }

        public void Dispose() {
            // do nothing
        }
    }
}
The module looks for requests that begin with /Home. When such a request is received, I set the status code to 500, which indicates a server error and call the CompleteRequest method to terminate request handling. You can apply this technique anywhere in the request life cycle, and, of course, you don’t have to send the client an error message—what’s important is that you can use the CompleteRequest method to terminate the request life cycle before the components you are concerned about are reached. Listing 6-13 shows the registration of the new module in the Web.config file.
Listing 6-13. Registering a Module in the Web.config File
<?xml version="1.0" encoding="utf-8"?>

<configuration>
  <appSettings>
    <add key="webpages:Version" value="3.0.0.0" />
    <add key="webpages:Enabled" value="false" />
     <add key="ClientValidationEnabled" value="true" />
    <add key="UnobtrusiveJavaScriptEnabled" value="true" />
  </appSettings>
  <system.web>
    <compilation debug="true" targetFramework="4.5.1" />
    <httpRuntime targetFramework="4.5.1" />
  </system.web>
  <system.webServer>
    <modules>
      <add name="Redirect" type="RequestFlow.Infrastructure.RedirectModule"/>
      <add name="Select" type="RequestFlow.Infrastructure.HandlerSelectionModule"/>
      <add name="Debug" type="RequestFlow.Infrastructure.DebugModule"/>
      <add name="Deflect" type="RequestFlow.Infrastructure.DeflectModule"/>
    </modules>
  </system.webServer>
</configuration>
To test the module, start the application and request the /Home/Index URL. Rather than seeing the view associated with the action method, the browser will display the error message shown in Figure 6-9.
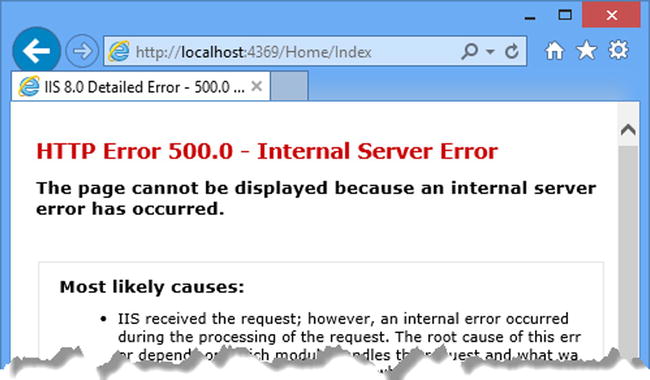
Figure 6-9. Displaying an error message in the browser
The final way to disrupt the regular flow of life cycle events is to throw an unhandled exception. When the ASP.NET platform receives an exception that has propagated from a handler or a module, it abandons the request, triggers the Error event, and jumps to the LogRequest event and completes the request. To demonstrate the effect on request handling, I created a class file called EventListModule.cs in the Infrastructure folder and used it to define the module shown in Listing 6-14.
Listing 6-14. The Contents of the EventListModule.cs File
using System;
using System.Reflection;
using System.Web;

namespace RequestFlow.Infrastructure {
    public class EventListModule : IHttpModule {

        public void Init(HttpApplication app) {

            string[] events = { "BeginRequest", "AuthenticateRequest",
                "PostAuthenticateRequest", "AuthorizeRequest", "ResolveRequestCache",
                "PostResolveRequestCache", "MapRequestHandler", "PostMapRequestHandler",
                "AcquireRequestState", "PostAcquireRequestState",
                "PreRequestHandlerExecute", "PostRequestHandlerExecute",
                 "ReleaseRequestState", "PostReleaseRequestState",
                "UpdateRequestCache", "LogRequest", "PostLogRequest",
                "EndRequest", "PreSendRequestHeaders", "PreSendRequestContent"};


            MethodInfo methodInfo = GetType().GetMethod("HandleEvent");
            foreach (string name in events) {
                EventInfo evInfo = app.GetType().GetEvent(name);

                evInfo.AddEventHandler(app,
                    Delegate.CreateDelegate(evInfo.EventHandlerType,
                        this, methodInfo));
            }

            app.Error += (src, args) => {
                System.Diagnostics.Debug.WriteLine("Event: Error");
            };
        }

        public void HandleEvent(object src, EventArgs args) {
            string name = HttpContext.Current.CurrentNotification.ToString();
            if (HttpContext.Current.IsPostNotification &&
                !HttpContext.Current.Request
                    .CurrentExecutionFilePathExtension.Equals("css")) {
                name = "Post" + name;
            }
            if (name == "BeginRequest") {
                System.Diagnostics.Debug.WriteLine("---------------");
            }
            System.Diagnostics.Debug.WriteLine("Event: {0}", new string[] { name });
        }

        public void Dispose() {
            // do nothing
        }
    }
}
This module uses reflection to register a handler for all the life cycle events and writes out the name of the event as it is received. The names are written using the System.Diagnostics.Debug.WriteLine method, which is visible in the Visual Studio Output window. (Select View ![]() Output if the window isn’t available.) Listing 6-15 shows how I registered the new module in the Web.config file and disabled the DeflectModule from the previous section.
Output if the window isn’t available.) Listing 6-15 shows how I registered the new module in the Web.config file and disabled the DeflectModule from the previous section.
Listing 6-15. Registering and Disabling Modules in the Web.config File
...
<system.webServer>
  <modules>
    <add name="Redirect" type="RequestFlow.Infrastructure.RedirectModule"/>
    <add name="Select" type="RequestFlow.Infrastructure.HandlerSelectionModule"/>
    <add name="Debug" type="RequestFlow.Infrastructure.DebugModule"/>
    <!--<add name="Deflect" type="RequestFlow.Infrastructure.DeflectModule"/>-->
    <add name="EventList" type="RequestFlow.Infrastructure.EventListModule"/>
  </modules>
</system.webServer>
...
![]() Note You will notice that there are two handlers in this example: a lambda expression for the Error event and the HandleEvent method for all the others. The HandleEvent method uses the HttpContect.CurrentNotificiation property to determine which event is being handled, but the value of this property isn’t set correctly for the Error event and remains set to whichever event was triggered before the event occurred. To create accurate results, I had to create a separate handler for the Error event so that I know for certain when it has been triggered.
Note You will notice that there are two handlers in this example: a lambda expression for the Error event and the HandleEvent method for all the others. The HandleEvent method uses the HttpContect.CurrentNotificiation property to determine which event is being handled, but the value of this property isn’t set correctly for the Error event and remains set to whichever event was triggered before the event occurred. To create accurate results, I had to create a separate handler for the Error event so that I know for certain when it has been triggered.
In Listing 6-16, I have added an action method to the Home controller that throws an exception. This is a common error, where a default value is assigned to an action method parameter to simplify the code. The action method works as long as the request includes a value that the model binding process can use for the parameter but fails when the request omits a value.
Listing 6-16. Adding a Broken Action Method to the HomeController.cs File
using System.Web.Mvc;

namespace RequestFlow.Controllers {
    public class HomeController : Controller {

        public ActionResult Index() {
            return View();
        }

        public ActionResult Authenticate() {
            return RedirectToAction("Index", "Home");
        }

        public ActionResult Calc(int val = 0) {
            int result = 100 / val;
            return View("Index");
        }
    }
}
I select the Index view as the result of the action method, but the reason that this action method exists is to throw an exception that will propagate up through the MVC framework and into the ASP.NET platform. To see the event sequence for a regular request, start the application and request the URL /Home/Index. You will see the following in the Visual Studio Output window:
Event: BeginRequest
Event: AuthenticateRequest
Event: PostAuthenticateRequest
Event: AuthorizeRequest
Event: ResolveRequestCache
Event: PostResolveRequestCache
Event: MapRequestHandler
Event: PostMapRequestHandler
Event: AcquireRequestState
Event: PostAcquireRequestState
Event: PreExecuteRequestHandler
Event: PostExecuteRequestHandler
Event: ReleaseRequestState
Event: PostReleaseRequestState
Event: UpdateRequestCache
Event: LogRequest
Event: PostLogRequest
Event: EndRequest
Event: SendResponse
Event: SendResponse
![]() Tip To simplify the output, the module I defined in Listing 6-14 ignores requests for CSS files.
Tip To simplify the output, the module I defined in Listing 6-14 ignores requests for CSS files.
This is the regular sequence of life-cycle events I described in Chapter 3. To see the effect of an uncaught exception, request the /Home/Calc URL. The Visual Studio debugger will break to handle the exception. Press F5 to resume execution, and you will see the following in the Output window:
Event: BeginRequest
Event: AuthenticateRequest
Event: PostAuthenticateRequest
Event: AuthorizeRequest
Event: ResolveRequestCache
Event: PostResolveRequestCache
Event: MapRequestHandler
Event: PostMapRequestHandler
Event: AcquireRequestState
Event: PostAcquireRequestState
Event: PreExecuteRequestHandler
Event: Error
Event: LogRequest
Event: PostLogRequest
Event: EndRequest
Event: SendResponse
Event: SendResponse
The important point to note is that the ASP.NET platform jumps to the LogRequest event after triggering the Error event, which means that modules that depend on later events won’t receive them and may be left in an undesirable state. Modules that need to update the state of the application or release resources when events are triggered should handle the Error event so they know that a request has encountered problems and is being terminated.
![]() Tip You can get information about the exception that disrupted the life cycle through the HttpContext.Error property.
Tip You can get information about the exception that disrupted the life cycle through the HttpContext.Error property.
Summary
In this chapter, I showed you how to interrupt the normal request life cycle to avoid performing unnecessary work and to work around the dangerous parts of brittle applications. I showed you how to perform redirections earlier in the request life cycle, how to control the selection and execution of the request handler, how to terminate requests so that difficult components are not executed, and how to receive notifications of errors. These are not techniques that you will need every day, but knowing what is possible will help you build better applications and can help keep old ones up and running. In the next chapter, I describe the ASP.NET platform facilities for identifying and adapting to the capabilities of browsers, which can help ensure that your application runs on the widest possible range of devices.