
3
Hello React Native
After you learned the basics of React and React Native in Chapter 1, What Is React Native?, and the fundamentals of JavaScript and TypeScript in Chapter 2, Understanding the Essentials of JavaScript and TypeScript, it is now time to dive deeper into the React Native world.
One of the best things about React Native is that it is very flexible when it comes to how you use it. You can choose Expo, which handles all the native part for you and allows you to complete your first app in hours. It also makes it possible to build iOS apps without having a Mac. But you also can go with a bare React Native workflow, which gives you a lot of options in terms of how you integrate your React Native app into your whole development landscape.
You can also integrate or even write your own (native) libraries. While this flexibility is one of the biggest strengths of React Native, it needs you to really understand what’s going on in the different scenarios to make the right choice for your project and your company.
This chapter will enable you to do so. You will truly understand the different approaches, how to leverage them, and when to use each approach.
You will learn the following things in the sections of this chapter:
- Understanding how React Native works on an example app
- Passing properties
- Understanding class components, function components, and Hooks
- Connecting different platforms to JavaScript
- Introducing the new React Native Architecture
Technical requirements
To be able to run the code in this chapter, you have to set up the following things:
- A working React Native environment (https://reactnative.dev/docs/environment-setup—React Native command-line interface (CLI) quickstart guide)
- While most of this chapter should also work on Windows, I would recommend working on a Mac
Understanding how React Native works on an example app
There is no better way to understand a technology than by working with it. This section contains a simple example app that will show information about movies based on a static JavaScript Object Notation (JSON) file. The app will be further developed in the next chapters. For now, it should contain the following views:
- A home view to show a list of movie categories
- A category detail page with information about the category as well as the most popular movies of the category, with title and poster
- A movie detail page with information about the movie, including title, poster, rating, release date, and description
While this is a very simple example, we’ll use it to focus a lot on understanding what’s going on under the hood. But let’s start with creating the app. We’ll use a React Native bare workflow to be complete in control while not having any overhead. That means we are using the official React Native CLI to initialize our project. This is done with the following command:
npx react-native init videoexample
--template react-native-template-typescript
We are using a TypeScript template to directly set up our project as a TypeScript project. This includes the TypeScript compiler (tsc) as well as the correct file extensions. You will learn more about templates and other options to start a React Native project in Chapter 9, Essential Tools for Improving React Native Development.
The preceding command creates a videoexample folder that contains the new React Native project. If you have set up everything correctly, you can start your example app on your iOS simulator with cd videoexample && npx react-native run-ios (iOS simulators only work on iOS; on Windows, you can use cd videoexample && npx react-native run-android to start an Android simulator).
When you have successfully started your simulator, you should see the React Native default app running. It should look like this:
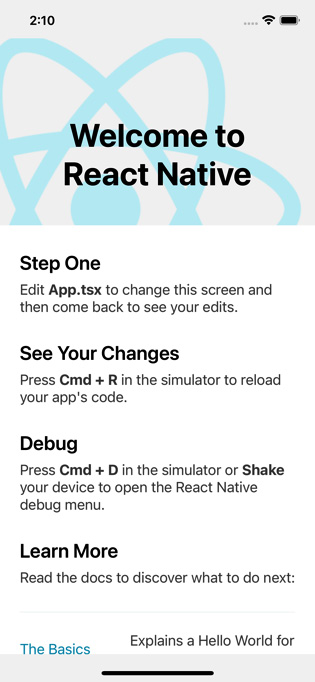
Figure 3.1 – React Native default app
When you open the videoexample folder in your integrated development environment (IDE), you will see that the React Native CLI has created a lot of files for you. In the following subsection, you’ll learn what they are and what they do.
Understanding the React Native example project
The example project has only one screen, but technically it is a complete Android and iOS app. This means it contains the following things:
- android: This folder contains the native Android project. You can open this folder with Android Studio and work with it like a native Android app. It uses Gradle as the build system, which also is integrated very nicely into Android Studio. The most important files you may have to touch on at some point in time are the following ones:
- android/app/src/main/AndroidManifest.xml: The Android manifest contains essential information about the app. You may have to edit this file when adding certain functionality to your app that needs user permission or starting the app from push notifications.
- android/app/src/main/java/com/<youridentifier>/MainApplication.java & android/app/src/main/java/com/<youridentifier>/MainApplication.java: These are the main files of your application. Normally you don’t have to touch these, but some libraries need some extra configuration here to work correctly.
- android/app/build.gradle: This file defines the Android build process for your app. In most cases, React Native handles this automatically, even if you install third-party libraries with native parts. But in some cases, you can have conflicts between these libraries, or you have to do some additional configuration. In these cases, this is the file to look at. There is also another build file in android/build.gradle, where you can add configurations for all sub-projects/modules.
- iOS: This folder contains the native iOS project. It consists of your app project, and something called pods. These pods are third-party projects that get bundled in your app to provide native functionality to React Native and all third-party libraries. The following files and folders are good to know about:
- <youridentifier>.xcodeproj: This is your app’s project file. It contains only your project. Don’t use this in Xcode because it won’t work!
- <youridentifier>.xcworkspace: This is the file to work with. It contains your project as well as the pods’ projects. This is the file to work with in Xcode.
- Podfile: In this file, you can define dependencies for other projects. These dependencies are fetched via cocoapods. You can think of cocoapods like the npm or yarn package for native dependencies. In most cases, all dependencies are handled automatically by React Native, but sometimes, you must adapt the dependencies (at the time of writing—for example—on an M1 Mac). If you must do so, the Podfile is the file to look at.
Note on cocoapods
cocoapods is a very popular dependency management tool for iOS development. Nevertheless, it is not an official tool provided by Apple but an open source solution. The cocoapods team has no information about upcoming releases of Xcode or macOS, so it can sometimes take some time for cocoapods to work well with the latest releases.
- node_modules: This folder is completely autogenerated during the dependency installation process with npm install or yarn. You don’t have to change anything here unless you want to patch third-party libraries.
Hint on patching libraries
Sometimes, it can be useful to patch an existing library to fix a bug or add certain functionality. In these cases, you can either maintain your own fork of this library (which is very time-consuming) or you can use patch-package. patch-package is a small tool that creates patches for certain npm dependencies. You can read more on this in Chapter 10, Structuring Large-Scale, Multi-Platform Projects.
- .eslintrc.js/.prettierrc.js: A fresh React Native project comes with built-in ESLint and Prettier support. These files contain the configurations for ESLint and Prettier. For more information on these tools, please read Chapter 9, Essential Tools for Improving React Native Development.
- .watchmanconfig: React Native uses a tool called watchman to watch projects’ files and trigger actions when they change. This is important for hot reloading during development. In most cases, this file is just an empty object.
- app.json: This file contains information about your app, such as the app name.
- babel.config.js/tsconfig.json: These files contain information, standards, and rules for the Babel and TypeScript compiler. In most cases, you don’t have to edit these.
- metro.config.js: React Native uses a bundler called Metro to create your JavaScript bundle during development. This bundler runs on your Mac or PC, recreates your app’s JavaScript bundle after you have made changes, and pushes it to your device or simulator. This file contains the configuration of the metro bundler. In most cases, you don’t have to edit it. If you want to learn more about Metro, please visit the official page here: https://facebook.github.io/metro/.
- Index.js: This is the entry point of your JavaScript bundle. If you have a look at the code, it does nothing but bind it from ./App to the native app via React Native AppRegistry.registerComponent.
- App.tsx: This is the React Native default app. You can make changes here and see them directly in your simulator. This file will be replaced by our example application later on.
By getting to know all these files, you already learned a lot about React Native. You saw that it contains real native projects with real native dependencies, uses a lot of useful tools, and has a single entry point.
The next step for our example application is to set up a working folder structure.
Structuring the example application
First, I always recommend creating an src folder for all of your JavaScript/TypeScript code. It is always a good idea to have all the code that belongs together in one place.
For our example app, we create the following three subfolders in the src folder:
- @types: In this folder, you place your TypeScript type declarations.
- components: This folder contains all reusable components.
- containers: Here, you have containers that are used to define the user interface (UI) structure of your views. Typically, you put things such as ScrollView containers with custom animations here. These containers are used to hold the content of your views.
- services: In this folder, we’ll create our services to connect to the movies. In this example, it will use the static JSON file as the source; later, we’ll connect to an external application programming interface (API).
- views: This folder contains whole-page views. In our case, it is the three views defined before.
Note
There are other approaches to how to structure a React Native project. Especially for large-scale projects, with multiple repositories, there can be ones that work better in some cases. You’ll learn about some of them in Chapter 10, Structuring Large-Scale, Multi-Platform Projects. For our example project, this structure is absolutely fine.
To get a deeper understanding of what’s going on, we try to do the first version of our example project completely without any third-party libraries. This is only for learning purposes and is not recommended in real-world projects.
The first thing we must decide on is the general architecture of the app. It can be very helpful to visualize the different parts of the application in a diagram, like the one you can see here:

Figure 3.2 – Example app architecture
As you can see in Figure 3.2, we will create three views (Home.tsx, Genre.tsx, and Movie.tsx). Since we are not using any navigation library, we must use the state of App.tsx to switch between these views. All three views use the ScrollContainer container to correctly place the views’ content. They also share some reusable components.
The result is a very simple app that lets us navigate our movie content. In the following screenshot, you can see what it looks like:
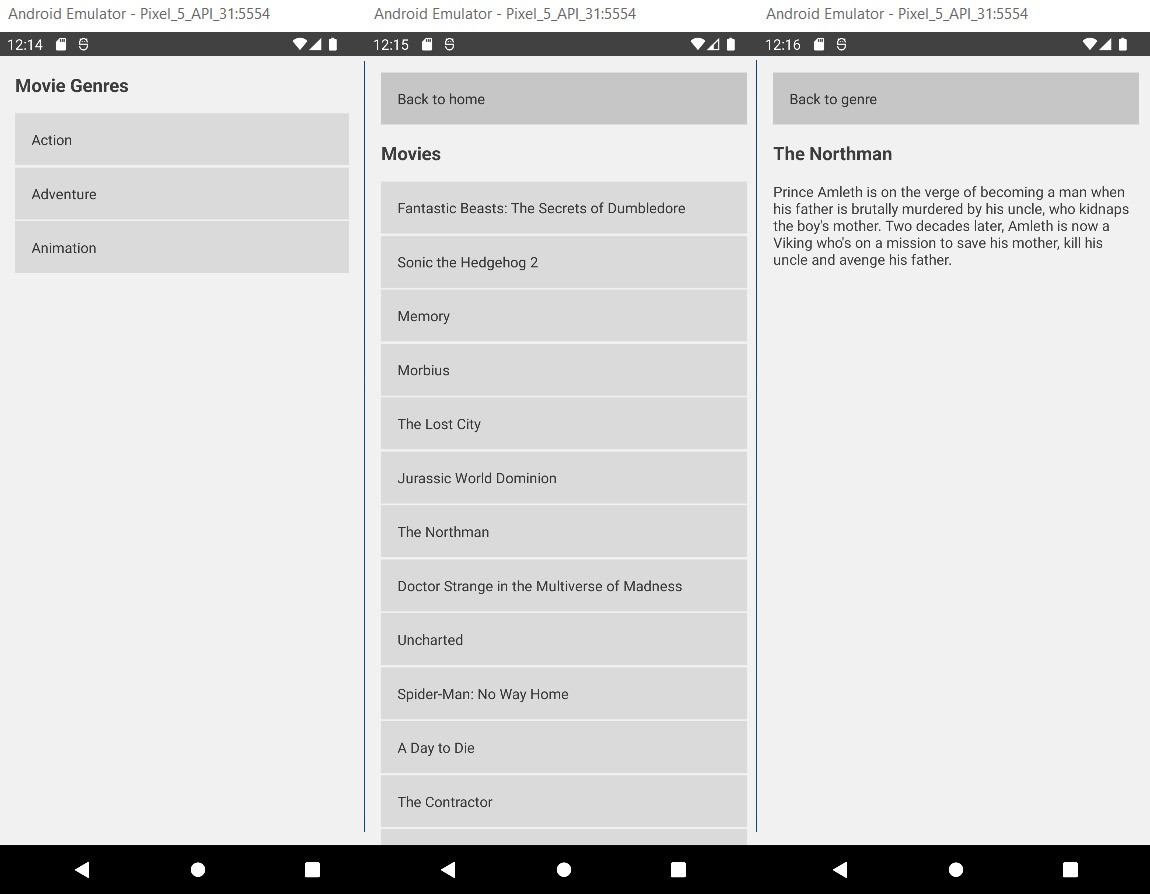
Figure 3.3 – Example app screenshot
You can see a list of movie genres on the first page, a list of movies of a single genre on the second page, and movie details on the third page.
Now you’ve learned about the architecture and seen a high-level overview, it’s now time to dive deeper into the code. We’ll focus on the most interesting parts, but if you want to see the whole code, please go to the GitHub repository mentioned in the Technical requirements section. Let’s start with the App.tsx file.
Creating a root view
The App.tsx file serves as the root component of our project. It decides which view should be mounted and holds the global application state. Please have a look at the following code:
const App = () => {
  const [page, setPage] = useState<number>(PAGES.HOME);
  const [genre, setGenre] = useState<IGenre |
      undefined>(undefined);
  const [movie, setMovie] = useState<IMovie |
      undefined>(undefined);
  const chooseGenre = (lGenre: IGenre) => {
    setGenre(lGenre);
    setPage(PAGES.GENRE);
  };
  const chooseMovie = (lMovie: IMovie) => {
    setMovie(lMovie);
    setPage(PAGES.MOVIE);
  };
  const backToGenres = () => {
    setMovie(undefined);
    setPage(PAGES.GENRE);
  };
  const backToHome = () => {
    setMovie(undefined);
    setGenre(undefined);
    setPage(PAGES.HOME);
  };
  switch (page) {
    case PAGES.HOME:
      return <Home chooseGenre={chooseGenre} />;
    case PAGES.GENRE:
      return (
        <Genre
          backToHome={backToHome}
          genre={genre}
          chooseMovie={chooseMovie}
        />
      );
    case PAGES.MOVIE:
      return <Movie backToGenres={backToGenres}
          movie={movie} />;
  }
};
As you can see here, the App.tsx file has three state variables. This state can be seen as a global state because the App.tsx file is the root component of the app and can be passed down to the other components. It must contain a page that defines which view should be visible, and it can hold a genre and a movie.
At the end of the file, you can find a switch/case statement. Based on the page state, this switch/case decides which view should be mounted. Also, the App.tsx file provides some functions to navigate through the application (chooseGenre, chooseMovie, backToGenres, backToHome) and passes them down to the views.
Important hint
As you can see, the direct setter functions of the state variables (setPage, setGenre, setMovie) aren’t passed down to any view. Instead, we created functions that call these setter functions. This is best practice because it guarantees that our state is mutated in a predictable way. You should never allow your state to get mutated directly from outside your component. You will learn more about this in Chapter 5, Managing States and Connecting Backends.
Next, let’s have a look at the views. These are pages that display content.
Displaying content based on a state
The Home view is the first page the user sees when opening the app. Please have a look at the following code:
import {getGenres} from '../../services/movieService';
interface HomeProps {
  chooseGenre: (genre: IGenre) => void;
}
const Home = (props: HomeProps) => {
  const [genres, setGenres] = useState<IGenre[]>([]);
  useEffect(() => {
    setGenres(getGenres());
  }, []);
  return (
    <ScrollContainer>
      <Header text="Movie Genres" />
      {genres.map(genre => {
        return (
          <Pressable onPress={() =>
               props.chooseGenre(genre)}>
               <Text style={styles.genreTitle}>{genre.name}
                   </Text>
          </Pressable>
        );
      })}
    </ScrollContainer>
  );
};
Here, you can see multiple things. At the top of the code block, you can see that we defined an interface for the props component. This is the TypeScript declaration of what should be passed down to this component from the parent component (in this case, the App.tsx file). Next, we have a list of genres as state variables.
This is a local state or component state because it is only used inside this component. In the next line, we use the useEffect hook to call the getGenres method of our movieService to fetch the genres and set them to the local state.
You will learn more about the useState and useEffect hooks in the Understanding class components, function components, and Hooks section of this chapter, but for now, it is only important that useEffect with an empty array as the second argument is called once when the component gets mounted.
Note
When working with React, the terms mounting and unmounting are used a lot. Mounting means adding components to the render tree that weren’t there before. A newly mounted component can trigger its lifecycle functions (class components) or hooks (function components). Unmounting means removing components from the render tree. This can also trigger lifecycle functions (class components) or Hook cleanups (function components).
After the useEffect Hook, you can see the return statement, which contains the JavaScript XML (JSX) that describes the UI. We use our ScrollContainer container, which contains the Header component and a list of Pressable instances, one for each genre. This list is created with the .map command.
Important note
This mixing of declarative UI and JavaScript data processing is one of the biggest strengths of React and React Native, and you will see it a lot. But whenever you do it, keep in mind that this is processed and recalculated every time the component is re-rendered. This means no expensive data processing operations should be done here.
After looking at the Home view, we should also have a look at the Genre view. It basically works the same way, but with one big difference. The Genre view fetches its data based on a property that is passed from the App.tsx file. Look at the useEffect hook of the Genre.tsx file here:
  useEffect(() => {
    if (typeof props.genre !== 'undefined') {
      setMovies(getMoviesByGenreId(props.genre.id));
    }
  }, [props.genre]);
You can see that the getMoviesByGenreId method of movieService needs a genre identifier (ID). This is taken from the genre that is passed down to the Genre.tsx file from the App.tsx file.
The whole process works as follows:
- The App.tsx file passes down a chooseGenre function to the Home.tsx file.
- The user clicks on a genre and triggers the chooseGenre function, which sets the genre to the App.tsx state and also sets the page to GENRE in the App.tsx file, which unmounts Home.tsx and mounts Genre.tsx.
- The App.tsx file passes down the genre to the Genre.tsx file.
- The Genre.tsx file fetches the genre’s movies based on the genre ID.
The same pattern is used to set the movie and navigate to the Movie.tsx view.
The Movie.tsx page does not fetch any data on its own in this example. It gets passed down the movie data it displays from the App.tsx file and needs no other information.
After understanding the views, we’ll now have a look at the components.
Using reusable components
It is very important to move UI code that you use in different places to components, at least when the project grows—this is crucial to prevent duplicate code and an inconsistent UI. But even in a smaller project, using reusable components is always a good idea and speeds up development a lot. In this simple example, we created a Header component:
interface HeaderProps {
  text: string;
}
const Header = (props: HeaderProps) => {
  return <Text style={styles.title}>{props.text}</Text>;
};
const styles = StyleSheet.create({
  title: {
    fontSize: 18,
    fontWeight: 'bold',
    marginBottom: 16,
  },
});
As you can see, this is a very simple component. It takes a string and renders the string in a predefined way, but even this simple component saves us quite some time and prevents duplicated code. Instead of having to style the header text in Home.tsx, Genre.tsx, and Movie.tsx, we can just use the Header component and get our header text styled in a consistent way.
Important note
Use reusable components wherever you can. They ensure a consistent UI and make changes easily adaptable throughout the whole application.
After looking at the components, we’ll turn our attention to the services next.
Using services to fetch data
You should always abstract the data fetching from the rest of the application. This is not only for logical reasons, but also if you have to change anything here (because of an API change), you don’t want to touch your views or components.
In this example, we use two JSON files as the data source. You can find them in the repository under assets/data. The services use the files to filter or list the data and provide it to the views. Please have a look at the following code:
const genres: IGenre[] = require('../../assets/data/genres.json');
const movies: IMovie[] = require('../../assets/data/movies.json');
const getGenres = (): Array<IGenre> => {
  return genres;
};
const getMovies = (): Array<IMovie> => {
  return movies;
};
const getMovieByGenreId = (genreId: number):
    Array<IMovie> => {
        return movies.filter(movie =>
            movie.genre_ids.indexOf(genreId) > -1);
};
export {getGenres, getMovies, getMovieByGenreId };
As you can see here, we require the two JSON files in the first two lines. The getGenres and getMovies functions just return the content of the files, without any filtering. getMovieByGenreId takes a numeric genre ID and filters the movies for this ID in the genre_ids of the movie. It then returns the filtered movies array.
In the last line, we export the functions to be importable in our views.
Important note
In larger projects, it is very common to start working with dummy data such as our JSON files here. This is because the frontend part is often developed in parallel to the API, and with the dummy data, the frontend team exactly knows what the data will look like. When the API is ready and the data service is well abstracted, it is no problem to replace the dummy data with the real-world API data fetching. We’ll also do this in Chapter 5, Managing States and Connecting Backends.
At last, we’ll have a look at the containers.
Using containers for page styling
In our example, we only have one container, ScrollContainer. It has a very similar purpose to the components, but while components are mainly parts that are used as parts of a view, containers are used to define the (outer) layout of a view. Please have a look at the code of our ScrollContainer container here:
interface ScrollContainerProps {
  children: React.ReactNode;
}
const ScrollContainer = (props: ScrollContainerProps) => {
  return (
    <SafeAreaView style={styles.backgroundStyle}>
      <ScrollView
        contentInsetAdjustmentBehavior="automatic"
        contentContainerStyle={styles.contentContainer}
        style={styles.backgroundStyle}>
        {props.children}
      </ScrollView>
    </SafeAreaView>
  );
};
As you can see in the interface definition, our ScrollContainer container takes only one property called children, which is defined as React.ReactNode. This means you can pass components to ScrollContainer. Also, the children property of a React component makes it possible to use this component with opening and closing tags while passing all JSX between the tags down to the component as a children property. This is exactly what we have done in all our views.
Our ScrollContainer container also uses a component called SafeAreaView. This is provided by React Native and handles all the different devices with notches (iPhone, Samsung), virtual back buttons (Android), and more.
Now that you’ve had a look at all the different parts of our first example application, it’s time for a short wrap-up. Up to now, you’ve learned how to structure an application, why it is important to abstract the different layers, and how to create reusable UI.
You’ve also learned that React and React Native components always consist of two parts: preparing the data in state/props and displaying the data with JSX. Maybe you also have realized that all our components are sorted in such a way that the data preparation is at the top of the component while the displaying of the data is at the bottom. I prefer this way of structuring a component because it makes it much more readable.
You also already know a way to pass properties between components. Because this is a very important topic, we’ll focus on that in more detail in the next section.
Passing properties
As you have already seen in the example application, there are multiple ways to pass data around in an application. Some best practices have been established that you should definitely stick to; otherwise, your application can get very hard to debug and maintain. We list these here:
- Never modify a component state in an unpredictable way from outside the component: I know—I repeat myself; we had this in the previous section, but this is very important. Modifying your state in an unpredictable way from outside the component can lead to bad errors, especially when you are working on a large project with a team of developers. But let’s have a look in detail.
Unpredictable in this scenario means that you pass the setter function of your state directly to other components.
Why is this so bad? Because other components and maybe other developers can decide what to put in the state of your component. It is very likely that sooner or later, one of them decides to put something in there that your component can’t handle in some edge cases.
What is the solution? There are multiple scenarios where you have to modify a component state from outside the component, but if you have to, do it in a predictable way by passing predefined functions. These functions should then verify the data and handle the state modification.
- Always use type declarations for your props: You should always use any kind of type declaration for your component props so that other developers know what kind of data your component expects. I recommend using TypeScript, but if you use plain JavaScript, there is a library called PropTypes you can use. For more information, please look at this link: https://www.npmjs.com/package/prop-types.
- Limit the number of props you pass: The more properties you pass, the harder your code will get to read and maintain, so think twice if it is necessary to pass a property. Also, it’s better to pass objects rather than multiple primitives.
After these best practices for passing properties, we’ll have a deeper look at different component types and hooks in the next section.
Understanding class components, function components, and Hooks
React and React Native provide two different ways to write components: class components and function components. Nowadays, you can use both variants interchangeably. Both ways are supported, and there is no sign that one of them won’t be supported in the future. So, why do two different ways exist? This is due to historical reasons. Before hooks were introduced in 2019 (React 16.8), function components couldn’t have a state or use any lifecycle methods, which meant that any component that needed to fetch and store data had to be a class component. But because function components require less code to write, they were often used for displaying data that was passed as props.
The limitation of function components changed with the introduction of Hooks. Hooks are functions provided by React that make it possible to use functionality, which was limited to class components, also in function components.
Today, it depends a lot on your preferences as to whether you work with function components and hooks or class components and lifecycle methods. Again, function components are less code to write, but developers with experience in object-oriented programming (OOP) languages might prefer to work with class components. Both ways are totally fine and don’t differ in terms of performance. Only the app size will be a little larger when working with class components.
In the next subsections, we’ll have a look at the different syntax and how to work with the different component types. We’ll start with class components.
Working with class components and lifecycle methods
As already mentioned, class components were always able to hold dynamic data in a changeable state. This state can be changed due to either user interaction or an action triggered in a lifecycle method. Lifecycle methods are methods that are provided by React and are called at a specific time of the component execution.
One of the most important lifecycle methods is componentDidMount. This method is called directly after a component was mounted and is often used for data fetching. The following code example shows a very basic example of a class component:
class App extends React.Component {
  constructor() {
    super();
    this.state = {
        num: Math.random() * 100
    };
  }
  render() {
    return <Text>This is a random number:
        {this.state.num}</Text>;
  }
}
The class component has one state property that is initialized in the constructor of the class. This state variable can hold multiple objects. In this case, it only contains a num property that gets initialized with a random number between 0 and 100. The component always has to have a render function. This function contains the JSX of the component. In this example, it’s only a Text component that displays a random number to the user.
To bring some life to this example, we can start an interval to regenerate the random number every second. This is where lifecycle functions come into play. We would use the componentDidMount lifecycle function to start the interval and componentWillUnmount to clean it up. Please have a look at the following code snippet:
  componentDidMount = () => {
    this.interval = setInterval(() => {
      this.setState({ num: Math.random() * 100 });
    }, 1000);
  };
  componentWillUnmount = () => {
    clearInterval(this.interval);
  };
In componentDidMount, we create an interval that updates the num state every second. As you can see, we are not setting the state directly, but we are using the setState method. Remember—setting the state directly is only allowed for initialization in the constructor.
We also store the interval’s handle to this.interval. In componentWillUnmount, we clear this.interval so that we don’t have code running infinitely when we are navigating away from the component.
Note
componentDidMount is the right place to fetch data that is used in the component.
If you want to see a running version of this example, please have a look at the following CodeSandbox instance: https://codesandbox.io/s/class-component-basic-nz9cy?file=/src/index.js.
After this simple example, it’s time to look at lifecycle methods a little closer. You’ll now get to know the most used ones, as listed here:
- componentDidMount(): This method is called directly after a component is mounted. It is called only once during the whole lifecycle of a component. It can be used for data fetching, adding handlers, or populating the state in any other way.
- componentWillUnmount(): This method is called directly before a component gets unmounted. It is called only once during the whole lifecycle of a component. It should be used for cleaning up handlers, intervals, timeouts, or any other executing code.
- componentDidUpdate(prevProps): This method is called every time a component gets updated and re-rendered. It can be called multiple times (a lot of times) during the whole lifecycle of a component. componentDidUpdate gets the previous props passed as a parameter so that you can compare them to the current props to check what changed. It can be used for refetching data based on changed parameters of the component. Please be informed that any setState method in the componentDidUpdate method has to be wrapped in a condition. This is for preventing infinite loops.
- shouldComponentUpdate(nextProps, nextState): This method is called every time before a re-render will take place. It can be called multiple times (a lot of times) during the whole lifecycle of a component. It exists only for performance reasons, because in some scenarios, you only want to re-render a component when specific parts of props or state are changing. This can be especially useful when working with large applications or large lists of data.
There are some more lifecycle methods that aren’t used that often. If you want to check them out, please have a look at the official documentation here: https://reactjs.org/docs/react-component.html.
In this subsection, you learned the syntax of class components and how to work with lifecycle methods. To have a direct comparison, we’ll write the same example for function components with Hooks in the next subsection.
Working with function components and Hooks
You should already be familiar with the function component syntax since we were using it for the example app in the first section of this chapter. Nevertheless, we’ll have a look at a code example, as we did in the previous subsection about class components, as follows:
const App = () => {
  const [num, setNum] = useState(Math.random() * 100);
  return <Text>This is a random number: {num}</Text>;
};
As you can see, even in this small example, the code is much shorter. A function component is basically nothing else than a function that runs on every re-render. But with Hooks, especially the useState hook, function components provide a way of storing data between re-renders.
We use the useState hook to store our num variable in the component state. Function components have to return what should be rendered. You can think of the component as a direct render function. We can then use the num variable to print the random number.
Important hint
All code that you put in a function component without using Hooks or similar mechanisms runs on every re-render. It is basically the same as putting code in the render function of a class component. This means you should only put your declarative UI and cheap data processing operations there. All other operations should be wrapped with Hooks, to prevent performance issues.
Next, we’ll start an interval to change the random number every second. We did the same in the example with the class component. The following code does exactly this in a function component:
  useEffect(() => {
    const interval = setInterval(() => {
      setNum(Math.random() * 100);
      }, 1000);
    return () => clearInterval(interval);
  }, []);
We use the useEffect Hook to start the interval. The useEffect interval takes two arguments. The first one is a function that defines the effect that should be run. The second argument is an array, and it defines when the effect should be run. It is optional, and if you don’t provide it, your effect will run on every re-render.
You can put state variables, other functions, and much more in there. If you do so, the effect will run every time one of the variables in this array changes. In our case, we want the effect to only run once when the component is mounted. To achieve this, we’ll use an empty array as a second argument.
We also return an anonymous function that clears the interval in the effect. This is a cleanup function. This cleanup function runs when the component unmounts and before running the effect the next time. Since we only run the effect on mount, the cleanup function only runs on unmount.
If you want to run this example, please have a look at the following CodeSandbox instance: https://codesandbox.io/s/function-component-basic-yhsrlo.
After this simple example, it’s time to take a deeper look at the most important Hooks. We already used two of them, which are by far the most important ones.
Working with stateless function components with useState
The useState Hook makes it possible to store information between re-renders. and create stateful function components. It returns an array with two entries. The first one is the state variable, while the second one is the setter function for the state variable. In most cases, you will use array destructuring to access both entries in one line, as in the following code example:
const [example, setExample] = useState(exampleDefaultValue)
The useState function also takes one argument that you can use to define the default value of the state variable. This is the value it gets initialized with.
To change the value of the state, you always have to use the setter function. Never set the value directly since this won’t trigger any re-renders or other React internals.
To change the value and trigger a re-render, you can simply call the setter function with a fixed value. This is how it looks:
setExample(newValue)
This is what you’ll do most of the time, but you also can pass an update function. This can be very useful when you have to do state updates based on the old state, like this:
setExample(prevValue => prevValue + 1)
In this example, we’ll pass a function that takes the previous value as a single argument. We can now use this value to return the new value, which will then be used in the setter. This is especially useful when incrementing or decrementing values.
Now that we are able to store data between re-renders, we’ll want to run some functions after certain events.
Using effects with useEffect
The useEffect Hook is used to run code after certain events. These events can be the mounting of a component or an update of a component. The first argument of the useEffect Hook has to be a function that will be run when the effect is triggered.
The second argument is an array that can be used to limit the events the effect should trigger on. It is optional, and when you don’t provide it, the effect runs on mount and on every update that triggers a re-render. If you provide it as an empty array, the effect runs only on mount. If you provide values in the array, the effect is limited to running only if one of the provided values changes.
There is one very important thing to mention here. If you use references to variables and functions that can change between re-renders inside your useEffect Hook, you have to include them in the dependencies. This is because otherwise, you could have a reference to stale data in your useEffect Hook. Please have a look at the following diagram for an illustration of this:

Figure 3.4 – References in useEffect
On the left side, you see what happens when you don’t include a state variable—which you access inside your useEffect Hook—in the dependencies. In this case, the state variable changes and triggers a re-render, but since your useEffect Hook has no connection to the state variable, it does not know that there was a change.
When the effect runs the next time—for example, triggered by a change in another dependency—you’ll access the stale (old) version of your state variable. This is very important to know because it can lead to very serious and hard-to-find bugs.
On the right side of the diagram, you see what happens when you include the state variable in the dependencies of the useEffect Hook. The useEffect Hook now knows when the state variable changes and updates the reference.
This is the same for functions that you write in your component. Please always keep in mind that every function that you write inside your function component that is not wrapped by a Hook will be recreated on every re-render.
That means if you want to access functions inside an useEffect Hook, you also have to add them to the dependencies. Otherwise, you’ll potentially reference stale versions of these functions. But this leads to another problem. Since the functions are recreated on every re-render, it would trigger your effect on every re-render, and this is something we don’t want most of the time.
This is where two other Hooks come into play. It is possible to memoize values and functions between re-renders, which not only solves our useEffect triggering problem but also improves performance significantly.
Improving performance with useCallback and useMemo
Both useCallback and useMemo are Hooks to memoize things between re-renders. While useCallback is provided to memoize a function, useMemo is provided to memoize a value. The API of both Hooks is very similar. You provide a function and an array of dependencies. The useCallback Hook memoizes the function without executing it, while the useMemo Hook executes the function and memoizes the return value of the function.
Always keep in mind that these hooks are for performance optimization. Especially regarding useMemo, the React documentation explicitly state that there is no semantic guarantee that memoization works in every case. This means you have to write your code in a way that works even without memoization.
You now know the most common Hooks. You’ll get to know some more in Chapter 5, Managing States and Connecting Backends. If you want to get a deeper understanding, I can recommend the official Hooks tutorial in the React documentation: https://reactjs.org/docs/hooks-reference.html.
Note
Besides the Hooks that are provided by React, you can write your own Hooks to share logic between function components. You can call all React Hooks inside your custom Hook. Please stick to the naming convention and always start your custom Hooks with use.
After this extensive look at components, Hooks, and how the React part of React Native works, it’s now time to have a deeper look at the native part. As you learned in Chapter 1, What Is React Native?, React Native has a JavaScript part and a native part.
As you learned in the first section of this chapter, React Native ships with a complete Android project and a complete iOS project. It’s time to have a look at how everything is tied together.
Connecting different platforms to JavaScript
In the first subsection of this section, we’ll focus on Android and iOS because these are the most common platforms. At the end of this section, we’ll also have a look at how to deploy to the web, Mac, Windows, and even other platforms.
First, it is important to understand that React Native provides a way of communication between JavaScript and Native. Most of the time, you don’t need to change anything on the native side because the framework itself or some community libraries cover most of the native functionalities, but nevertheless, it is important to understand how it works.
Let’s start with the UI. When you write your UI in JavaScript, React Native maps your JSX components such as View and Text to native components such as UIView and NSAttributedString on iOS or android.view and SpannableString on Android. The styling of these native components is done using a layout engine called Yoga.
While React Native provides a lot of components for Android and iOS, there are some scenarios that don’t work out of the box. A good example of this is Scalable Vector Graphics (SVG). React Native itself does not provide SVG support but React Native provides the logic it uses to connect JavaScript and native components so that everyone can create their own mappings and components.
And here comes the large React Native community into play. Nearly every feature is covered by an open source library that provides these mappings, at least for Android and iOS. That’s also the case for SVG support. There is a well-maintained library called react-native-svg, which you can find here: https://github.com/react-native-svg/react-native-svg.
This library provides a <SVG /> JavaScript component that under the hood maps to the native SVG implementations on Android and iOS.
After understanding how UI mapping works, it’s time to have a look at other communication between JavaScript and Native. The second very common use case is the transfer of data such as information about user gestures, sensor information, or other data that can be created on one side and has to be transferred to the other side.
This is done through connected methods. React Native provides a way to call native methods from JavaScript, pass callback functions to Native, and call these callbacks from Native. This is how data can be transferred in both directions.
While Android and iOS support comes out of the box, React Native is not limited to these platforms. Microsoft created open source projects called react-native-windows and react-native-macos. There are a lot of features supported by these projects to bring your app to Windows and macOS.
There is also a very useful project called react-native-web that adds web support to React Native. One important thing to understand is that even if you could use the same code base for all platforms, you might want to adapt it to best practices for the particular platform.
For example, if you are targeting the web, you might want to optimize your project for search engines, something that is not necessary for Android and iOS apps. There are multiple approaches to handling these platform-specific adjustments. The most common ones will be explained in Chapter 10, Structuring Large-Scale, Multi-Platform Projects.
While you can use Android, iOS, Windows, macOS, and the web quite easily, you are not limited to them. Basically, you could use React Native to create apps for any platform, and you would only have to write the native part on your own.
For a long time, all communication between JavaScript and Native was done asynchronously via JSON over the so-called bridge. While this works fine for most cases, it can lead to performance issues in some cases.
Therefore, the React Native core team at Facebook decided to completely rewrite the React Native Architecture. It took a couple of years, but at the time of writing this book, the new architecture is rolled out at the main Facebook app, and it also landed in the React Native open source repository to be publicly available. You will learn more about the new architecture in the next section.
Introducing the new React Native Architecture
In the last section, you learned how the connection between JavaScript and Native works in general. While this general idea does not change, the underlying implementation changes completely. Please have a look at the following diagram:

Figure 3.5 – The new React Native Architecture
The core of the new React Native Architecture is something called JavaScript Interface (JSI). It replaces the old way of communication via the bridge. While communication over the bridge was done with serialized JSON in an asynchronous way, JSI makes it possible for JavaScript to hold references to C++ host objects and invoke methods on them.
This means the JavaScript object and the C++ host object connected via JSI will be really aware of each other, which makes synchronous communication possible and makes the need for JSON serialization obsolete. This results in a huge performance boost for all React Native apps.
Another part of the rearchitecture is a new renderer called Fabric, which reduces the number of steps done to create a native UI. Also, using JSI, a shadow tree that determines what will be rendered is created directly in C++, while JavaScript also has a reference to it. This means JavaScript and Native can both interact with the shadow tree, which massively improves the responsiveness of the UI.
The second part of the rearchitecture that benefits from JSI is called Turbo Modules. It replaces Native Modules, which was the way to connect native modules and JavaScript modules. While the old Native Modules all had to be initialized at startup because JavaScript had no information about the state of the native module, JSI makes it possible to delay the initialization of the module until it is needed.
Since JavaScript can now hold a direct reference, there is also no need to work with serialized JSON. This results in a significant boost in the startup time for React Native apps.
There is also a new developer tool called CodeGen that gets introduced with the new architecture. It uses typed JavaScript to generate corresponding native interface files, to ensure compatibility between JavaScript and the native side. This is very useful when writing own libraries with native code. You will learn more about this in Chapter 10, Structuring Large-Scale, Multi-Platform Projects, in the Creating Own Libraries section.
All in all, the new architecture will bring a huge performance boost on all levels for every React Native app. It will take some time to switch an existing app to the new architecture, and it also will take some time until all common open source libraries have done the switch. But it will happen sooner or later, and it will definitely be worth the work.
Summary
To end this chapter, let’s have a short summary of what this chapter was about. You learned about what the project structure of a simple React Native app looks like and what the different files are for. You also know about class components and function components, and you understand the most important lifecycle methods and Hooks. Based on this, you can use component states and trigger code execution in both class components and function components.
You also learned how JavaScript and Native are connected in React Native apps, what the problems are with the current (old) React Native Architecture, and what the new architecture is.
Now that you have a good overview of how React Native works in general, let’s dive deeper into components, styling, storage, and navigation in the next chapter.