
For many applications, data is held in memory and accessed as if it were a three-dimensional solid; when you need to access a variable or an object, use its name—and, presto, it is available to you. When you want to move your data into or out of a file, across the network, or over the Internet, however, your data must be streamed.[1] In a stream, data flows much like bubbles in a stream of water.
Typically, the endpoint of a stream is a backing store. The backing store provides a source for the stream, like a lake provides a source for a river. Typically, the backing store is a file, but it is also possible for the backing store to be a network or web connection.
Files and directories are abstracted by classes in the .NET Framework. These classes provide methods and properties for creating, naming, manipulating, and deleting files and directories on your disk.
The .NET Framework provides both buffered and unbuffered streams, as well as classes for asynchronous I/O. With asynchronous I/O you can instruct the .NET classes to read your file; while they are busy getting the bits off the disk, your program can be working on other tasks. The asynchronous I/O tasks notify you when their work is done. The asynchronous classes are sufficiently powerful and robust that you might be able to avoid creating threads explicitly (see Chapter 20).
Streaming into and out of files is no different from streaming across the network, and the second part of this chapter will describe streaming using both TCP/IP and web protocols.
To create a stream of data, your object will typically be serialized , or written to the stream as a series of bits. You have already encountered serialization in Chapter 19. The .NET Framework provides extensive support for serialization, and the final part of this chapter walks you through the details of taking control of the serialization of your object.
Before looking at how you can get data into and out of files, let’s start by examining the support provided for file and directory manipulation.
The classes you need are in the System.IO
namespace. These include the
File
class, which represents a file on disk,
and the Directory class, which represents a
directory (also known in Windows as a
folder
).
The Directory
class exposes static methods for creating,
moving, and exploring directories. All the methods of the
Directory class are static, and therefore you can
call them all without having an instance of the class.
The DirectoryInfo
class is a similar class, but one which
has nothing but instance members (i.e., no static members at all).
DirectoryInfo derives from
FileSystemInfo, which in turn derives from
MarshalByRefObject. The
FileSystemInfo
class has a number of properties and
methods that provide information about a file or directory.
Table 21-1 lists the principal methods of the
Directory class, and Table 21-2
lists the principal methods of the DirectoryInfo
class, including important properties and methods inherited from
FileSystemInfo.
Table 21-1. Principal methods of the Directory class
Table 21-2. Principal methods and properties of the DirectoryInfo class
To explore a directory hierarchy, you need
to instantiate a
DirectoryInfo object.
The DirectoryInfo class provides methods for
getting not just the names of contained files and directories, but
also FileInfo and DirectoryInfo
objects, allowing you to dive into the hierarchical structure,
extracting subdirectories and exploring these recursively.
Instantiate a DirectoryInfo object with the name
of the directory you want to explore:
string path = Environment.GetEnvironmentVariable("SystemRoot");
DirectoryInfo dir = new DirectoryInfo(path);
Tip
Remember that the @ sign before a string creates a verbatim string literal in which it isn’t necessary to escape characters such as the backslash. This was covered in Chapter 10.
You can ask that DirectoryInfo object for
information about itself, including its name, full path, attributes,
the time it was last accessed, and so forth. To explore the
subdirectory hierarchy, ask the current directory for its list of
subdirectories:
DirectoryInfo[] directories = dir.GetDirectories();
This returns an array of DirectoryInfo objects,
each of which represents a directory. You can then recurse into the
same method, passing in each DirectoryInfo object
in turn:
foreach (DirectoryInfo newDir in directories)
{
   dirCounter++;
   ExploreDirectory(newDir);
}
The
dirCounter static
int member variable keeps track of how many
subdirectories have been found altogether. To make the display more
interesting, add a second static int member
variable indentLevel that will be incremented each
time you recurse into a subdirectory, and will be decremented when
you pop out. This will allow you to display the
subdirectories indented under
the parent directories. The complete listing is shown in Example 21-1.
Example 21-1. Recursing through subdirectories
#region Using directives

using System;
using System.Collections.Generic;
using System.IO;
using System.Text;

#endregion

namespace RecursingDirectories
{
   classTester
   {

      // static member variables to keep track of totals
      // and indentation level
      static int dirCounter = 1;
      static int indentLevel = -1; // so first push = 0

      public static void Main( )
      {
         Tester t = new Tester( );

         // choose the initial subdirectory
         string theDirectory =
            Environment.GetEnvironmentVariable( "SystemRoot" );
         // Mono and Shared Source CLI users on Linux, Unix or
         // Mac OS X should comment out the preceding two lines
         // of code and uncomment the following:
         //string theDirectory = "/tmp";

         // call the method to explore the directory,
         // displaying its access date and all
         // subdirectories

         DirectoryInfo dir = new DirectoryInfo( theDirectory );

         t.ExploreDirectory( dir );

         // completed. print the statistics
         Console.WriteLine(
            "

{0} directories found.
",
            dirCounter );
      }

      // Set it running with a directoryInfo object
      // for each directory it finds, it will call
      // itself recursively

      private void ExploreDirectory( DirectoryInfo dir )
      {
         indentLevel++;  // push a directory level

         // create indentation for subdirectories
         for ( int i = 0; i < indentLevel; i++ )
            Console.Write( "  " ); // two spaces per level

         // print the directory and the time last accessed
         Console.WriteLine( "[{0}] {1} [{2}]
",
            indentLevel, dir.Name, dir.LastAccessTime );

         // get all the directories in the current directory
         // and call this method recursively on each
         DirectoryInfo[] directories = dir.GetDirectories( );
         foreach ( DirectoryInfo newDir in directories )
         {
            dirCounter++;  // increment the counter
            ExploreDirectory( newDir );
         }
         indentLevel--; // pop a directory level
      }
   }
}

Output (excerpt):
    [2] logiscan [5/1/2001 3:06:41 PM]

    [2] miitwain [5/1/2001 3:06:41 PM]

  [1] Web [5/1/2001 3:06:41 PM]

    [2] printers [5/1/2001 3:06:41 PM]

      [3] images [5/1/2001 3:06:41 PM]

    [2] Wallpaper [5/1/2001 3:06:41 PM]

363 directories found.
Warning
You must add using
System.IO;
to the top of your file; Visual Studio 2005 doesn’t
do this automatically.
The program begins by identifying a directory
(SystemRoot, usually
C:WinNT or C:Windows) and
creating a DirectoryInfo object for that
directory. It then calls ExploreDirectory, passing
in that DirectoryInfo object.
ExploreDirectory displays information about the
directory and then retrieves all the subdirectories.
The list of all the subdirectories of the current directory is
obtained by calling GetDirectories. This returns
an array of DirectoryInfo objects.
ExploreDirectory is the recursive method; each
DirectoryInfo object is passed into
ExploreDirectory in turn. The effect is to push
recursively into each subdirectory, and then pop back out to explore
sister directories until all the subdirectories of
%SystemRoot% are displayed. When
ExploreDirectory finally returns, the calling
method prints a summary.
The
DirectoryInfo object
can also return a collection of all the files in each subdirectory
found. The GetFiles( )
method returns an array of FileInfo objects, each
of which describes a file in that directory. The
FileInfo and File objects
relate to one another, much as DirectoryInfo and
Directory do. Like the methods of
Directory, all the File methods
are static; like DirectoryInfo, all the methods of
FileInfo are instance methods.
Table 21-3 lists the principal methods of the
File class; Table 21-4 lists the important members of the
FileInfo class.
Table 21-3. Principal public static methods of the File class
Table 21-4. Methods and properties of the FileInfo class
Example 21-2 modifies Example 21-1,
adding code to get a FileInfo object for each file
in each subdirectory. That object is used to display the name of the
file, along with its length and the date and time it was last
accessed.
Example 21-2. Exploring files and subdirectories
#region Using directives

using System;
using System.Collections.Generic;
using System.IO;
using System.Text;

#endregion

namespace ExploringFilesAndSubdirectories
{
   classTester
   {

      // static member variables to keep track of totals
      // and indentation level
      static int dirCounter = 1;
      static int indentLevel = -1; // so first push = 0

      static int fileCounter = 0;

      public static void Main( )
      {
         Tester t = new Tester( );

         // choose the initial subdirectory
         string theDirectory =
            Environment.GetEnvironmentVariable( "SystemRoot" );
         // Mono and Shared Source CLI users on Linux, Unix or
         // Mac OS X should comment out the preceding two lines
         // of code and uncomment the following:
         //string theDirectory = "/tmp";

         // call the method to explore the directory,
         // displaying its access date and all
         // subdirectories
         DirectoryInfo dir = new DirectoryInfo( theDirectory );

         t.ExploreDirectory( dir );

         // completed. print the statistics

         Console.WriteLine(
            "

{0} files in {1}  directories found.
",
            fileCounter, dirCounter );
      }

      // Set it running with a directoryInfo object
      // for each directory it finds, it will call
      // itself recursively
      private void ExploreDirectory( DirectoryInfo dir )
      {
         indentLevel++;  // push a directory level

         // create indentation for subdirectories
         for ( int i = 0; i < indentLevel; i++ )
            Console.Write( "  " ); // two spaces per level

         // print the directory and the time last accessed
         Console.WriteLine( "[{0}] {1} [{2}]
",
            indentLevel, dir.Name, dir.LastAccessTime );

         // get all the files in the directory and
         // print their name, last access time, and size
         FileInfo[] filesInDir = dir.GetFiles( );
         foreach ( FileInfo file in filesInDir )
         {
            // indent once extra to put files
            // under their directory
            for ( int i = 0; i < indentLevel + 1; i++ )
               Console.Write( "  " ); // two spaces per level

            Console.WriteLine( "{0} [{1}] Size: {2} bytes",
               file.Name,
               file.LastWriteTime,
               file.Length );
            fileCounter++;
         }

         // get all the directories in the current directory
         // and call this method recursively on each
         DirectoryInfo[] directories = dir.GetDirectories( );
         foreach ( DirectoryInfo newDir in directories )
         {
            dirCounter++;  // increment the counter
            ExploreDirectory( newDir );
         }
         indentLevel--; // pop a directory level
      }
   }
}

Output (excerpt):
[0] WINDOWS [9/4/2004 8:37:13 AM]

  0.LOG [8/30/2004 8:26:05 PM] Size: 0 bytes
  AC3API.INI [1/14/1999 2:04:06 PM] Size: 231 bytes
  actsetup.log [7/1/2004 11:13:11 AM] Size: 3848 bytes
  Blue Lace 16.bmp [8/29/2002 6:00:00 AM] Size: 1272 bytes
  BOOTSTAT.DAT [8/30/2004 8:25:03 PM] Size: 2048 bytes
12630 files in 1444  directories found.
The example is initialized with the name of the SystemRoot directory. It prints information about all the files in that directory and then recursively explores all the subdirectories and all their subdirectories (your output might differ). This can take quite a while to run because the SystemRoot directory tree is rather large (1,444 subdirectories on my machine, as shown in the output).
As
you can see from Tables Table 21-3 and Table 21-4, it’s possible to use the
FileInfo class to create, copy, rename, and delete
files. The next example creates a new subdirectory, copies files in,
renames some, deletes others, and then deletes the entire directory.
Tip
To set up these examples, create a est directory and copy the media directory from WinNT or Windows into the est directory. Don’t work on files in the system root directly; when working with system files you want to be extraordinarily careful.
The first step is to create a
DirectoryInfo
object for the test directory (adjust
theDirectory appropriately if you are on a Mac OS
X, Linux, or Unix system):
string theDirectory = @"c:	estmedia";
DirectoryInfo dir = new DirectoryInfo(theDirectory);
Next, create a subdirectory within the test directory by calling
CreateSubDirectory
on the
DirectoryInfo object. You get back a new
DirectoryInfo object, representing the newly
created subdirectory:
string newDirectory = "newTest";
DirectoryInfo newSubDir =
   dir.CreateSubdirectory(newDirectory);
You can now iterate over the test and copy files to the newly created subdirectory:
FileInfo[] filesInDir = dir.GetFiles();
foreach (FileInfo file in filesInDir)
{
   string fullName = newSubDir.FullName +
      "\" + file.Name;
   file.CopyTo(fullName);
   Console.WriteLine("{0} copied to newTest",
      file.FullName);
}
Notice the syntax of the
CopyTo method. This is a method of the
FileInfo object. Pass in the full path of the new
file, including its full name and extension.
Once you’ve copied the files, you can get a list of the files in the new subdirectory and work with them directly:
filesInDir = newSubDir.GetFiles( );
foreach (FileInfo file in filesInDir)
{
Create a simple integer variable named counter and
use it to rename every other file:
if (counter++ %2 == 0)
{
    file.MoveTo(fullName + ".bak");
    Console.WriteLine("{0} renamed to {1}",
        fullName,file.FullName);
}
You rename a file by “moving” it to the same directory, but with a new name. You can, of course, move a file to a new directory with its original name, or you can move and rename at the same time.
Rename every other file, and delete the ones you don’t rename:
file.Delete( );
Console.WriteLine("{0} deleted.",
    fullName);
Once you’re done manipulating the files, you can clean up by deleting the entire subdirectory:
newSubDir.Delete(true);
The Boolean parameter determines whether this is a recursive delete.
If you pass in false, and if this directory has
subdirectories with files in it, it throws an exception.
Example 21-3 lists the source code for the complete program. Be careful when running this: when it is done, the subdirectory is gone. To see the renaming and deletions, either put a breakpoint on the last line or remove the last line.
Example 21-3. Creating a subdirectory and manipulating files
#region Using directives

using System;
using System.Collections.Generic;
using System.IO;
using System.Text;

#endregion

namespace CreatingSubdirectoryManipulatingFile
{
   classTester
   {
      public static void Main( )
      {
         // make an instance and run it
         Tester t = new Tester( );
         string theDirectory = @"c:	estmedia";
         DirectoryInfo dir = new DirectoryInfo( theDirectory );
         t.ExploreDirectory( dir );
      }

      // Set it running with a directory name
      private void ExploreDirectory( DirectoryInfo dir )
      {

         // make a new subdirectory
         string newDirectory = "newTest";
         DirectoryInfo newSubDir =
            dir.CreateSubdirectory( newDirectory );

         // get all the files in the directory and
         // copy them to the new directory
         FileInfo[] filesInDir = dir.GetFiles( );
         foreach ( FileInfo file in filesInDir )
         {
            string fullName = newSubDir.FullName +
               "\" + file.Name;
            file.CopyTo( fullName );
            Console.WriteLine( "{0} copied to newTest",
               file.FullName );
         }

         // get a collection of the files copied in
         filesInDir = newSubDir.GetFiles( );

         // delete some and rename others
         int counter = 0;
         foreach ( FileInfo file in filesInDir )
         {
            string fullName = file.FullName;

            if ( counter++ % 2 == 0 )
            {
               file.MoveTo( fullName + ".bak" );
               Console.WriteLine( "{0} renamed to {1}",
                  fullName, file.FullName );
            }
            else
            {
               file.Delete( );
               Console.WriteLine( "{0} deleted.",
                  fullName );
            }
         }

         newSubDir.Delete( true ); // delete the subdirectory
      }
   }
}

Output (excerpts):
c:	estmediaBach's Brandenburg Concerto No. 3.RMI
        copied to newTest
c:	estmediaBeethoven's 5th Symphony.RMI copied to newTest
c:	estmediaBeethoven's Fur Elise.RMI copied to newTest
c:	estmediacanyon.mid copied to newTest
c:	estmedia
ewTestBach's Brandenburg Concerto
        No. 3.RMI renamed to
c:	estmedia
ewTestBach's Brandenburg Concerto
        No. 3.RMI.bak
c:	estmedia
ewTestBeethoven's 5th Symphony.RMI deleted.
c:	estmedia
ewTestBeethoven's Fur Elise.RMI renamed to
c:	estmedia
ewTestBeethoven's Fur Elise.RMI.bak
c:	estmedia
ewTestcanyon.mid deleted.
Reading and
writin
g data is accomplished with the
Stream class. Remember
streams? This is a chapter about streams.[2]
Stream supports synchronous and asynchronous reads
and writes. The .NET Framework provides a number of classes derived
from Stream, including
FileStream, MemoryStream, and
NetworkStream. In addition, there is a
BufferedStream class that provides buffered I/O
and can be used with any of the other stream classes.
The principal classes involved with
I/O are summarized in
Table 21-5.
Table 21-5. Principal I/O classes of the .NET Framework
|
Class |
Use |
|---|---|
|
Abstract class that supports reading and writing bytes. | |
|
Read and write encoded strings and primitive datatypes to and from streams. | |
|
Provide implementations for the abstract
| |
|
For reading to and from | |
|
| |
|
A stream that adds buffering to another stream such as a
| |
|
A nonbuffered stream whose encapsulated data is directly accessible in memory, and is most useful as a temporary buffer. | |
|
A stream over a network connection. |
This
section starts by using the
basic Stream
class to perform a
binary read of a file. The term
binary
read is used to
distinguish from a text
read. If
you don’t know for certain that a file is just text,
it is safest to treat it as a stream of bytes, known as a
binary file.
The Stream class is chock-a-block with methods,
but the most important are Read(
)
,
Write( )
,
BeginRead( )
,
BeginWrite( )
, and
Flush( )
. All of these are covered in the next
few sections.
To perform a binary read, begin by creating a pair of
Stream objects, one for reading and one for
writing:
Stream inputStream = File.OpenRead(
@"C: estsource est1.cs");
Stream outputStream = File.OpenWrite(
@"C: estsource est1.bak");To open the files to read and write, use the
static
OpenRead( ) and
OpenWrite()
methods of the
File
class. The static overload of these methods
takes the path for the file as an argument, as shown previously.
Binary reads work by reading into a
buffer. A buffer is
just an array of bytes that will hold the data read by the
Read( ) method.
Pass in the buffer, the offset in the buffer at which to begin
storing the data read in, and the number of bytes to read.
InputStream.Read
reads bytes from the backing store
into the buffer and returns the total number of bytes read.
It continues reading until no more bytes remain:
while ( (bytesRead =
   inputStream.Read(buffer,0,SIZE_BUFF)) > 0 )
{
    outputStream.Write(buffer,0,bytesRead);
}
Each bufferful of bytes is written to the output file. The arguments
to Write( ) are the buffer from which to read, the
offset into that buffer at which to start reading, and the number of
bytes to write. Notice that you write the same number of bytes as you
just read.
Example 21-4 provides the complete listing.
Example 21-4. Implementing a binary read and write to a file
#region Using directives

using System;
using System.Collections.Generic;
using System.IO;
using System.Text;

#endregion

namespace ImplementingBinaryReadWriteToFile
{
   classTester
   {
      const int SizeBuff = 1024;

      public static void Main( )
      {
         // make an instance and run it
         Tester t = new Tester( );
         t.Run( );
      }

      // Set it running with a directory name
      private void Run( )
      {
         // the file to read from
         Stream inputStream = File.OpenRead(
            @"C:	estsource	est1.cs" );

         // the file to write to
         Stream outputStream = File.OpenWrite(
            @"C:	estsource	est1.bak" );

         // create a buffer to hold the bytes
         byte[] buffer = new Byte[SizeBuff];
         int bytesRead;

         // while the read method returns bytes
         // keep writing them to the output stream
         while ( ( bytesRead =
            inputStream.Read( buffer, 0, SizeBuff ) ) > 0 )
         {
            outputStream.Write( buffer, 0, bytesRead );
         }

         // tidy up before exiting
         inputStream.Close( );
         outputStream.Close( );
      }
   }
}
Tip
Before you run this program, create the C: estsource subdirectory and add a file (containing the source to this program) named test1.cs. As with previous examples, Unix, Linux, and Mac OS X readers should adjust the paths appropriately.
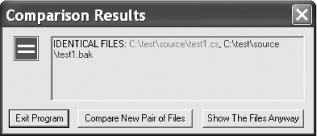
The result of running this program is that a copy of the input file (test1.cs) is made in the same directory and named test1.bak. You can compare these files using your favorite file comparison tool; they are identical, as shown in Figure 21-1.[3]
In
the
previous example, you created a buffer to read into. When you called
Read( ), a bufferful was read from disk. It might
be, however, that the operating system can be much more efficient if
it reads a larger (or smaller) number of bytes at once.
A buffered stream object creates an internal buffer, and reads bytes to and from the backing store in whatever increments it thinks are most efficient. It will still fill your buffer in the increments you dictate, but your buffer is filled from the in-memory buffer, not from the backing store. The net effect is that the input and output are more efficient and thus faster.
A
BufferedStream object
is composed around an existing Stream object that
you already have created. To use a BufferedStream,
start by creating a normal stream class as you did in Example 21-4:
Stream inputStream = File.OpenRead(
    @"C:	estsourcefolder3.cs");

Stream outputStream = File.OpenWrite(
    @"C:	estsourcefolder3.bak");
Once you have the normal stream, pass that stream object to the buffered stream’s constructor:
BufferedStream bufferedInput =
    new BufferedStream(inputStream);

BufferedStream bufferedOutput =
    new BufferedStream(outputStream);
You can then use the BufferedStream as a normal
stream, calling Read() and
Write( ) just as you did before. The operating
system handles the buffering:
while ( (bytesRead =
     bufferedInput.Read(buffer,0,SIZE_BUFF)) > 0 )
 {
     bufferedOutput.Write(buffer,0,bytesRead);
 }
Remember to flush the buffer when you want to ensure that the data is written out to the file:
bufferedOutput.Flush();
This essentially tells the in-memory buffer to flush out its contents.
Tip
Note that all streams should be closed, though the finalizer will eventually close them for you if you just let them go out of scope. In a robust program, you should always explicitly close the buffer.
Example 21-5 provides the complete listing.
Example 21-5. Implementing buffered I/O
namespace Programming_CSharp
{
   using System;
   using System.IO;

   class Tester
   {
      const int SizeBuff = 1024;

      public static void Main( )
      {
         // make an instance and run it
         Tester t = new Tester( );
         t.Run( );
      }

      // Set it running with a directory name
      private void Run( )
      {
         // create binary streams
         Stream inputStream = File.OpenRead(
            @"C:	estsourcefolder3.cs");

         Stream outputStream = File.OpenWrite(
            @"C:	estsourcefolder3.bak");

         // add buffered streams on top of the
         // binary streams
         BufferedStream bufferedInput =
            new BufferedStream(inputStream);

         BufferedStream bufferedOutput =
            new BufferedStream(outputStream);
         byte[] buffer = new Byte[SizeBuff];
         int bytesRead;

         while ( (bytesRead =
            bufferedInput.Read(buffer,0,SizeBuff)) > 0 )
         {
            bufferedOutput.Write(buffer,0,bytesRead);
         }

         bufferedOutput.Flush( );
         bufferedInput.Close( );
         bufferedOutput.Close( );
      }
   }
}
With larger files, this example should run more quickly than Example 21-4 did.
If you
know that the file you
are reading (and writing) contains nothing but text, you might want
to use the
StreamReader
and
StreamWriter
classes. These classes are designed to
make manipulation of text easier. For example, they support the
ReadLine( )
and
WriteLine( )
methods that read and write a line of
text at a time. You’ve already used
WriteLine( ) with the Console
object.
To create a StreamReader instance, start by
creating a FileInfo object and then call the
OpenText() method on that object:
FileInfo theSourceFile =
   new FileInfo (@"C:	estsource	est1.cs");

StreamReader stream = theSourceFile.OpenText( );
OpenText( ) returns a
StreamReader for the file. With the
StreamReader in hand, you can now read the file,
line by line:
do
{
    text = stream.ReadLine();
} while (text != null);
ReadLine( ) reads a line at a time until it reaches
the end of the file. The StreamReader will return
null at the end of the file.
To create the StreamWriter class, call the
StreamWriter constructor, passing in the full name
of the file you want to write to:
StreamWriter writer = new
StreamWriter(@"C:	estsourcefolder3.bak",false);
The second parameter is the Boolean argument
append
. If the file already exists,
true will cause the new data to be appended to the
end of the file, and false will cause the file to
be overwritten. In this case, pass in false,
overwriting the file if it exists.
You can now create a loop to write out the contents of each line of the old file into the new file, and while you’re at it, to print the line to the console as well:
do
{
    text = reader.ReadLine();
    writer.WriteLine(text);
    Console.WriteLine(text);
} while (text != null);
Example 21-6 provides the complete source code.
Example 21-6. Reading and writing to a text file
#region Using directives

using System;
using System.Collections.Generic;
using System.IO;
using System.Text;

#endregion

namespace ReadingWritingToTextFile
{
   classTester
   {
      public static void Main( )
      {
         // make an instance and run it
         Tester t = new Tester( );
         t.Run( );
      }

      // Set it running with a directory name
      private void Run( )
      {
         // open a file
         FileInfo theSourceFile = new FileInfo(
            @"C:	estsource	est.cs" );

         // create a text reader for that file
         StreamReader reader = theSourceFile.OpenText( );

         // create a text writer to the new file
         StreamWriter writer = new StreamWriter(
            @"C:	estsource	est.bak", false );

         // create a text variable to hold each line
         string text;

         // walk the file and read every line
         // writing both to the console
         // and to the file
         do
         {
            text = reader.ReadLine( );
            writer.WriteLine( text );
            Console.WriteLine( text );
         } while ( text != null );

         // tidy up
         reader.Close( );
         writer.Close( );
      }
   }
}
When this program is run, the contents of the original file are written both to the screen and to the new file. Notice the syntax for writing to the console:
Console.WriteLine(text);
This syntax is nearly identical to that used to write to the file:
writer.WriteLine(text);
The key difference is that the WriteLine( ) method
of Console is static, while the
WriteLine( )
method of StreamWriter, which is inherited from
TextWriter, is an instance method, and thus must
be called on an object rather than on the class itself.
All the programs you’ve looked at so far perform synchronous I/O , meaning that while your program is reading or writing, all other activity is stopped. It can take a long time (relatively speaking) to read data to or from the backing store, especially if the backing store is a slow disk or (horrors!) a source on the Internet.
With large files, or when reading or writing across the network,
you’ll want asynchronous
I/O, which allows you to begin a read and then
turn your attention to other matters while the
CLR fulfills your request. The .NET
Framework provides asynchronous I/O through the
BeginRead( ) and
BeginWrite()
methods of Stream.
The sequence is to call BeginRead() on your file
and then to go on to other, unrelated work while the read continues,
possibly in another thread. When the read completes, you are notified
via a callback method. You can then process the data that was read,
kick off another read, and then go back to your other work.
In addition to the three parameters you’ve used in
the binary read (the buffer, the offset, and how many bytes to read),
BeginRead() asks for a
delegate
and a
state
object
.
Tip
This is an instance of the more general async pattern seen throughout .NET (e.g., async stream I/O, async socket operations, async delegate invocation, etc.).
The delegate is an optional callback method, which, if provided, is
called when the data is read. The state object is also optional. In
this example, pass in null for the state object.
The state of the object is kept in the member variables of the test
class.
You are free to put any object you like in the state parameter, and you can retrieve it when you are called back. Typically (as you might guess from the name), you stash away state values that you’ll need on retrieval. The state parameter can be used by the developer to hold the state of the call (paused, pending, running, etc.).
In this example, create the buffer and the Stream
object as private member variables of the class:
public class AsynchIOTester
{
    private Stream inputStream;
    private byte[] buffer;
    const int BufferSize = 256;
In addition, create your delegate as a private member of the class:
private AsyncCallback myCallBack; // delegated method
The delegate is declared to be of type
AsyncCallback, which is what the
BeginRead() method of Stream
expects.
An AsyncCallBack delegate is declared in the
System namespace as follows:
public delegate void AsyncCallback (IAsyncResult ar);
Thus, this delegate can be associated with any method that returns
void and that takes an
IAsyncResult
interface as a parameter. The CLR
will pass in the IAsyncResult interface object at
runtime when the method is called. You only have to declare the
method:
void OnCompletedRead(IAsyncResult asyncResult)
and then hook up the delegate in the constructor:
AsynchIOTester( )
{
        //...
     myCallBack = new AsyncCallback(this.OnCompletedRead);
}
Here’s how it works, step by step. In
Main( )
, create an instance of the class and tell
it to run:
public static void Main()
{
    AsynchIOTester theApp = new AsynchIOTester();
    theApp.Run( );
}
The call to new invokes the constructor. In the
constructor, open a file and get a Stream object
back. Then allocate space in the buffer, and hook up the callback
mechanism:
AsynchIOTester()
{
    inputStream = File.OpenRead(@"C:	estsourceAskTim.txt");
    buffer = new byte[BufferSize];
    myCallBack = new AsyncCallback(this.OnCompletedRead);
}
Tip
This example needs a large text file. I’ve copied a column written by Tim O’Reilly (“Ask Tim”) from http://www.oreilly.com into a text file named AskTim.txt. I placed that in a subdirectory testsource on my C: drive. You can use any text file in any subdirectory.
In the Run()
method,
call
BeginRead( ), which causes an asynchronous read of
the file:
inputStream.BeginRead(
     buffer,             // where to put the results
     0,                  // offset
     buffer.Length,      // BufferSize
     myCallBack,         // call back delegate
     null);              // local state object
Then go on to do other work. In this case, simulate useful work by counting up to 500,000, displaying your progress every 1,000 iterations:
for (long i = 0; i < 500000; i++)
{
    if (i%1000 == 0)
    {
        Console.WriteLine("i: {0}", i);
    }
}
When the read completes, the CLR will call your callback method:
void OnCompletedRead(IAsyncResult asyncResult)
{
The first thing to do when notified that the read has completed is to
find out how many bytes were actually read. Do so by calling the
EndRead( )
method of the Stream
object, passing in the IAsyncResult interface
object passed in by the CLR:
int bytesRead = inputStream.EndRead(asyncResult);
EndRead() returns the number of bytes read. If the
number is greater than zero, you’ll convert the
buffer into a string and write it to the console, and then call
BeginRead( ) again, for another asynchronous read:
if (bytesRead > 0)
{
    String s =
    Encoding.ASCII.GetString (buffer, 0, bytesRead);
    Console.WriteLine(s);
    inputStream.BeginRead(
    buffer, 0, buffer.Length,
    myCallBack, null);
}
The effect is that you can do other work while the reads are taking place, but you can handle the read data (in this case, by outputting it to the console) each time a bufferful is ready. Example 21-7 provides the complete program.
Example 21-7. Implementing asynchronous I/O
#region Using directives

using System;
using System.Collections.Generic;
using System.IO;
using System.Text;

#endregion

namespace AsynchronousIO
{
   public classAsynchIOTester
   {
      private Stream inputStream;

      // delegated method
      private AsyncCallback myCallBack;

      // buffer to hold the read data
      private byte[] buffer;

      // the size of the buffer
      const int BufferSize = 256;

      // constructor
      AsynchIOTester( )
      {
         // open the input stream
         inputStream =
            File.OpenRead(
            @"C:	estsourceAskTim.txt" );

         // allocate a buffer
         buffer = new byte[BufferSize];

         // assign the call back
         myCallBack =
            new AsyncCallback( this.OnCompletedRead );
      }

      public static void Main( )
      {
         // create an instance of AsynchIOTester
         // which invokes the constructor
         AsynchIOTester theApp =
            new AsynchIOTester( );

         // call the instance method
         theApp.Run( );
      }

      void Run( )
      {
         inputStream.BeginRead(
            buffer,             // holds the results
            0,                  // offset
            buffer.Length,      // (BufferSize)
            myCallBack,         // call back delegate
            null );              // local state object

         // do some work while data is read
         for ( long i = 0; i < 500000; i++ )
         {
            if ( i % 1000 == 0 )
            {
               Console.WriteLine( "i: {0}", i );
            }
         }
      }

      // call back method
      void OnCompletedRead( IAsyncResult asyncResult )
      {
         int bytesRead =
            inputStream.EndRead( asyncResult );

         // if we got bytes, make them a string
         // and display them, then start up again.
         // Otherwise, we're done.
         if ( bytesRead > 0 )
         {
            String s =
               Encoding.ASCII.GetString( buffer, 0, bytesRead );
            Console.WriteLine( s );
            inputStream.BeginRead(
               buffer, 0, buffer.Length, myCallBack, null );
         }
      }
   }
}

Output (excerpt):
i: 47000
i: 48000
i: 49000
Date: January 2001
From: Dave Heisler
To: Ask Tim
Subject: Questions About O'Reilly
Dear Tim,
I've been a programmer for about ten years. I had heard of
O'Reilly books,then...
Dave,
You might be amazed at how many requests for help with
school projects I get;
i: 50000
i: 51000
i: 52000
The output reveals that the program is working on the two threads concurrently. The reads are done in the background while the other thread is counting and printing out every thousanth iteration. As the reads complete, they are printed to the console, and then you go back to counting. (I’ve shortened the listings to illustrate the output.)
In a real-world application, you might process user requests or compute values while the asynchronous I/O is busy retrieving or storing to a file or database.
Writing to a remote object on the Internet isn’t very different from writing to a file on your local machine. You might want to do this if your program needs to store its data to a file on a machine on your network, or if you are creating a program that displays information on a monitor connected to another computer on your network.
Network I/O is based on the use of streams created with sockets. Sockets are very useful for client/server applications, peer to peer (P2P), and when making remote procedure calls.
A socket is an object that represents an endpoint for communication between processes communicating across a network. Sockets can work with various protocols, including UDP and TCP. In this section, we create a TCP/IP connection between a server and a client. TCP/IP is a connection-based stream-like protocol for network communication. Connection-based means that with TCP/IP, once a connection is made, the two processes can talk with one another as if they were connected by a direct phone line.
Tip
Although TCP/IP is designed to talk across a network, you can simulate network communication by running the two processes on the same machine.
It is possible for more than one application on a given computer to be talking to various clients all at the same time (e.g., you might be running a web server, an FTP server, and a program that provides calculation support). Therefore, each application must have a unique ID so that the client can indicate which application it is looking for. That ID is known as a port . Think of the IP address as a phone number and the port as an extension.
The server instantiates a TcpListener and tells
the listener to listen for connections on a specific port. The
constructor for the TcpListener has two
parameters, an IP address and an int representing
the port on which that listener should listen.
Client applications connect to a specific IP address. For example, Yahoo’s IP address is 66.94.234.13. Clients must also connect to a specific port. All web browsers connect to port 80 by default. Port numbers range from 0 to 65,535 (e.g., 216); however, some numbers are reserved.[4]
Tip
Ports are divided into the following ranges:
0-1023: well-known ports
1024-49151: registered ports
49152-65535: dynamic and/or private ports
For a list of all the well-known and registered ports, look at http://www.iana.org/assignments/port-numbers.
Once the listener is created, call
Start() on it,
telling the listener to begin accepting network connections. When the
server is ready to start responding to calls from clients, call
AcceptSocket( )
. The thread in which
you’ve called AcceptSocket( )
blocks (waiting sadly by the phone, wringing its virtual hands,
hoping for a call).
You can imagine creating the world’s simplest listener. It waits patiently for a client to call. When it gets a call, it interacts with that client to the exclusion of all other clients. The next few clients to call will connect, but they will automatically be put on hold. While they are listening to the music and being told their call is important and will be handled in the order received, they will block in their own threads. Once the backlog (hold) queue fills, subsequent callers will get the equivalent of a busy signal. They must hang up and wait for our simple socket to finish with its current client. This model works fine for servers that take only one or two requests a week, but it doesn’t scale well for real-world applications. Most servers need to handle thousands, even tens of thousands of connections a minute!
To handle a high volume of connections, applications use asynchronous I/O to accept a call and create a socket with the connection to the client. The original listener then returns to listening, waiting for the next client. This way your application can handle many calls; each time a call is accepted, a new socket is created.
The client is unaware of this sleight of hand in which a new socket is created. As far as the client is concerned, he has connected with the IP address and port he requested. Note that the new socket establishes a connection with the client. This is quite different from UDP, which uses a connectionless protocol. With TCP/IP, once the connection is made, the client and server know how to talk with each other without having to readdress each packet.
To
create a network
server for TCP/IP streaming, start by creating a
TcpListener
object to listen to the TCP/IP port
you’ve chosen. I’ve arbitrarily
chosen port 65000 from the available port IDs:
IPAddress localAddr = IPAddress.Parse("127.0.0.1");
TcpListener tcpListener = new TcpListener(localAddr, 65000);
Once the TcpListener
object is constructed, you can ask it to start listening:
tcpListener.Start();
Now wait for a client to request a connection:
Socket socketForClient = tcpListener.AcceptSocket( );
The AcceptSocket
method of the TcpListener object returns a
Socket object that represents a
Berkeley
socket
interface
and is bound to a specific
endpoint. AcceptSocket( ) is a synchronous method
that will not return until it receives a connection request.
Tip
Because the model is widely accepted by computer vendors, Berkeley sockets simplify the task of porting existing socket-based source code from both Windows and Unix environments.
Once you have a socket you’re ready to send the file
to the client. Create a
NetworkStream
class, passing the socket into the
constructor:
NetworkStream networkStream = new NetworkStream(socketForClient);
Then create a StreamWriter object much as you did
before, except this time not on a file, but rather, on the
NetworkStream you just created:
System.IO.StreamWriter streamWriter = new
   System.IO.StreamWriter(networkStream);
When you write to this stream, the stream is sent over the network to
the client. Example 21-8 shows the entire server.
(I’ve stripped this server down to its bare
essentials. With a production server, you almost certainly would run
the request processing code in a thread, and you’d
want to enclose the logic in try blocks to handle
network problems.)
Example 21-8. Implementing a network streaming server
#region Using directives

using System;
using System.Collections.Generic;
using System.Net;
using System.Net.Sockets;
using System.Text;

#endregion

namespace NetworkStreamingServer
{
   public classNetworkIOServer
   {

      public static void Main( )
      {
         NetworkIOServer app =
            new NetworkIOServer( );
         app.Run( );
      }

      private void Run( )
      {
         // create a new TcpListener and start it up
         // listening on port 65000

         IPAddress localAddr = IPAddress.Parse( "127.0.0.1" );
         TcpListener tcpListener = new TcpListener( localAddr, 65000 );
         tcpListener.Start( );

         // keep listening until you send the file
         for ( ; ; )
         {
            // if a client connects, accept the connection
            // and return a new socket named socketForClient
            // while tcpListener keeps listening
            Socket socketForClient =
               tcpListener.AcceptSocket( );
            Console.WriteLine( "Client connected" );

            // call the helper method to send the file
            SendFileToClient( socketForClient );

            Console.WriteLine(
                  "Disconnecting from client..." );

            // clean up and go home
            socketForClient.Close( );
            Console.WriteLine( "Exiting..." );
               break;
         }
      }

      // helper method to send the file
      private void SendFileToClient(
         Socket socketForClient )
      {
         // create a network stream and a stream writer
         // on that network stream
         NetworkStream networkStream =
            new NetworkStream( socketForClient );
         System.IO.StreamWriter streamWriter =
            new System.IO.StreamWriter( networkStream );

         // create a stream reader for the file
         System.IO.StreamReader streamReader =
            new System.IO.StreamReader(
               @"C:	estsourcemyTest.txt" );

         string theString;

         // iterate through the file, sending it
         // line-by-line to the client
         do
         {
            theString = streamReader.ReadLine( );

            if ( theString != null )
            {
               Console.WriteLine(
                  "Sending {0}", theString );
               streamWriter.WriteLine( theString );
               streamWriter.Flush( );
            }
         }
         while ( theString != null );

         // tidy up
         streamReader.Close( );
         networkStream.Close( );
         streamWriter.Close( );
      }
   }
}The
client instantiates a
TcpClient
class, which represents a
TCP/IP client
connection to a host:
TcpClient socketForServer;
socketForServer = new TcpClient("localHost", 65000);
With this TcpClient, you can create a
NetworkStream
, and on that stream you can create a
StreamReader:
NetworkStream networkStream = socketForServer.GetStream();
System.IO.StreamReader streamReader =
    new System.IO.StreamReader(networkStream);
Now read the stream as long as there is data on it, outputting the results to the console:
do
{
    outputString = streamReader.ReadLine();

    if( outputString != null )
    {
        Console.WriteLine(outputString);
    }
}
while( outputString != null );
Example 21-9 is the complete client.
Example 21-9. Implementing a network streaming client
#region Using directives

using System;
using System.Collections.Generic;
using System.Net.Sockets;
using System.Text;

#endregion

namespace NetworkStreamingClient
{
   public classClient
   {

      static public void Main( string[] Args )
      {

         // create a TcpClient to talk to the server
         TcpClient socketForServer;

         try
         {
            socketForServer =
               new TcpClient( "localHost", 65000 );
         }
         catch
         {
            Console.WriteLine(
               "Failed to connect to server at {0}:65000",
                  "localhost" );
            return;
         }

         // create the Network Stream and the Stream Reader object
         NetworkStream networkStream =
               socketForServer.GetStream( );
         System.IO.StreamReader streamReader =
            new System.IO.StreamReader( networkStream );

         try
         {
            string outputString;

            // read the data from the host and display it
            do
            {
               outputString = streamReader.ReadLine( );

               if ( outputString != null )
               {
                  Console.WriteLine( outputString );
               }
            }
            while ( outputString != null );
         }
         catch
         {
            Console.WriteLine(
               "Exception reading from Server" );
         }

         // tidy up
         networkStream.Close( );
      }
   }
}
To test this, I created a simple test file named myText.txt:
This is line one
This is line two
This is line three
This is line four
Here is the output from the server and the client:
Output (Server):

Client connected
Sending This is line one
Sending This is line two
Sending This is line three
Sending This is line four
Disconnecting from client...
Exiting...
Output (Client):

This is line one
This is line two
This is line three
This is line four
Press any key to continue
Tip
If you are testing this on a single machine, run the client and
server in separate command windows or individual instances of the
development environment. You need to start the server first, or the
client will fail, saying it can’t connect. If you
aren’t running this on a single machine, you need to
replace occurrences of 127.0.0.1 and
localhost to the IP address of the machine running
the server. If you are running Windows XP Service Pack 2 with the
default settings, you will get a Windows Security Alert asking if you
want to unblock the port.
As mentioned earlier, this example doesn’t scale well. Each client demands the entire attention of the server. A server is needed that can accept the connection and then pass the connection to overlapped I/O, providing the same asynchronous solution that you used earlier for reading from a file.
To manage this, create a new server,
AsynchNetworkServer, which will nest within it a
new class, ClientHandler. When your
AsynchNetworkServer receives a client connection,
it instantiates a ClientHandler and passes the
socket to that ClientHandler instance.
The ClientHandler constructor will create a copy
of the socket and a buffer and
open a new NetworkStream on that socket. It then
uses overlapped I/O to asynchronously read and write to that socket.
For this demonstration, it simply echoes whatever text the client
sends, back to the client and also to the console.
To create the asynchronous I/O, ClientHandler
defines two delegate methods, OnReadComplete() and
OnWriteComplete(), that manages the overlapped I/O
of the strings sent by the client.
The body of the Run() method for the server is
very similar to what you saw in Example 21-8. First,
create a listener and then call Start(). Then
create a forever loop and call
AcceptSocket( )
. Once the socket is connected, instead
of handling the connection, create a new
ClientHandler and call
StartRead()
on that object.
The complete source for the server is shown in Example 21-10.
Example 21-10. Implementing an asynchronous network streaming server
#region Using directives

using System;
using System.Collections.Generic;
using System.Net;
using System.Net.Sockets;
using System.Text;

#endregion

namespace AsynchNetworkServer
{
   public class AsynchNetworkServer
   {

      class ClientHandler
      {
         private byte[] buffer;
         privateSocket socket;
         private NetworkStream networkStream;
         private AsyncCallback callbackRead;
         private AsyncCallback callbackWrite;

         public ClientHandler( Socket socketForClient )
         {
            socket = socketForClient;
            buffer = new byte[256];
            networkStream =
               new NetworkStream( socketForClient );

            callbackRead =
               new AsyncCallback( this.OnReadComplete );

            callbackWrite =
               new AsyncCallback( this.OnWriteComplete );
         }

         // begin reading the string from the client
         public void StartRead( )
         {
            networkStream.BeginRead(
               buffer, 0, buffer.Length,
               callbackRead, null );
         }

         // when called back by the read, display the string
         // and echo it back to the client
         private void OnReadComplete( IAsyncResult ar )
         {
            int bytesRead = networkStream.EndRead( ar );

            if ( bytesRead > 0 )
            {
               string s =
                  System.Text.Encoding.ASCII.GetString(
                     buffer, 0, bytesRead );
               Console.Write(
                     "Received {0} bytes from client: {1}",
                      bytesRead, s );
               networkStream.BeginWrite(
                  buffer, 0, bytesRead, callbackWrite, null );
            }
            else
            {
               Console.WriteLine( "Read connection dropped" );
               networkStream.Close( );
               socket.Close( );
               networkStream = null;
               socket = null;
            }
         }

         // after writing the string, print a message and resume reading
         private void OnWriteComplete( IAsyncResult ar )
         {
            networkStream.EndWrite( ar );
            Console.WriteLine( "Write complete" );
            networkStream.BeginRead(
               buffer, 0, buffer.Length,
               callbackRead, null );
         }
      }

      public static void Main( )
      {
         AsynchNetworkServer app =
            new AsynchNetworkServer( );
         app.Run( );
      }

      private void Run( )
      {
         // create a new TcpListener and start it up
         // listening on port 65000

         IPAddress localAddr = IPAddress.Parse( "127.0.0.1" );
         TcpListener tcpListener = new TcpListener( localAddr, 65000 );
         tcpListener.Start( );

         // keep listening until you send the file
         for ( ; ; )
         {
            // if a client connects, accept the connection
            // and return a new socket named socketForClient
            // while tcpListener keeps listening
            Socket socketForClient =
               tcpListener.AcceptSocket( );
            Console.WriteLine( "Client connected" );
            ClientHandler handler =
               new ClientHandler( socketForClient );
            handler.StartRead( );
         }
      }
   }
}
The server starts up and listens to port 65000. If a client connects,
the server will instantiate a ClientHandler that
will manage the I/O with the client while the server listens for the
next client.
Tip
In this example, you write the string received from the client to the
console in
OnReadComplete( )
and
OnWriteComplete( ). Writing to the console can
block your thread until the write completes. In a production program,
you don’t want to take any blocking action in these
methods because you are using a pooled thread. If you block in
OnReadComplete( ) or
OnWriteComplete(), you may cause more threads to
be added to the thread pool, which is inefficient and will harm
performance and scalability.
The client code is very simple. The client creates a
tcpSocket for the port on which the server will
listen (65000) and creates a NetworkStream object
for that socket. It then writes a message to that stream and flushes
the buffer. The client creates a StreamReader to
read on that stream and writes whatever it receives to the console.
The complete source for the client is shown in Example 21-11.
Example 21-11. Implementing a client for asynchronous network I/O
#region Using directives

using System;
using System.Collections.Generic;
using System.Net.Sockets;
using System.Text;

#endregion

namespace AsynchNetworkClient
{
   public class AsynchNetworkClient
   {
      privateNetworkStream streamToServer;

      static public int Main( )
      {

         AsynchNetworkClient client =
            new AsynchNetworkClient( );
         return client.Run( );
      }

      AsynchNetworkClient( )
      {
         string serverName = "localhost";
         Console.WriteLine( "Connecting to {0}", serverName );
         TcpClient tcpSocket = new TcpClient( serverName, 65000 );
         streamToServer = tcpSocket.GetStream( );
      }

      private int Run( )
      {
         string message = "Hello Programming C#";
         Console.WriteLine(
             "Sending {0} to server.", message );

         // create a streamWriter and use it to
         // write a string to the server
         System.IO.StreamWriter writer =
            new System.IO.StreamWriter( streamToServer );
         writer.WriteLine( message );
         writer.Flush( );

         // Read response
         System.IO.StreamReader reader =
            new System.IO.StreamReader( streamToServer );
         string strResponse = reader.ReadLine( );
         Console.WriteLine( "Received: {0}", strResponse );
         streamToServer.Close( );
         return 0;
      }
   }
}

Output (Server):
Client connected
Received 22 bytes from client: Hello Programming C#
Write complete
Read connection dropped

Output (Client):
Connecting to localhost
Sending Hello Programming C# to server.
Received: Hello Programming C#
In this example, the network server doesn’t block
while it is handling client connections, but rather, it delegates the
management of those connections to instances of
ClientHandler. Clients should not experience a
delay waiting for the server to handle their connections.
You can now combine the skills learned for asynchronous file reads with asynchronous network streaming, to produce a program that serves a file to a client on demand.
Your server will begin with an asynchronous read on the socket, waiting to get a filename from the client. Once you have the filename, you can kick off an asynchronous read of that file on the server. As each bufferful of the file becomes available, you can begin an asynchronous write back to the client. When the asynchronous write to the client finishes, you can kick off another read of the file; in this way you ping-pong back and forth, filling the buffer from the file and writing the buffer out to the client. The client need do nothing but read the stream from the server. In the next example, the client will write the contents of the file to the console, but you could easily begin an asynchronous write to a new file on the client, thereby creating a network-based file copy program.
The structure of the server isn’t unlike that shown
in Example 21-10. Once again you will create a
ClientHandler class, but this time add an
AsyncCallBack named
myFileCallBack, which you initialize in the
constructor along with the callbacks for the network read and write:
myFileCallBack =
   new AsyncCallback(this.OnFileCompletedRead);

callbackRead =
   new AsyncCallback(this.OnReadComplete);

callbackWrite =
   new AsyncCallback(this.OnWriteComplete);
The Run( )
function of the outer class, now named
AsynchNetworkFileServer, is unchanged. Once again
you create and start the TcpListener class as well
as create a forever loop in which you call
AcceptSocket( ). If you have a socket, instantiate
the ClientHandler and call
StartRead( )
. As in the previous example,
StartRead( ) kicks off a
BeginRead(), passing in the buffer and the
delegate to OnReadComplete.
When the read from the network stream completes, your delegated
method OnReadComplete() is called and it retrieves
the filename from the buffer. If text is returned,
OnReadComplete( ) retrieves a string from the
buffer using the static
System.Text.Encoding.ASCII.GetString( ) method:
if( bytesRead > 0 )
{
   string fileName =
      System.Text.Encoding.ASCII.GetString(
      buffer, 0, bytesRead);
You now have a filename; with that, you can open a stream to the file and use the exact same asynchronous file read used in Example 21-7:
inputStream =
   File.OpenRead(fileName);

inputStream.BeginRead(
   buffer,             // holds the results
   0,                  // offset
   buffer.Length,      // Buffer Size
   myFileCallBack,     // call back delegate
   null);              // local state object
This read of the file has its own callback that will be invoked when the input stream has read a bufferful from the file on the server disk drive.
Tip
As noted earlier, you normally shouldn’t take any
action in an overlapped I/O method that might block the thread for
any appreciable time. The call to open the file and begin reading it
is normally pushed off to a helper thread, instead of doing this work
in OnReadComplete( ). It has been simplified for
this example to avoid distracting from the issues at hand.
When the buffer is full, OnFileCompletedRead() is
called, which checks to see if any bytes were read from the file. If
so, it begins an asynchronous write to the network:
if (bytesRead > 0)
{
   // write it out to the client
   networkStream.BeginWrite(
      buffer, 0, bytesRead, callbackWrite, null);
}
If OnFileCompletedRead was called and no bytes
were read, this signifies that the entire file has been sent. The
server reacts by closing the NetworkStream and
socket, thus letting the client know that the transaction is
complete:
networkStream.Close();
socket.Close();
networkStream = null;
socket = null;
When the network write completes, the
OnWriteComplete( ) method is called, and this kicks
off another read from the file:
private void OnWriteComplete( IAsyncResult ar )
{
   networkStream.EndWrite(ar);
   Console.WriteLine( "Write complete");

   inputStream.BeginRead(
      buffer,             // holds the results
      0,                  // offset
      buffer.Length,      // (BufferSize)
      myFileCallBack,     // call back delegate
      null);              // local state object

}
The cycle begins again with another read of the file, and the cycle continues until the file has been completely read and transmitted to the client. The client code simply writes a filename to the network stream to kick off the file read:
string message = @"C:	estsourceAskTim.txt";
System.IO.StreamWriter writer =
    new System.IO.StreamWriter(streamToServer);
 writer.Write(message);
 writer.Flush( );
The client then begins a loop, reading from the network stream until
no bytes are sent by the server. When the server is done, the network
stream is closed. Start by initializing a Boolean value to
false and creating a buffer to hold the bytes sent
by the server:
bool fQuit = false;
while (!fQuit)
{
   char[] buffer = new char[BufferSize];
You are now ready to create a new StreamReader
from the NetworkStream member variable
streamToServer:
System.IO.StreamReader reader =
   new System.IO.StreamReader(streamToServer);
The call to Read( ) takes three parameters: the
buffer, the offset at which to begin reading, and the size of the
buffer:
int bytesRead = reader.Read(buffer,0, BufferSize);
Check to see if the Read() returned any bytes; if
not, you are done and you can set the Boolean value
fQuit to true, causing the loop
to terminate:
if (bytesRead == 0)
   fQuit = true;
If you did receive bytes, you can write them to the console, or write them to a file, or do whatever it is you will do with the values sent from the server:
   else
   {
      string theString = new String(buffer);
      Console.WriteLine(theString);
   }
}
Once you break out of the loop, close the
NetworkStream:
streamToServer.Close();
The complete annotated source for the server is shown in Example 21-12, with the client following in Example 21-13.
Example 21-12. Implementing an asynchronous network file server
#region Using directives

using System;
using System.Collections.Generic;
using System.IO;
using System.Net;
using System.Net.Sockets;
using System.Text;

#endregion

namespace AsynchNetworkFileServer
{
   public class AsynchNetworkFileServer
   {

      class ClientHandler
      {
         private const int BufferSize = 256;
         private byte[] buffer;
         privateSocket socket;
         private NetworkStream networkStream;
         private Stream inputStream;
         private AsyncCallback callbackRead;
         private AsyncCallback callbackWrite;
         private AsyncCallback myFileCallBack;

         // constructor
         public ClientHandler(
            Socket socketForClient )
         {
            // initialize member variable
            socket = socketForClient;

            // initialize buffer to hold
            // contents of file
            buffer = new byte[256];

            // create the network stream
            networkStream =
               new NetworkStream( socketForClient );

            // set the file callback for reading
            // the file
            myFileCallBack =
               new AsyncCallback( this.OnFileCompletedRead );

            // set the callback for reading from the
            // network stream
            callbackRead =
               new AsyncCallback( this.OnReadComplete );

            // set the callback for writing to the
            // network stream
            callbackWrite =
               new AsyncCallback( this.OnWriteComplete );
         }

         // begin reading the string from the client
         public void StartRead( )
         {
            // read from the network
            // get a filename
            networkStream.BeginRead(
               buffer, 0, buffer.Length,
               callbackRead, null );
         }

         // when called back by the read, display the string
         // and echo it back to the client
         private void OnReadComplete( IAsyncResult ar )
         {
            int bytesRead = networkStream.EndRead( ar );

            // if you got a string
            if ( bytesRead > 0 )
            {
               // turn the string to a file name
               string fileName =
                  System.Text.Encoding.ASCII.GetString(
                  buffer, 0, bytesRead );

               // update the console
               Console.Write(
                  "Opening file {0}", fileName );

               // open the file input stream
               inputStream =
                  File.OpenRead( fileName );

               // begin reading the file
               inputStream.BeginRead(
                  buffer,             // holds the results
                  0,                  // offset
                  buffer.Length,      // BufferSize
                  myFileCallBack,     // call back delegate
                  null );              // local state object

            }
            else
            {
               Console.WriteLine( "Read connection dropped" );
               networkStream.Close( );
               socket.Close( );
               networkStream = null;
               socket = null;
            }
         }

         // when you have a bufferful of the file
         void OnFileCompletedRead( IAsyncResult asyncResult )
         {
            int bytesRead =
               inputStream.EndRead( asyncResult );

            // if you read some file
            if ( bytesRead > 0 )
            {
               // write it out to the client
               networkStream.BeginWrite(
                  buffer, 0, bytesRead, callbackWrite, null );
            }
            else
            {
               Console.WriteLine( "Finished." );
               networkStream.Close( );
               socket.Close( );
               networkStream = null;
               socket = null;
            }
         }

         // after writing the string, get more of the file
         private void OnWriteComplete( IAsyncResult ar )
         {
            networkStream.EndWrite( ar );
            Console.WriteLine( "Write complete" );

            // begin reading more of the file
            inputStream.BeginRead(
               buffer,             // holds the results
               0,                  // offset
               buffer.Length,      // (BufferSize)
               myFileCallBack,         // call back delegate
               null );              // local state object
         }
      }

      public static void Main( )
      {
         AsynchNetworkFileServer app =
            new AsynchNetworkFileServer( );
         app.Run( );
      }

      private void Run( )
      {
         // create a new TcpListener and start it up
         // listening on port 65000

         IPAddress localAddr = IPAddress.Parse( "127.0.0.1" );
         TcpListener tcpListener = new TcpListener( localAddr, 65000 );
         tcpListener.Start( );

         // keep listening until you send the file
         for ( ; ; )
         {
            // if a client connects, accept the connection
            // and return a new socket named socketForClient
            // while tcpListener keeps listening
            Socket socketForClient =
               tcpListener.AcceptSocket( );
            if ( socketForClient.Connected )
            {
               Console.WriteLine( "Client connected" );
               ClientHandler handler =
                  new ClientHandler( socketForClient );
               handler.StartRead( );
            }
         }
      }
   }

}
Example 21-13. Implementing a client for an asynchronous network file server
using System;
using System.Net.Sockets;
using System.Threading;
using System.Text;

public class AsynchNetworkClient
{
   private const int BufferSize = 256;
   private NetworkStream   streamToServer;

   static public int Main( )
   {

      AsynchNetworkClient client =
         new AsynchNetworkClient( );
      return client.Run( );
   }

   AsynchNetworkClient( )
   {
      string serverName = "localhost";
      Console.WriteLine("Connecting to {0}", serverName);
      TcpClient tcpSocket = new TcpClient(serverName, 65000);
      streamToServer = tcpSocket.GetStream( );
   }

   private int Run( )
   {
      string message = @"C:	estsourceAskTim.txt";
      Console.Write(
         "Sending {0} to server.", message);

      // create a streamWriter and use it to
      // write a string to the server
      System.IO.StreamWriter writer =
         new System.IO.StreamWriter(streamToServer);
      writer.Write(message);
      writer.Flush( );

      bool fQuit = false;

      // while there is data coming
      // from the server, keep reading
      while (!fQuit)
      {
         // buffer to hold the response
         char[] buffer = new char[BufferSize];

         // Read response
         System.IO.StreamReader reader =
            new System.IO.StreamReader(streamToServer);

         // see how many bytes are
         // retrieved to the buffer
         int bytesRead =
            reader.Read(buffer,0,BufferSize);
         if (bytesRead == 0)  // none? quite
            fQuit = true;
         else                 // got some?
         {
            // display it as a string
            string theString = new String(buffer);
            Console.WriteLine(theString);
         }
      }
      streamToServer.Close( ); // tidy up
      return 0;
   }
}
By combining the asynchronous file read with the asynchronous network read, you have created a scalable application that can handle requests from a number of clients.
Instead of reading from a stream provided by a custom server, you can just as easily read from any web page on the Internet.
A WebRequest
is an object that requests a resource
identified by a
URI such as the URL for a web page.
You can use a WebRequest object to create a
WebResponse
object that will encapsulate the object
pointed to by the URI. That is, you can call
GetResponse( )
on your WebRequest
object to get access to the object pointed to by the URI. What is
returned is encapsulated in a WebResponse object.
You can then ask that WebResponse object for a
Stream object by calling
GetResponseStream().
GetResponseStream( ) returns a stream that
encapsulates the contents of the web object (e.g., a stream with the
web page).
The next example retrieves the contents of a web page as a stream. To
get a web page, you’ll want to use
HttpWebRequest.
HttpWebRequest
derives from WebRequest and provides additional
support for interacting with the HTTP protocol.
To create the HttpWebRequest, cast the
WebRequest returned from the static
Create() method of the
WebRequestFactory
:
HttpWebRequest webRequest =
    (HttpWebRequest) WebRequest.Create
    ("http://www.libertyassociates.com/book_edit.htm");
Create( )
is a static method of WebRequest. When you pass in
a URI, an instance of HttpWebRequest is created.
Tip
The method is overloaded on the type of the parameter. It returns
different derived types depending on what is passed in. For example,
if you pass in a URI, an object of type
HttpWebRequest is created. The return type,
however, is WebRequest, and so you must cast the
returned value to HttpWebRequest.
Creating the HttpWebRequest establishes a
connection to a page on your web site. What you get back from the
host is encapsulated in an
HttpWebResponse
object, which is an HTTP
protocol-specific subclass of the more general
WebResponse class:
HttpWebResponse webResponse =
    (HttpWebResponse) webRequest.GetResponse();
You can now open a StreamReader on that page by
calling the
GetResponseStream( )
method of the
WebResponse
object:
StreamReader streamReader = new StreamReader(
    webResponse.GetResponseStream(), Encoding.ASCII);
You can read from that stream exactly as you read from the network stream. Example 21-14 shows the complete listing.
Example 21-14. Reading a web page as an HTML stream
#region Using directives

using System;
using System.Collections.Generic;
using System.IO;
using System.Net;
using System.Net.Sockets;
using System.Text;

#endregion

namespace ReadingWebPageAsHTML
{
   public classClient
   {

      static public void Main( string[] Args )
      {

         // create a webRequest for a particular page
         HttpWebRequest webRequest =
            ( HttpWebRequest ) WebRequest.Create
            ( "http://www.libertyassociates.com/");

         // ask the web request for a webResponse encapsulating
         // that page
         HttpWebResponse webResponse =
            ( HttpWebResponse ) webRequest.GetResponse( );

         // get the streamReader from the response
         StreamReader streamReader = new StreamReader(
            webResponse.GetResponseStream( ), Encoding.ASCII );

         try
         {
            string outputString;
            outputString = streamReader.ReadToEnd( );
            Console.WriteLine( outputString );
         }
         catch
         {
            Console.WriteLine( "Exception reading from web page" );
         }
         streamReader.Close( );
      }
   }
}

Output (excerpt):
<html>
<head>
<title>Liberty Associates</title>
<meta http-equiv="Content-Type" content="text/html; charset=iso-8859-1">
<script language="JavaScript">
<!--
isNS=(navigator.appName=="Netscape");
activeMenu="";
activeIndex=-1;
activeImg="";

window.onError = null;

function setImage(imgName,index) {
 if(activeImg==imgName)
   return true;
 document.images[imgName].src = rolloverImg[index].src;
 return true;
}

rolloverImg=new Array( );
The output shows that what is sent through the stream is the HTML of the page you requested. You might use this capability for screen scraping : reading a page from a site into a buffer and then extracting the information you need.
When an object is streamed to disk, its various member data must be serialized—that is, written out to the stream as a series of bytes. The object will also be serialized when stored in a database or when marshaled across a context, app domain, process, or machine boundary.
The CLR provides support for serializing an
object
graph—an
object and all the member data of that object. As noted in Chapter 19, by default, types aren’t
serializable. To be able to serialize an object, you must explicitly
mark it with the [Serializable] attribute.
The CLR will do the work of serializing your object for you. Because the CLR knows how to serialize all the primitive types, if your object consists of nothing but primitive types (all your member data consists of integers, longs, strings, etc.), you’re all set. If your object consists of other user-defined types (classes), you must ensure that these types are also serializable. The CLR will try to serialize each object contained by your object (and all their contained objects as well), but these objects themselves must be either primitive types or serializable, or else they will not be serialized.
This was also evident in Chapter 19 when you
marshaled a Shape object that contained a
Point object as member data. The
Point object in turn consisted of primitive data.
To serialize (and thus marshal) the Shape object,
its constituent member, the Point object, also had
to be marked as serializable.
Tip
When an object is
marshaled, either by value or by
reference, it must be serialized. The difference is only whether a
copy is made or a proxy is provided to the client. Objects marked
with the [Serializable] attribute are marshaled by
value; those that derive from MarshalByRefObject
are marshaled by reference, but both are serialized. See Chapter 19 for more information.
When data is serialized, it is eventually read, by either the same program or another program on the same or a different computer. In any case, the code reading the data expects that data to be in a particular format. Most of the time in a .NET application, the expected format is either native binary format or SOAP.
Tip
SOAP is a simple, lightweight, XML-based protocol for exchanging information across the Web. SOAP is highly modular and very extensible. It also leverages existing Internet technologies, such as HTTP and SMTP.
When data is serialized, the format of the serialization is
determined by the formatter you apply. In Chapter 19, you used formatters with channels when
communicating with a remote object. Formatter classes implement the
interface IFormatter
; you are also free to create your own
formatter, though very few programmers will ever need or want to! The
CLR provides both a
SoapFormatter
for use with web services and a
BinaryFormatter
that is useful for fast local storage or remoting.
You can instantiate these objects with their default constructors:
BinaryFormatter binaryFormatter =
  new BinaryFormatter( );
Once you have an instance of a formatter, you can invoke its
Serialize( )
method, passing in a stream and an
object to serialize. You’ll see how this is done in
the next example.
To see serialization at work, you need a sample
class that you can serialize and then deserialize. You can start by
creating a class named SumOf.
SumOf has three member variables:
private int startNumber = 1;
private int endNumber;
private int[] theSums;
The member array theSums represents the value of
the sums of all the numbers from startNumber
through endNumber. Thus, if
startNumber is 1 and
endNumber is 10, the array will
have the values:
1,3,6,10,15,21,28,36,45,55
Each value is the sum of the previous value plus the next in the
series. Thus if the series is 1,2,3,4, the first
value in theSums will be 1. The
second value is the previous value (1) plus the
next in the series (2); thus,
theSums[1] will hold the value
3. Likewise, the third value is the previous value
(3) plus the next in the series, so
theSums[2] is 6. Finally, the
fourth value in theSums is the previous value
(6) plus the next in the series
(4), for a value of 10.
The constructor for the SumOf object takes two
integers: the starting number and the ending number. It assigns these
to the local values and then calls a helper function to compute the
contents of the array:
public SumOf(int start, int end)
{
    startNumber = start;
    endNumber = end;
    ComputeSums( );
The ComputeSums helper function fills in the
contents of the array by computing the sums in the series from
startNumber through endNumber:
private void ComputeSums()
{
    int count = endNumber - startNumber + 1;
    theSums = new int[count];
    theSums[0] = startNumber;
    for (int i=1,j=startNumber + 1;i<count;i++,j++)
    {
        theSums[i] =  j + theSums[i-1];
    }
}
You can display the contents of the array at any time by using a
foreach loop:
private void DisplaySums()
{
    foreach(int i in theSums)
    {
        Console.WriteLine("{0}, ",i);
    }
}Now, mark the class as eligible for
serialization with the
[Serializable] attribute:
[Serializable]
class SumOf
To invoke serialization, you first need a
fileStream object into which
you’ll serialize the SumOf
object:
FileStream fileStream =
   new FileStream("DoSum.out",FileMode.Create);
You are now ready to call the formatter’s
Serialize( ) method, passing in the stream and the
object to serialize. Because this is done in a method of
SumOf, you can pass in the this
object, which points to the current object:
binaryFormatter.Serialize(fileStream,this);
This serializes the SumOf object to disk.
To
reconstitute the object, open the file
and ask a binary formatter to DeSerialize it:
public static SumOf DeSerialize()
                     {
                     FileStream fileStream =
                     new FileStream("DoSum.out",FileMode.Open);
                     BinaryFormatter binaryFormatter =
                     new BinaryFormatter( );
                     SumOf retVal = (SumOf) binaryFormatter.Deserialize(fileStream);
                     fileStream.Close( );
                     return retVal;
                     }
To make sure all this works, first instantiate a new object of type
SumOf and tell it to serialize itself. Then create
a new instance of type SumOf by calling the static
deserializer and asking it to display its values:
public static void Main()
{
    Console.WriteLine("Creating first one with new...");
    SumOf app = new SumOf(1,10);

    Console.WriteLine(
       "Creating second one with deserialize...");
    SumOf newInstance = SumOf.DeSerialize( );
    newInstance.DisplaySums( );
}
Example 21-15 provides the complete source code to illustrate serialization and deserialization.
Example 21-15. Serializing and deserializing an object
#region Using directives

using System;
using System.Collections.Generic;
using System.IO;
using System.Runtime.Serialization;
using System.Runtime.Serialization.Formatters.Binary;
using System.Text;

#endregion

namespace SerializingDeserialingAnObject
{
   [Serializable]
   class SumOf
   {
      private int startNumber = 1;
      private int endNumber;
      private int[] theSums;

      public static void Main( )
      {
         Console.WriteLine( "Creating first one with new..." );
         SumOf app = new SumOf( 1, 10 );

         Console.WriteLine( "Creating second one with deserialize..." );
         SumOf newInstance = SumOf.DeSerialize( );
         newInstance.DisplaySums( );
      }

      public SumOf( int start, int end )
      {
         startNumber = start;
         endNumber = end;
         ComputeSums( );
         DisplaySums( );
         Serialize( );
      }

      private void ComputeSums( )
      {
         int count = endNumber - startNumber + 1;
         theSums = new int[count];
         theSums[0] = startNumber;
         for ( int i = 1, j = startNumber + 1; i < count; i++, j++ )
         {
            theSums[i] = j + theSums[i - 1];
         }
      }

      private void DisplaySums( )
      {
         foreach ( int i in theSums )
         {
            Console.WriteLine( "{0}, ", i );
         }
      }

      private void Serialize( )
      {
         Console.Write( "Serializing..." );
         // create a file stream to write the file
         FileStream fileStream =
            new FileStream( "DoSum.out", FileMode.Create );
         // use the CLR binary formatter
         BinaryFormatter binaryFormatter =
            new BinaryFormatter( );
         // serialize to disk
         binaryFormatter.Serialize( fileStream, this );
         Console.WriteLine( "...completed" );
         fileStream.Close( );
      }

      public static SumOf DeSerialize( )
      {
         FileStream fileStream =
           new FileStream( "DoSum.out", FileMode.Open );
         BinaryFormatter binaryFormatter =
           new BinaryFormatter( );
         SumOf retVal = ( SumOf ) binaryFormatter.Deserialize( fileStream );
         fileStream.Close( );
         return retVal;
      }
   }
}

Output:
Creating first one with new...
1,
3,
6,
10,
15,
21,
28,
36,
45,
55,
Serializing......completed
Creating second one with deserialize...
1,
3,
6,
10,
15,
21,
28,
36,
45,
55,
The output shows that the object was created, displayed, and then serialized. The object was then deserialized and output again, with no loss of data.
In some ways, the approach to serialization demonstrated in Example 21-15 is very wasteful. Because you can compute the contents of the array given its starting and ending numbers, there really is no reason to store its elements to disk. Although the operation might be inexpensive with a small array, it could become costly with a very large one.
You can tell the serializer not to serialize some data by marking it
with the
[NonSerialized]
attribute:
[NonSerialized] private int[] theSums;
If you don’t serialize the array, however, the object you create will not be correct when you deserialize it. The array will be empty. Remember, when you deserialize the object, you simply read it up from its serialized form; no methods are run.
To fix the object before you return it to the caller, implement the
IDeserializationCallback
interface:
[Serializable]
class SumOf : IDeserializationCallback
Also implement the one method of this interface:
OnDeserialization( )
. The CLR promises that if you
implement this interface, your class’s
OnDeserialization( ) method will be called when the
entire object graph has been deserialized. This is just what you
want: the CLR will reconstitute what you’ve
serialized, and then you have the opportunity to fix up the parts
that were not serialized.
This implementation can be very simple. Just ask the object to recompute the series:
public virtual void OnDeserialization (Object sender)
{
    ComputeSums( );
}
This is a classic space/time trade-off; by not serializing the array,
you may make deserialization somewhat slower (because you must take
the time to recompute the array), and you make the file somewhat
smaller. To see if not serializing the array had any effect, I ran
the program with the digits 1 to 5,000. Before setting
[NonSerialized] on the array, the serialized file
was 20K. After setting [NonSerialized], the file
was 1K. Not bad. Example 21-16 shows the source code
using the digits 1 to 5 as input (to simplify the output).
Example 21-16. Working with a nonserialized object
#region Using directives

using System;
using System.Collections.Generic;
using System.IO;
using System.Runtime.Serialization;
using System.Runtime.Serialization.Formatters.Binary;
using System.Text;

#endregion

namespace WorkingWithNonSerializedObject
{
   [Serializable]
   class SumOf : IDeserializationCallback
   {
      private int startNumber = 1;
      private int endNumber;
      [NonSerialized]
      private int[] theSums;

      public static void Main( )
      {Console.WriteLine("Creating first one with new...");
         SumOf app = new SumOf(1,5);

         Console.WriteLine("Creating second one with deserialize...");
         SumOf newInstance = SumOf.DeSerialize( );
         newInstance.DisplaySums( );
      }

      public SumOf(int start, int end)
      {
         startNumber = start;
         endNumber = end;
         ComputeSums( );
         DisplaySums( );
         Serialize( );
      }

      private void ComputeSums( )
      {
         int count = endNumber - startNumber + 1;
         theSums = new int[count];
         theSums[0] = startNumber;
         for (int i=1,j=startNumber + 1;i<count;i++,j++)
         {
            theSums[i] =  j + theSums[i-1];
         }
      }

      private void DisplaySums( )
      {
         foreach(int i in theSums)
         {
            Console.WriteLine("{0}, ",i);
         }
      }

      private void Serialize( )
      {
         Console.Write("Serializing...");
         // create a file stream to write the file
         FileStream fileStream =
            new FileStream("DoSum.out",FileMode.Create);
         // use the CLR binary formatter
         BinaryFormatter binaryFormatter =
            new BinaryFormatter( );
         // serialize to disk
         binaryFormatter.Serialize(fileStream,this);
         Console.WriteLine("...completed");
         fileStream.Close( );
      }

      public static SumOf DeSerialize( )
      {
         FileStream fileStream =
           new FileStream("DoSum.out",FileMode.Open);
         BinaryFormatter binaryFormatter =
           new BinaryFormatter( );
         SumOf retVal = (SumOf) binaryFormatter.Deserialize(fileStream);
         fileStream.Close( );
         return retVal;
      }

      // fix up the nonserialized data

      public virtual void OnDeserialization
         (Object sender)
      {
         ComputeSums( );
      }
   }
}

Output:
Creating first one with new...
1,
3,
6,
10,
15,
Serializing......completed
Creating second one with deserialize...
1,
3,
6,
10,
15,
You can see in the output that the data was successfully serialized to disk and then reconstituted by deserialization. The trade-off of disk storage space versus time doesn’t make a lot of sense with five values, but it makes a great deal of sense with five million values.
So far you’ve streamed your data to disk for storage and across the network for easy communication with distant programs. There is one other time you might create a stream: to store permanent configuration and status data on a per-user basis. For this purpose, the .NET Framework offers isolated storage.
The .NET CLR provides
isolated storage to allow the
application developer to store data on a
per-user basis. Isolated storage provides much
of the functionality of traditional Windows .ini
files or the more recent HKEY_CURRENT_USER key in
the Windows Registry.
Applications save data to a unique data compartment associated with the application. The CLR implements the data compartment with a data store, which is typically a directory on the filesystem.
Administrators are free to limit how much isolated storage individual applications can use. They can also use security so that less-trusted code can’t call more highly trusted code to write to isolated storage.
What is important about isolated storage is that the CLR provides a standard place to store your application’s data, but it doesn’t impose (or support) any particular layout or syntax for that data. In short, you can store anything you like in isolated storage.
Typically, you will store text, often in the form of name-value pairs. Isolated storage is a good mechanism for saving user configuration information such as login name, the position of various windows and widgets, and other application-specific, user-specific information. The data is stored in a separate file for each user, but the files can be isolated even further by distinguishing among different aspects of the identity of the code (by assembly or by originating application domain).
Using isolated storage is fairly straightforward. To write to
isolated storage, create an instance of an
IsolatedStorageFileStream, which you initialize
with a filename and a file mode (create, append, etc.).
IsolatedStorageFileStream configFile =
    new IsolatedStorageFileStream
    ("Tester.cfg",FileMode.Create);
Now create a StreamWriter on that file:
StreamWriter writer =
    new StreamWriter(configFile);
Then write to that stream as you would to any other. Example 21-17 illustrates.
Example 21-17. Writing to isolated storage
#region Using directives

using System;
using System.Collections.Generic;
using System.IO;
using System.IO.IsolatedStorage;
using System.Text;

#endregion

namespace WritingToIsolatedStorage
{
   public classTester
   {

      public static void Main( )
      {
         Tester app = new Tester( );
         app.Run( );
      }

      private void Run( )
      {
         // create the configuration file stream
         IsolatedStorageFileStream configFile =
             new IsolatedStorageFileStream
             ( "Tester.cfg", FileMode.Create );

         // create a writer to write to the stream
         StreamWriter writer =
             new StreamWriter( configFile );

         // write some data to the config. file
         String output;
         System.DateTime currentTime = System.DateTime.Now;
         output = "Last access: " + currentTime.ToString( );
         writer.WriteLine( output );
         output = "Last position = 27,35";
         writer.WriteLine( output );

         // flush the buffer and clean up
         writer.Close( );
         configFile.Close( );
      }
   }
}
After running this code, search your hard disk for Tester.cfg. On my machine, this file is found in:
C:Documents and SettingsJesseLocal SettingsApplication Data
IsolatedStoragemipjwcsz.iir2hzvpjcc.p0yStrongName.
mwoxzllzqpx3u0taclp1dti11kpddwyoUrl.a2f4v2g3ytucslmvlpt2wmdxhrhqg1pz
Files
You can read this file with Notepad if what you’ve written is just text:
Last access: 5/2/2001 10:00:57 AM
Last position = 27,35
Or, you can access this data programmatically. To do so, reopen the file:
IsolatedStorageFileStream configFile =
    new IsolatedStorageFileStream
    ("Tester.cfg",FileMode.Open);
Create a StreamReader object:
StreamReader reader =
    new StreamReader(configFile);
Use the standard stream idiom to read through the file:
string theEntry;
do
{
    theEntry = reader.ReadLine( );
    Console.WriteLine(theEntry);
} while (theEntry != null);
Console.WriteLine(theEntry);
Isolated storage is scoped by assembly (so if you shut down your
program and start it later, you can read the configuration file you
created, but you can’t read the configuration of any
other assembly). Example 21-18 provides the method
needed to read the file. Replace the Run( ) method
in the previous example, recompile it, and run it (but
don’t change its name, or it won’t
be able to access the
isolated storage you created previously).
Example 21-18. Reading from isolated storage
        private void Run()
        {
            // open the configuration file stream
            IsolatedStorageFileStream configFile =
                new IsolatedStorageFileStream
                ("Tester.cfg",FileMode.Open);

            // create a standard stream reader
            StreamReader reader =
                new StreamReader(configFile);

            // read through the file and display
            string theEntry;
            do
            {
                theEntry = reader.ReadLine( );
                Console.WriteLine(theEntry);
            } while (theEntry != null);

            reader.Close( );
            configFile.Close( );
        }

Output:
Last access: 5/2/2001 10:00:57 AM
Last position = 27,35
[1] Internet data may also be sent in datagrams.
[2] With a tip of the hat to Arlo Guthrie.
[3] My personal favorite file comparison utility, as shown here, is ExamDiff Pro (http://www.prestosoft.com/ps.asp?page=edp_examdiffpro).
[4] If you run your program on a network with a firewall, talk to your network administrator about which ports are closed.