
Chapter 3
Capturing Network Packets Using Python
Abstract
This chapter examines the rules of thumb necessary to setup a packet capture environment. In addition, I cover considerations for information capture, Python data type selection for observation storage along with the creation of classes for handling data storage, and retrieval of packet contents. Finally, the P2NMAP capture script is completed and ready for use to passively capture TCP and UDP packets.
Keywords
Packet Capture
TCP
UDP
Dictionary
Tuples
Signaling
Class
ServerIP
ClientIP
Port
Smart Switch
Monitoring
SYN
TOS
DF
TTL
WindowSize
promiscuous mode
“We are drowning in information, but starved for knowledge”
John Naisbitt
Setting up a Python Passive Network Mapping Environment
Chapter 2 provided two initial, (yet incomplete) solutions to promiscuous mode packet capturing. The first used the standard Linux tcpdump command and the second a Python script that captured packets flowing to and from TCP Port 443. The Python script developed in Chapter 2 provides a good foundation for both the capture and extraction of key data from packets traversing the network we are monitoring.
Switch Configuration for Packet Capture
At this point you might be asking how to configure an environment to begin experimenting with packet capturing using these methods. Within most modern networking infrastructures, switches support port mirroring via a Switched Port ANalyzer (SPAN) or Remote Switched Port ANalyzer (RSPAN). For my experimentation and daily use, I’m using a TP-LINK 8 Port Gigabit Easy Smart Switch TL-SG108E as shown in Figure 3-1. I have experimented with many switches and hubs for this purpose, and for a low cost, reliable and easy to configure device, this is the best that I have found so far.

Figure 3-1 TL-SG108E 8-Port Gigabit Switch.
The simplicity of the switch is based on a software application “Easy Smart Configuration Utility”, shown in Figure 3-2, that comes with the switch. The configuration utility allows for the configuration of all the features available on the TL-SG108E.
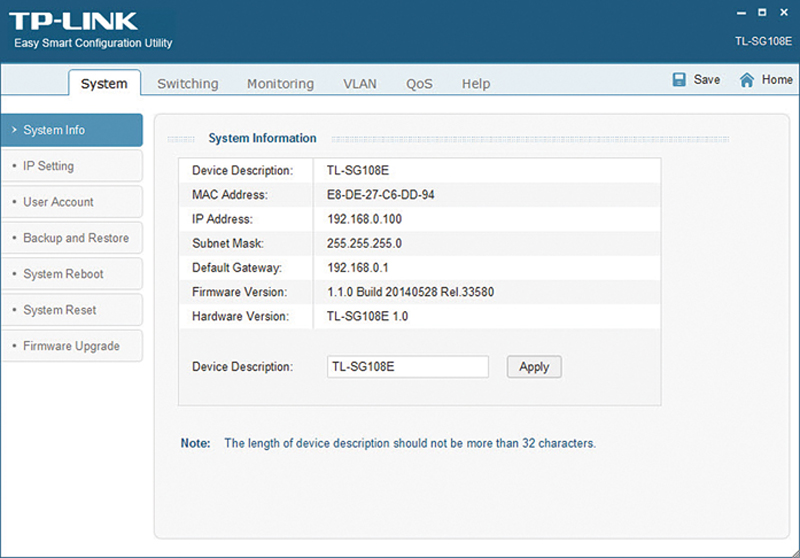
Figure 3-2 Easy Smart Configuration Utility.
For our purposes, the most important feature is the establishment of a monitoring port that is usable for passively capturing network traffic. Figure 3-3 shows the configuration screen for port monitoring. In this example, I have setup Port 8 to be the monitoring port and ports 2-7 to be monitored. This means all traffic flowing in or out of ports 2-7 will be available for monitoring on Port 8. Note, I purposely chose to leave port 1 out of the selection. I then connect my sniffing appliance (my Linux computer in this case) to Port 8 of the switch, and I can begin using tcpdump or the Python script developed in Chapter 2 to silently capture network traffic and run experiments.
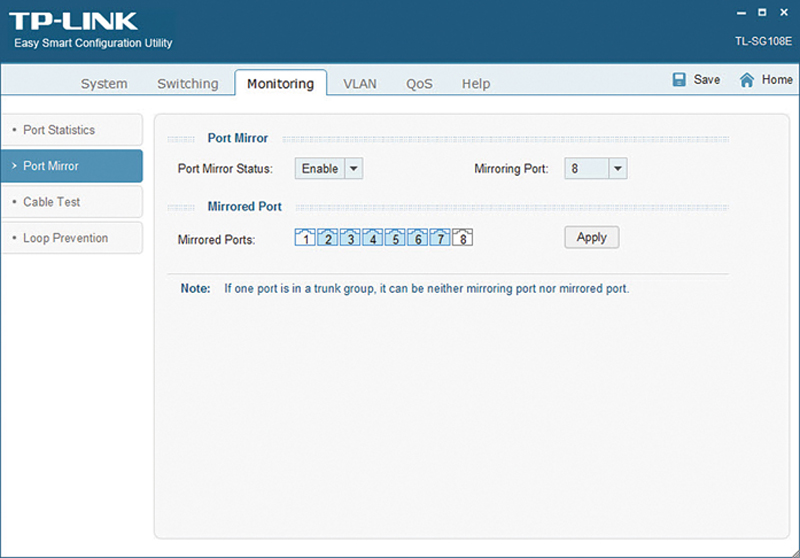
Figure 3-3 Port Monitoring Configuration using the Easy Smart Configuration Utility.
Computing Resources
Performing packet capture is both processor and memory intensive, so for simple experimentation and demonstration almost any modern platform will due. For the examples in this book, I focus on using Linux and Windows. The scripts can be modified to run on Mac as well, but updates to libcap, ifconfig etc. would be necessary. However, for use in real-world environments where capturing packet data over several days or weeks will require greater considerations, a minimum system would be configured as follows:
▪ Dual Quad Core Processors 3GHz (in later chapters we will examine multiprocessor separation threading of code)
▪ 64-128 GB of Memory
▪ 4 TB of Fixed Storage
▪ 10 Gbps NIC Card (if the network supports these speeds
Storing Captured Data
The next challenge that we face is the storage of the captured packets, including the definition of what information I need to store. Python offers many internal data structures for this purpose, and if you recall, in Chapter 2, I used Python List Objects to store the captured data:
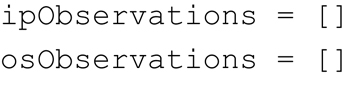
Each entry of ipObservations List contains:
[serverIP, clientIP, serverPort]
serverIP: The IP Address of the deduced Server
clientIP: The IP Address of the deduced Client
serverPort: The Port Number associated with the deduced Server
Each entry of osObservations contains a list which holds extracted TCP/IP Header Data if the SYN flag was set for the packet. This data will be used later as an aid to OS Fingerprinting.
[serverIP, TOS, timeToLive, DF, windowSize]
serverIP: The IP Address of the deduced Server
TOS: Type of Service Field
DF: Don’t Fragment bit; when set, a packet cannot be fragmented
windowSize: Largest TCP receive window that the server can handle.
timeToLive: Sets the network hop limit for a packet life. TTL is decremented by one each time it passes through a router; once the value reaches zero, the packet is discarded to avoid endless looping.
The nice thing about this approach it is quite simple, however, the Python List contains duplicates, and due to the number of packets destined to be collected we want to reduce the size of the packet information we store. So, we must be a little more strategic. In addition, there is some additional information that will be useful to record. Namely, the time that the packets are observed.
Storing the Captured Packets – Python Dictionaries
The question is how to do this without completely saturating the data that we capture? Since the time of each packet would be different if we decide to store the actually time value for each packet, we couldn’t remove duplicate serverIP, ClientIP, serverPort packets from our captures. Thus, I have come up with a method of retaining vital time based information regarding each packet, without holding duplicate packets. In addition, this approach will allow for the implementation of Python Dictionaries as the basic storage mechanism.
Python Dictionaries are built-in to the language and thus are quite useful. Fundamentally, Python Dictionaries are Key / Value pairs. Where the Key and Value can be complex types such as Lists or Tuples.
Therefore, let’s create a dictionary Key / Value Pair to replace the ipObservations List.
Key = tuple(serverIP, clientIP, serverPort)
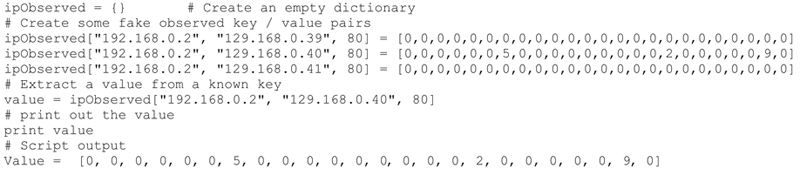
Value = [0,0,0,0,0,0,0,0,0,0,0,0,0,0,0,0,0,0,0,0,0,0,0,0]
Each value entry is the number of occurrences of this combination per hour. Note that there are 24 values representing each of the hours of the day. Here is a code snippet that shows how to create a dictionary to do this. Obviously we will be extracting the packet data dynamically and creating the dictionary and key value pairs.
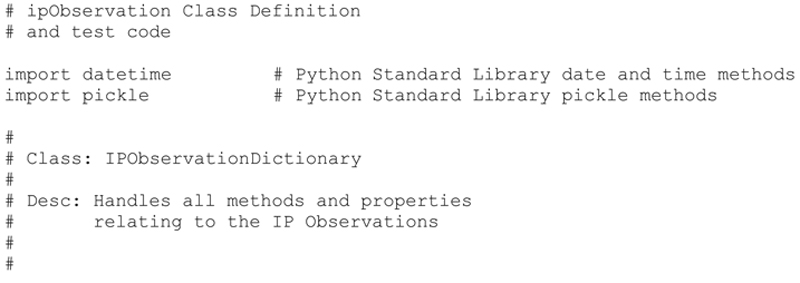
IPObservationDictionary Class
Approaching the storage of the IP observations in this manner will allow me to keep the size of the storage to a minimum by only recording the unique connection observations (e.g., unique server–client connections). In addition, I will be able to generate histograms of activities based on serverIP, clientIP and service type in future chapters based on the hour of the day.
To make this approach re-usable, I will create a class to handle the IPObservationDictionary. The class will be simple at first and will be enhanced in later chapters when we begin to process the data collected by the Python Capture process.
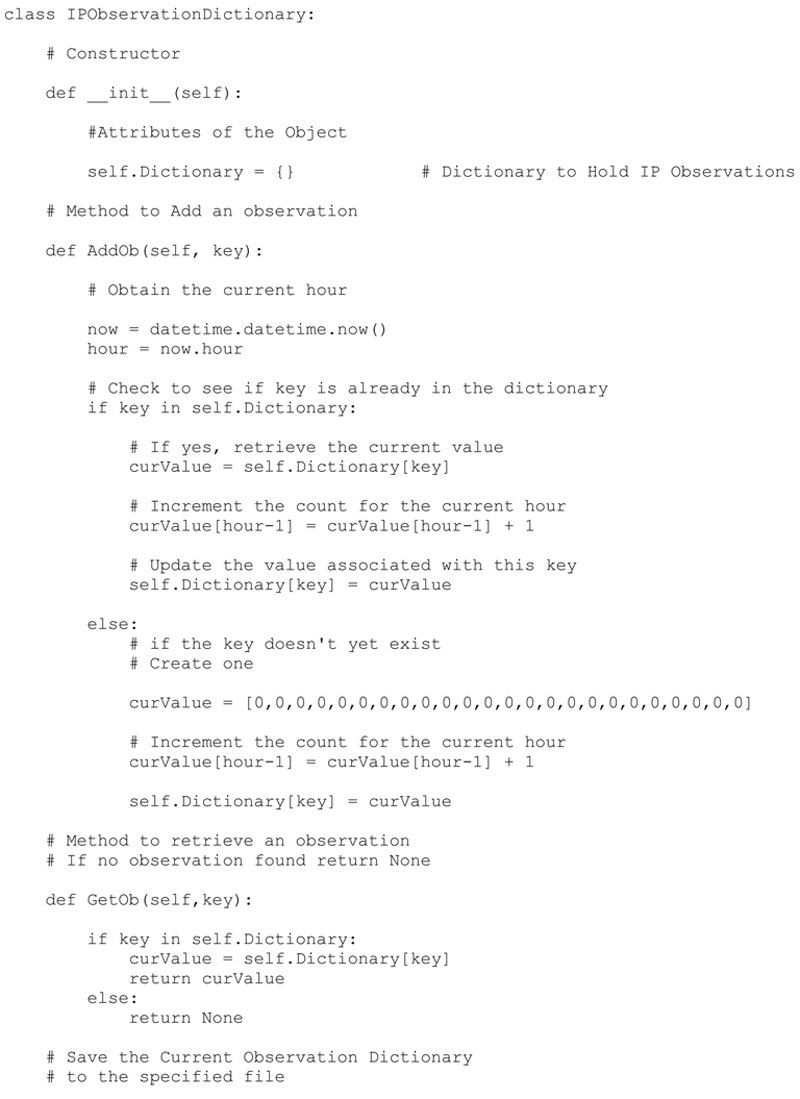
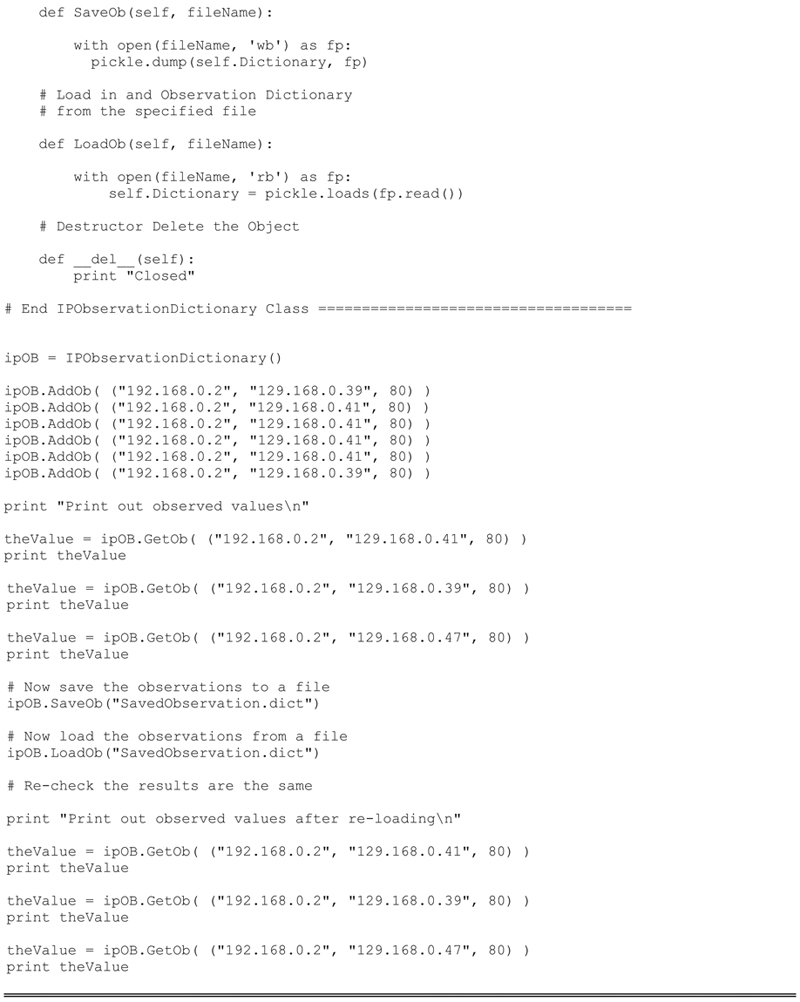
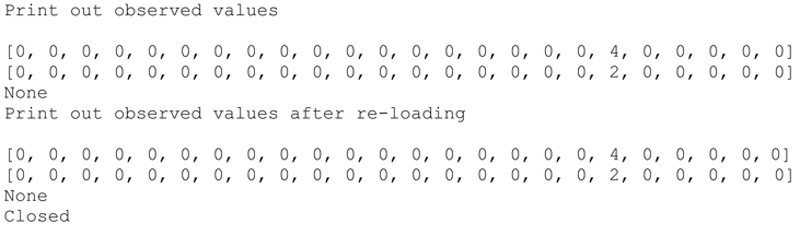
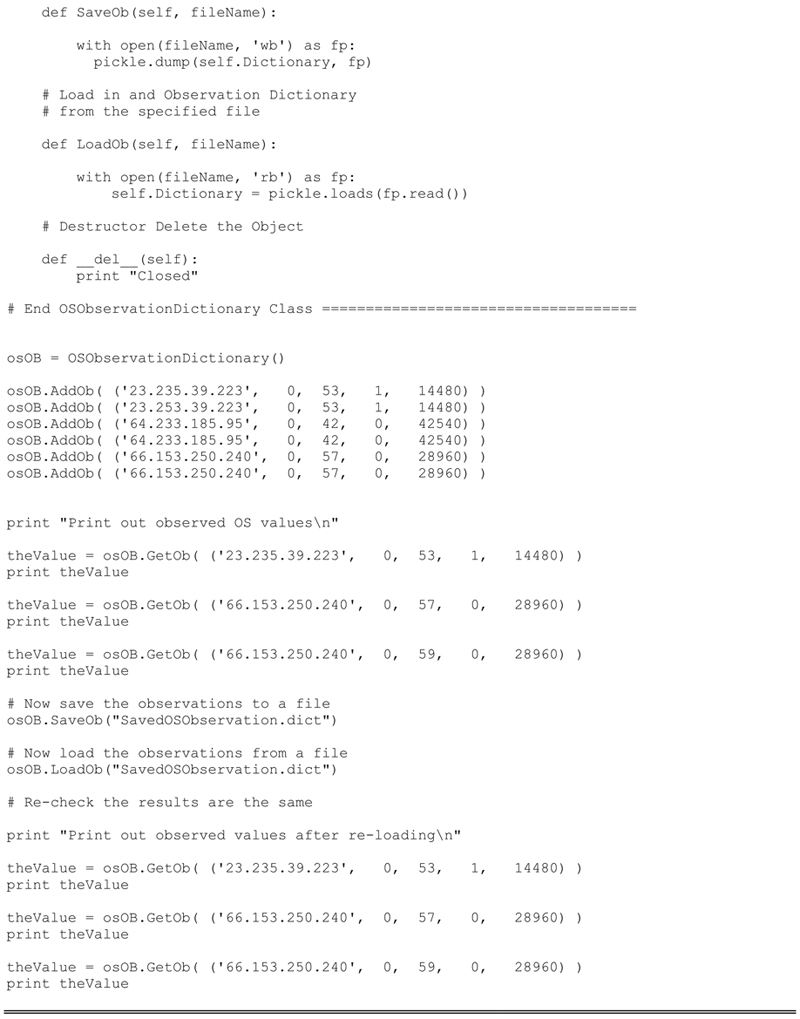
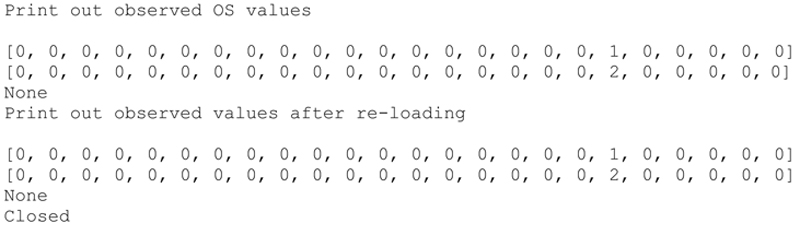
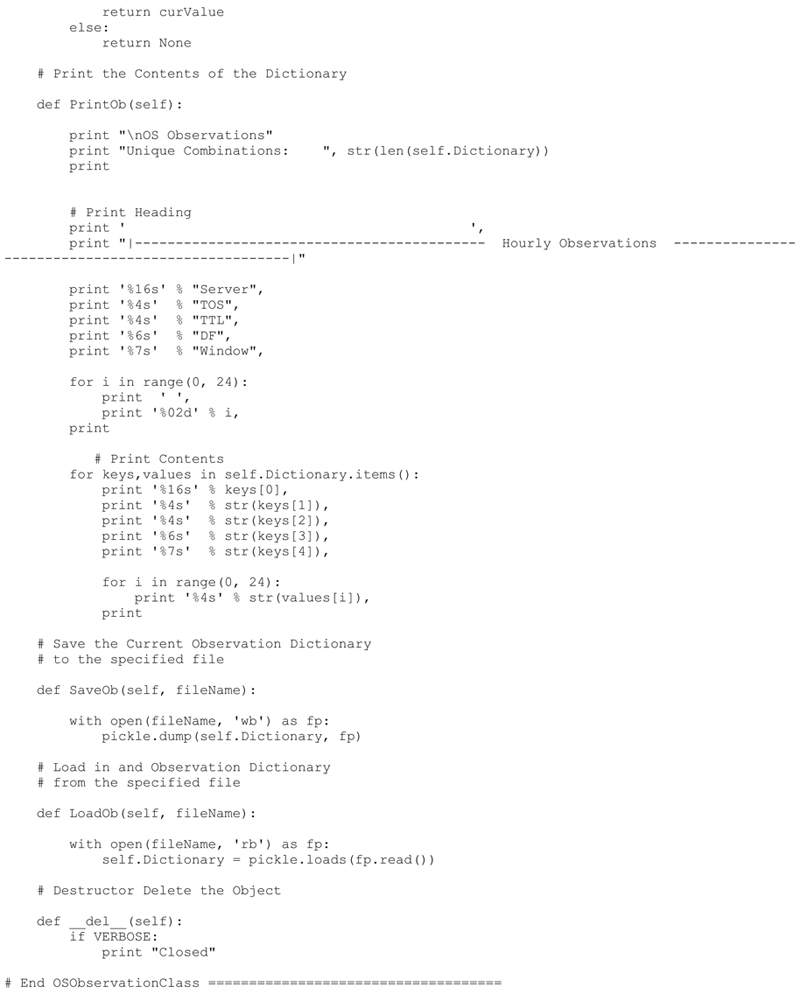
The example and resulting code run verifies that the Dictionary and Class are functioning properly. We have validated each of the class methods:
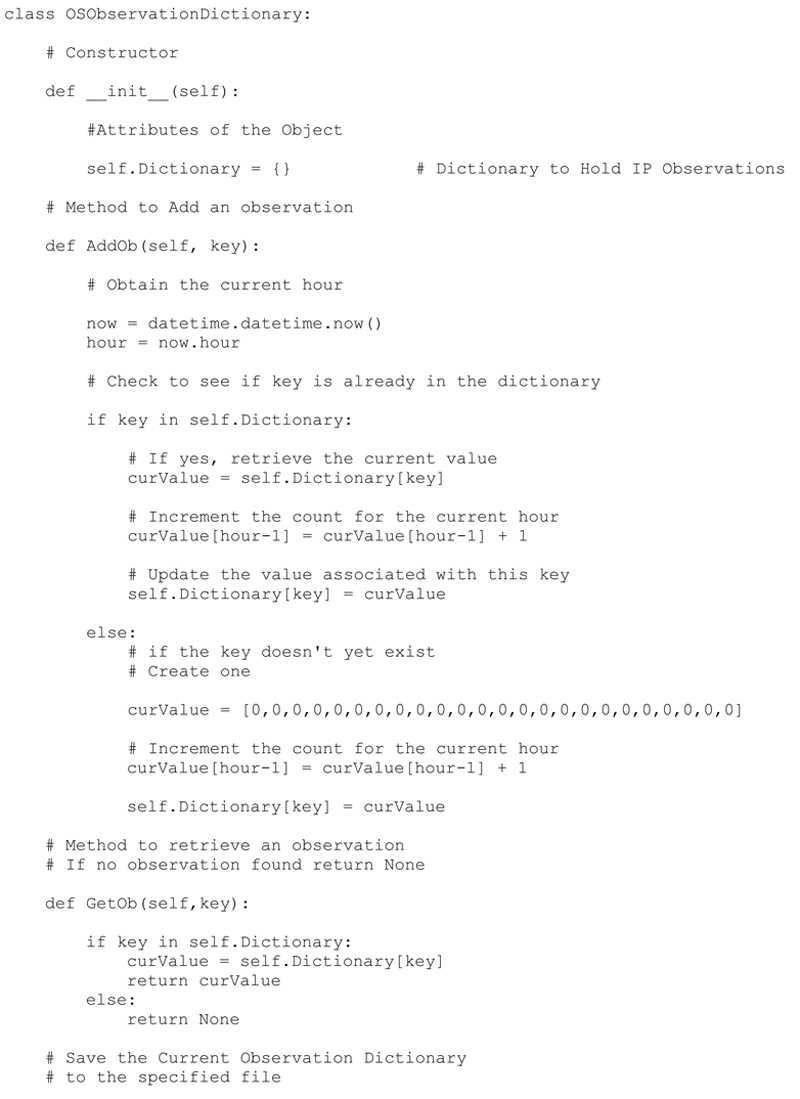
init: Creates the empty dictionary
AddOb: Adds an observation to the dictionary. If the key does not exist it will create a new entry. If the key exists it will simply add the observation to the proper hour (time slot) for the histogram.
GetOb: Attempts to retrieve and observation based on a key, the key does not exist it return None.
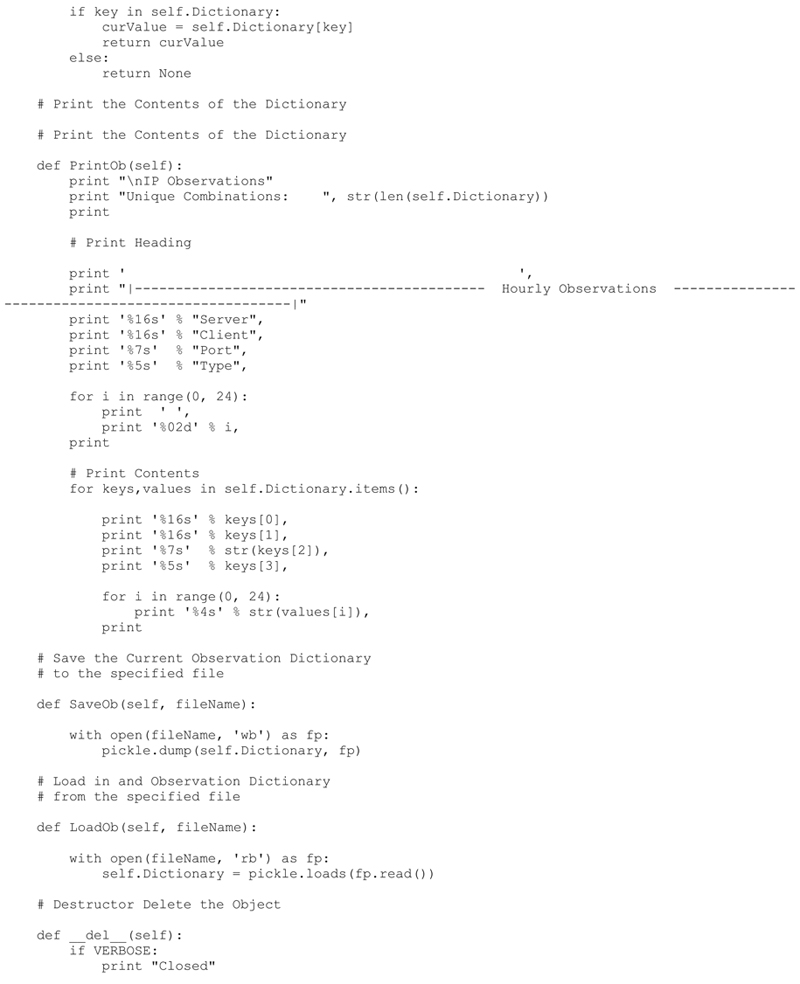
SaveOb: Saves the current Dictionary Object to a file of our choice. This will be useful if we which to periodically save the Dictionary Object to a file.
LoadOb: Loads a previously saved Dictionary object.
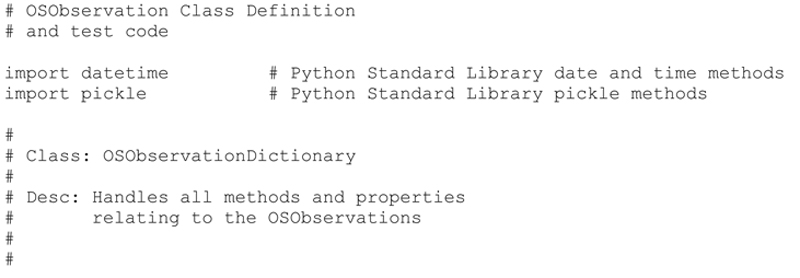
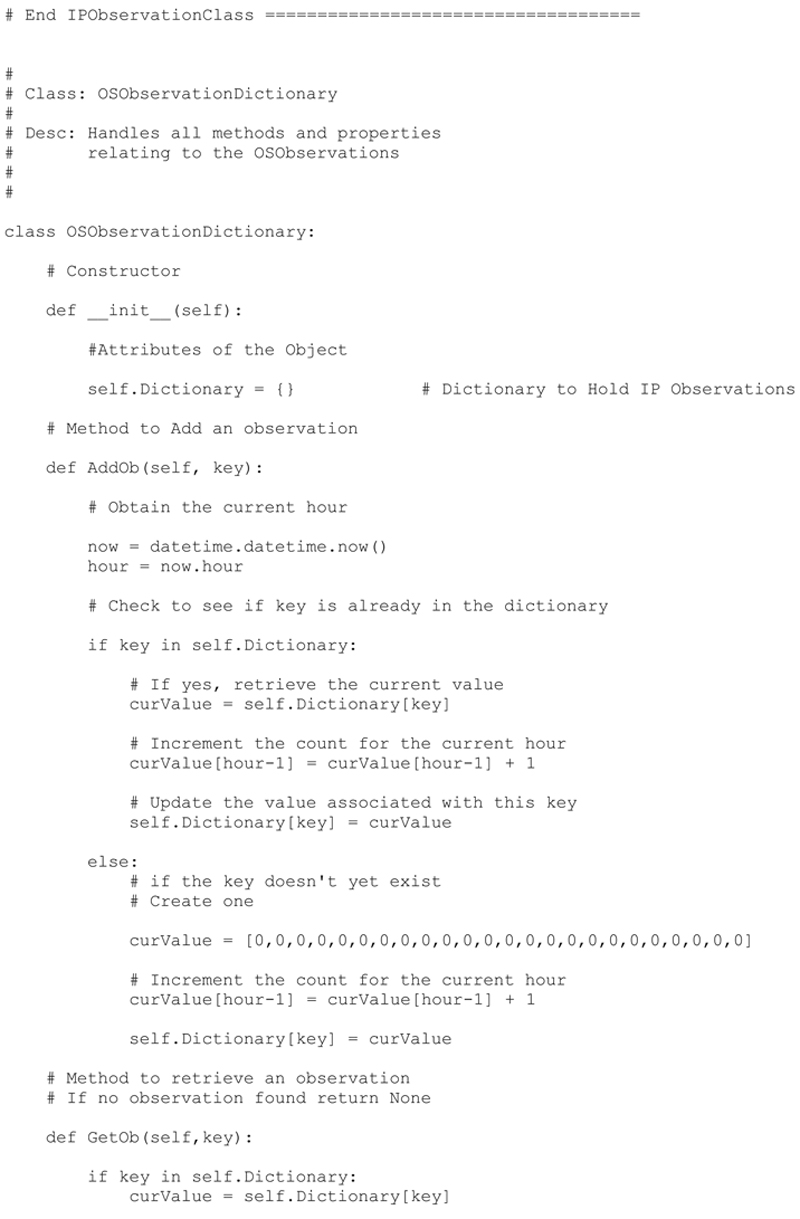
OSObservationDictionary Class
Very similar to the IPObservationDictionaryClass, this class handles the data storage operations of the operating system observations. These observations include:
The serverIP, TOS, timeToLive, DF, and windowSize, all of which were defined earlier in the chapter.
The Art of the Silent Capture
The next step is to enhance our primitive capture script developed in Chapter 2 with the following capabilities:
1. Allow for the capture of TCP or UDP packets specified on the command line
2. Allow for storage of the capture packets into the newly created IPObservationsClass
3. Allow for the storage of the Operating System Observations into the newly created OSObservationsClass
4. Add a PrintOB method to both the IPObservation and OSObservation classes, this will print the contents of the observations
5. Allow the user to specify the time period of the capture
6. Save the results of capture to a file for later analysis
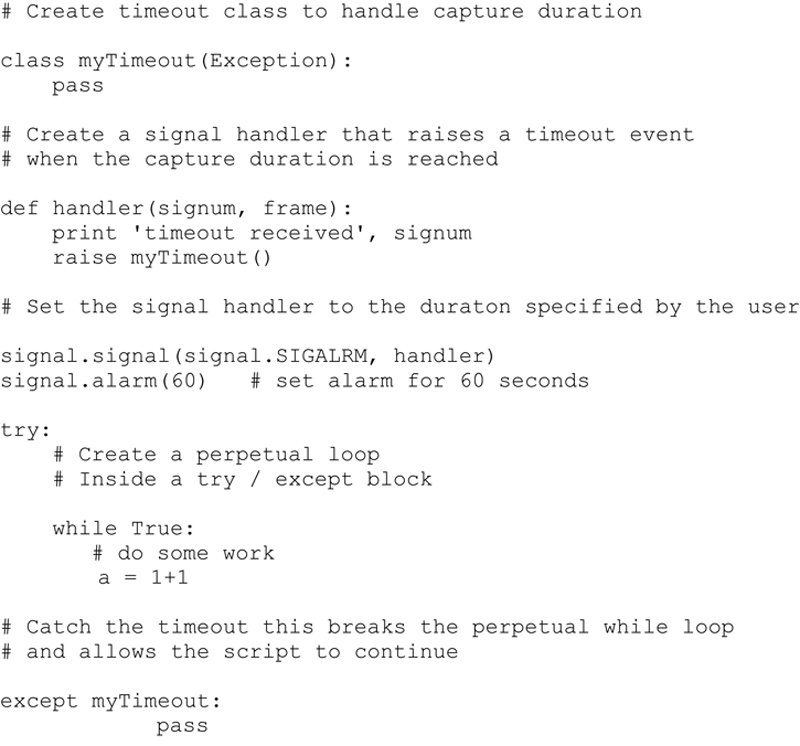
I have covered all of these individual steps and basic capabilities with the exception of the time period for the capture. In order to accomplish this I will introduce the concept of signaling and raise an exception when the time expiries. I will then integrate the specific exception handling operation in the main loop of the script. This requires a few removed steps.
1. I create a class myTimeout that will propagate the exception into the script when the handler fires
2. I create a signal handler that will catch the timeout when the set time expires
3. I need to establish an alarm based on the duration of the capture. (Note capture duration is represented in seconds).
4. Finally, within a try / except block, the specific timeout exception is caught and the perpetual loop is terminated.
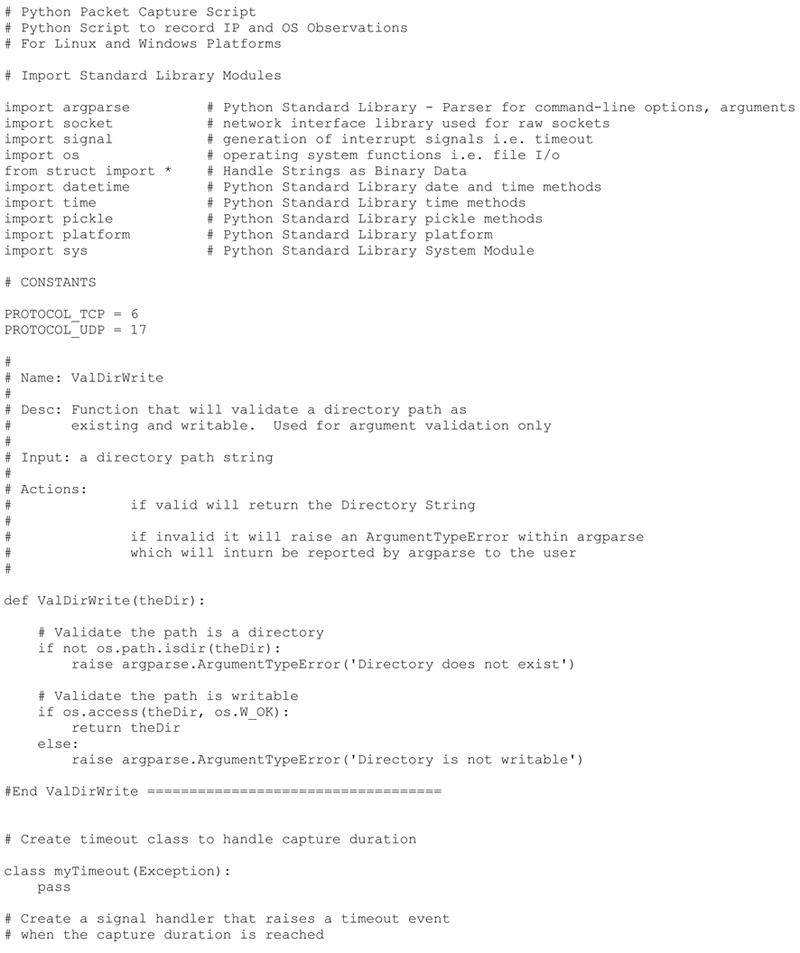
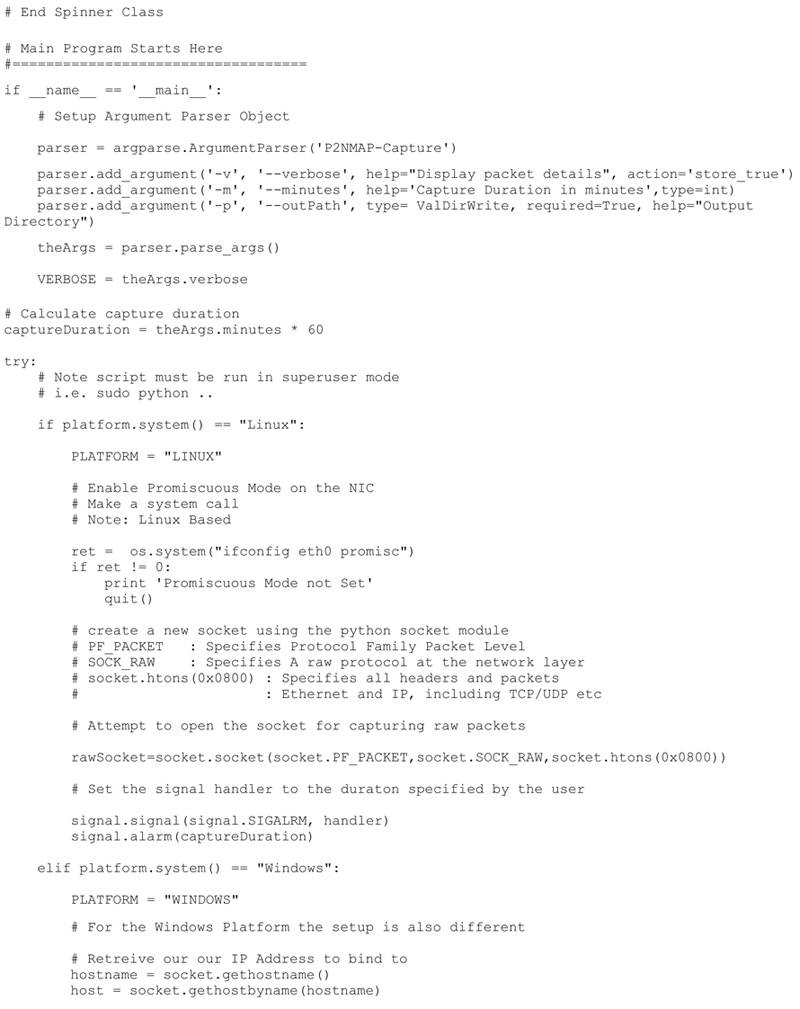
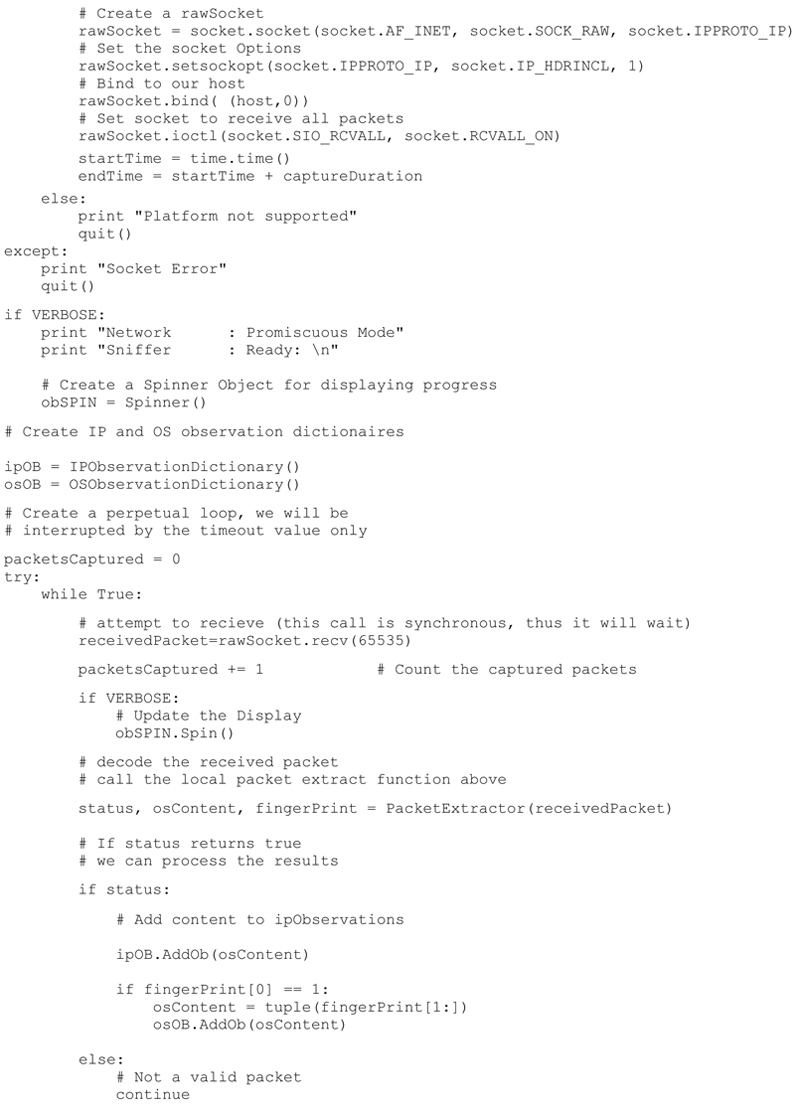
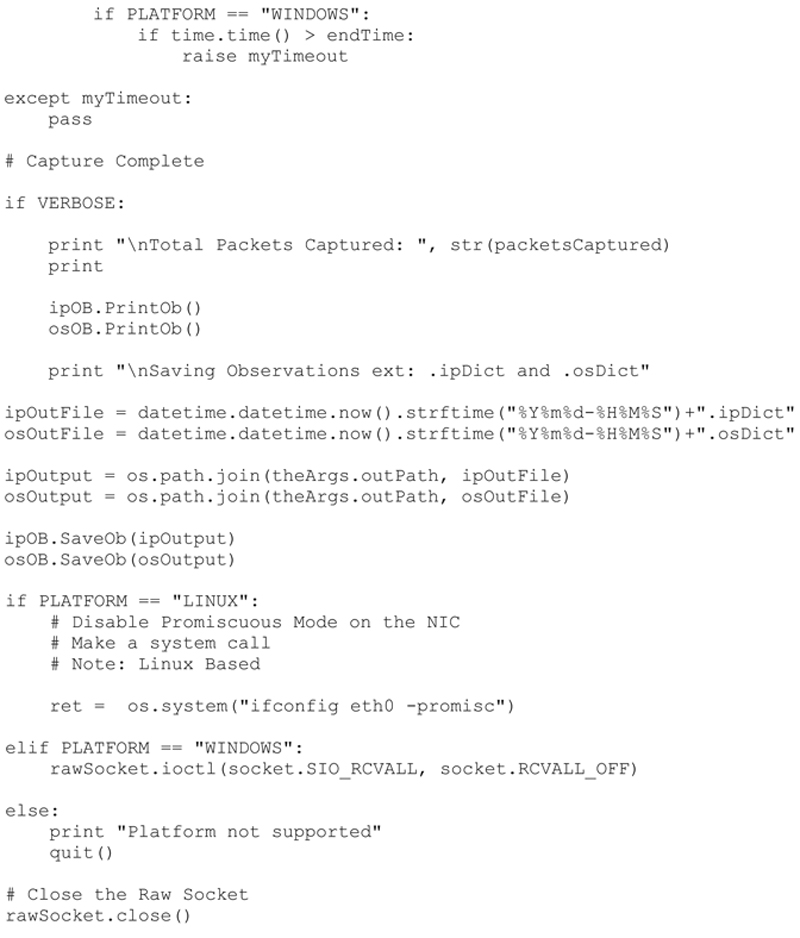
Python Source Code
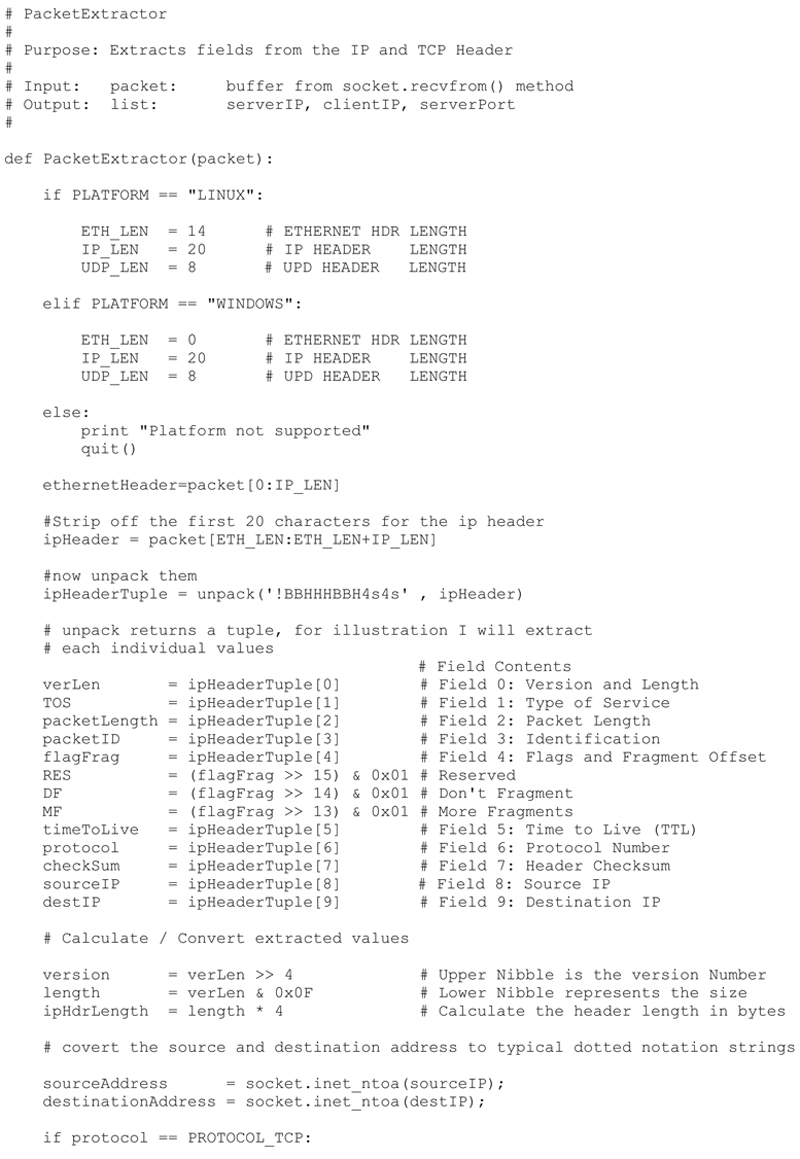
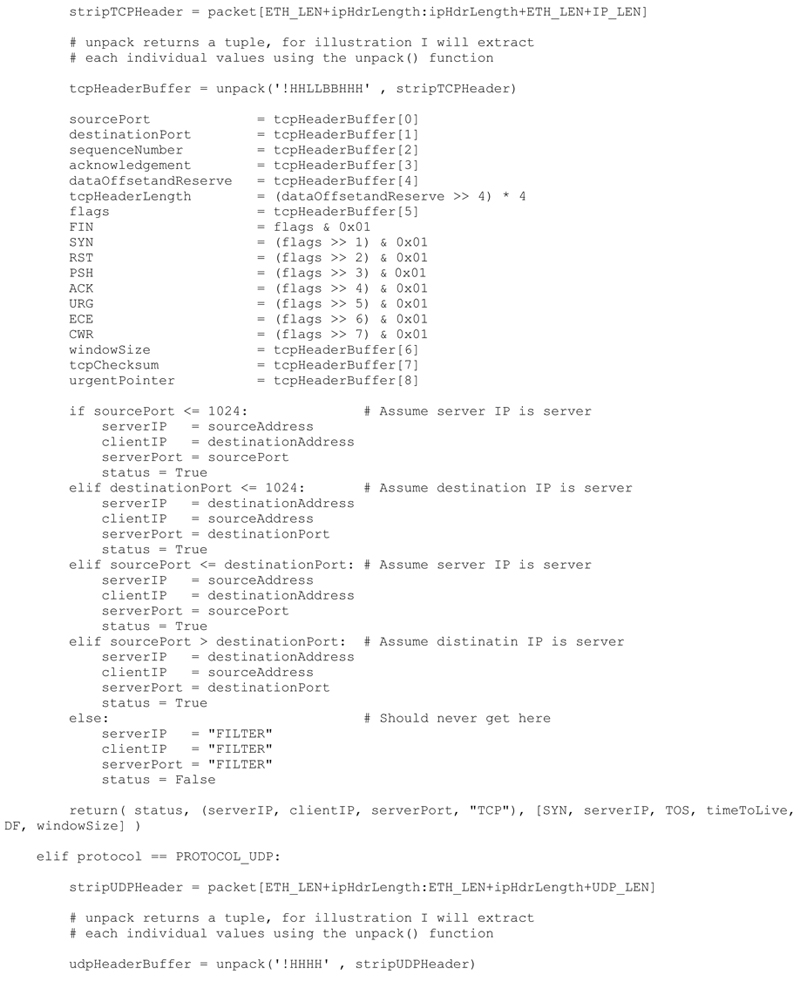
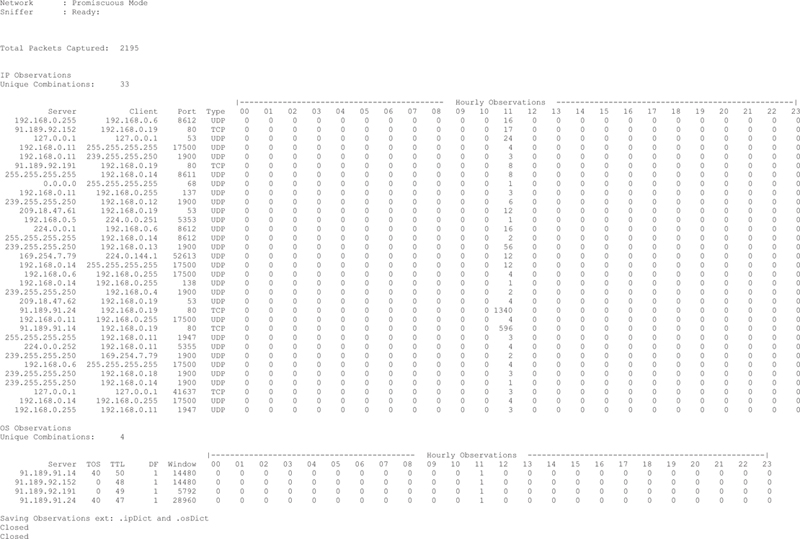
The final commented P2NMAP capture script shown here includes all the capabilities defined above. I have also included a sample output from the capture script.
I will be creating the actual network map based on the results of this script in following chapters.


Command Line Entry and Execution of P2NMAP-Capture.py
Windows: (note the command prompt must be launched with Administrator Rights:
python P2MAP-Capture.py –v –m 2 –p ./
Linux:
sudo python P2MAP-Capture.py –v –m 2 –p ./
Review
In Chapter 3, we examined the rules of thumb necessary to setup a packet capture environment, including the discussion of switch selection and configuration along with system hardware considerations. Next, we examined the “kind-of” information that is required to collect from network packets that will eventually aid in the passive mapping of a network and operating system fingerprinting. I then considered different Python data types that could dynamically store the packet results, and the Python Dictionary was chosen as the data storage type. Special consideration was given to the construction of these dictionaries in order to eliminate duplicate observations. In addition, I devised a method for including a basic histogram of similar packet occurrence for each unique combination of Server IP, Server Port and Client IP. At this point I designed two classes: IPObservationsDictionary and OSObservationDictionary that handle creation, adding, reading, loading, saving and printing of the associated Dictionary. I then revealed the concept of signaling to handle a time based capture of packets. Finally, I combined all these capabilities into a single script to perform packet capture and storage.
Summary Questions
1. What additional information might be useful for network mapping or OS Fingerprinting to store about each packet without disrupting the reduction of duplicate entries?
2. For packets with both source IP and Destination IP addresses above 1024, what method could be developed to better establish server vs. client identity.
3. How might we filter out specific packet types or IP ranges from our capture in order to reduce the storage requirements?
..................Content has been hidden....................
You can't read the all page of ebook, please click here login for view all page.