
Let’s face it, the C and C++ languages have a bad reputation. Hard to learn, obtuse syntax, lots of ways to mishandle memory; you’ve heard it, I’m sure. You might have heard scuttlebutt that the Arduino sketch language is somehow related to C and C++, but that all the “hard stuff” was taken care of for you by the Arduino desktop application.
The truth is this. Arduino sketches are written in C++. They use the same GNU G++ compiler that Linux uses, albeit configured for 8-bit ATmega CPUs. The Arduino application does handle some things for us, and as we make the leap to C++, we’ll have to learn to do those for ourselves. Don’t worry. I’ll walk you through it. It’s not that complicated.
What the Arduino Package Really Is
So we can understand what we have to do for ourselves now, let’s take a quick look at what Arduino’s been doing for us all this time. We’ll start by looking at what, exactly, the Arduino application is, and what’s in it. To do that, in turn, let’s go ahead and put one on the Raspberry Pi.
Install Arduino on Raspberry Pi
Open the web browser on your Pi and go to http://www.arduino.cc/en/Main/Software . Be patient, especially if you’re on a Pi Zero W. This will take a while. Once you’re there, scroll down to “Download the Arduino IDE” and click on Linux Arm. Time for more patience, while your Pi writes that rather large package to your microSD card.
While you’re waiting, you might be wondering why on Earth I want you to put the Arduino desktop software on your Pi. Fair question. The answer is that way down in Chapter 12, called “The Best of Both Worlds,” we’ll need it. You might also wonder why we’re getting it through the web browser instead of apt-get. Didn’t I just finish saying that apt-get was easier and faster than graphical installers? Well yes, I did say that. There’s one major drawback to apt-get, though, and you might as well find out about it now. The software archives it uses are often behind the times. Nowhere is this more true than the Arduino application. It was ported once, shortly after the Pi was introduced, and hasn’t been updated since. By contrast, the Arduino project itself ported and maintains the ARM version we’re downloading now. All done? Good. You can try just clicking on the downloaded file like you would on a desktop computer, but I don’t recommend it, especially on a Pi Zero W. Instead, crank up the terminal application. (Choose Raspberry menu ➤ Accessories ➤ Terminal, or it’s probably in the top panel of your screen.) Here’s how you do this the old school way. And you’ll get another UNIX/linux command too.
First, cd to the Downloads directory. This is where the Chromium browser puts downloaded files, unless you tell it to put them someplace else. If you do an ls for *.tar.*, you’ll see any file with .tar.whatever as its extension. These are called tarballs today. Once upon a time, in a data center far far away, that file would instead be on a magtape. Google 9 track tape if you’re curious about that.
Anyway, the program we’ll use to expand the archive is called, unsurprisingly, tar, and since you know it had to do with tapes, it’s probably not surprising it stands for Tape Archive. Tar takes a ridiculous number of flags, but here are the ones you’ll most often need. (You can also go to man tar if you forget them. I usually have to for anything but expanding archives.)
To expand an archive, you use tar -xf <<tarball name>. To create a new archive, use tar -cf <<tarball name>> <files or directories to go in the tarball>>. Tar’s one of those strong, silent types. If you want to see what it’s actually doing (because waiting five minutes on a screen where nothing’s happening is boring, if nothing else), pass tar the v flag too.
But we’re looking at a tar.xz file. The xz stands for x-zip. It’s a standard UNIX/Linux data compression tool. The tar file’s been compressed. We could uncompress the tar file and then extract it in two steps, but modern tar is smart and can handle compression automatically. When it sees the xz, or a file extension indicating some other compression routine appended to the end, it will do the right thing automatically. Like this.
Here, I’ve used a wildcard to avoid typing out the whole filename. The wildcard matches any file with arduino-1.8.5 at the beginning, in this case arduino-1.8.5-linuxarm.tar.xz.
Thousands upon thousands of files later…
Next, we need to install the Arduino application. This is easiest from the terminal window too. Just cd into the arduino-1.8.5 (or whatever version you downloaded) directory and type sudo ./install.sh.
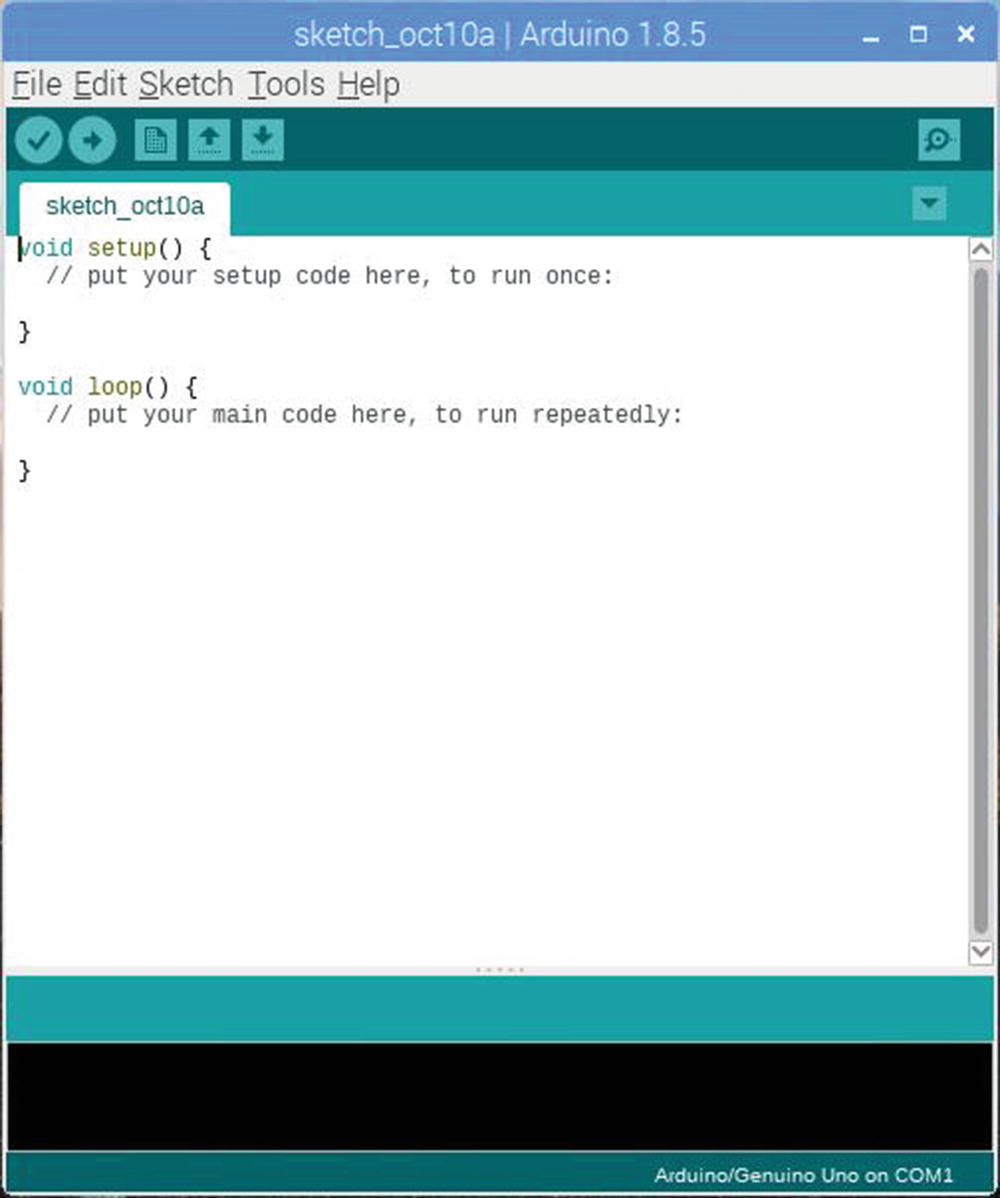
Arduino IDE
What you’re looking at here is the Arduino IDE. (It stands for Integrated Development Environment, and has nothing to do with the hard disk standard from the early 1990s. That used to mess me up.) In Figure 4-2, I’ve opened Geany, the IDE we’ll be using on the Pi, beside the Arduino IDE.
IDE
We’ll get into this more in the compiler section, but there are two major steps to compiling a computer program: compiling and linking. Compiling means the raw source code is fed to whatever precompiler is involved, then the compiler. When your code comes out of the compiler, it’s machine code, but it’s not connected to any external libraries you’ve called, nor to any other code you’ve included in it. Hooking all that together and producing a single program that will actually run is the job of the linker.
In the old days, when I learned programming, you wrote code in a text editor and then compiled and linked it by hand. Seriously. The first minicomputer operating system I ever used (Digital Equipment’s Vax VMS) did it that way. If your program consisted of separate parts, you compiled them separately, and it was up to you to make sure all the parts had been compiled before you linked them in. This process was fraught with errors. (Although in school, most of our programs had only one file, so it was less an issue.) If you forgot to compile a module, you could chase your tail for hours trying to fix a bug that you’d already fixed. Allegedly, this, in fact, was how UNIX make came to be. UNIX make was a godsend. Instead of keeping track of what had and had not been compiled, make checked the touch dates (remember touch dates? the date that shows up in ls -l?) of the compiled version of the code against the uncompiled version, and if the uncompiled version (the source code) was later, only then would make compile that code. It saved time and sanity for programmers.
IDEs solve the same problem. Like UNIX make, they keep track of when a given piece of code was last compiled, and whether the source code has been altered since then. You’ve used this, even if you didn’t know it, with the Arduino IDE. If you’ve used a third-party library and dropped it into a separate tab in the IDE, the Arduino IDE is keeping track of whether you’ve compiled that library since the last time it was modified.
The Arduino IDE also does syntax coloring (so you can tell comments from code, for example), they match parentheses for you (a godsend, in and of itself), they can help you keep your code neat by indenting or commenting whole blocks at once, and a dozen other fiddly little things that make programming easier. Again, you’ve probably used these in the Arduino IDE a lot. I certainly did in my previous book about Arduinos.
Compiler
In case you haven’t heard the formal definition a dozen times already in your life, a compiler is a program that translates a higher level language, such as C or C++, into machine code. Like we talked about in the IDE section, compilers usually work in cooperation with linkers, to combine compiled programs into an executable image. Any time you tell the Arduino application to compile? That’s what it’s doing.
In the Linux world, g++ is the default C++ compiler. This tells you nothing, because g++ is a wrapper, in this case around gcc, the GNU project Compiler Collection. (Back in the days when I was building it on a MicroVax II, gcc stood for GNU C Compiler. They changed it as they added more languages.) The usual abbreviation for C++ is cpp, however, so if you type which cpp, you’ll get this:
If you did an ls -l on that file, you’d discover that it’s a pointer to cpp-6. This calls version 6 and above of GNU cpp. Other distributions of Linux may also have g++ version 5, which is referred to as simply cpp. There’s a lot of redirection, and that when you unwind it all, you’re really calling gcc with some flags. None of which is that important to us. When you call /usr/bin/cpp, it works.
See what I mean?
Anyway. That’s the compiler we’ll be using for our programs in the Pi. It might startle you to know it’s the same compiler used by the Arduino application. Try this. Type cd /home/pi/Downloads/Arduino-1.8.5/hardware/tools/avr/bin. We’ve just jumped into the Arduino application’s directories.
Note
If you plan to use the Arduino application on your Pi for more than experiments, it’s a good idea to move it outside the Downloads directory and re-run install.sh.
Hardware is the directory specific to one type of Arduino. The avr directory is for ATmega AVR Arduinos—the uno, the mega, and all the classic ones. The bin directory is where the binaries are stored for that type of hardware, that is, compiled programs used to produce the compiled program that will run on the ATmega Arduino.
A quick ls shows us that there’s a c++ here.
If we call that compiler, we can pass it a -v flag to see what version it is. A quick caveat. We have to specify that we want to load avr-gcc from this directory. The bash shell doesn’t assume that’s what you want by default and will search the usual system directories otherwise. This is when the . shortcut becomes the most useful. To do that, precede the file you want to execute with a . to tell bash to “run a program from this directory.” Like this:
Look familiar? It’s an old version of gcc—4.92 versus 6.3.0—but it’s fundamentally the same compiler. You’ve been writing C/C++ code all along and possibly never realized it.
Libraries
I mentioned that the Arduino application was handling some libraries in the background for you. While we’re poking around in here, let’s look at those too. Use cd to navigate to /home/pi/Downloads/arduino-1.8.5/hardware/arduino/avr/cores/arduino. Once again, we’re looking at just the part of Arduino that’s for the avr/ATmega-based boards. A quick ls gives you quite a list.
All that gets linked with every sketch you write, and any routines you actually call from your sketch are part of the sketch binary that ultimately gets sent to the Arduino. The Arduino app is handling all that in the background. But what about the #includes you sometimes have to do? If you’ve done some spi or i2c programming on the Arduino and had to use an #include statement to add them, like #include <Wire.h>, you might have wondered where that comes from. They’re in there too.
You get the idea.
Uploader
There’s one other piece of the Arduino puzzle that we have to talk about. We won’t use it when programming the Raspberry Pi, but we will be tinkering with it at some length for the last project in this book, “The Best of Both Worlds,” so this is as good a time to mention it as any. That part is the uploader. For ATmega/AVR-based Arduinos, it’s called AVRDUDE, which stands for AVRDownloaderUploaDEr , according to the website. Like the compiler, it’s another standalone project that has been rolled into the Arduino application. It’s in the same directory as the compiler: /home/pi/Downloads/arduino-1.8.5/hardware/tools/avr/bin.
AVRDUDE resets the Arduino from whatever it was doing to kick off the bootloader. It signals the bootloader to go into programming mode, then transfers the sketch into the Arduino using the Arduino protocol to verify that the compiled sketch got there in one piece. Then it resets again, and lets the bootloader switch over to sketch mode. At least normally. Our “Best of Both Worlds” project will skip a few of these steps. More on that later.
Meet Geany
In our travels in the Raspberry Pi, we’re going to use the Geany IDE. There are certainly others, but Geany is lightweight, relatively simple to use, and if you decide you like it, odds are you can get it for your desktop computer too.
Geany versus the Arduino IDE
You already have the Arduino application running, right? Go ahead and crank up Geany, (choose Raspberry menu ➤ Programming ➤ Geany), and cut/paste the setup() and loop() functions from the empty Arduino sketch into the window on Geany. Now, in Geany, choose File ➤ Save As and give it the name arduino_skel.cpp. (Some filesystems are touchy about ++ in filenames, so cpp is usually used for the extension.)

Geany with the Arduino Sketch skeleton
Note also that Geany has found the two functions we’ve given it, Loop and Setup, and that they’re listed under Symbols in the left-most column. This is a really, really useful thing. If you click on Loop or Setup in the left-most column, Geany takes your cursor there right now. It would do the same if we had multiple files. Now click on one of the braces. See how it highlights the one that matches that one? It highlights in dark blue by default, so you might have to look closely. It does the same thing with (square) brackets, parentheses, and so on. Good modern editors do this. Heck, even nano, my terminal mode editor of choice, can be configured to do syntax coloring. But Geany also manages your files, just like the Arduino IDE does, only easier.

Do nothing function and donothing.cpp
Here’s where Geany really shines. Instead of having a directory of files that might or might not be associated with arduino_skel. cpp , we can combine them into a project. Choose Project ➤ New, and when it asks if you want to include all the open files (in our case, arduino_skel.cpp and do_nothing.cpp) in the project session, choose yes. It may ask to create a Projects directory (folder.) Go ahead and let it.
What we’ve done is to create metadata for the project that lists all the files in the project. However, Geany has not moved our files to the project directory. We can do that with File ➤ Save_As for each open tab. Make sure to save the files into /home/Pi/projects/arduino_skel to avoid confusion later. When we go to create new files, however, Geany will use the project’s directory as the default.

Geany in Documents mode
I admit. I’ve been a holdout for the tools of the 80s and 90s—make and text editors—but now that I am used to using the Arduino IDE with Arduino projects and have used Geany (for this book, in fact), I’m sold. Hopefully you are too.
Configuring Geany
Out of the box, as it came with the Raspbian distribution, Geany works pretty well. There are a few issues though. The big one is that while it can compile and build software (they’re different, I’ll get to that shortly), it can neither run Lint (cppcheck) to check our C++ syntax, nor can it execute (run) whatever we built. Let’s fix those problems.
Install Lint (cppcheck)
We won’t be using Lint (aka cppcheck) to check our C++ syntax in this book. If you want it, you can fix this problem by typing this:
Packages get installed…
Basically Geany couldn’t make Lint work because the program it was calling, cppcheck, wasn’t installed.
Set Up Execute
The execute problem is a bit stranger, and really should be taken care of in the distribution itself. In fact, by the time you read this, it might have been. Feel free to skip ahead to where we actually try to use the Execute button and come back here if it fails.
Hello again. Didn’t work? Okay. To make it brief, Geany should be able to run a program we’ve just built, but as of the August 8th, 2017 version of Raspbian I have, it can’t. The terminal window starts, but it hangs. By default, Geany is calling the terminal through the alternatives system. This, in turn, wraps around default applications, like the terminal program, so that if you were to change terminal programs, you don’t have to go to Geany and any of dozens of other programs using that terminal and change the terminal call in them. That’s great, except that the alternatives wrapper doesn’t take the parameters Geany is trying to send it. Bug in the wrapper? Bug in Geany? Bug in LXterminal, the Pi’s default terminal program? I don’t really know.

Geany Preferences window
The Terminal line is what we’re after. Yours almost certainly looks different from mine. (Mine’s already fixed.) Replace what’s in terminal with /usr/bin/lxterminal -e /bin/sh %c and save the configuration file. But let’s stop and look at the fix a moment.
That /usr/bin/lxterminal part looks like a call to a program, doesn’t it? You’re right. That file, lxterminal, is the real name of the Terminal program we’ve been using right along. If you’re reading this more than a few years after 2017, it’s possible that’s changed. Here’s how you tell for sure.
The update-alternatives command works on any Debian-derived system, and it lists what program, of the many options, is being used for a specific function on that Linux installation. In this case, the x-terminal-emulator is the terminal emulator we’ve selected to run on this Pi.
We’re calling lxterminal directly with /usr/bin/lxterminal. Passing lxterminal the -e flag means “execute this program.” We then pass it /bin/sh, which is a shell. Once upon a time, sh was a separate, small, lightweight shell called the Bourne shell . If you do an ls -l on /bin/sh, you’ll see it’s just a symbolic link to our old friend bash, which stands for Bourne Again SHell. It’s an improved, open source version of sh. In Linux, they’re usually the same thing.
Anyway, the %c is a variable filled in by Geany with the name of the program we’d like to run. So why, you might ask (as I did), not have lxterminal call the file directly? By having lxterminal call /bin/sh first, we get all the environment variables we’re used to setting. Environment variables are how bash keeps track of a great many things, most importantly (right now) our current directory. We can then pass just the filename of the compiled program to sh, which runs it in the terminal window. Well. Kind of. Geany wraps our compiled program in a script that gives us more information when it runs.
That’s a lot of Linux poking we just did, and a pretty dense explanation of it on my part. We covered all these concepts back in Chapter 3, “Survival Linux,” so if you need to look back at them and review, go ahead. That’s why that chapter is there.
By the by, if you’re wondering, “Does this mean if I do change terminal applications, Geany won’t be able to run programs again?” Good catch. Maybe. It depends on whether you uninstall lxterminal. As long as /bin/lxterminal is there, it will work. If it’s not there, execute won’t work.
Build versus Compile
Okay. Now that we have Geany working right, lets test the building, compiling, and execution functions. We’ll use the arduino_skel project for that, but we’ll have to add a couple of things to it.
Right now, the arduino_skel.cpp file looks like this:
This isn’t a complete program. Just a couple of functions. The truth is, every Arduino sketch you write is that: code in a couple of functions. In the background, the Arduino IDE adds what we’re about to add by hand. Add the following function at the bottom of the arduino_skel file.
Your finely tuned Arduino habits should tell you instantly that main is a function, returning an integer. It calls setup, without passing it any parameters, and then it loops forever, calling loop over and over again. This may not be the exact code the Arduino uses, but it does what the Arduino code does. Run setup once, run loop forever.
Go ahead and choose Build ➤ Compile. That compiles the file we’ve been working on, in this case arduino_skel.cpp. You can run Lint on it too, if you like. But here’s the catch. Compile only compiles the one file shown. It only compiles arduino_skel.cpp. It does not compile do_nothing.cpp, and it does not link anything together.
Choosing Build ➤ Build will tell Geany to compile all the files in the project, as needed, and link them together in a finished image, which is an executable program. Go ahead and build the project. I don’t recommend executing it. It doesn’t do anything, and it loops infinitely at the end, so you’ll just have to close the terminal window anyway.
Executing Programs
Let’s modify the arduino_skel project to at least produce something we can see, and so it doesn’t loop infinitely. Then we can execute it and verify that it, and all our tools, work.
Right now, arduino_skell.cpp looks like this:
The first thing we want to do is have it print something in the terminal window. To do this, we need to pull in a library called iostream. You can bet the Arduino IDE does something like it for you, so that serial.print() works. We’ll do it by hand.
At the top, where we added #include "do_nothing.cpp", we’ll include the library. The syntax is a little different. Instead of quote marks, we’ll use greater-than/less-than marks. This tells the precompiler that handles the includes to use the system library instead of looking for it in our directory. It looks like this: #include <iostream.h>.
Next, we need to fix the infinite loop. Let’s change it to a for loop. You’ve probably done these a thousand times in sketches. Edit main() so that it looks like this:
Now let’s put some code in the loop function, for old time’s sake. We’ll use a function called cout, which we included in iostream. I won’t explain what all it does right now, because we’ll get into that in the “Write Your First C++ Program” section. It does more or less what serial.print does.
Now choose Build ➤ Build. The compiler will compile both arduino_skell.cpp and do_nothing.cpp . The linker will go out and find the precompiled library called iostream and link that in, and it will produce the finished image, called arduino_skell, and put it in ~/projects/arduino_skell/arduino_skell. If you do an ls -l on that file, you’ll see that Geany even set it as executable. So let’s execute it.

The Output window
Write Your First C++ Program
So you’ve already written your very first C++ program, but we left the Arduino training wheels on for that one. To be honest, maintaining them by hand from here on out will be more work than they’re worth. So let’s go ahead and do a program without them, the C/C++ way.
The C++ Way
Full disclosure. I’m not a C++ expert by any stretch of the imagination. The techniques I’m going to tell you are more “use C++isms, especially objects, when they make sense” rather than pedantically pure C++ structure. Computers don’t care about pedantry. If the program works, in many cases, that’s all that’s required. If you’re doing security, aerospace, medical, or other places where any bug might be a major issue, you’re probably reading the wrong book, and you might want to read the Raspberry Pi foundation’s notice that Pis aren’t for that. If you happen to be a C++ expert, all I can say is you know more than I do about it. These programs work (I’ve tested them). That’s all I can promise.
The Preprocessor
I’ve mentioned the preprocessor in passing, but it’s time I give you the heads up on what exactly the preprocessor does. The preprocessor, as the name suggests, is a program that reads your C++ source code (the human readable stuff we’re going to write) before compilation takes place. It’s best thought of as an interpreted programming language to make C++ programming easier. We’ve already used it.
Expanding #include
The C/C++ preprocessor interpreted the #include directives we put in arduino_skel.cpp. It hit that directive, went out and got the do_nothing.cpp file, and copied that code into a file along with arduino_skell.cpp, before the whole business got sent to the C++ compiler. That’s the most common job for the preprocessor.
Macro Expansion
Preprocessor macros are extraordinarily useful. They’re also extremely common in the microcontroller world (like Arduino), because they take no memory at runtime. None. A variable can get pretty heavy, memory-wise, when you’re dealing with only 4KB of memory, so having constants in that kind of environment is a waste. I used them a ton in my previous book, Junk Box Arduino, to substitute for Arduino constants with ambiguous names, to substitute for binary bit patterns, and so forth. Here’s an example.
If you’ve done any Arduino port programming, you know that those port names change depending on what model of Arduino you’re on. By abstracting them in a macro, it meant that if you moved my code to say, an Arduino Mega, you just had to change portb or ddrb, instead of modifying the whole program. That’s how macros are expanded. The first term is the macro, the second is its value. So we’re defining Control_Port and telling the preprocessor to substitute portb every time it sees Control_Port, ddrb for every Control_DDR, and 3.14 for every pi. Macros can do a lot more than that. They can take parameters and do math and string operations on them. The C/C++ precompiler is, itself, a fairly complete programming language.
In a contest called “Obfuscated C,” the story goes, a programmer wrote an entire sieve of Eratosthenes in precompiler macros, and the only C code was the code that printed out the list of prime numbers that was the result. If memory serves, he won the brand new “Best Abuse of the Preprocessor” award. Once compiled, of course, his program would have taken no time to run, since the prime numbers were already generated. It would have taken a long time to compile though. I don’t use preprocessor functions in this book. They’re tricky and hard to read, and they’re well documented online.
Conditional Compilation
C and C++ are funny animals. You can sometimes find yourself in a corner where you have to #include something twice. In arduino_skel.cpp, the function setup() calls the function do_nothing(). Suppose do_nothing() calls a third function that is also called by main in arduino_skel. Function order can get very fussy, and at times with complex programs, it’s possible to get stuck in a situation where there’s no right answer when a function can be defined. The C/C++ solution to this conundrum is the function prototype. We’ll get to those in later chapters, but the short version is, it provides a placeholder definition for a function to be formally defined later. These, in turn, are often stored in .h files and included at compile time.
Here’s where conditional compilation matters. You often break out those function definitions in separate files, but put the skeletons together in the same file. Your compiler will complain if you include the header file twice. Here’s how the preprocessor fixes that for you. In your program file and in all the function definition files, you can put this.
What’s happening here? Well, #ifndef is “if not defined.” If the macro header_included is not defined, it means that the header file has not been included. The next lines are what happen if header_included is not defined. We define it, and then we include the header file.
The last line ends the #ifndef statement. This bit of preprocessor code will #include the header file only if it hasn’t already been loaded. When the precompiler goes to roll this particular file into the one big file it will feed to the compiler, if header_included is already defined, it won’t run the #include "header.h". I’ve intended the ifdef code here like we would in C++ and C, but it’s often not written that way.
But you can do more with conditional compilation. To get back to the code we talked about in the “Macro Expansion” section, let’s say I knew my Arduino sketch was going to be run on more than one type of Arduino. I could put something like this in:
You’re not limited to putting #ifdefs before the C++ code, either. If you have a function that is specific to one processor but not another, you can #ifdef that function out based on what processor you’re using.
We won’t use #ifdef much, if at all, but it’s a useful thing.
Object-Oriented Programming
You can program a long time in Arduino and not touch object-oriented programming. I’ve found objects useful from time to time, so I’m going to dive right on in and give you a quick overview of the subject.
There are four major parts to the object-oriented puzzle that you really have to understand, and they’re easy to get muddy on. They go by different names and have slightly different rules in different languages, but these are the C++ names.
Objects
An object is a way to put data and code in a single entity. It’s like if the toolkit in your car (I’m dating myself again, aren’t I?) had literally all the tools you’d ever need to work on the car, and only that car. Every other kind of car has its own tools, and even if my car is the same as your car, each of our cars has its own toolbox, and we can’t use each other’s.
Attributes
In non-object-oriented programming, attributes are what we’d call variables. They’re where the data in an object is stored. Here’s one of the big differences. You know how a function can have variables that the rest of the program can’t see (local variables)? An object can have private attributes like that. An object can also have public attributes that, if you have an object, you can change with code outside the object.
Methods
Methods are the object-oriented equivalent to functions, except they’re contained inside the object. Like attributes, they can be public or private. Because a method is part of the object, whether it’s public or private, it can access private attributes and (other) private methods. So to use the car analogy again, if I have a public method called lug_wrench and a private attribute called lugs (the studs and nuts that hold the wheels on), I can’t touch lugs because I am not part of the car and its tools, and lugs is private. However, I can call lug_wrench. It’s public. Because lug_wrench is part of the car and its tools, it can access lugs.
To extend the analogy to its limit without getting silly, if I have a private method called cheater_bar (a long piece of heavy pipe you put over the handle of a wrench to increase your leverage), once again, I can’t touch either lugs or cheater_bar because I am not part of the car or its tools. But if lug_wrench can call cheater_bar, I can call lug_wrench, it can call cheater_bar and access lugs, because it is part of the car and its tools.
The car and its tools are one object. I am code outside the object. Cheater_bar is a private method, and lugs is a private attribute. Lug_wrench is a public method. See?
Classes
So now that you’ve got a grasp of what an object is, and what it’s made of, the next obvious question is, “how do you make them?”
There are two steps. Bear this in mind. It’s one of the things that confused me about C++ for a long time. Two steps. The first is to define what we want the object to be. That definition is called a class.
A class defines the attributes and methods of the object and gives them their names. For the previous example, it might look like this:
Lugs and the cheater_bar function are private, but lug_wrench is public. It’s important, so I’ll repeat it. A class is not an object. Nothing is actually created by a class. If I put this code in arduino_skel. cpp , it will compile, but it won’t do anything. If I tried to call lug_wrench(), I’d get an error.
Let There Be Objects
When you turn a class into an object, it’s exactly the same as creating a variable. Same idea, same syntax.
This declares an object called My_VW of the type car_and_tools.
Now an object exists. Let’s create another one.
Done. If I want to use the lug_wrench() method of My_VW, I can call it like this:
I can’t do anything to My_Wifes_Subaru calling methods on My_VW. My_Wifes_Subaru has its own lug wrench, and I’d call it like this.
I can’t touch the lugs attribute of either object because they’re defined in the class as private. I can’t touch the cheater_bar() method in either object because they’re defined in the class as private. I know, I’m repeating myself, but these are the fundamentals of object-oriented programming. Do they make sense now?
Good. Enough lecture. Let’s go write a program.
TicTac
The first program we’re going to write in C++ really has nothing to do with Raspberry Pi-specific programming. It runs just as well on my Mac as it did on the Raspberry Pi I wrote it on. (I used Pi3plus, if you wondered. It’s faster.) We’re going to write a tic-tac-toe program. In the interest of keeping it really simple, we’re not even going to write an opponent. We’ll make it a two player game. (A good opponent would involve some game theory. A quick and easy opponent would always win. Tic-Tac-Toe is not a very good game.)
Planning
Maybe it’s my age, that I grew up in the days of pencil and paper, and that I was about 10 when I first got my hands on a computer, but I’ve found that when I plan a program on paper, it works better. Laziness forces me to keep things simple. You don’t have to use pencil and paper, but it’s a good idea to plan the program, especially when it comes to the objects and data structures in it. Prior preparation prevents poor performance, or so they say.
Rules
The rules of tic-tac-toe are pretty simple. You and your opponent take turns placing Xs and Os on the board until one or the other (or more often neither) of you gets three in a row horizontally, vertically, or diagonally. (Yeah, the Elle King song is running through my head now too. Sorry.) So the program needs to represent the board in data. It needs to be able to tell if someone won. And it needs a way for players to put their data in. If that sounds like there’s an object involved, you’ve got a good ear.
Objects
There’s only one object we need in this program. It’s called the_board, of the class board. Go ahead and write that down. We need a class called board.
Attributes
The board class needs to store all the moves in the game. To make it easy to picture how all this code works, we’ll represent those moves as a two-dimensional array of chars. (Single characters.) Yes, a boolean would use less memory. Don’t worry about it. You’re programming a Raspberry Pi now. Your Pi has at least 256MB of RAM. The fact that we’re using nine bytes of RAM to store data we could fit in nine bits doesn’t matter. We’ll call it board_data.
No code outside the board object needs to talk to board_data, so we’ll make it private. So write that down in the board class.
Methods
The board class needs to be able to see if anyone has won. While that method needs to be accessed from the outside, it’s going to be a huge monster of a method. Let’s break it down further.
If you think about it, you can check all the possible victory conditions with three types of checks. A check across, a check vertically, and a check diagonally. So let’s create methods to do those things. No code outside the board object needs to access these smaller methods, so we’ll make them private. We’ll fill the actual code in later.
We’ll need a public method so that code outside an object of the board class can see if the board is in a winning state. But by now, there’s something that should have you screaming at me. The board_data array is not initialized. Anywhere. That is a great way to get pseudo-random results, and that’s not what we’re looking for, so we need to create two public methods: one to initialize the array, and one to check to see if a player has won.
Actually we need more methods than that. We need a method to display the board on the terminal window. We also need a way for players to make their moves. Okay. Let’s write all those down too.
Actually wait.
The only time we’re going to call the method that initializes the board_data array is when the object is first instantiated. It’d be nice if C++ could just call that for us, wouldn’t it? It can. If you name a public method the same thing as the class name, it’s called the constructor, and C++ will call it when the object is created. As the name might suggest, there is also a destructor, if you need one. It’s also a public method and it’s the class name again, only with a tilde (~) in front of it. Like this:
C++ actually has a default constructor and destructor, so if you don’t have to do anything special for one or the other, you don’t need to include one. We need a constructor to initialize board_ data , but the default destructor is just fine. So let’s write that down too.
It’s more complicated than a sketch, but not much more complicated. You may have written sketches with objects already. If so, you’re ahead of the game. If not, and you’re looking at the class and wondering how much worse this is going to get, the answer is not much. Most of the complexity is right here in the skeleton. Each of those methods is straightforward code. You’ve done functions harder than these if you’ve done much Arduino programming. And with all the heavy lifting done in objects of the board class, main() is pretty simple too, as you’ll see.
So let’s get coding.
Coding
I’m not going to walk you through writing each of these functions. As I said, they’re not complicated at all. I’m going to throw the code at you, annotate it in spots above and beyond my already lengthy comments, and figure you’ve done this enough to follow along.
Note
Do comment your code, even if you’re the only person who will ever see it. You might have to try to understand it again a few years down the road, and future you will thank present you for it.
The Class
Here’s the actual board class, in all its glory, comments intact.
We just declared the constructor. You noticed, right?
I use boolean logic a lot. It’s very important to differentiate between a binary and (&) and a logical and (&&). A binary and (&) takes two binary values and returns a third. If you pass it a char, that’s eight bits. Say, 0b00000001 and 0b00000011. If you and those two values together, you get 0b00000001. Only the leading 1 is true in both values. The point is, binary ands don’t work at all when you pass them a boolean variable (true or false). For that you need a boolean, or logical, and (&&). If it sounds like I chased my tail for some time writing this program because I forgot that, I did.
By the by: 0bxxxx is notation for a binary literal, just as 0x precedes hexadecimal literals. It’s part of the C++ standard as of 2014, and was part of GNU C++ long before that. If you’re also coding for the Arduino, I strongly recommend against using their B prefix for binary values. It only works with values up to eight bits. 0b always works.
Just in case you didn’t already know, // is an alternative notation for comments. Multiline comments are surrounded with /* and */.
Main
So with most of the game taken care of in the board object class, what’s left for main to do? Not a whole lot, and that’s fine. The ideal main() doesn’t do a lot of heavy lifting. The idea is that somehow objects in code might be reusable without a lot of custom code to make them go in main(). How realistic that is, I don’t honestly know, but that’s the ideal.
Our main needs to do three things, really. It needs to instantiate a board class object, display the board, then loop back and forth between players, display the board and getting moves until someone wins.
And that’s exactly what it does.
Note that main must return an integer variable. This tells Linux whether or not there were errors during the program’s run.
Cout Is Not Serial.print
It’s tempting to use std:: cout just the same as we used serial.print in Arduino. They are not the same thing. Because this is C++, cout and cin are objects. The commands we’re actually issuing are << (the stream insertion operator) and >> (the stream extraction operator). They are formatted input and output operators, and they’re smart enough (barely) to recognize what type of variable or attribute they’re being asked to put data into or get data out of. The problem is, the stream may have other stuff in it. For cout , this is seldom a problem. For cin , it can make quite a mess, because anything left in the stream will be read the next time cin is accessed. In later programs we’ll get into more serious input protection, when we need it. For tictac.cpp, just bear in mind that if you feed it bad input values, it will go into an infinite loop and give you an error message. By default, C++ and its ancestor C are horrible at handling user input in general, but especially character strings. I guarantee you that you’ll miss the Arduino string class long before we’re done. We’ll use a better mechanism as we get into later chapters.
Compiling
Go ahead and build the tictac.cpp file, whether you type it in by hand or load it from the example code available for this book. Remember, build, not just compile. We want iostream linked in.
Running
When you click Execute, a new terminal window should pop up, and this is what should be in it.
Remember when we told Geany what to do explicitly to execute a program? This is the result. Go ahead and play the game through.
See the line that says (program executed with code: 0)? That’s the script Geany generates to run our program talking. That 0 is what main returns. If you run tictac.cpp from a terminal window directly, like this—~/projects/tictac/tictac—you won’t get that. If you run it in its own terminal, like this—lxterminal -e ~/projects/tictac/tictac or lxterminal -e ./tictac if you’re in the project directory already—you’ll notice that when the game ends, the terminal window closes immediately.
Congratulations. You’ve written a C++ program, with nothing Arduino-related involved.
The Code
Here’s the complete source code for tictac.cpp, including all my comments and the usual GNU copyleft boilerplate. Geany will insert that for you, if you choose File ➤ New ➤ New (with template) ➤ main.cxx when you create the file, instead of the usual File ➤ New.
Conclusion
The Arduino software is made up of the Arduino IDE, the GNU C++ compiler for AVR, Wiring, the standard interface for the various AVR flavors’ built-in hardware, and the AVRDUDE uploader for transferring compiled code to the Arduino. For the Pi, we’ll use the Geany IDE, which is quite similar to Arduino’s, and GNU C++ for ARM Linux (it comes with Raspbian). We can run the code directly on the Pi where we wrote it. We’ll use WiringPi in place of Wiring, and we’ll cover that in depth in Chapter 5.