
Device Capabilities
An iOS device is not just limited to making phone calls; it’s one of the most advanced pieces of machinery ever invented. And the real power lies in the various device capabilities. In this chapter we will learn about the following device capabilities:
- GeoLocation
- AsyncStorage
- Native Alert
- WebView
- Animations
GeoLocation
In this section, you will learn how to use iOS location services with a React Native application. Location services are used very often in many popular apps, especially in travel, navigation, cab sharing and the list is endless. This single feature significantly improves the user experience and the silver lining is it’s very easily implemented.
The Geolocation property is enabled in React Native by default when we setup a project with react-native init. Let’s create an application to implement this capability:
$react-native init GeoLocationMap
Update index.ios.js with the following code:
'use strict';

var React = require('react-native');
var {
  AppRegistry,
  StyleSheet,
  Text,
  View,
  MapView
} = React;

var GeoLocationMap = React.createClass({
   getInitialState: function() {
    return {
      region: {
        latitude: 40.712784,
        longitude: -74.005941,
        latitudeDelta: 10,
        longitudeDelta: 10,
      },
    };
  },
  render: function() {
    return (
       <View style={styles.container}>
         <View style={styles.desc}>
         <Text> Maps </Text>
         </View>
        <MapView
          style={styles.map}
          region={this.state.region}
        />
      </View>
    );
  }
});

var styles = StyleSheet.create({
  container: {
    flex: 1,
    flexDirection: 'column',
    backgroundColor: '#F5FCFF',
    alignItems: 'stretch'

  },
    desc: {
    flex: 1,
    alignItems: 'center',
    justifyContent: 'center'
  },
   map: {
    flex: 5,
  },
});

AppRegistry.registerComponent('GeoLocationMap', () => GeoLocationMap);
Now build your application in Xcode for the first time to see the results shown in Figure 5-1.
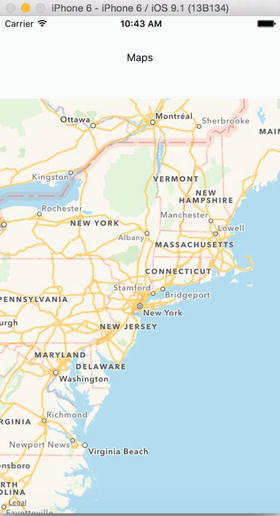
Figure 5-1. GeoLocation MapView
Reviewing the GeoLocationMap Code
Let’s now understand what we have done in this part of our program.
var {
  AppRegistry,
  StyleSheet,
  Text,
  View,
  MapView
} = React;
Here we are first including the React Native component MapView, which is pivotal to accessing the location services. Next we create our Geolocation component which will utilize MapView:
var GeoLocationMap = React.createClass({
   getInitialState: function() {
    return {
      region: {
        latitude: 40.712784,
        longitude: -74.005941,
        latitudeDelta: 10,
        longitudeDelta: 10,
      },
    };
  },
  render: function() {
    return (
       <View style={styles.container}>
         <View style={styles.desc}>
         <Text> Maps </Text>
         </View>
        <MapView
          style={styles.map}
          region={this.state.region}
        />
      </View>
    );
  }
});
Here, we have set the initial state for the region with certain latitude and longitude parameters, which will be later set when we render the function with the MapView component. In the MapView component, we are using the region prop, which is supplied with latitude, longitude, longitudeDelta and latitudeDelta. These should always be numbers(integer or float) and they help us plot a specific region on the map. Finally we have added some style with Flex and registered our component.
Adding Annotation on Map
Next, let’s add annotations to our application, and update getInitialState with the new state annotations, having parameters like latitude, longitude, title and subtitle:
getInitialState: function() {
    return {
      region: {
        latitude: 40.712784,
        longitude: -74.005941,
        latitudeDelta: 10,
        longitudeDelta: 10,
      },
      annotations: [{
       latitude: 40.72052634,
       longitude:  -73.97686958312988,
       title: 'New York',
       subtitle: 'This is cool!'
     }],
    };
  },
Now update the MapView component with the new prop called annotations:
<MapView
          style={styles.map}
          region={this.state.region}
          annotations= {this.state.annotations}
        />
Besides the mentioned values, the annotations prop can have the following additional parameters:
annotations [{latitude: number, longitude: number, animateDrop: bool, title: string, subtitle: string, hasLeftCallout: bool, hasRightCallout: bool, onLeftCalloutPress: function, onRightCalloutPress: function, id: string}] #
Let’s refresh and see the changes shown in Figure 5-2.

Figure 5-2. MapView with added parameters
Displaying the Latitude and Longitude of the Present Location
In this final part of our Geolocation application, we will display our present latitude and longitude on the view. In the previous example, we had a constant location; in this part, we will fly to our current location in real-time. Now that sounds like something exciting, so let’s start building it. There are two ways to check for the current location on our maps. One is to simply add showsUserLocation={true} to your MapView component.
Another way is to use NSLocationWhenInUseUsageDescription geolocation. We will need to update info.plist to add this key, but it is enabled by default when you create a project with react-native init.
Replace your index.ios.js with the following code:
'use strict';

var React = require('react-native');
var {
  AppRegistry,
  StyleSheet,
  Text,
  View,
  MapView
} = React;

var GeoLocationMap = React.createClass({
   getInitialState: function() {
    return {
      region: {
        latitude: 40.712784,
        longitude: -74.005941,
        latitudeDelta: 10,
        longitudeDelta: 10,
      },
      annotations: [{
       latitude: 40.72052634,
       longitude:  -73.97686958312988,
       title: 'New York',
       subtitle: 'This is cool!'
     }],
    };
  },
     componentDidMount: function() {
    navigator.geolocation.getCurrentPosition(
      (initialPosition) => this.setState({initialPosition}),
      (error) => alert(error.message),
      {enableHighAccuracy: true, timeout: 20000, maximumAge: 1000}
    );
    this.watchID = navigator.geolocation.watchPosition((lastPosition) => {
      this.setState({latitude: lastPosition.coords.latitude});
      this.setState({longitude: lastPosition.coords.longitude});
      var newRegion = {
        latitude: lastPosition.coords.latitude,
        longitude: lastPosition.coords.longitude,
        latitudeDelta: 10,
        longitudeDelta: 10,
      }
      this.setState({  region: newRegion});

      this.setState({  annotations: [{
        latitude: lastPosition.coords.latitude,
        longitude: lastPosition.coords.longitude,
        title: 'Current Location',
        subtitle: 'You are here'
      }]});

    });
  },

  componentWillUnmount: function() {
    navigator.geolocation.clearWatch(this.watchID);
  },
  render: function() {
    return (
       <View style={styles.container}>
        <View style={styles.desc}>
          <Text>
            latitude:  {this.state.latitude}
          </Text>
          <Text>
            longitude: {this.state.longitude}
          </Text>
        </View>
        <MapView
          style={styles.map}
          region={this.state.region}
          annotations= {this.state.annotations}
        />
      </View>
    );
  }
});

var styles = StyleSheet.create({
  container: {
    flex: 1,
    flexDirection: 'column',
    backgroundColor: '#F5FCFF',
    alignItems: 'stretch'

  },
    desc: {
    flex: 1,
    alignItems: 'center',
    justifyContent: 'center'
  },
   map: {
    flex: 5,
  },
});

AppRegistry.registerComponent('GeoLocationMap', () => GeoLocationMap);
Now build our application to load it on the iOS simulator shown in Figure 5-3.

Figure 5-3. Access location prompt
If we allow this request, we will fly to the location we mentioned in our code; in this case it’s California (Figure 5-4).

Figure 5-4. Fly to a specified location in the code
There is one extra step when you debug a GeoLocation application. As mentioned, in this example we will fly to our present location. We have saved that requirement so that it can be accomplished now. Open the Debug menu using Ctrl + Command + z and select the “Debug in Chrome” option as shown in Figure 5-5.
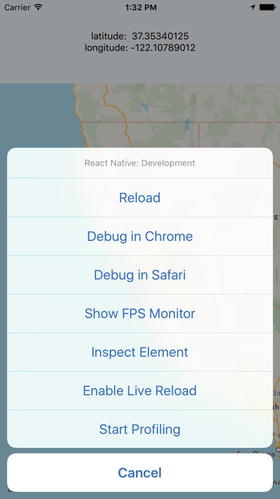
Figure 5-5. Select debug in chrome option
Once you click “Debug in Chrome” you will get a popup to allow your location to be served to the iOS simulator application as shown in Figure 5-6.

Figure 5-6. Allow the present location to be shared with the iOS simulator
Once you allow this, you will move to your current location in the app(Figure 5-7).
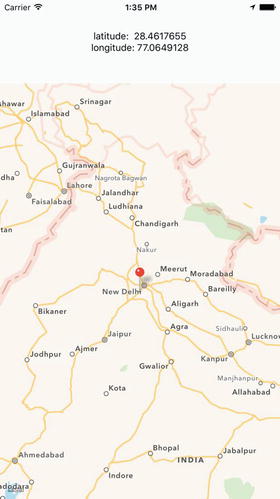
Figure 5-7. Current location is now shown
Reviewing the GeoLocation Code for the Present Location
Let’s review what we have programmed in this example.
componentDidMount: function() {
    navigator.geolocation.getCurrentPosition(
      (initialPosition) => this.setState({initialPosition}),
      (error) => alert(error.message),
      {enableHighAccuracy: true, timeout: 20000, maximumAge: 1000}
    );
    this.watchID = navigator.geolocation.watchPosition((lastPosition) => {
      this.setState({latitude: lastPosition.coords.latitude});
      this.setState({longitude: lastPosition.coords.longitude});
      var newRegion = {
        latitude: lastPosition.coords.latitude,
        longitude: lastPosition.coords.longitude,
        latitudeDelta: 10,
        longitudeDelta: 10,
      }
Here, in componentDidMount, we first get the current position; by default, the iOS simulator gives us a default value which you can change using debug ![]() location. If navigator.geolocation.getCurrentPosition does get the value, then we set various states and their parameters. In this example, we have latitude and longitude description which are at the top of the view and are set using this.setState({latitude :}) and this.setState({longitude:}). And the map below it is plotted with newRegion.
location. If navigator.geolocation.getCurrentPosition does get the value, then we set various states and their parameters. In this example, we have latitude and longitude description which are at the top of the view and are set using this.setState({latitude :}) and this.setState({longitude:}). And the map below it is plotted with newRegion.
    this.setState({  region: newRegion});

    this.setState({  annotations: [{
      latitude: lastPosition.coords.latitude,
      longitude: lastPosition.coords.longitude,
      title: 'Current Location',
      subtitle: 'You are here'
    }]});

  });
},
We use React’s superb power to rerender the component whenever the state changes. With the above code snippet, we will rerender newRegion with updated coordinates.
componentWillUnmount: function() {
  navigator.geolocation.clearWatch(this.watchID);
},
With componentWillUnmount, we will clear navigator.geolocation in case we move to some other part of the application.
 render: function() {
    return (
       <View style={styles.container}>
        <View style={styles.desc}>
          <Text>
            latitude:  {this.state.latitude}
          </Text>
          <Text>
            longitude: {this.state.longitude}
          </Text>
        </View>
        <MapView
          style={styles.map}
          region={this.state.region}
          annotations= {this.state.annotations}
        />
      </View>
    );
  }
});
Finally, we render our components on the view with the latitude and longitude description having its respective style and the updated MapView component with its respective style, region mapping and annotations.
AsyncStorage
AsyncStorage is a key-value based storage system. It can be easily implemented and is globally available to the app. This persistence system is simple and asynchronous, and also a recommended way to store data.
Let’s create an AsyncStorage example application; to do so, execute the following command:
$react-native init AsyncStorage
Great now lets add the following code in our index.ios.js
'use strict';

var React = require('react-native');
var {
  AppRegistry,
  StyleSheet,
  Text,
  View,
  TextInput,
  TouchableHighlight,
  AsyncStorage
} = React;

var STORAGE_KEY = '@AsyncStorageExample:someKey';

var AsyncStorageExample = React.createClass({
  getInitialState: function() {
    return {
      messages: '',
      textInputMessage: ''
    };
  },
  componentDidMount() {
    AsyncStorage.getItem(STORAGE_KEY).then((value) => {
      this.addMessage(value);
    }).done();
  },

  addMessage(message) {
    this.setState({messages: message});
  },

  updateStorage () {
    AsyncStorage.setItem(STORAGE_KEY, this.state.textInputMessage);
    AsyncStorage.getItem(STORAGE_KEY).then((value) => {
      this.addMessage(value);
    }).done();

  },

  render: function() {
    return (
      <View style={styles.container}>
        <View style={styles.form}>
          <TextInput style={styles.textField}
                     onChangeText={(textInputMessage) => this.setState({textInputMessage})}
                     value={this.state.textInputMessage}/>
          <TouchableHighlight style={styles.button} onPress={this.updateStorage}>
            <Text> Update Storage </Text>
          </TouchableHighlight>
        </View>
        <View style={styles.message}>
          <Text> Text from local storage:</Text>
          <Text>{this.state.messages} </Text>
        </View>
      </View>
    );
  }
});

var styles = StyleSheet.create({
  container: {
    flex: 1,

justifyContent: 'center',
    alignItems: 'center',
    backgroundColor: '#F5FCFF',
  },
  form: {
    flex: 1,
    justifyContent: 'center',
    alignItems: 'center'
  },
  textField: {
    height: 40,
    borderColor: 'gray',
    borderWidth: 1,
    width: 180},
  message: {
    flex: 1,
    alignItems: 'center'
  },
  button: {
    backgroundColor: '#05A5D1',
    marginTop: 10,
    height: 40,
    width: 180,
    alignItems: 'center',
    justifyContent: 'center'
  }
});

AppRegistry.registerComponent('AsyncStorage', () => AsyncStorageExample);
Let’s build our application in Xcode to see the results. You can enter the text in a text box as shown in Figure 5-8 and then click “Update Storage.”

Figure 5-8. Storage is updated
Once that is done refresh for the result shown in Figure 5-9.
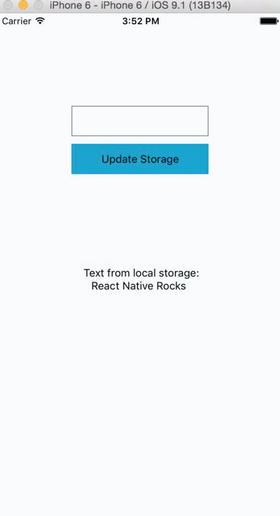
Figure 5-9. Text from the async storage mechanism
This time the text below “Text from local storage” is coming from the async storage mechanism, which we have set in place.
Reviewing the AsyncStorage Code
In this example, we have included the AsyncStorage default component in our list of components to be used for this app.
var React = require('react-native');
var {
  AppRegistry,
  StyleSheet,
  Text,
  View,
  TextInput,

TouchableHighlight,
  AsyncStorage
} = React;

var STORAGE_KEY = '@AsyncStorageExample:someKey';
We will be using this AsyncStorage React component within our AsyncStorageExample component. Above, we have also specified a key, which we will use, with our Async Storage.
Inside our AsyncStorageExample component we have set up getInitialState and componentDidMount methods and also, created addMessage & updateStorage. Let’s discuss them one by one.
  getInitialState: function() {
    return {
      messages: '',
      textInputMessage: ''
    };
  },
In getInitialState we have specified blank values for messages & textInputMessages, which we will keep updating as and when their state changes.
  componentDidMount() {
    AsyncStorage.getItem(STORAGE_KEY).then((value) => {
      this.addMessage(value);
    }).done();
  },
With componentDidMount AsyncStorage the getItem method is loaded with the addMessage value. This is invoked only at the time of initial rendering and is responsible for showing the text below ‘text from local storage’, once we have updated the storage and refreshed the app again.
  addMessage(message) {
    this.setState({messages: message});
  },
The method addMessage updates the message state with a new updated value whenever it is triggered.
  updateStorage () {
    AsyncStorage.setItem(STORAGE_KEY, this.state.textInputMessage);
    AsyncStorage.getItem(STORAGE_KEY).then((value) => {
      this.addMessage(value);
    }).done();
  },
Update storage updates Asyc Storage values, which are persisted permanently.
render: function() {
    return (
      <View style={styles.container}>
        <View style={styles.form}>
          <TextInput style={styles.textField}
                     onChangeText={(textInputMessage) => this.setState({textInputMessage})}
                     value={this.state.textInputMessage}/>
          <TouchableHighlight style={styles.button} onPress={this.updateStorage}>
            <Text> Update Storage </Text>
          </TouchableHighlight>
        </View>
        <View style={styles.message}>
          <Text> Text from local storage:</Text>
          <Text>{this.state.messages} </Text>
        </View>
      </View>
    );
  }
});
With the above code, we set up various sections of our AsyncStorageExample component. Here, we can change a text input field to update the textInputMessage state. We also have an onPress prop for the TouchableHighlight component, which calls the updatedStorage method and persists the values permanently. In the end, we display the saved message by accessing the present state of the message.
var styles = StyleSheet.create({
  container: {
    flex: 1,
    justifyContent: 'center',
    alignItems: 'center',
    backgroundColor: '#F5FCFF',
  },
  form: {
    flex: 1,
    justifyContent: 'center',
    alignItems: 'center'
  },
  textField: {
    height: 40,
    borderColor: 'gray',
    borderWidth: 1,
    width: 180},
  message: {
    flex: 1,
    alignItems: 'center'
  },
  button: {
    backgroundColor: '#05A5D1',
    marginTop: 10,
    height: 40,
    width: 180,
    alignItems: 'center',
    justifyContent: 'center'
  }
});

AppRegistry.registerComponent('AsyncStorage', () => AsyncStorageExample);
Finally, we set up a user interface style with some self-explanatory Flex settings and register our AsyncStorageExample component.
Native Alert
Alerts are used to give important information to application users. In the case of iOS, only after selecting the option in the alert view, can we proceed further to use the app. Optionally, we can provide a list of buttons. Tapping any button will fire the respective onPress callback and dismiss the alert. By default, there is only one button.
Let’s create a project to understand more about native alert:
$react-native init NativeAlert
React Native provides a component AlertIOS for creating Alert boxes. Let’s create a Button that will open an alert box when clicked.
Update index.ios.js with the following code:
'use strict';

var React = require('react-native');
var {
  AppRegistry,
  StyleSheet,
  Text,
  View,
  TouchableHighlight,
  AlertIOS
} = React;

var NativeAlert = React.createClass({
  render: function() {
    return (
      <View style={styles.container}>
         <TouchableHighlight style={styles.wrapper}
          onPress={() => AlertIOS.alert(
            'Alert Title',
            'Alert Message'
          )}>
          <View style={styles.button}>
            <Text style={styles.buttonText}>Click me !!</Text>
          </View>
        </TouchableHighlight>
      </View>
    );
  }
});

var styles = StyleSheet.create({
  container: {
    flex: 1,
    justifyContent: 'center',
    alignItems: 'center',
    backgroundColor: '#FFFFFF',
  },
   button: {
    backgroundColor: '#659EC7',
    padding: 10,
   margin: 10
  },
  buttonText: {
    color: '#FFFFFF'
  }

});

AppRegistry.registerComponent('NativeAlert', () => NativeAlert);
Let’s build the application and test it in the simulator. Figure 5-10 shows the result.
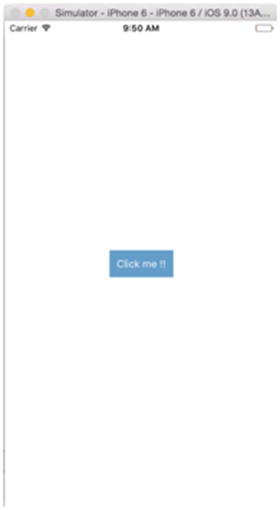
Figure 5-10. This button will open an alert box when clicked
Tap the “Click me !!” button to see an alert box as shown in Figure 5-11.
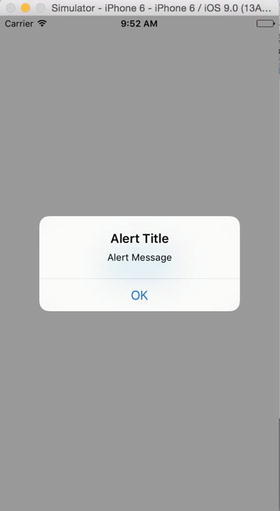
Figure 5-11. The Alert box appears
Reviewing the NativeAlert Code
After we created a new NativeAlert project, we created a new component NativeAlert:
var NativeAlert = React.createClass({
  render: function() {
    return (
      <View style={styles.container}>
         <TouchableHighlight style={styles.wrapper}
          onPress={() => AlertIOS.alert(
            'Alert Title',
            'Alert Message'
          )}>
          <View style={styles.button}>
            <Text style={styles.buttonText}>Click me !!</Text>
          </View>
        </TouchableHighlight>
      </View>
    );
  }
});
In the component NativeAlert, we have used onPress callback. The method alert, passes the string ‘Alert Title’ and ‘Alert Message’, which produces an alert box having a title, message and a button. AlertIOS provides two methods: alert and prompt.
static alert(title: string, message?: string, buttons?: Array<{ text: ?string; onPress?: ?Function; }>, type?: string)

static prompt(title: string, value?: string, buttons?: Array<{ text: ?string; onPress?: ?Function; }>, callback?: Function)
Finally, we have added some style in the following segment and registered our root component with AppRegistry.
var styles = StyleSheet.create({
  container: {
    flex: 1,
    justifyContent: 'center',
    alignItems: 'center',
    backgroundColor: '#FFFFFF',
  },
   button: {
    backgroundColor: '#659EC7',
    padding: 10,
   margin: 10
  },
  buttonText: {
    color: '#FFFFFF'
  }

});

AppRegistry.registerComponent('NativeAlert', () => NativeAlert);
Extending the NativeAlert Example
Now let’s add some more buttons to our application, replace the following code for your NativeAlert component in index.ios.js:
var NativeAlert = React.createClass({
   getInitialState: function(){
    return{
      textForButton: 'Button text will come here'
    }
  },
  render: function() {
    return (
      <View style={styles.container}>
         <TouchableHighlight style={styles.wrapper}
          onPress={() => AlertIOS.alert(
            'Alert Title',
            'Alert Message'
          )}>
          <View style={styles.button}>
            <Text style={styles.buttonText}>Click me !!</Text>
          </View>
        </TouchableHighlight>
        <TouchableHighlight style={styles.wrapper}
          onPress={() => AlertIOS.alert(
            'Alert Title',
            'Alert Message',
            [
            {text: 'Button 1', onPress: () => this.setState({textForButton: 'Button 1 clicked'})},
            {text: 'Button 2', onPress: () => this.setState({textForButton: 'Button 2 clicked'})}
            ]
          )}>
          <View style={styles.button}>
            <Text style={styles.buttonText}>Alert with Buttons !!</Text>
          </View>
        </TouchableHighlight>
        <Text> {this.state.textForButton} </Text>
      </View>
    );
  }
});
Let’s refresh our view to see the changes in Figure 5-12.
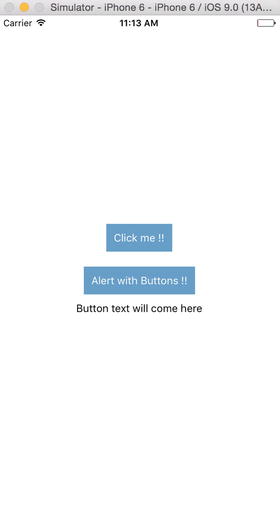
Figure 5-12. “Alert with Buttons !!” has been added
Click “Alert with Buttons!!” to see the result shown in Figure 5-13.
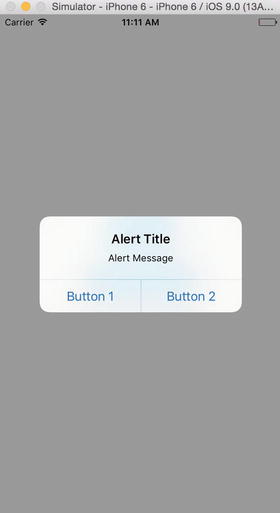
Figure 5-13. Select Button 1 or 2
In Figure 5-14, the home page shows which button is clicked.
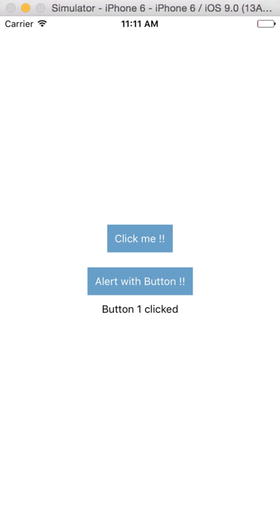
Figure 5-14. Button 1 was clicked
Reviewing the Extended NativeAlert Example Code
Now let’s understand what we have done in this updated NativeAlert component:
var NativeAlert = React.createClass({
   getInitialState: function(){
    return{
      textForButton: 'Button text will come here'
    }
  },
  render: function() {
    return (
      <View style={styles.container}>
         <TouchableHighlight style={styles.wrapper}
          onPress={() => AlertIOS.alert(
            'Alert Title',
            'Alert Message'
          )}>
          <View style={styles.button}>
            <Text style={styles.buttonText}>Click me !!</Text>
          </View>
        </TouchableHighlight>
        <TouchableHighlight style={styles.wrapper}
          onPress={() => AlertIOS.alert(
            'Alert Title',
            'Alert Message',
            [
            {text: 'Button 1', onPress: () => this.setState({textForButton: 'Button 1 clicked'})},
            {text: 'Button 2', onPress: () => this.setState({textForButton: 'Button 2 clicked'})}
            ]
          )}>
          <View style={styles.button}>
            <Text style={styles.buttonText}>Alert with Buttons !!</Text>
          </View>
        </TouchableHighlight>
        <Text> {this.state.textForButton} </Text>
      </View>
    );
  }
});
Here, we have set our getInitialState method with a state textForButton, which we will later get updated with the button we have clicked. Tapping the “Alert with Buttons!!” button fires an onPress call back which uses the alert method of AlertIOS to set title, message and buttons for our alert box. In this part of the NativeAlert component we have two buttons whose ‘textForButton’ state is updated with required text on execution of onPress callback.
WebView
In this section, we will create a shell for loading any URL in WebView with React Native. Let’s begin with generating the application structure:
$ react-native init WebviewShell
Next, open up file index.ios.js and replace its code with the following:
'use strict';

var React = require('react-native');
var {
  AppRegistry,
  StyleSheet,
  Text,
  View,
  WebView
} = React;

var WebviewShell = React.createClass({
  render: function() {
    return (
      <View style={styles.container}>
        <WebView url={'https://www.facebook.com/'} />
      </View>
    );
  }
});

var styles = StyleSheet.create({
  container: {
    flex: 1
  }
});

AppRegistry.registerComponent('WebviewShell', () => WebviewShell);
Let’s build our WebviewShell application with Xcode and load in iOS simulator to see the results as shown in Figure 5-15.
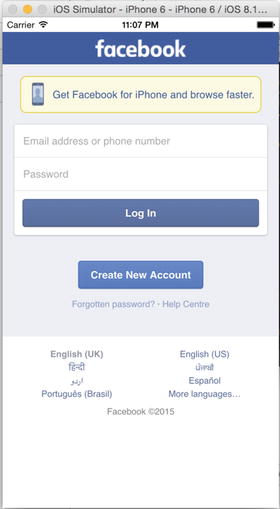
Figure 5-15. WebView with a URL
Reviewing the WebView Code
In this example, we have created a component WebviewShell that returns a View. The following code creates a view with our desired URL loaded in the WebView.
var WebviewShell = React.createClass({
  render: function() {
    return (
      <View style={styles.container}>
        <WebView url={'https://www.facebook.com/'} />
      </View>
    );
  }
});
Fluid, meaningful animations are essential in creating a stunning user experience. In this section, we will achieve this using React Native animation APIs. Animations with React Native revolve around two complementary systems: LayoutAnimation for animating global layout transactions, and Animated for more granular control over specific properties.
The Animated library is designed in a way to make a variety of amazing animations and interactions with your app with simplicity and high performance. The Animated library focuses on configurable transforms in between, having declarative relationships between input and output, and easy start-stop methods, which control animations based on time.
Let’s understand this library with an example by creating an AnimationExample React Native project:
$react-native init AnimationExample
Add the following code to your index.ios.js:
'use strict';

var React = require('react-native');
var {
  AppRegistry,
  StyleSheet,
  Text,
  View,
} = React;

var AnimationExample = React.createClass({
  render: function() {
    return (
       <View style={styles.container}>
        <View
        style={{
          backgroundColor: '#DC143C',
          flex: 1
        }} />
        <View

style={{
          backgroundColor: '#1E90FF',
          flex: 1,
        }} />
      </View>

    );
  }
});

var styles = StyleSheet.create({
  container: {
    flex: 1,
    flexDirection: 'column'
  },
});

AppRegistry.registerComponent('AnimationExample', () => AnimationExample);
Build the project with Xcode to load it on the iOS simulator. Figure 5-16 shows two colorful boxes.
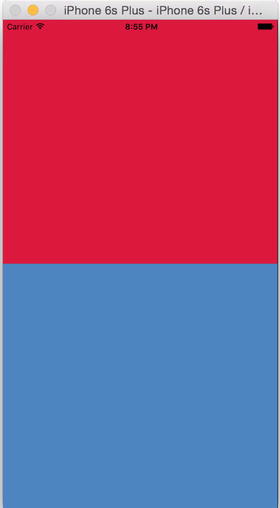
Figure 5-16. The project now has a red and blue box
Now let’s add some animation. Update your index.ios.js with the following code:
'use strict';

var React = require('react-native');

var {
  AppRegistry,
  StyleSheet,
  Text,
  View,

Animated
} = React;

var AnimationExample = React.createClass({
  getInitialState: function() {
    return {
      bounceValue: new Animated.Value(0)
    };
  },
   componentDidMount() {
    this.state.bounceValue.setValue(1.5);
    Animated.spring(
      this.state.bounceValue,
      {
        toValue: 0.8,
        friction: 1,
      }
    ).start();
  },
  render: function() {
    return (
       <View style={styles.container}>
        <Animated.View
        style={{
          backgroundColor: '#DC143C',
          flex: 1,
            transform: [
            {scale: this.state.bounceValue},
          ]
        }} />
        <View
        style={{
          backgroundColor: '#1E90FF',
          flex: 1,
        }} />
      </View>

    );
  }
});

var styles = StyleSheet.create({
  container: {
    flex: 1,
    flexDirection: 'column'
  },
});

AppRegistry.registerComponent('AnimationExample', () => AnimationExample);
Let’s refresh to see the changes (Figure 5-17).
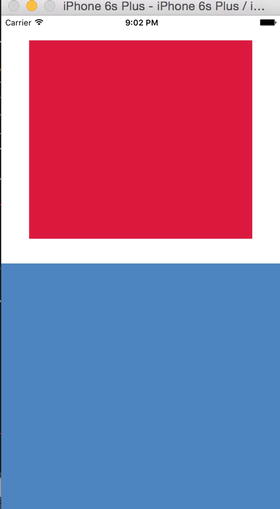
Figure 5-17. The red box in the upper half now has a bounce effect in it
Great, let’s now add some animation to our bottom half section. Update index.ios.js with the following code:
'use strict';

var React = require('react-native');
var {
  AppRegistry,
  StyleSheet,
  Text,
  View,
  Animated
} = React;

var AnimationExample = React.createClass({
  getInitialState: function() {
    return {
      bounceValue: new Animated.Value(0),
      fadeAnim: new Animated.Value(0)
    };
  },
   componentDidMount() {
    this.state.bounceValue.setValue(1.5);
    Animated.spring(
      this.state.bounceValue,
      {
        toValue: 0.8,
        friction: 1,
      }
    ).start();
    Animated.timing(
          this.state.fadeAnim,
          {
            toValue: 1,
            duration: 2000,
          },
        ).start();
  },
  render: function() {
    return (
       <View style={styles.container}>
        <Animated.View
        style={{
          backgroundColor: '#DC143C',
          flex: 1,
            transform: [

{scale: this.state.bounceValue},
          ]
        }} />
        <Animated.View
        style={{
          backgroundColor: '#1E90FF',
          flex: 1,
          opacity: this.state.fadeAnim,

        }} />
      </View>

    );
  }
});

var styles = StyleSheet.create({
  container: {
    flex: 1,
    flexDirection: 'column'
  },
});

AppRegistry.registerComponent('AnimationExample', () => AnimationExample);
Figure 5-18 shows the changes.

Figure 5-18. Now there is a bounce in the upper half of the screen and fading animation in the bottom half
Let’s now get into our code and see what we have done here.
Reviewing the Animation Code
In the first part of this example, we have created the AnimationExample component, which has a split, having two sections, which we will use for animations later on. We have not used any default React Native component yet.
Next, we have added components necessary for use in our example.
'use strict';

var React = require('react-native');
var {
  AppRegistry,
  StyleSheet,
  Text,
  View,
  Animated
} = React;
Here, we have added an Animated React Native default component, which is necessary for animations in various segments of our example. Let’s now understand how we have shaped our AnimationExample component with two different animations.
var AnimationExample = React.createClass({
  getInitialState: function() {
    return {
      bounceValue: new Animated.Value(0),
      fadeAnim: new Animated.Value(0)
    };
  },
With getInitialState, we are setting up an initial state for bounceValue, which will be used for the bounce effect in the upper half, and fadeAnim, which will add fading animation to the bottom half. Initially both are set to 0.
 componentDidMount() {
    this.state.bounceValue.setValue(1.5);
    Animated.spring(
      this.state.bounceValue,
      {
        toValue: 0.8,
        friction: 1,
      }
    ).start();
    Animated.timing(
          this.state.fadeAnim,
          {
            toValue: 1,
            duration: 2000,
          },
        ).start();
  },
With componentDidMount, we are setting the value of bounceValue to have a spring effect. We are also setting up a value for fadeAnim so that its fading effect has certain timing. Both start immediately at the time the application loads.
  render: function() {
    return (
       <View style={styles.container}>
        <Animated.View
        style={{
          backgroundColor: '#DC143C',
          flex: 1,
            transform: [
            {scale: this.state.bounceValue},
          ]
        }} />
        <Animated.View
        style={{
          backgroundColor: '#1E90FF',
          flex: 1,
          opacity: this.state.fadeAnim,

        }} />
      </View>

    );
  }
});
Next, we render both our animations on a specific section of the app. In the first container, we set the bounce effect and in second, we have fading animation.
var styles = StyleSheet.create({
  container: {
    flex: 1,
    flexDirection: 'column'
  },
});

AppRegistry.registerComponent('AnimationExample', () => AnimationExample);
Lastly, we have some more Flex styling and register our AnimationExample component.
As discussed earlier animations with React Native have two system Animated and layout animations. We have gone in details on animated, as an exercise, explore layout animation with the same example.
Summary
In this chapter, we learned about capabilities of your iOS device beyond just user interface. We learned how to use Geolocation and loading maps for your app, AsyncStorage to persist data, Native alerts to share important info in your app, WebView to load HTML5 content and lastly animations.
In next chapter we will learn how to interact with a backend server because probably no real world application is complete without connecting to a backend.